
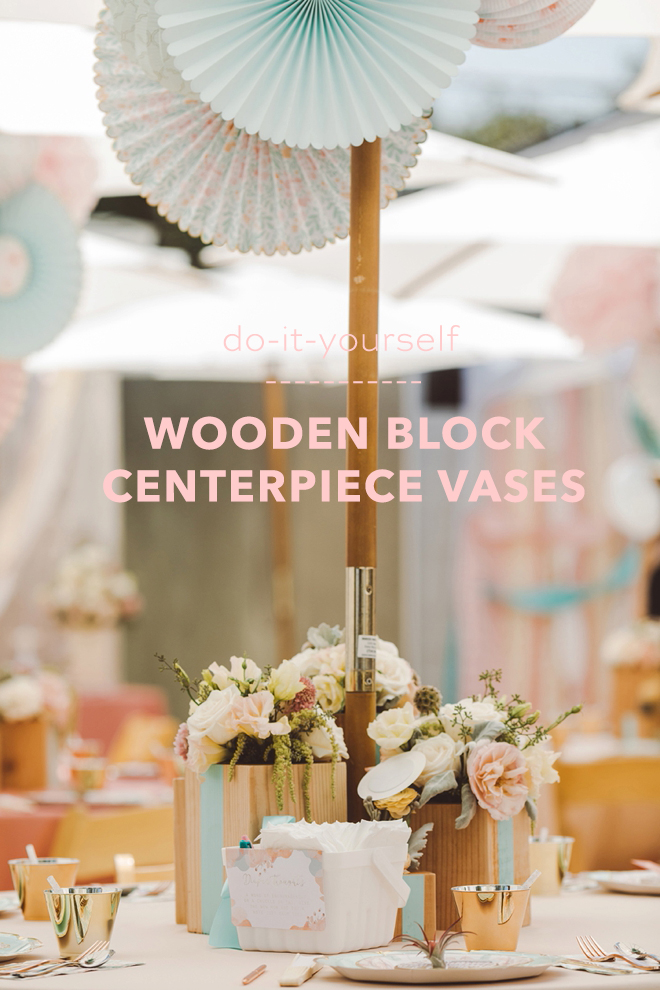
DIY Painted Wooden Block Centerpiece Vases
-Sponsored Post-
For our fifth DIY flower feature with FiftyFlowers (you might remember our fourth one the Air Plant Embroidery Hoop Favors, also from the baby shower), we’re making these gorgeously rustic wooden block centerpieces! In this post, I’m sharing how to create the wood vases and how to arrange the flowers for them. We used an array of flowers from FiftyFlowers that were all delivered right to our door, which was such a time saver since we had so much to coordinate for the event. It’s companies like them that make DIY-ing and party-planning not only easy but fabulous too!
Baby Shower Week: To see the full baby shower feature, visit this post.
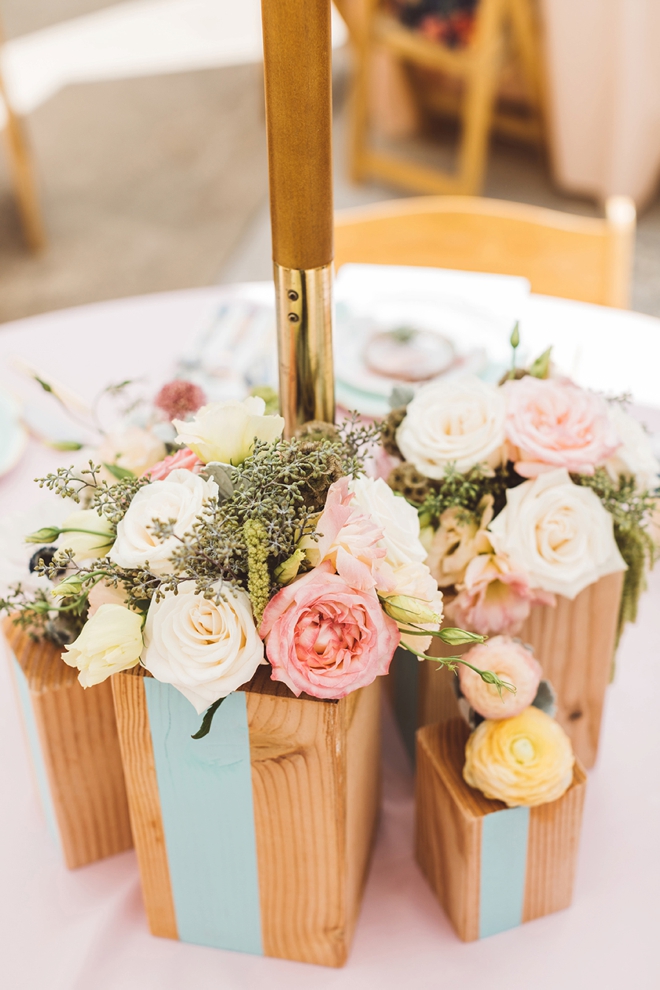
6 Per Table
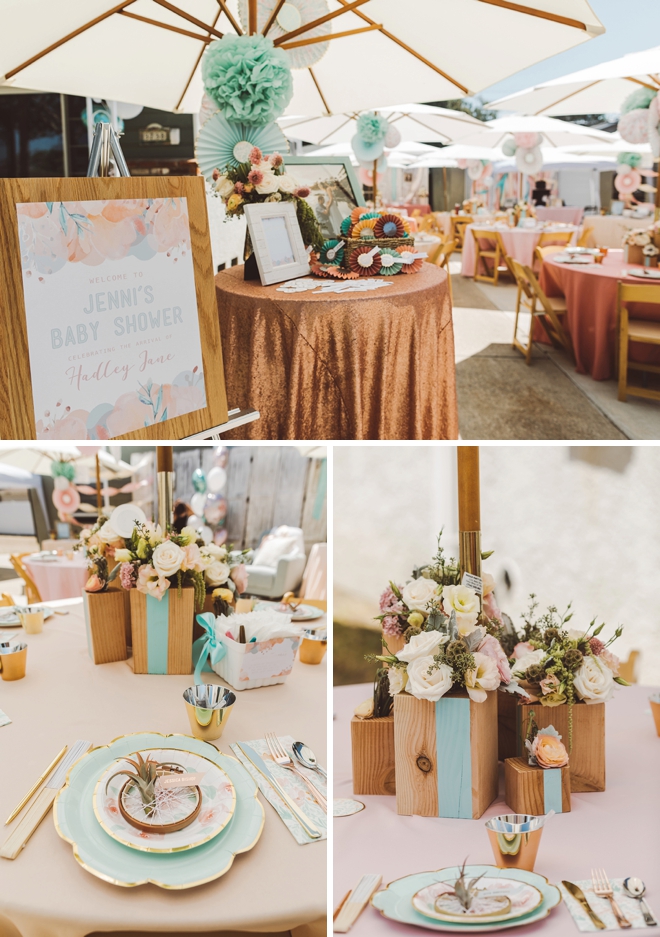
Each table at my baby shower had 6 gorgeous wood vases. Each table also had 6 gorgeous guests… so each guest got to take home a vase at the end of the event! Which was perfect because although I absolutely love these vases, I have no room to store 36 of them!
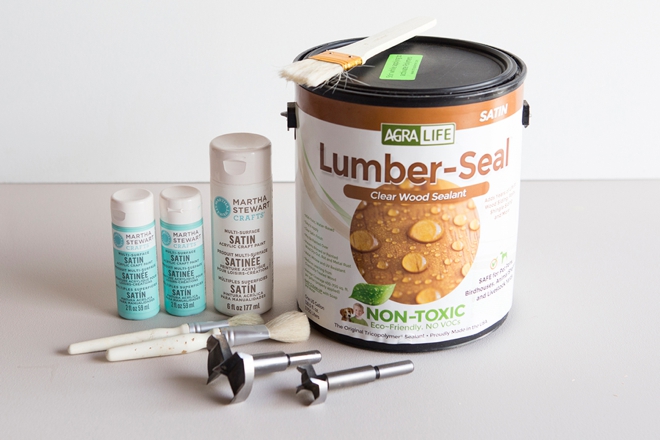
SUPPLIES:
- Wholesale flowers to match your event from FiftyFlowers
- 6″ x 6″ x 8′ and 4″ x 4″ x 8′ Lumber Pieces, to be cut down
- 2″ and 1″ Forstner Bits
- Lumber Seal
- Paint Brushes
- Craft Paint (optional)
- Chenille Stems (aka. pipe cleaners)
- Garden Shears
- Hardware Store Buckets
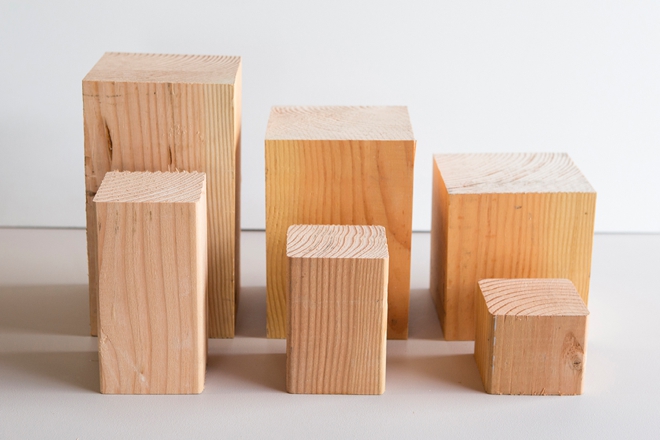
The Wood
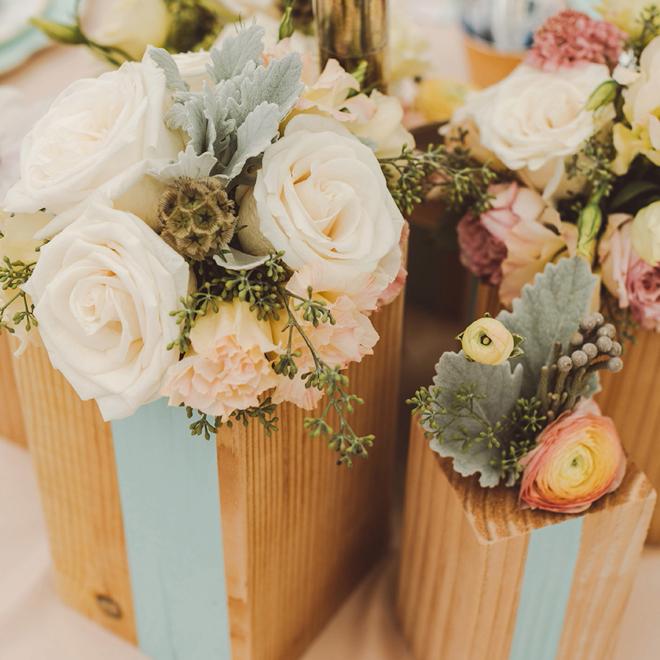
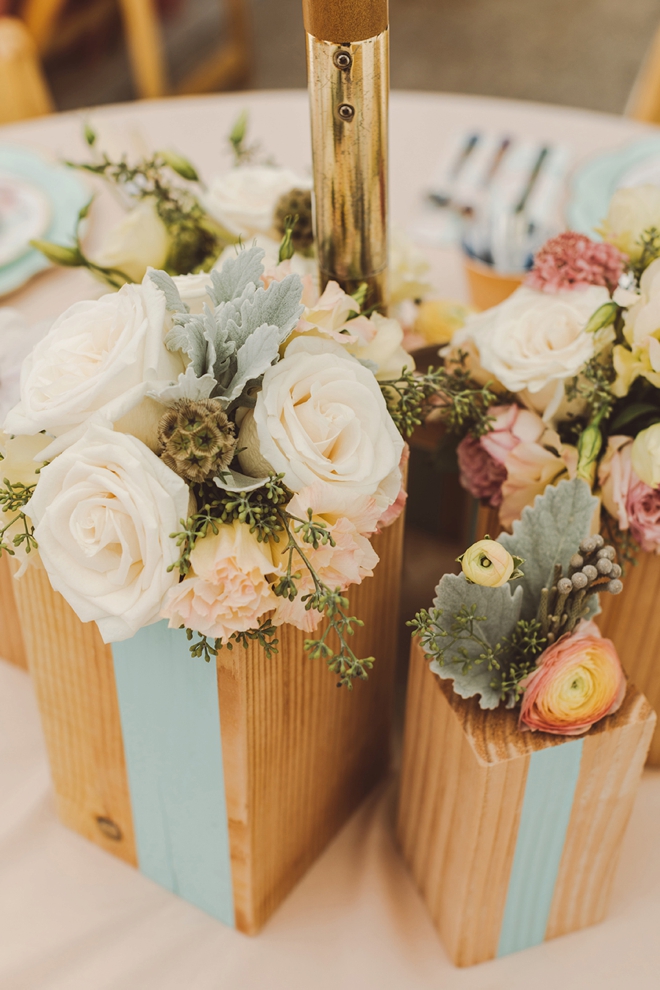
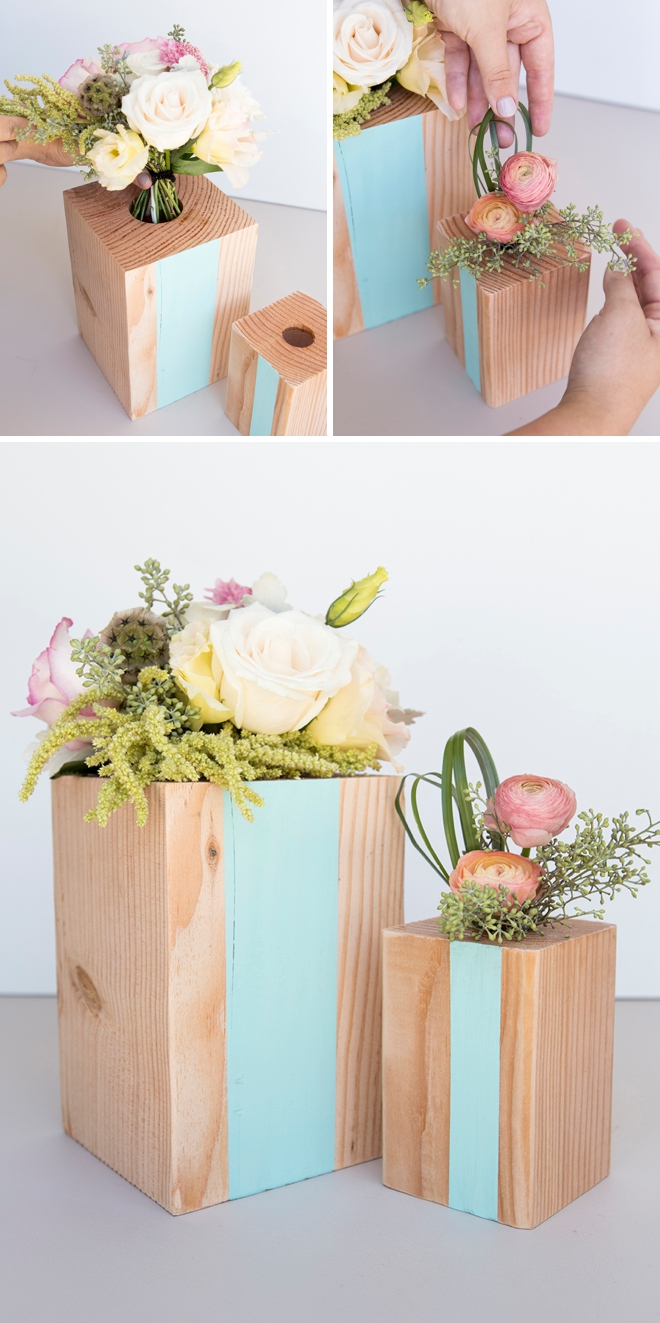
We used 6″ x 6″ x 8′ and 4″ x 4″ x 8′ pieces of wood to create these vases. My Dad cut them down to the sizes below, but you can also have them cut at your local hardware store when you’re purchasing the wood. We cut three different heights to create interest and add dimension to the centerpieces. Each table had one of each sized vase, 6 total.
- 6″ x 6″ = 10″, 8″, and 6″ tall
- 4″ x 4″ = 7″, 5″, and 3″ tall
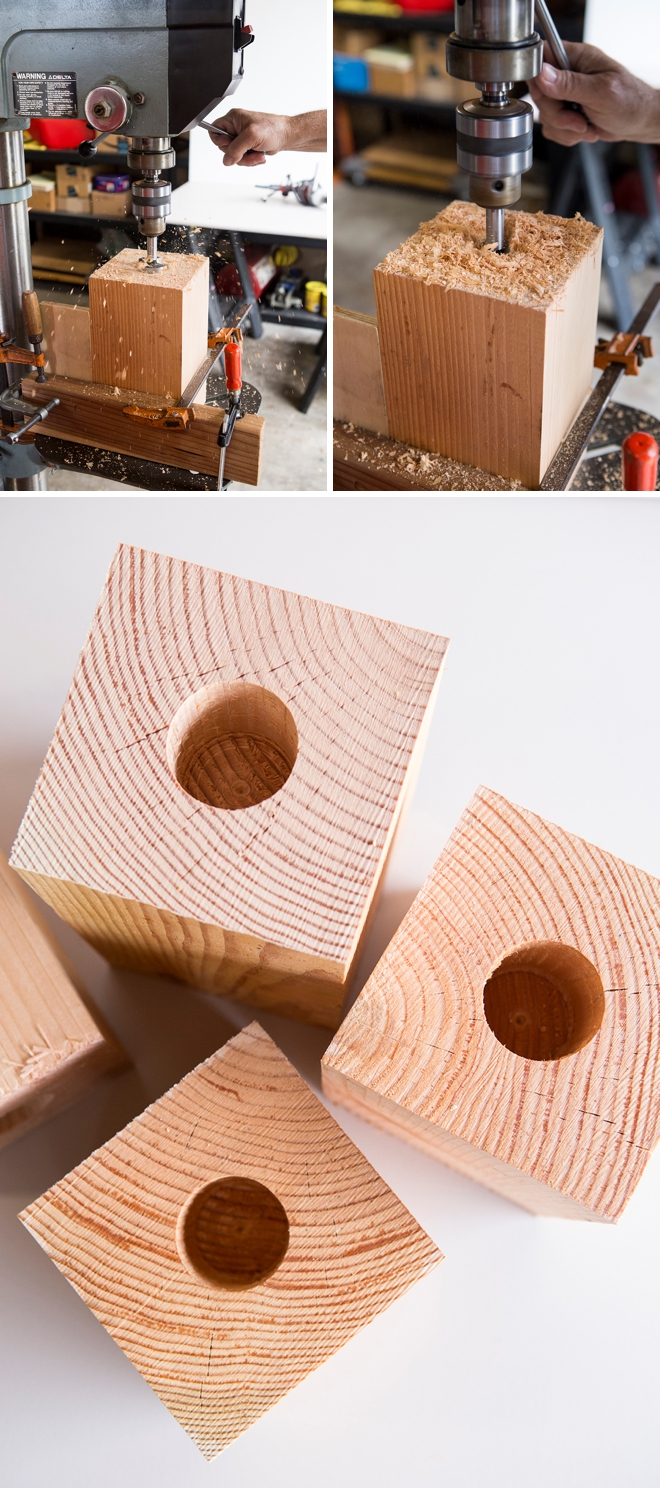
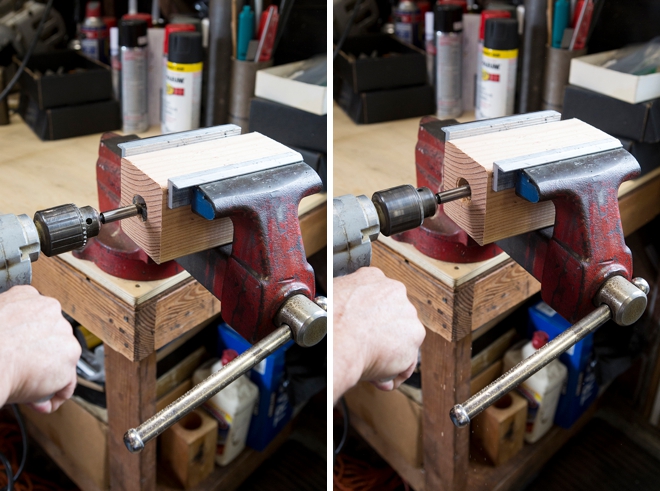
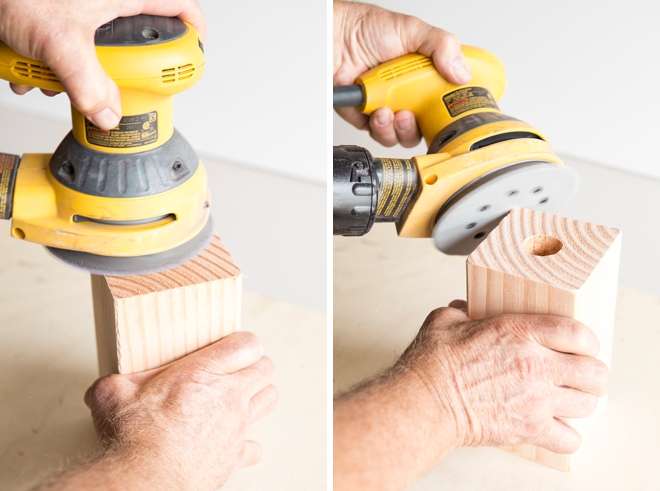
Drilling The Holes
Having Forstner Bits for this project is a must, as they are the drill bits that will cut holes. You can either do this on a drill press pictured below, or by using clamps and a vice shown two images down. A drill press is much easier but you or your family might not have access to one. Each hole was drilled 2.25″ deep.
- 6″ x 6″ Vases = 2″ Forstner Bit
- 4″ x 4″ Vases= 1″ Forstner Bit
Sand The Blocks Smooth
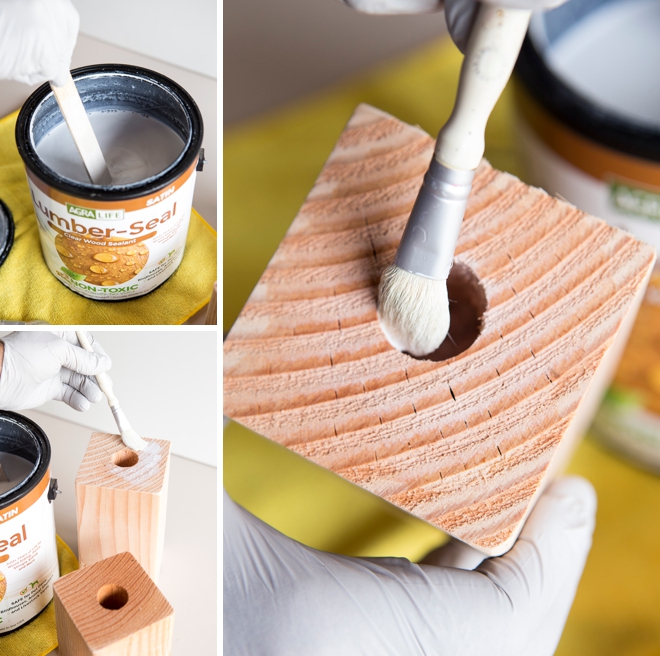
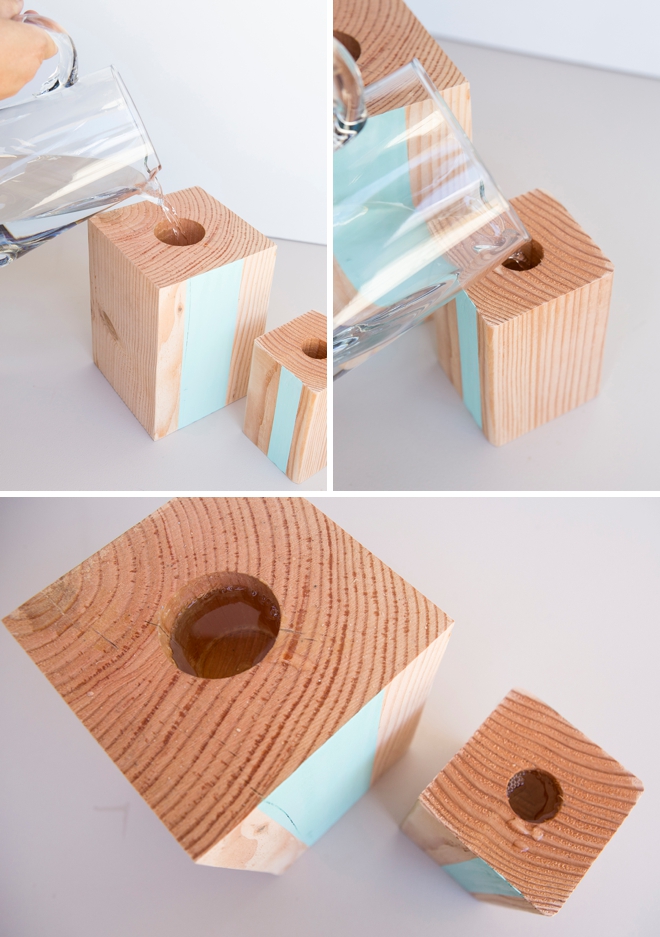
Lumber Seal
The Lumber Seal ensures that the water you put in your “vase” will stay there and not just soak into the wood. The one I linked below from Amazon worked perfectly for this project. Apply two liberal coats to the hole and a bit around the top of it. Let dry for 72 hours before filling with water.
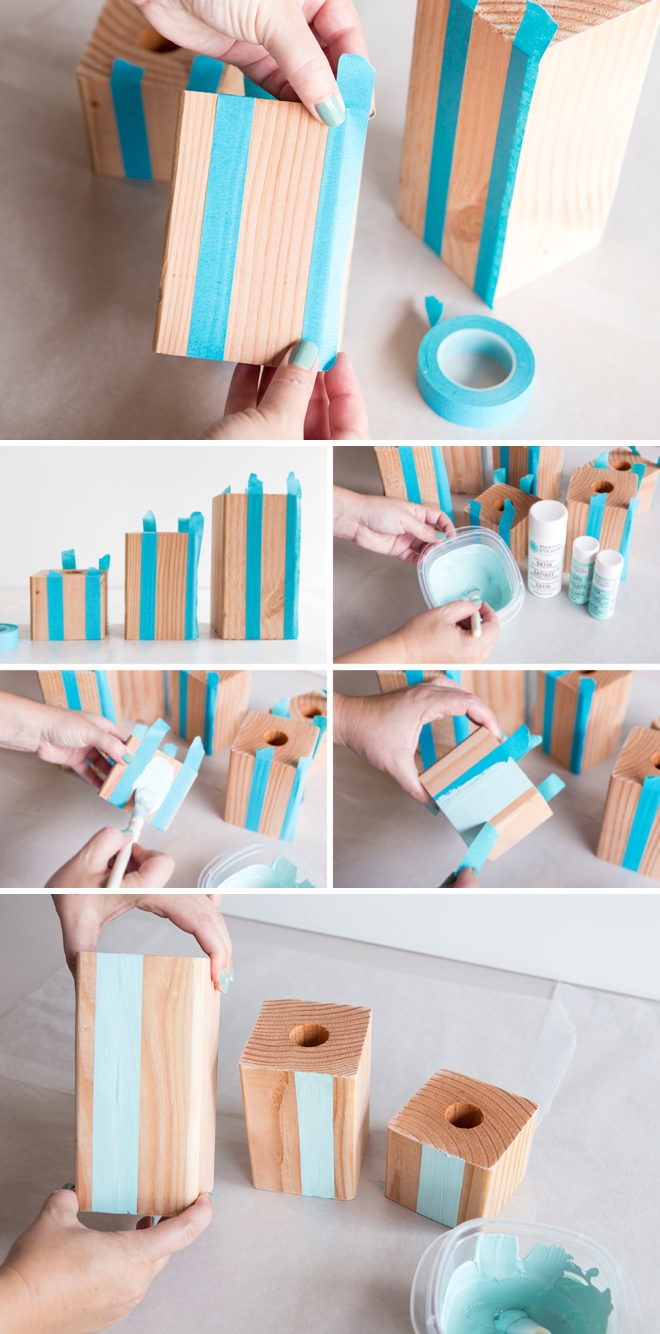
Paint A Few Stripes
Since my tablecloths were all shades of pink, I wanted to add a pop of mint to the vases with some paint. I taped off random stripes on all the vases, just on one side, and then pained with a mix of a few different Martha Stewart craft paints to get the perfect shade of mint. Peel the tape off before the paint dries to avoid the paint sticking to the tape.
Now your vases are complete and ready for their flower arrangements!
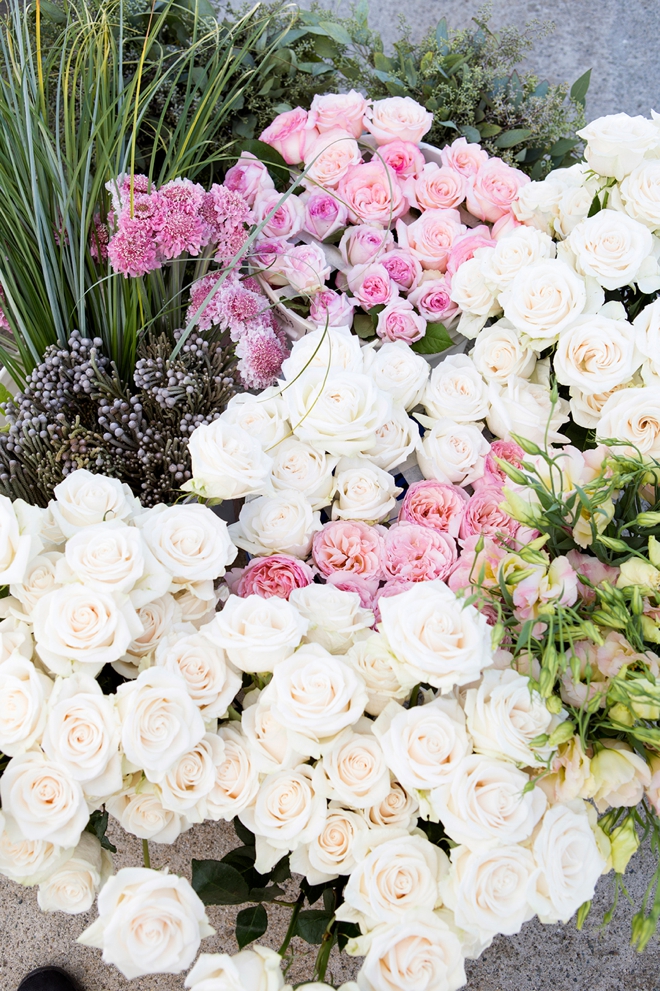
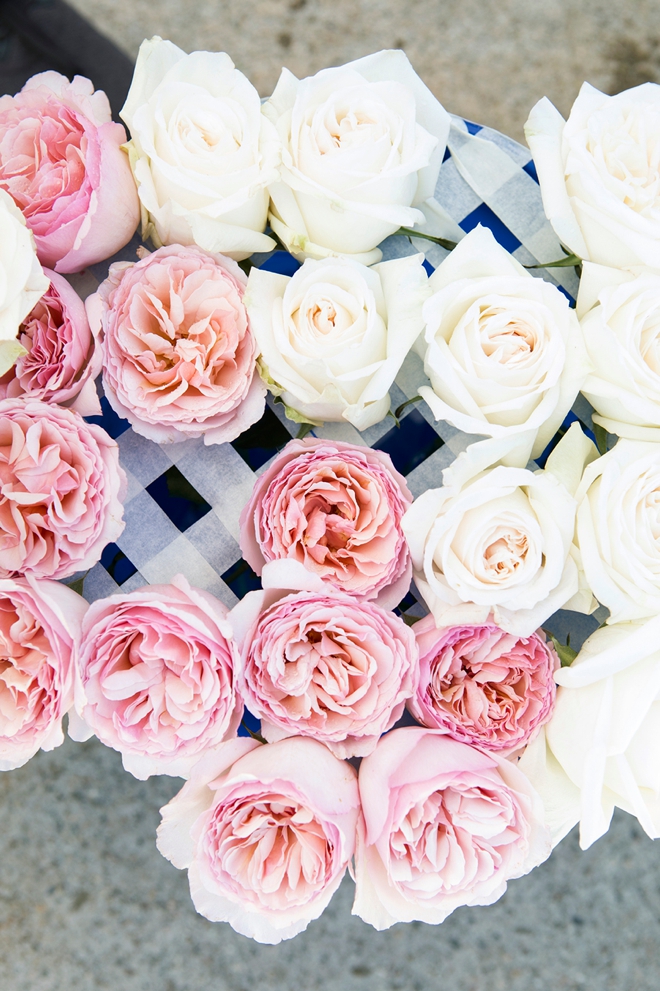
The Gorgeous Flowers
We ordered the wholesale flowers for my baby shower from FiftyFlowers and they truly made the shower look spectacular! I love the pink, peach, and cream combination we chose… see the exact flowers we used below:
- Delicate Garden DIY Flower Combo
- Whimsical Garden Rose Sampler Pack
- Rustic Wedding Flower Combo Box
- Cream Fresh Roses
- Apricot Lisianthus
- Seeded Eucalyptus
Rehydrating
FiftyFlowers is a farm to customer, wholesale flower company. Which means that your flowers are shipped straight to you from the farm! They will arrive in large cardboard boxes.
- Using two hardware store style buckets, fill them up 1/4 of the way with water, make sure they are clean to start with.
- Carefully unbox and unpackage your flowers, per the instructions from FiftyFlowers. Each flower is different and their team can walk you through the prep for each flower if needed.
- It is 100% normal for your flowers to look a bit tired and lifeless, they’ve been on a long journey to you.
- Give each stem a fresh diagonal cut and place in the water to rehydrate for 4-12 hours.
- Keep out of the heat and sun while rehydrating.
Bucket Tip
Tape a grid pattern across the top of your hardware store buckets with masking tape to space out your flowers and hold them properly!
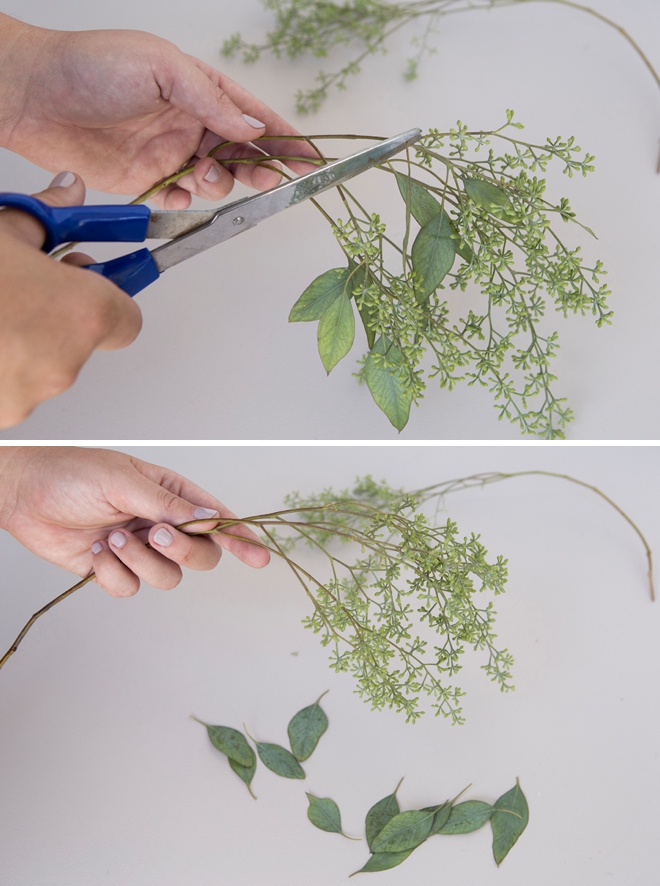
Seeded Eucalyptus Tip
Everyone loves the look of seeded eucalyptus but did you know you need to cut the leaves off to get that look? I didn’t but my fabulous florist Jacki helped me with this. Usually the leaves aren’t cute anyway, so just discard after cutting to leave those cute little berries!
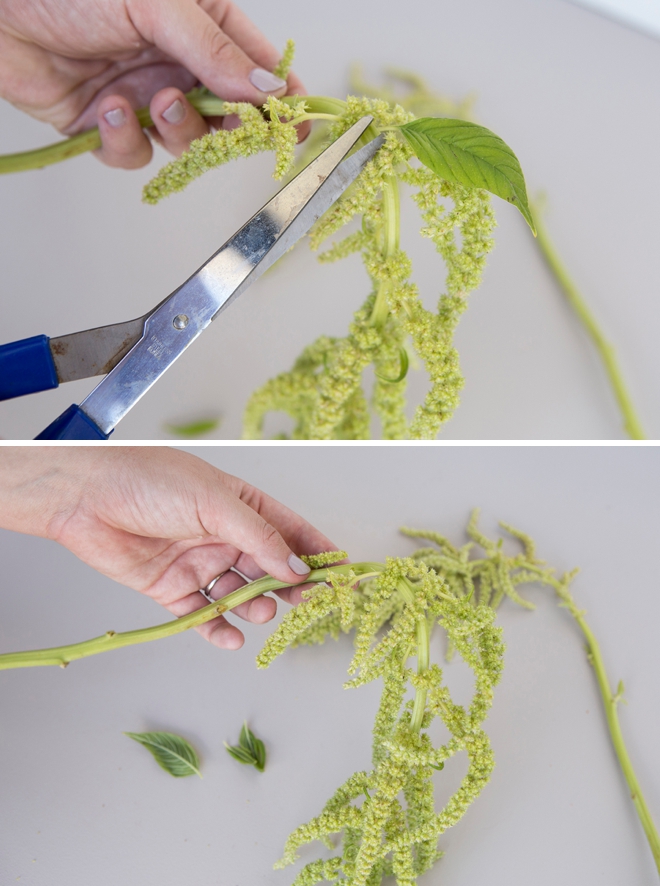
Hanging Amaranthus
Same thing with the Green Hanging Amaranthus, cut away all the leaves to leave those gorgeous fluffy tails!
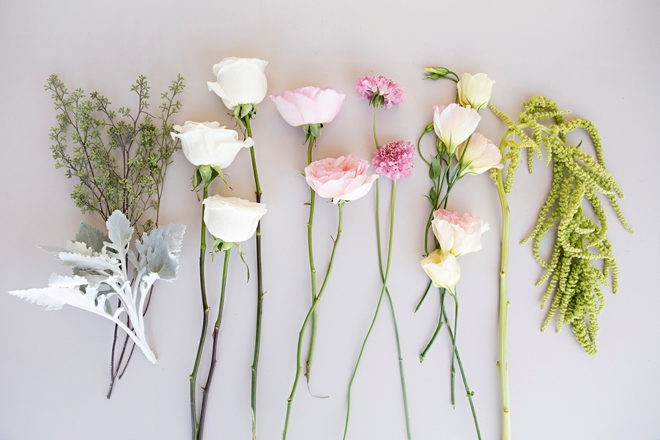
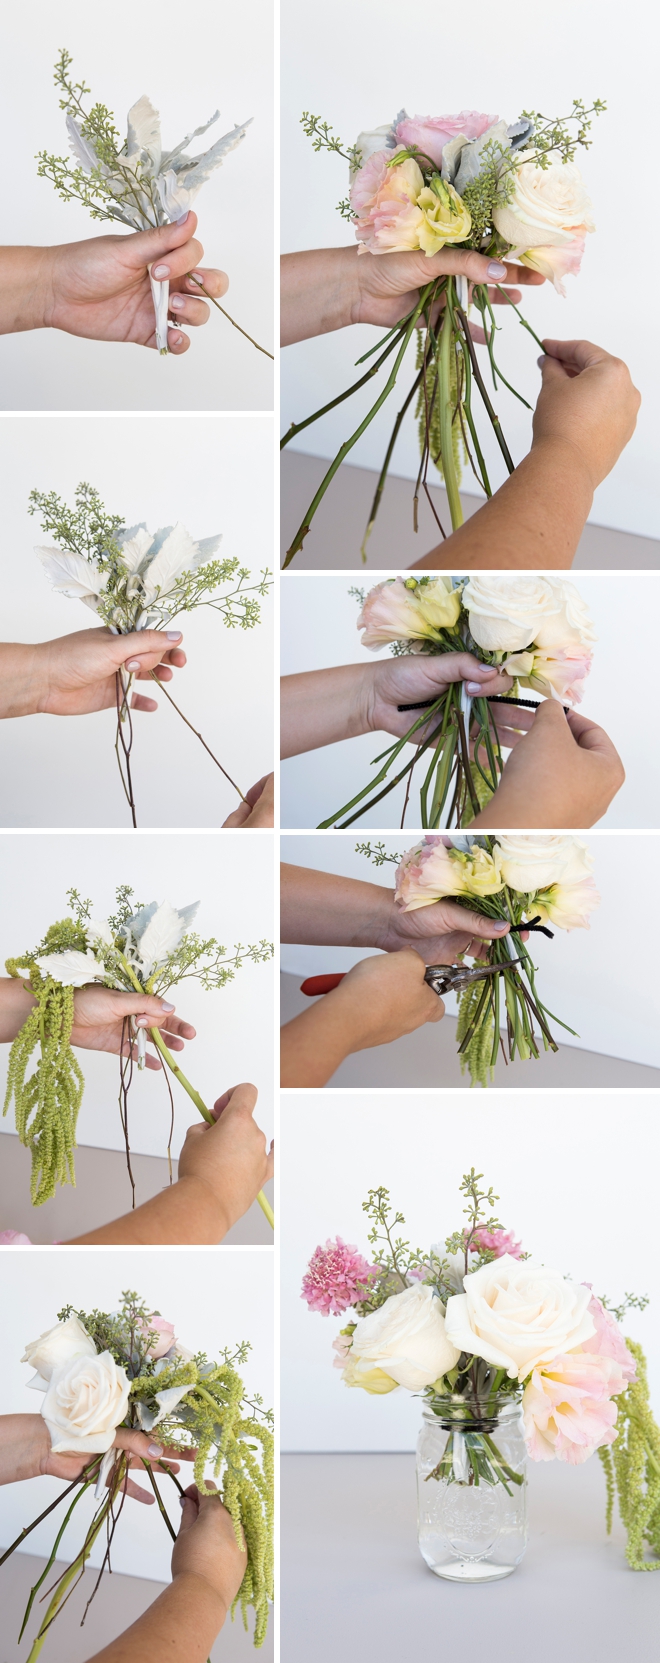
Large Arrangements
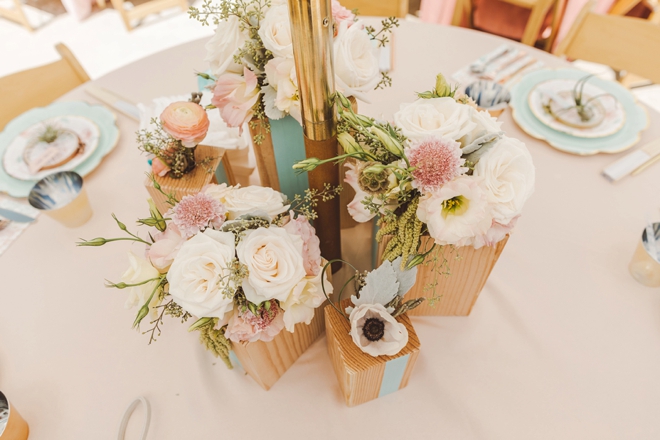
Each arrangement for the 6″ x 6″ vases had: 3 roses, 2 cabbage roses, 2 frilly scabiosas, 5 lisianthus, 1 stem hanging amaranthus, a few pieces of seeded eucalyptus, and a few dusty miller leaves.
Assemble
Start with the foliage first and then add the flowers, when you’re happy with the arrangement tie to secure with a chenille stem. Trim the ends so they’ll fit into the vase, at about 2″ long.
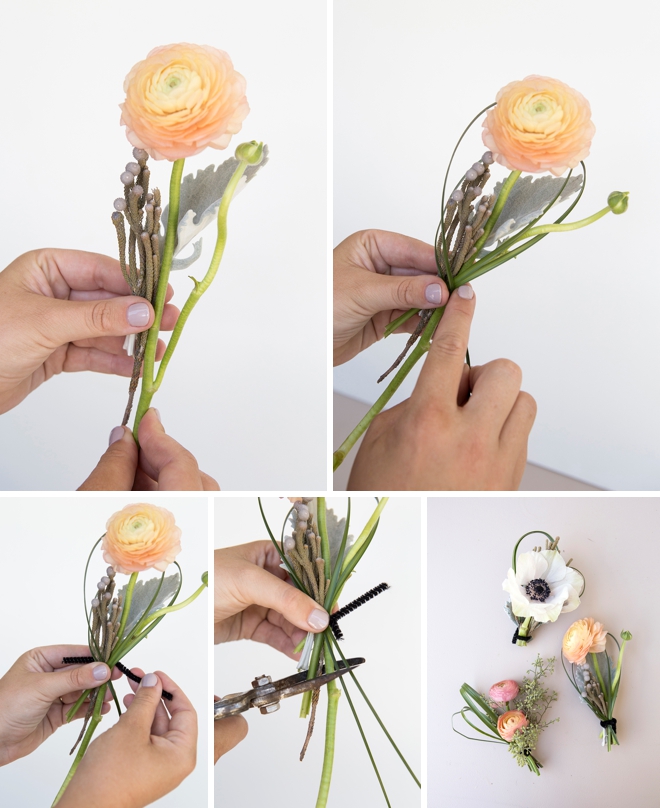
Small Arrangements
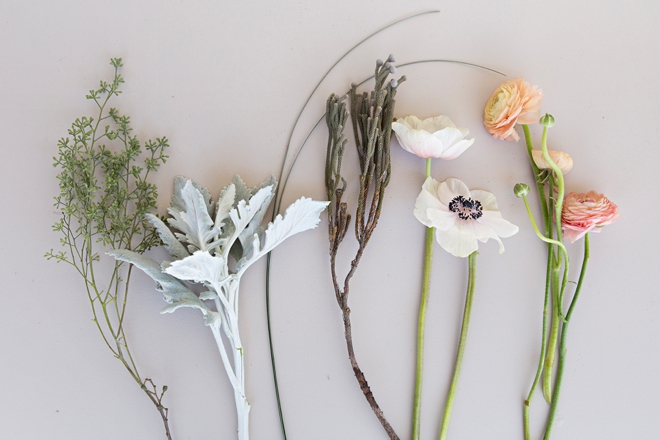
Each arrangement for the 4″ x 4″ vases had: 3, ranunculus, 2 anemones, 1 stem Silver Brunia, a few pieces of seeded eucalyptus, a piece or two of bear grass, and a few dusty miller leaves.
Assemble
Start with the foliage first and then add the flowers, when you’re happy with the arrangement tie to secure with a chenille stem. Trim the ends so they’ll fit into the vase, at about 2″ long.
We created the arrangements the day before the shower and stored them each in mason jars until we were ready to fill the vases with water and arrange them on the tables.
Fill The Vases With Water
Add The Flower Arrangements
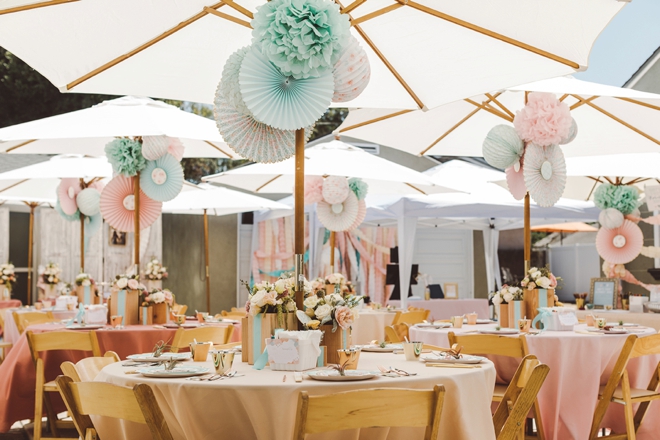
Arrange On The Tables
FiftyFlowers made the entire flower process super easy for my shower. The flowers were delivered a few days before the event, Jacki was able to clean and rehydrate them and then we created the arrangements the day before. No worries about driving to the flower mart to buy the flowers in the early morning or hope that the stores had the flowers we wanted. With just a few clicks we ordered what we wanted and they came right to our door!

DIY Tutorial Sponsored By:
FiftyFlowers is the customer-centric, online destination for wholesale wedding flowers, shipped fresh from the farm straight to your door! Inspired by the DIY bride, we offer an extensive selection of fresh flowers, greenery, and floral accessories because we believe anyone can create their own wedding flowers.
As with all our DIY tutorials, if you create one of our projects please send us a picture – We Love Seeing Your Creativity! If you use Instagram or Twitter please use the hashtag #SomethingTurquoiseDIY and it will show up on our Get Social page. Happy Crafting!
DIY Tutorial Credits
Event Photography: Steve Cowell Photography // Step-Out Photography + DIY Tutorial: Jen Causey of Something Turquoise // All Flowers: courtesy of FiftyFlowers.com // Floral Design: Floral Design By Jacqueline Ahne // Wood: Lowe’s Special Order // Forstner Bits: Amazon // Paint: Martha Stewart // Wood Sealer: Amazon // Nail Polish: OPI – Withstands the Test of Thyme
Shop The Supplies:
Find the supplies you’ll need for this project from our affiliate links below:


Comments