

How To Make Boho, Shrinky-Dink Photo Keychains With Canon PIXMA
This is a sponsored post written by me on behalf of Canon. All opinions are 100% mine.
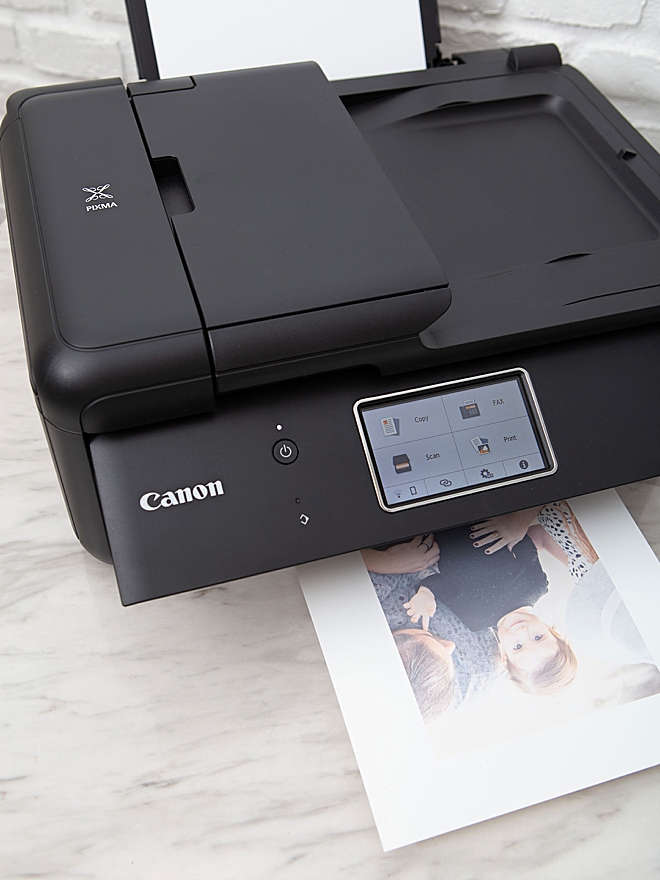
I love making photo gifts. Handmade gifts are always special but when it’s focused around a special photograph, the sentimentality soars. With Mother’s Day right around the corner, I wanted to make something fun for my Mom and for the Moms on my team, so I came up with this boho keychain idea. We’re throwing it back to the 90’s by using Shrinky Dink material to create the awesome photo keychain charms. When I was little you couldn’t print on the stuff, but now they actually have an inkjet version that works like a dream with my Canon PIXMA TR8620 All-in-One Printer.
Something New: I just started creating Instagram Reels for some of our projects so if you’re into that, check out our Reels page to see this project in particular, up close!

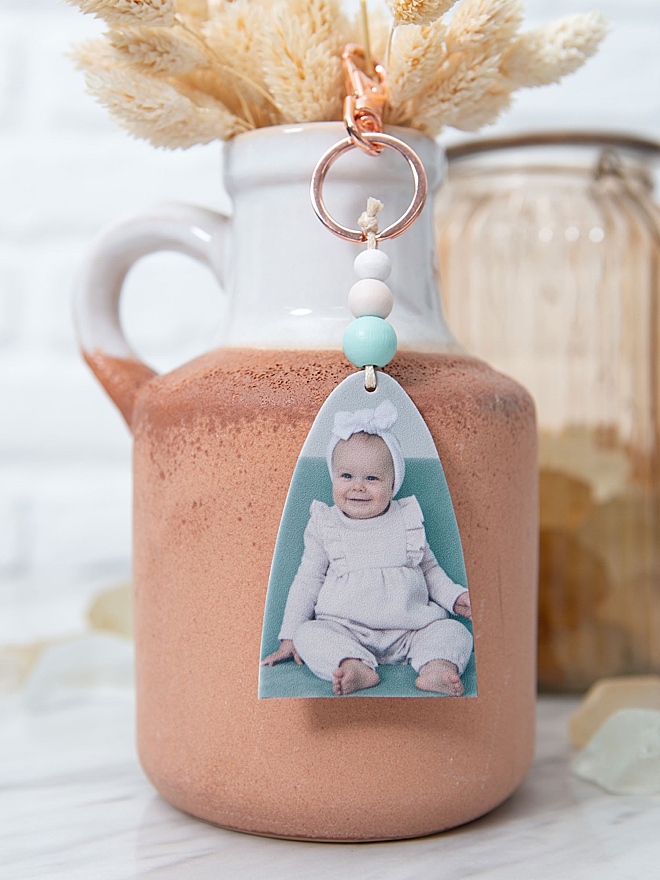
Adorable Gifts
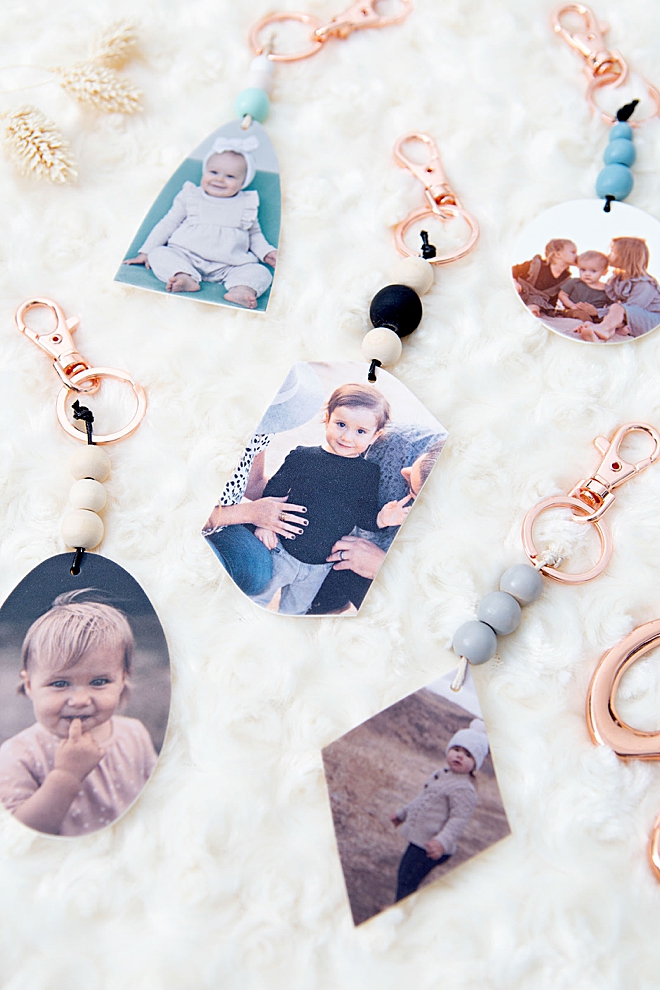
Perfect for Mother’s Day, Father’s Day, Grandparents Day… and any other time you need to give someone a special gift. I am looking so forward to mailing all these to my co-workers and giving the one of my babes to my Mom, and I hope that they will add a little cheer to their keys.
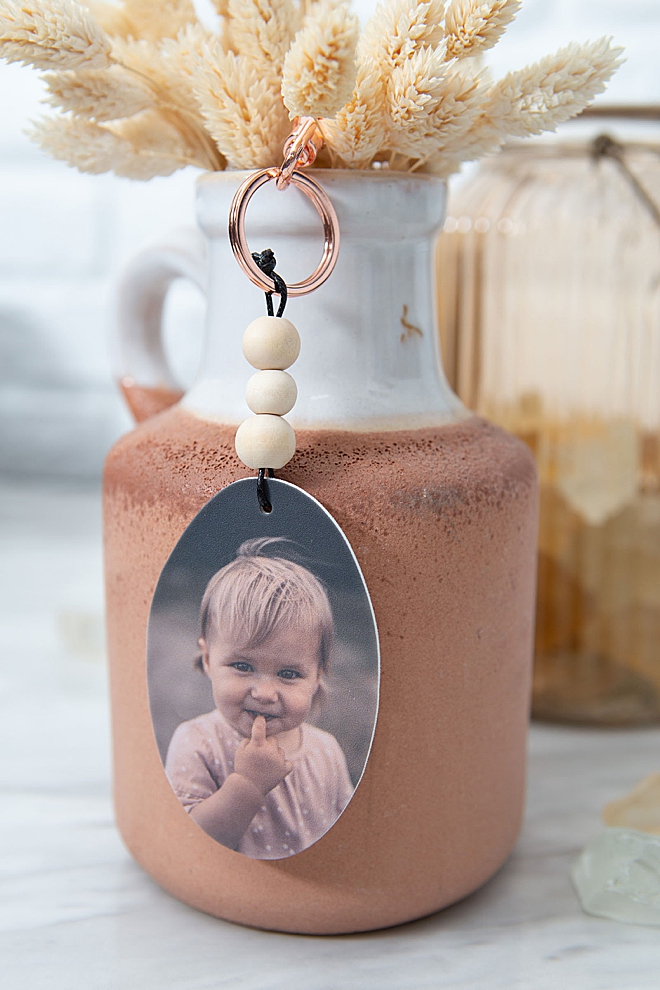
My babes.

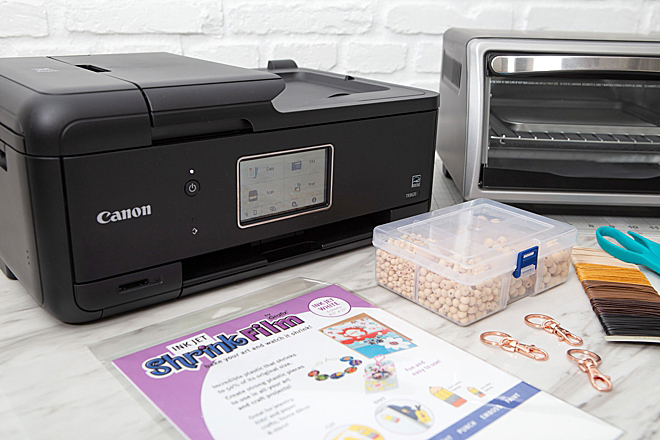
SUPPLIES:
- Canon PIXMA TR8620 All-in-One Printer
- Inkjet Shrink Film
- Cute Keychain Clips
- Assorted Wooden Beads
- 1mm Waxed Cotton Cord
- Large Hole Punch
- Paint (optional)
- Gorilla Glue
- Scissors
- Oven, Oven Mit, Baking Sheet
- Our FREE printable photo shape patterns at the end of the post!
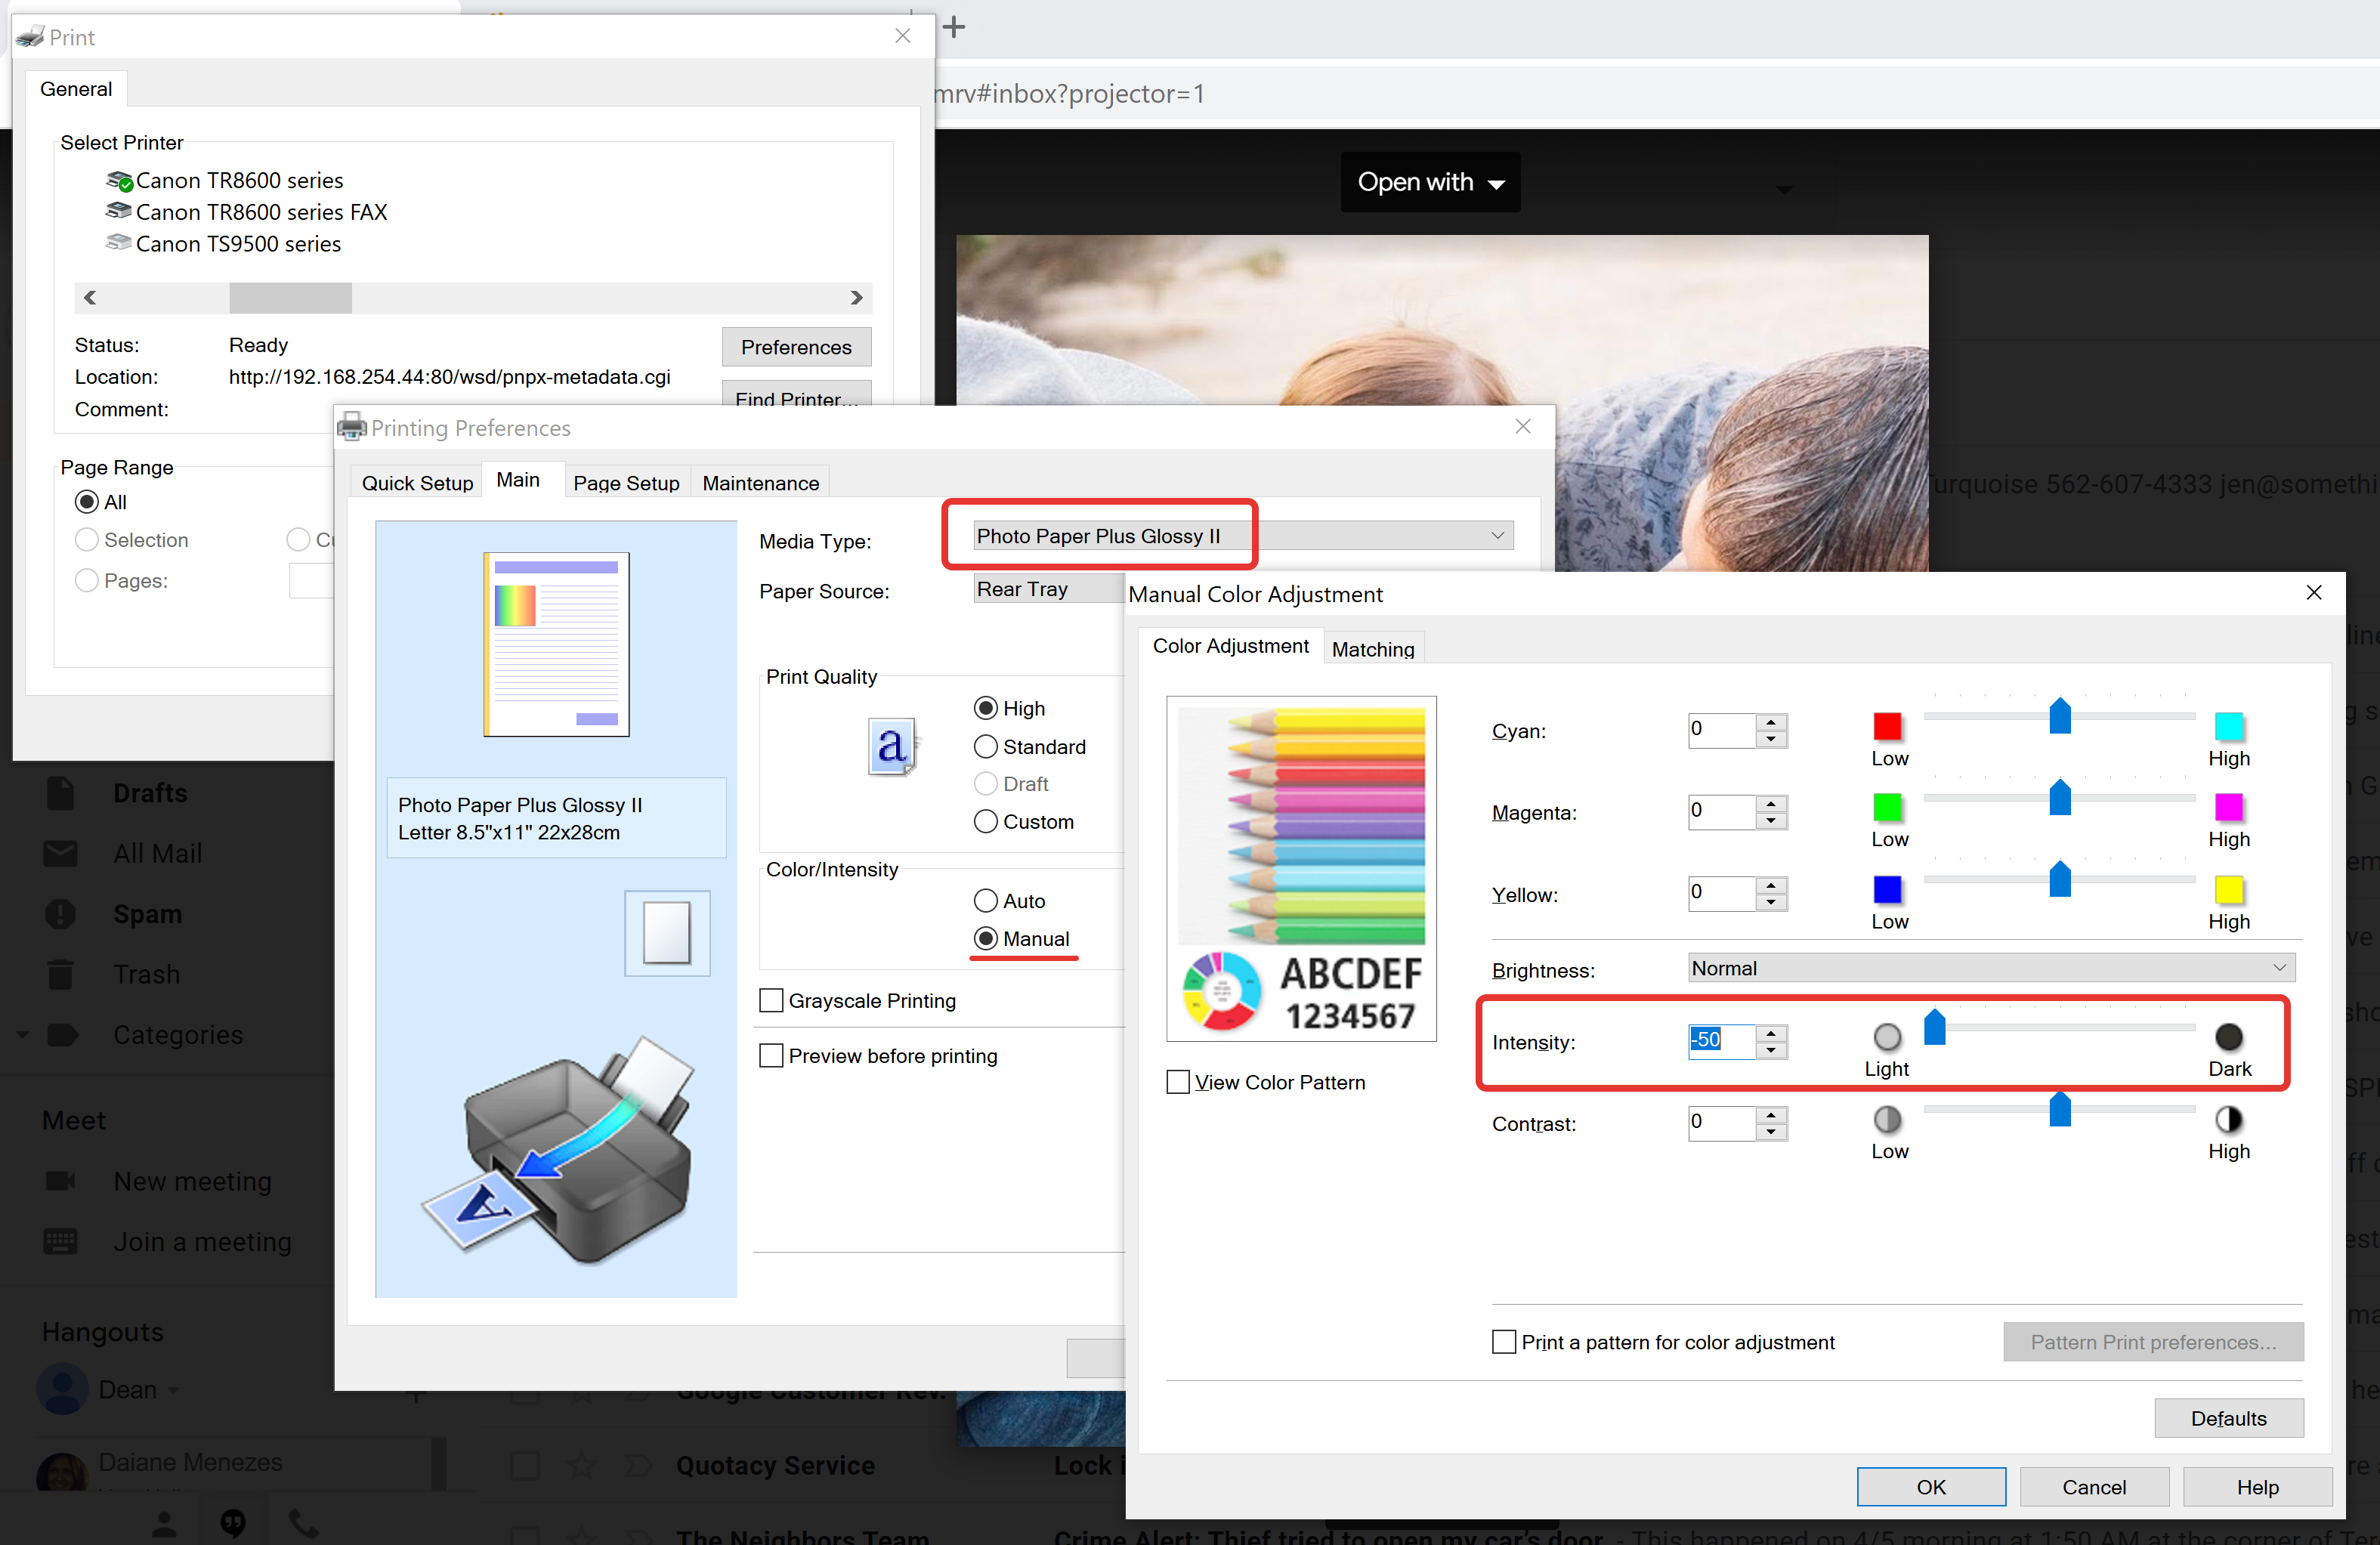
Print At 50% Intensity/Opacity
You’re going to have to be a little tech-savvy for this step of the project as you MUST print your special photo at 50% of it’s original intensity/opacity. What that means is that you need to make your photo 50% lighter than the original. The reason being that when these cuties shrink, the color is saturated. Use your favorite photo editing software for this step and size to half the printable 8.5″ x 11″ sheet, so that you can fit two photos per sheet if you are making more than one keychain.
MICROSOFT TIP: Some Microsoft users might be able to accomplish the 50% reduction right from the Printer Preview Box! Simply click on Manual under color settings to open up a screen with more color options. Under Intensity, slide the toggle towards light to reach -50%, ready to print!
Canon PIXMA TR8620 All-In-One
The magic is in the print. The ability of my Canon PIXMA TR8620 to nail the 50% opacity and make such a beautiful photo print is the reason that these photo charms look so fabulous. Photo Paper Plus Glossy II is the ideal setting for the shrink film.
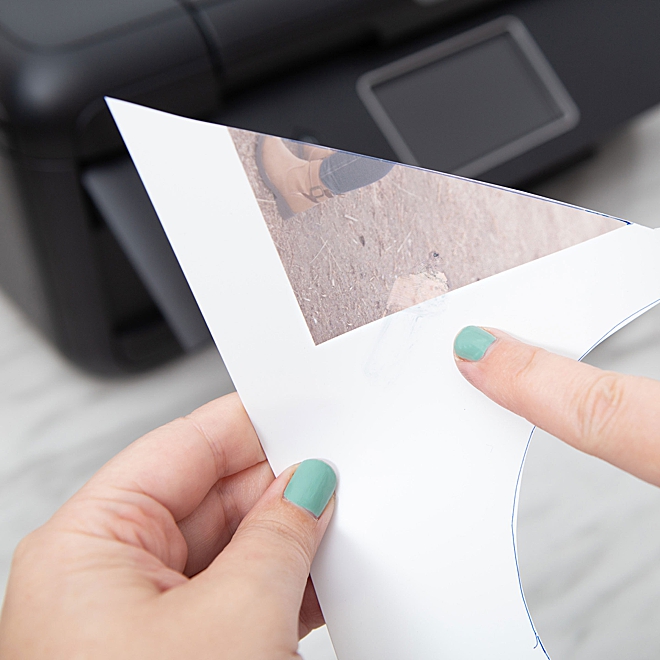
Not Waterproof
Handle the pre-shrunk print with care! The ink on the Shrink-film is not waterproof! This little spot was literally from the condensation on my finger from my cold drink. I’m so glad it was outside of my pattern area. Any moisture that touches the print before you shrink it can ruin your photo!
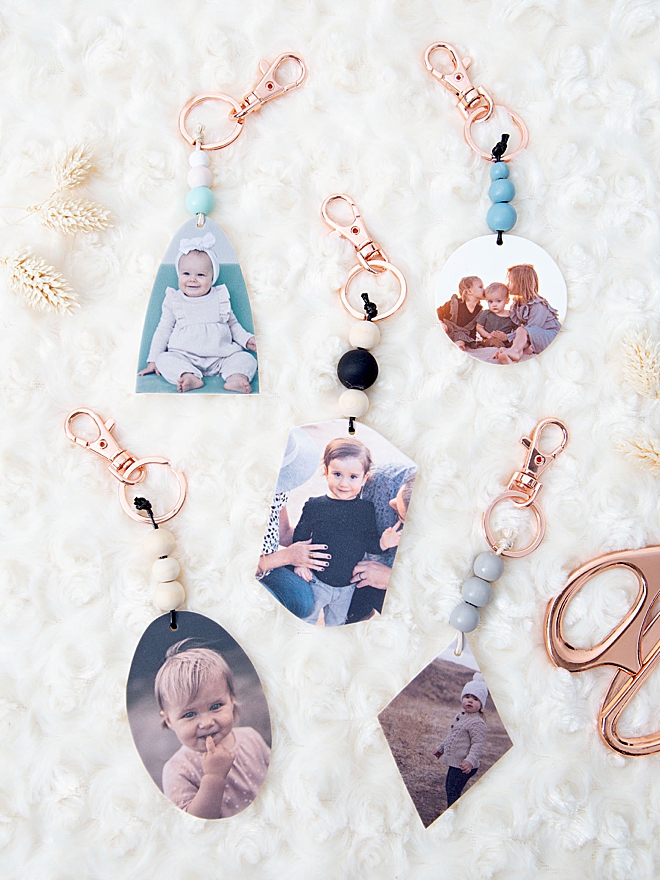
Free Shape Patterns
I’m sharing 6, free printable shape patterns for your keychain photos at the end of the post. Simply click on the graphic and the download will start instantly. Save to your computer or phone and print on regular printer paper. Trim your shape out.
CRAFTERS TIP: depending on how large you print your photos, you might need to resize these patterns, which is super easy. Just change the scale to a percentage lower than 100% to find the right size.
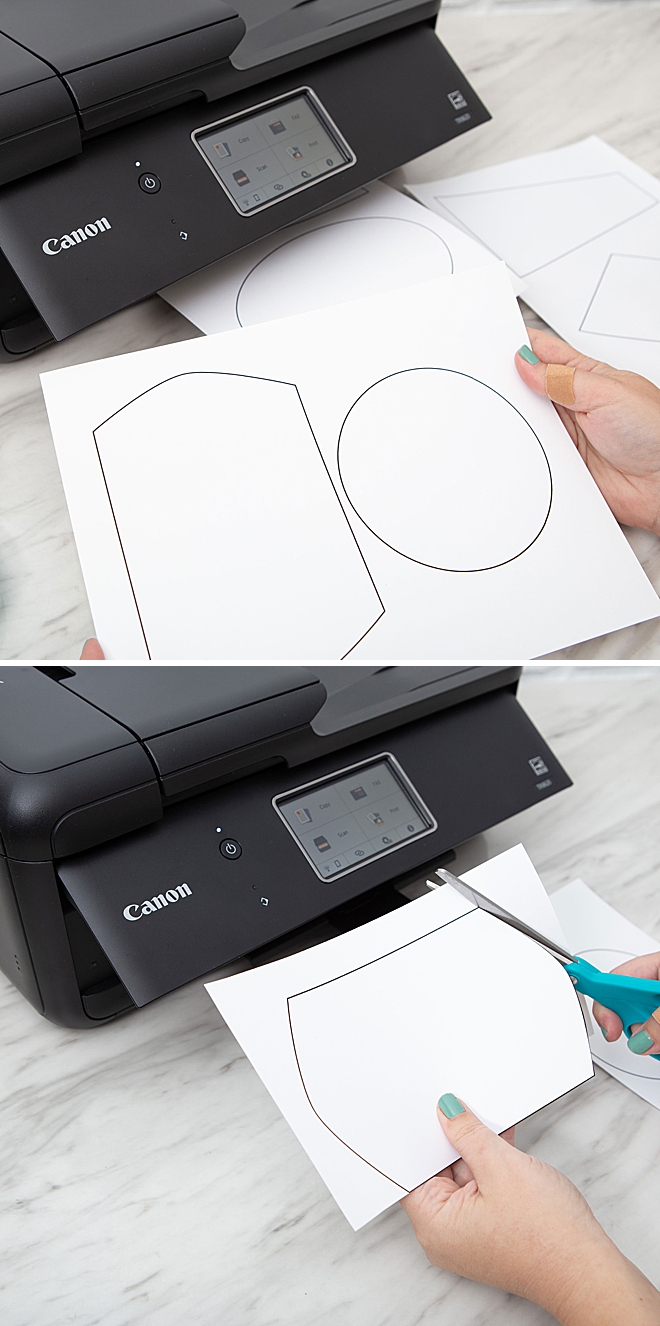
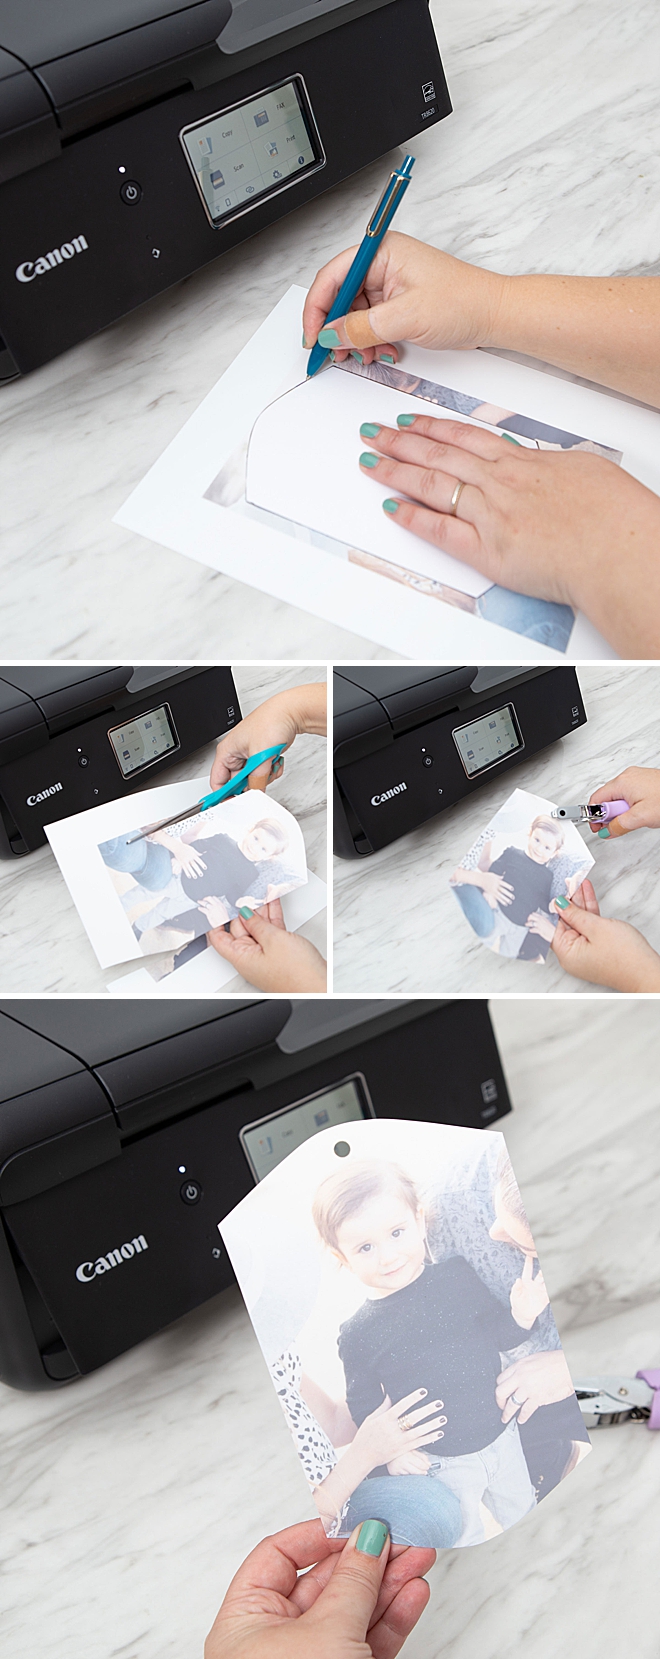
Cut + Hole Punch
Carefully trace the shape pattern over your photo and then cut out. Try and touch the actual photo as little as possible, then punch a hole at the top. Punching a hole for the keychain BEFORE you bake is a must!
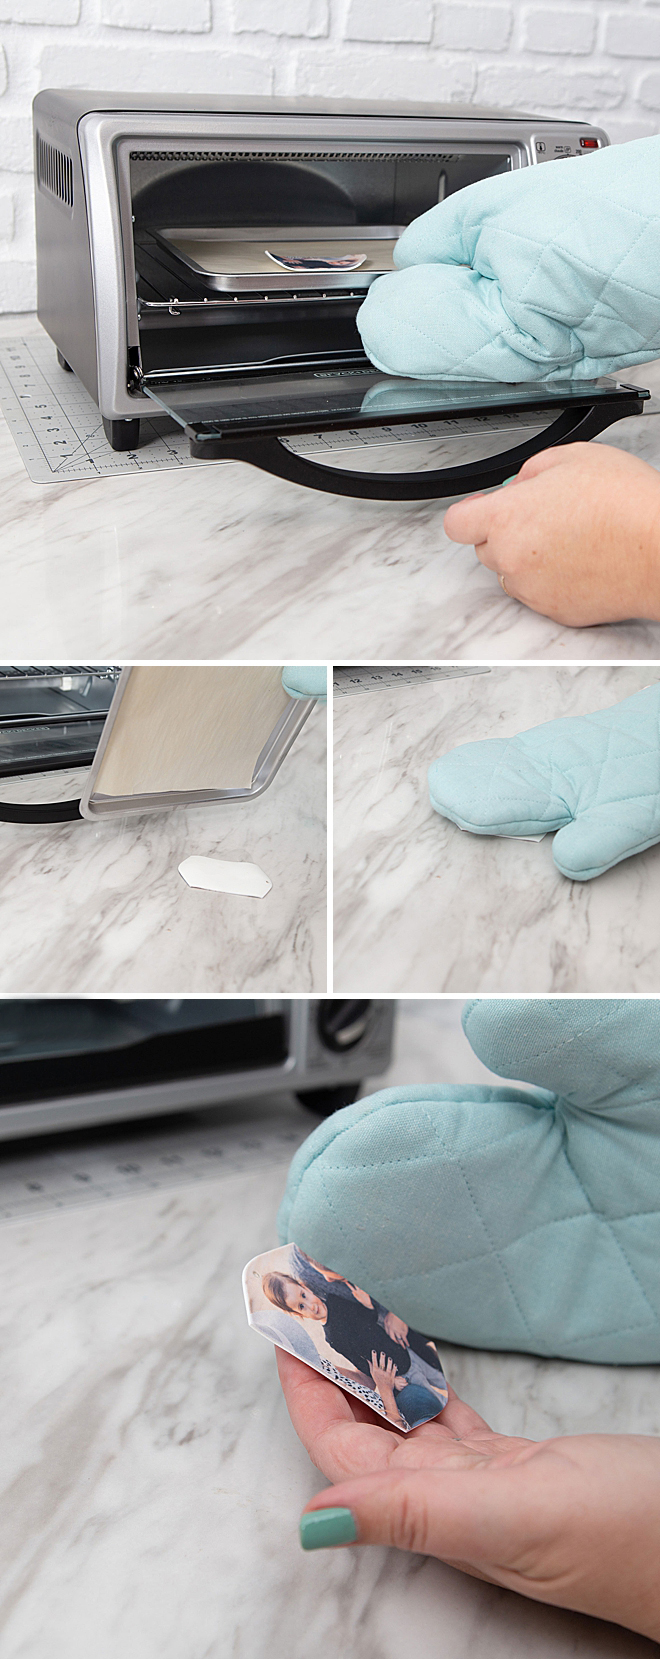
Bake To Shrink
Follow the instructions on your package of shrink product for temperature and time. I found that for this exact Shrink-Film, 325º for roughly 1 minute did the trick, but it can take up to 3 minutes depending on your oven – so watch them carefully. Here I’m using my craft toaster oven because I don’t have a regular oven in my studio. The film will twist and wiggle while it’s shrinking and can look crazy for a second, to see it in action check out our IG Reels but it will eventually flatten out.
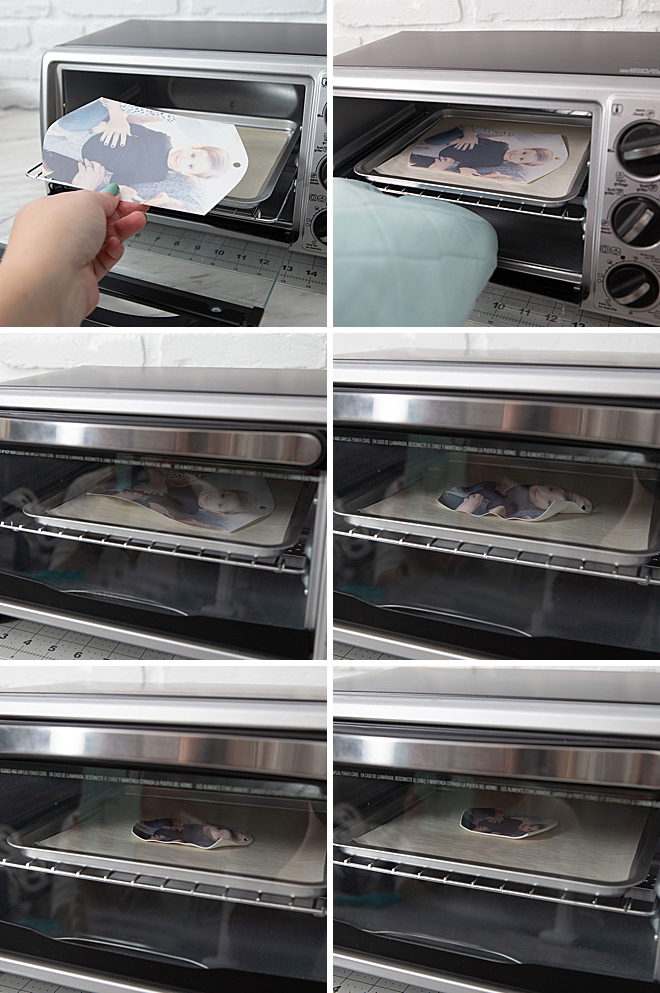
Flatten If Necessary
Some shapes tend to arch up on the edges, so flip the photo out on your table and simply flatten it with your oven mitt. They cool off very quickly so holding for a few seconds will flatten it perfectly.
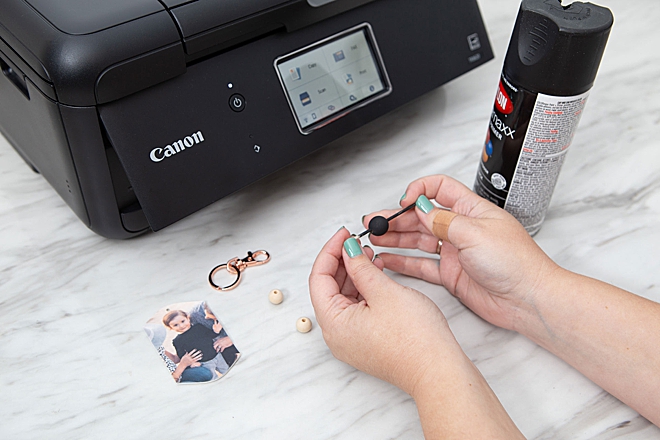
Paint Optional
Painting your wooden beads is totally optional. Here I only painted the middle bead black with spray paint. I put it on a tiny dowel to make the painting easier.
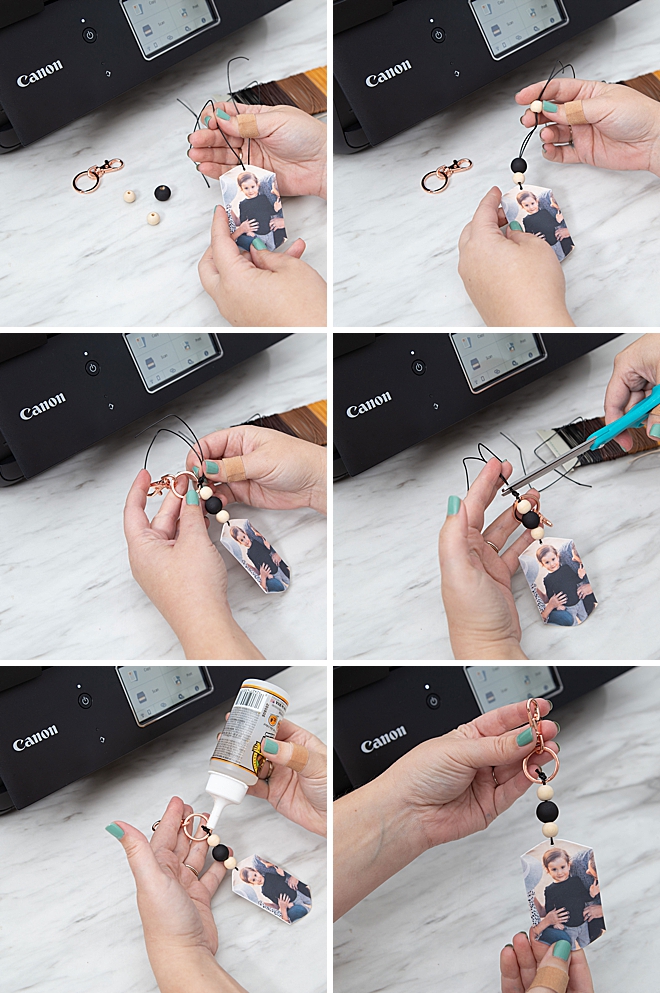
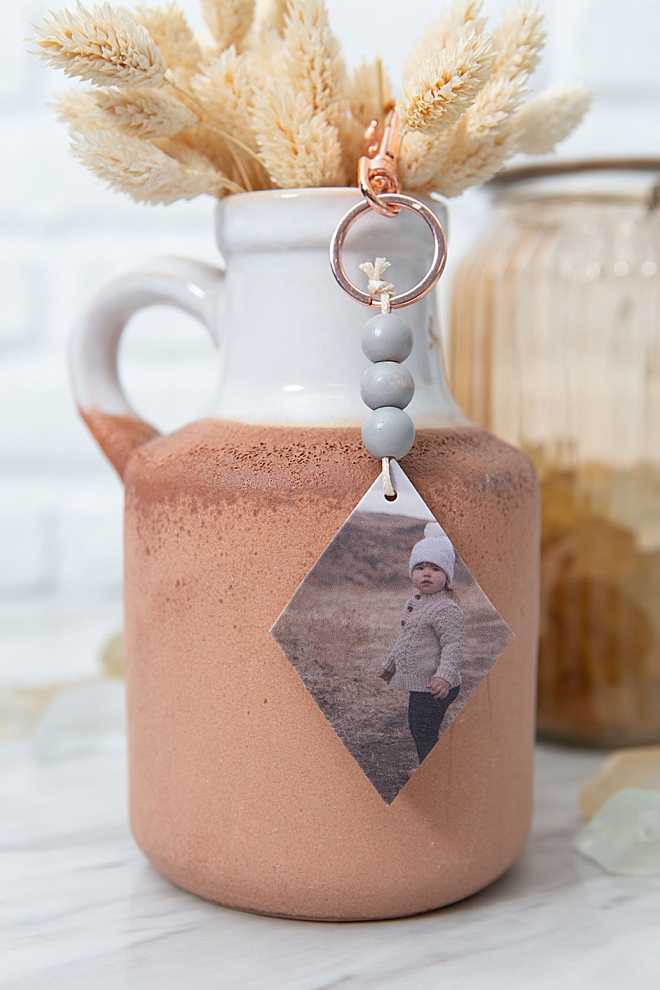
Assemble
Cut and thread about 12″ of the 1mm waxed cotton cord through the hole in the photo, then add your wooden beads. Tie a knot around the keychain ring and secure by adding a tiny amount of Gorilla Glue (or the like) to the knot. Let dry for 24 hours and you have yourself a gorgeous, custom photo keychain!
Printer Power
What a cool thing!? Am I right? How is it that we can print onto such an awesome and weird piece of thin plastic and turn it into a thick photo charm? The size reduction alone is so cool. I trust you gals will have fun with this project and I cannot wait to see your renditions, don’t forget to share them with us!

Huge thanks to the fabulous women on my team for sharing pictures of their adorable kids with me for this project, such a gorgeous looking bunch of littles!
DIY TUTORIAL SPONSORED BY:
Canon U.S.A., Inc. prides itself on allowing consumers to create and preserve beautiful imagery, from capture to print. With wireless technology and seamless printing capabilities, you can print your photos and printables with precision and ease.

If you create one of our projects, please share a picture with us on Instagram or Facebook by using the hashtag #somethingturquoisediy, we regularly re-share our favorites! Your profile will need to be public for us to see it otherwise, you can always DM us!
DIY Tutorial Credits
Photography + DIY Tutorial: Jen Causey-Kidder of Something Turquoise // Canon PIXMA TR8620 All-in-One Printer: courtesy of Canon // White, Inkjet Shrink Film: Amazon // Assorted Wooden Beads: Amazon // Rose Gold Keychain Clips: Amazon // Waxed Twine: Amazon // Large Hole Punch: Amazon // Clear Gorilla Glue: Amazon
Shop The Supplies:
Find the supplies you’ll need for this project from our affiliate links below:


Comments