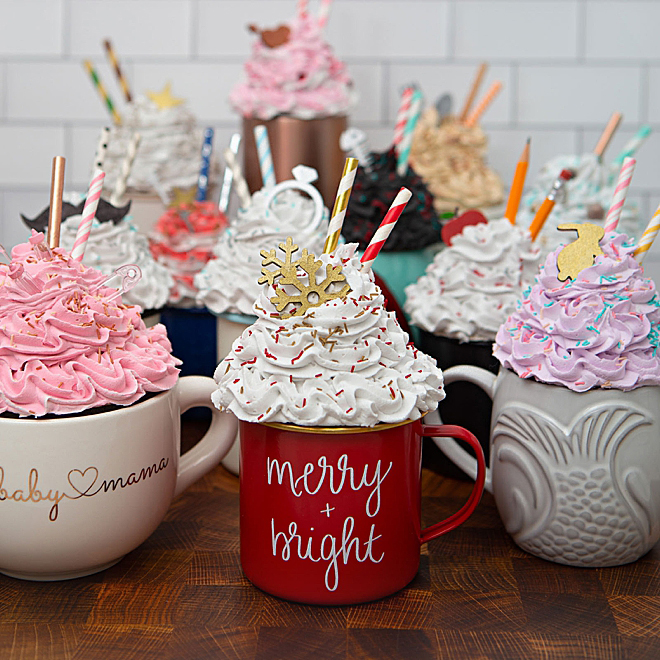

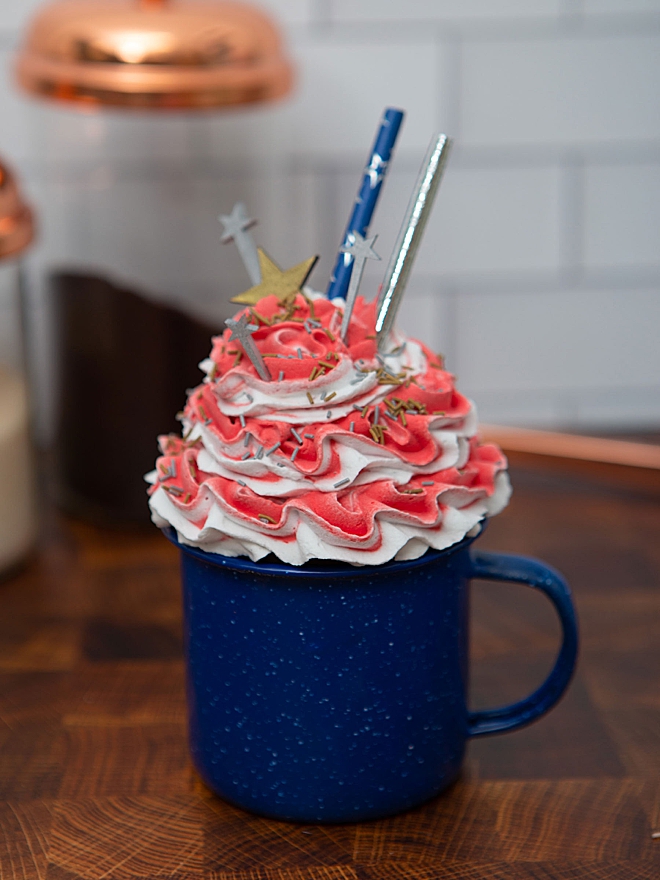
How To Make Faux Whipped Cream Mug Toppers
Ok, I don’t sell my crafts, just my craft files, but if I did sell something, it would be these Faux Whipped Cream Mug Toppers for sure, or these name bracelets. For those with decorative coffee bars, I know you feel me. I started with the Thanksgiving mug first, then the seashells, then Halloween, and I was so obsessed that I decided to make one for myself for EVERY month of the year. If you’re like “what the heck?! what is this? is it in the cup or just on top?” it’s called a mug topper, it’s just for decor, and it just sits on top of the cup. For those who have a special affinity for coffee like myself, these are an adorable way to dress up your kitchen coffee area by season. I found the best faux whipped cream ever and I’m giving you all the details below!

Glowforge Toppings
I had a hell of a time trying to find the right little things to put in my whipped cream, so I just made them on my Glowforge. If you make and sell these mug toppers and you don’t have a Glowforge – you should get one!!! It made this entire process an absolute breeze and way cheaper than buying these items. Custom little toppings were just a few clicks away. I spray painted them and they were ready to go. Perfectly sized and painted for each topper. I’ve heard that some craft stores have good doll house items for sale that work, otherwise you’ll have to pick things up as the seasons go by.
You can use this referral link to save up to $500 on your Glowforge purchase!
Purchase Instead
If you’re like me, you probably have most of these supplies already, some oven bake clay, a large frosting tip, and straws. If you don’t, the supplies can get a bit pricey and if you only want one or two, it’s definitely cheaper to just buy them on Etsy. But they are SUPER fun to make and would make terrific handmade gifts for the holidays!
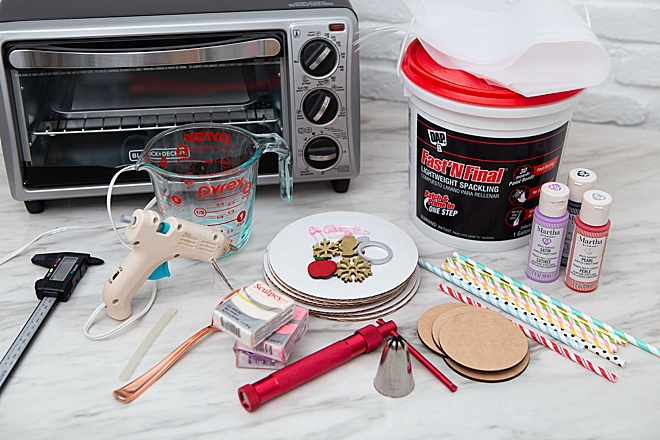
SUPPLIES:
- Fast n’ Final Lightweight Spackling
- Extra-Thick Pastry Bags
- Extra-Large Closed Star Decorating Tip
- Oven Bake Polymer Clay
- Clay Extruder
- Cardboard or Draftboard
- Paper Towel
- Hot Glue Gun
- Cute Paper Straws
- Cute Coffee Mugs
- Scissors
Make Your Own Sprinkles
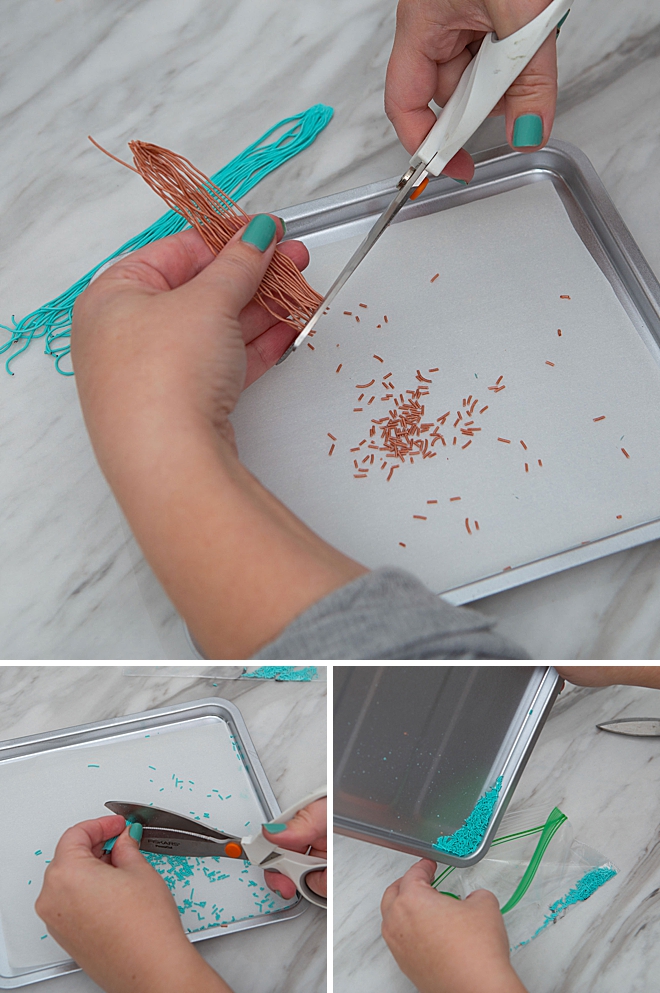
Making your own sprinkles is way easier and faster than I thought it would be. Make small balls out of oven bake polymer clay like Sculpey. Place inside a clay extruder with the tiny round holes disk and crank it out. Place it on a cookie sheet, no need to separate, and bake for 8 minutes at 275ºF (follow your package), then let cool.
Here I’m doing this in my small toaster oven that’s in my craft studio, but originally I made like 10 different colors on one cookie sheet and threw them in my oven at home. Which made this process go very quick.
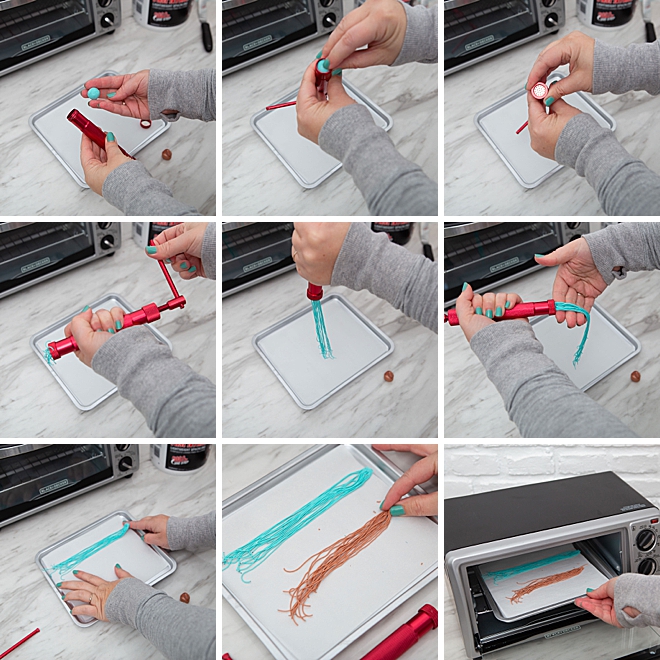
CUT: now using a sharp pair of scissors just cut the strips into tiny sprinkles. This step is probably the longest of all the steps. I separated each color in snack bags. Set aside.
If you don’t want to make your own sprinkles, you can always buy fake sprinkles on Amazon.
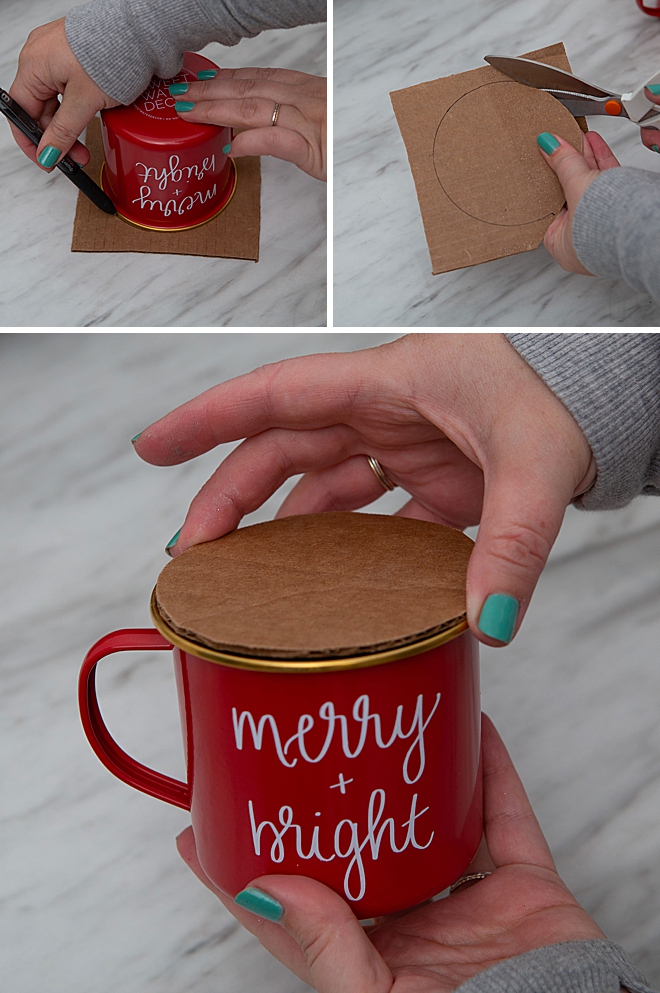
Mug Topper Bases
There are a few ways to make the base for the faux whipped cream.
- Trace your cup on a piece of cardboard and cut out, or
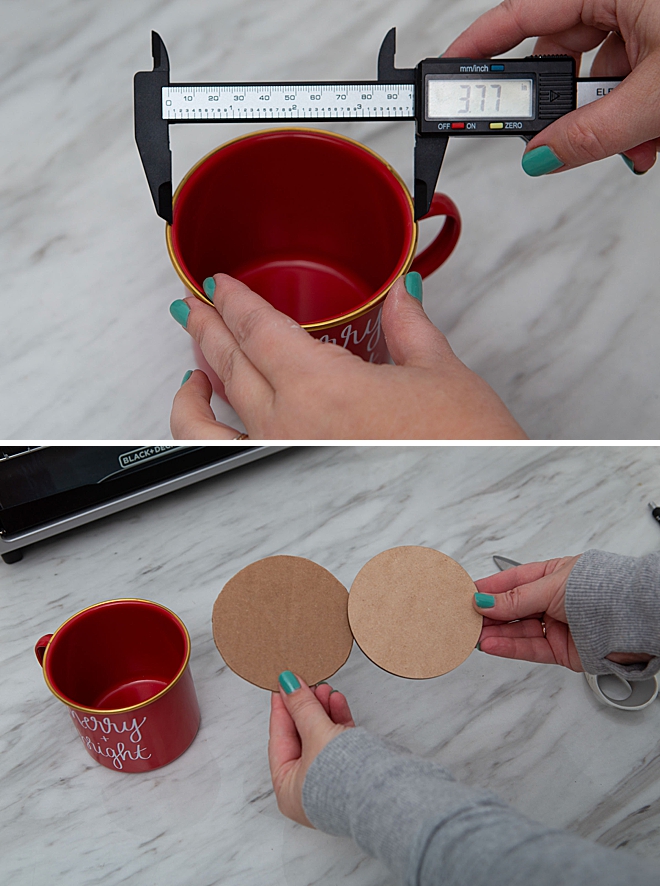
- Measure with digital calipers (or a ruler) and cut a piece of chipboard with your Cricut Maker, or
- Measure with digital calipers (or a ruler) and cut a piece of draftboard or plywood using your Glowforge, which is what I did
All my mugs have different diameters so I made a list of what mug would display each monthly topper and cut out the bases accordingly.
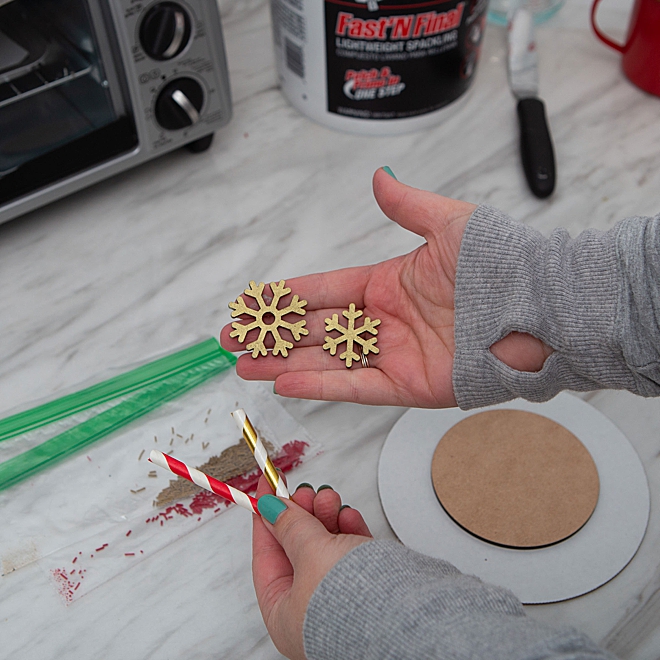
Cutie Little Things
Like I mentioned earlier, I had a hell of a time trying to find the right little items to stick in my whipped cream – so I just made them using my Glowforge. It was VERY quick and easy. I used designs already in the Glowforge dashboard, cut them out of 1/8″ draftboard and painted them.
This is something you could also do with chipboard or 3/16″ plywood with your Cricut Maker and Knife Blade!
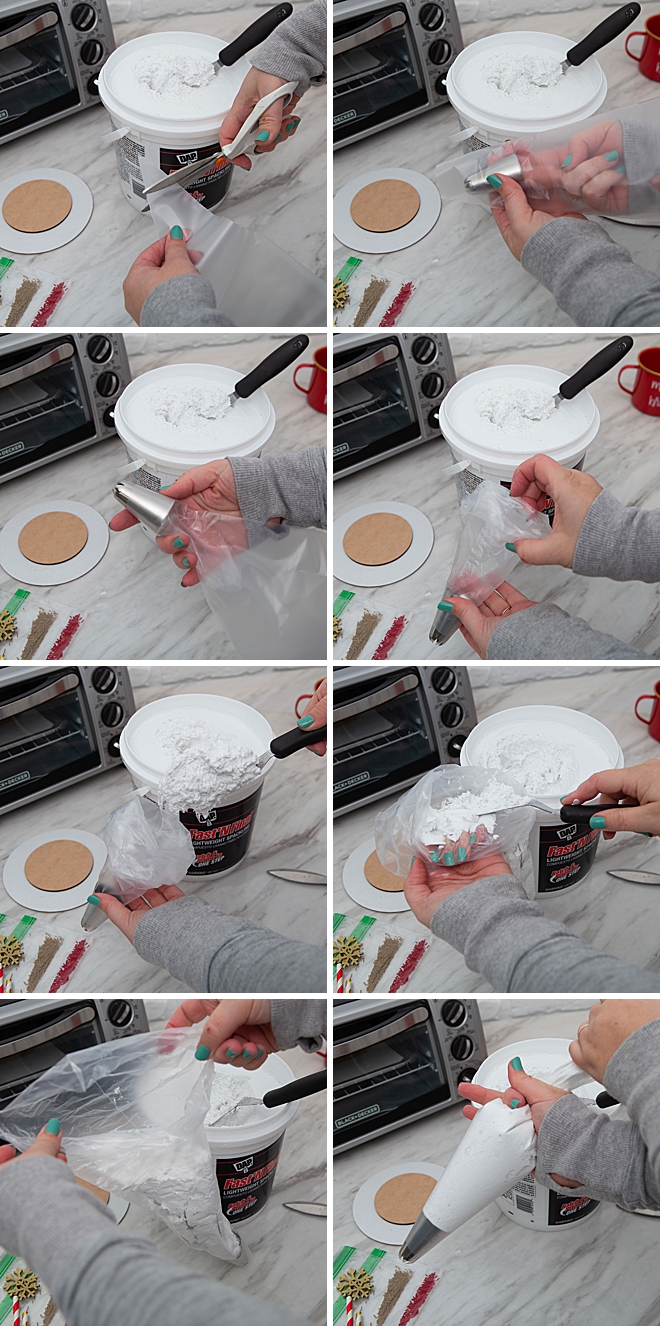
Prepare + Fill The Pastry Bag
THIS IS THE BEST PART. Cut about 1″ off the tip of the pastry bag to insert your extra-large closed-star frosting tip, then fold the sides of the bag down so it’s easier to add the spackling – and then fill with spackling. About 3/4 of a cup per mug should work, which is about half the bag. If I filled the bag as full as I could, I could get two mugs per bag.
Working with the Fast n’ Final spackling was a dream! It’s the perfect consistency for whipped cream! I tried out a few other spackling items that my husband had and they were all WAY to hard to use for this type of project. If you are considering making these, do yourself a favor and get the Fast n’ Final from the beginning.
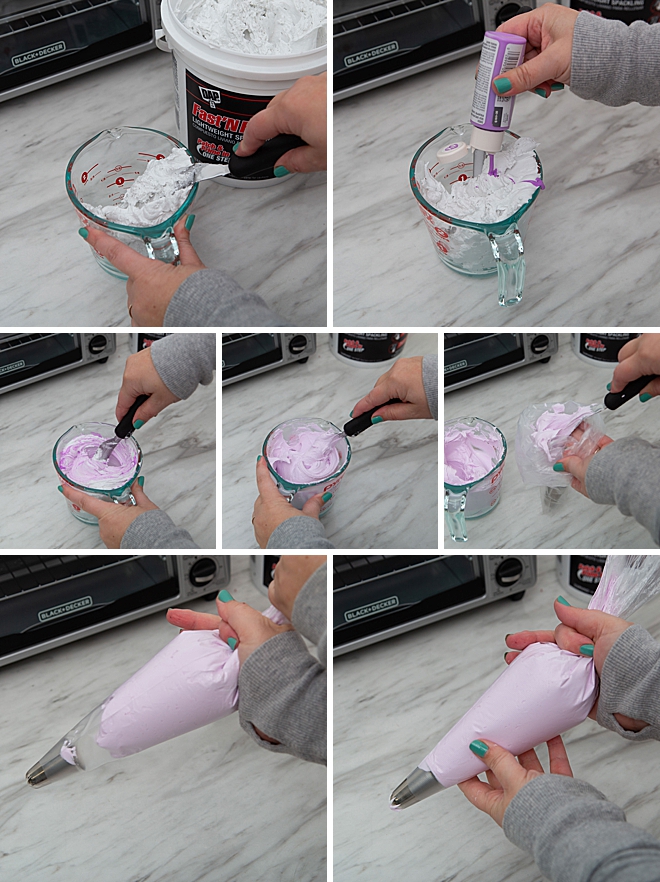
Adding Color
If you’d like to add color just one squirt of craft paint should do. This spackling takes paint perfectly. Put it in a glass or metal container to mix, then add to the pastry bag. If you want to do two colors like the 4th of July mug, you add one color on one side of the bag and the other on the other side, as best you can.
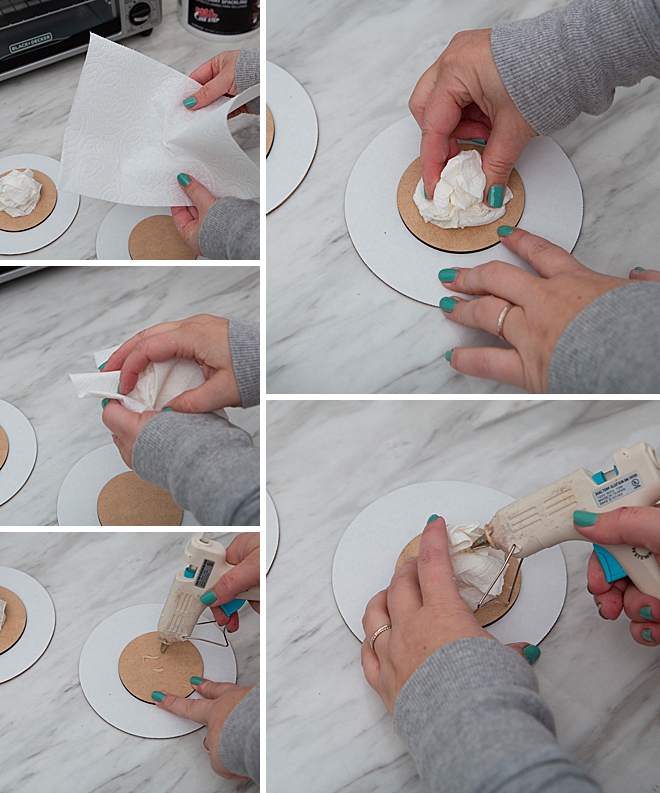
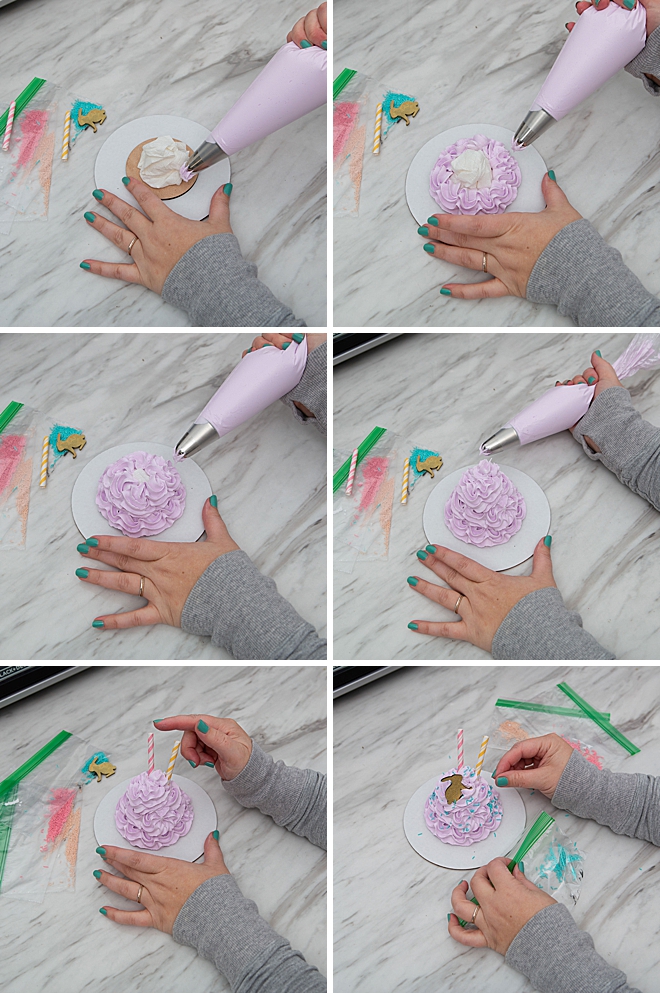
Prepare The Base
Making an entire mound of spackling is just TOO heavy so you need to add something to take up space. I tried cutting styrofoam balls in half but I really didn’t like the result. They are expensive, cutting them in half is a pain and it’s messy, and hot gluing them is terrible. So I just wadded up a single sheet of paper towel, the “choose a size, smallest sheet” and hot glued them to each base. I tried to give them a cone shape as best I could.
I did this step after I put the spackling in the pastry bag so that it had a minute to set up before I started piping.
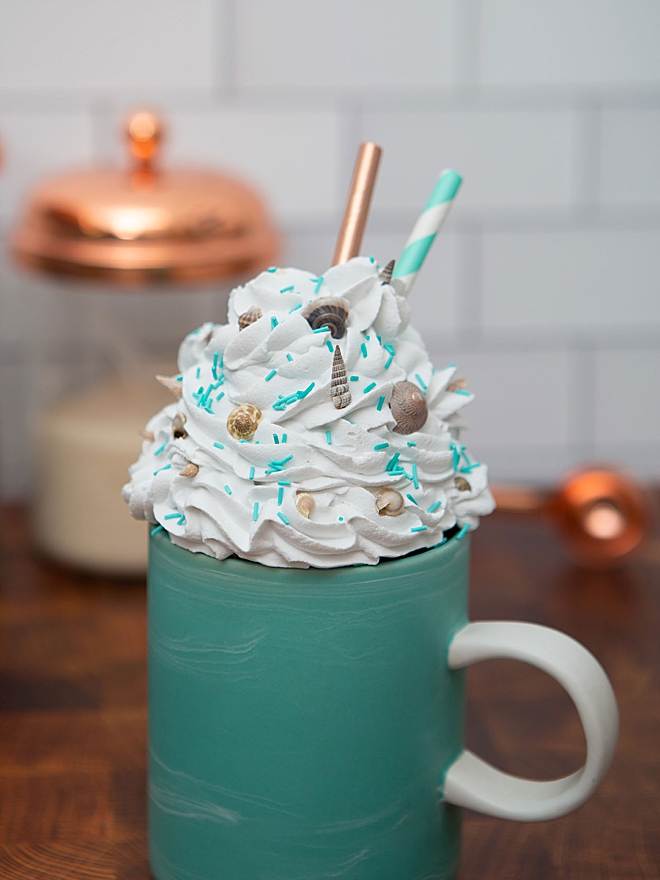
Faux Whipped Cream + Toppings
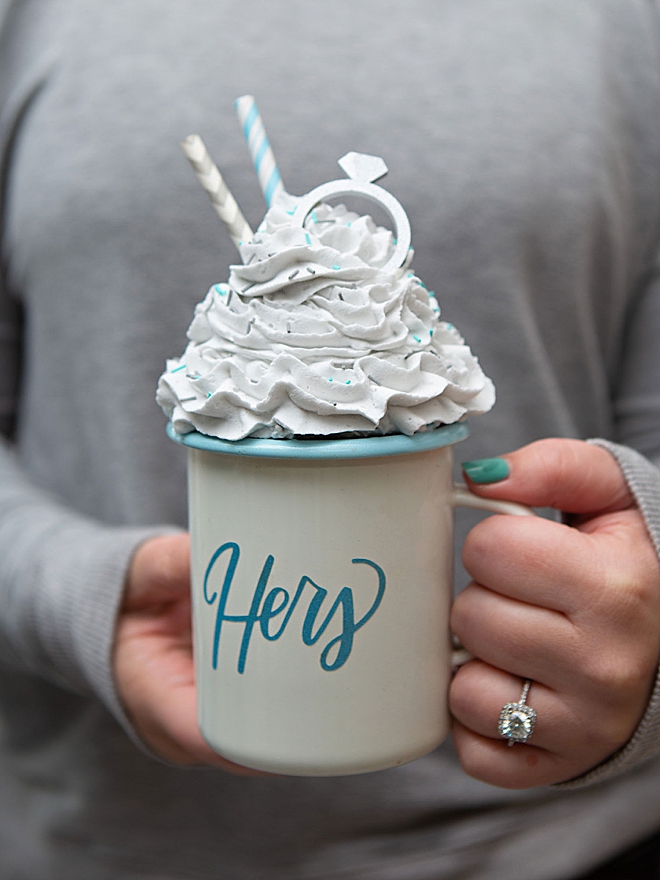
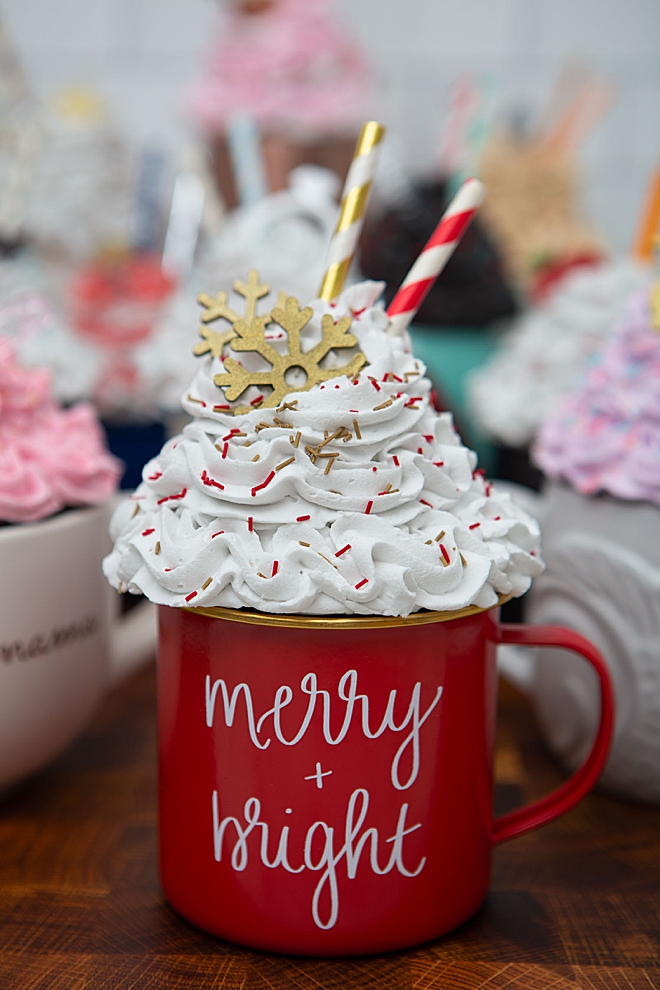
Using a gentle up and down motion, add the faux whipped cream around the base of the paper towel, three rows will be best. Then do another on top of that, and then another, to create the topper shape. Finish with a little squirt and lift off to make the characteristic whip cream end. Add straws, toppings, and sprinkles!
You can watch me make both of these toppers in a time-lapse video on Instagram!
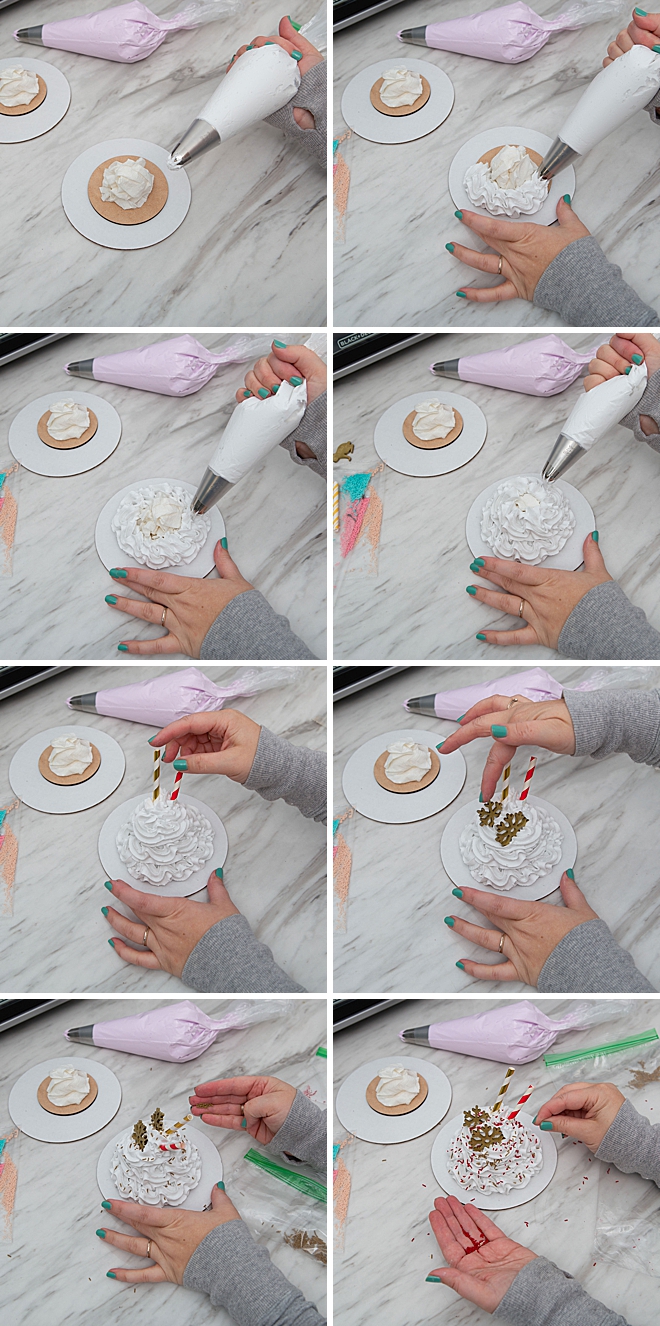
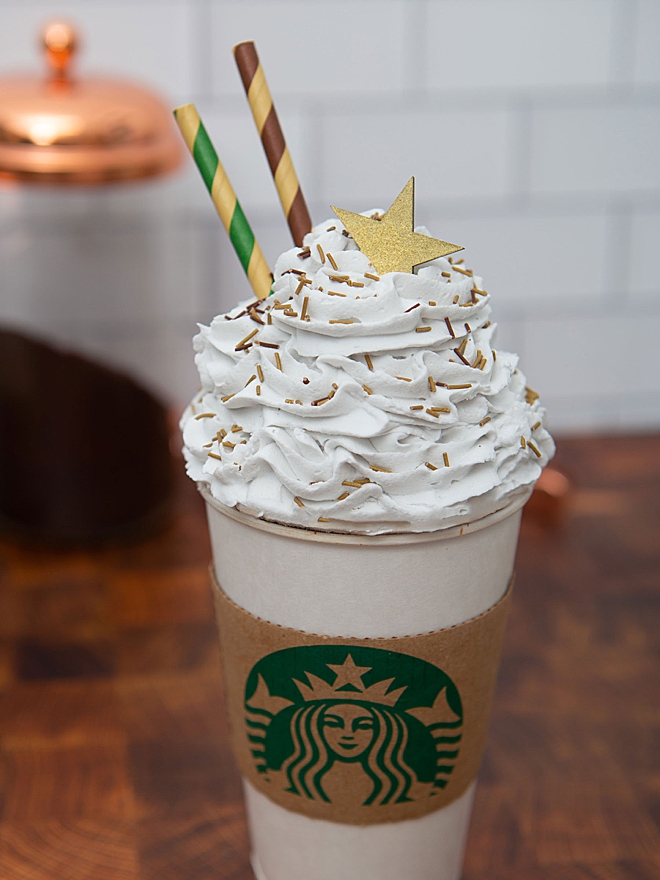
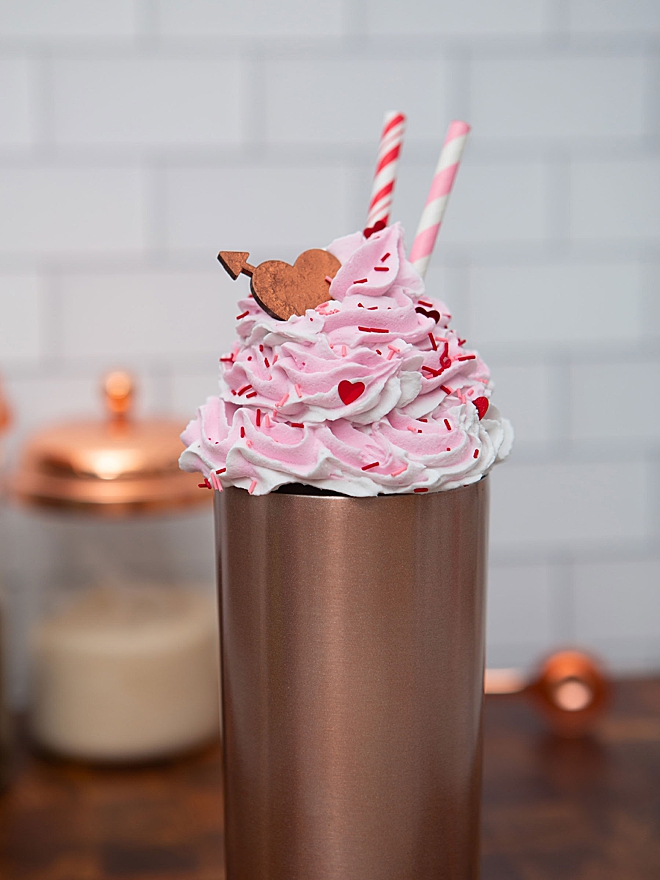
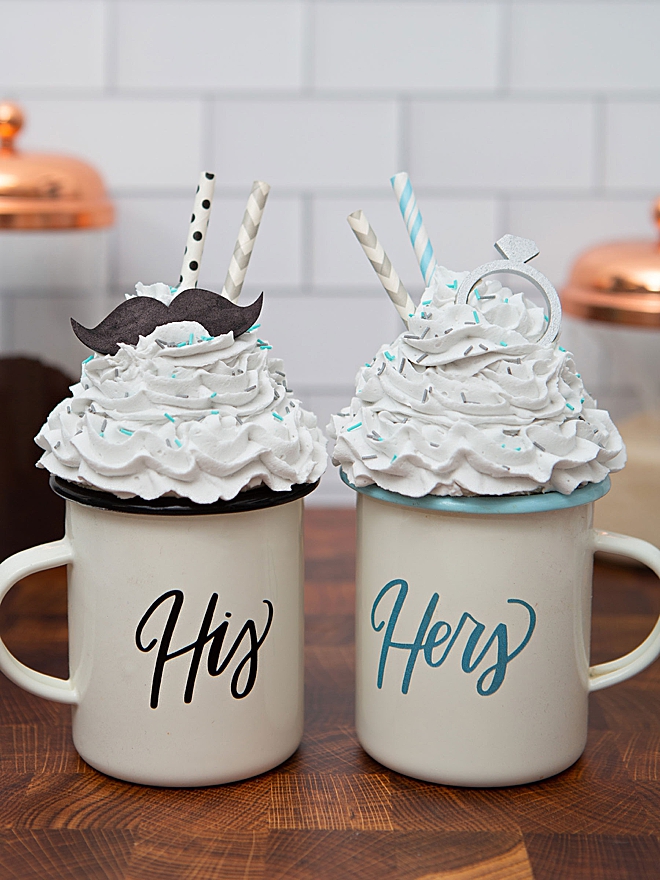
Pipe + Top
The same goes for all the toppers, pipe on the faux whipped cream, add straws, and sprinkles! SO FUN!
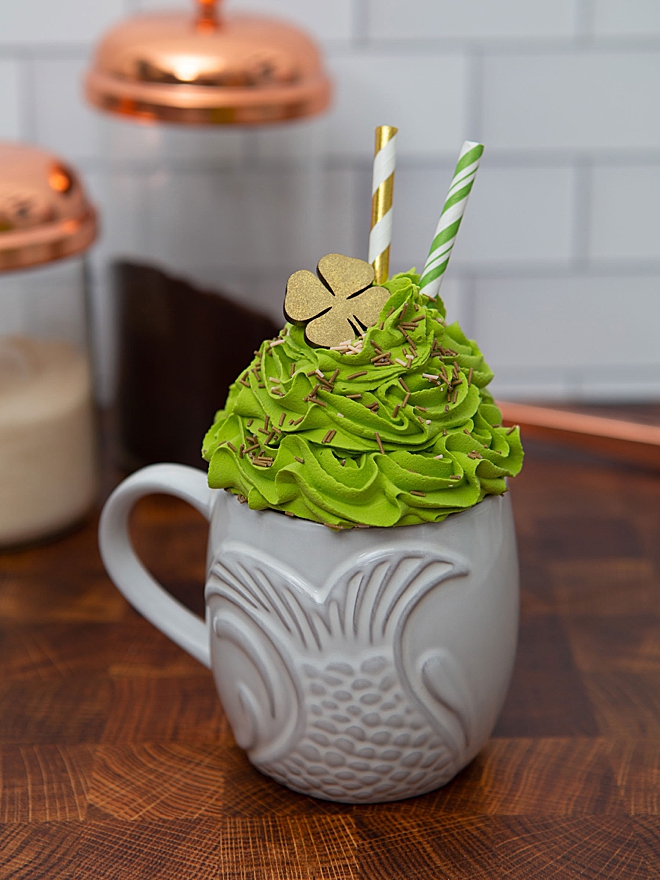
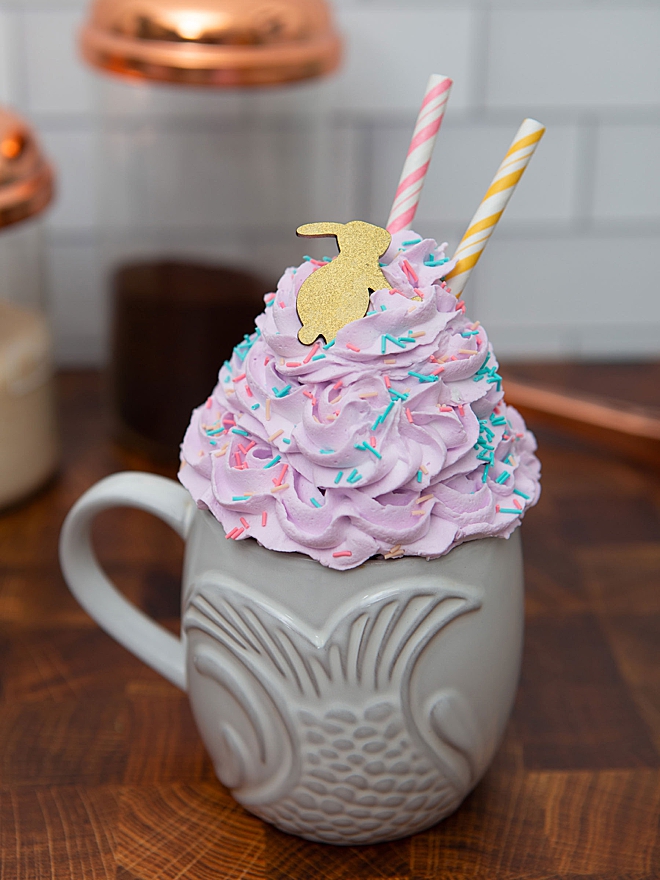
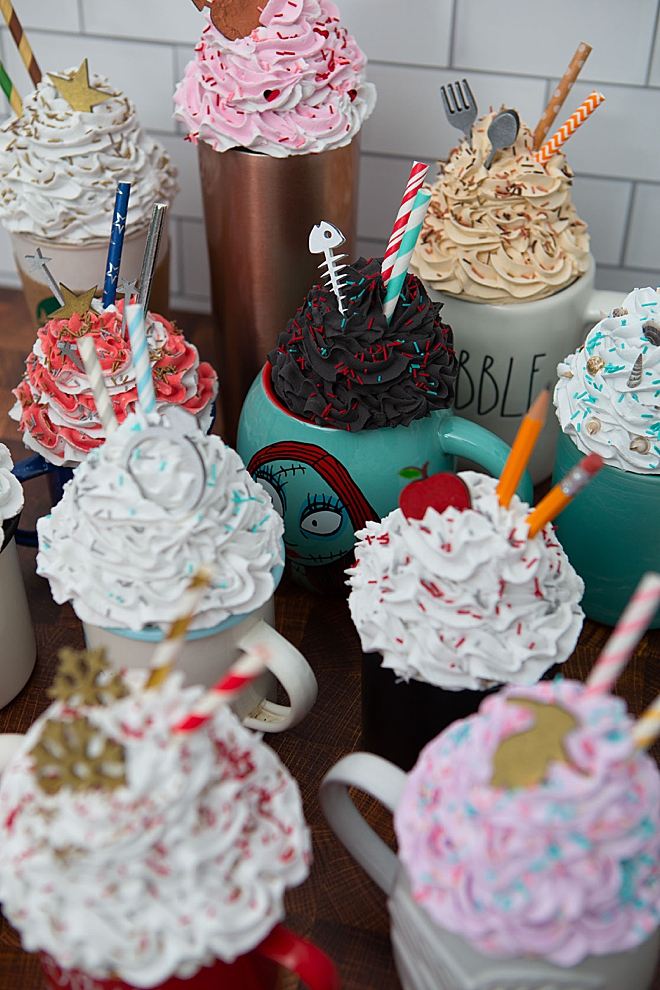
One For Every Month
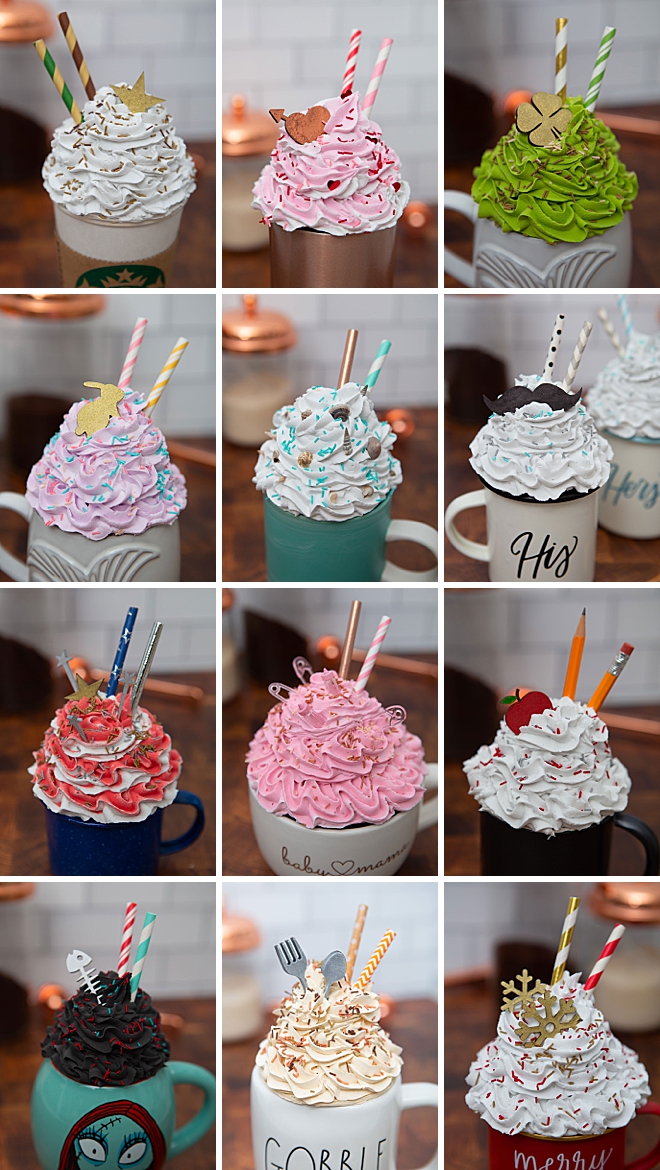
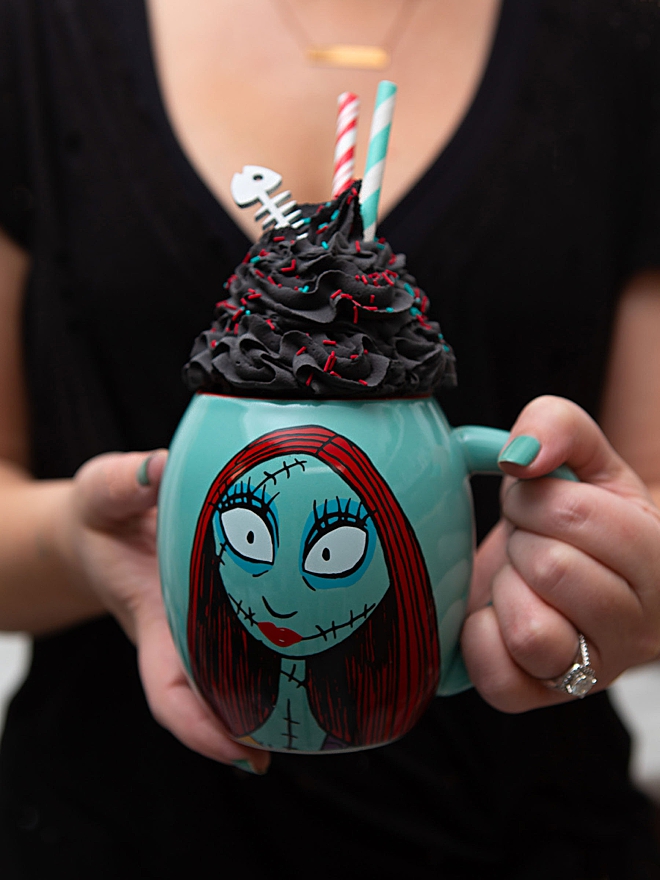
Halloween Is My Fav
Halloween is my favorite holiday and this mug topper is by far my favorite of them all. I am greatly looking forward to putting this out next year, along with the others, but this one, ugh, I love it.
Thanksgiving is a close second.

If you create one of our projects, please share a picture with us on Instagram or Twitter using the hashtag #somethingturquoisediy, we regularly reshare our favorites! Your profile will need to be public for us to see it otherwise, you can always DM us!
DIY Tutorial Credits
Photography + DIY Tutorial: Jen Causey of Something Turquoise // Fast n’ Final Lightweight Spackling: Amazon // Extra-Thick Pastry Bags: Amazon // Extra-Large Closed Star Frosting Tip #856: Amazon // Clay Extruder: Amazon // Oven Bake Polymer Clay: Amazon // Paper Straws: personal collection from all over // Merry & Bright Mug: Sweet Water Decor // Rae Dunn Gobble: Amazon // Fiskars PowerCut Scissors: Amazon // Save up to $500 on your Glowforge purchase here: Glowforge.com
Shop The Supplies:
Find the supplies you’ll need for this project from our affiliate links below:


Comments