
Stunning, Homemade Wedding Invitation Wraps With Minted & Cricut (6 ways!)
-Partnered Post-
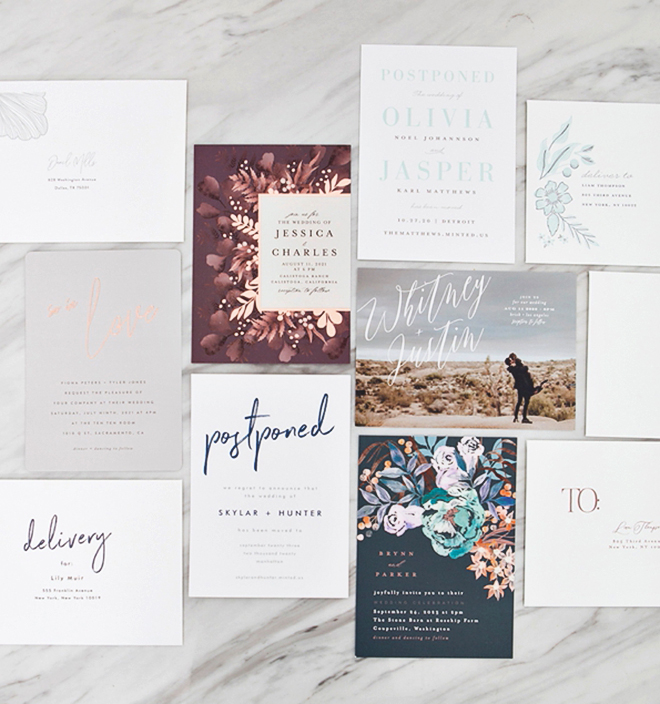
Let me start by saying that these stunning wedding save the dates and invitations from Minted didn’t need any embellishment, but that’s what DIY brides do best! They make things their own! I’ve been wanting to share a project like this for a very long time and I’m glad I had the opportunity to partner with Minted to share some of my ideas with you. Here we’re making 6 different types of invitation wraps or bands. I designed each one based on the invitation design, which I recommend that you do as well. Look at your invitation and see what you can do and what you can add to give it that extra little pop!
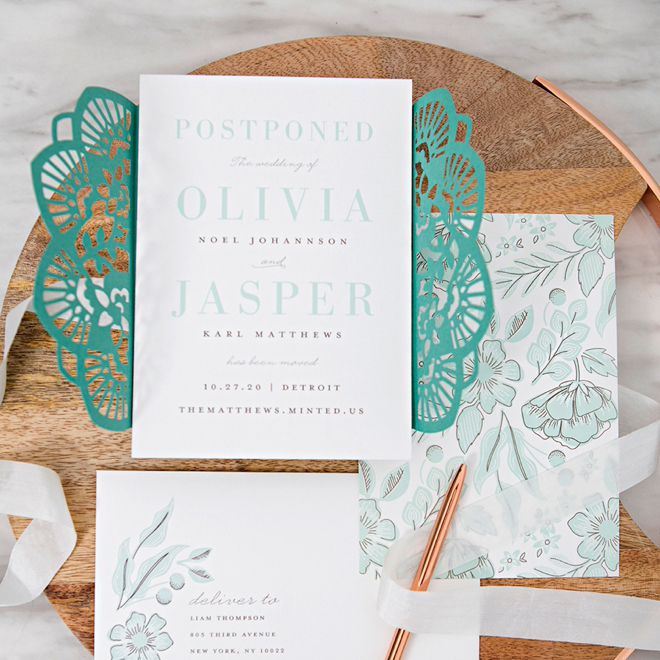
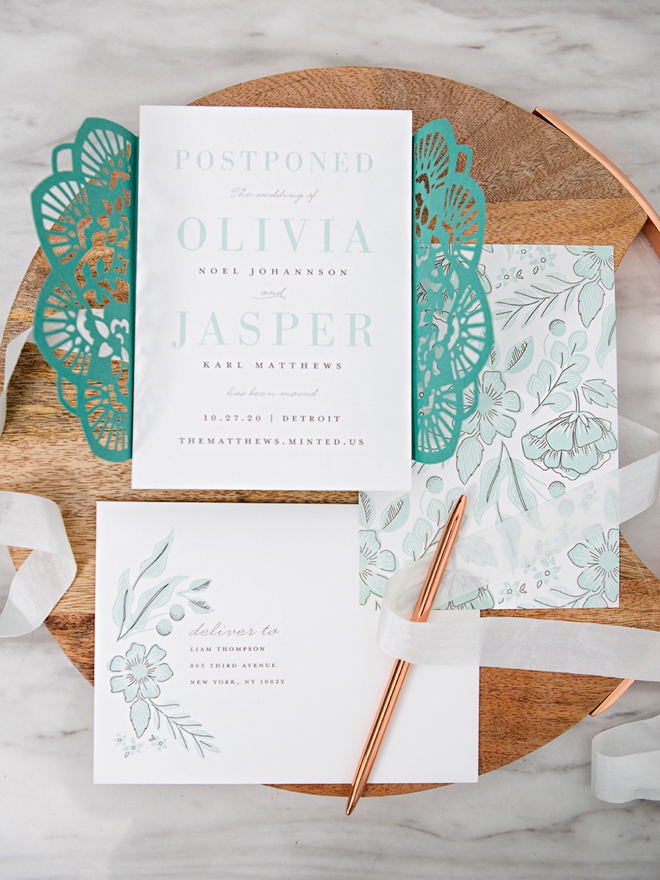
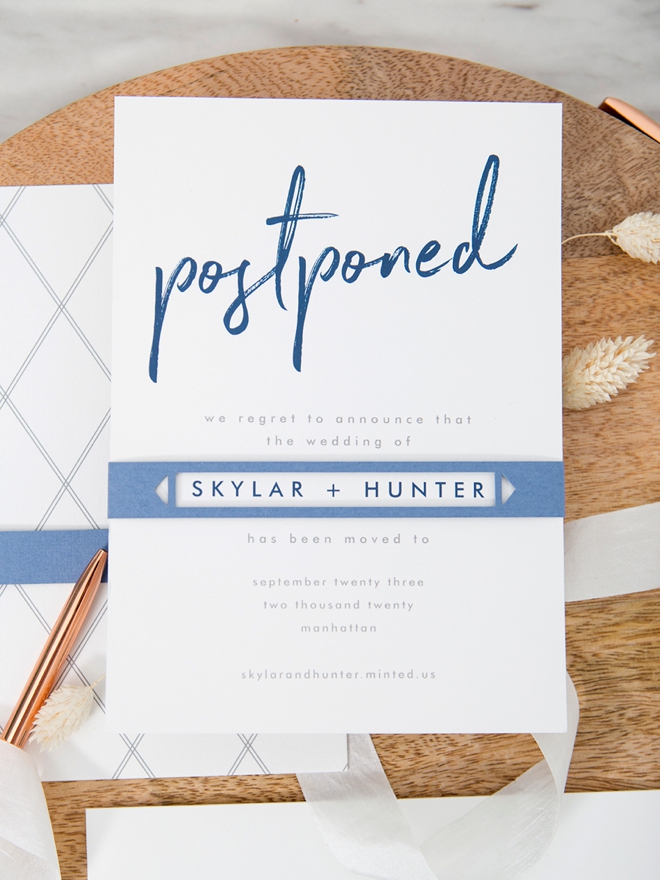
To all of those couples who’ve had to change their wedding dates, grieve original plans, and make the best of what you have, our thoughts, love, and prayers are with you.
Make It Custom
DIY Brides are looking for what is uniquely theirs. They aren’t buying things off the shelf, they are personalizing items to fit their own style to give their events that bit of extra flair. Like I mentioned above, these invitations need no embellishment, but if you’re a DIY bride, go ahead and add your own unique touch, we’ll help you!

Minted Wedding Invitations
First, we’re starting with stunning wedding invitations from Minted. They are one of our favorite invitations partners as they source their designs from an amazing group of talented independent artists!
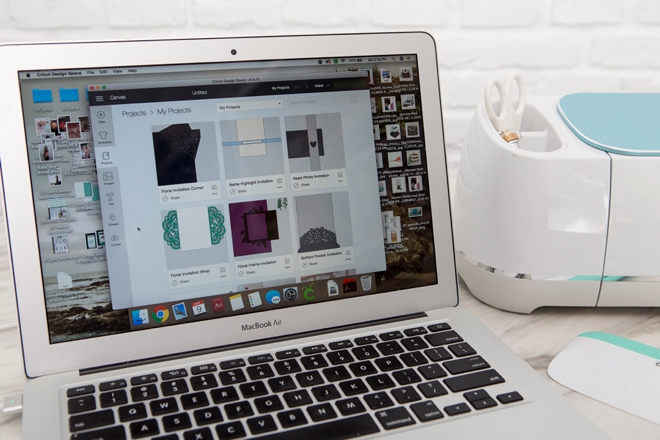
Design Space
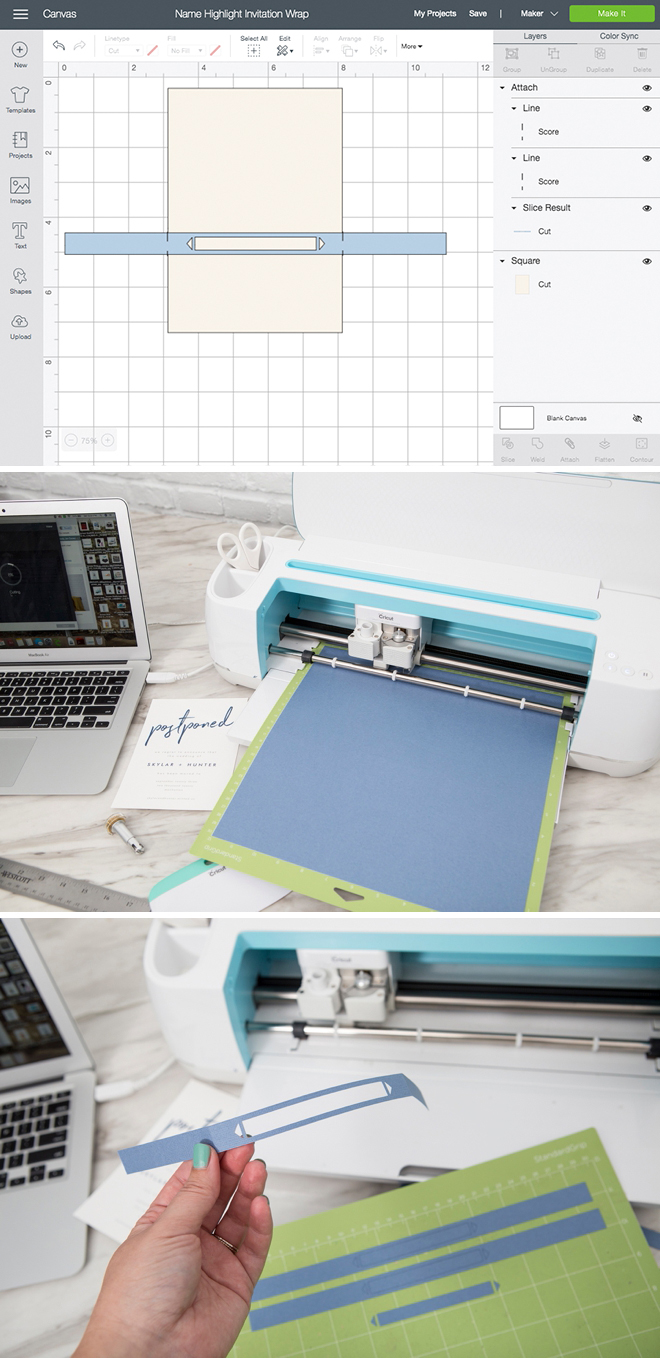
I created all of these custom invitation wraps using Cricut’s Design Space program alone – which you can do too! Basic Design Space knowledge will be helpful as this is an intermediate to advanced project.
Additional Supplies:
- Cricut Scoring Blade
- Cricut XL Scraper
- Cardstock
- Ruler
- Glue Dots
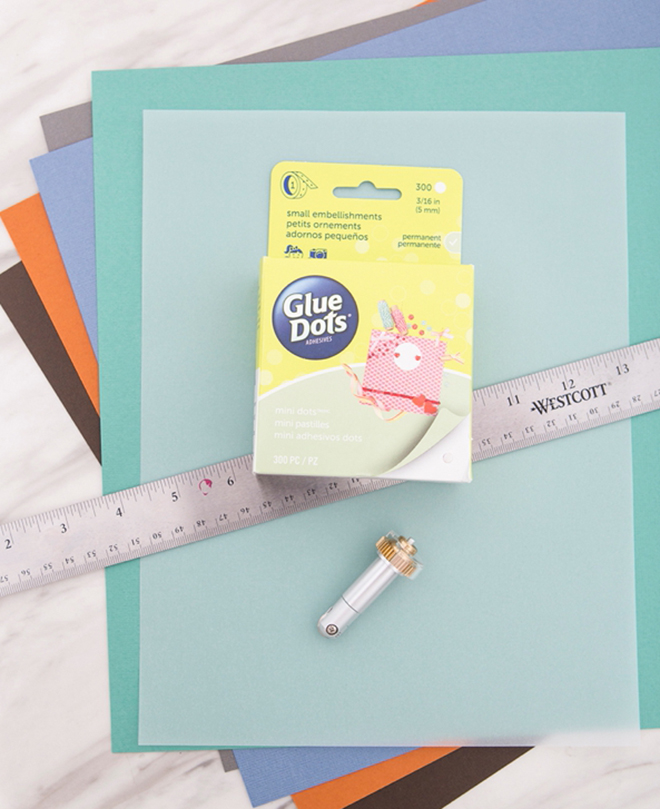
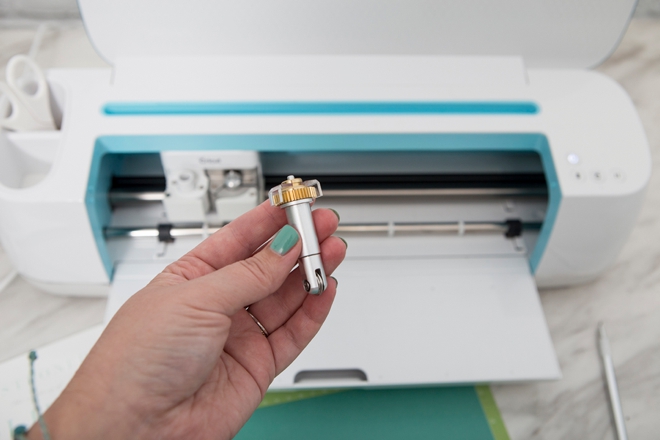
Scoring Wheel or Stylus
All of these invitation wraps will benefit greatly from using the Cricut scoring wheel (Maker) or scoring stylus (Explore). Design Space prompts you when to put this tool in to the machine and when to switch to the blade.
Full Foral Invitation Wrap
The first step is to login to Design Space to design your invitation wraps. Click here to visit my canvas to use this exact file. I used 80lb. cardstock for this wrap design.
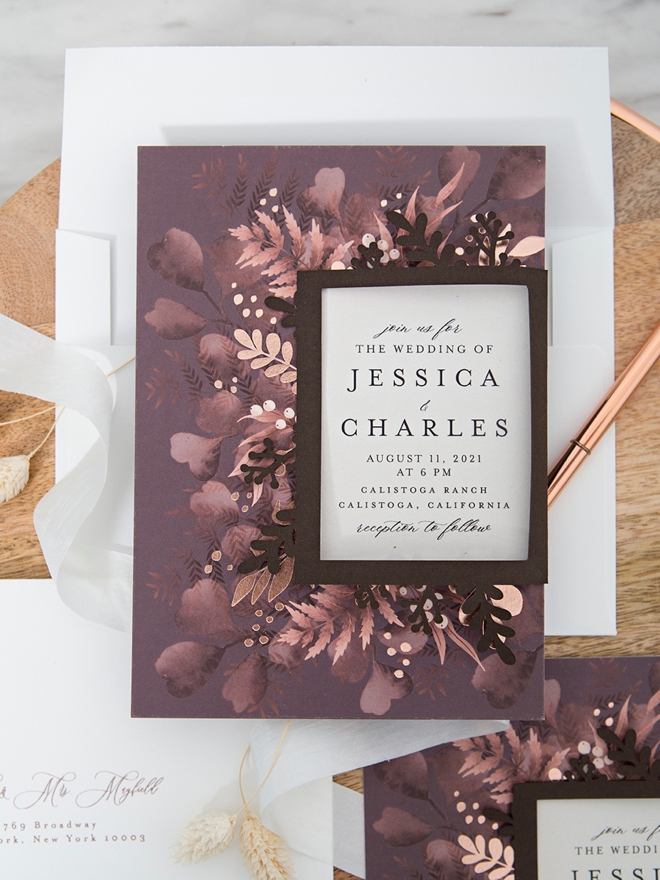
Minted Invitation: Over the Moon by Snow and Ivy

Carefully remove from the Cricut mat and use the XL scraper to help bend along the score lines. Then place behind your invitation!

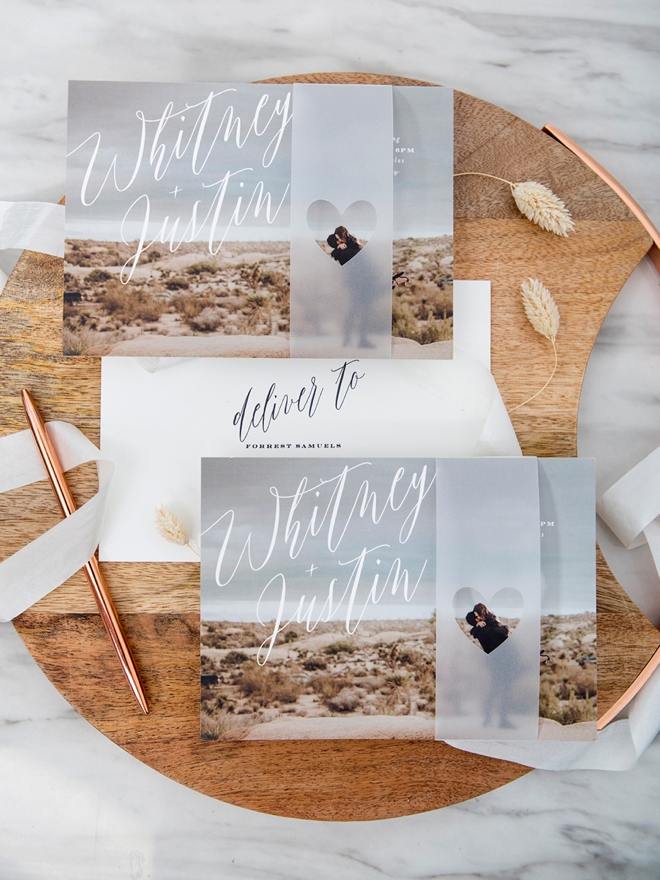
Heart Photo Belly Band
The first step is to login to Design Space to design your custom belly band. Click here to visit my canvas to use this exact file. I used vellum for this vertical belly band.
Minted Invitation: Signed by Roxy Cervantes
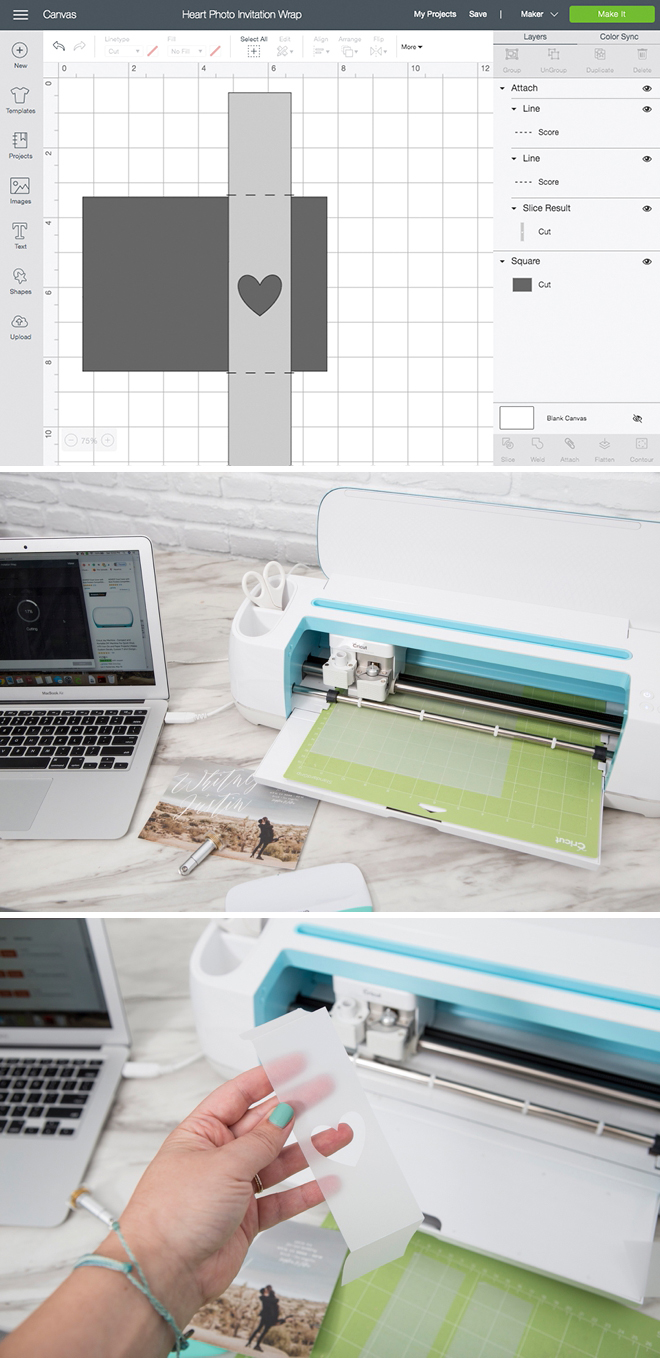
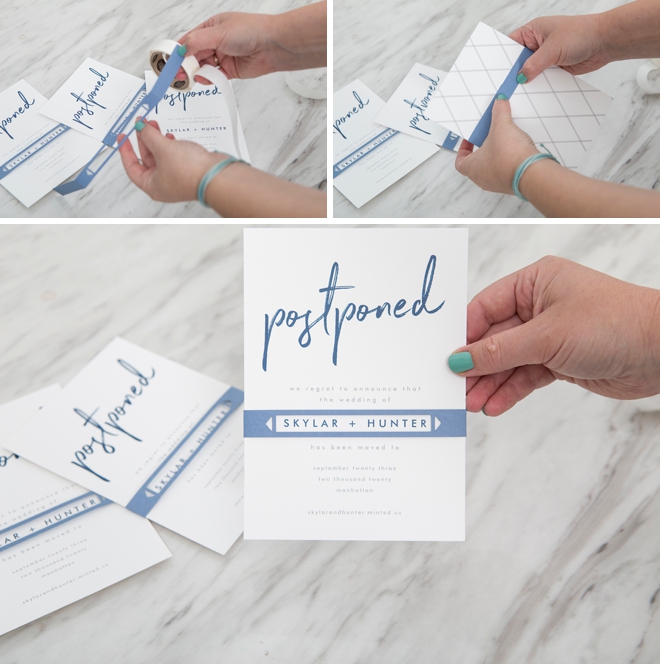
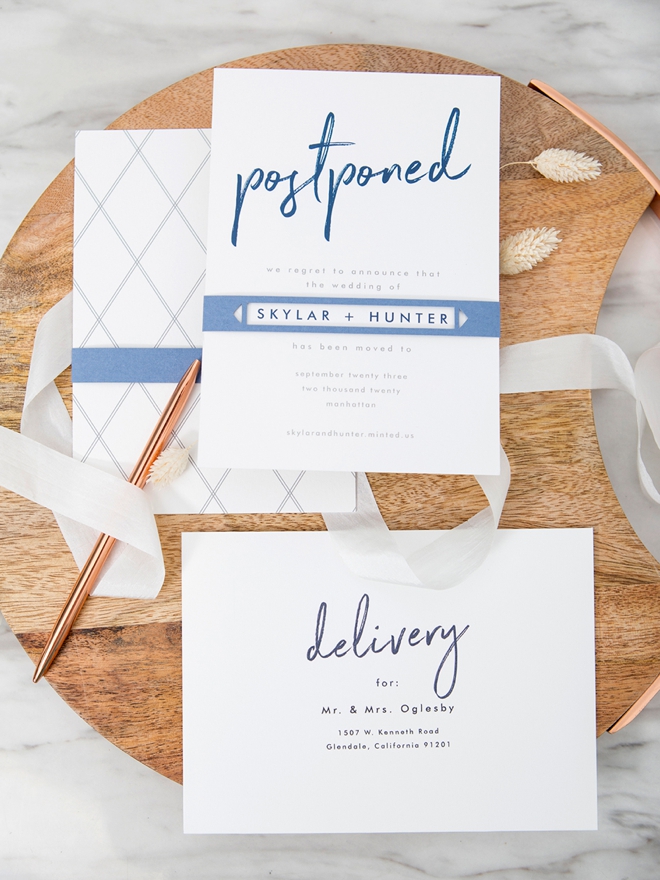
Carefully remove the bands from your Cricut mat and fold along the score lines. Attach the band to itself around the invitation using Glue Dots, making sure the heart perfectly frames your photo!

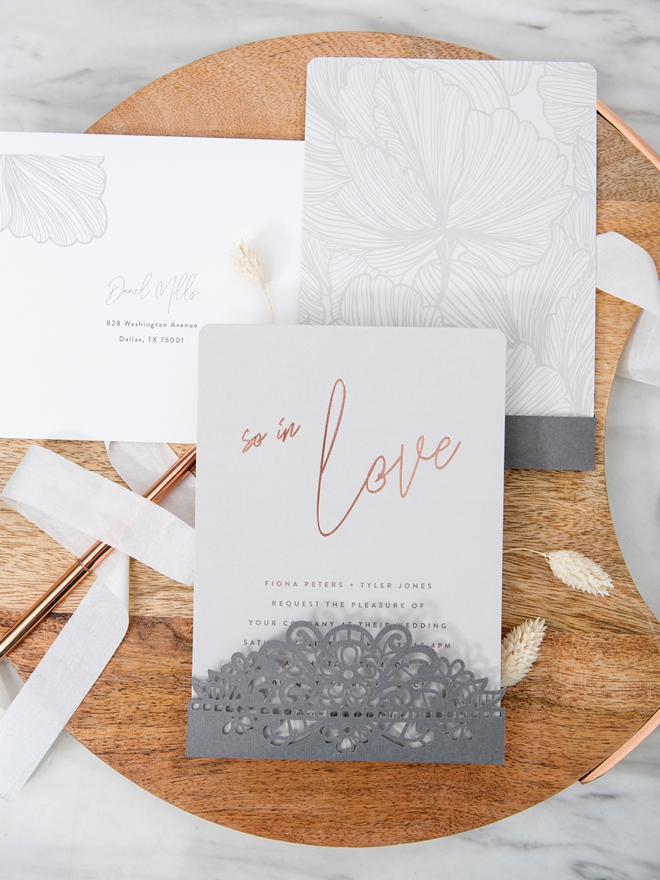
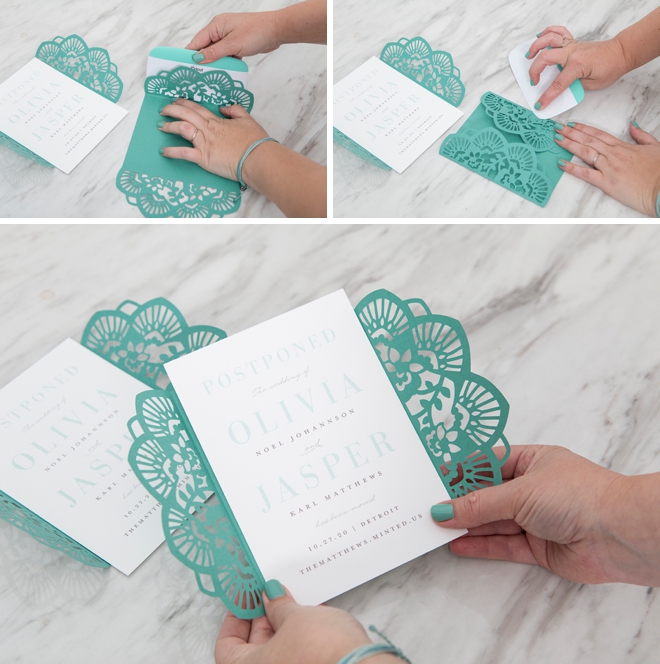
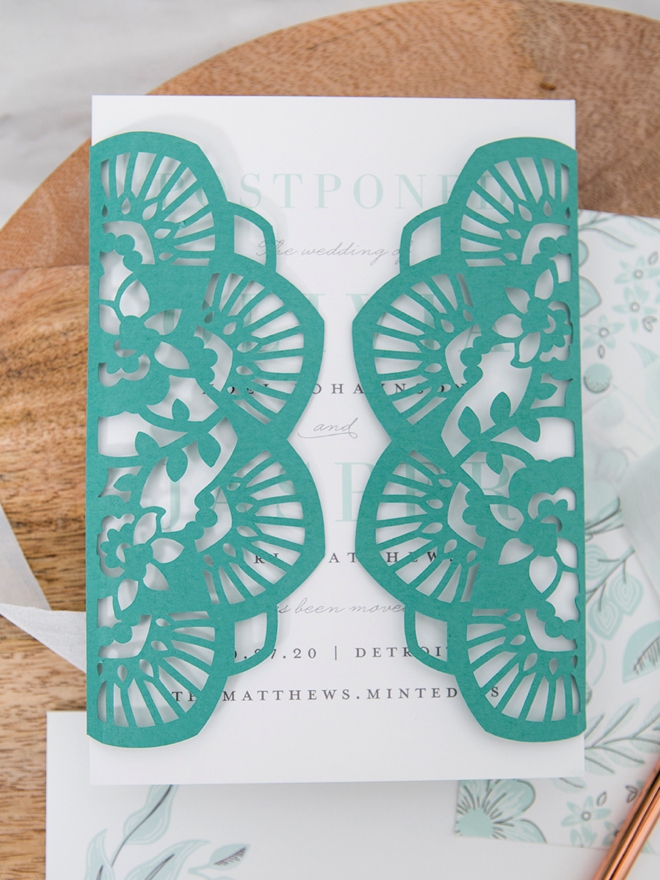
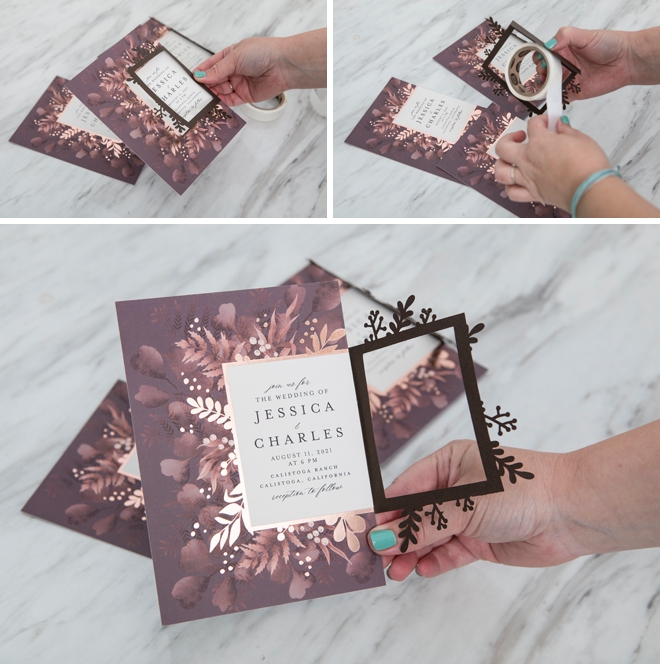
Floral Frame Side Wrap
The first step is to login to Design Space to design your invitation side wrap. Click here to visit my canvas to use this exact file. I used 80lb. cardstock for this wrap design.
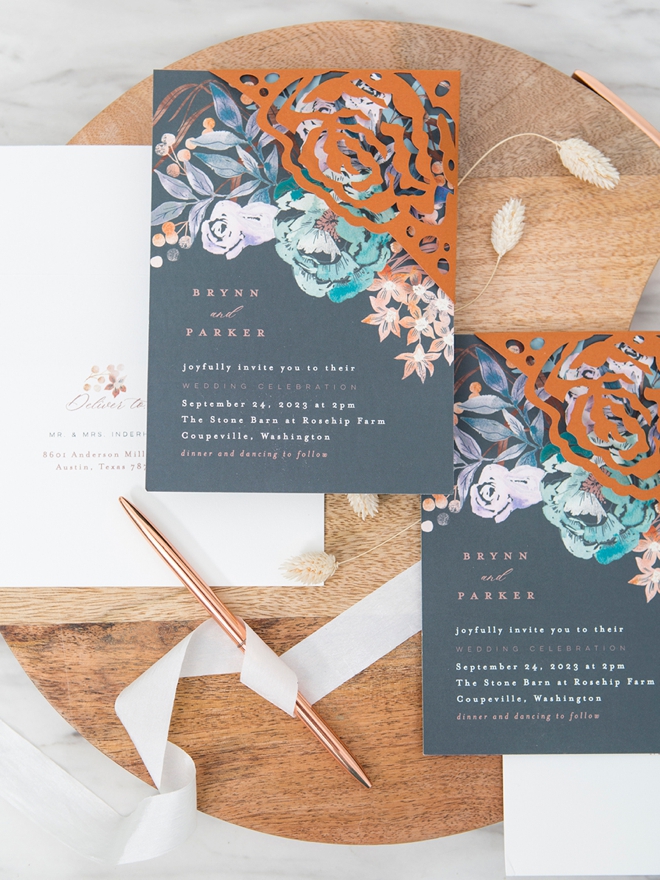
Minted Invitation: Wedding Nosegay by Chris Griffith
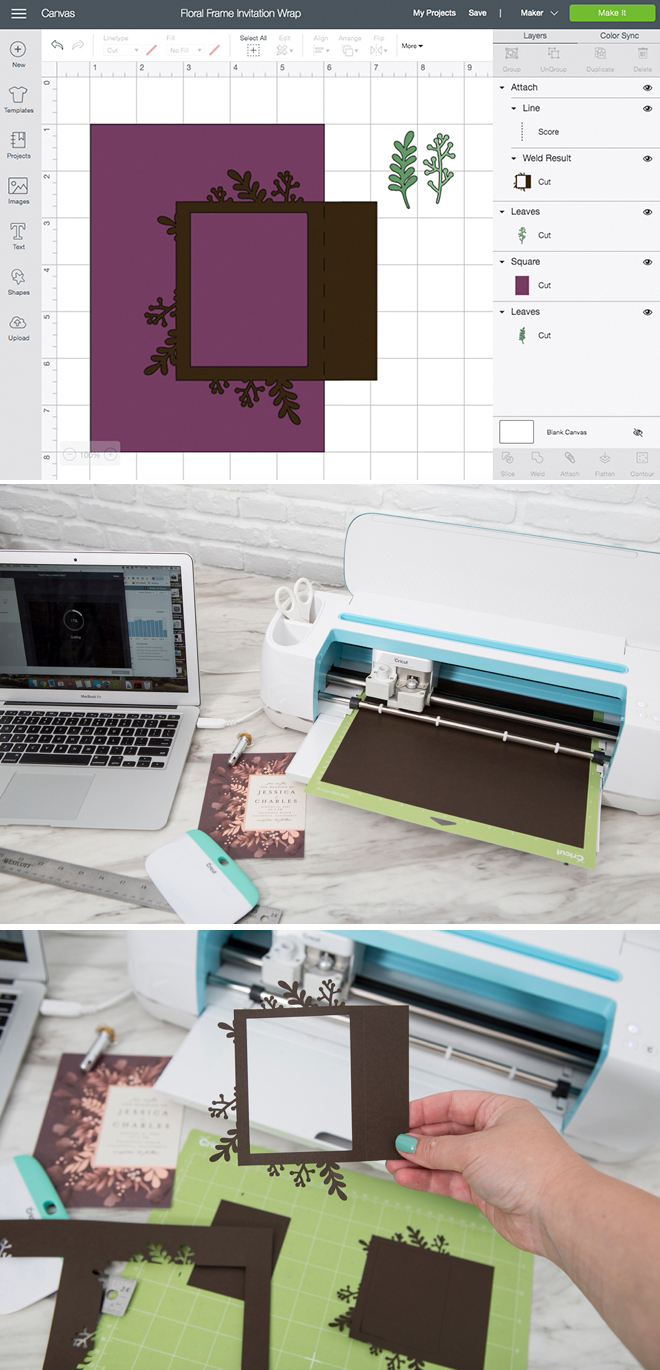
Carefully remove the frames from your Cricut mat and fold along the score line. Attach the side flap to the back of the invitation using Glue Dots, making sure the frame lines up perfectly with the invitation wording!
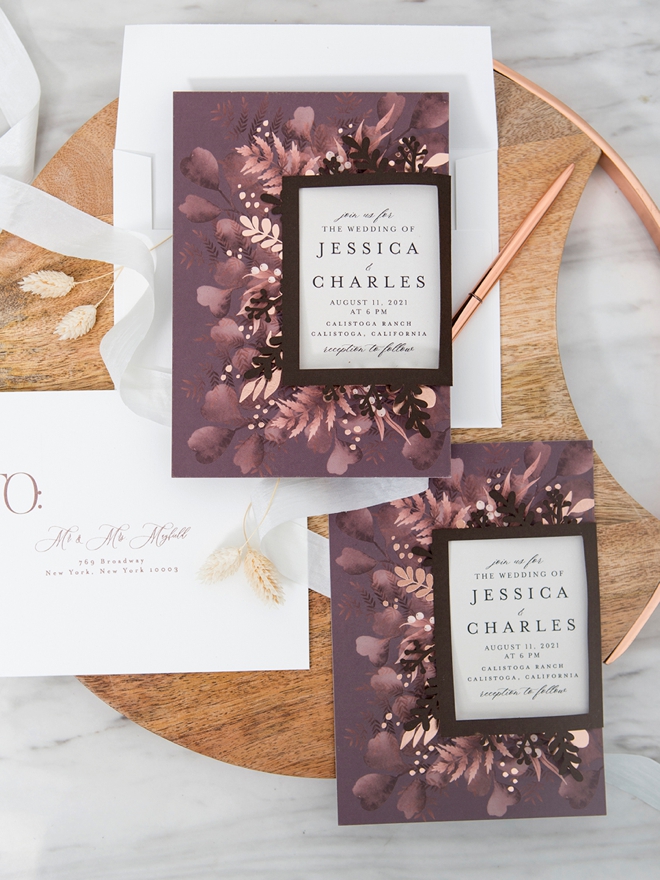
Name Highlight Belly Band
The first step is to login to Design Space to design your custom name wrap. Click here to visit my canvas to use this exact file. I used 80lb. cardstock for this design.
Minted Invitation: Funky Names by Phrosne Ras
Carefully remove the bands from your Cricut mat and fold along the score lines. Attach the band to itself around the invitation using Glue Dots, making sure the box perfectly frames your names!
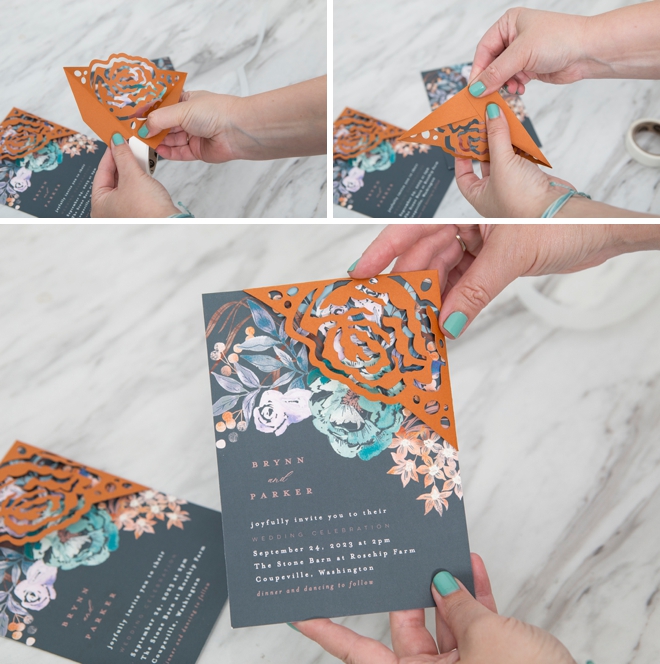
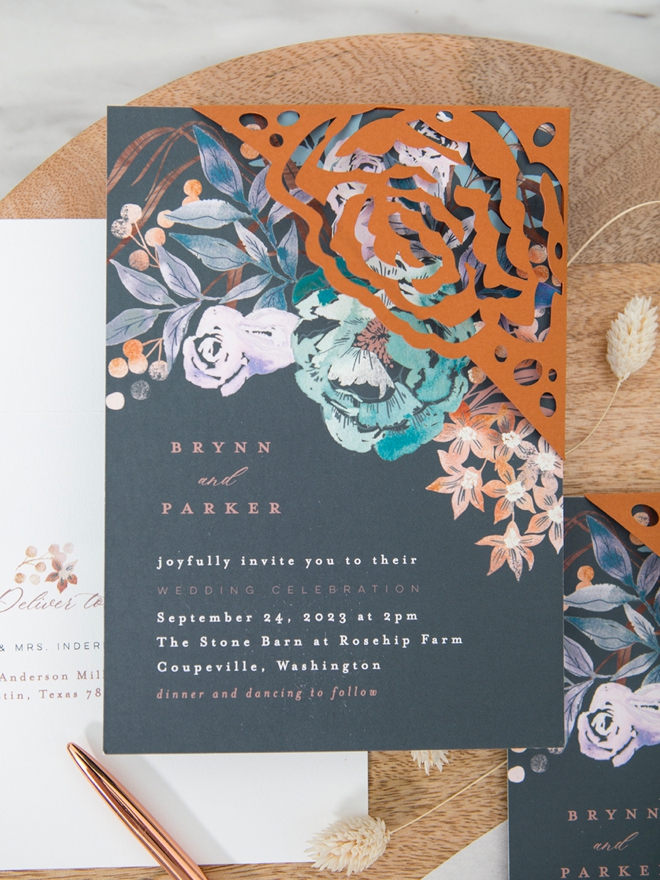
Floral Invitation Corner Wrap
The first step is to login to Design Space to design your custom floral corner wrap. Click here to visit my canvas to use this exact file. I used 80lb. cardstock for this design.
Minted Invitation: Fall Floral by Aletha and Ruth
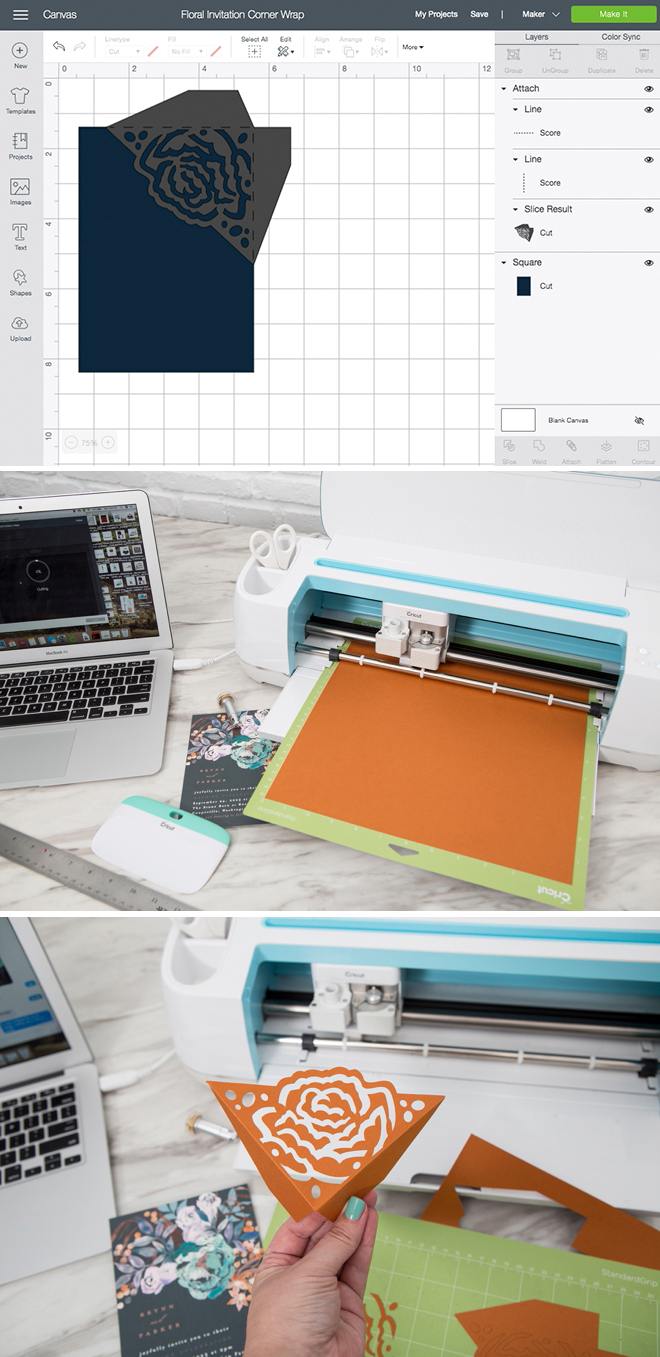
Carefully remove the wraps from your Cricut mat and fold along the score lines. Attach the corner wrap to itself with Glue Dots so that you can just slip it on the corner of each invitation!
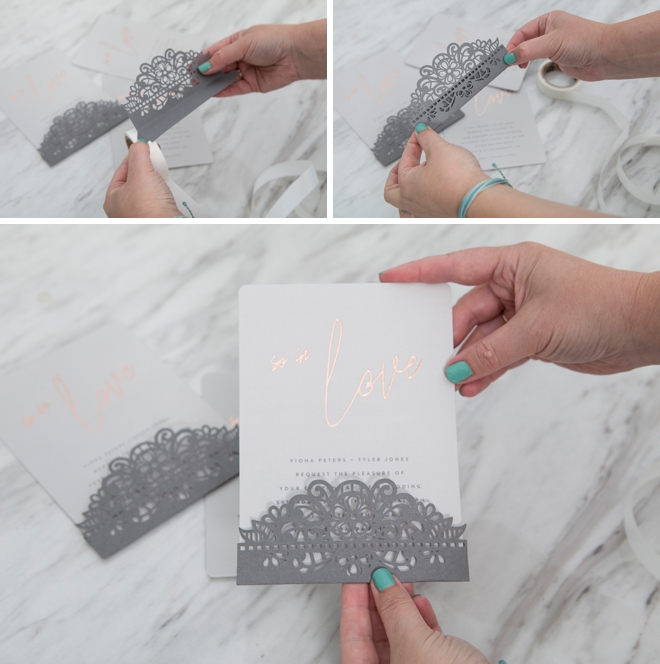
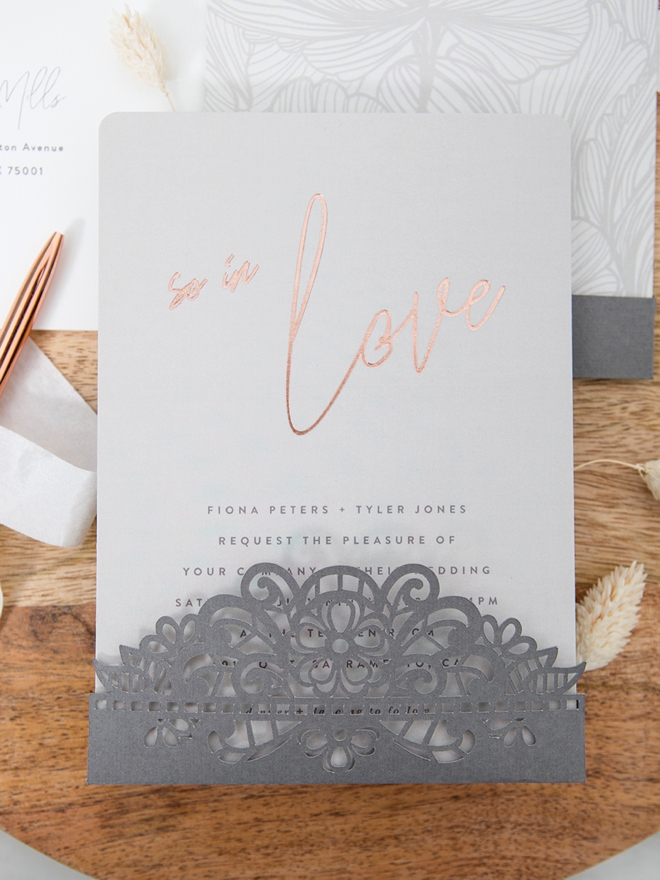
Bottom Pocket Invitation Wrap
The first step is to login to Design Space to design your invitation side wrap. Click here to visit my canvas to use this exact file. I used 80lb. cardstock for this wrap design.
Minted Invitation: In Script by JoAnn Jinks
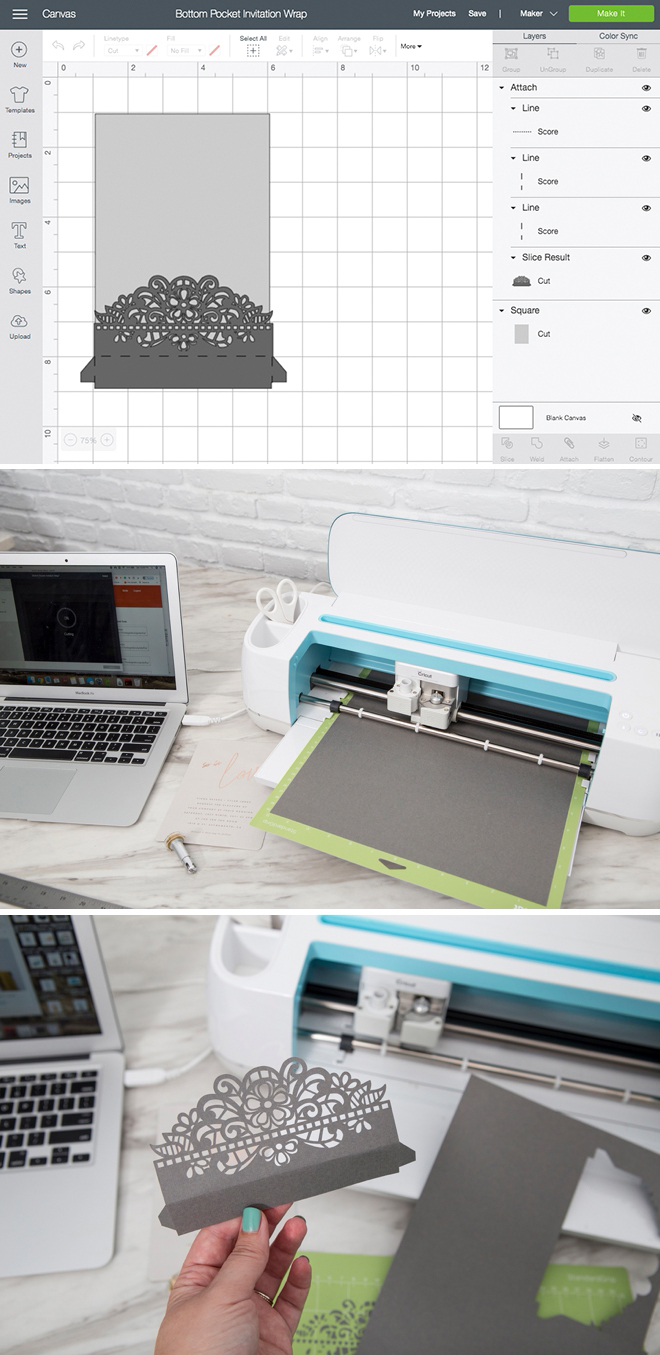
Carefully remove the wrap pockets from your Cricut mat and fold along the score lines. Attach the pocket to itself using Glue Dots, then slip your invitation inside!
![]()
Which One Is Your Favorite?
If you create one of our projects, please share a picture with us on Instagram or Twitter using the hashtag #somethingturquoisediy, we regularly reshare our favorites! Your profile will need to be public for us to see it otherwise, you can always DM us!
DIY Tutorial Credits
Photography + DIY Tutorial: Jen Causey of Something Turquoise // Wedding Stationery: courtesy of Minted // Cricut Maker: courtesy of Cricut // 80lb. Cardstock: Amazon // Glue Dots: Amazon
Shop The Supplies:
Find the supplies you’ll need for this project from our affiliate links below:


Comments