
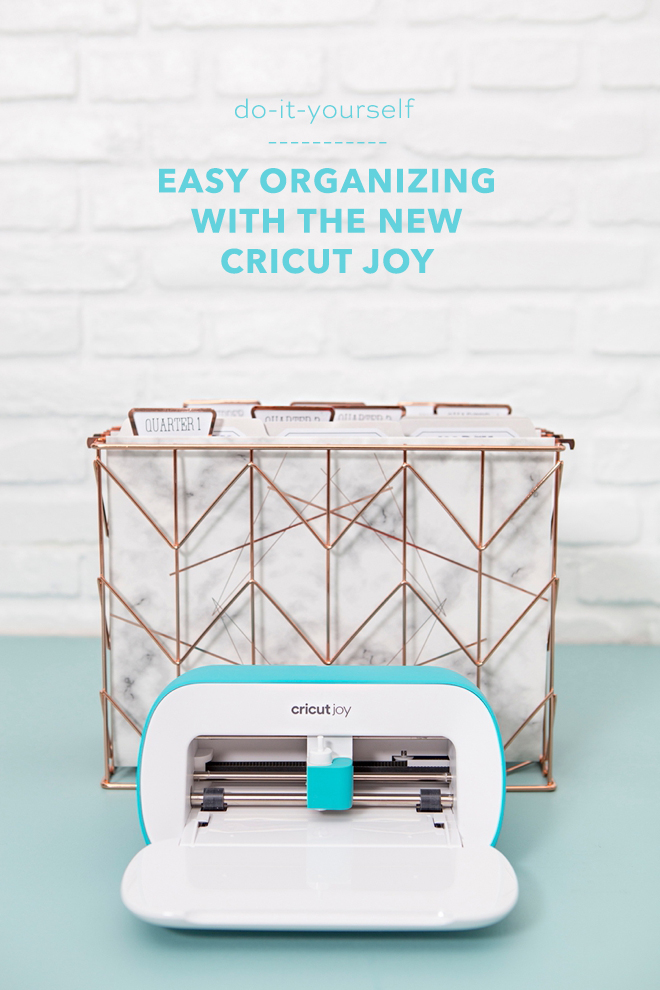
Organizing Made Easy With The New Cricut Joy
-Partnered Post-
This is a partnered post written by me on behalf of Cricut. All opinions are 100% mine.
If you’re a Cricut fan then you already know that a few months ago Cricut released it’s smallest machine yet – the Cricut Joy. While it’s beyond adorable, and perfect for any countertop at only 8″ x 4″ wide, it packs a huge punch! This bad boy can actually cut up to 20 feet long!! YES, 20 feet long! It uses the same amazing Cricut Design Space software that we have all grown to love and you can expect the same exceptional cutting quality, with a few new additions. The biggest being you don’t need a cutting mat! I know right!? Mind blow. The materials that are designed to be used with the Cricut Joy are called “smart-materials” and have a thicker backing sheet which makes the need for a mat almost obsolete. You can still use non-smart materials with a mat sized specifically for the new machine, which actually turns out to be a terrific way to use small scraps from other projects. While we’re on the topic of mats, my favorite element of the Joy is the Insert Cards and the Card Mat. Cricut has developed this unique cutting system that uses precut cards, inserts, envelopes and darling designs that will literally have you making custom greeting cards in about 2 minutes flat. This is what I’ve been using it for the most, I’m keeping it on my counter along with a card pack so I can whip one up whenever I need to. Design Space is packed with ready-to-make projects for the Cricut Joy that are easy to personalize right from your smartphone. Never before has it been so easy and so convenient to make something special.
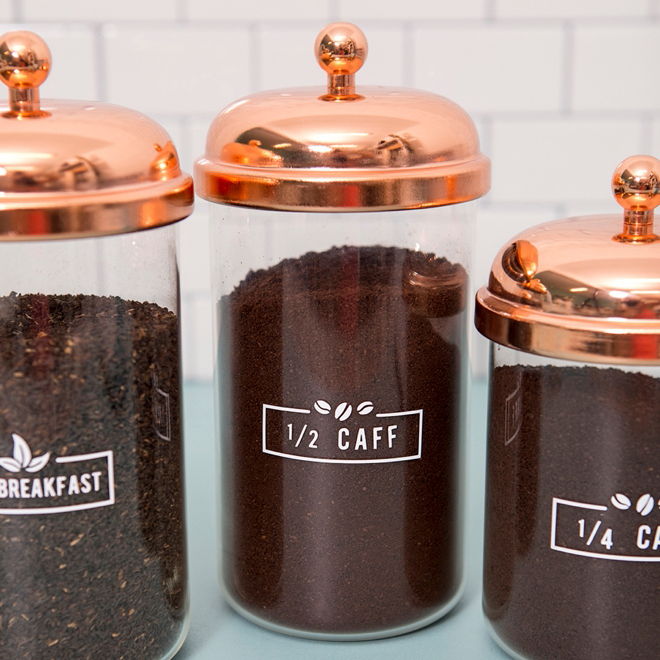
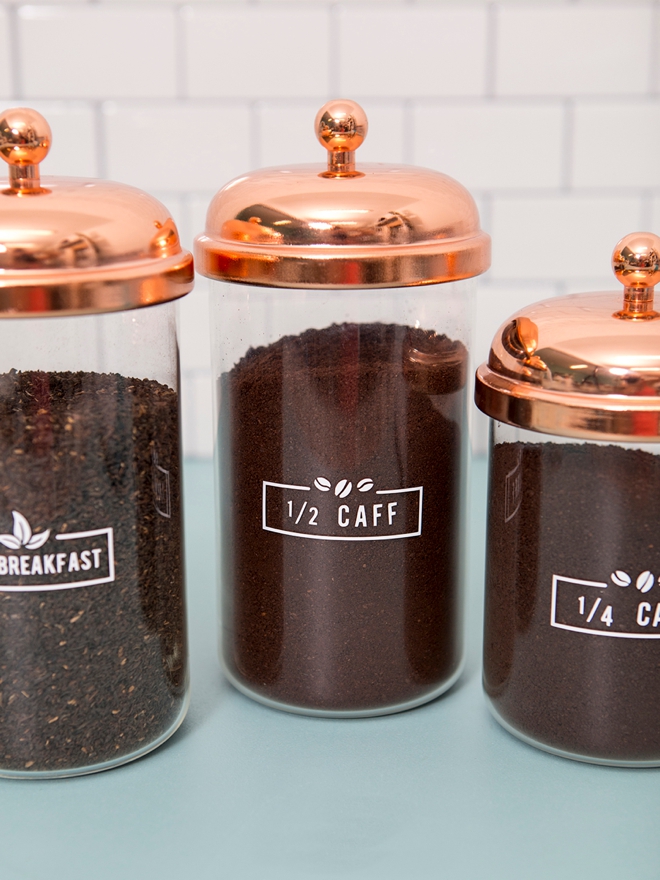
Coffee Bar Containers
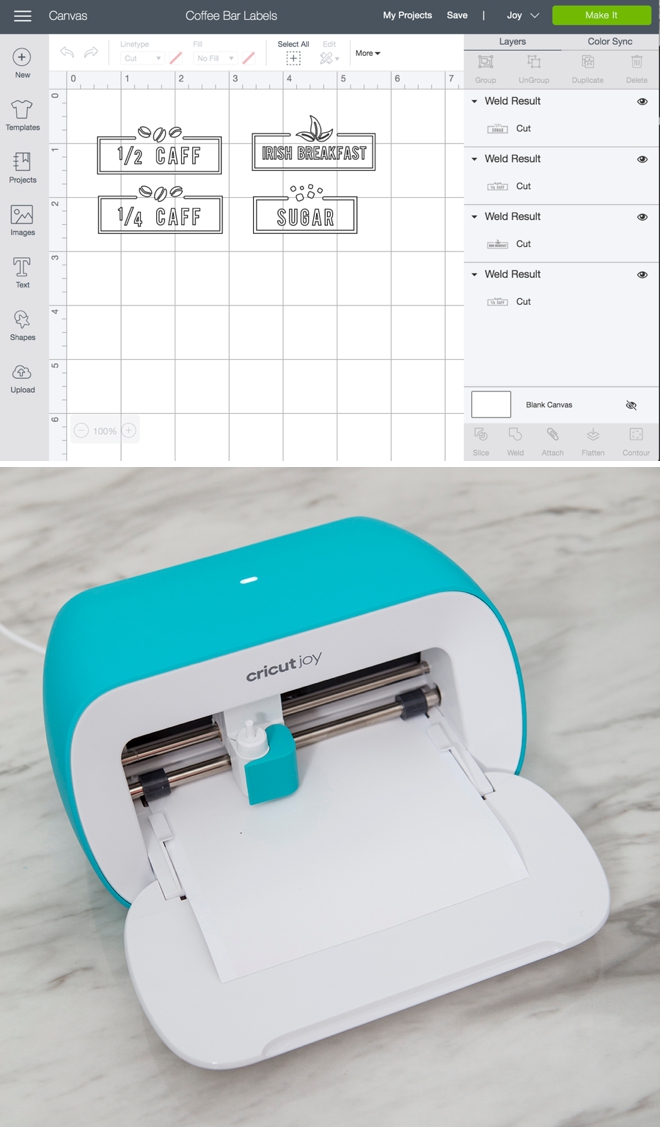
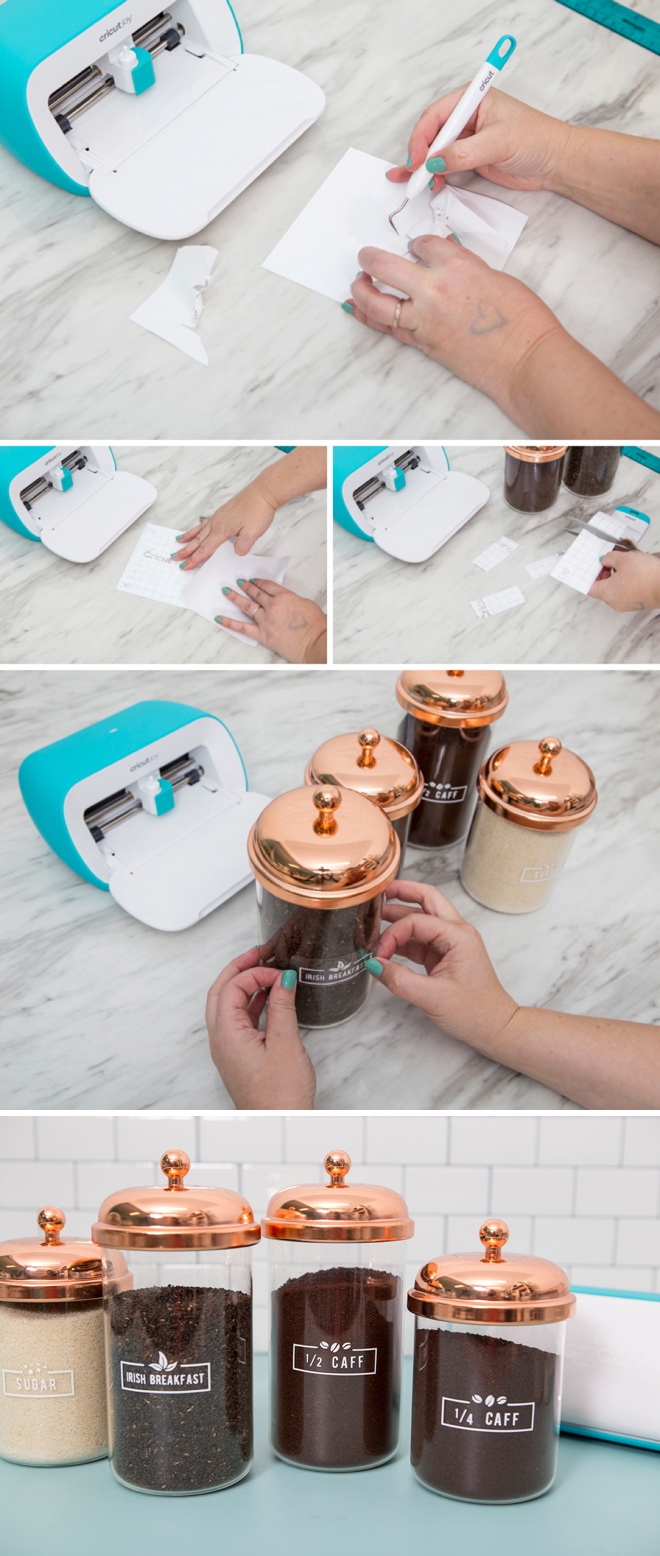
For Christmas, we purchased the Ninja Coffee Bar as our gift to each other and I’m obsessed. The hubs built me an open-shelf style coffee bar last year and with the addition of this new machine, I wanted our coffee and tea out in cute containers. I’d been eyeing these stunners for a while so I was super jazzed to finally have a reason to buy them. Over the past few years, I’ve grown fond of 1/2 caff-coffee (being pregnant and breastfeeding and all) but then a few months ago I also found the most delicious 1/4 caff-coffee! So now we always have 1/2 caff, 1/4 caff, Irish Breakfast loose leaf tea and sugar on deck… and I used my Joy to quickly make them extra cute!
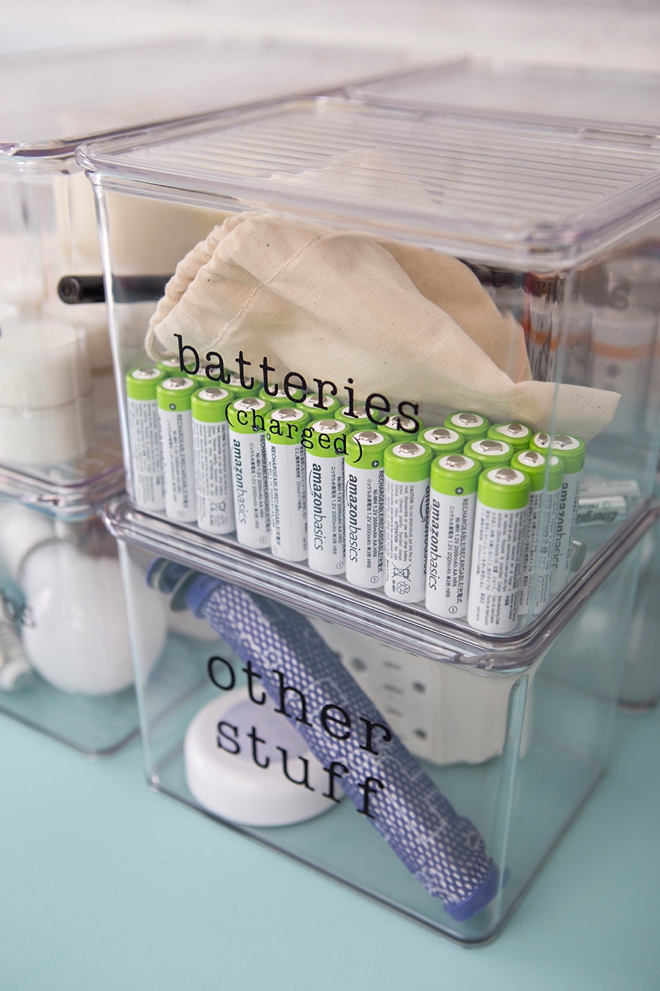
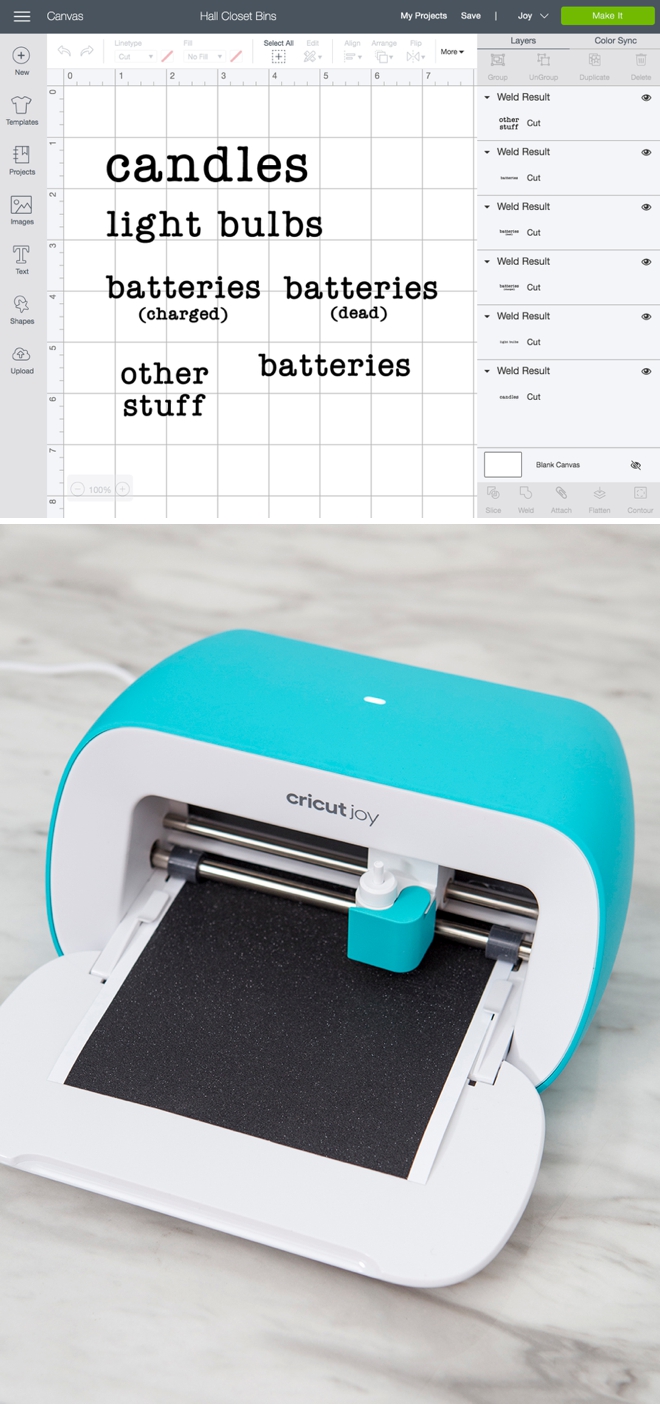
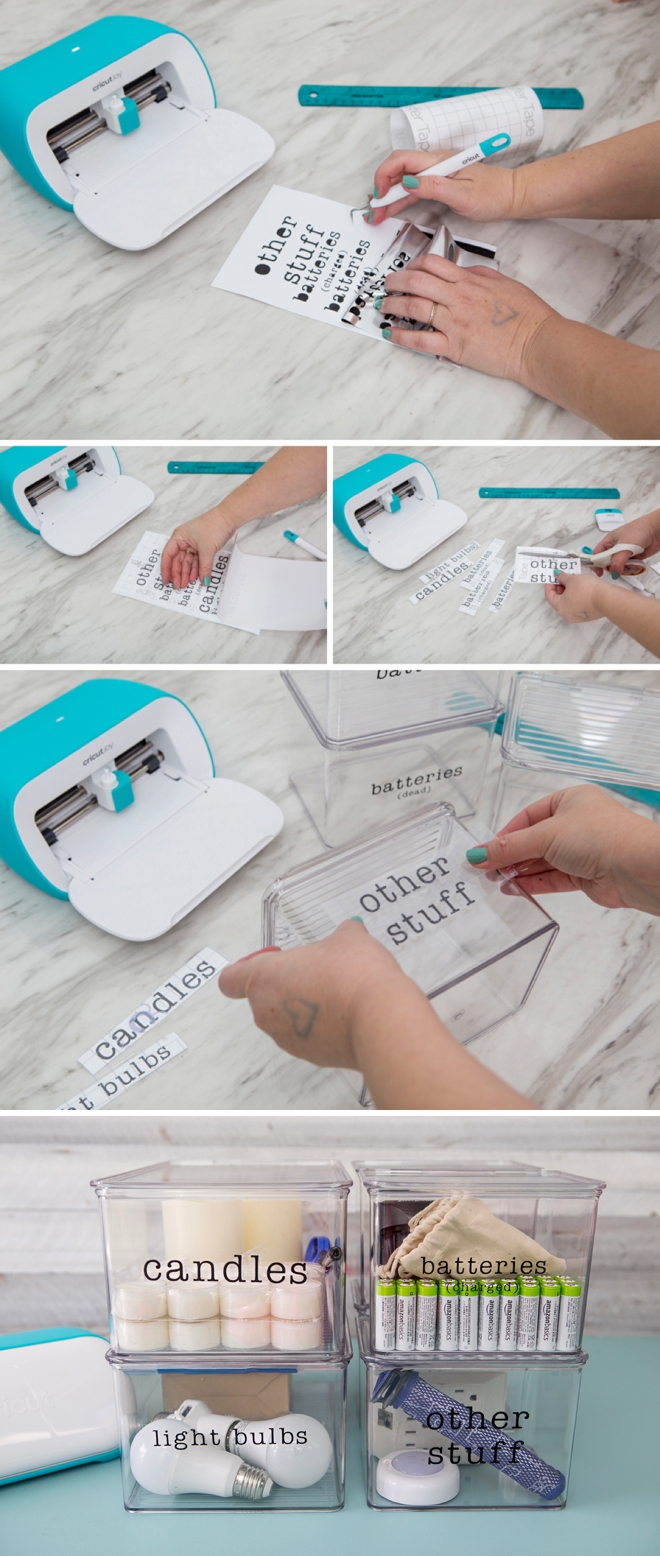
Hall Closet Bins
Our hall closet is a real pain point with me and the hubs. Our house is crazy small and we have too much stuff (and too many kids) for it’s whopping 860 square feet. The shape and size of this closet is also super lame. It’s deep and has only a few shelves which is overall a bad use of space. Tackling this space is on our list but it involves major demolition. Our plan is to reduce the depth of this closet along with the two-bedroom closets, and reconfigure the space of all three since they share walls. Until then, I’m going crazy with these clear plastic bins and my Cricut Joy!
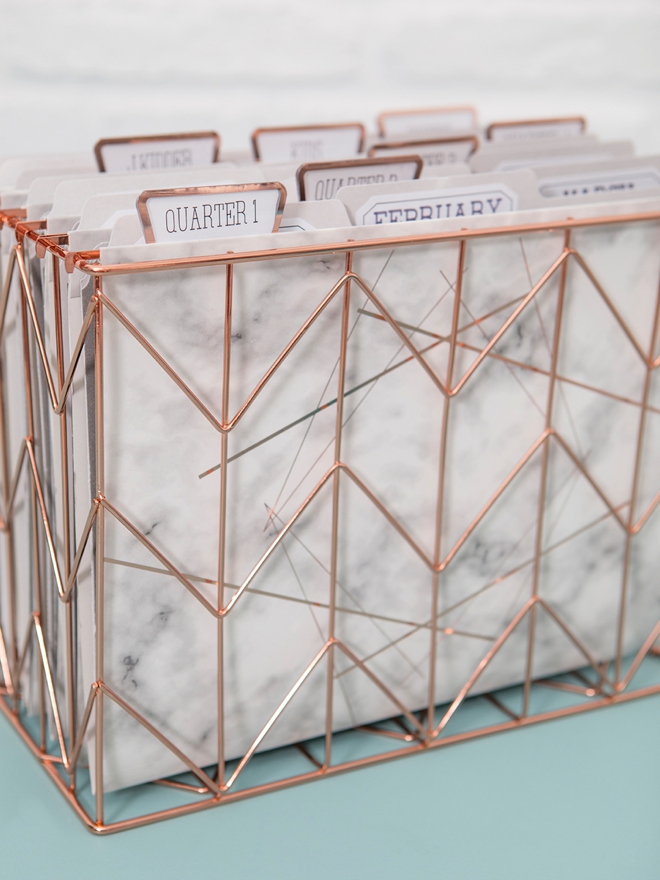
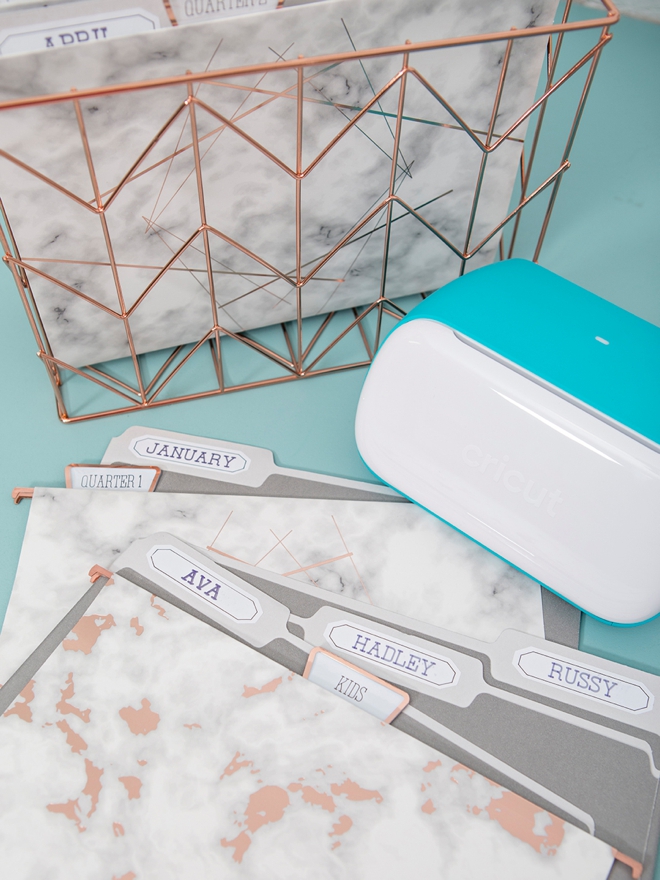
Desktop Filing System
I cannot be the ONLY one that has trouble taking receipts and bills from my purse and table and putting them in my actual filing cabinet? Ok, or maybe I am. To combat this unique laziness I decided to buy a super cute desktop filing basket for my most needed files. I’m keeping it super simple. Big, important stuff will go in my real cabinet but to help keep my desk and table clear this is my solution and I’m super jazzed with how my Cricut Joy labels turned out!
SUPPLIES:
- Cricut Joy
- Cricut Smart Vinyl in Removable White
- Cricut Smart Vinyl in Glitter Black
- Cricut Smart Labels in White
- Cricut Joy Pens
- Coffee Containers
- File Folders
- Clear Plastic Bins

The Coffee Containers
First, I logged into Design Space to design my labels. I used designs I found in Design Space and quickly edited them to fit this project. Then I cut them using my Cricut Joy from my smartphone and the Cricut app.
To see and use my exact design files, login to Design Space first, then come back and click on this link.
Apply The Labels
Just in case I decide to change the contents of these coffee bar containers, I used removable vinyl! Applied transfer tape, cut them up and transferred to my jars – YAY!!
The Hall Closet Containers
Since these labels were super simple, just text sized to fit the containers, I designed this file on my Cricut app from my phone, while I was breastfeeding! Then I let my Cricut Joy cut them for me with ease.
To see and use my exact design files, login to Design Space first, then come back and click on this link.
Apply The Labels
Added transfer tape, cut up the labels and added them to each bin, quick and easy! I used black glitter vinyl for these boxes.
Since I created these 6 bins I’ve already purchased 6 more! The items we use the least (like lightbulbs and vacuum filters/parts are in the back and the things we use the most (like batteries and candles) are in the front. Now there is no confusion on where things are or where they go!
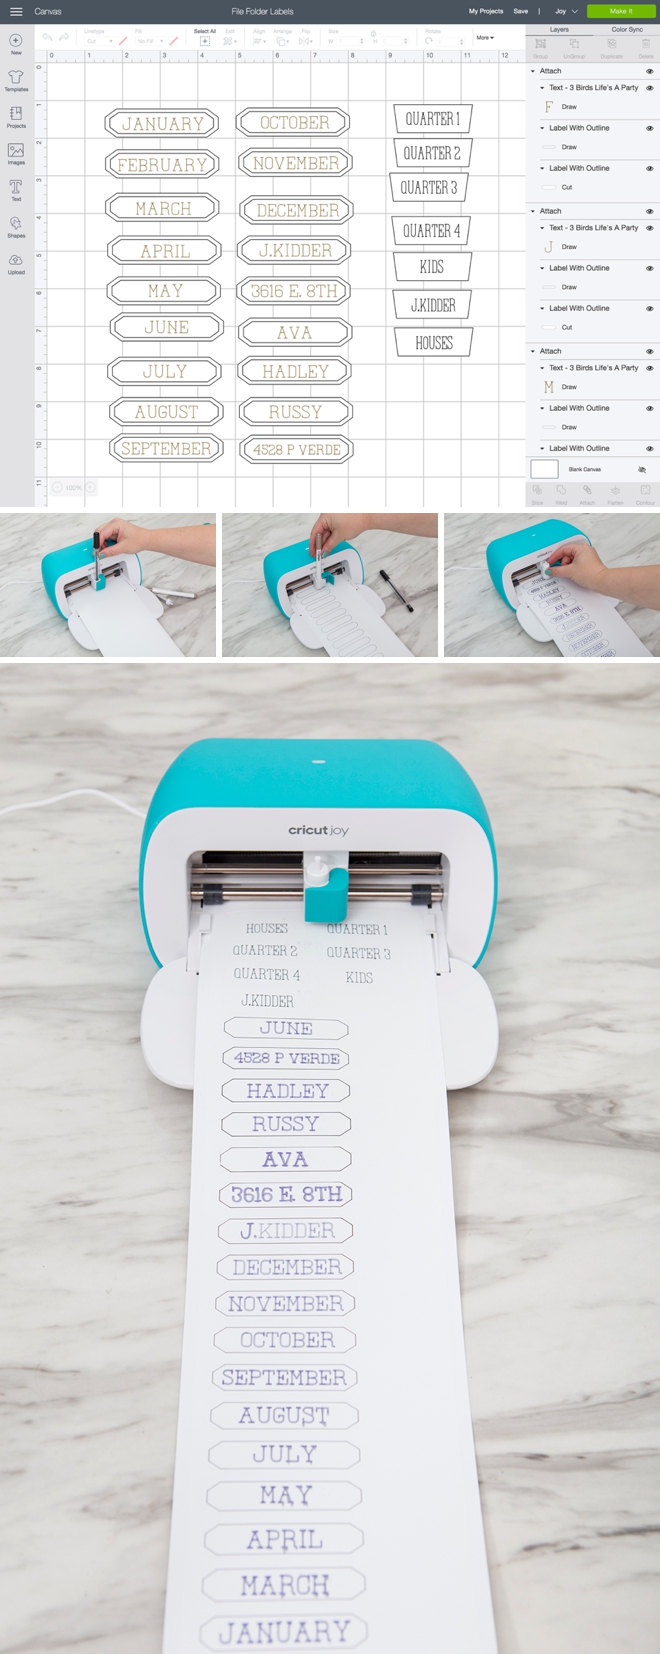
My New Desktop Files
By far, this was the most fun! I designed these labels on my desktop computer and again, cut them from the app using my Cricut Joy. Design Space will prompt you to put in the first pen color, then the next, and then the blade. I did have a little trouble with the metallic marker smearing a bit, so if I was to do this again I’d probably not do as many labels on one cut.
To see and use my exact design files, login to Design Space first, then come back and click on this link.
Apply The Labels
Applying the labels for this project is super quick and easy. The stickers go straight onto the file folders and inside of those plastic divider tabs and they’re done!
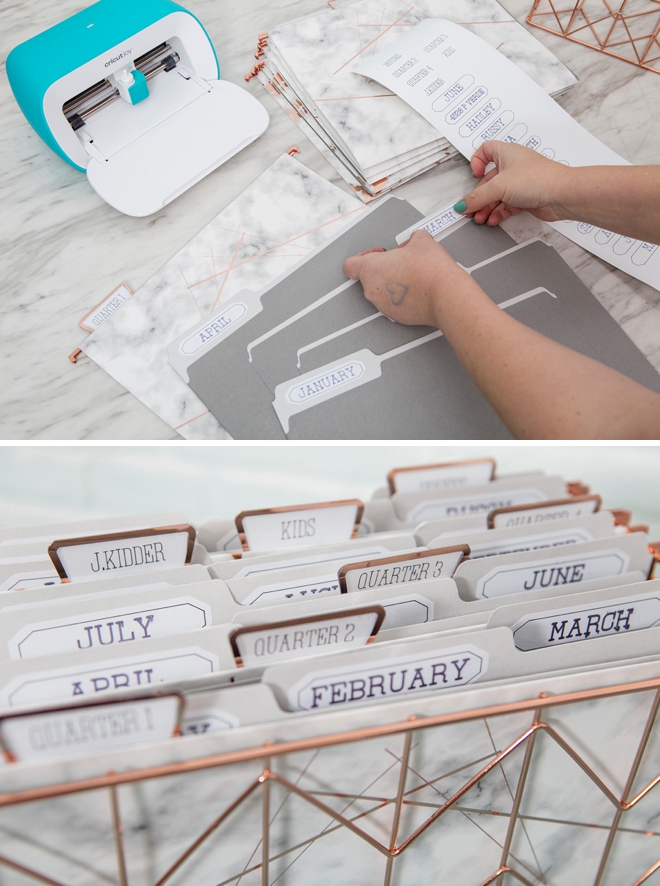
I created monthly files for receipts only. Then files for the kids, myself, and our two houses. I’ve already been using it for receipts because it’s SO easy! I’m not categorizing the receipts, just putting them in the right month, bam, done. WAY better than before. It’s crazy how something so small can change the way you do something in your everyday life. What kind of joy could the Cricut Joy spark for you?
His & Hers
Just for fun I also whipped up a few new coffee cups for me and the hubs using these hand-lettered designs. I used Premium Black Permanent Vinyl and a Premium Permanent Blue Vinyl from Martha Stewart. The perfect addition to my adorable new coffee bar!


If you create one of our projects, please share a picture with us on Instagram or Twitter using the hashtag #somethingturquoisediy, we regularly reshare our favorites! Your profile will need to be public for us to see it otherwise, you can always DM us!
DIY Tutorial Credits
Photography + DIY Tutorial: Jen Causey of Something Turquoise // Cricut Joy and all supplies courtesy of: Cricut // Rose Gold Coffee Bar Containers: Amazon // Rose Gold File Basket: Amazon // Marble Hanging File Folders: Amazon // Gray File Folders: Amazon // Clear Plastic Flip Top Bins: Amazon
Shop The Supplies:
Find the supplies you’ll need for this project from our affiliate links below:


Comments