

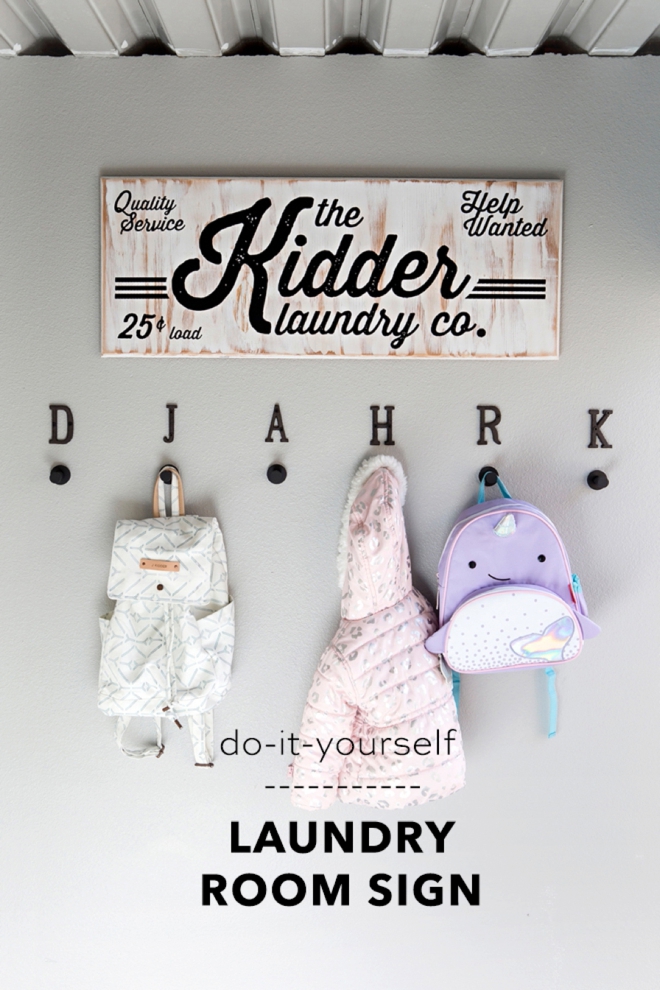
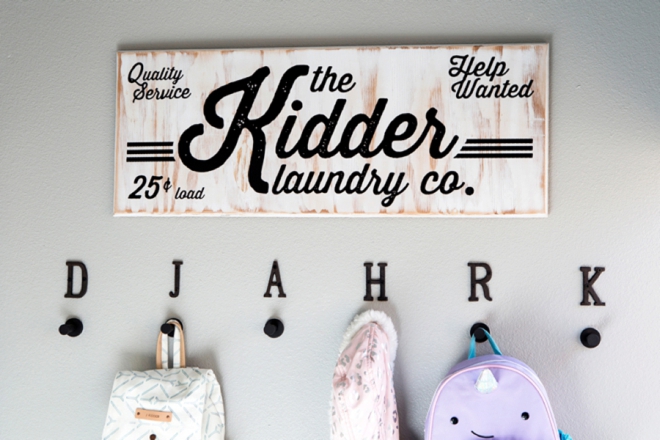
How To Make A Vintage Laundry Sign With Cricut
Recently my dear friend Ben was over and he often throws in a load of laundry for me or swaps a load and he was doing just that a few weeks ago. Sadly (not really) he broke my washing machine, and oh darn, the hubby said it was finally time to get a new set!!! Mama’s dream come true! When the old units were removed we found mold in the wall from a large rain, and oh darn, we had to fix and repaint the walls too and while we were at it, might as well just cover up that yucky cement floor with some adorable peel and stick tiles. Had to add new shelves too. And just like that, in about 10 days I had myself a beautifully brand new laundry room. Which needed a custom laundry room sign of course, so here’s how I made one!
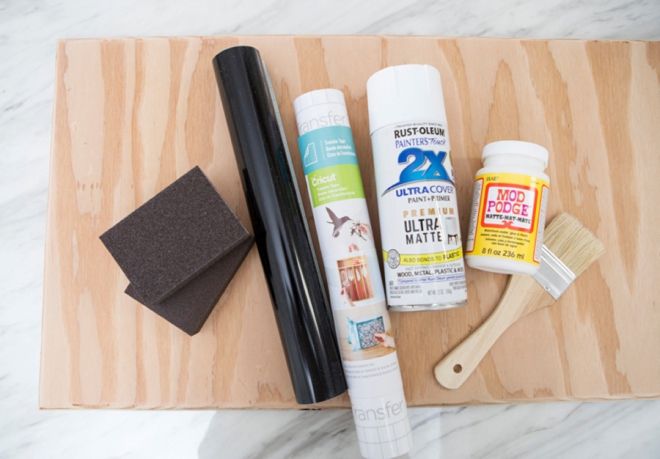
SUPPLIES:
- Cricut Maker or Cricut Explore
- Large Wood Board
- 12” x 24” Cutting Mat
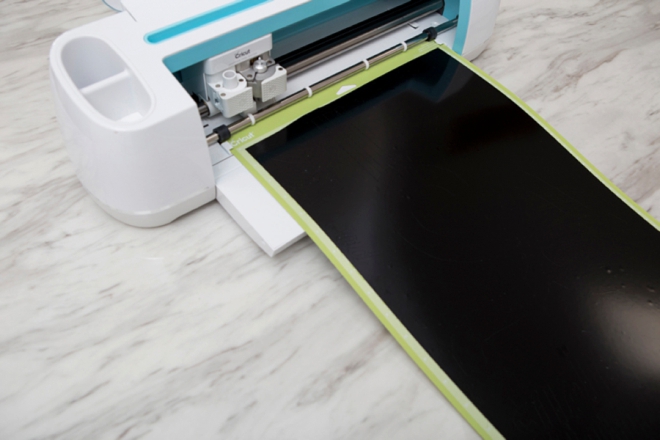
- Cricut Premium Vinyl, Black
- Cricut Transfer Tape
- Matte Finish Mod Podge
- Spray Paint
- Paint Brush
- Sanding Block
Prepare Your Sign
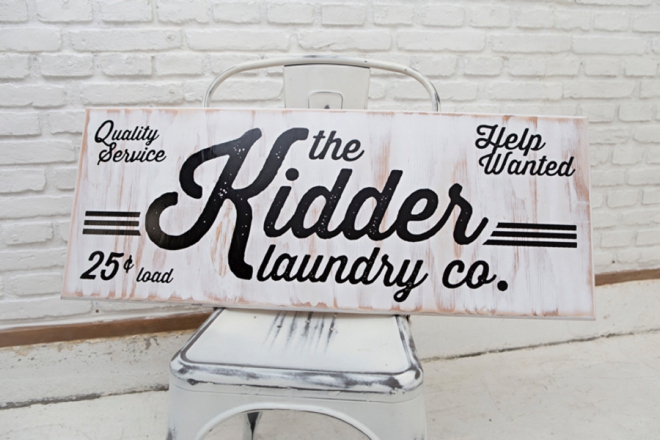
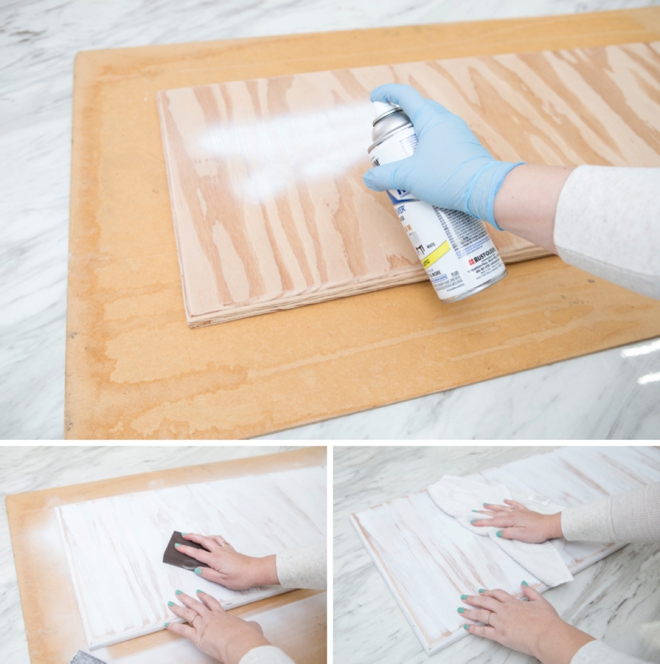
You can use wood, metal, or acrylic for a sign like this. I used a scrap piece of plywood we had laying around and cut it to fit my space at 14” x 36”. I painted it white with two coats of spray paint, then gave it a good rough sanding so that some of the wood came back through the paint. Then I wiped it down with a damp cloth to fully remove any dust from sanding.
Create In Design Space
Login to Design Space and start designing your custom laundry sign! Click on this link to visit my canvas in Design Space to use my pre-designed cut files. I used the font Thirsty Rough for the wording. Prepare your mat and get ready to cut!
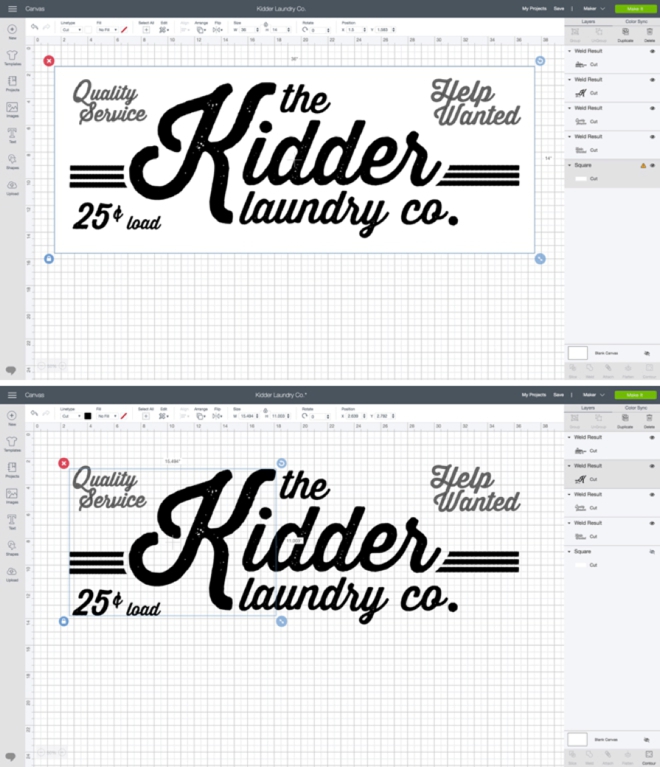
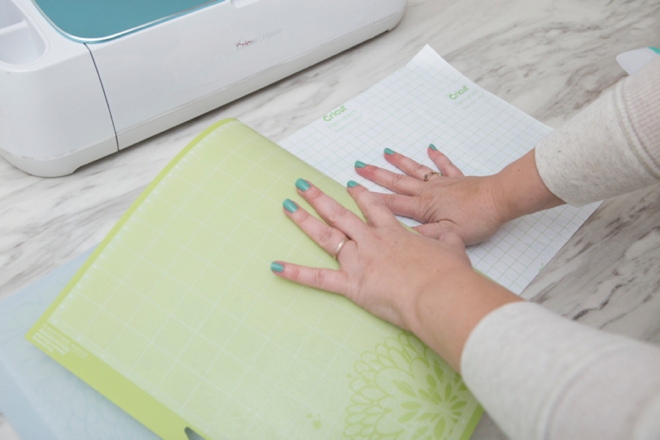
Prepare Your Oversized Cut
Since Cricut mats are only 12” x 24”, I had to cut two mats total, which meant I had to split up the design to fit that size. So I put half of the sign on one mat and half on the other.
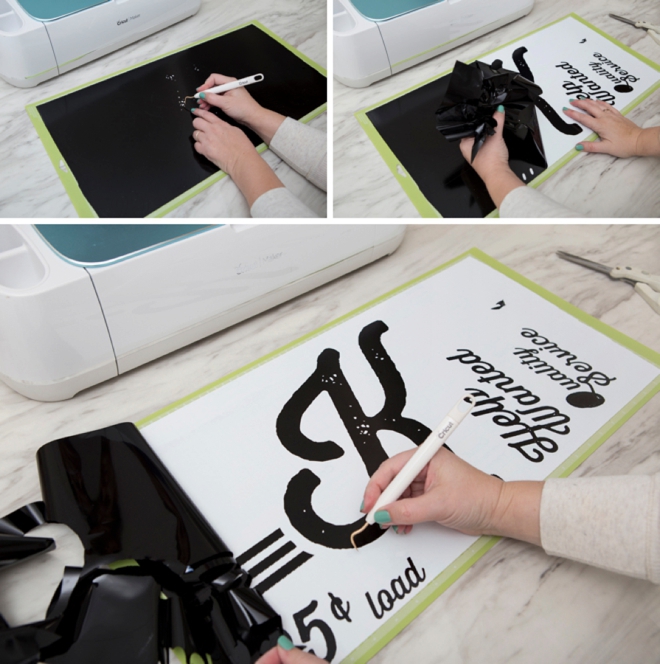
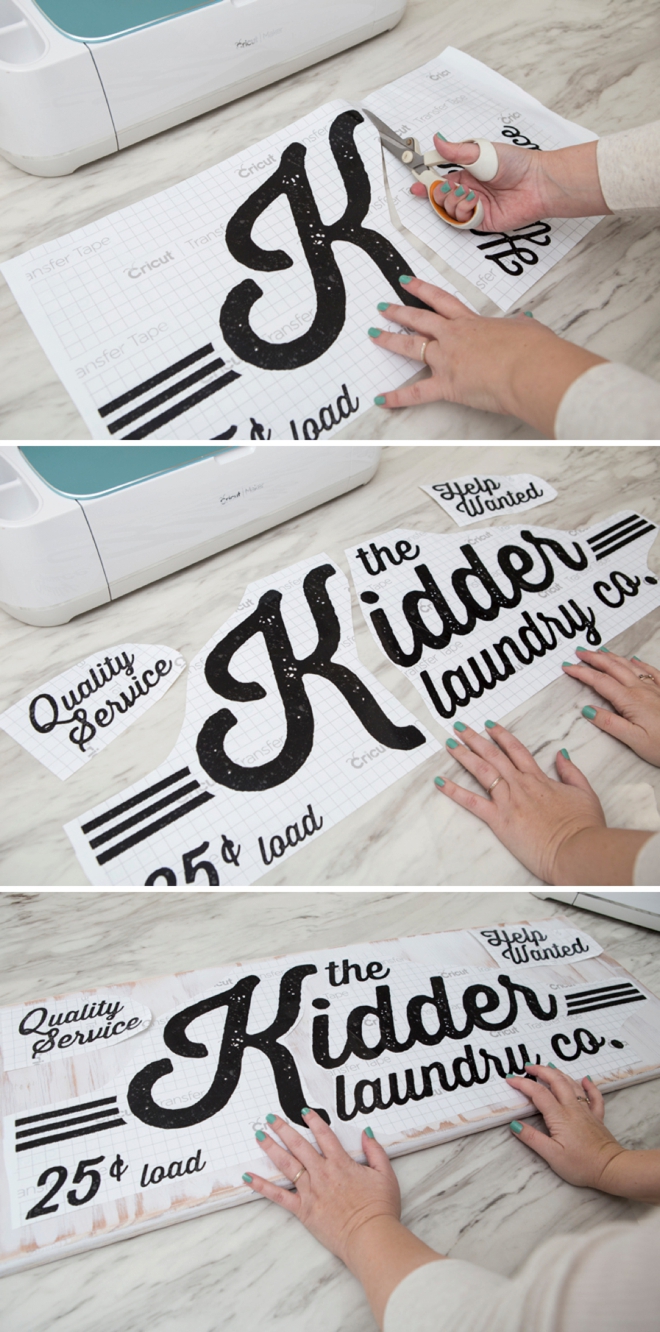
Weed The Designs
Weed, (aka. remove) all the excess iron-on material that isn’t a part of your design. Using the Cricut weeding tools makes the removal of intricate pieces super easy. For large designs like this I find it easiest to weed on the mat, then apply the transfer tape, then remove it form the mat.
Transfer Tape
Transfer tape is the BEST and if you’ve never used it, you must try it. Basically you transfer your new vinyl stickers from their base to a clear film so you can properly position them on their final resting place. Cut a piece of transfer tape just larger than your designs, peel and evenly smooth on top of the vinyl.
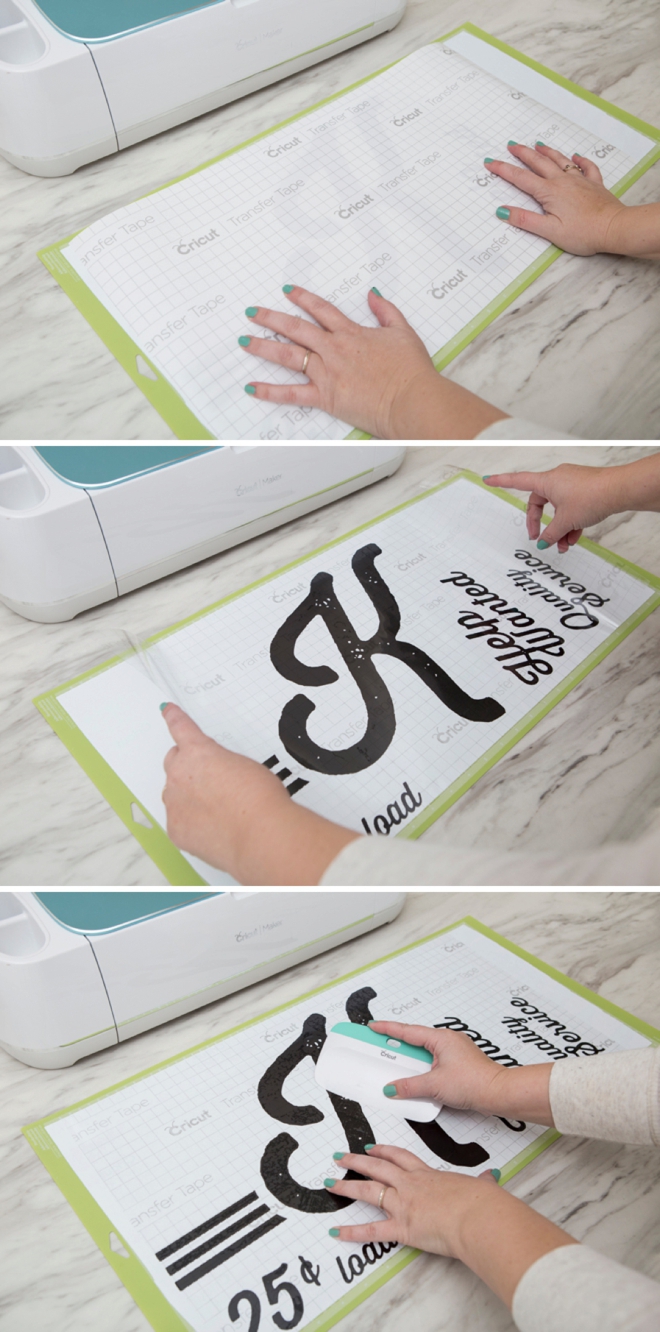
Remove the Mat
I find it easiest with large vinyl designs to remove the mat from the vinyl instead of the vinyl from the mat. Flip the mat upside down and peel it back from the vinyl, so you aren’t bending and rippling the vinyl sticker.
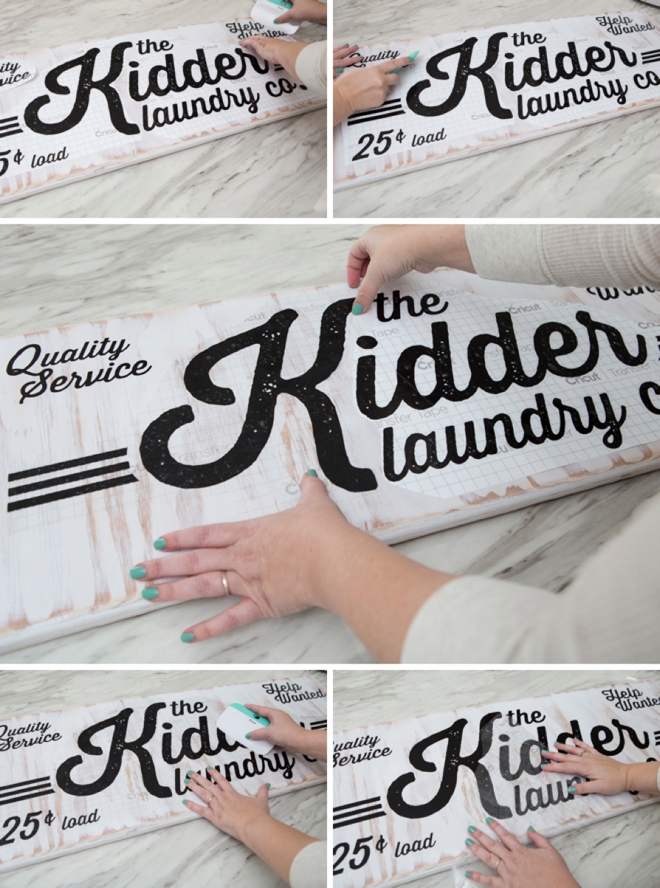
Layout Your Design
Layout the vinyl decals on top of your sign, make sure you are happy with the look and start applying the stickers. Remove the white backing sheet and carefully apply to the board. Using the large scraping tool really helps.
Apply The Designs
Now it’s time to transfer your gorgeous oversized designs onto the sign. Carefully peel off the clear transfer tape from each piece, lay it on the board, apply pressure with the scraping tool and then remove the transfer tape. I started with the smaller corner designs first and then led up to the big middle pieces.
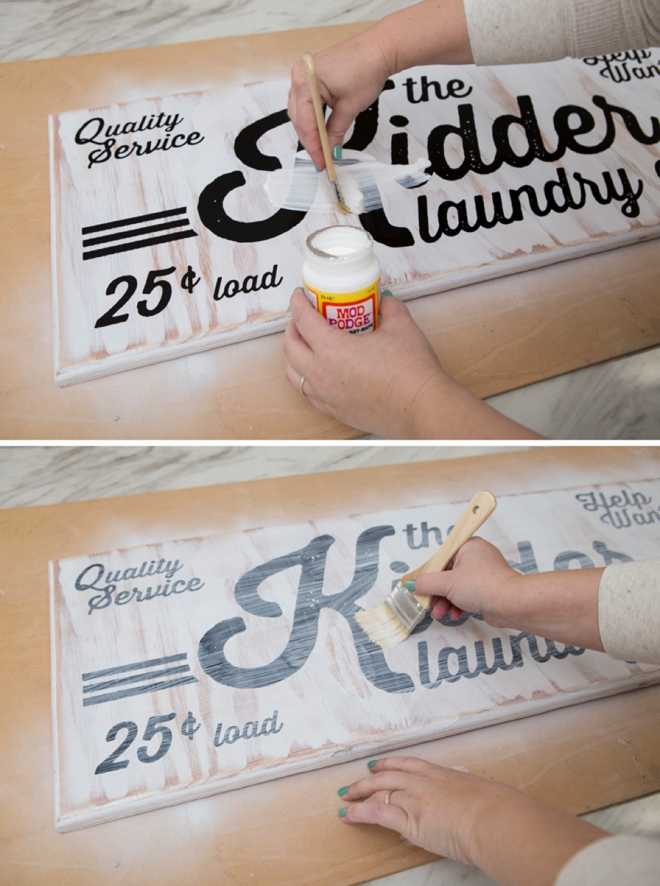
Seal With Mod Podge
This step is optional, but recommended for sign longevity. My laundry room isn’t properly insulated, it’s kind of an indoor/outdoor space, so it gets really hot and really cold. Also, where the sign hangs does get some sunlight so I decided sealing it would be best. I used matte Mod Podge and did two coats. It dried beautifully and I am so extremely happy with the results!

Laundry Sucks
Let’s face it, laundry sucks but having a new space with an adorable sign sure makes it suck a little less. I am so happy with this sign it literally brings a smile to my face every time I see it.
If you create one of our projects, please share a picture with us on Instagram or Twitter using the hashtag #somethingturquoisediy, we regularly reshare our favorites! Your profile will need to be public for us to see it otherwise, you can always DM us!
DIY Tutorial Credits
Photography + DIY Tutorial: Jen Causey of Something Turquoise // Cricut Maker, Vinyl and Supplies: courtesy of Cricut // Wood sign: DIY from plywood // Mod Podge: Amazon // Sanding Blocks: Amazon // Spray Paint: Amazon
Shop The Supplies:
Find the supplies you’ll need for this project from our affiliate links below:


Comments