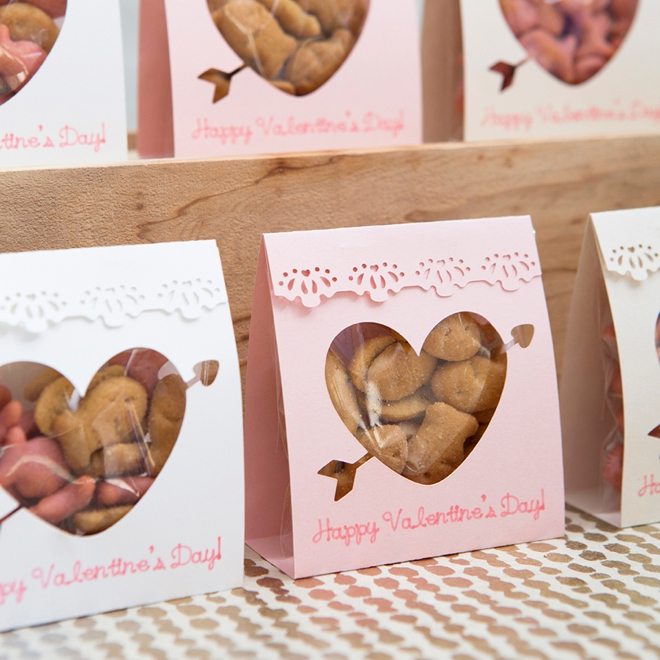

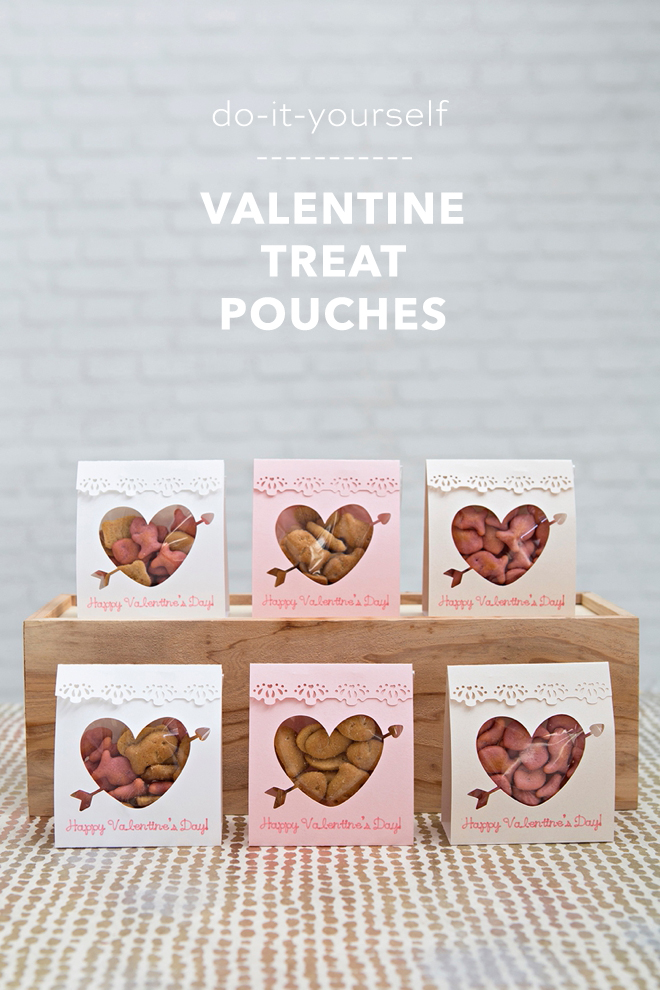
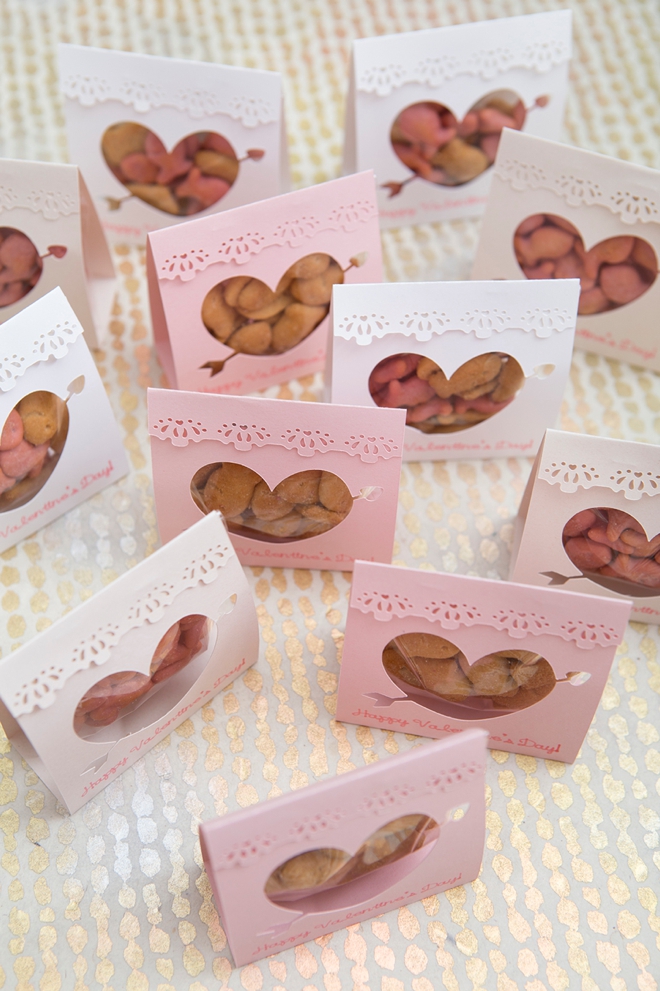
DIY Goldfish Cracker Valentine Treat Pouches
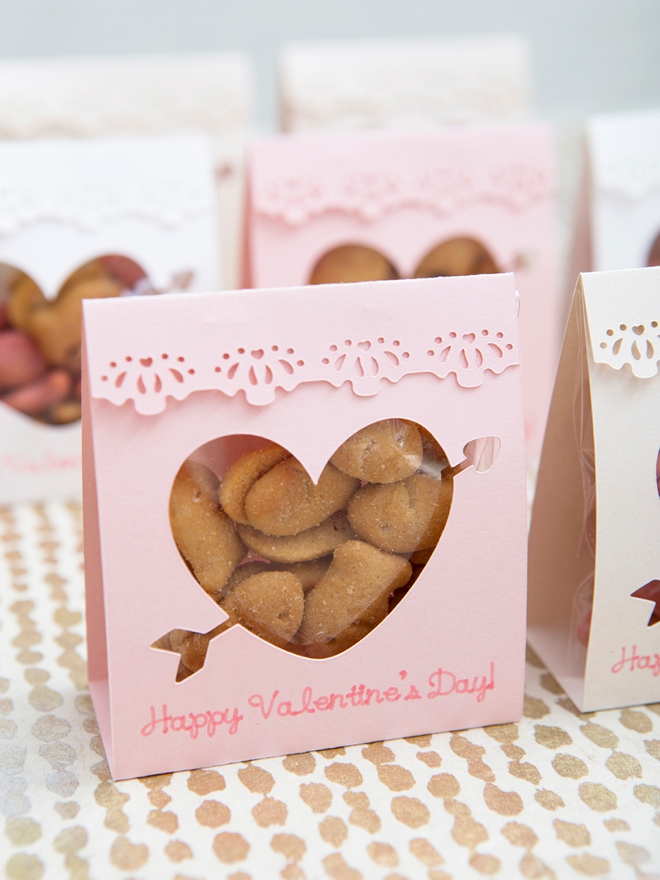
Years ago I created these adorable treat pouches as wedding favors and now that I have kids it struck me that they’d be perfect for classroom Valentine treats! We’re filling them with Goldfish crackers but you can, of course, fill them with whatever you’d like. Purchase our exclusive Cricut .SVG cut file for this project and make your Cricut do all the hard work for you. Let your little help you assemble these treats and they’ll be completed in no time!
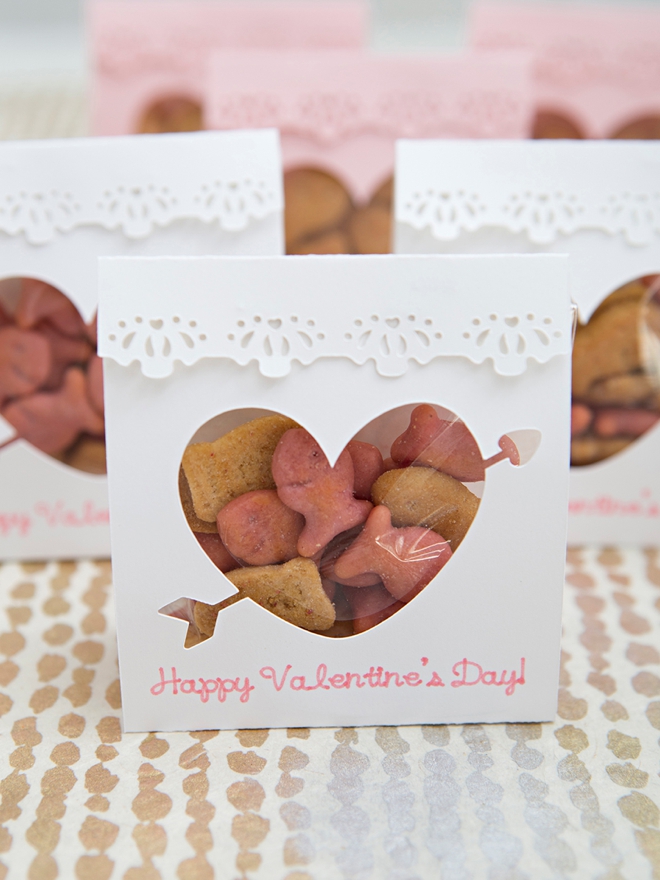
Goldfish For The Win
I asked my step-daughter Ava what kind of treats she’d like to give her friends at school and she said Goldfish crackers. Sounded good to me so I figured I would just use the regular orange ones… then I got to Target and remembered they had the pink princess kind (colored with beets!) and also the vanilla cupcake graham crackers! The perfect colors for Valentines day!
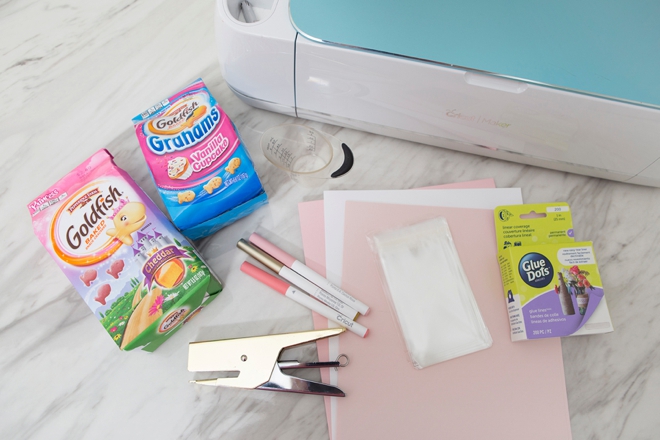
SUPPLIES:
- Cricut Maker or Cricut Explore
- Cricut Scoring Wheel (or scoring stylus if you have the Explore)
- Goldfish “Pink” Princess Crackers (colored with beets!)
- Goldfish Cupcake Graham Crackers
- 3″ x 4″ Self-Sealing Treat Bags
- 8.5″ x 11″ Cardstock
- Cricut Pens
- Glue Dots
- Stapler
- Our exclusive .SVG cut file available in our shop!

Create In Design Space
The first step is to login to Design Space and start designing your treat pouches! Stop by our craft file shop to purchase our exclusive Cricut cut file. Upload it to Design Space using the “upload” button on the left tool bar. Locate the file on your computer and select to add it to your canvas.
HOW TO EDIT:
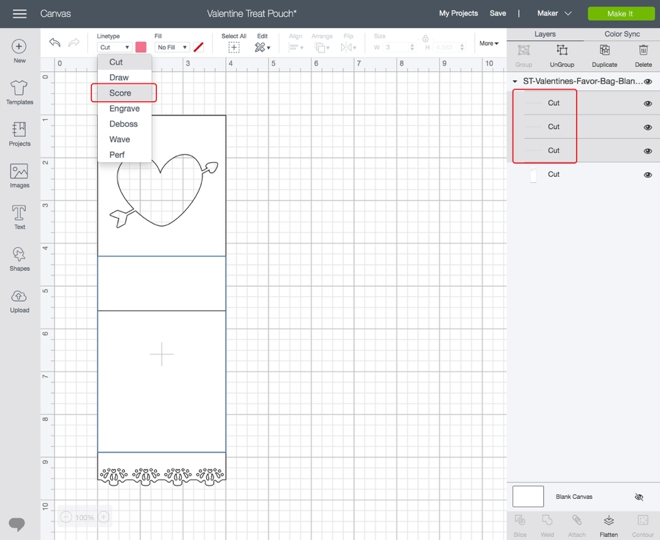
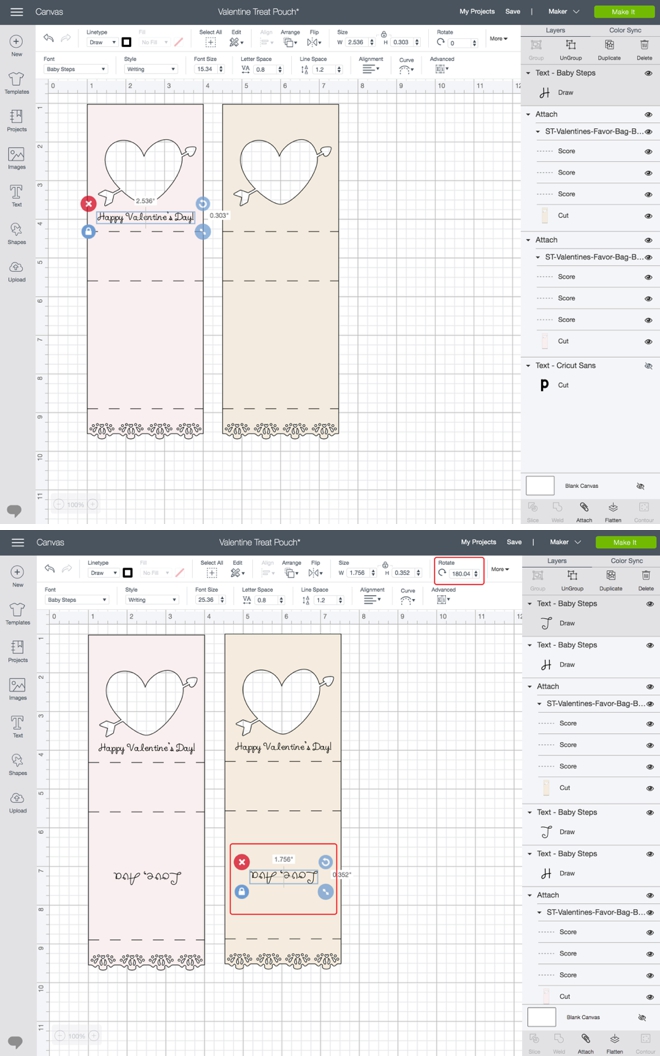
Step 1: select all three “cut” lines in the layers panel. Under the “Linetype” dropdown select score.
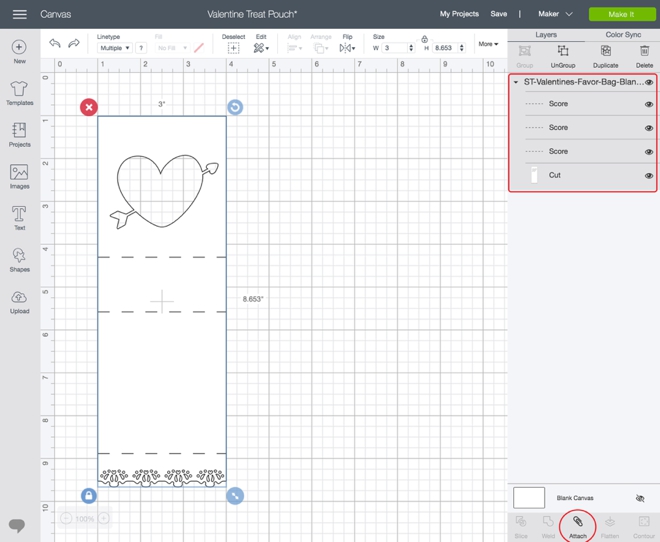
Step 2: Then select the 3 score lines and the card itself and click attach. This ensures that the Cricut will score the lines right where you want them to.
Step 3: choose your color of cardstock to visually help you with design and cutting.

Step 4: add the text. I filtered my text options by choosing the ones that had a “writing” style, since I knew I was going to use the pens.
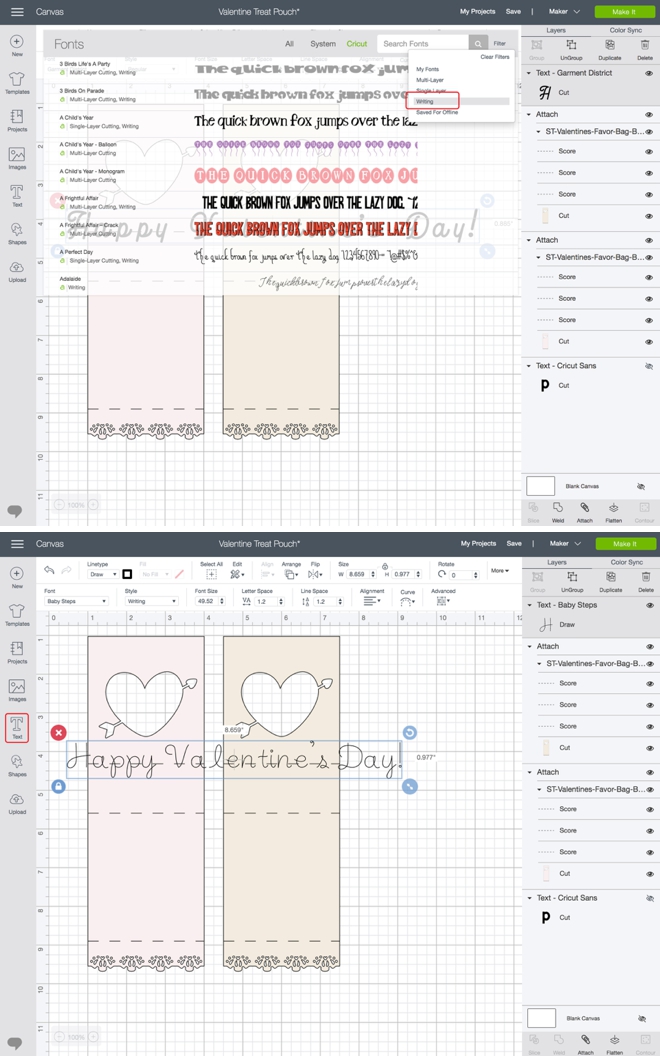
Step 5: Add whatever you’d like your treat pouches to say… I did Happy Valentine’s Day on the front, and Love, Ava on the back.
Make sure to turn the text upside down if you’re adding it to the empty square as once folded it will be right side up!
Step 6: select the card layer and the text boxes you’ve added to it and click attach. This will ensure that your Cricut will write the sayings exactly on the card where you want them to.
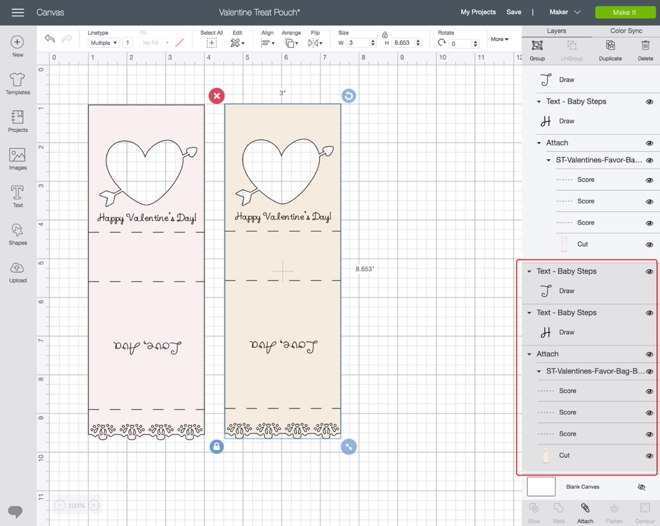
Step 7: make it! Design Space will prompt you to insert the pen, scoring blade, and fine point blade.
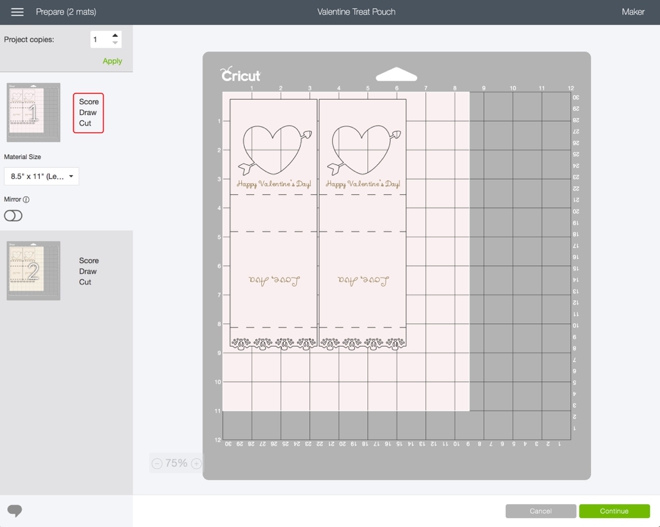
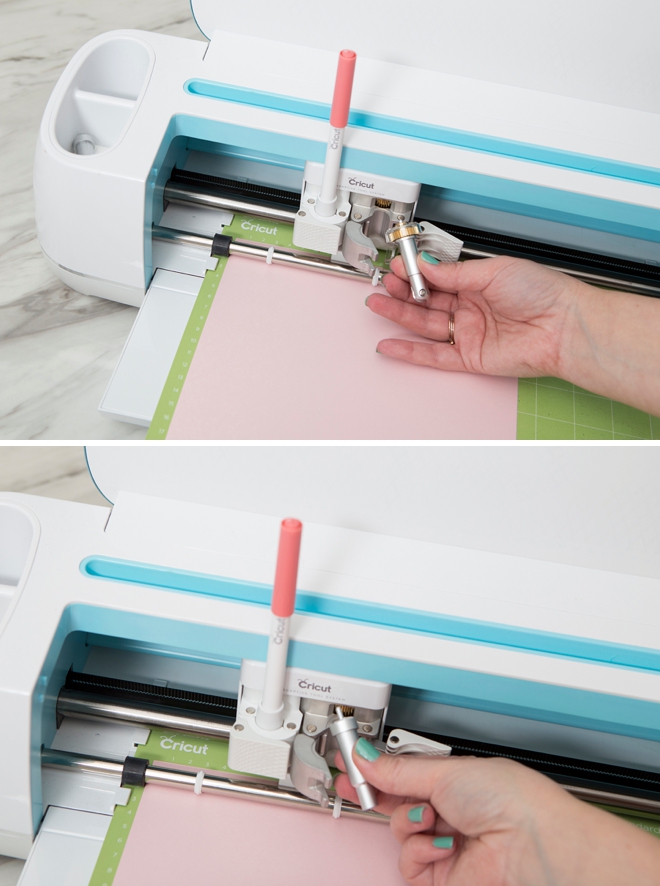
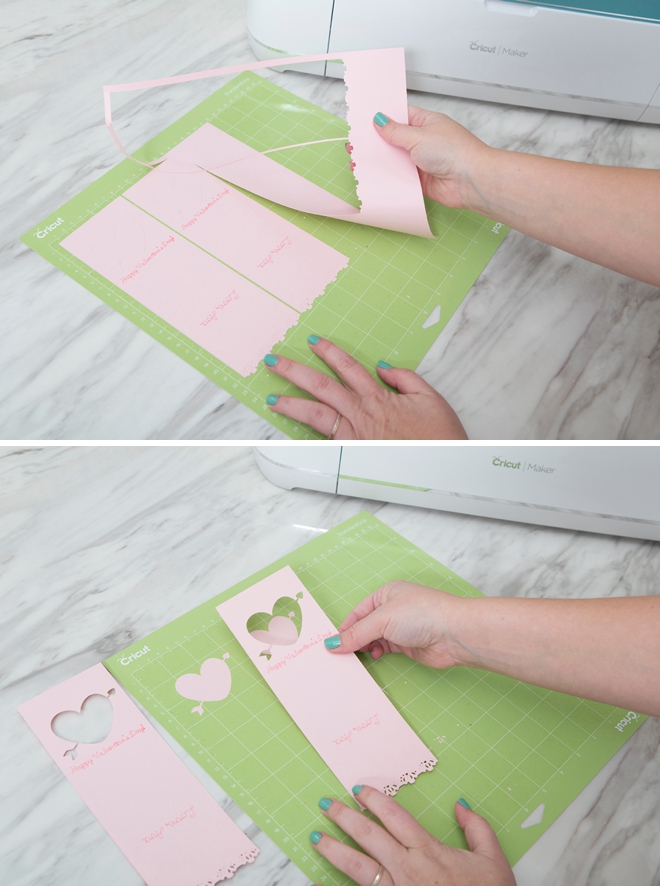
Let Your Cricut Work It’s Magic
Following the prompts to insert the pen, scoring blade, and fine point blade when needed! You can cut two treat pouches on one 8.5″ x 11″ piece of cardstock.
Carefully Remove From The Cutting Mat
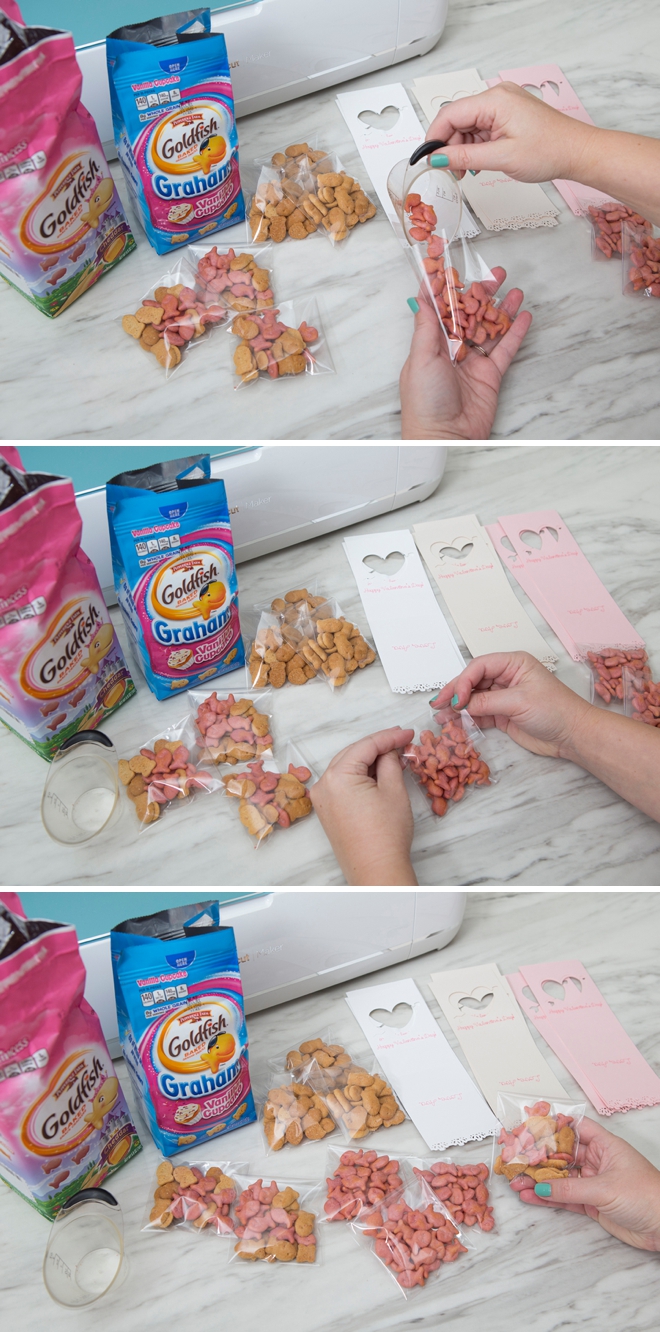
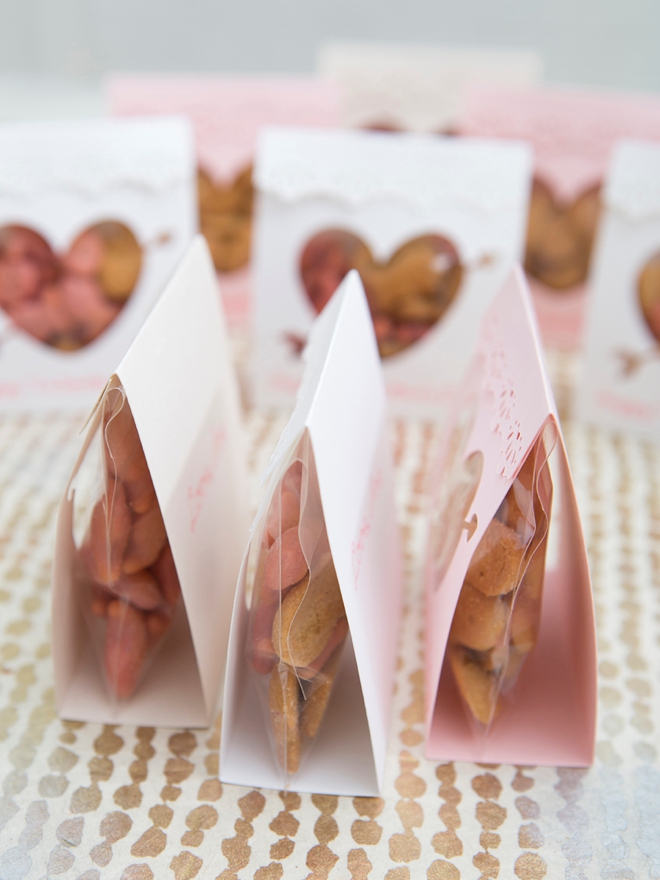
Fill The Treat Bags
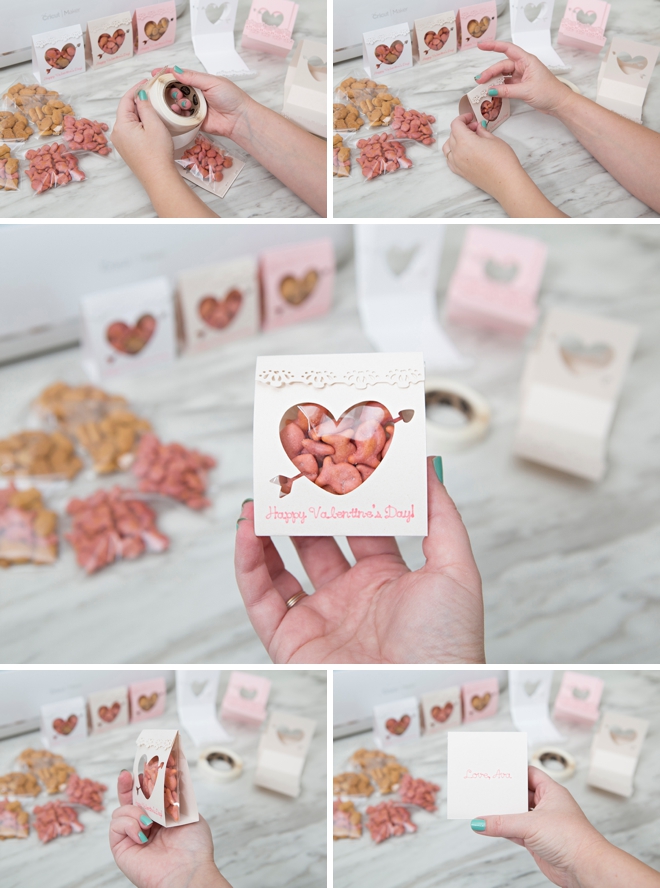
Each of the 3″ x 4″ treat bags will take about 1/4 cup of Goldfish crackers. Peel off the sticky backing to seal the bags.
Fold On The Score Lines
Gently fold the cardstock on the score lines that your Cricut created.
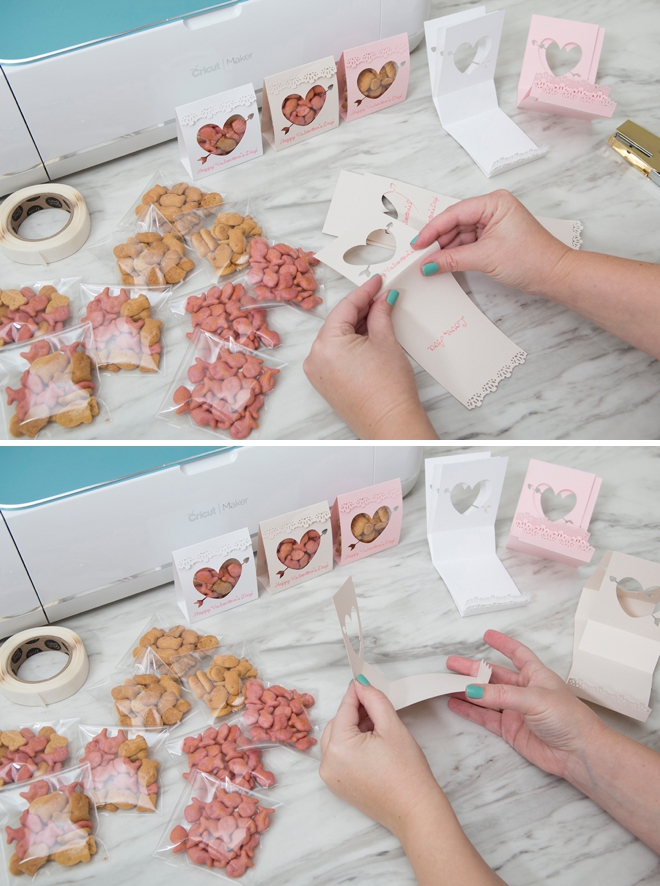
Assemble Your Treats
Now we are going to staple the candy bag inside of the pouch.
- Set the treat bag right the middle of the folded card.
- Fold the heart cut-out side up to the bag and staple.
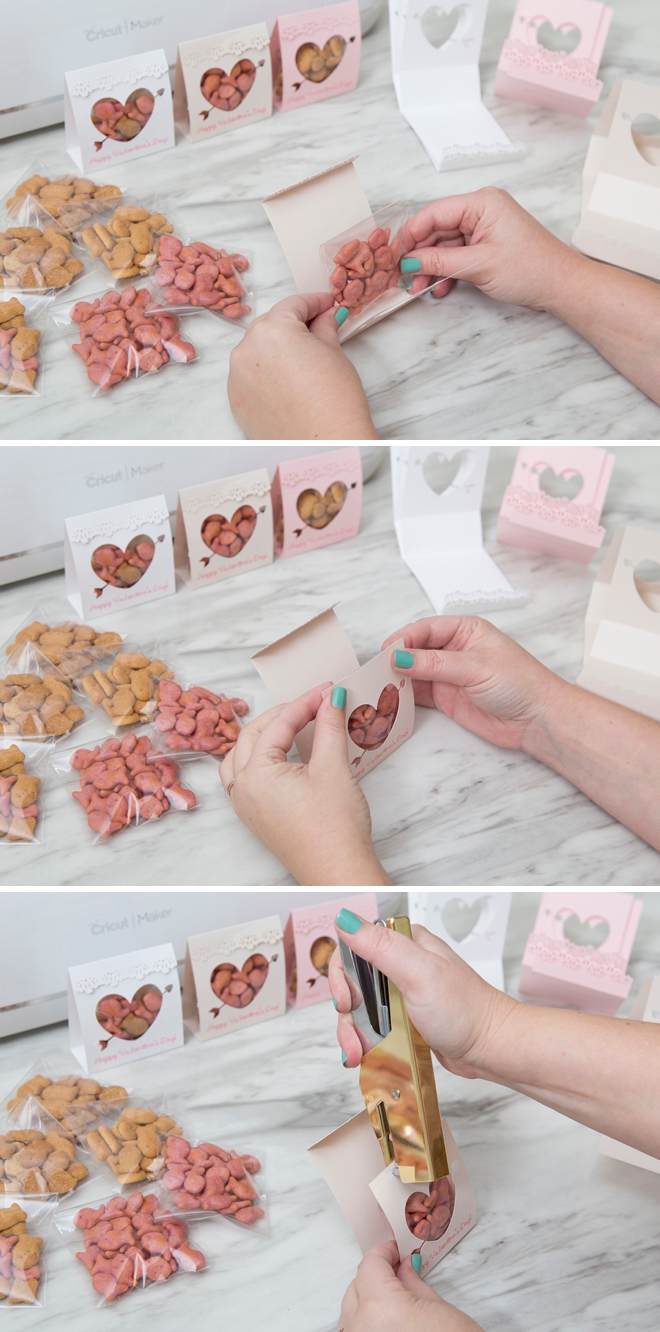
- Add 3 Glue Dots right underneath the punched border
- Fold the back side up and around
- Fold the flap with the Glue Dots to cover the staples
- Press firmly to seal!
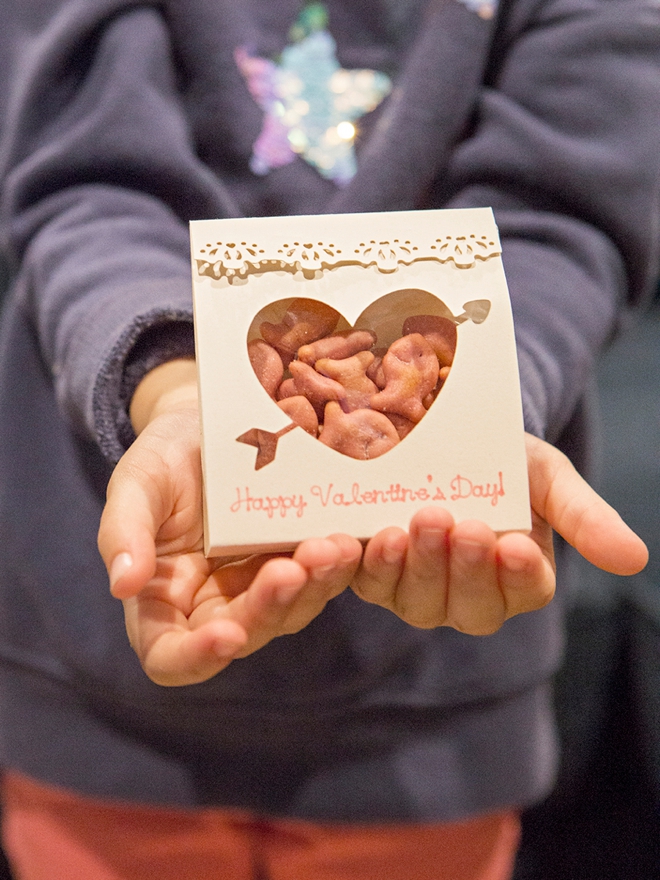
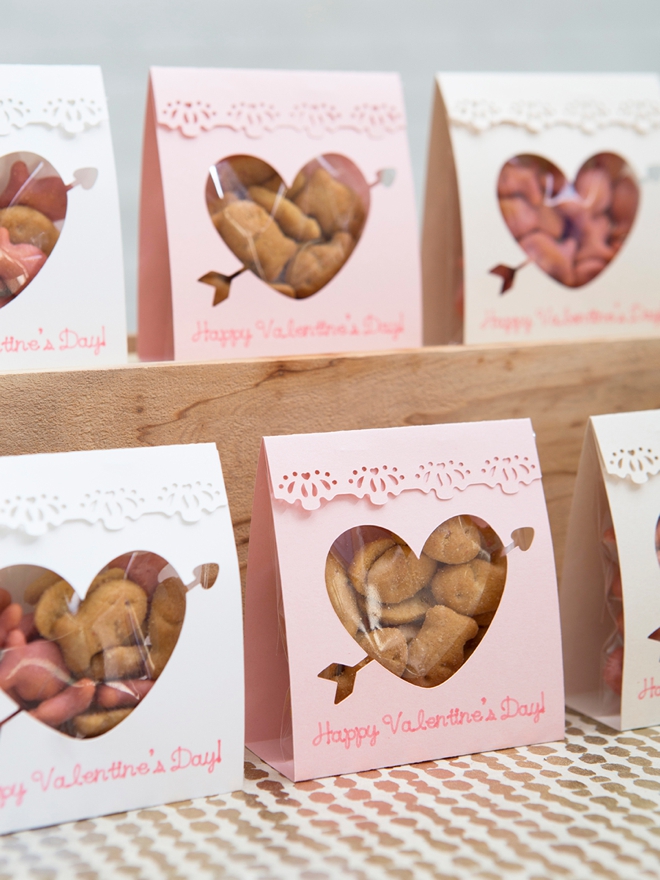
Perfect For Classroom Valentines
Fill these cuties with your littles favorite candy or treats for the perfect classroom handout. Also great for neighborhood friends!
If you create one of our projects, please share a picture with us on Instagram or Twitter using the hashtag #somethingturquoisediy, we regularly reshare our favorites! Your profile will need to be public for us to see it otherwise, you can always DM us!
DIY Tutorial Credits
Photography + DIY Tutorial: Jen Causey of Something Turquoise // Exclusive SVG Treat Pouch File: Shop Something Turquoise // Cricut Maker, Pens, Scoring Blade: courtesy of Cricut / 3″ x 4″ Self-Sealing Treat Bags: Amazon // 8.5″ x 11″ Cardstock: Michaels // Mini Gold Stapler: Amazon // Glue Dots: Amazon
Shop The Supplies:
Find the supplies you’ll need for this project from our affiliate links below:


Comments