
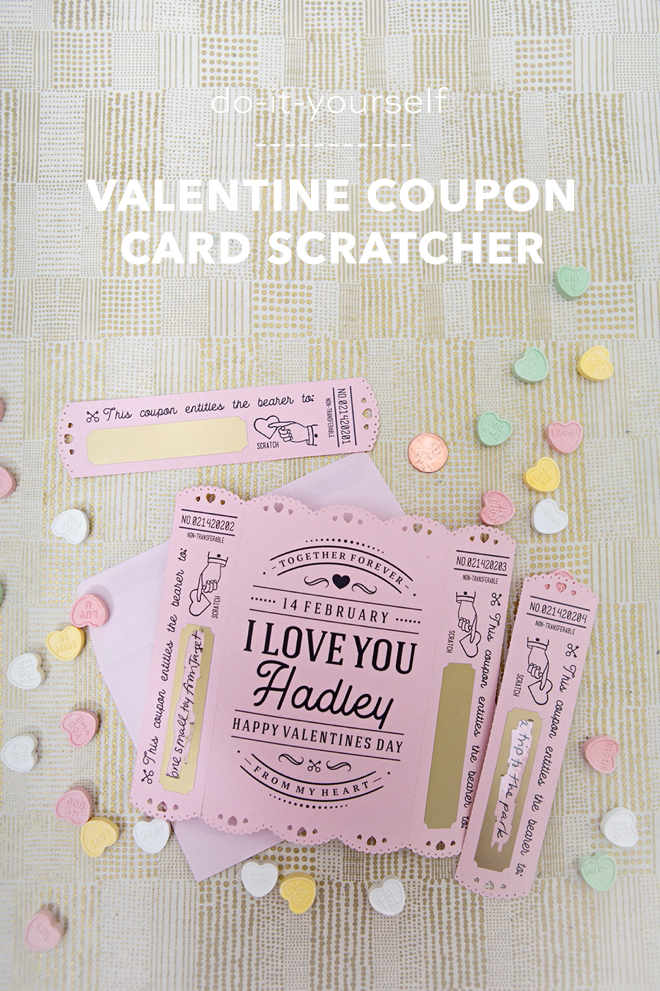
How To Make A Valentine Coupon Scratcher Card With Cricut Maker
-Sponsored Post-
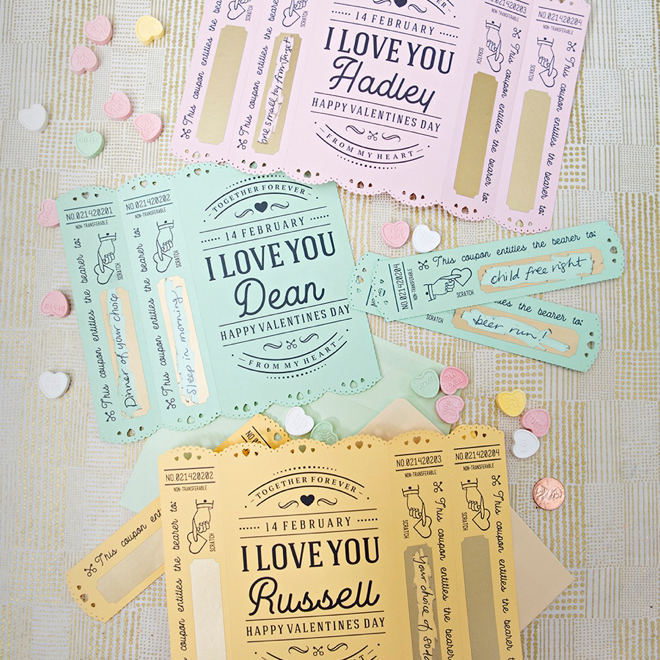
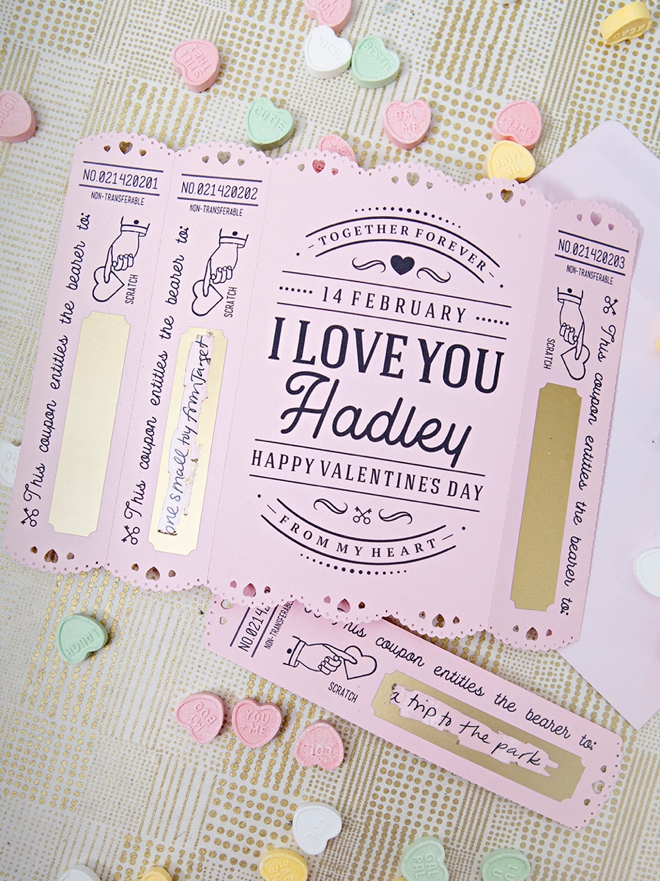
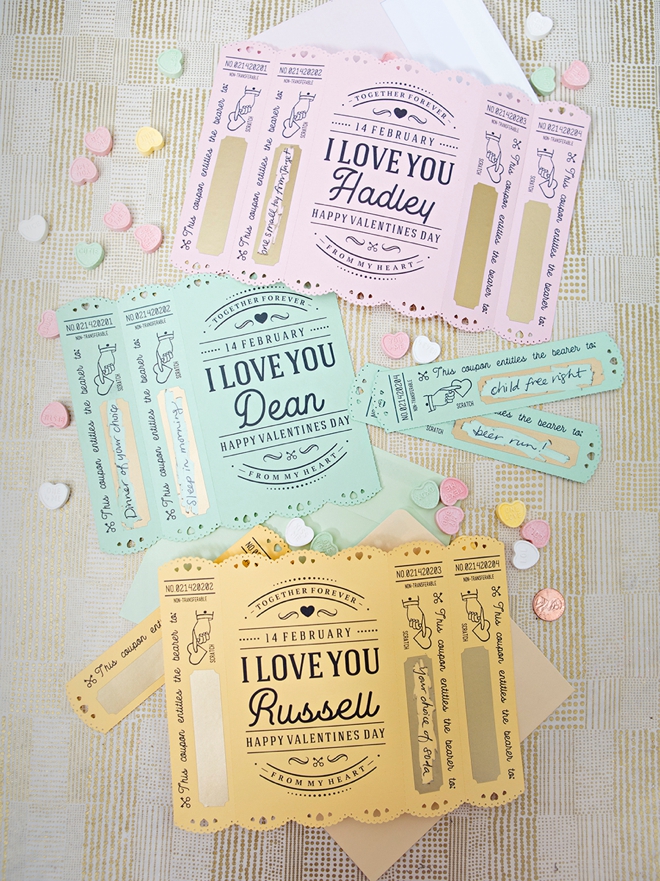
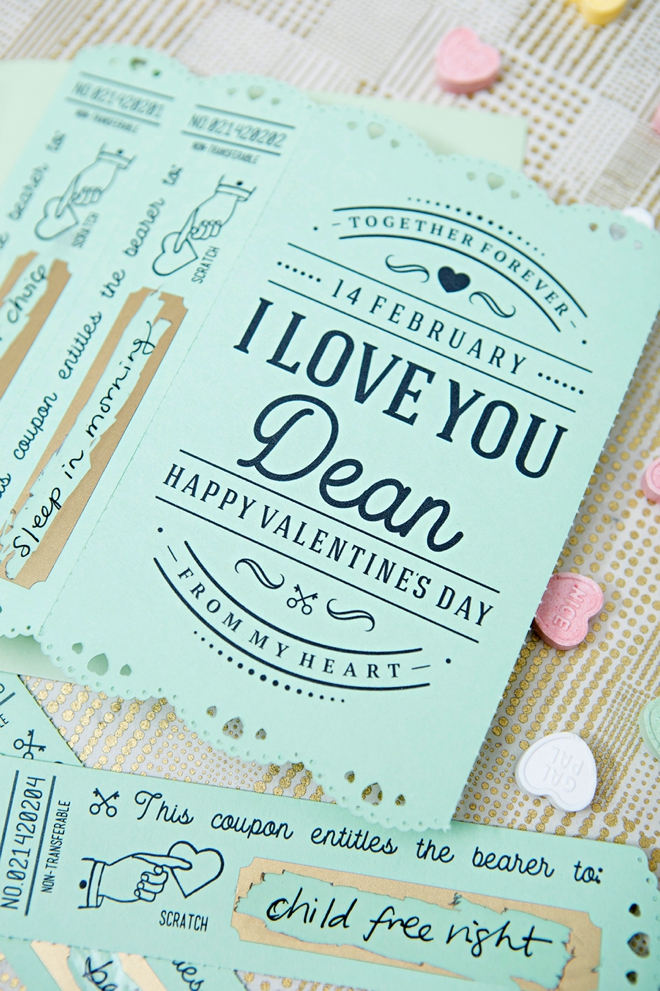
With Valentine’s Day right around the corner, it has us all lovey-dovey, thinking about those we care about the most. Show them just how much you care with a card that is handmade, not store-bought! We’ve created the ultimate, Valentine Coupon Card that has scratchers! You personalize our unique design, right in Design Space and within minutes, your Cricut Maker will do all the hard work for you. This card allows you to gift four “coupons” that you fill in, based on the recipient. Love comes in all shapes and sizes… and with Cricut, anyone can become a Valentine’s Day match-MAKER!
Perforation Obsessed
This is the first time I’m sharing a project using Cricut’s new Perforation Blade for the Maker and I’m obsessed! There are so many fun things you can make with this unique blade. It pops in and out of the quick release housing for easy swapping and creates a stunningly professional edge that can be ripped with ease!
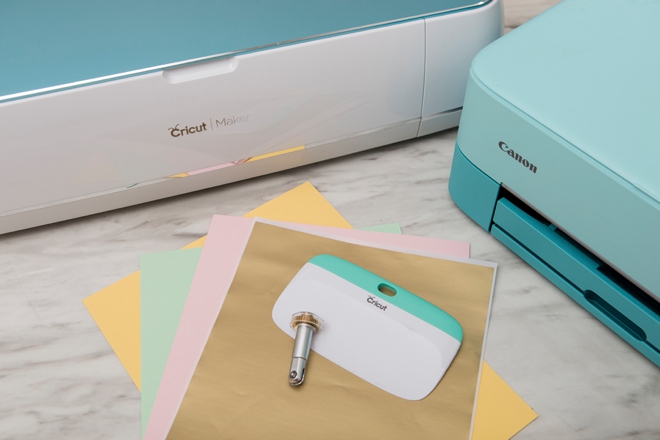
SUPPLIES:
- Cricut Maker
- Cricut Basic Perforation Blade
- Gold Scratch-Off Sticker Sheet
- Light Colored Cardstock
- A4 Sized Envelopes
- Home Printer
Edit In Design Space
The first step is to login to Design Space so you can edit our FREE, exclusive Cricut Valentine file! Click on this link to visit my exact canvas in Design Space. Some of the images I used for this card might cost a few dollars or come free with Cricut Access. I used the fonts Mensch and Garment District for the custom wording.
In the next few images I’m going to take you through the 8 steps it requires to properly edit this card within Design Space.
STEP 1: Locate the attached layers that include the perforation lines and the card design, then click to detach them. This releases the layers so you can start the editing process.
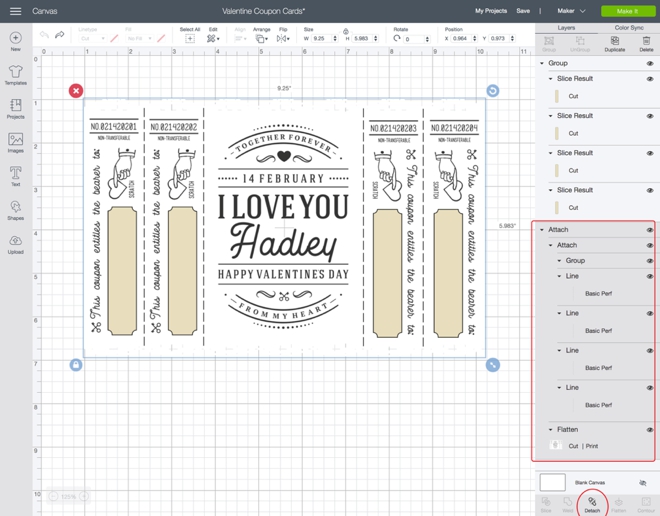
STEP 2: Find the card design layer that has been flattened and click to unflatten it. This now means you can edit all the text layers!
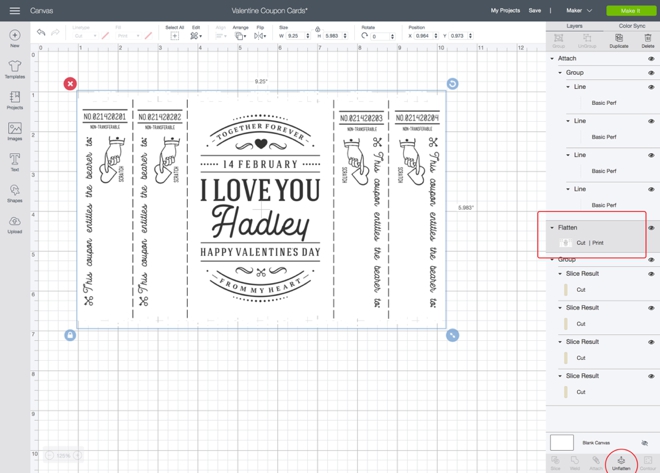
STEP 3: Select the Hadley name layer and delete it. Then add your loved ones name in place of it. I used Garment District for this wording.
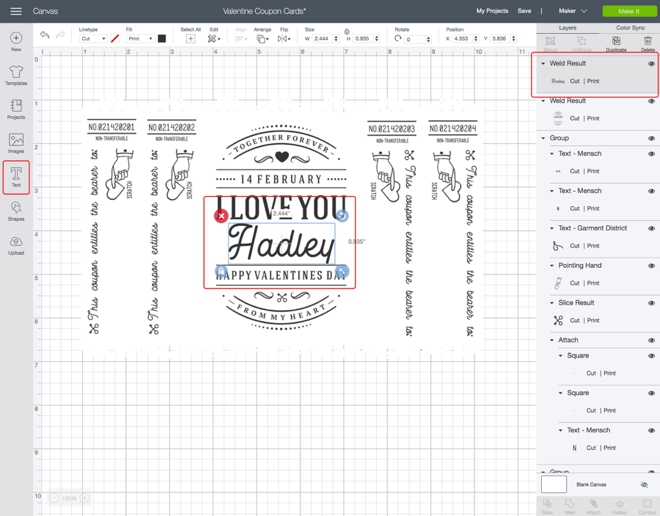
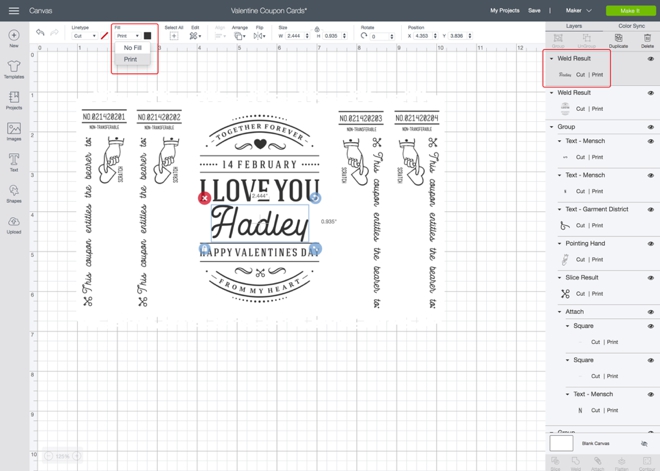
STEP 4: With the name selected, under “Fill” open the drop-down and select Print to make the name print not cut. If there are any other text elements you would like to edit, now is the time.
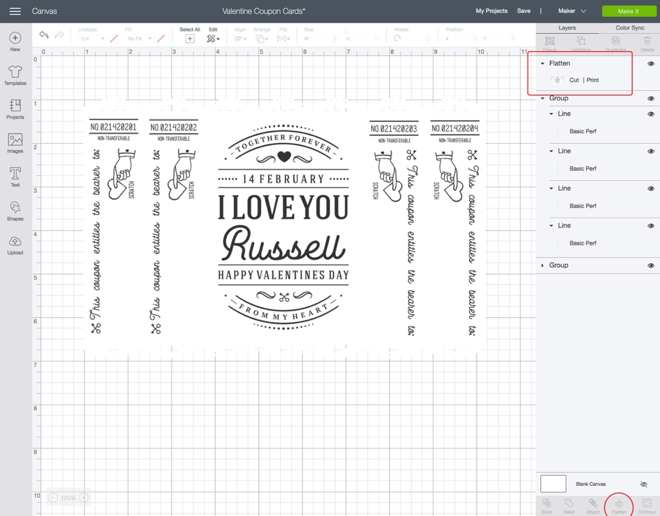
STEP 5: Click to select all the printable layers including the main card design, the name, and the four coupon groups; then click Flatten to make it all one printable design.
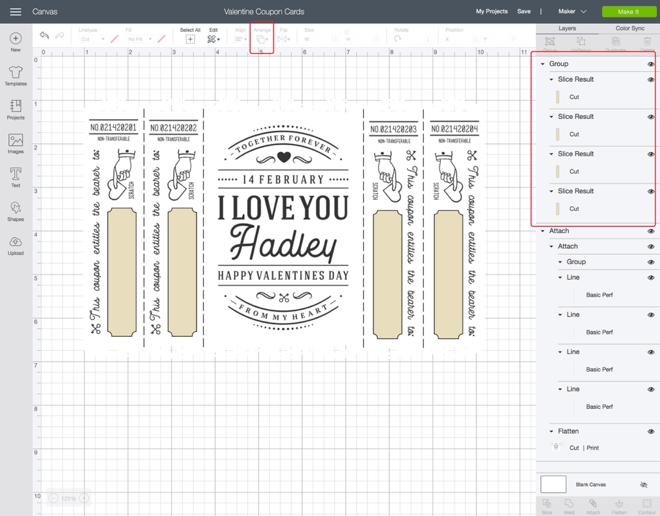
STEP 6: Click to select the perforation line group and under “Arrange” click send to front. Then click to select the perforation line group and the flattened printable design and click Attach.

STEP 7: Click to select the rectangle scratcher group and and under “Arrange” click send to front, then save the file. Now you’re ready to make your card!
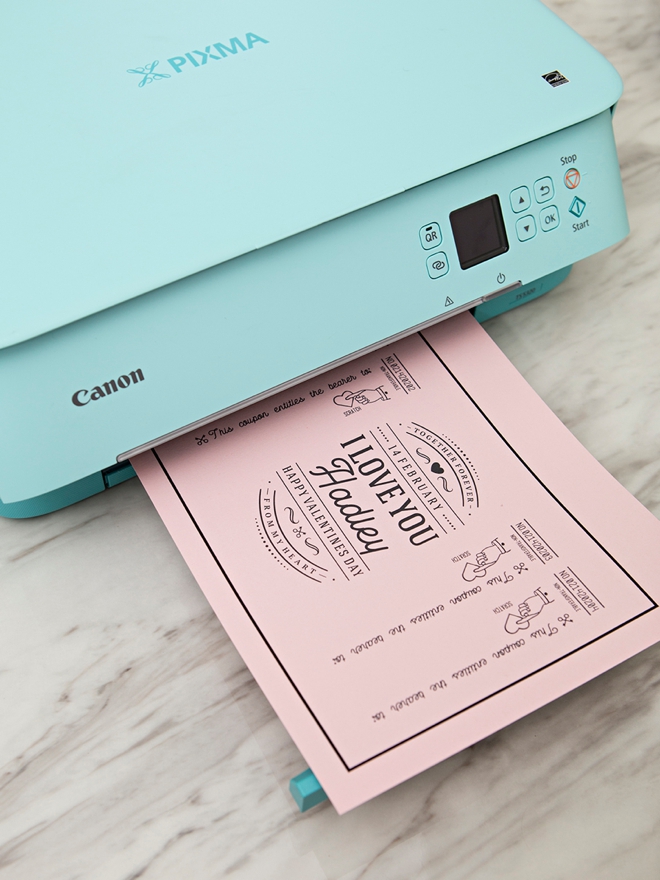
STEP 8: The first step is printing the card on light colored cardstock. Design Space prompts you to send the design to your printer, when it does this make sure to “toggle – off” the button that says Add Bleed. It should not be green.
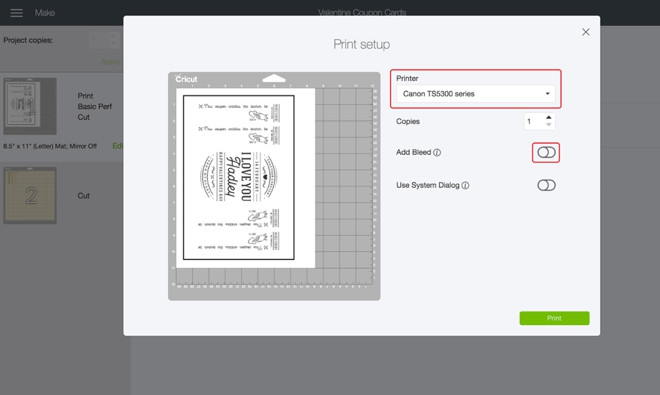
I’m using my Canon PIXMA TS5320 to create this lovely print. If you’ve never tried Print then Cut before, you’ll see that Cricut adds a black outline to your design – this is on purpose and it’s what tells the Cricut where to cut! I used 60lb cardstock for this project.
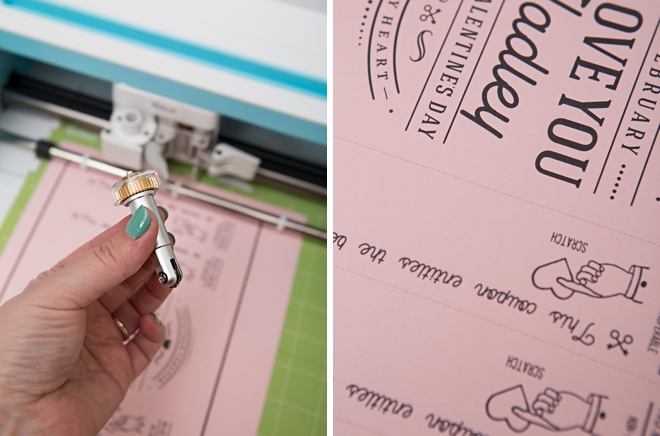
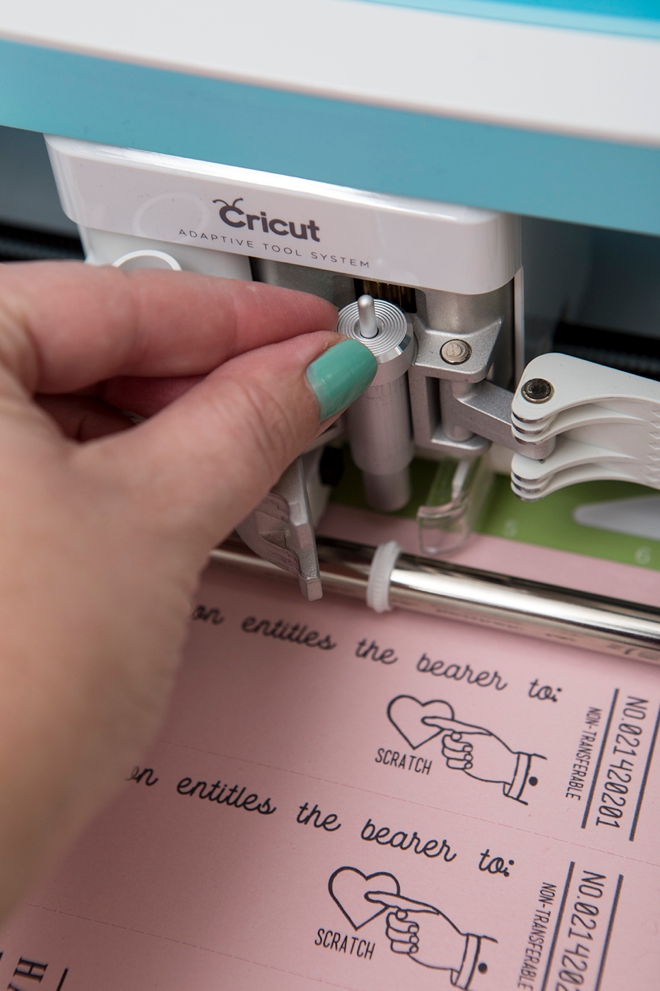
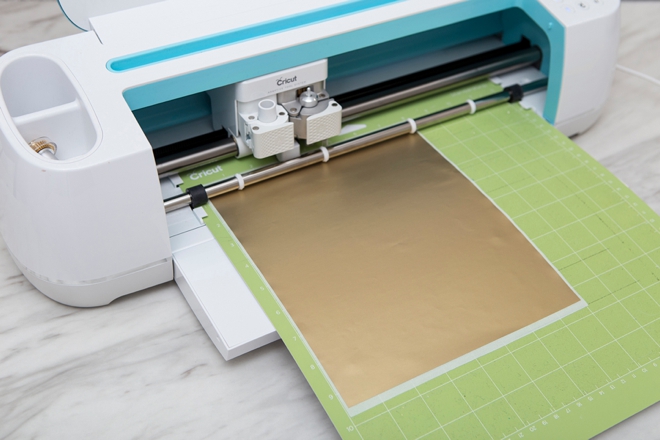
Perforate
For the first cutting step you’ll need to insert the Perforation Blade, which is the BEST thing ever!!!! I’m obsessed with perforating things and have been dying to make these cards for months now. Add the print to your cutting mat and load into the Cricut. The Maker will then look for that black outline with a little light, it’s so cool… and then it will cut the 4 perforated lines. The Maker is the only Cricut that can do Print then Cut on light colored paper, the Explore can only use white paper.
Cut
Next, Design Space will stop the Cricut and prompt you to insert your normal cutting blade to complete the rest of the project.
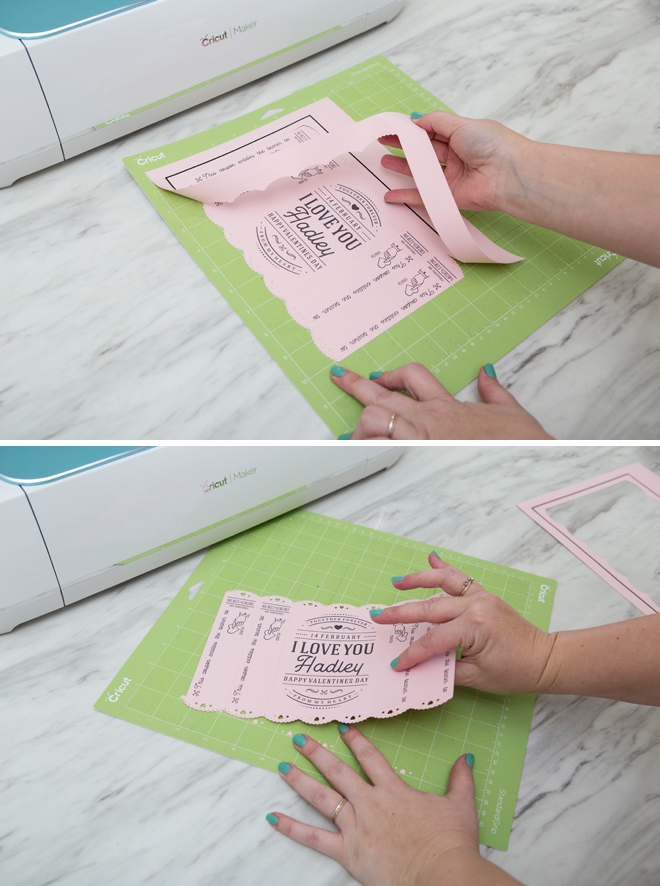
Remove From The Mat
Carefully remove your gorgeous new card from the cutting mat, making sure to lift it gently so you don’t accidentally rip the perforations.
Cut The Scratchers
Next cut the scratcher rectangles. I found these awesome scratcher sticker sheets on Amazon and with a little trial and error found the the absolute perfect kiss cut for them is to use the Washi Sheet setting.
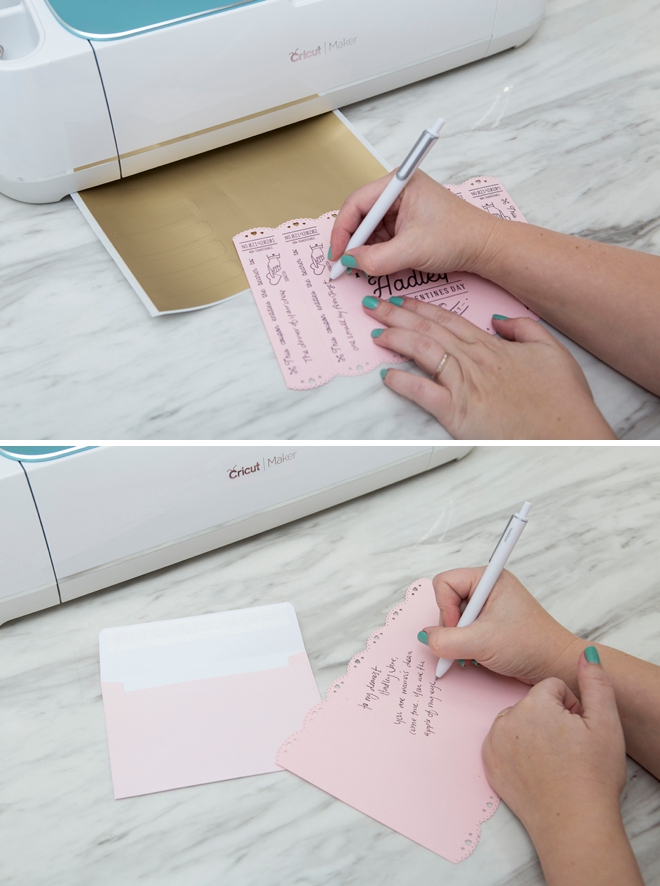
Personalize
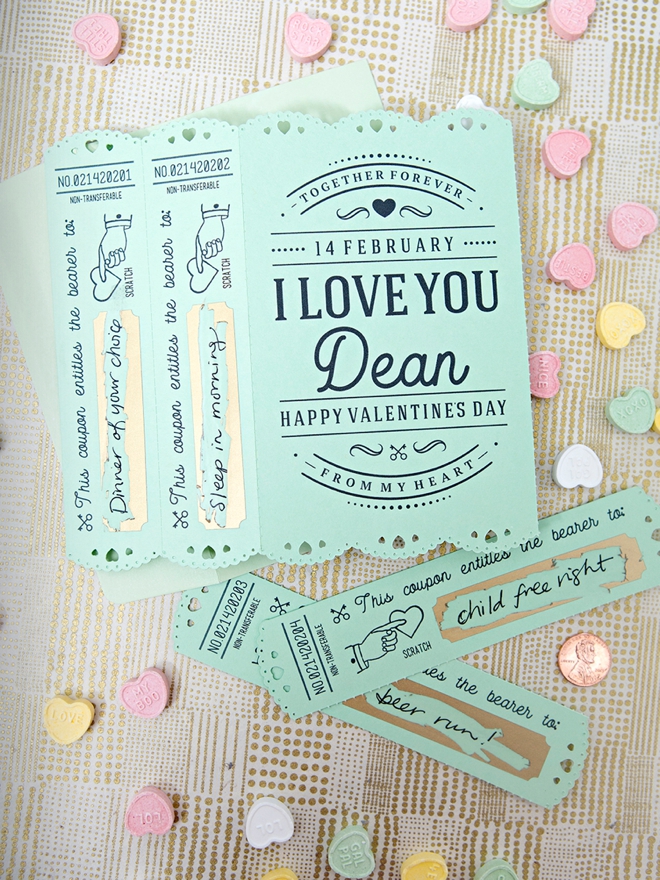
In the four blank “coupon” areas, fill in what you are giving your Valentine! And also write a sweet message on the back of the card if you’d like.
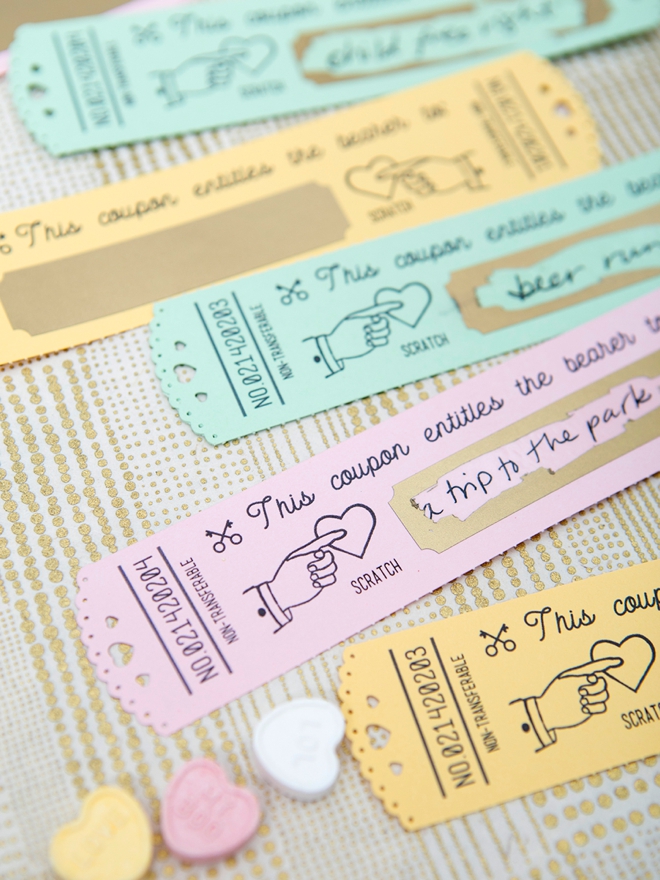
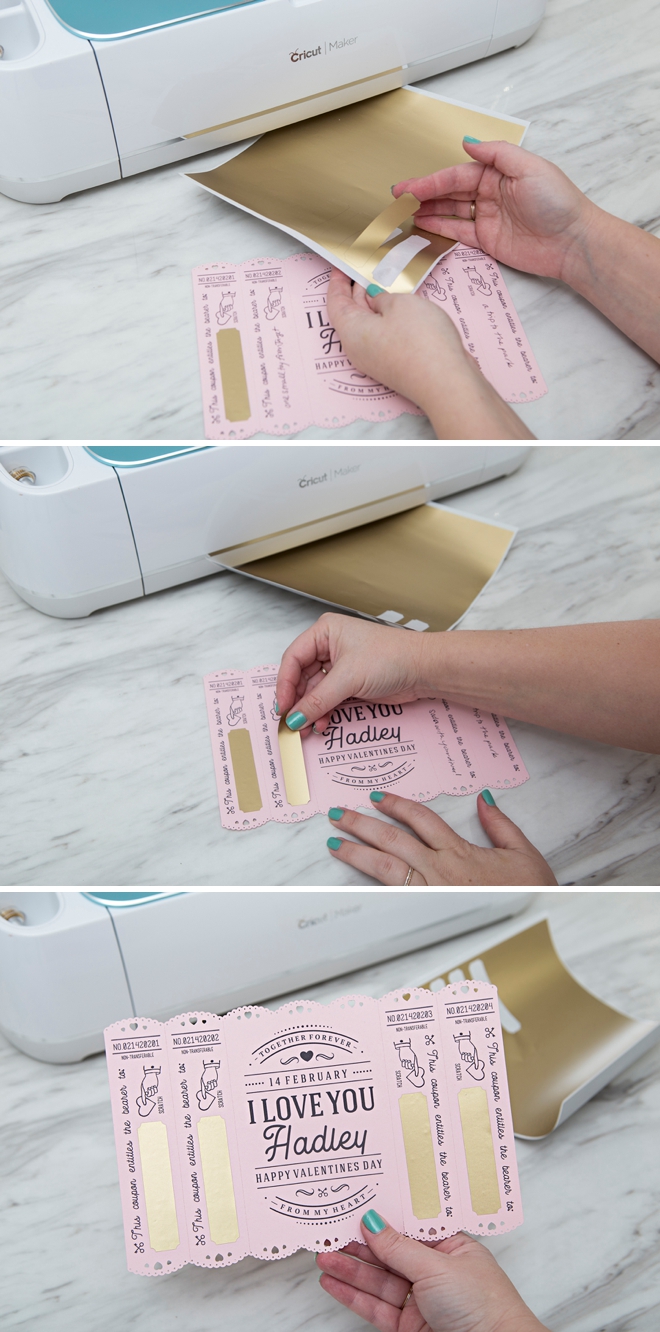
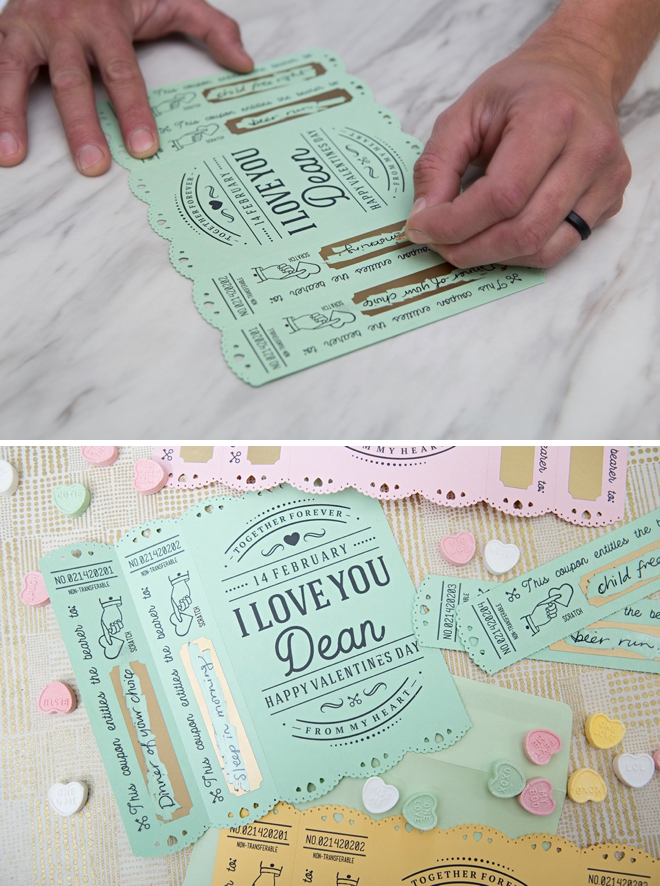
Add Scratcher Stickers
Peel off each scratcher sticker from it’s backer sheet and place over your hand-written gifts to conceal the prize until the recipient scratches it off!
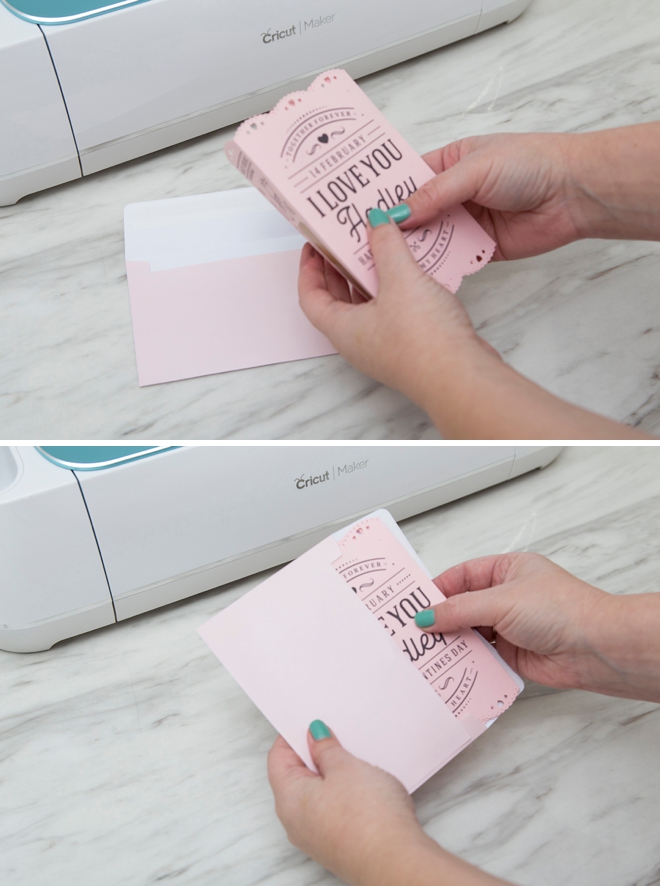
A4 Sized Envelopes
These cards have been designed to fold to fit into A4 sized envelopes (which are 4 1/4″ x 6 1/4″), which you can buy or cut on your Cricut. Simply fold both coupon flaps behind the card and insert into an envelope! Done and gorgeous!!
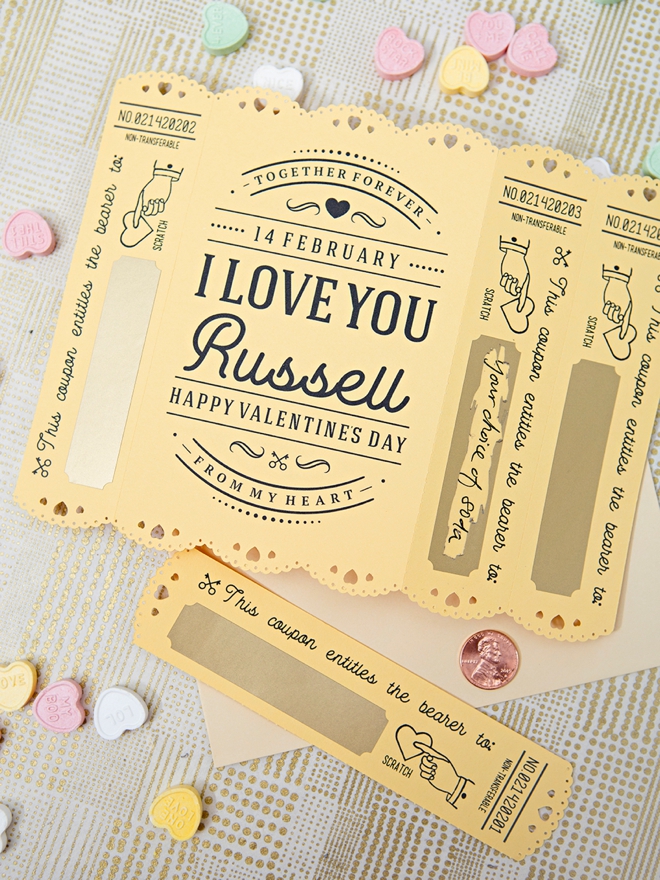
Scratch Away
So the question is… does the recipient get to scratch them all off before they redeem the coupons? Or do they have to Russian roulette them, and pick one to turn in and then scratch it to see what their prize is?? Hahaha…
Adults + Kids
These cards are great for both the adults and the kids in your life! From a beer run to a trip to the park, personalize these sweet cards perfectly to fit the recipient and watch with joy as they anxiously scratch off each coupon.

DIY TUTORIAL SPONSORED BY:

Cricut is a world-class leader in personal electronic cutting machines that has enabled people to achieve their creative best for over 50 years. Today, millions of people use Cricut products to create unique projects, and they focus on enhancing lives with this power of creativity. Let Cricut help you take your wedding personalization and project creativity to the next level!
If you create one of our projects, please share a picture with us on Instagram or Twitter using the hashtag #somethingturquoisediy, we regularly reshare our favorites! Your profile will need to be public for us to see it otherwise, you can always DM us!
DIY Tutorial Credits
Photography + DIY Tutorial + Card Design: Jen of Something Turquoise // Cricut Maker, Perforation Blade, and Supplies: courtesy of Cricut // Gold Scratch-off Sticker Sheet: Amazon // Pastel A4 Sized Envelopes: Amazon
Shop The Supplies:
Find the supplies you’ll need for this project from our affiliate links below:


Comments