

DIY Yeti + Big Foot Plushies With Fiskars
-Sponsored Post-
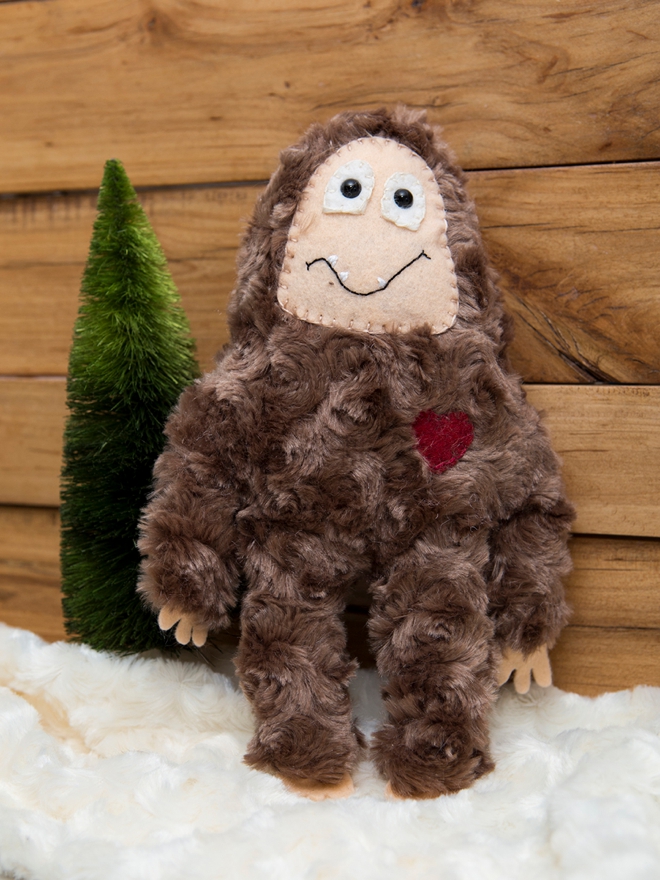
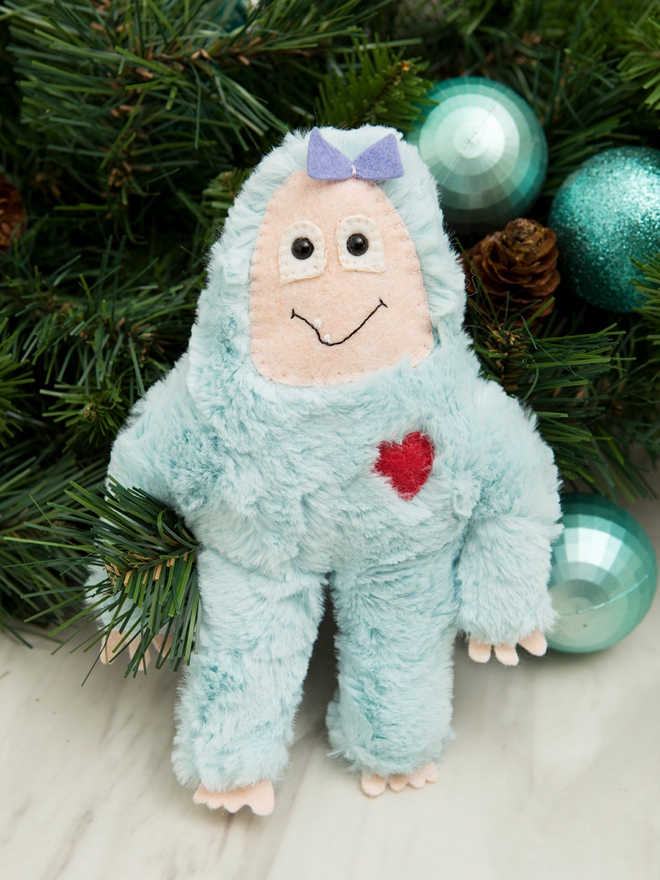
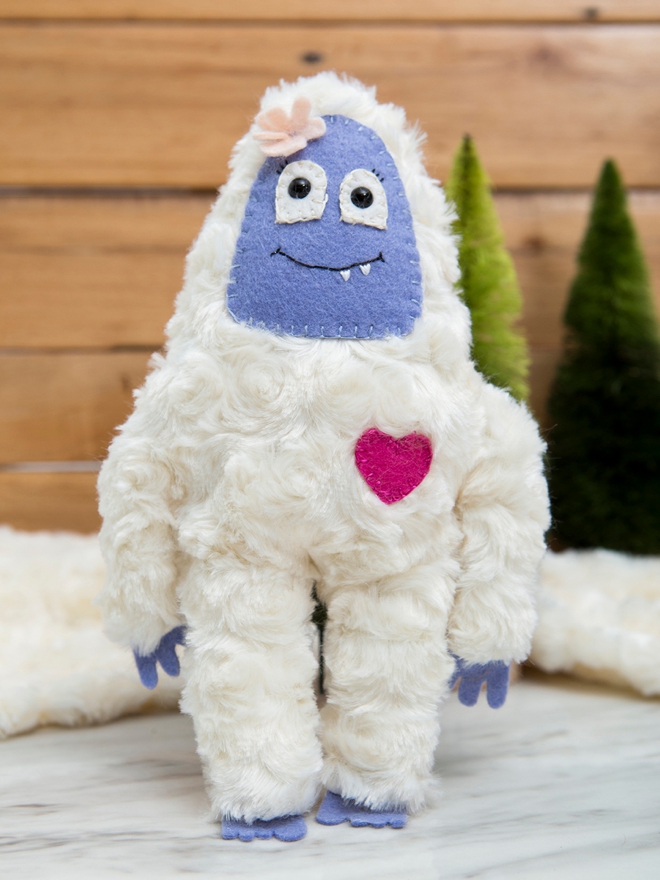
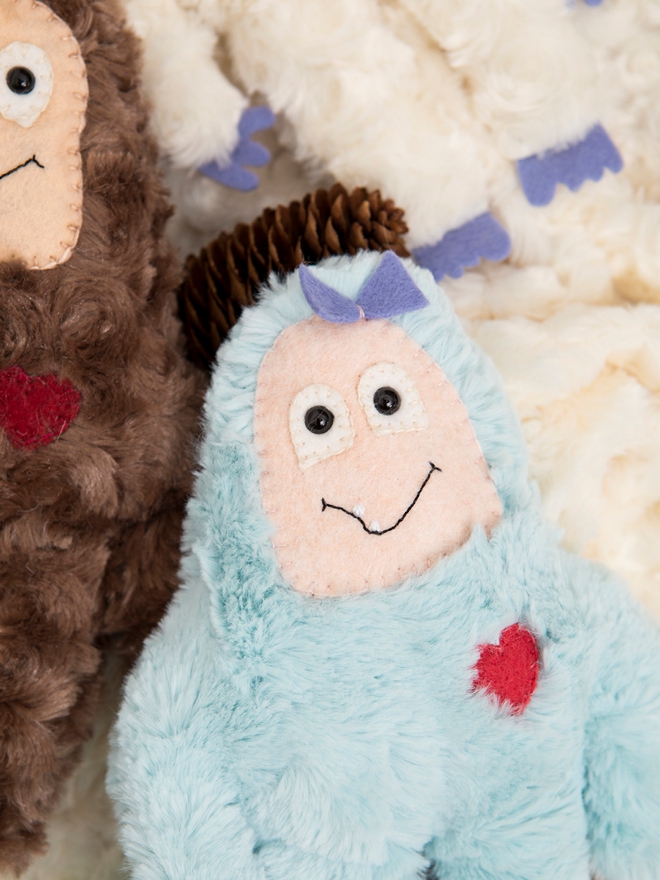
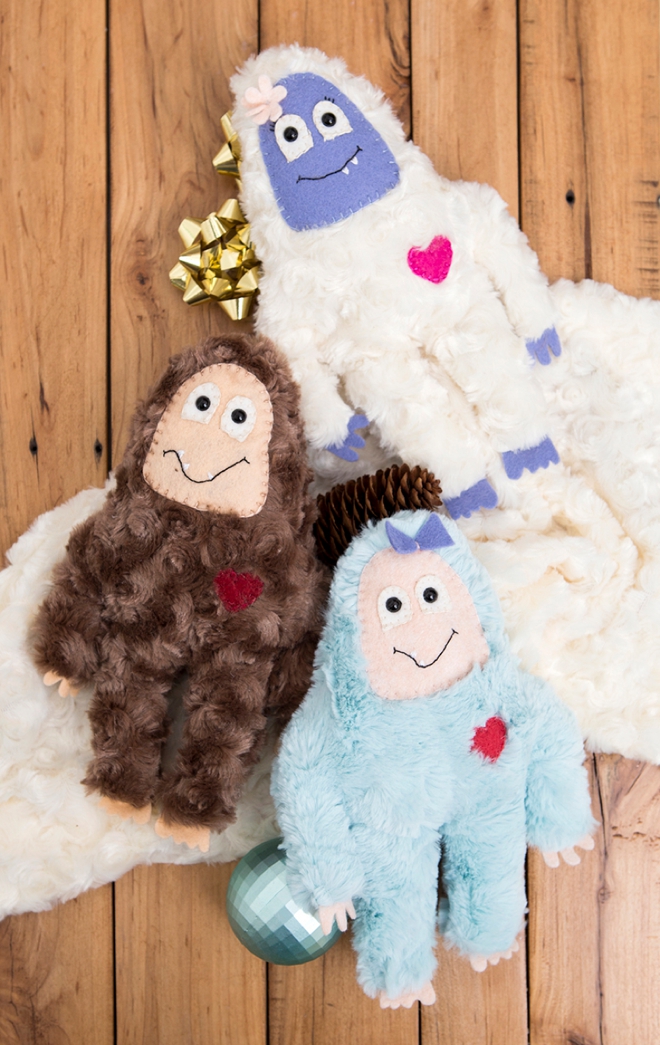
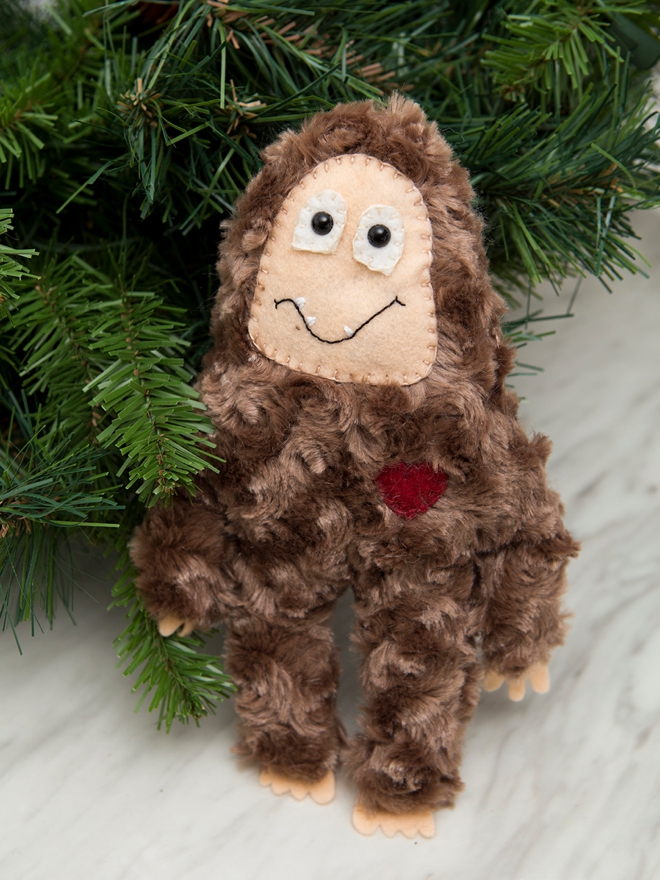
For our last DIY project of 2019, we’ve partnered with Fiskars to bring you some adorable little fuzzy creatures! Print my exclusive Big Foot and Yeti Plushy pattern for free at the end of the post and follow along to learn how easy they are to make. Each little guy should take about two hours, give or take depending on your skill level so there’s plenty of time to still make them before Christmas. I’ll be hanging each of these cuties inside my kids’ stockings in just a few days and I can’t wait to see their reactions! I think the white and purple one is my favorite…

Fiskars For The Win
Fiskars are my go-to scissors for all my sewing needs, from plushies to blankets and from home decor to clothing. From cutting the pattern to snipping the last thread, there is a Fiskars tool for every need.
SUPPLIES:
- Fiskars Classic Orange Handled Scissors
- Fiskars Ultrasharp Thread Snips
- Fiskars PowerCut Snips
- Sewing Machine
- Printer and Paper
- Faux Fur Material
- Wool Felt
- Embroidery Floss and Needles
- Stuffed Animal Safety Eyes
- Fiberfill
- Marker

Download + Print
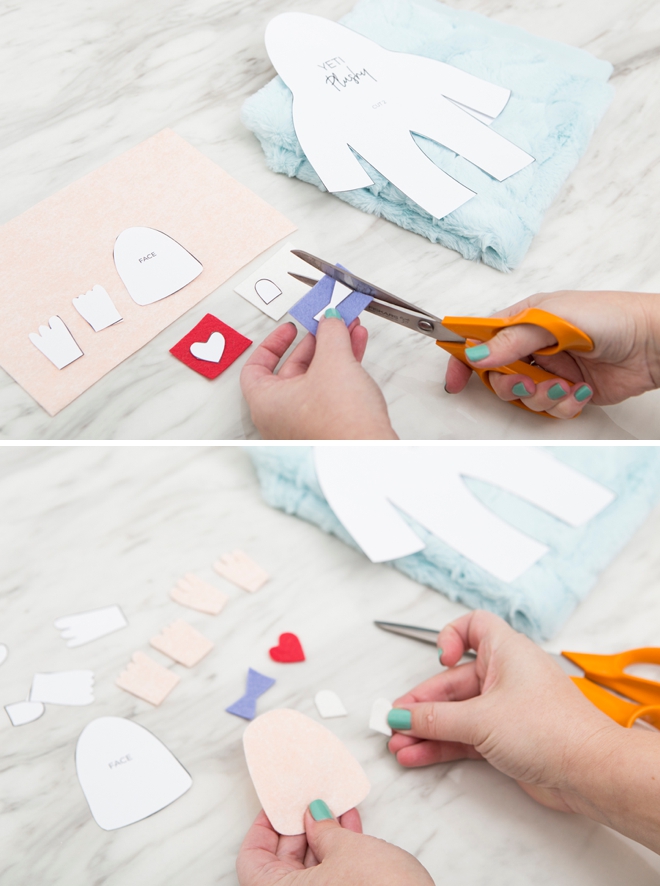
Visit the end of the post and click on the graphic to instantly download our free printable plushie pattern. Print both pages on white cardstock and cut out each item using your Classic Orange Handled Scissors from Fiskars.
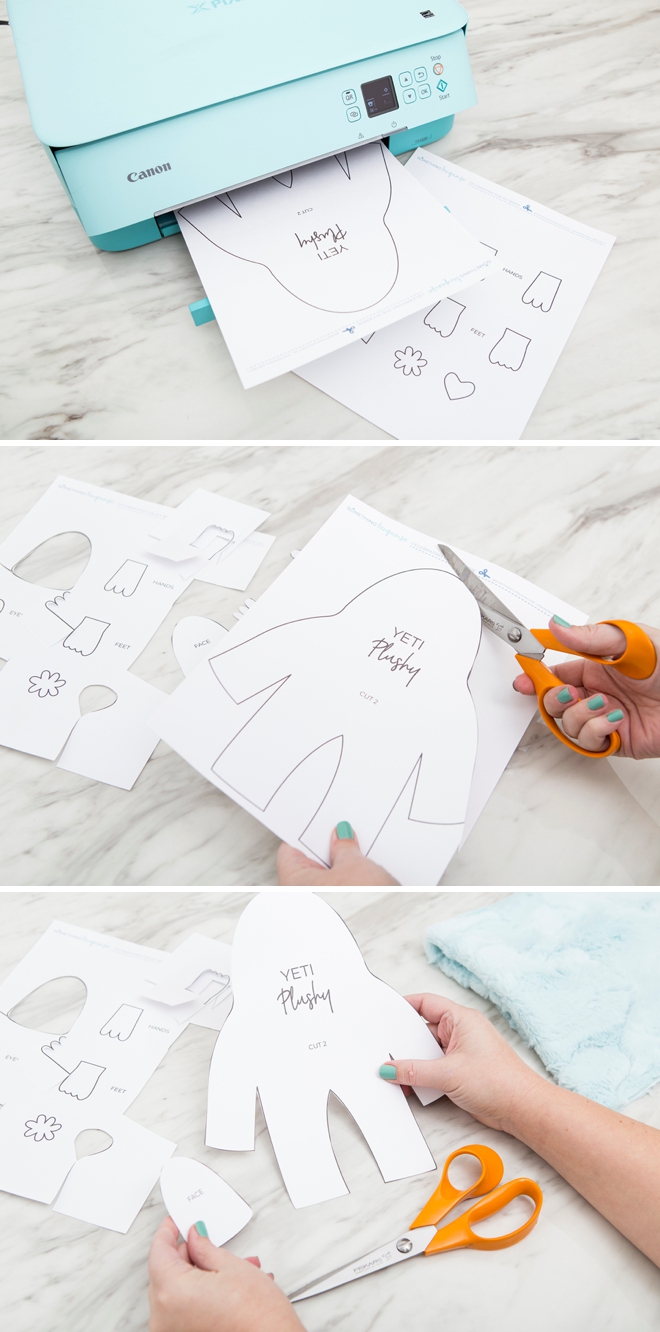
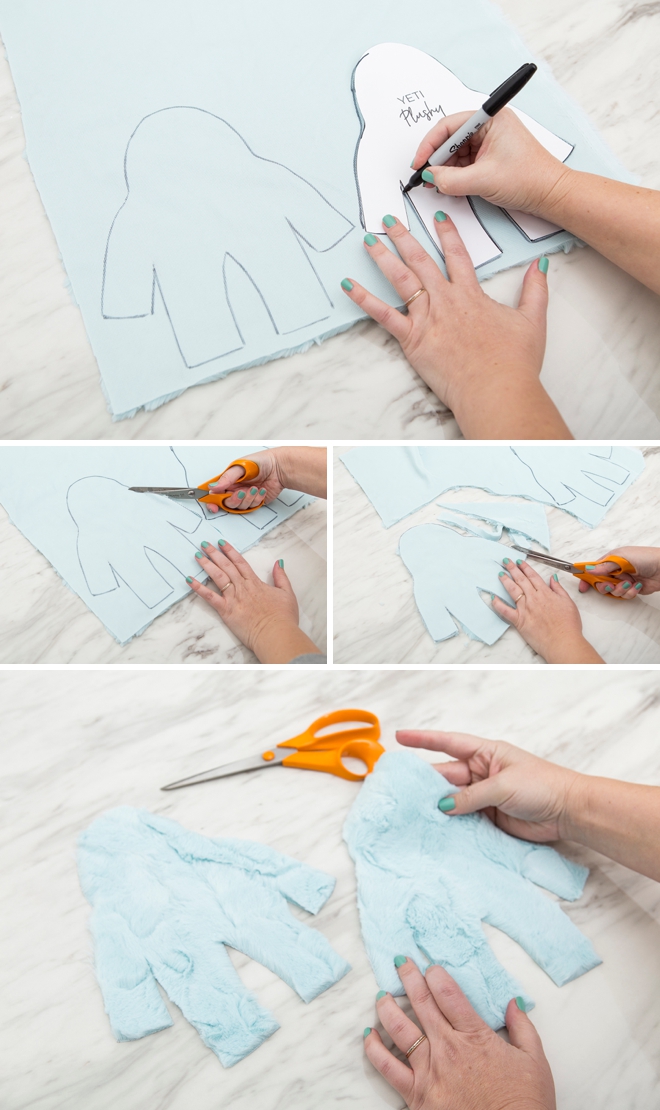
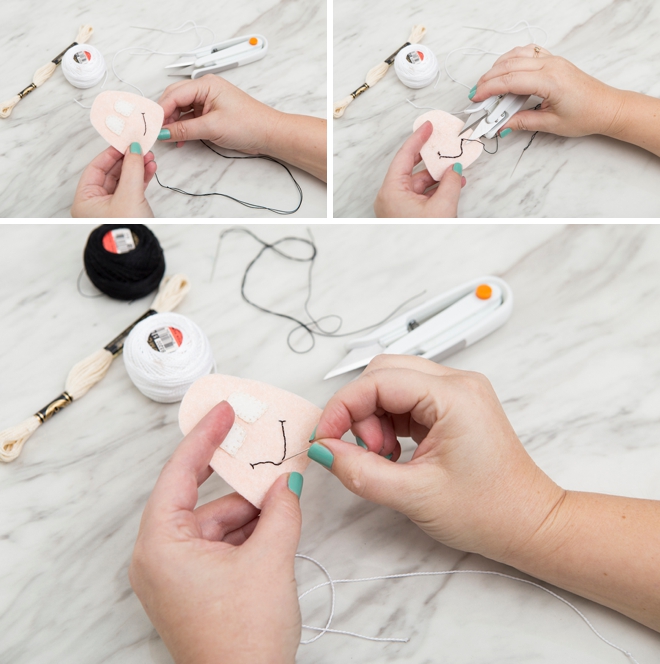
Face, Eyes, Hands, Feet, Heart
Cut out the face, eyes, hands, feet, heart and optional bow or flower using your choice of wool felt. Wool felt (we always use Benzie from Etsy) will wash and wear the best, opposed to kids crafting felt.
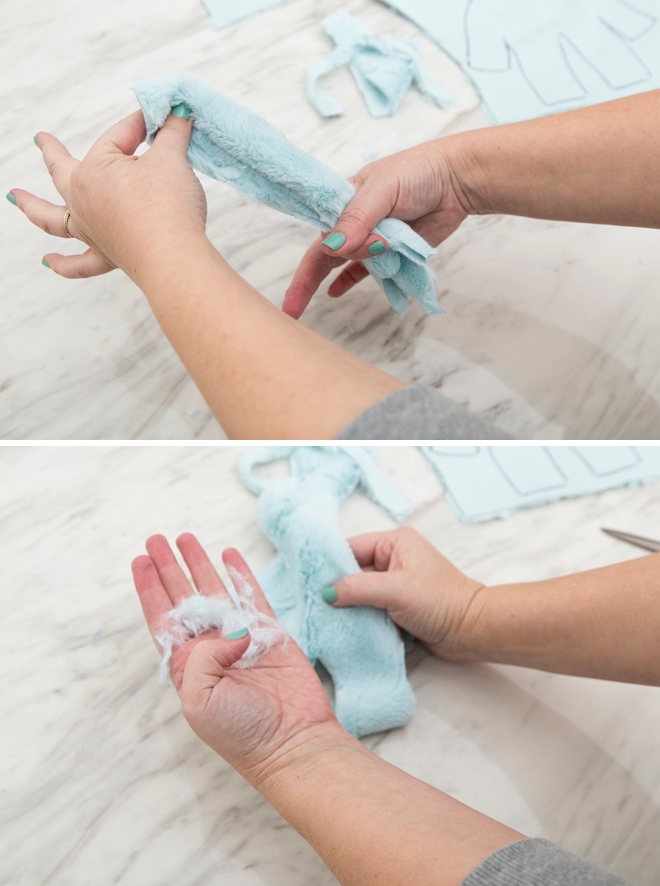
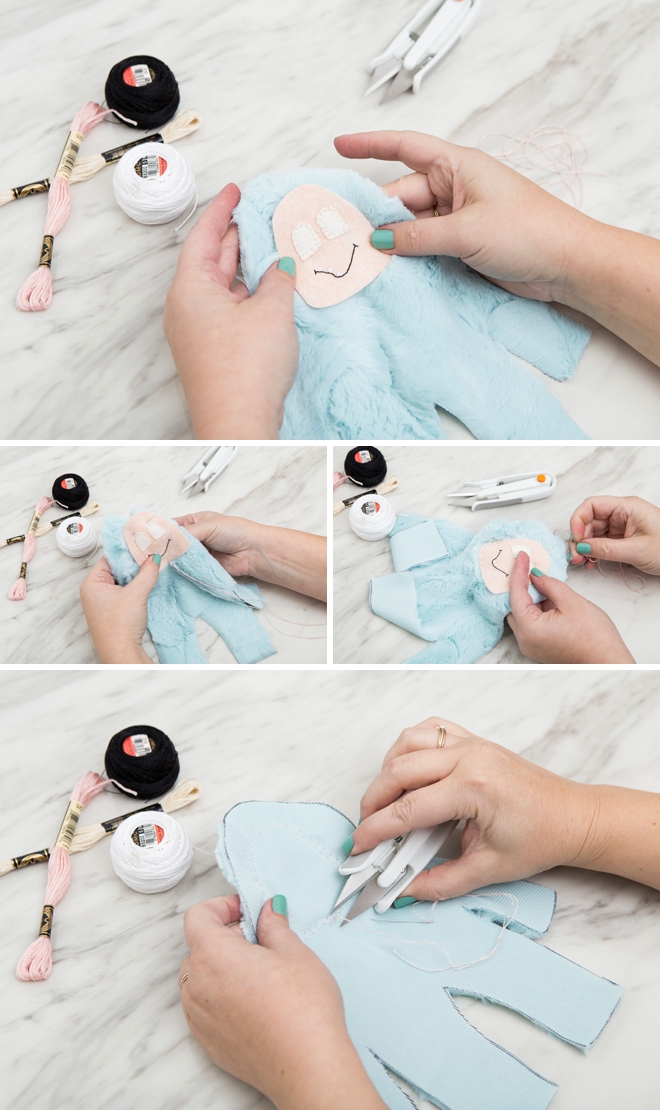
Faux Fur
Next, cut out the body of the yeti/big foot using faux fur, which is a very forgiving fabric when it comes to sewing – perfect for the beginner! I found it easiest to trace the plushy body with a marker instead of pin the paper to the fabric.
Extra Fluff
After you cut both the front and the back pieces of your plushy out the faux fur, run your hands along each piece to get as much of the extra fluff off as you can before sewing.
Starting With The Face…
First, sew the eyes onto the face. For all the hand-sewing pieces we’re using a blanket stitch. I’m obsessed with my Fiskars Ultrasharp Thread Snips, I actually have two pair. One with my scissors and one in my embroidery bag! They are the BEST for trimming all my loose ends.

Next, sew a little mouth, teeth… and maybe eyelashes!
After that, still using the blanket stitch, sew the face onto the plushy.
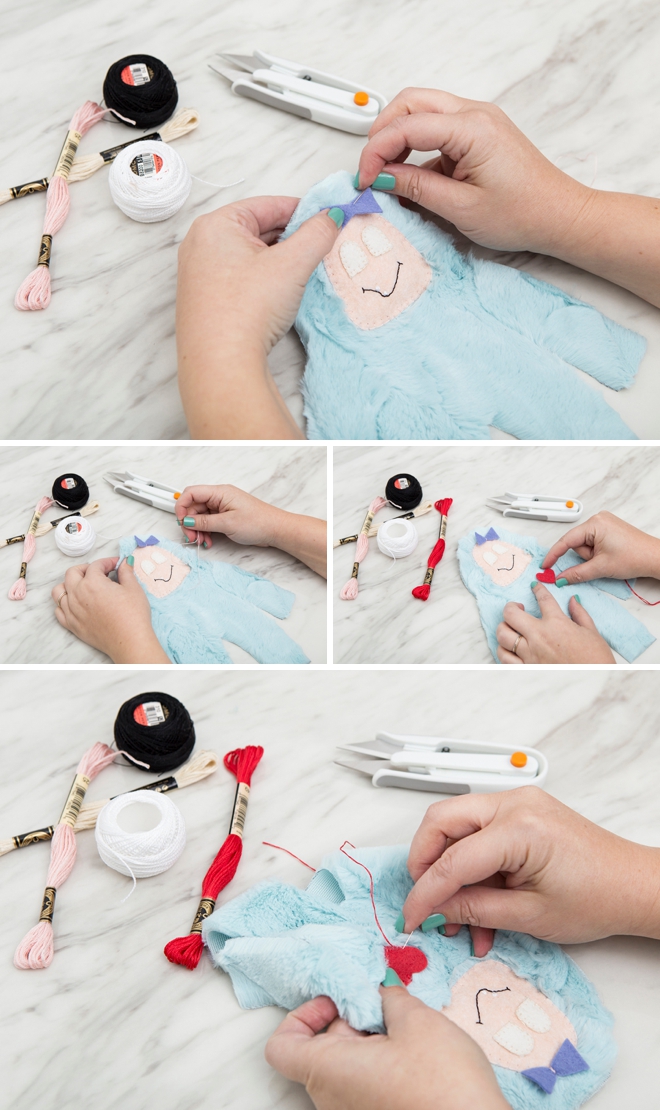
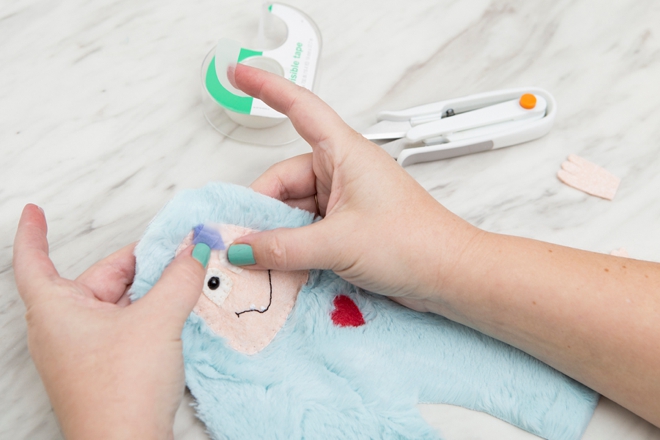
Next up, add the heart and maybe a bow or flower…
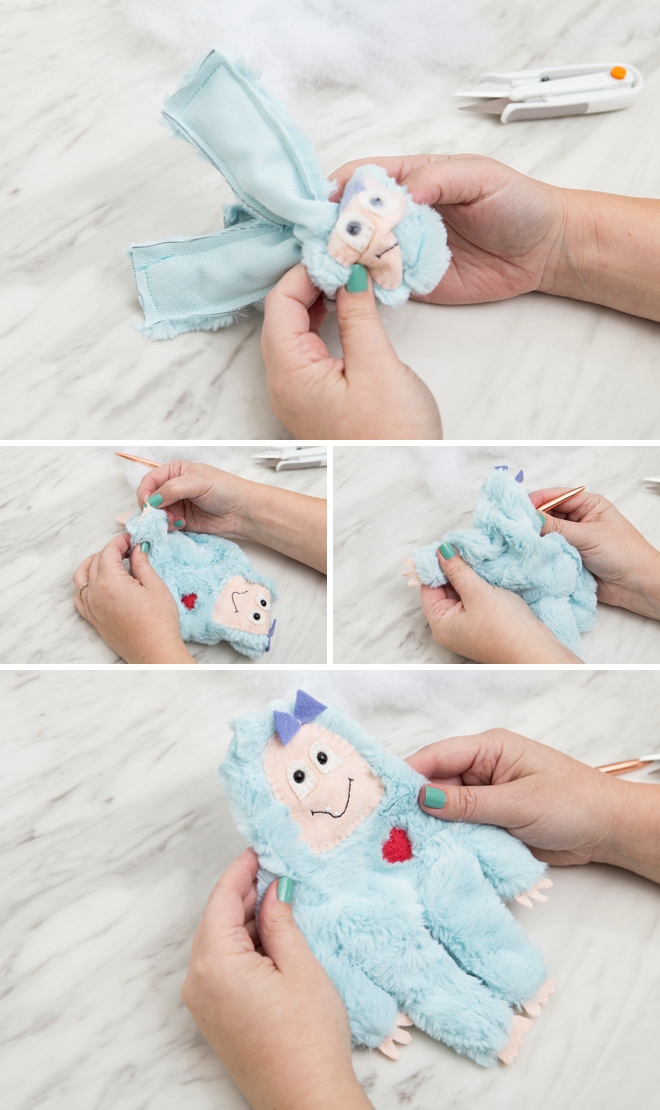
Eyes
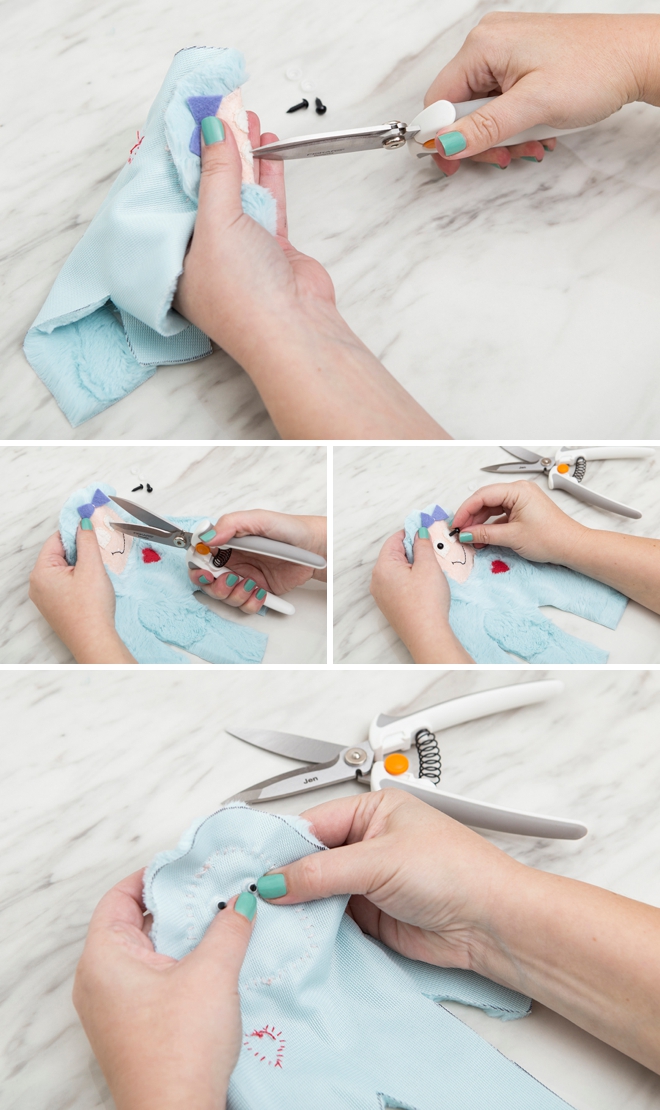
Now to add the animal safety eyes. I used my Fiskars PowerCut Snips to cut the holes through the two layers of felt and the faux fur. The tip of these snips is so sharp it went right through the three layers. I stuck the tip in the hole to make sure it went through so I could insert the eye piece and add the safety clasp on the back. This is when your plushy really comes to life!
If you’ve added a bow or a flower to your plushy, you might need to tape it down out of the way when you go to sew it.
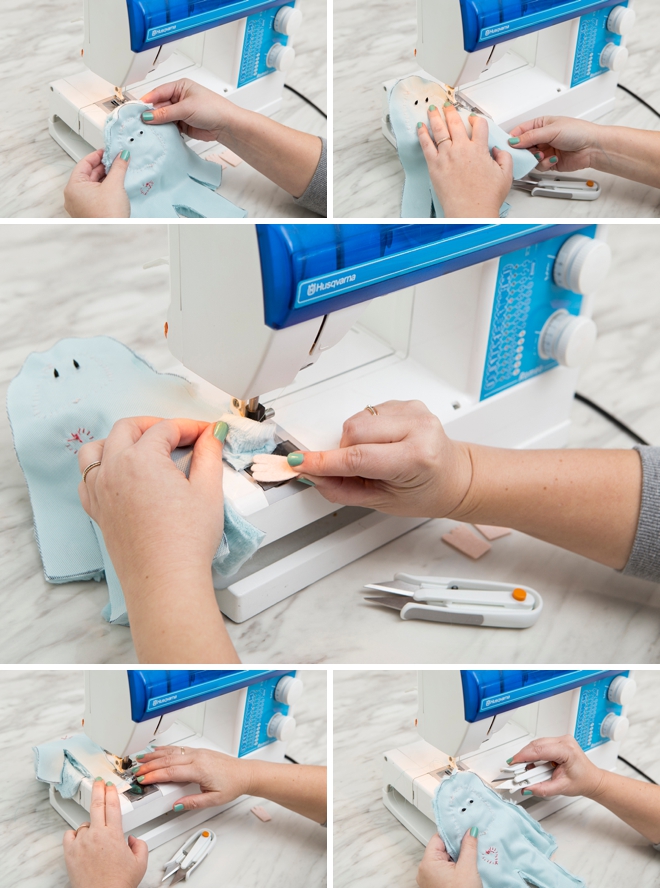
Sew
Place the right sides of the faux fur plushy together to sew. Using a 1/4″ seam allowance, sew around the entire outer edge of your plushy, making sure to leave about 3″ to fill it with stuffing. I did this on the upper side of the head.
Hands + Feet: When you come to the ends of the arms and legs, insert the hand and feet pieces with the square ends sticking out.
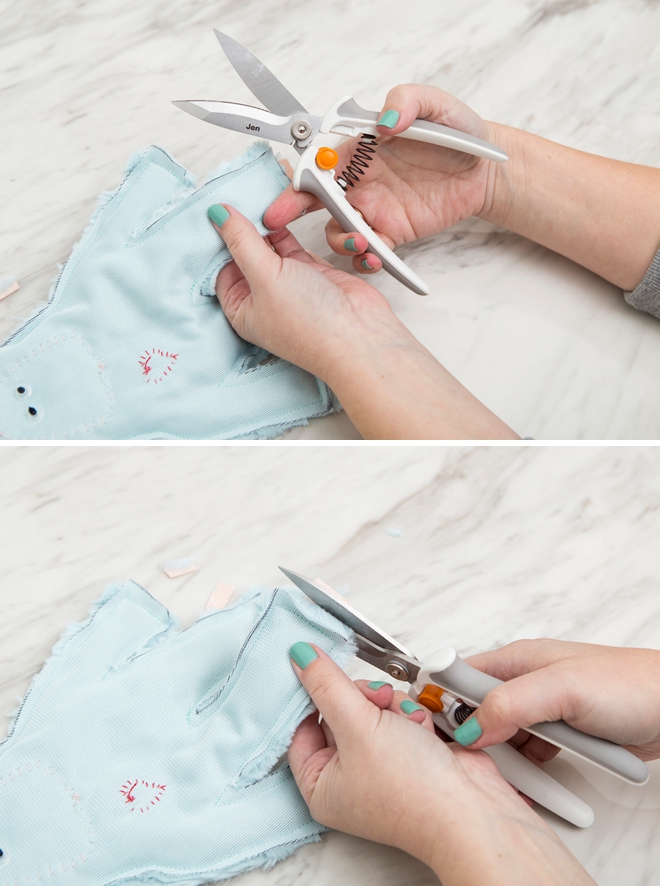
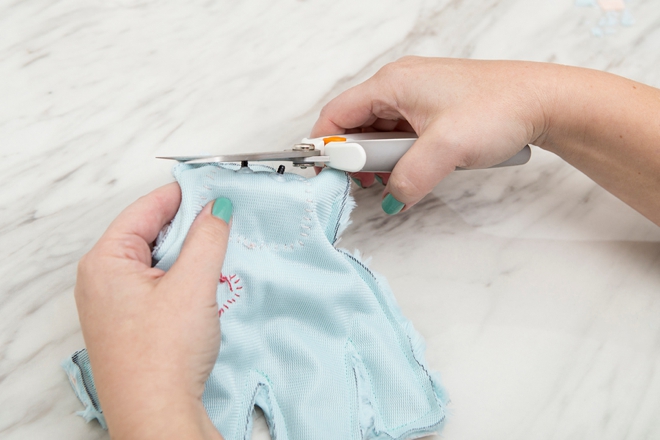
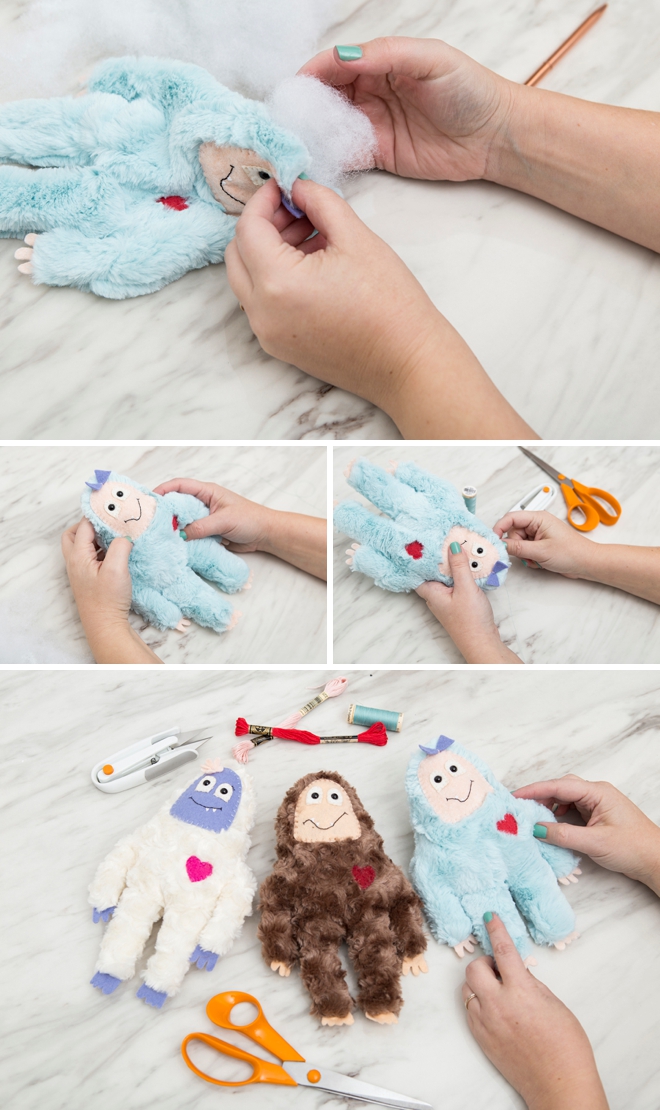
Trim
Trim away any excess felt and faux fur after you’ve sewn around the plushy…
Snip
The animal safety eyes I purchased had sharp ends, which I gave a little snip to…
Turn
Now the fun part! Turn your plushy right side out. Sometimes it helps to use a pen to push the arms and legs out, when you can, pull on the hands and feet to fully turn each limb…. SO cute!
Fill + Sew
The last step is to fill your plushy with FiberFill (aka. stuffing!). Once it’s packed to your liking, sew up the hole in it’s head, LOL, to finish! Pretty easy right!?
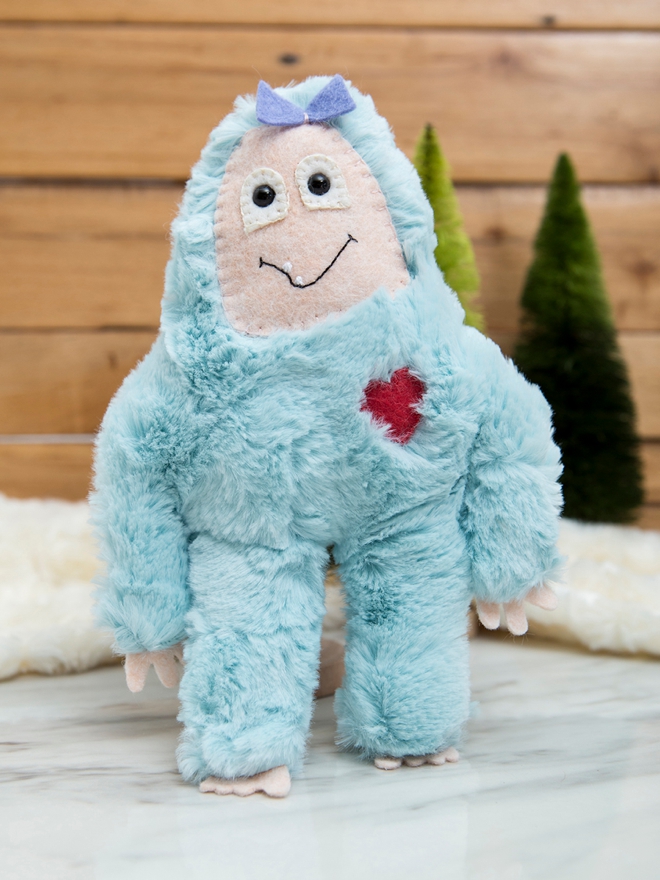
Yeti Love
My girls are obsessed with Yeti’s right now and they seem to be everywhere from toys to clothing so I can’t wait for them to see and play with these on Christmas morning! These funny little faces crack me up every time I look at them, hahaha…

DIY Tutorial Sponsored By:

Known for its iconic Orange-Handled Scissors™, Fiskars is a 369-year-old company that empowers everyday creativity through purposeful design. Fiskars is a leader in the DIY industry with tools spanning the categories of crafting & sewing, gardening & yard care, kids & school, and cooking. In addition to providing scissors, punches, trimmers, rotary cutters and many other tools, Fiskars shares inspiring project ideas to help DIY-ers do what they love using tools that make projects easier.

As with all our DIY tutorials, if you create one of our projects please send us a picture – We Love Seeing Your Creativity! If you use Instagram or Twitter please use the hashtag #SomethingTurquoiseDIY and it will show up on our Get Social page. Happy Crafting!
DIY Tutorial Credits
Photography + DIY Tutorial + Pattern Design: Jen Causey of Something Turquoise // All Scissors: courtesy of Fiskars // Wool Felt: Benzie Design // Animal Safety Eyes: Amazon // Faux Fur Swirl Design and Emboridery Supplies: JoAnn // Nail Polish: OPI – Withstands the Test of Thyme
Shop The Supplies:
Find the supplies you’ll need for this project from our affiliate links below:


Comments