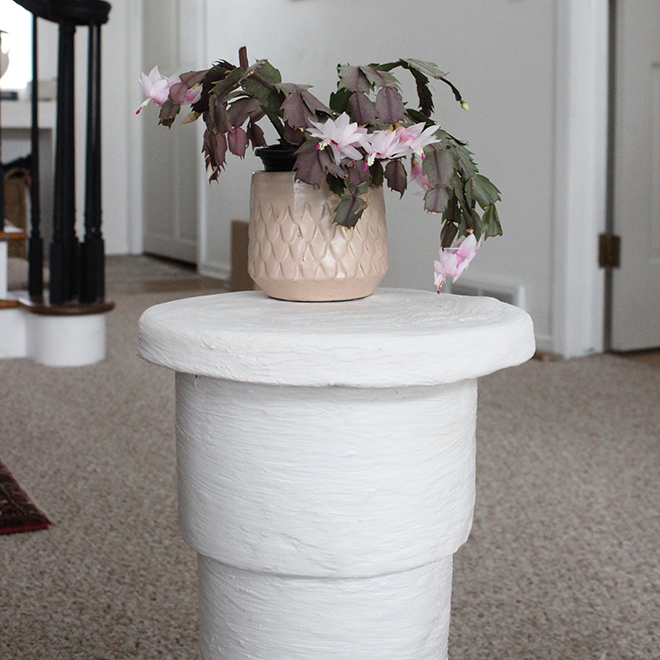

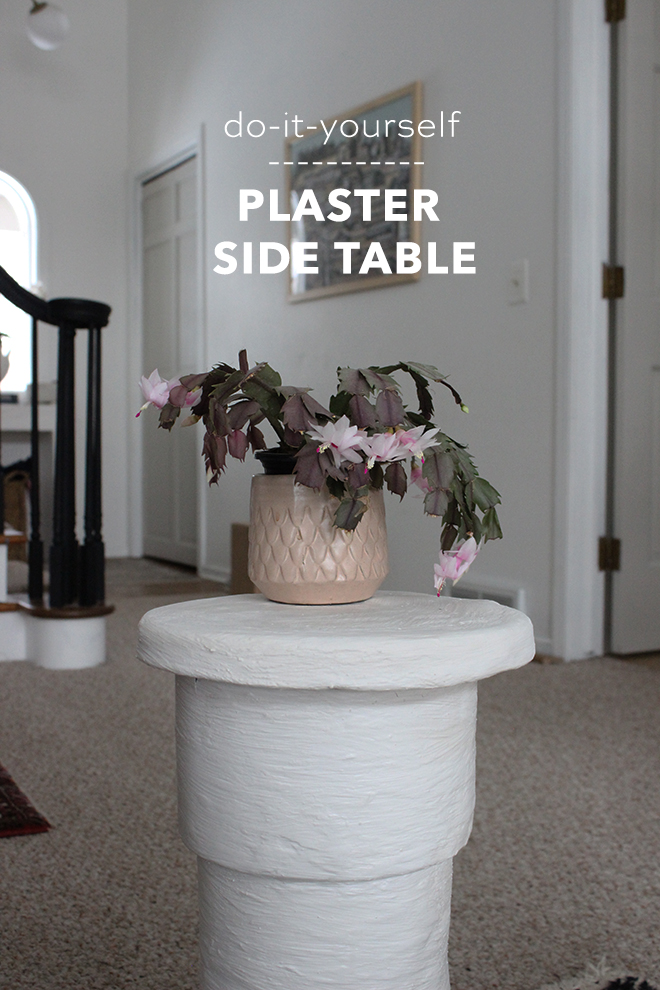
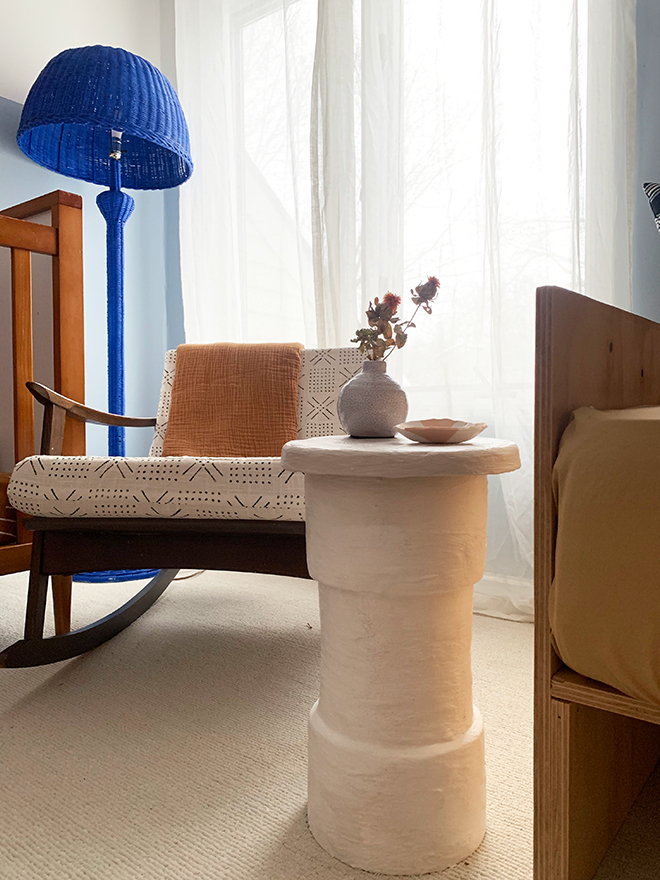
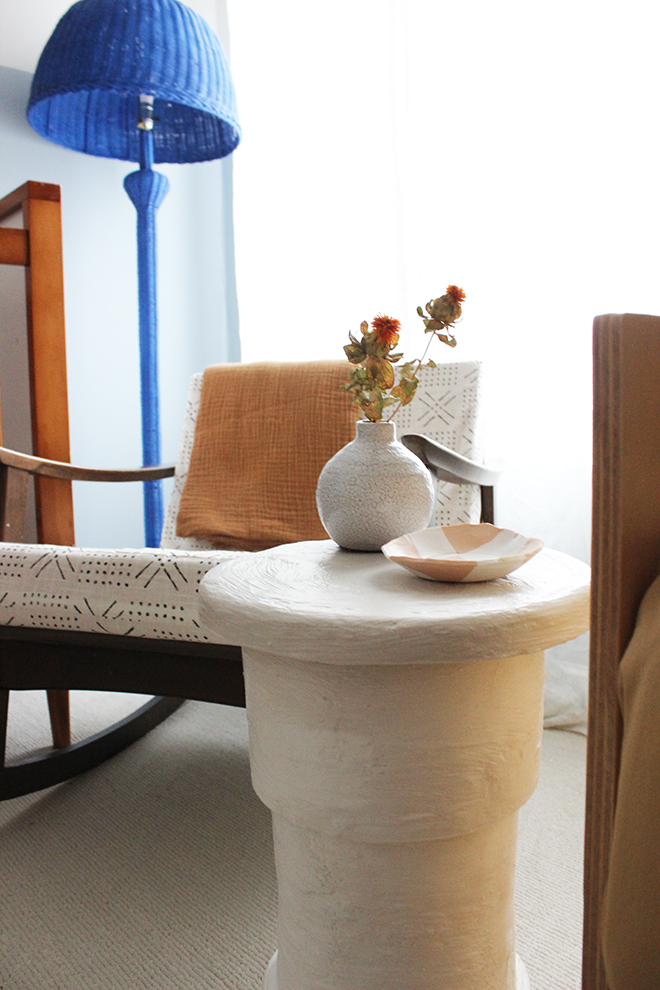
DIY Plaster Side Table
A few years back I tackled my first plaster project, an entry console table, and I have have not stopped since! Plaster is an amazing way to add texture and modernize a dated piece of furniture. This time around, I made a functional plaster side table out of two planters and a stepping stone mold! The table was the perfect piece needed to finish out the nursery for my baby on the way! This will be the spot where I will set bottles, glasses of water, sweet baby books and probably a few less glamorous items.

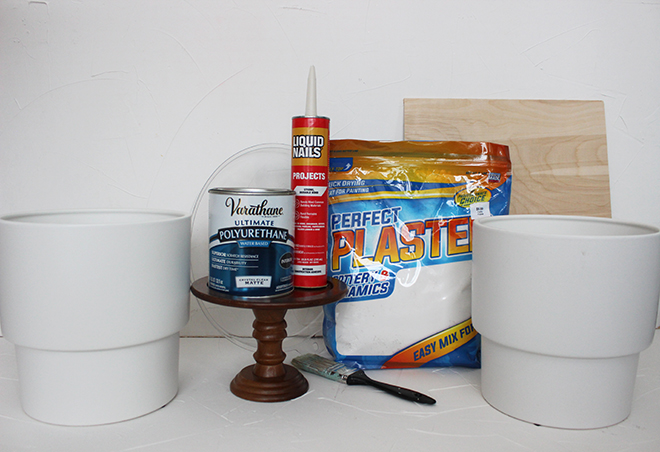
SUPPLIES:
- plaster mix
- planter
- stepping stone mold
- construction adhesive
- paint brushes
- disposable buckets
- stir sticks
- polyurethane
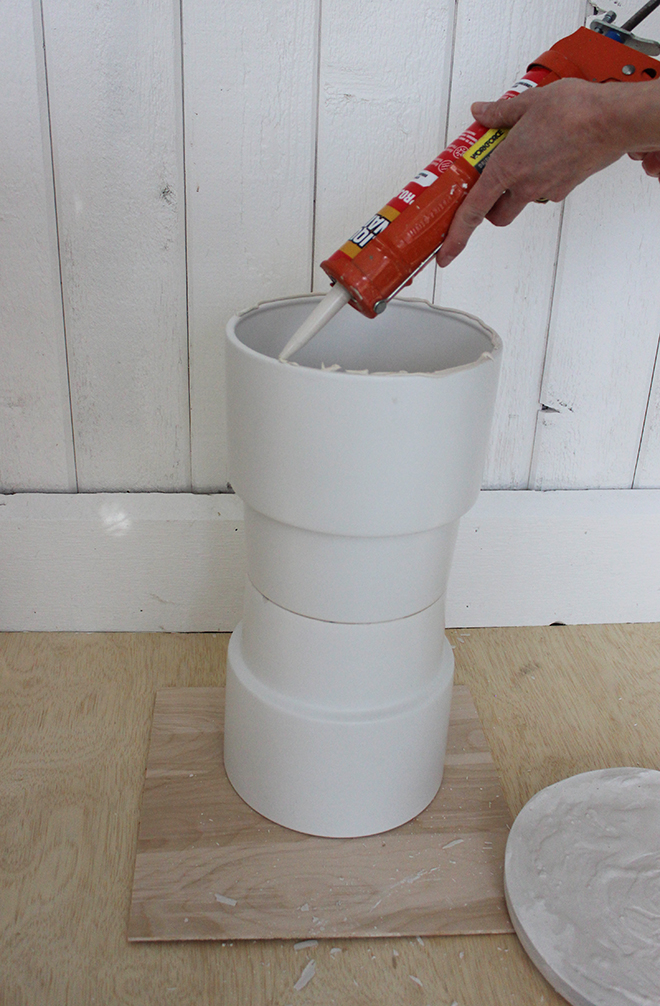
GLUE PLANTERS TOGETHER
Use construction adhesive to glue the bottoms of two planters together. The planters I used were 8″ tall, making the total table height about 18″, if you use smaller planters, you may need to stack and glue more than two together.
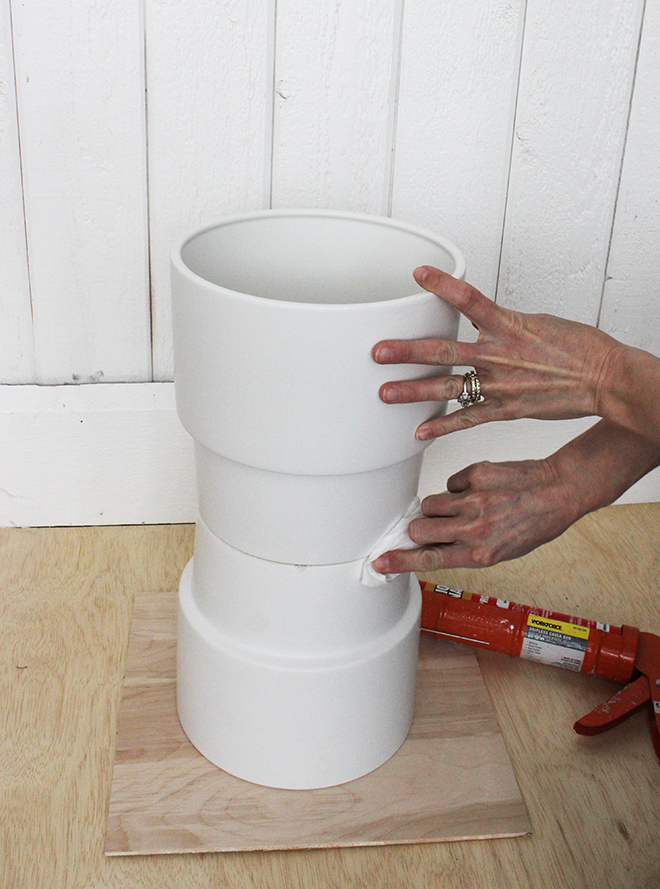
WIPE AWAY GLUE
Wipe away extra glue and allow to cure fully according to adhesive instructions.
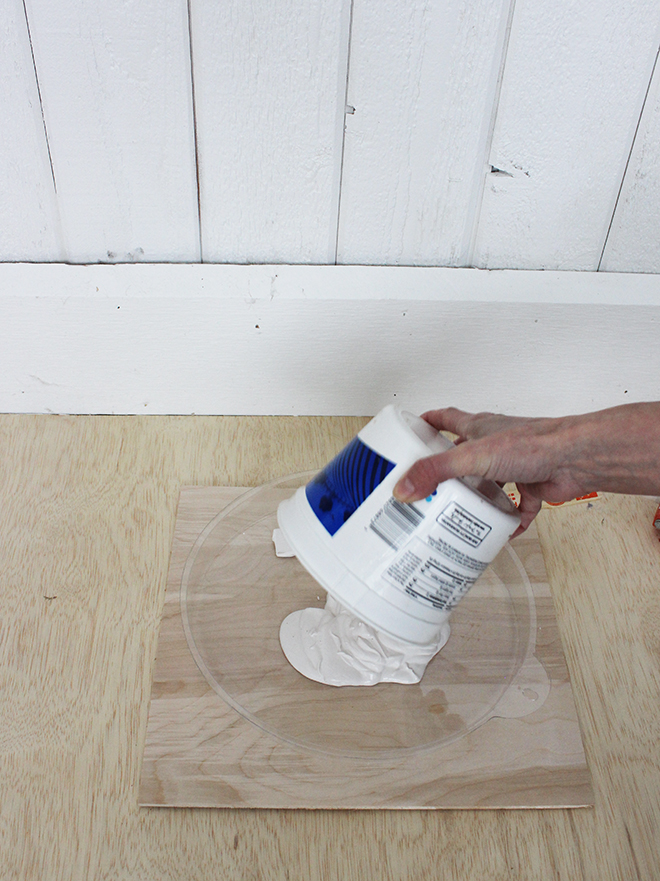
MAKE TABLE TOP
While the base is setting, make the table top. Mix plaster with water in a disposable container. The packaging recommends a ratio of 3 parts plaster to 1 part water. I mix until I get the consistency of pancake batter. Depending on the size of your mold, you will need a good amount, probably more than you think. Pour plaster mix into the mold. You will want the table top to be at least an inch thick, so mix and add more to mold if necessary. Let the table top set over night.
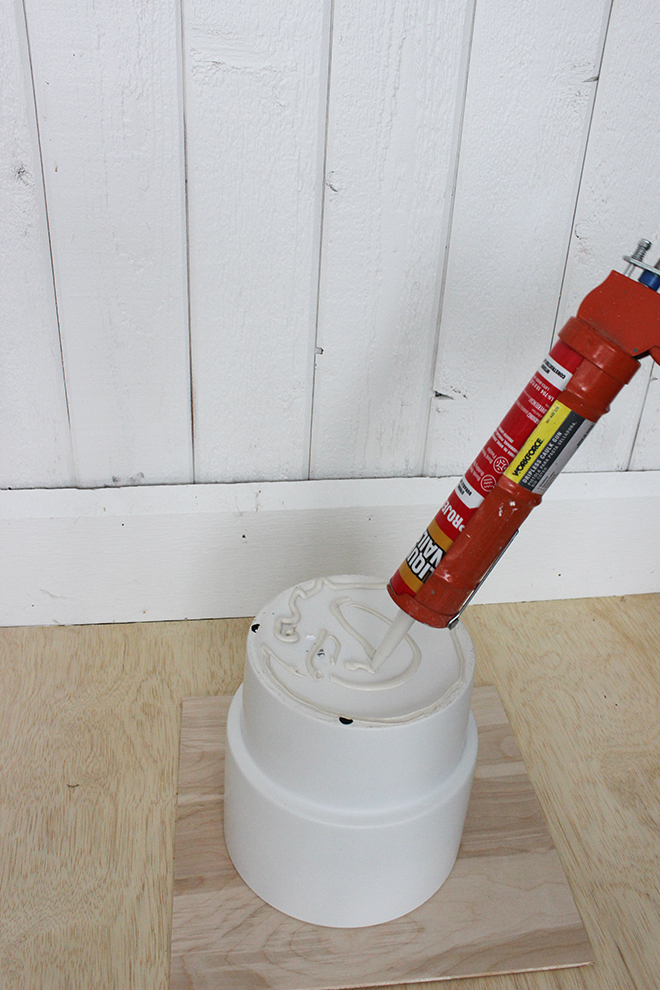
GLUE ON TBALE TOP
Just as you did with the base, use the construction adhesive to glue the table top to the base. Make sure you center the top on the base, use a tape measure or ruler if necessary. Wipe away extra glue and allow to cure fully according to adhesive instructions.
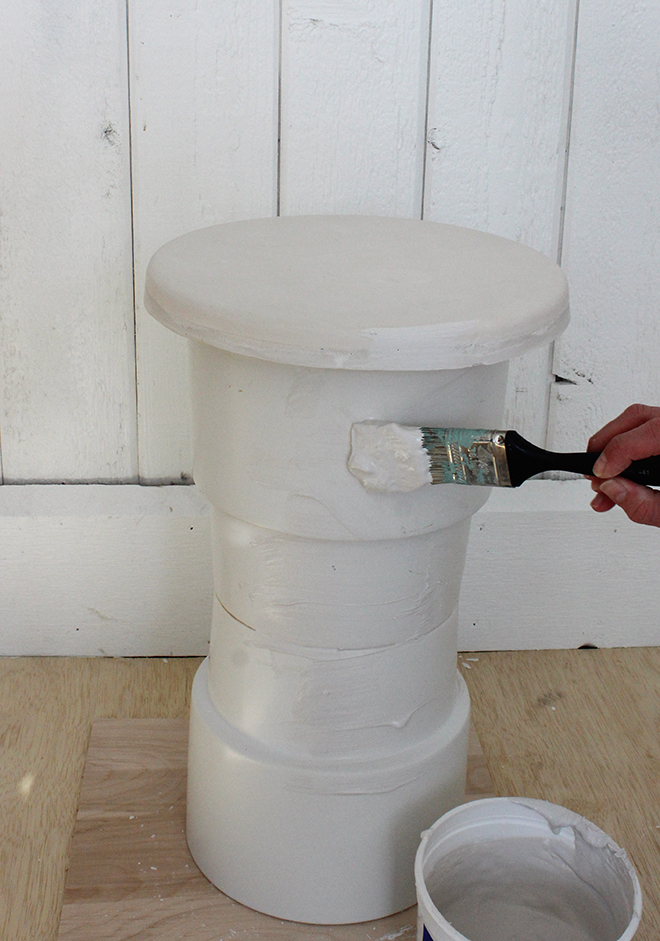
APPLY PLASTER TO TABLE
Once the table top is set to base, it’s time to apply the plaster. As with the table top mold, mix to consistency of pancake batter. Do not mix too much. Plaster dries extremely fast, so if you mix too much it will dry in the container. I like to use the rule of thumb of only mixing as much as you can apply in about 10 minutes. Have a second disposable container with water as you apply. You can dip the paint brush in the water and smooth plaster to achieve the texture you like.
You will likely need to apply at least two coats of plaster. Allow plaster to dry completely after each coat and use a sanding block to sand down any large divots, lumps or brush marks until you achieve a texture you are happy with.
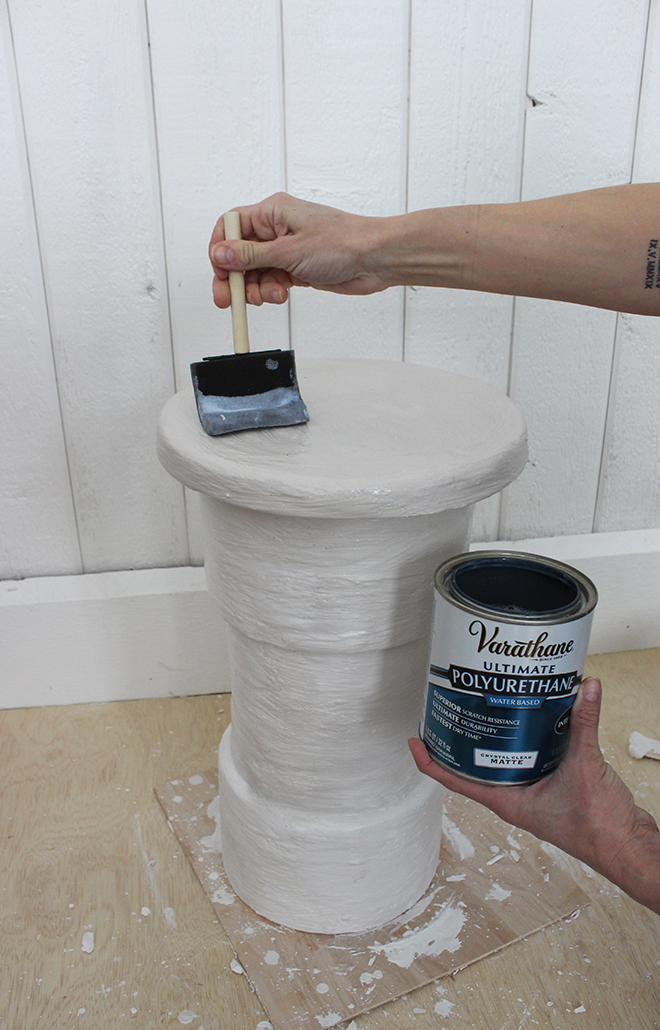
ADD POLYURETHANE
Once plaster is completely dry and you are happy with the texture, apply polyurethane. I used three coats of polyurethane to ensure protection and wipeability. I recommend a matte finish, as to not distract from the beautiful texture.
As with all our DIY tutorials, if you create one of our projects please send us a picture – We Love Seeing Your Creativity! If you use Instagram or Twitter please use the hashtag #SomethingTurquoiseDIY and it will show up on our Get Social page. Happy Crafting!
DIY TUTORIAL CREDITS
photography + DIY tutorial: Lauren Koster of Lauren Koster Creative // plaster mix // planter // stepping stone mold // construction adhesive // paint brushes // disposable buckets // stir sticks // polyurethane


Comments