
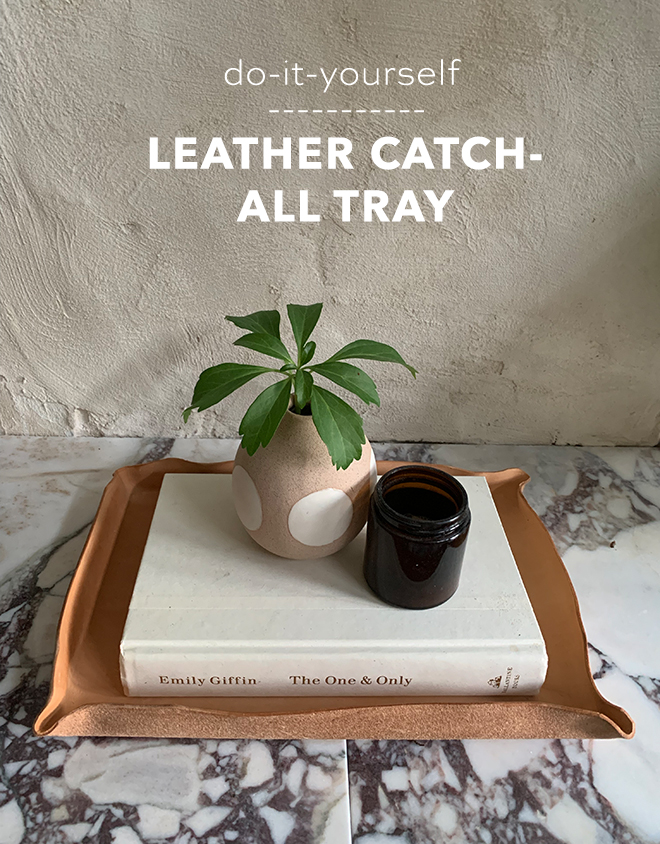
How to Make A Leather Catch-All Tray
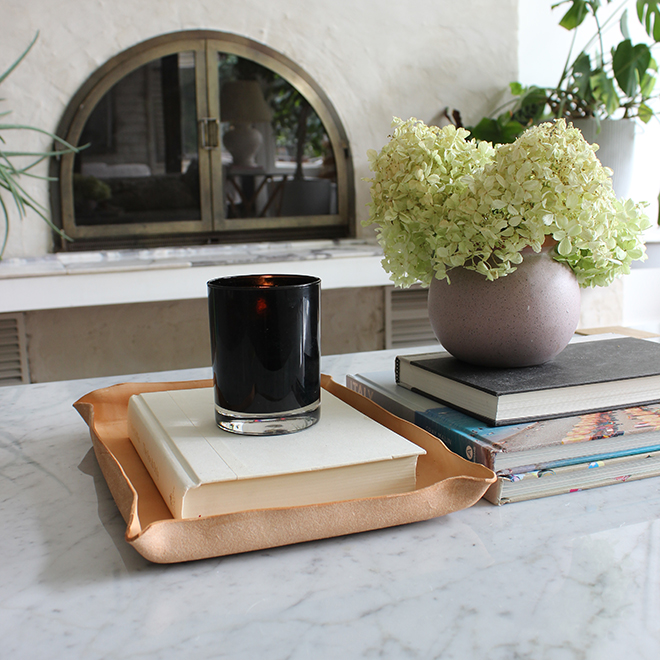
I’m of the mind set that you can never have too many catch-all dishes, bowls or trays. They are functional, think mail drop station, bed-side organizer, key dish, remote corral. But they are also the perfect styling piece. On a bookshelf, on a coffee table, kitchen counter, or dresser, there really aren’t many places that a catch-all tray can’t add layer, depth, dimension and texture. Today we are sharing how to make this darling, leather catch-all tray. It is a simple project that can be completed in an afternoon. We can’t wait to see how you use this project!!

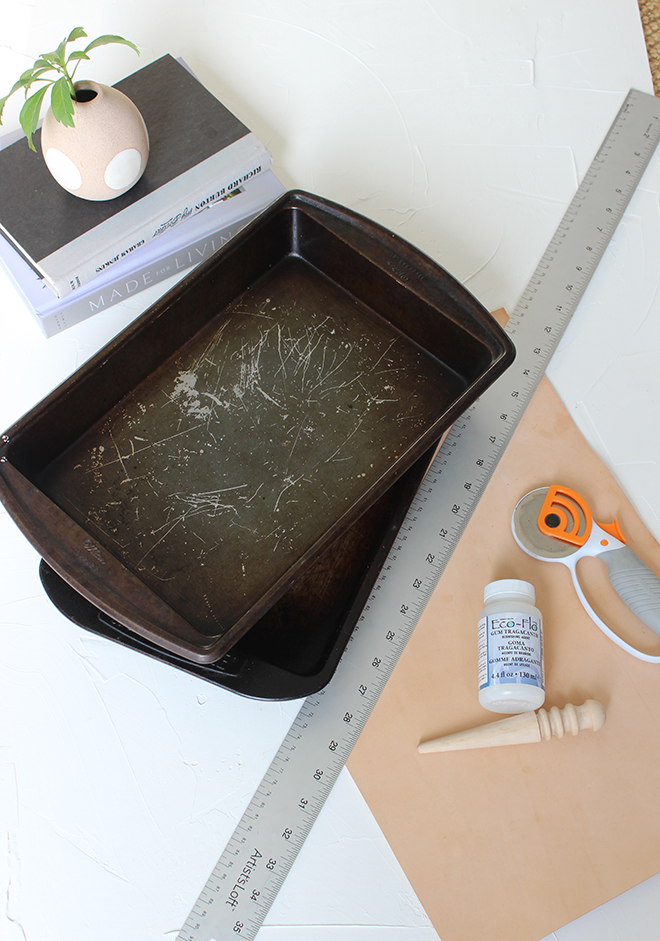
SUPPLIES:
- leather hide
- two matching baking sheets
- scissors
- rotary cutter
- cutting mat
- container or tub
- gum tragacanth
- leather burnishing tool
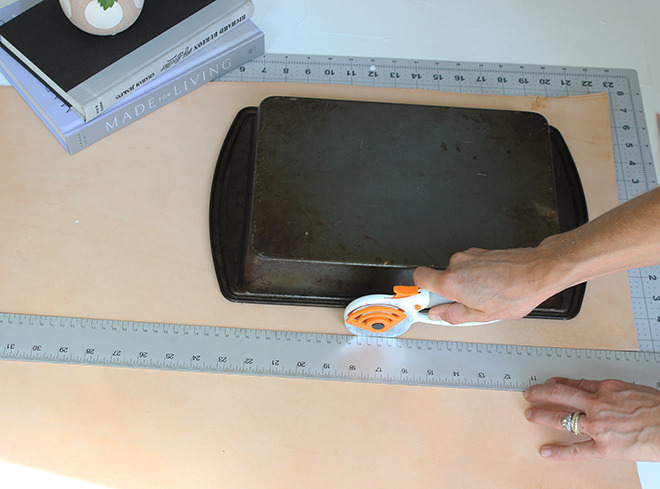
CUT LEATHER
Use rotary cutter to cut the leather hide to several inches larger than the baking sheets you are using.
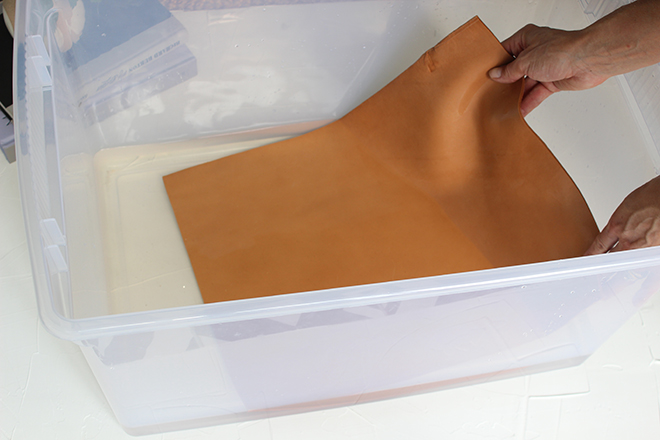
SOAK LEATHER
Submerge the entire piece of leather. You just need to soak a few minutes.
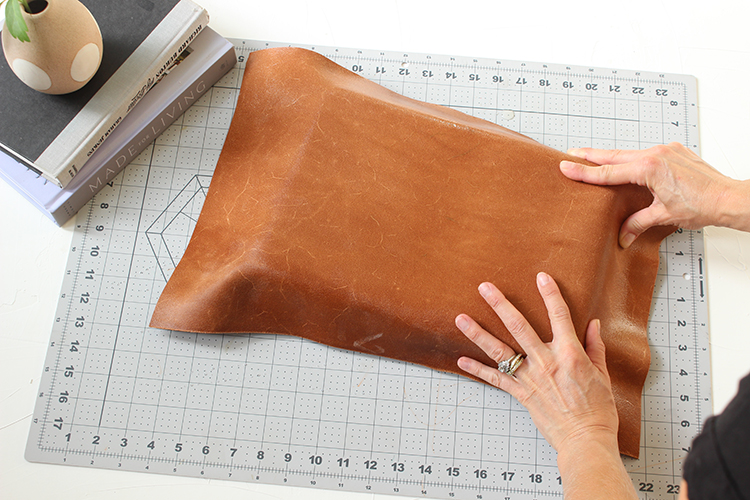
SHAPE TO BAKING SHEET
Shape leather to one of the baking sheets. Good side of the leather should be facing toward the bottom of baking sheet, you should see the back side of leather as you shape. I made the mistake of shaping the leather upside down on my first try of this project.
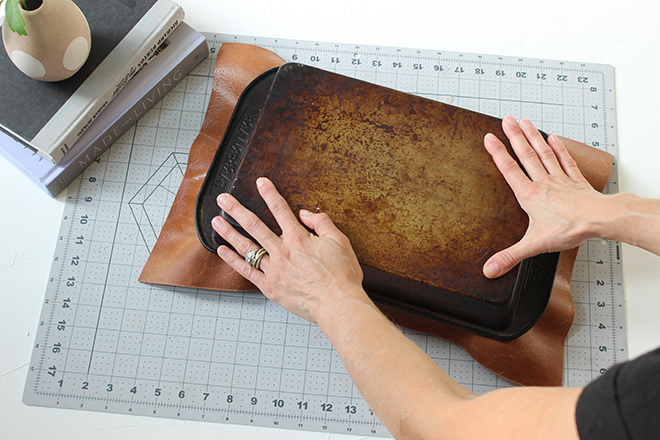
STACK THE BAKING SHEETS
Stack the second baking sheet on top of the leather shaped to first baking sheet. This will make a mold and will help to shape the tray while the leather dries.
TRIM TRAY
Once completely dry, trim off excess leather. I found it easiest and cleanest to use the rotary cutter.

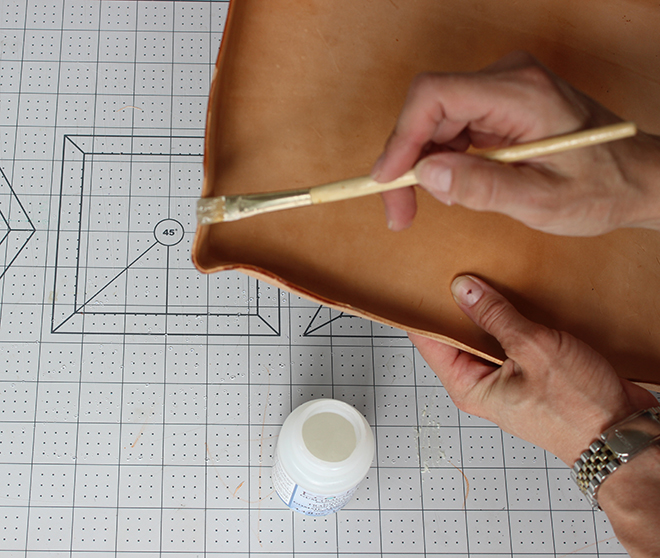
FINISH THE EDGES
Use a brush to apply gum tragacanth to the edges. Apply a generous amount, but not so much that it’s dripping. Let the gum tragacanth dry for a minute, then quickly rub the leather burnishing tool along the edges to set the finish.
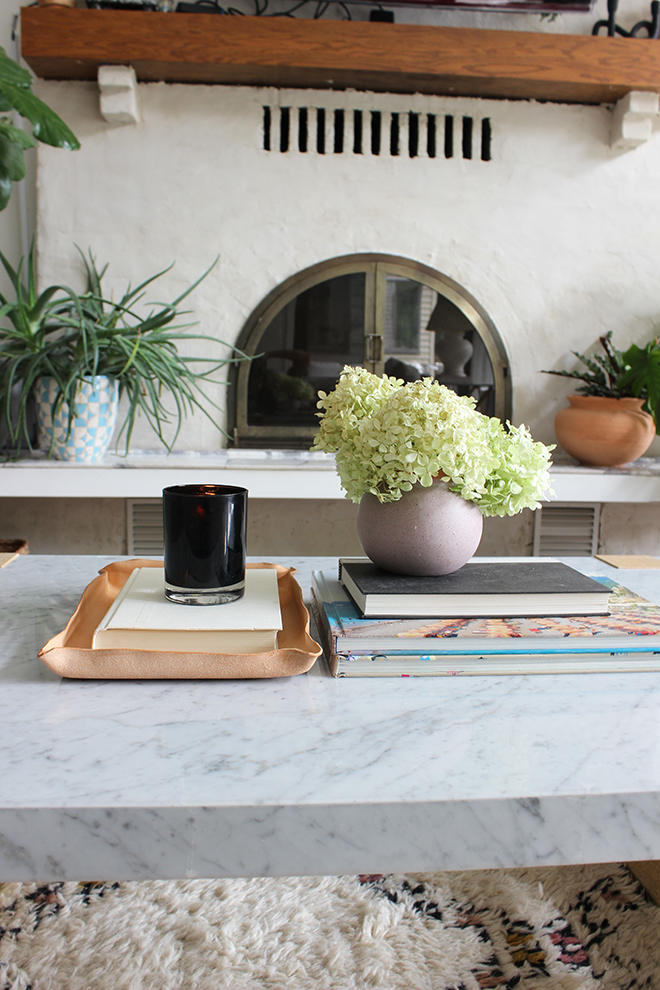
STYLE AND ENJOY!
As with all our DIY tutorials, if you create one of our projects please send us a picture – We Love Seeing Your Creativity! If you use Instagram or Twitter please use the hashtag #SomethingTurquoiseDIY and it will show up on our Get Social page. Happy Crafting!
DIY TUTORIAL CREDITS
photography + DIY tutorial: Lauren Koster of Lauren Koster Creative // leather hide // two matching baking sheets // scissors // rotary cutter // cutting mat // tub // Gum Tragacanth // Leather burnishing tool


Comments