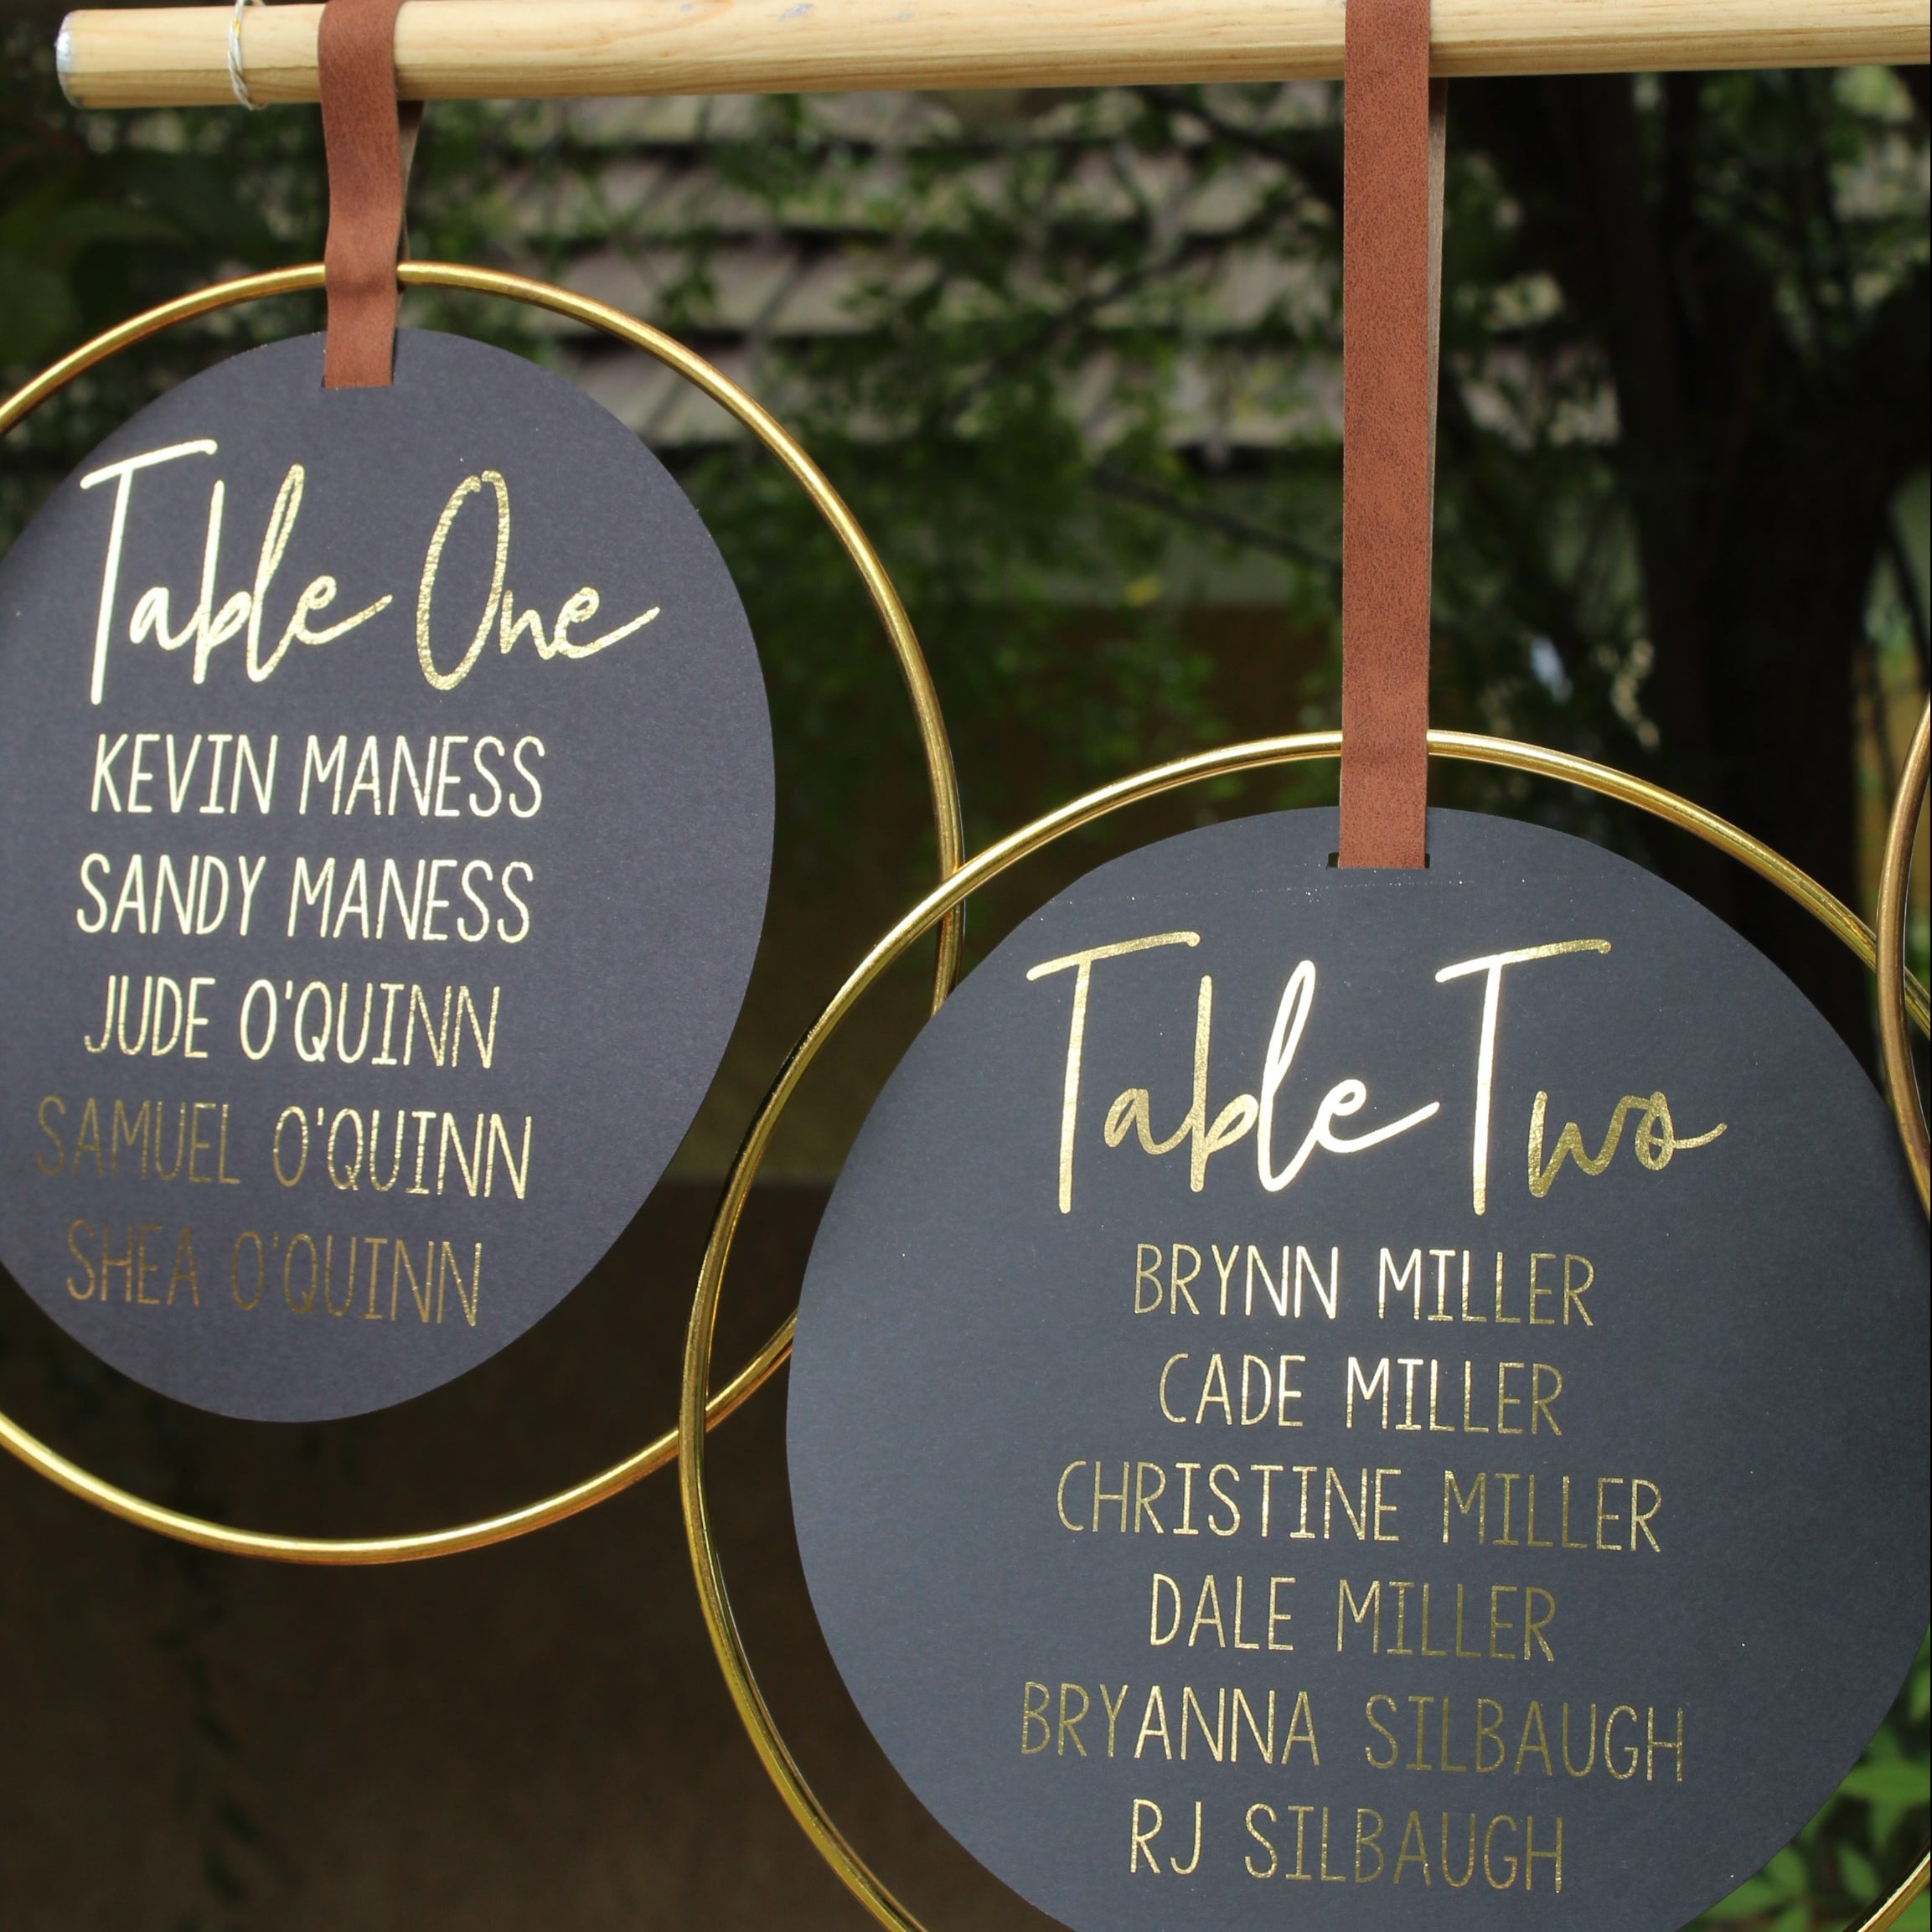

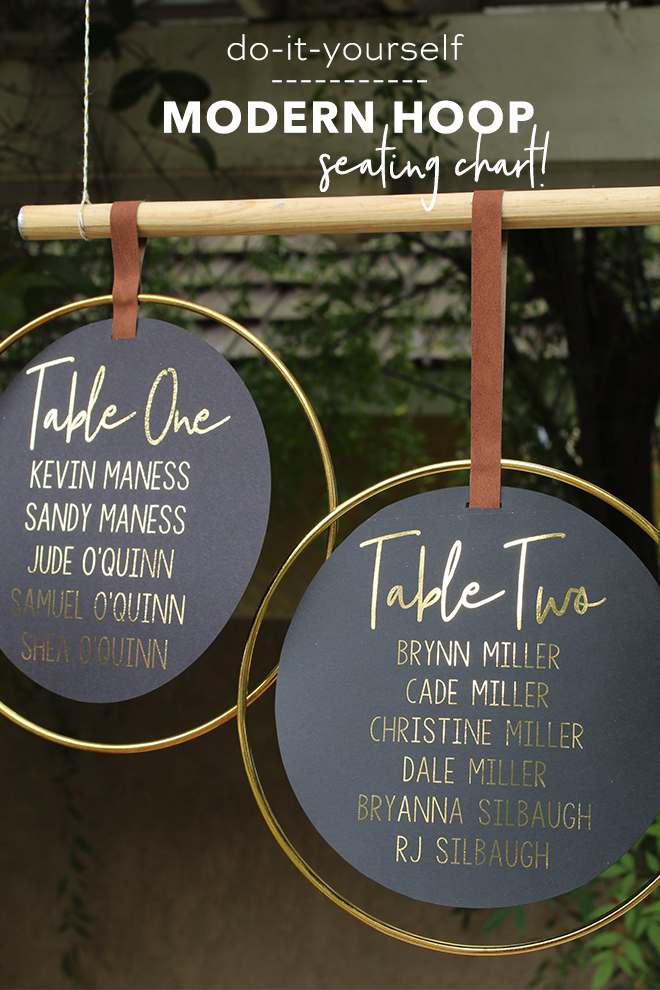
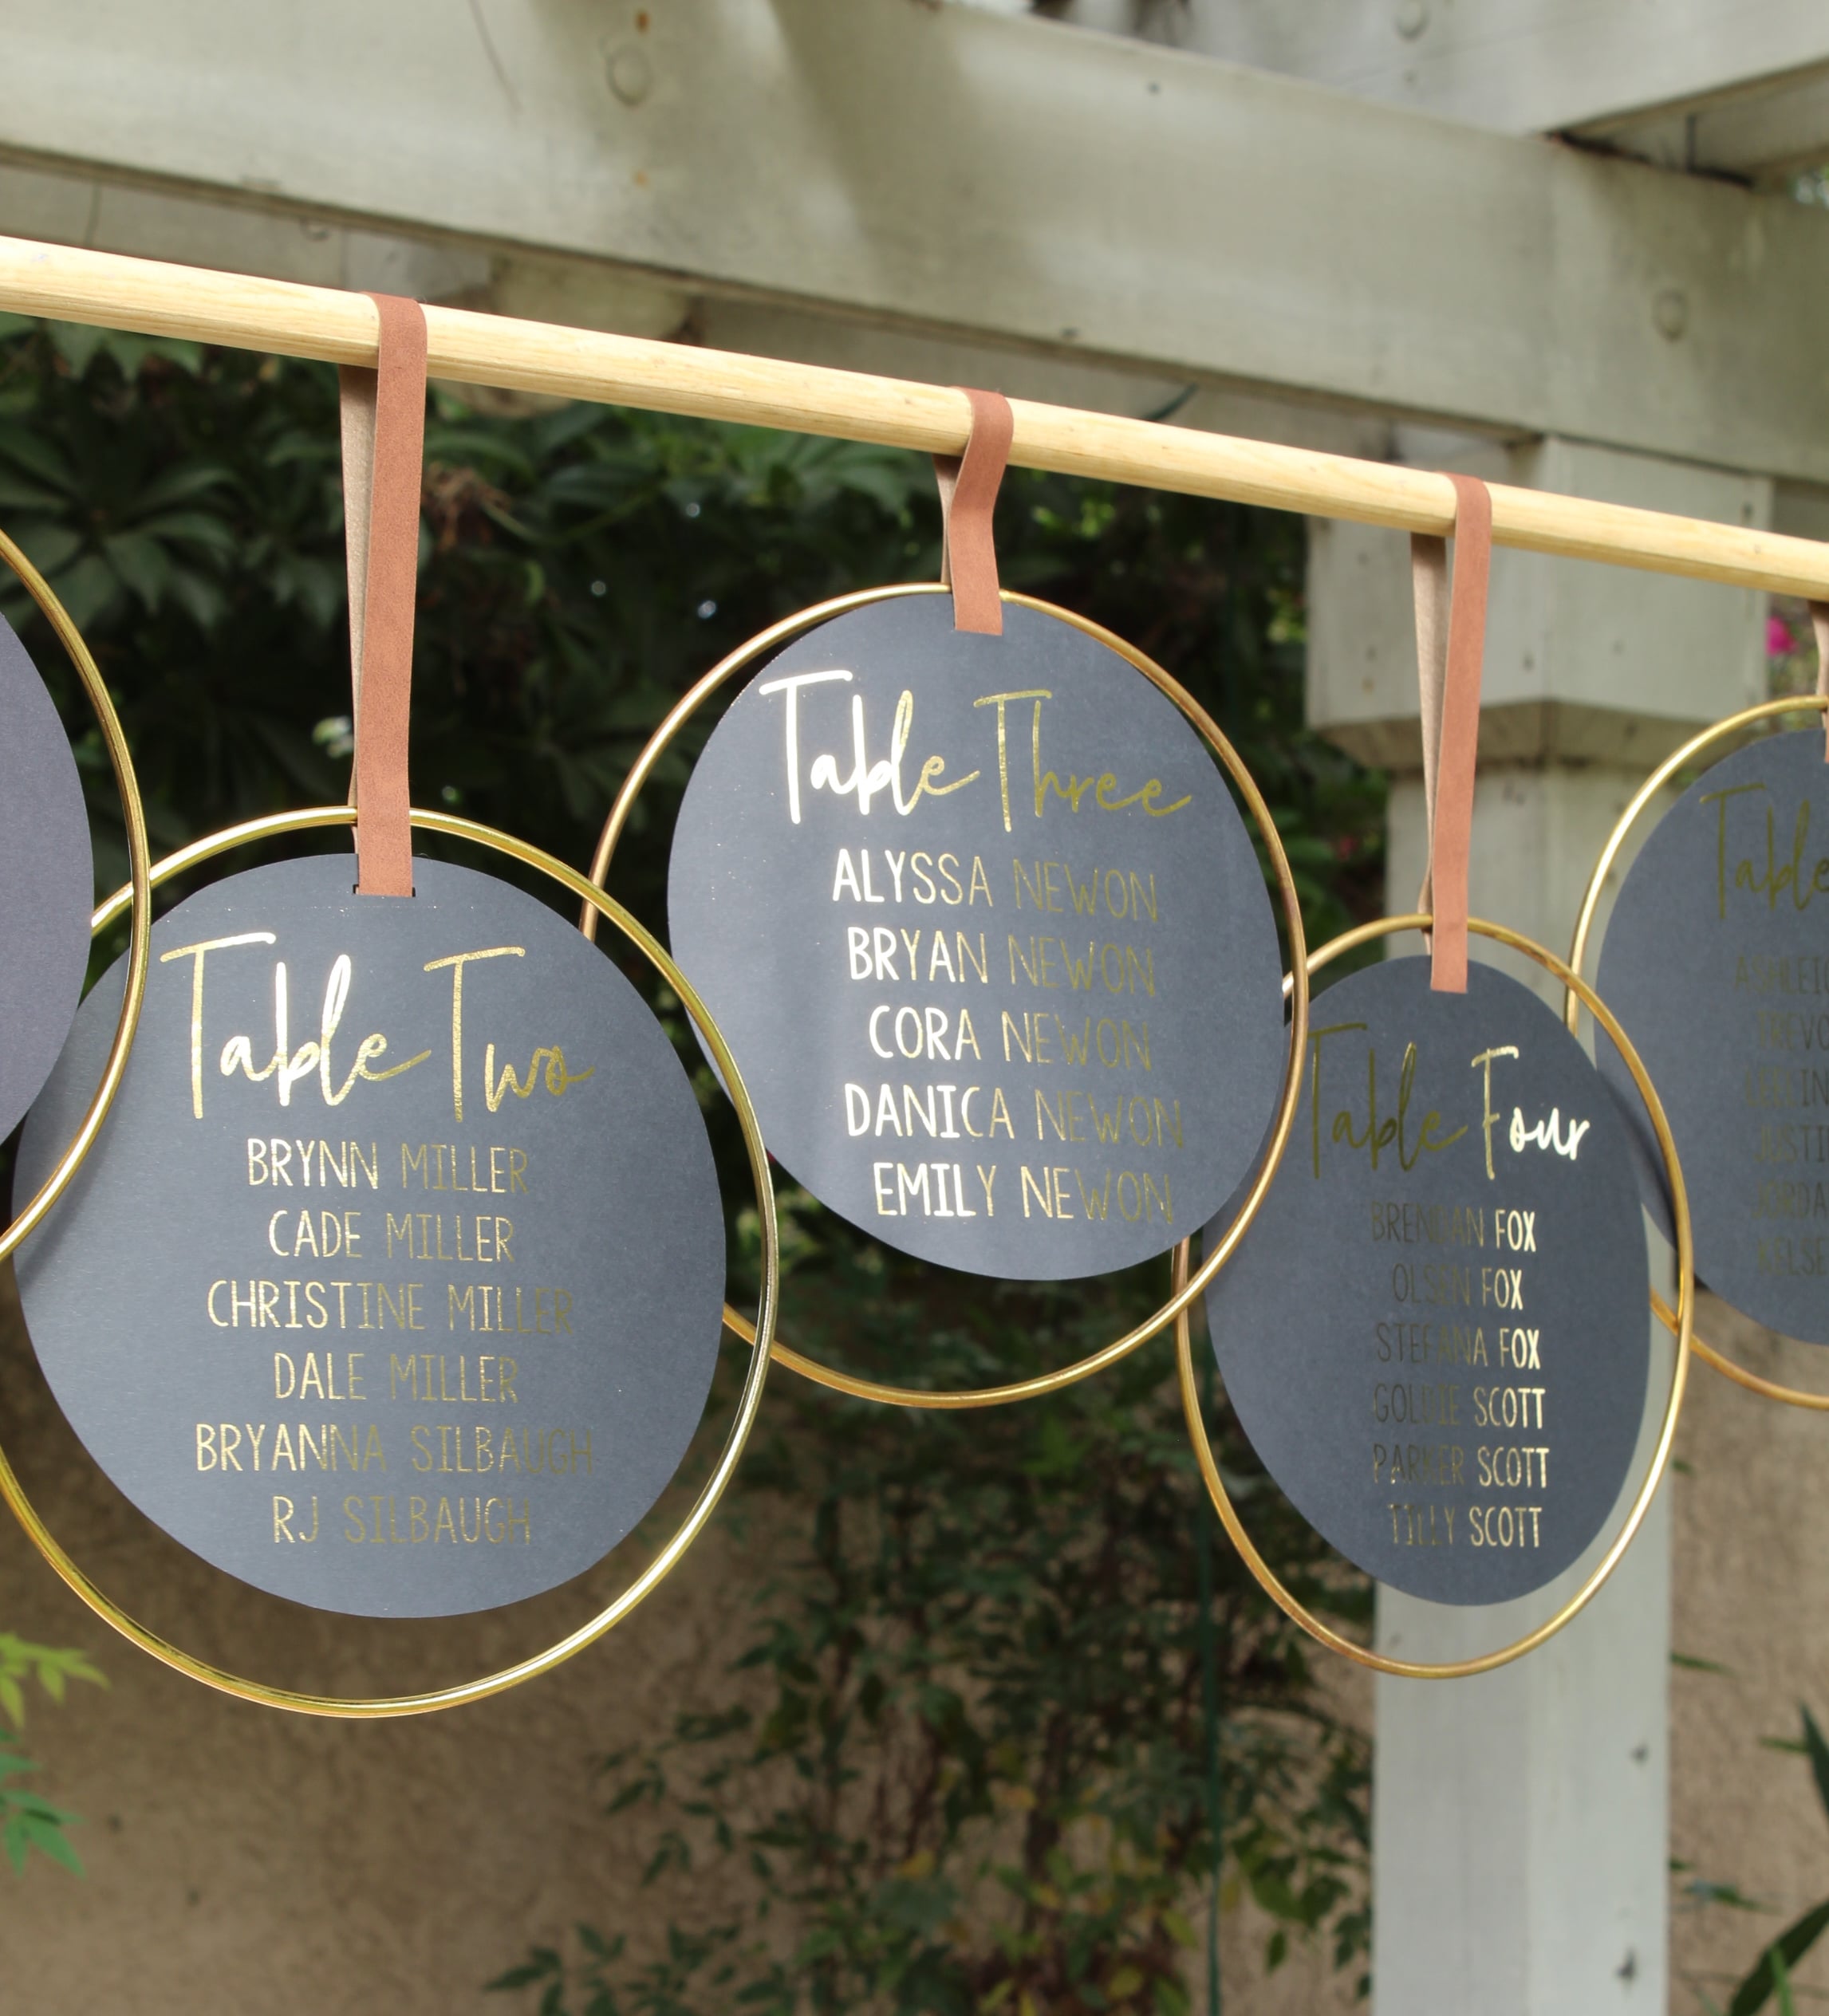
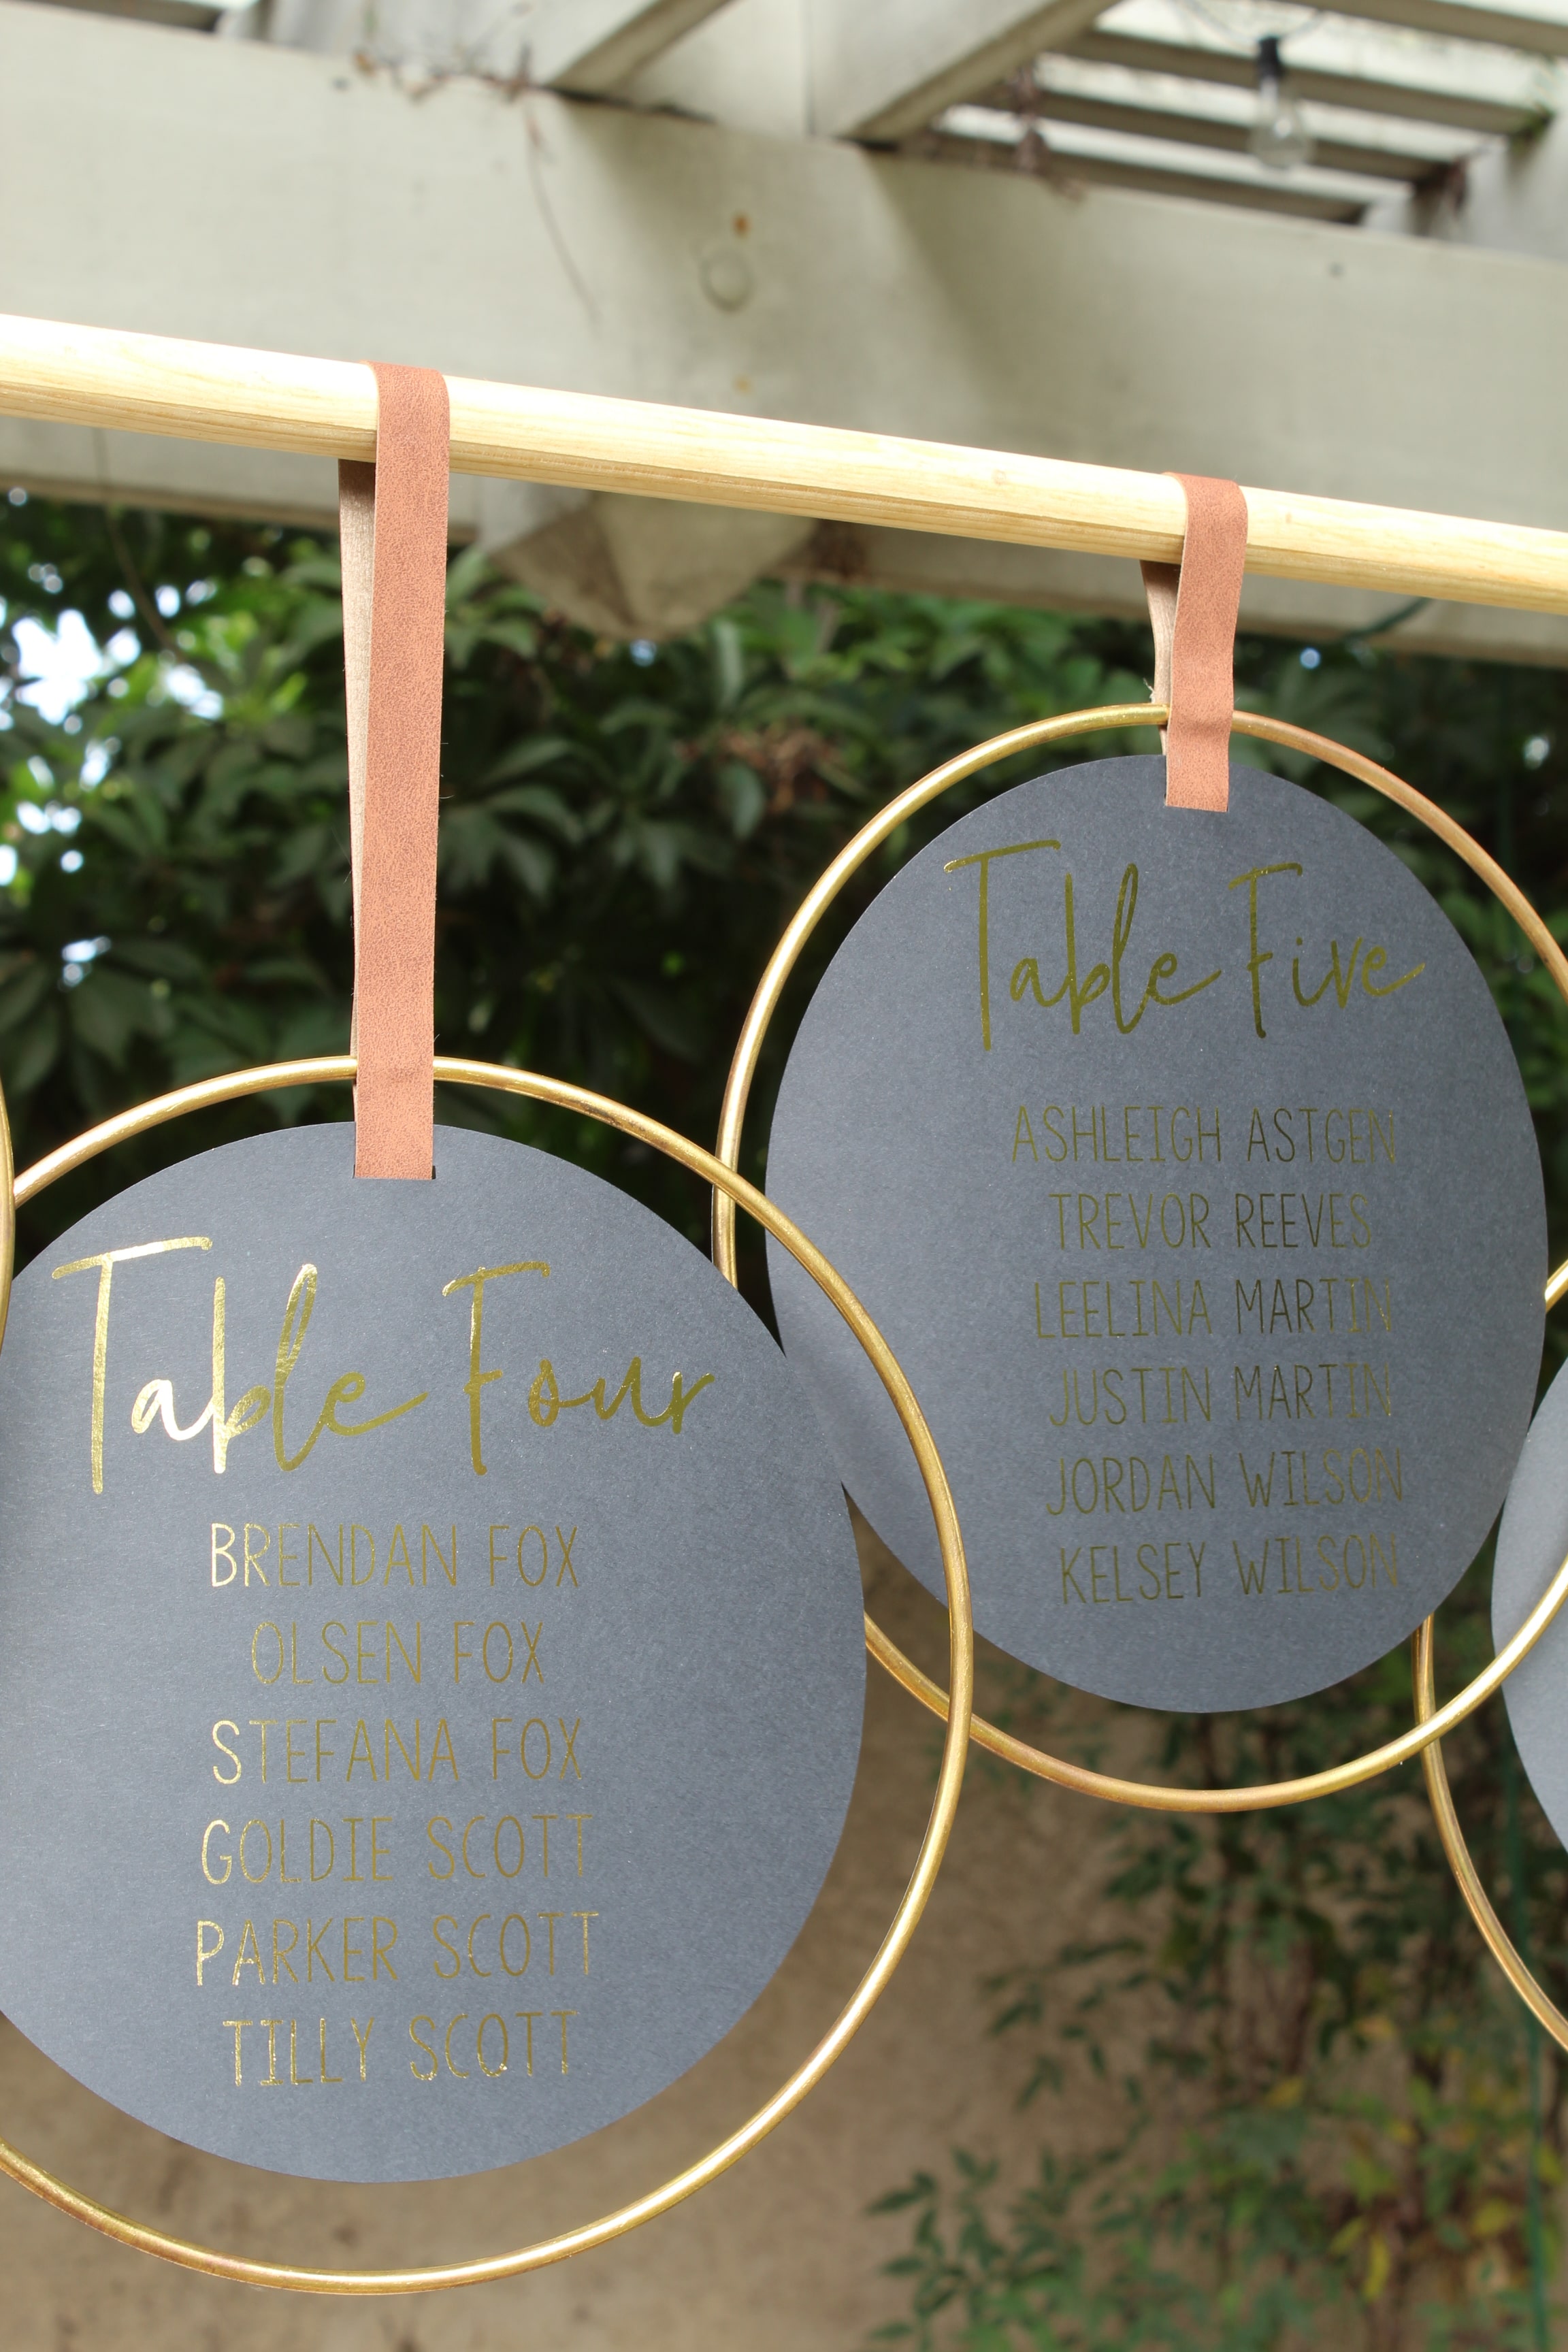
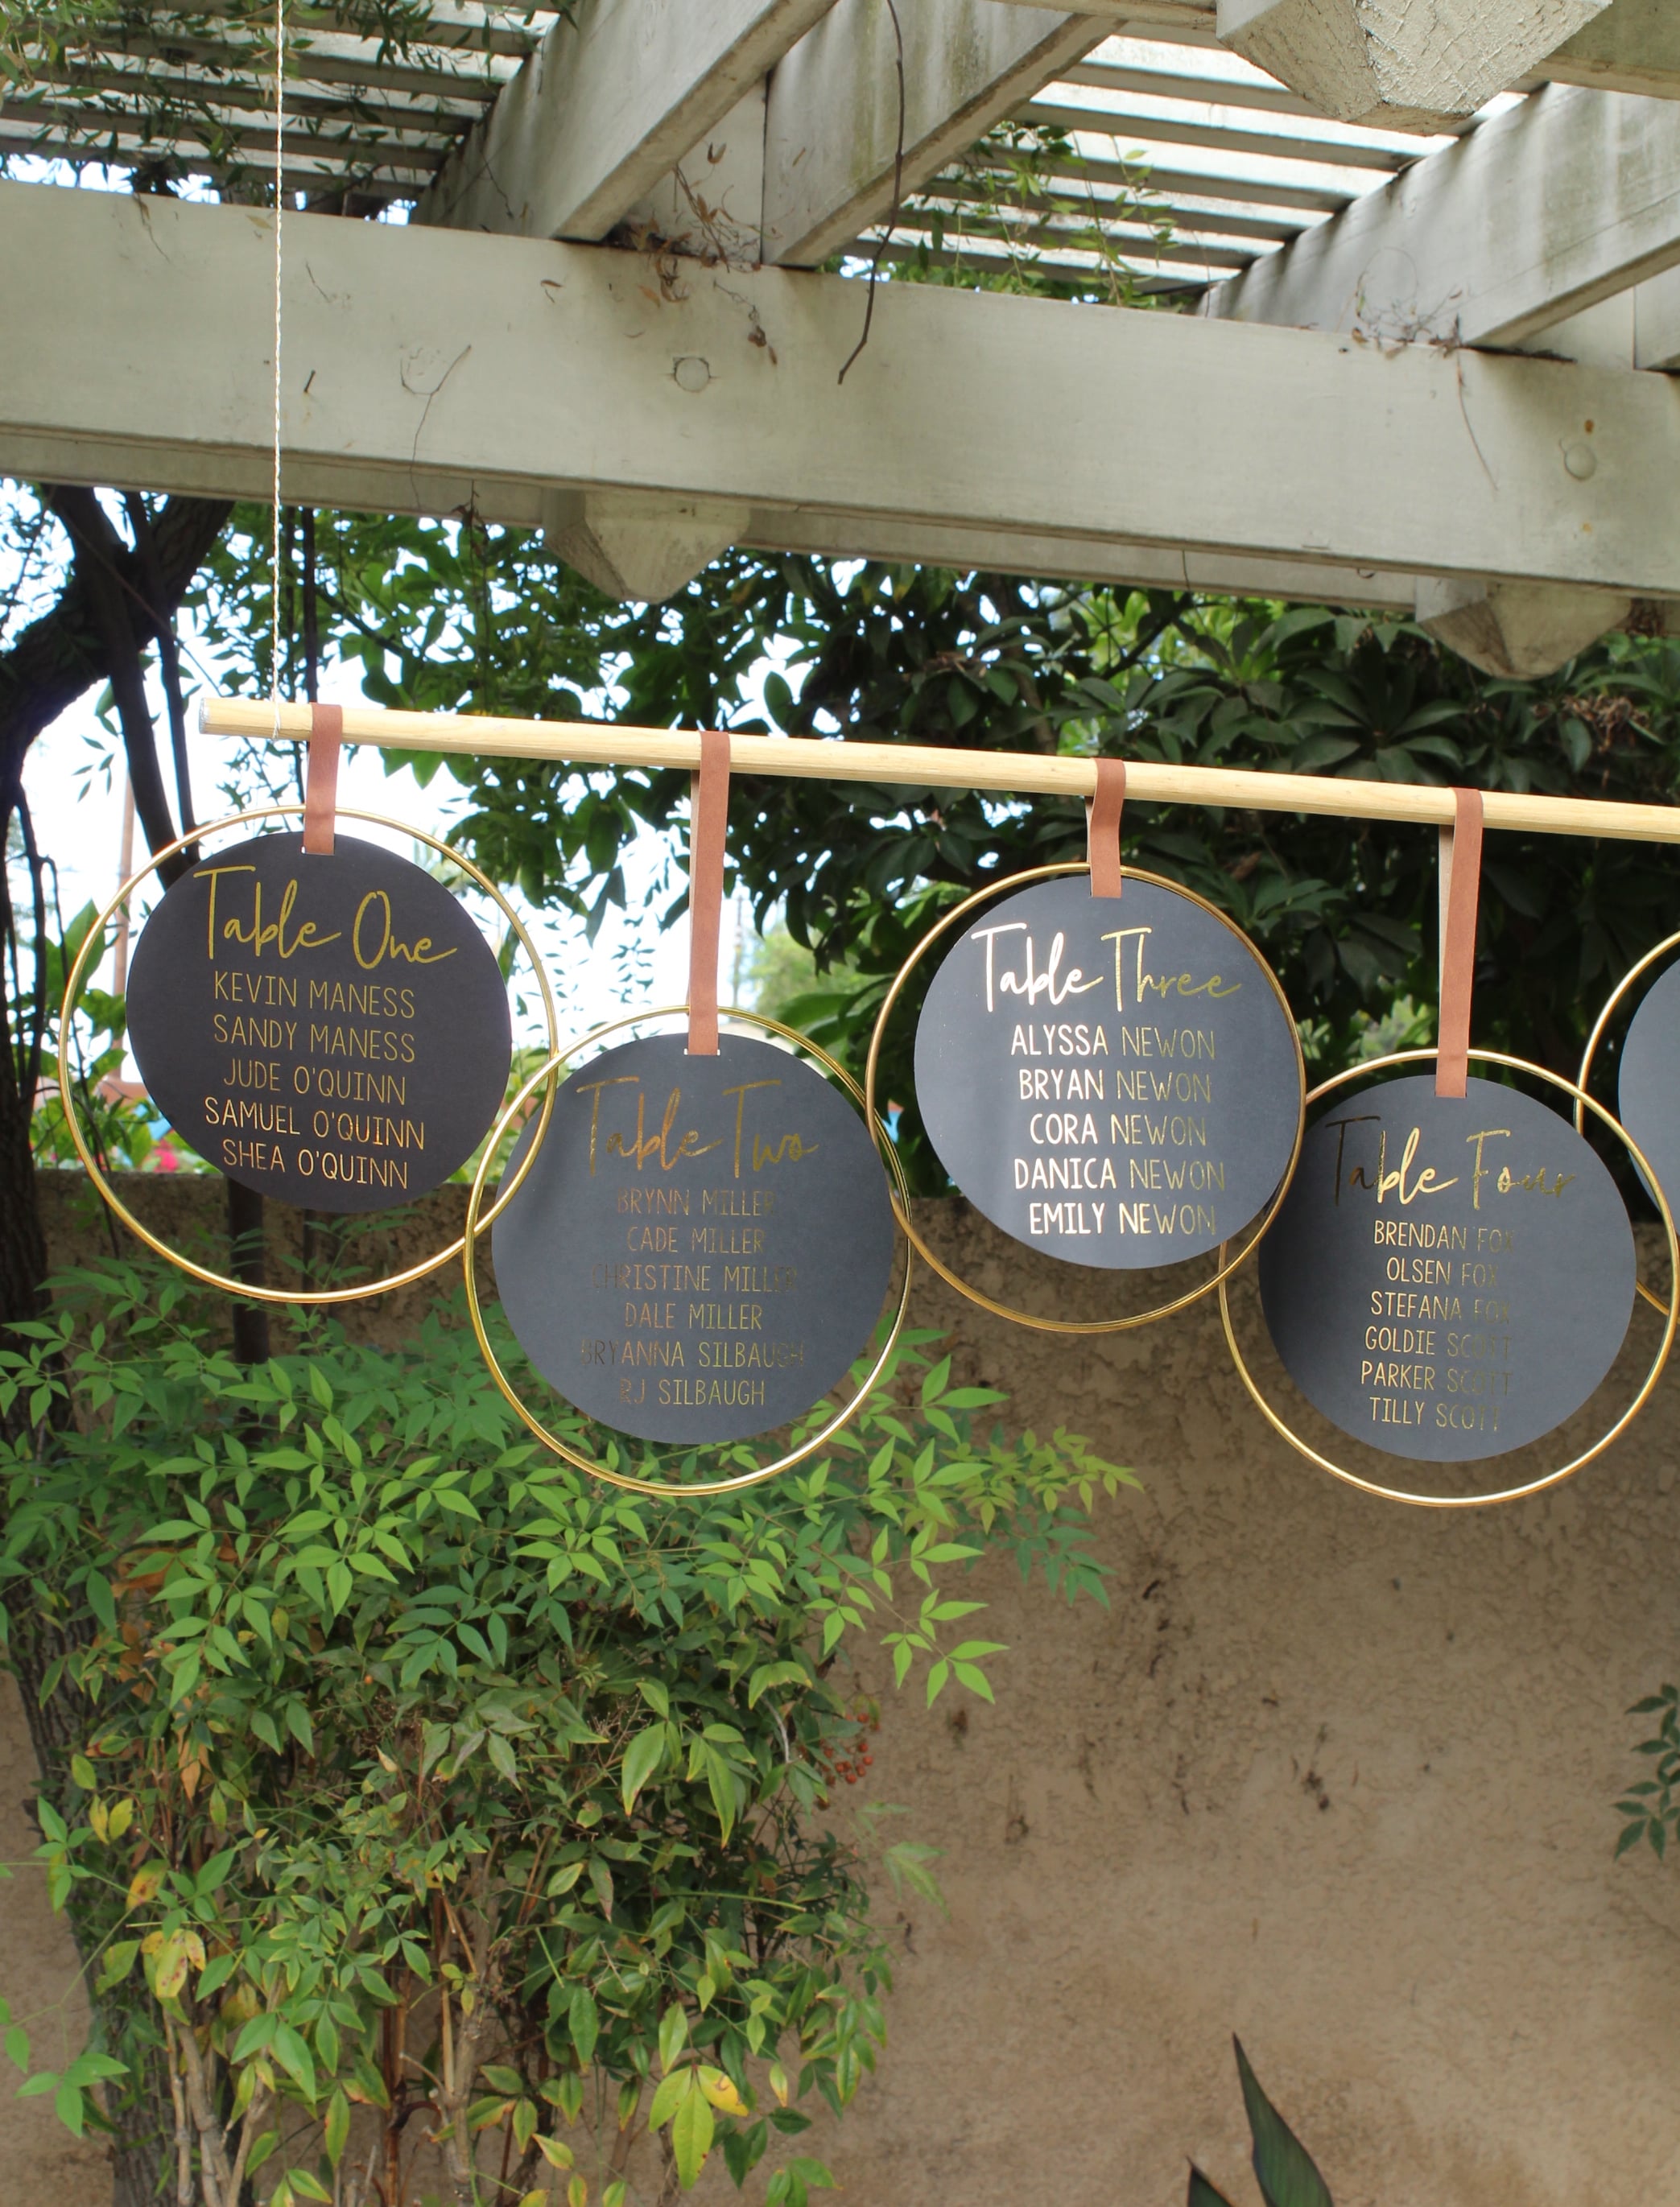
DIY Modern Hoop Seating Chart
Hey there bridal babes! Shea back with another DIY, and my first ever wedding DIY for ST! It’s no secret, 2020 has been a major buzzkill for engaged couples. Some having to postpone their wedding planning, cut their guest list down to nothing, and some putting it off for a year (or more!). Wedding planning is stressfully enough without a global pandemic added to it. I wanted to at least get the stress of the seating chart off your shoulders by creating this simple modern (and surprisingly easy) seating chart.
Supplies:
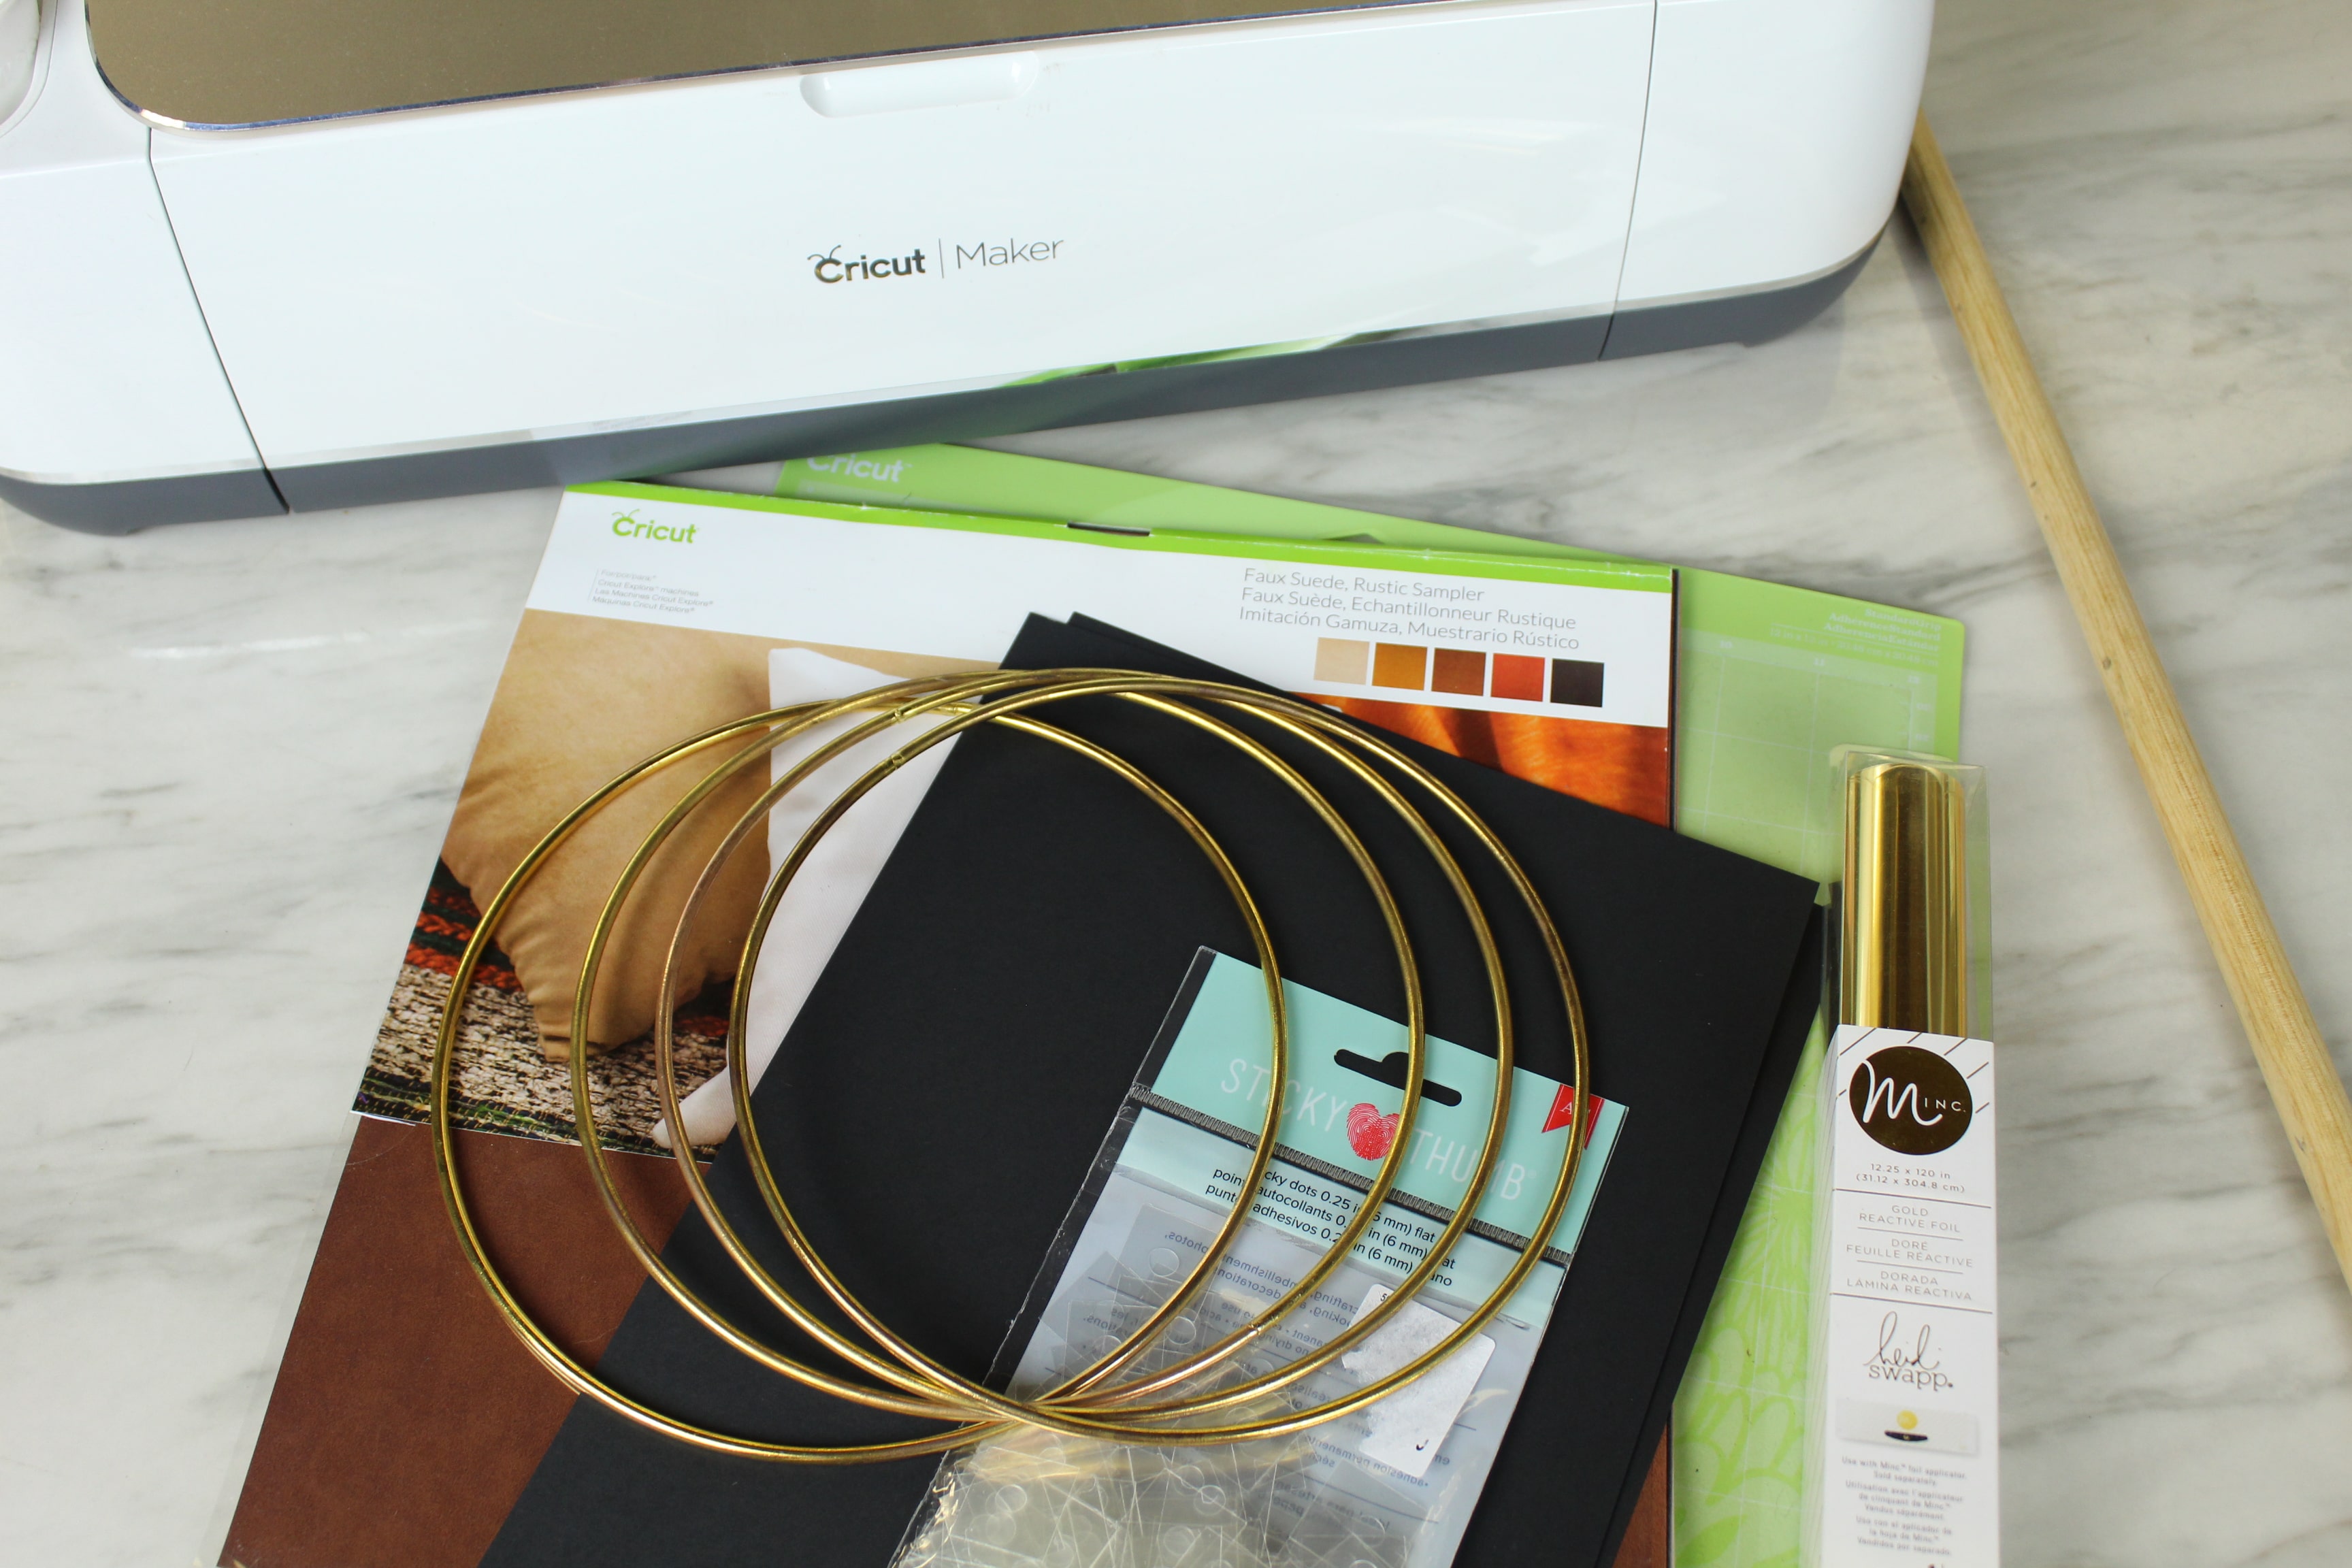
- 8 inch Macrame Hoops
- Cardstock in your choice of color (I used black)
- Faux Suede
- 36″ Wooden Dowel
- Glue Dots
- Printer (laserjet if foiling)
- Cricut Maker (I also have a non cutting machine version!)
- Cricut Standard Grip Mat
- Heidi Swapp Minc (Optional step if you’d like it foiled)
- Minc Foil (Optional step if you’d like it foiled)
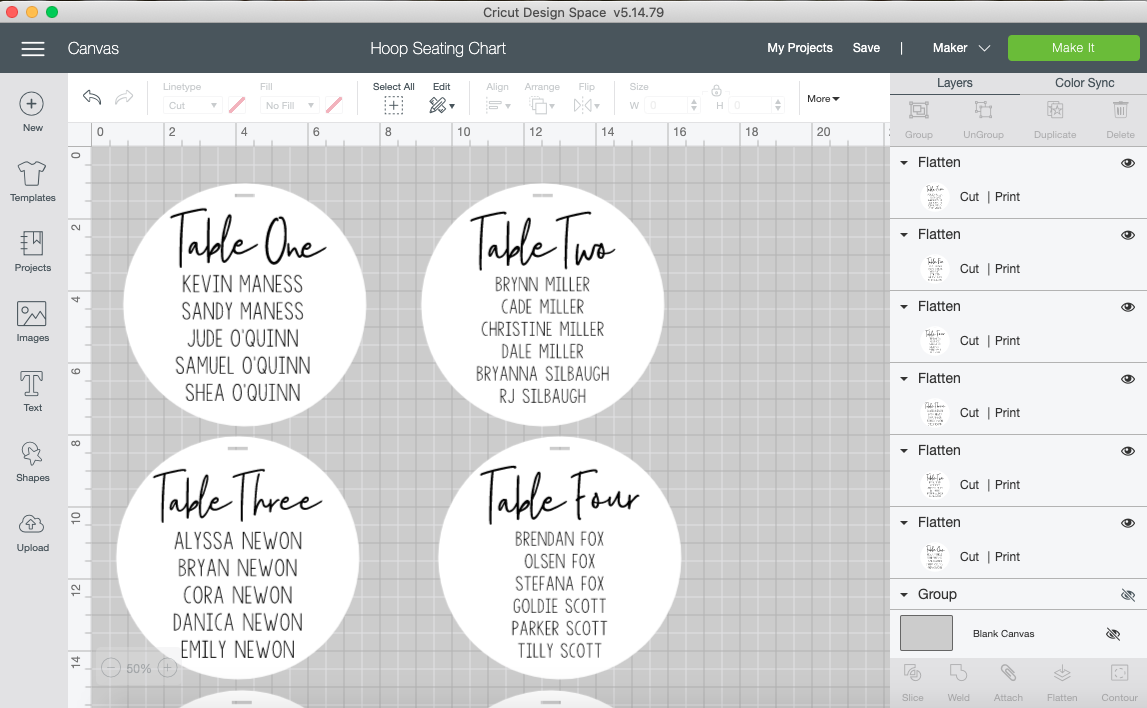
Open Design Space
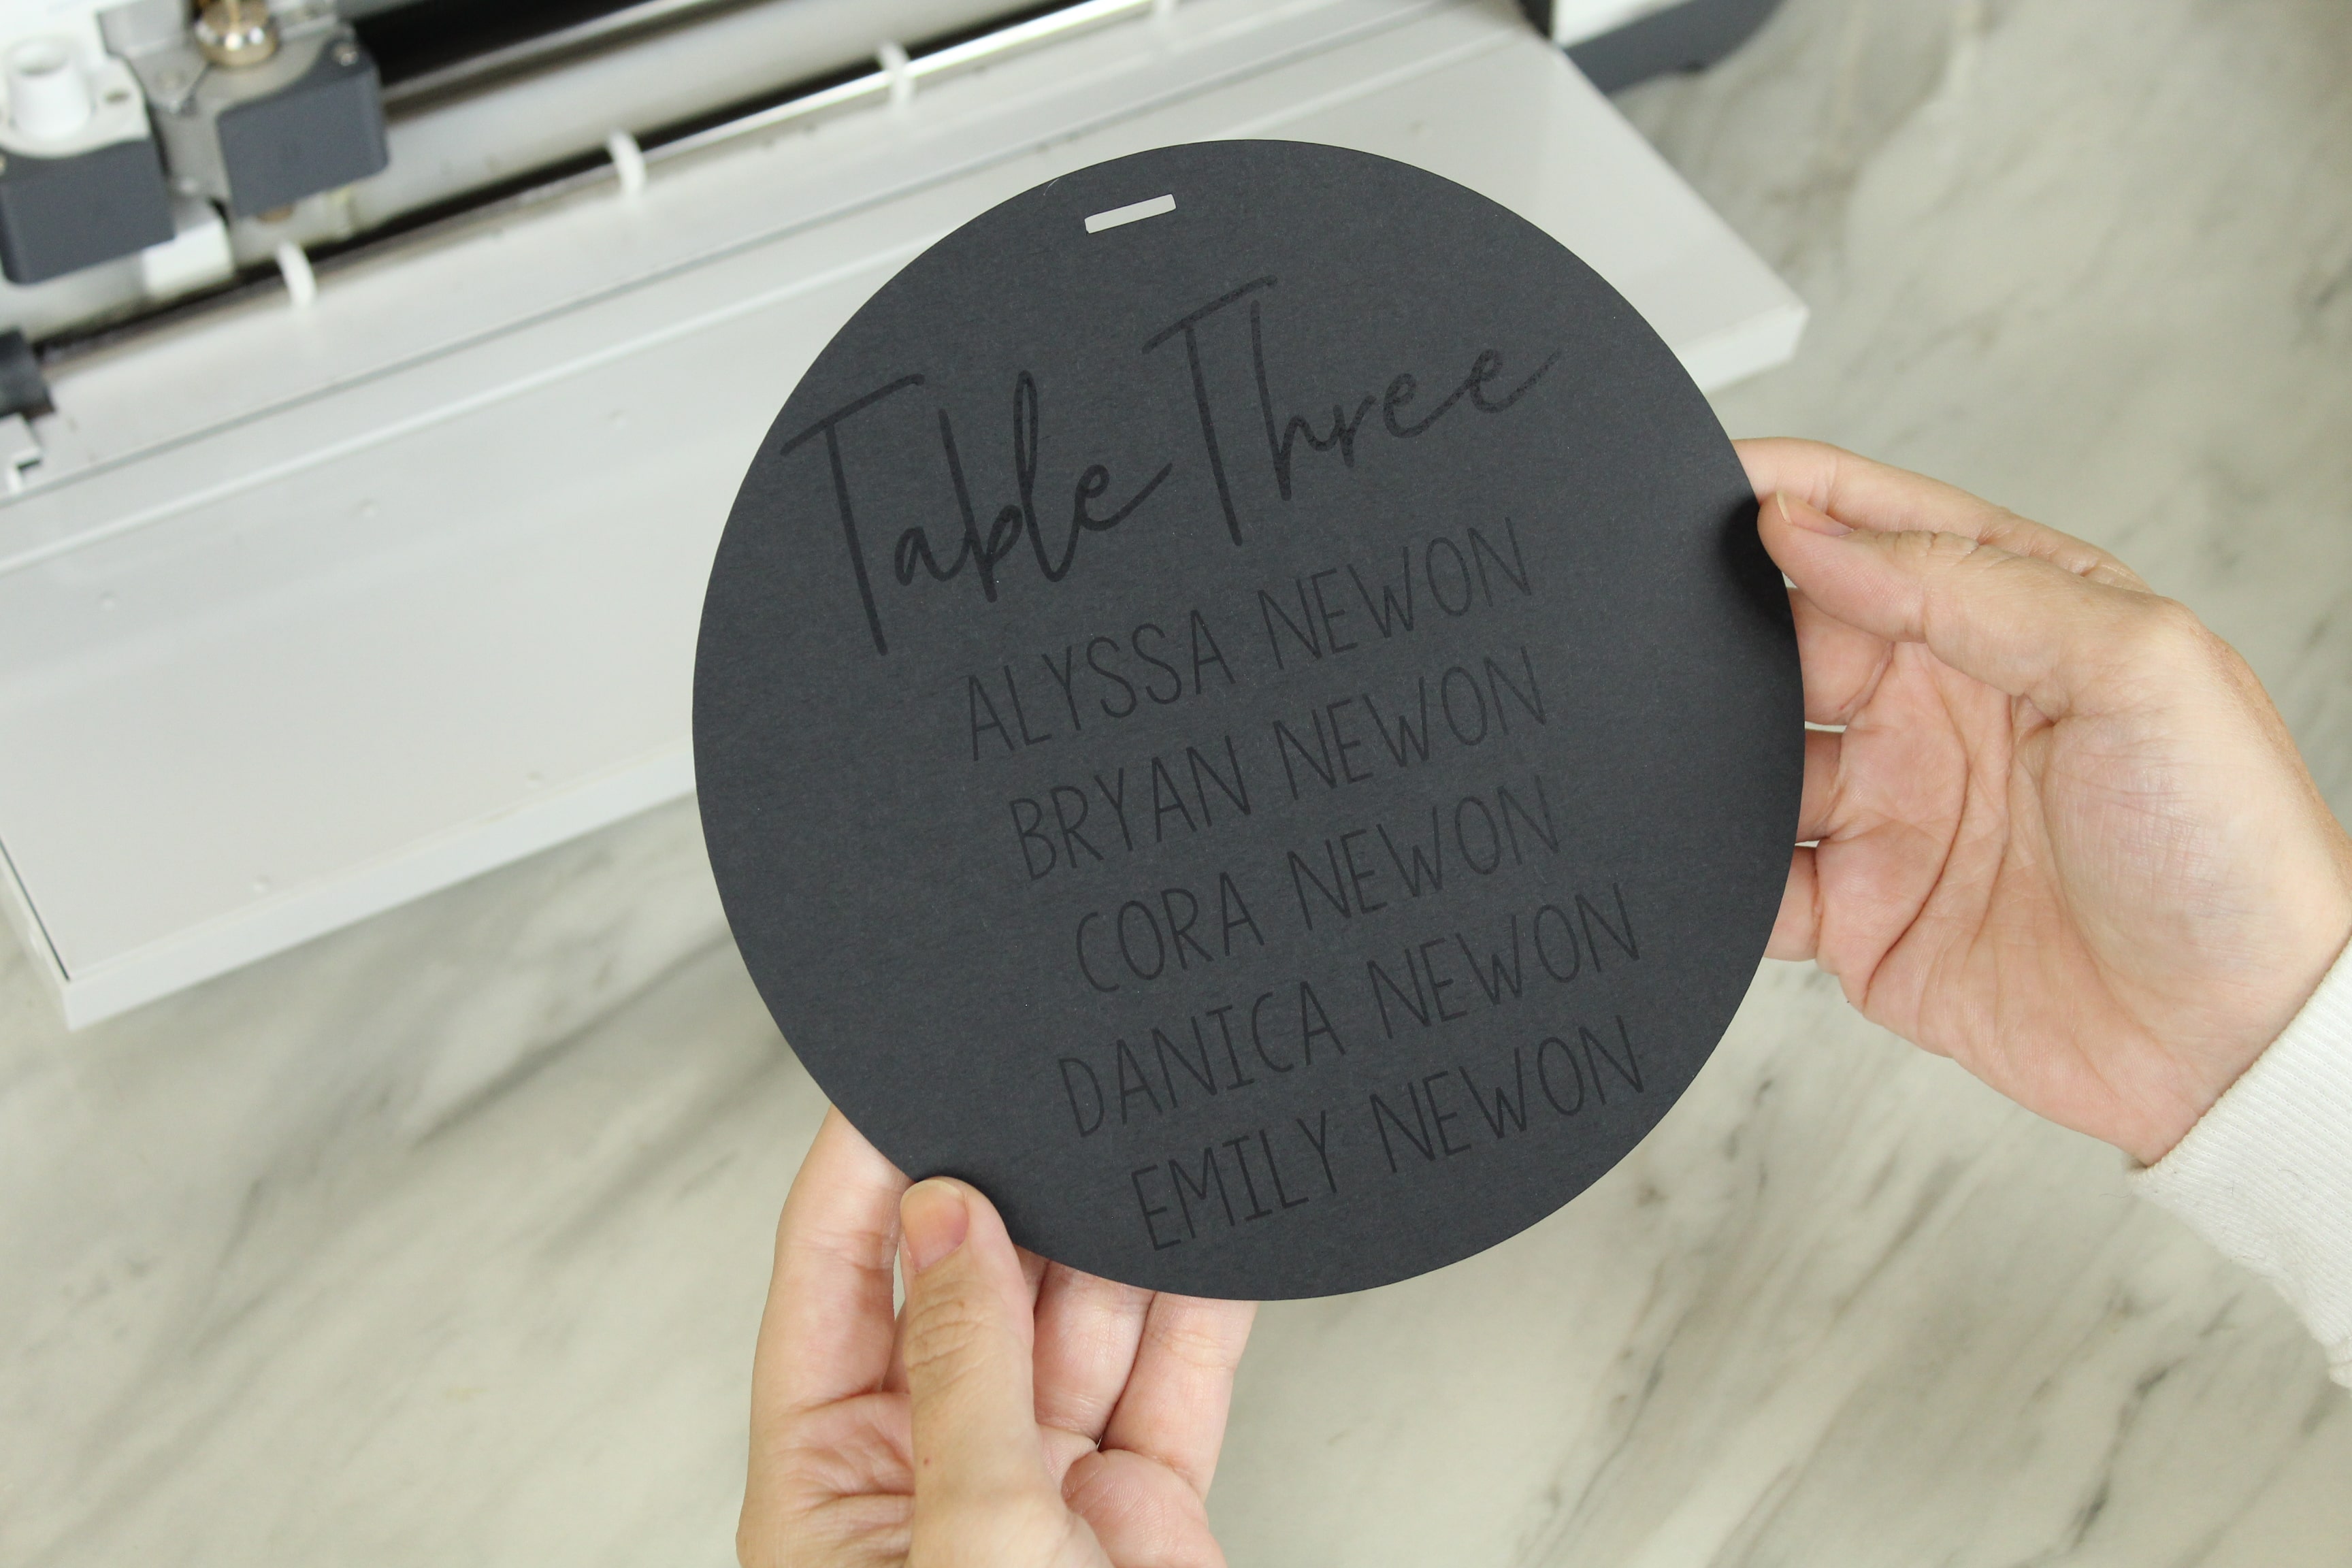
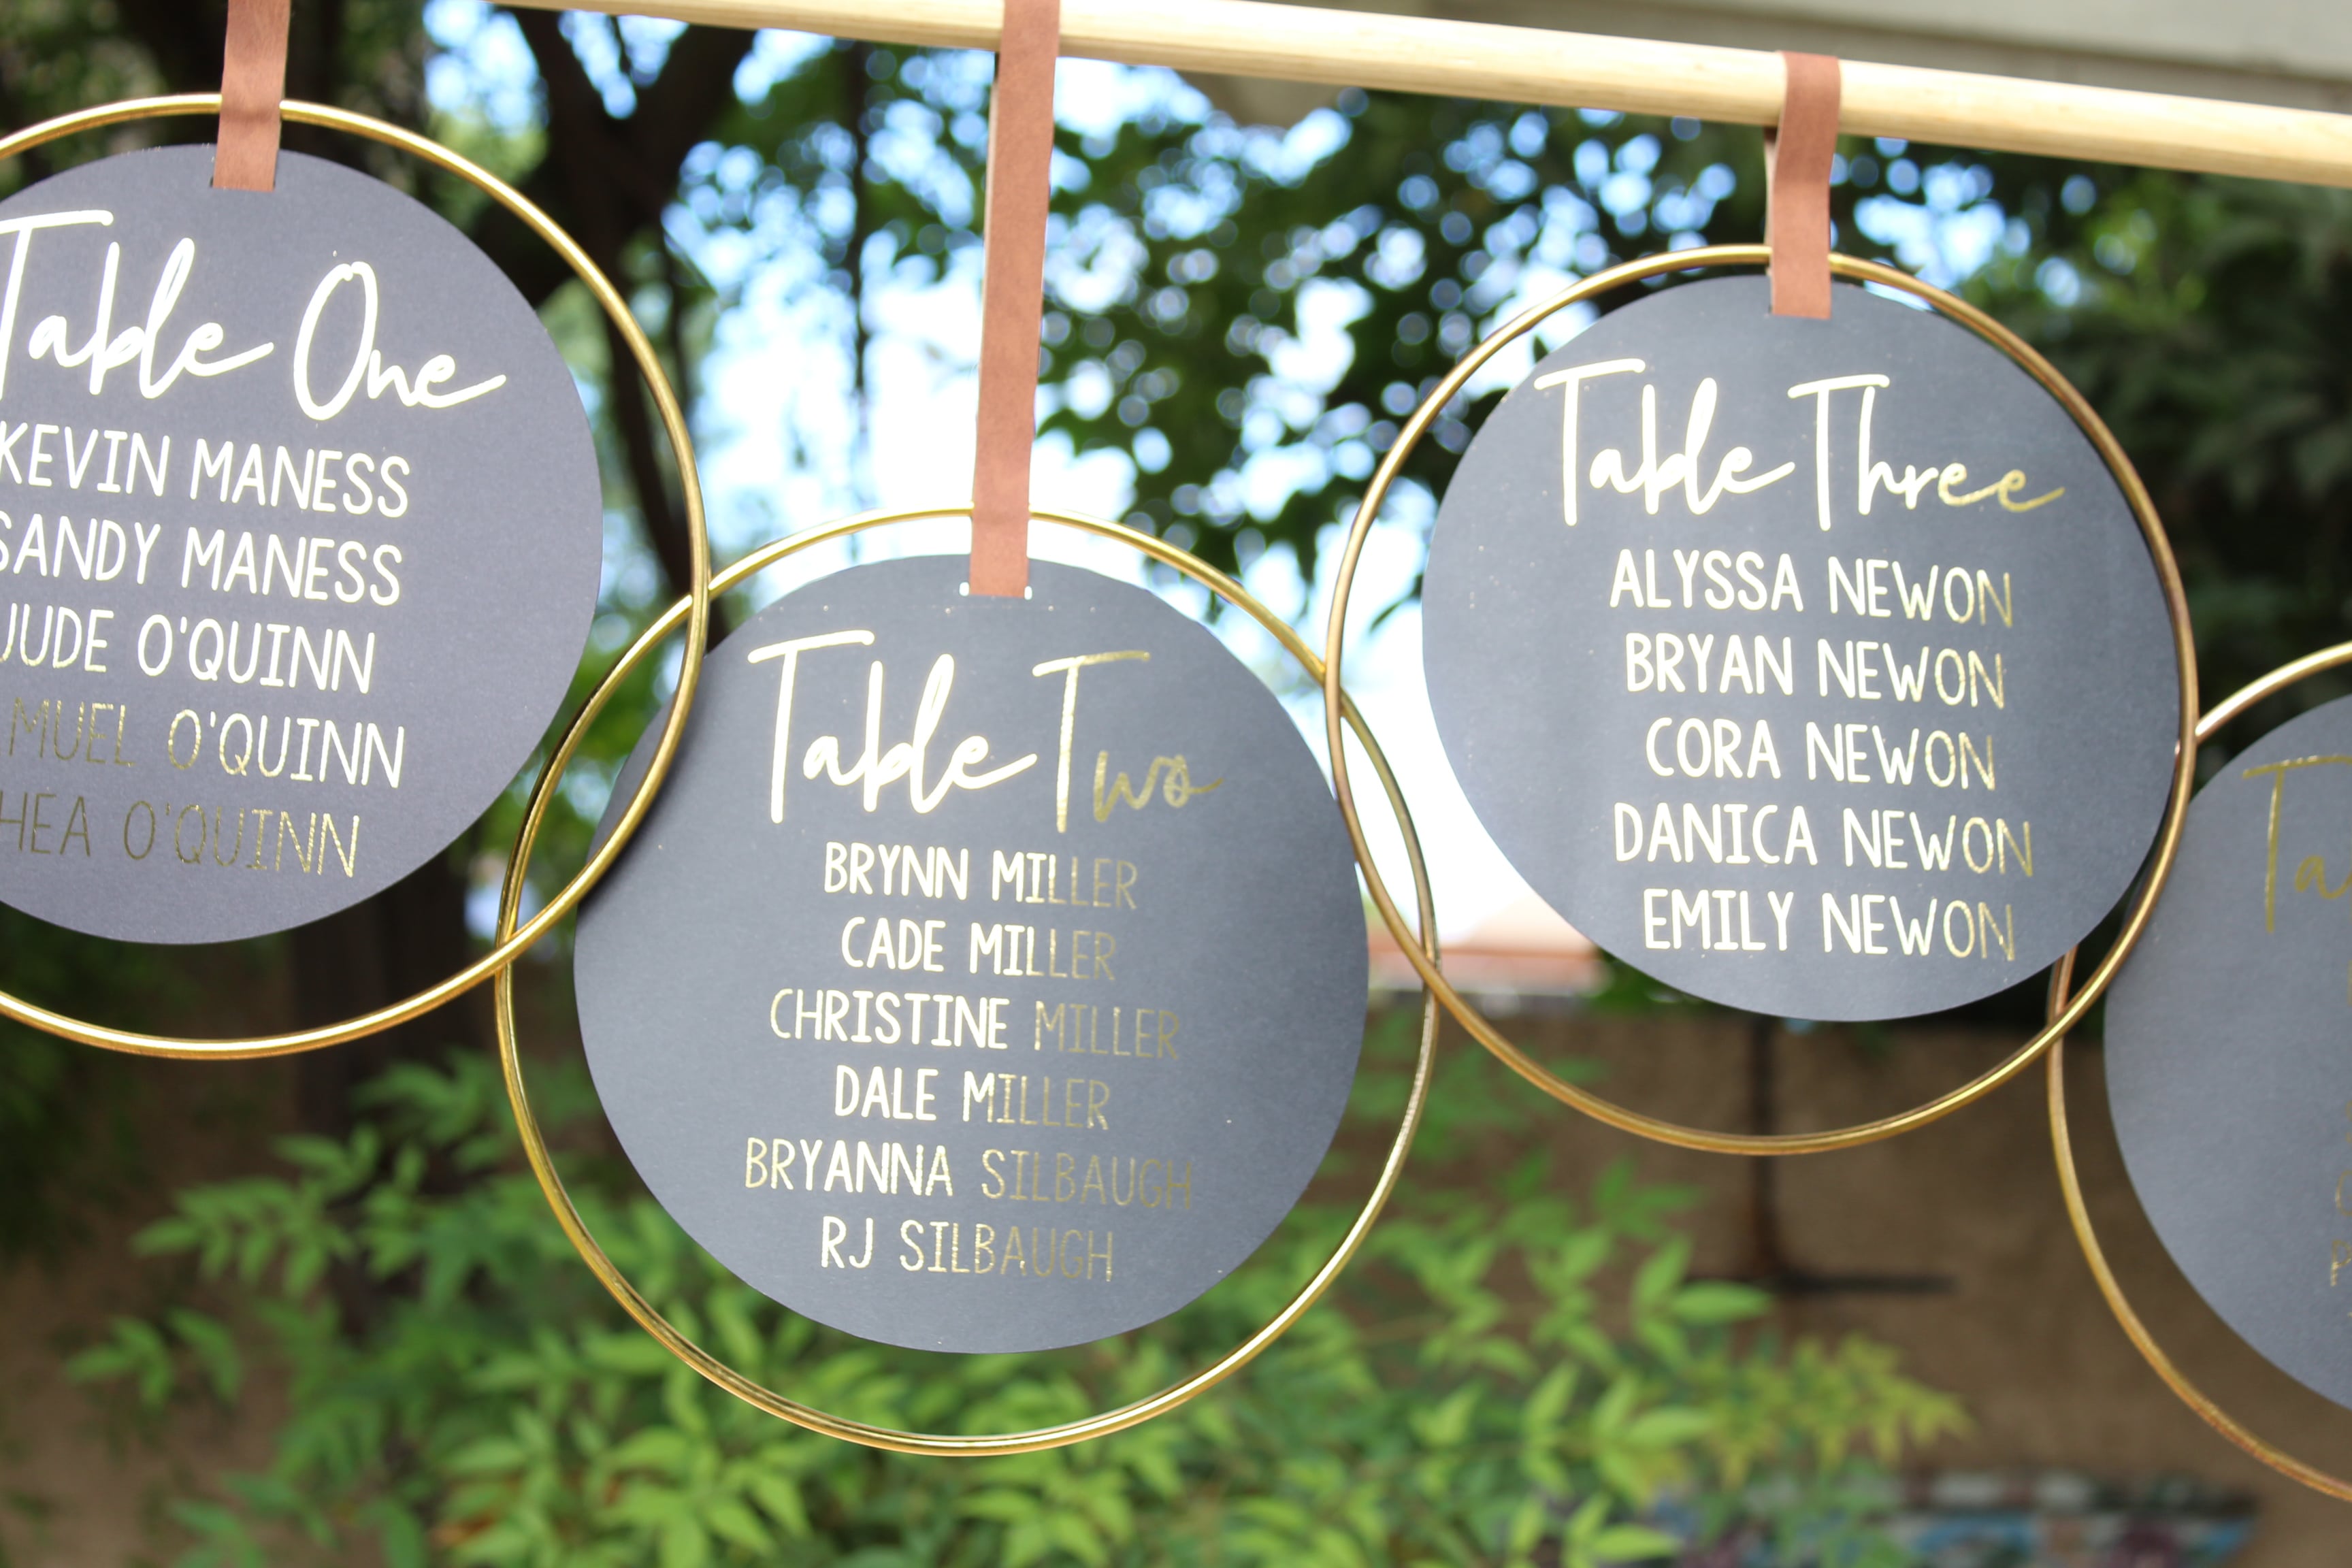
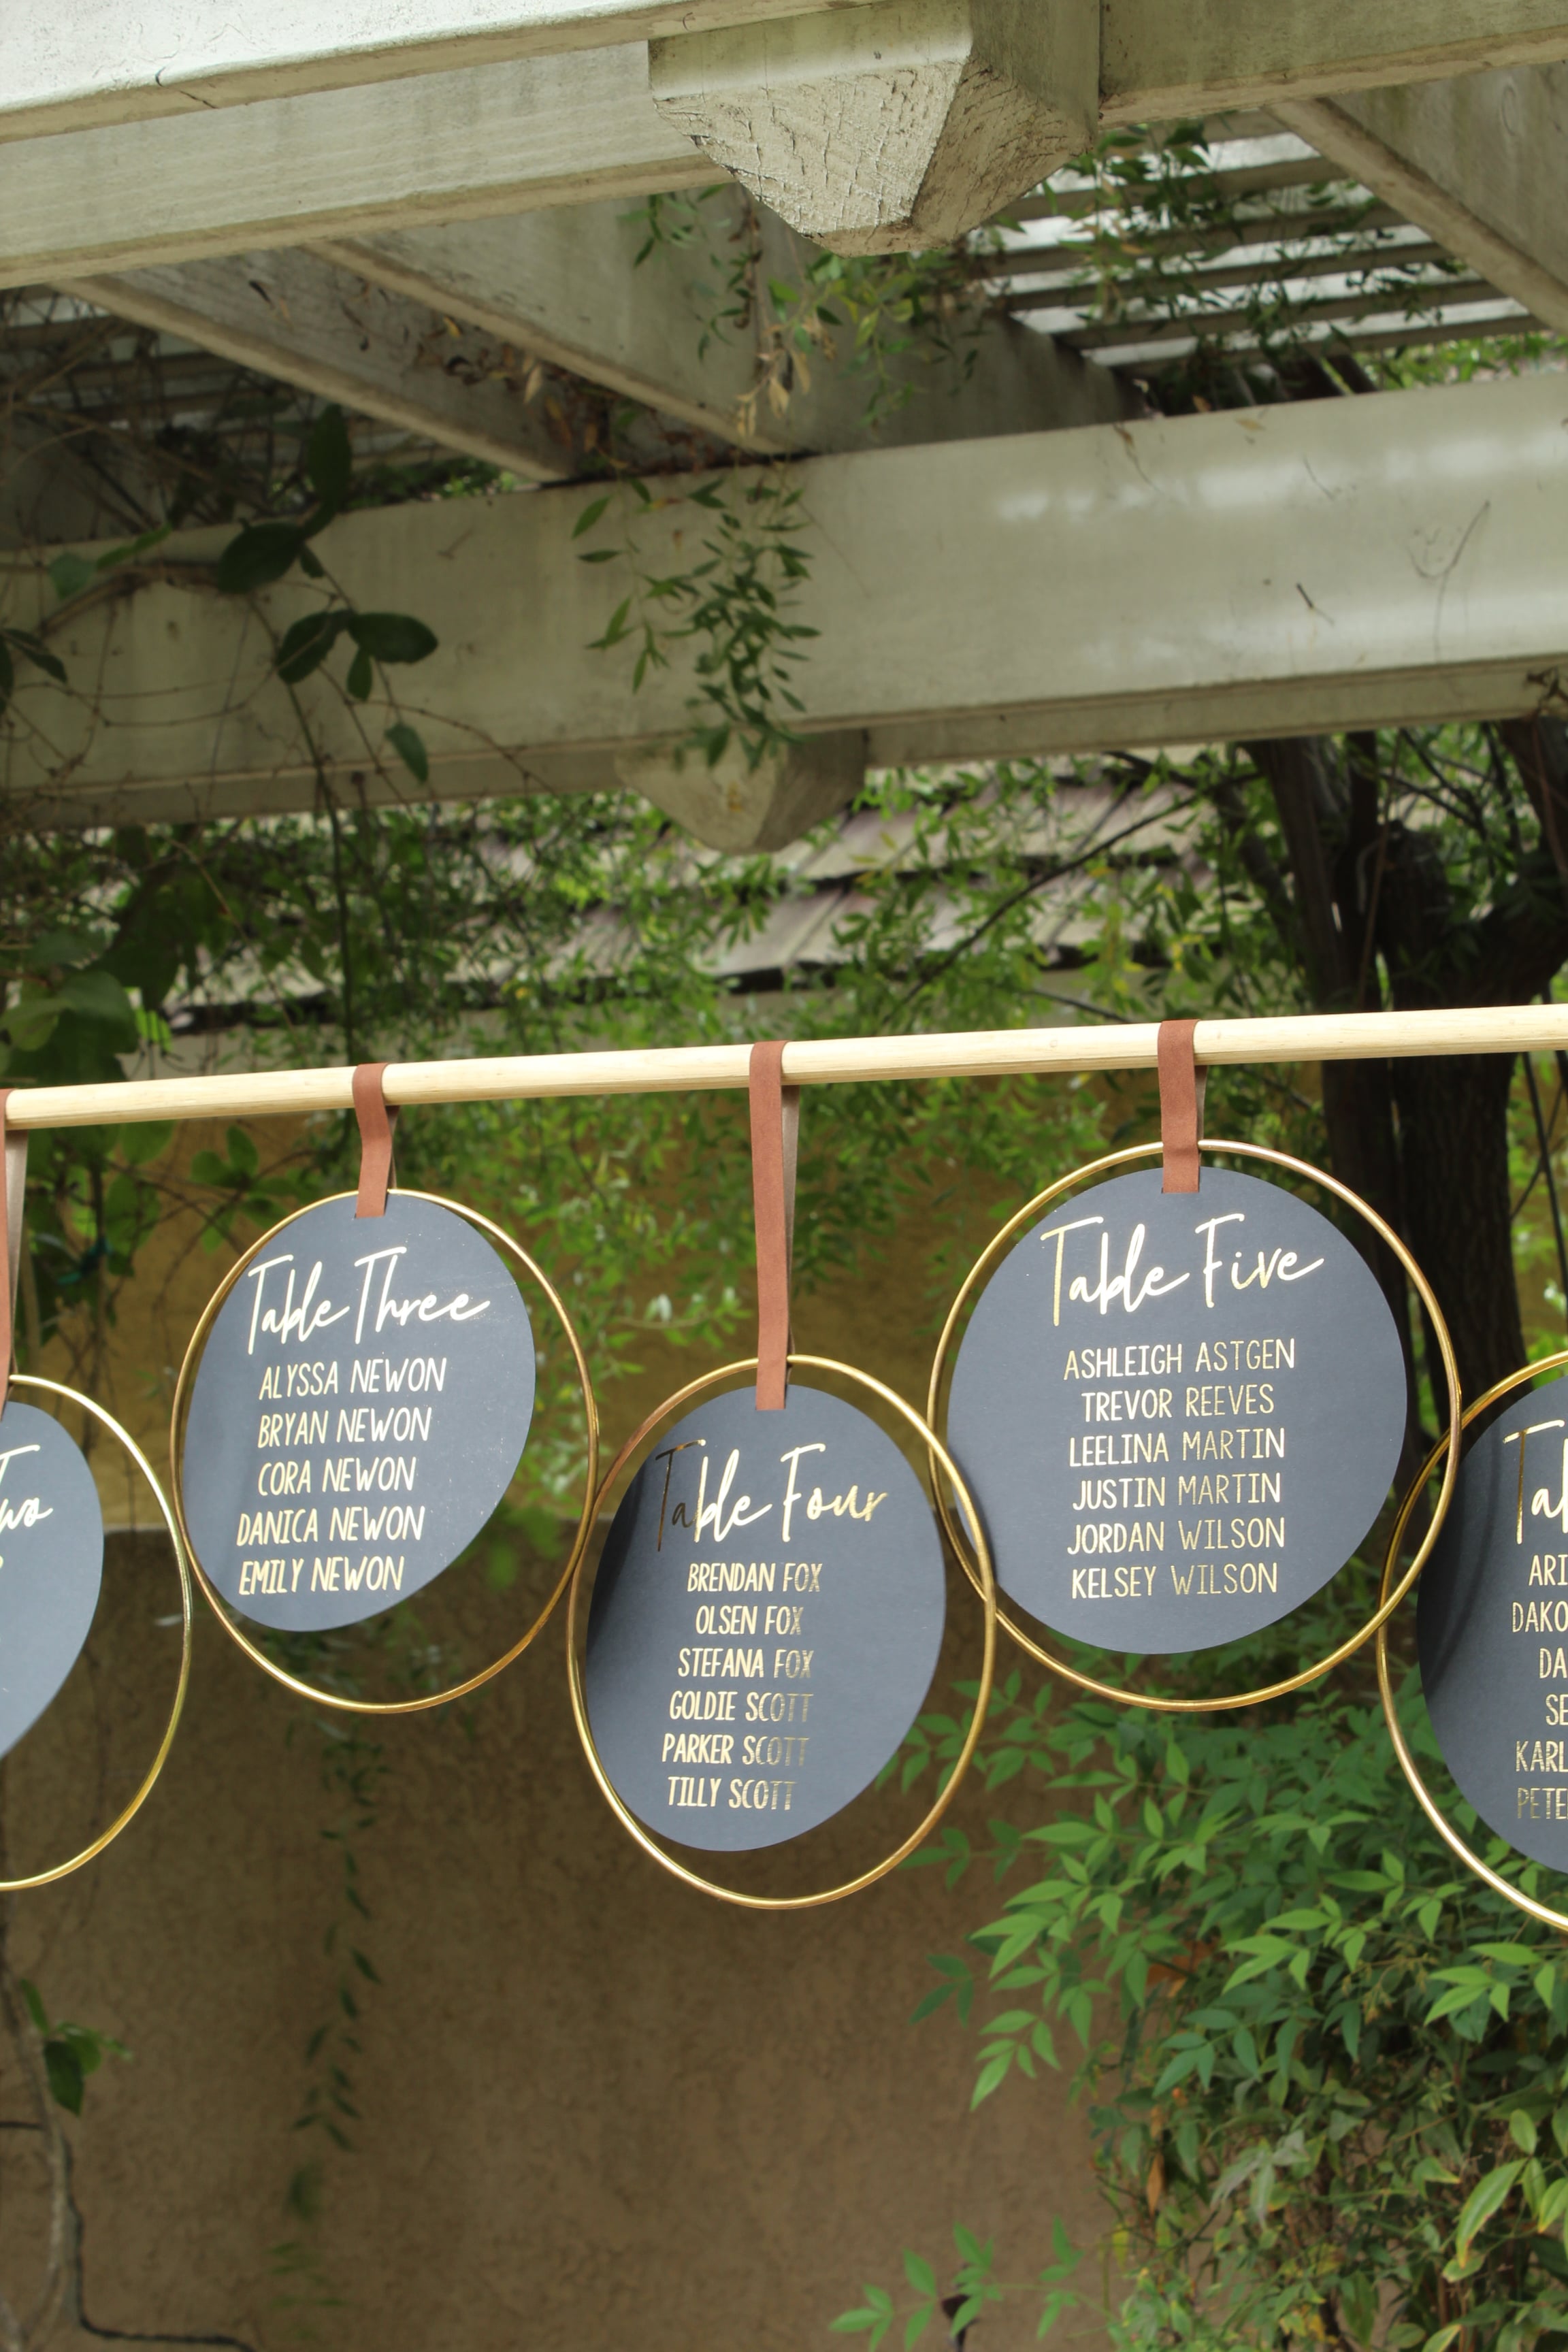
Since every version of this project will be different, depending on whose wedding it is, I simply created the circles that way you can make however many you need for your event. This way you can also name the tables whatever you’d like (I know some people don’t actually use numbers) and you can also add your own guests. (You can find the link to my project in Design Space at the bottom of the post.) Once you’ve added your texts, flatten it onto your circles so that it will print then cut.
I know that not every bride-to-be has a Cricut machine (although I think you definitely should… I actually got my first Cricut while planning my own wedding!) so, I also found a way to create this project using Microsoft PowerPoint (yes you read that right, PowerPoint is actually one of my favorite programs for designing). Full disclosure, since you’ll be cutting by hand your cuts probably won’t be as clean as they would with a Cricut, you can still create the same look!
Simply add a 6.75 inch circle. Add your text and then add a rectangle that is .09″ high and .55″ wide to the top (this is where you will add the suede strips).

Then print and cut by hand!
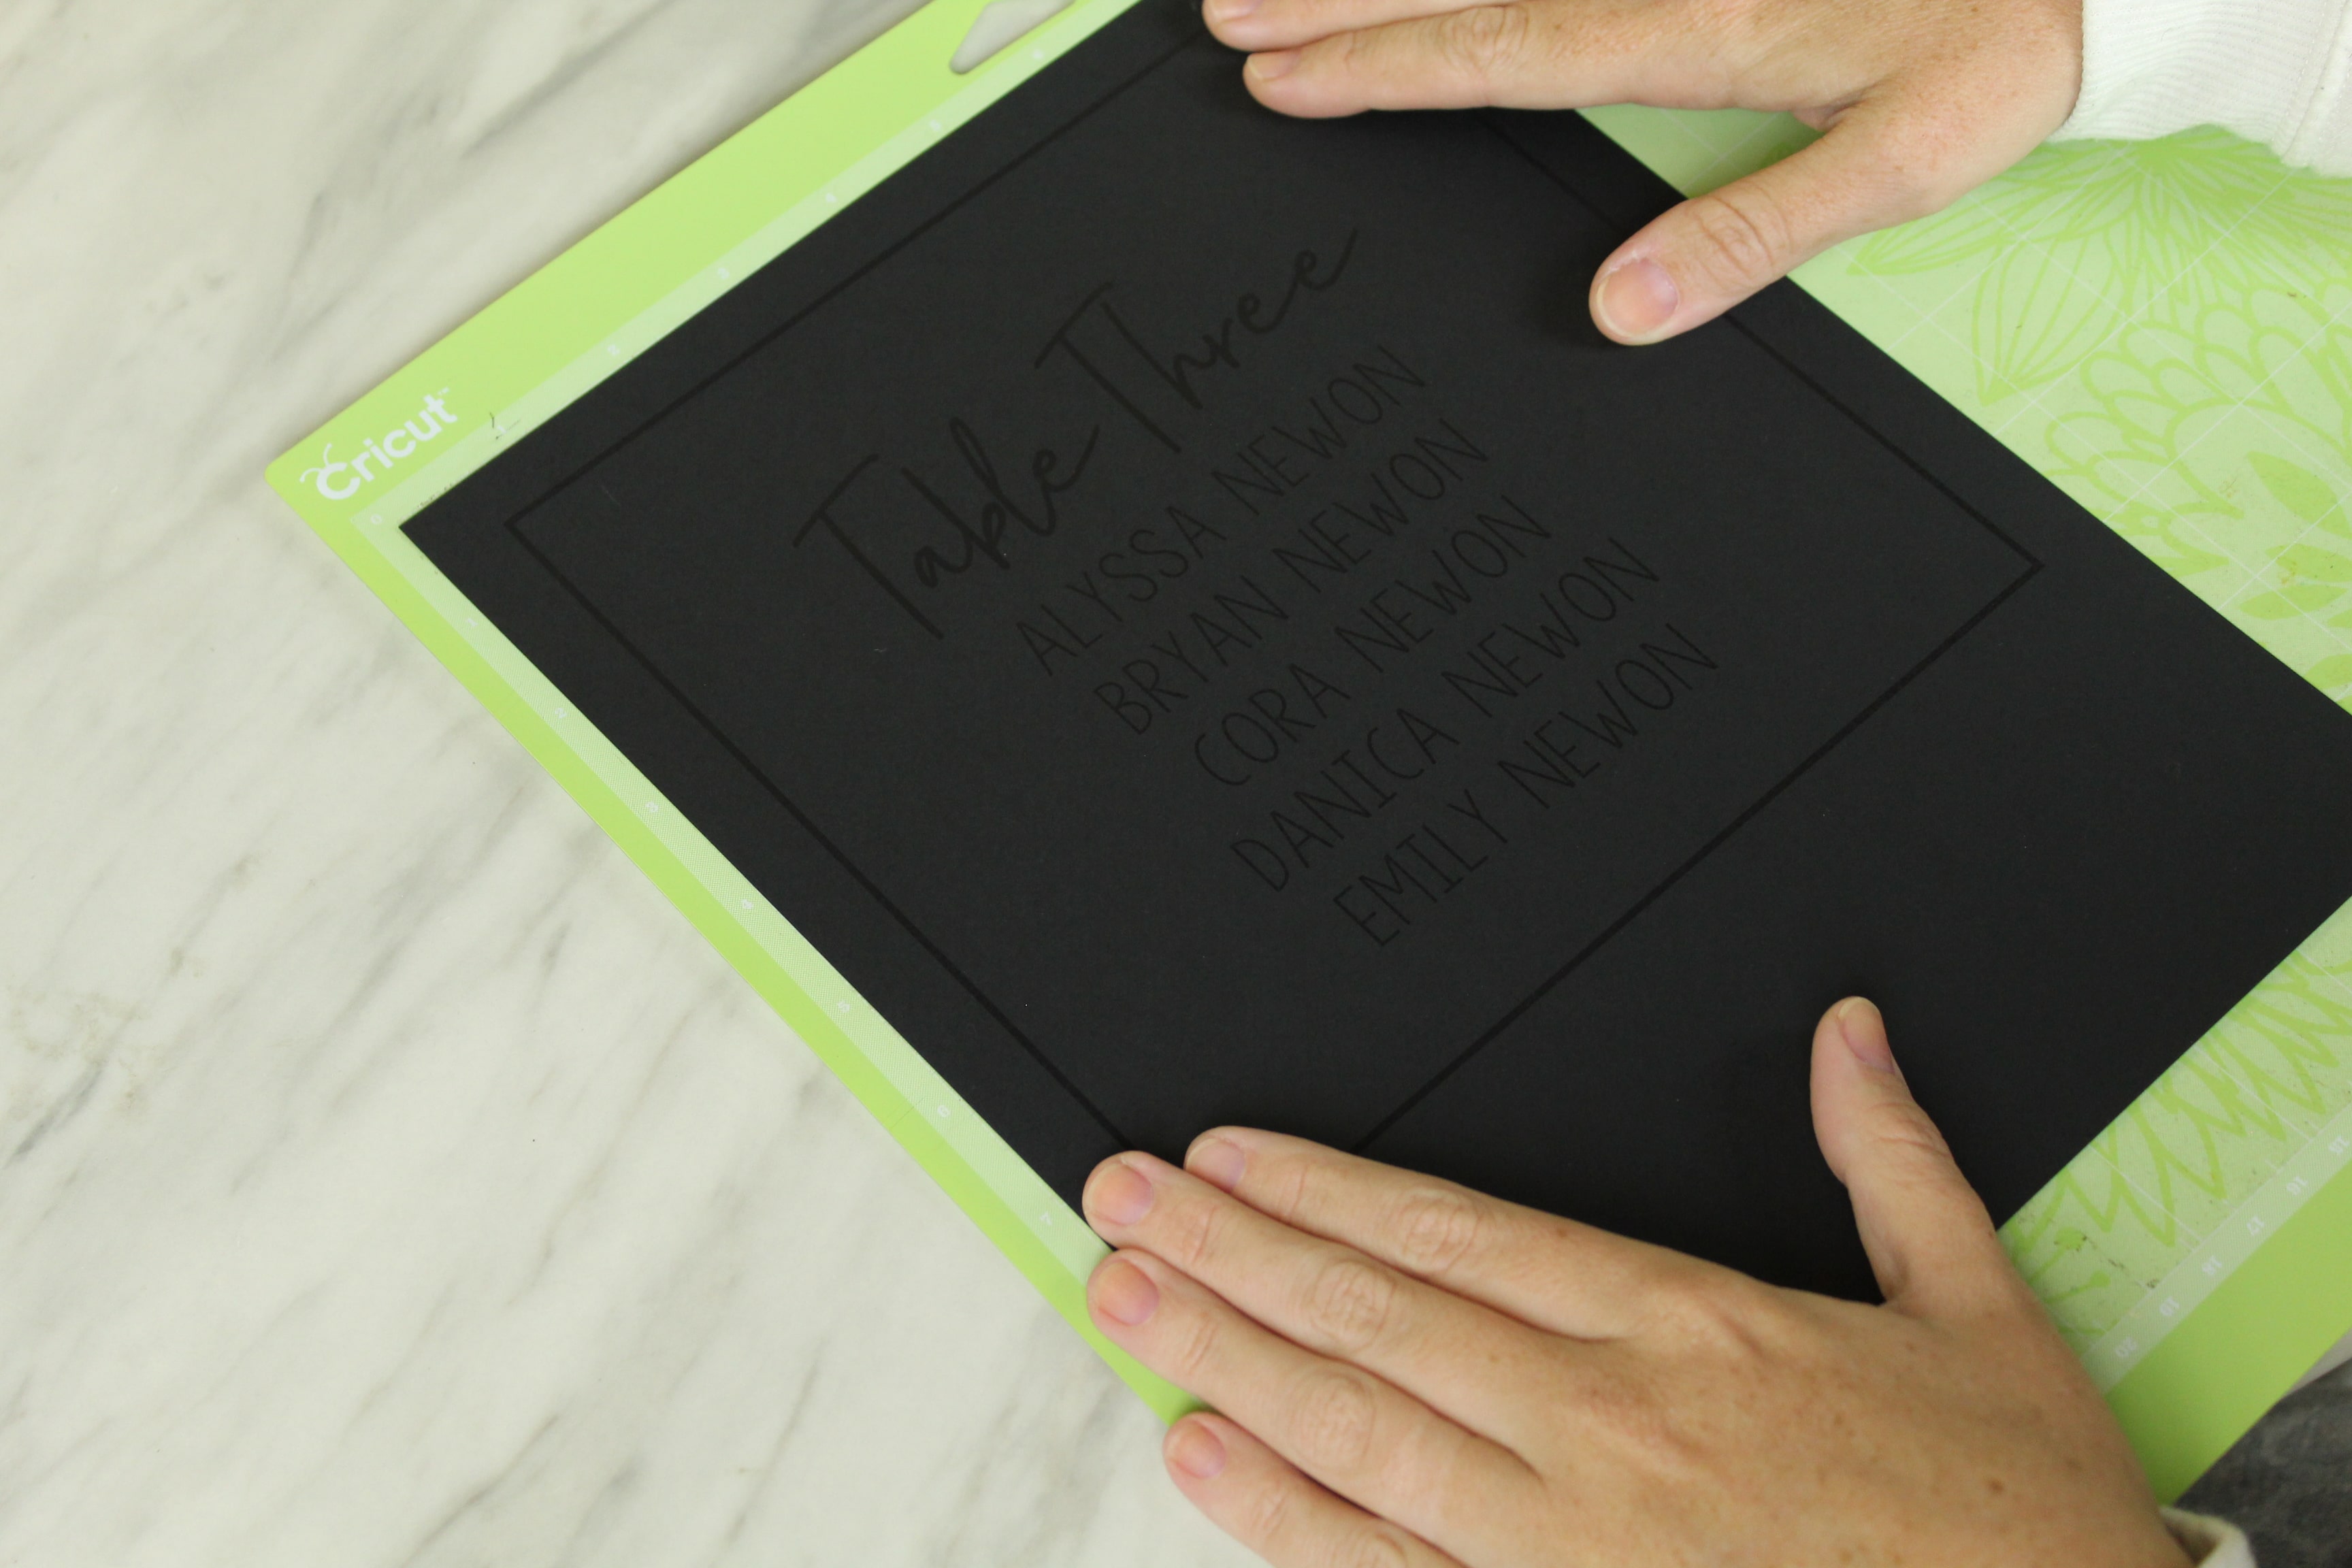
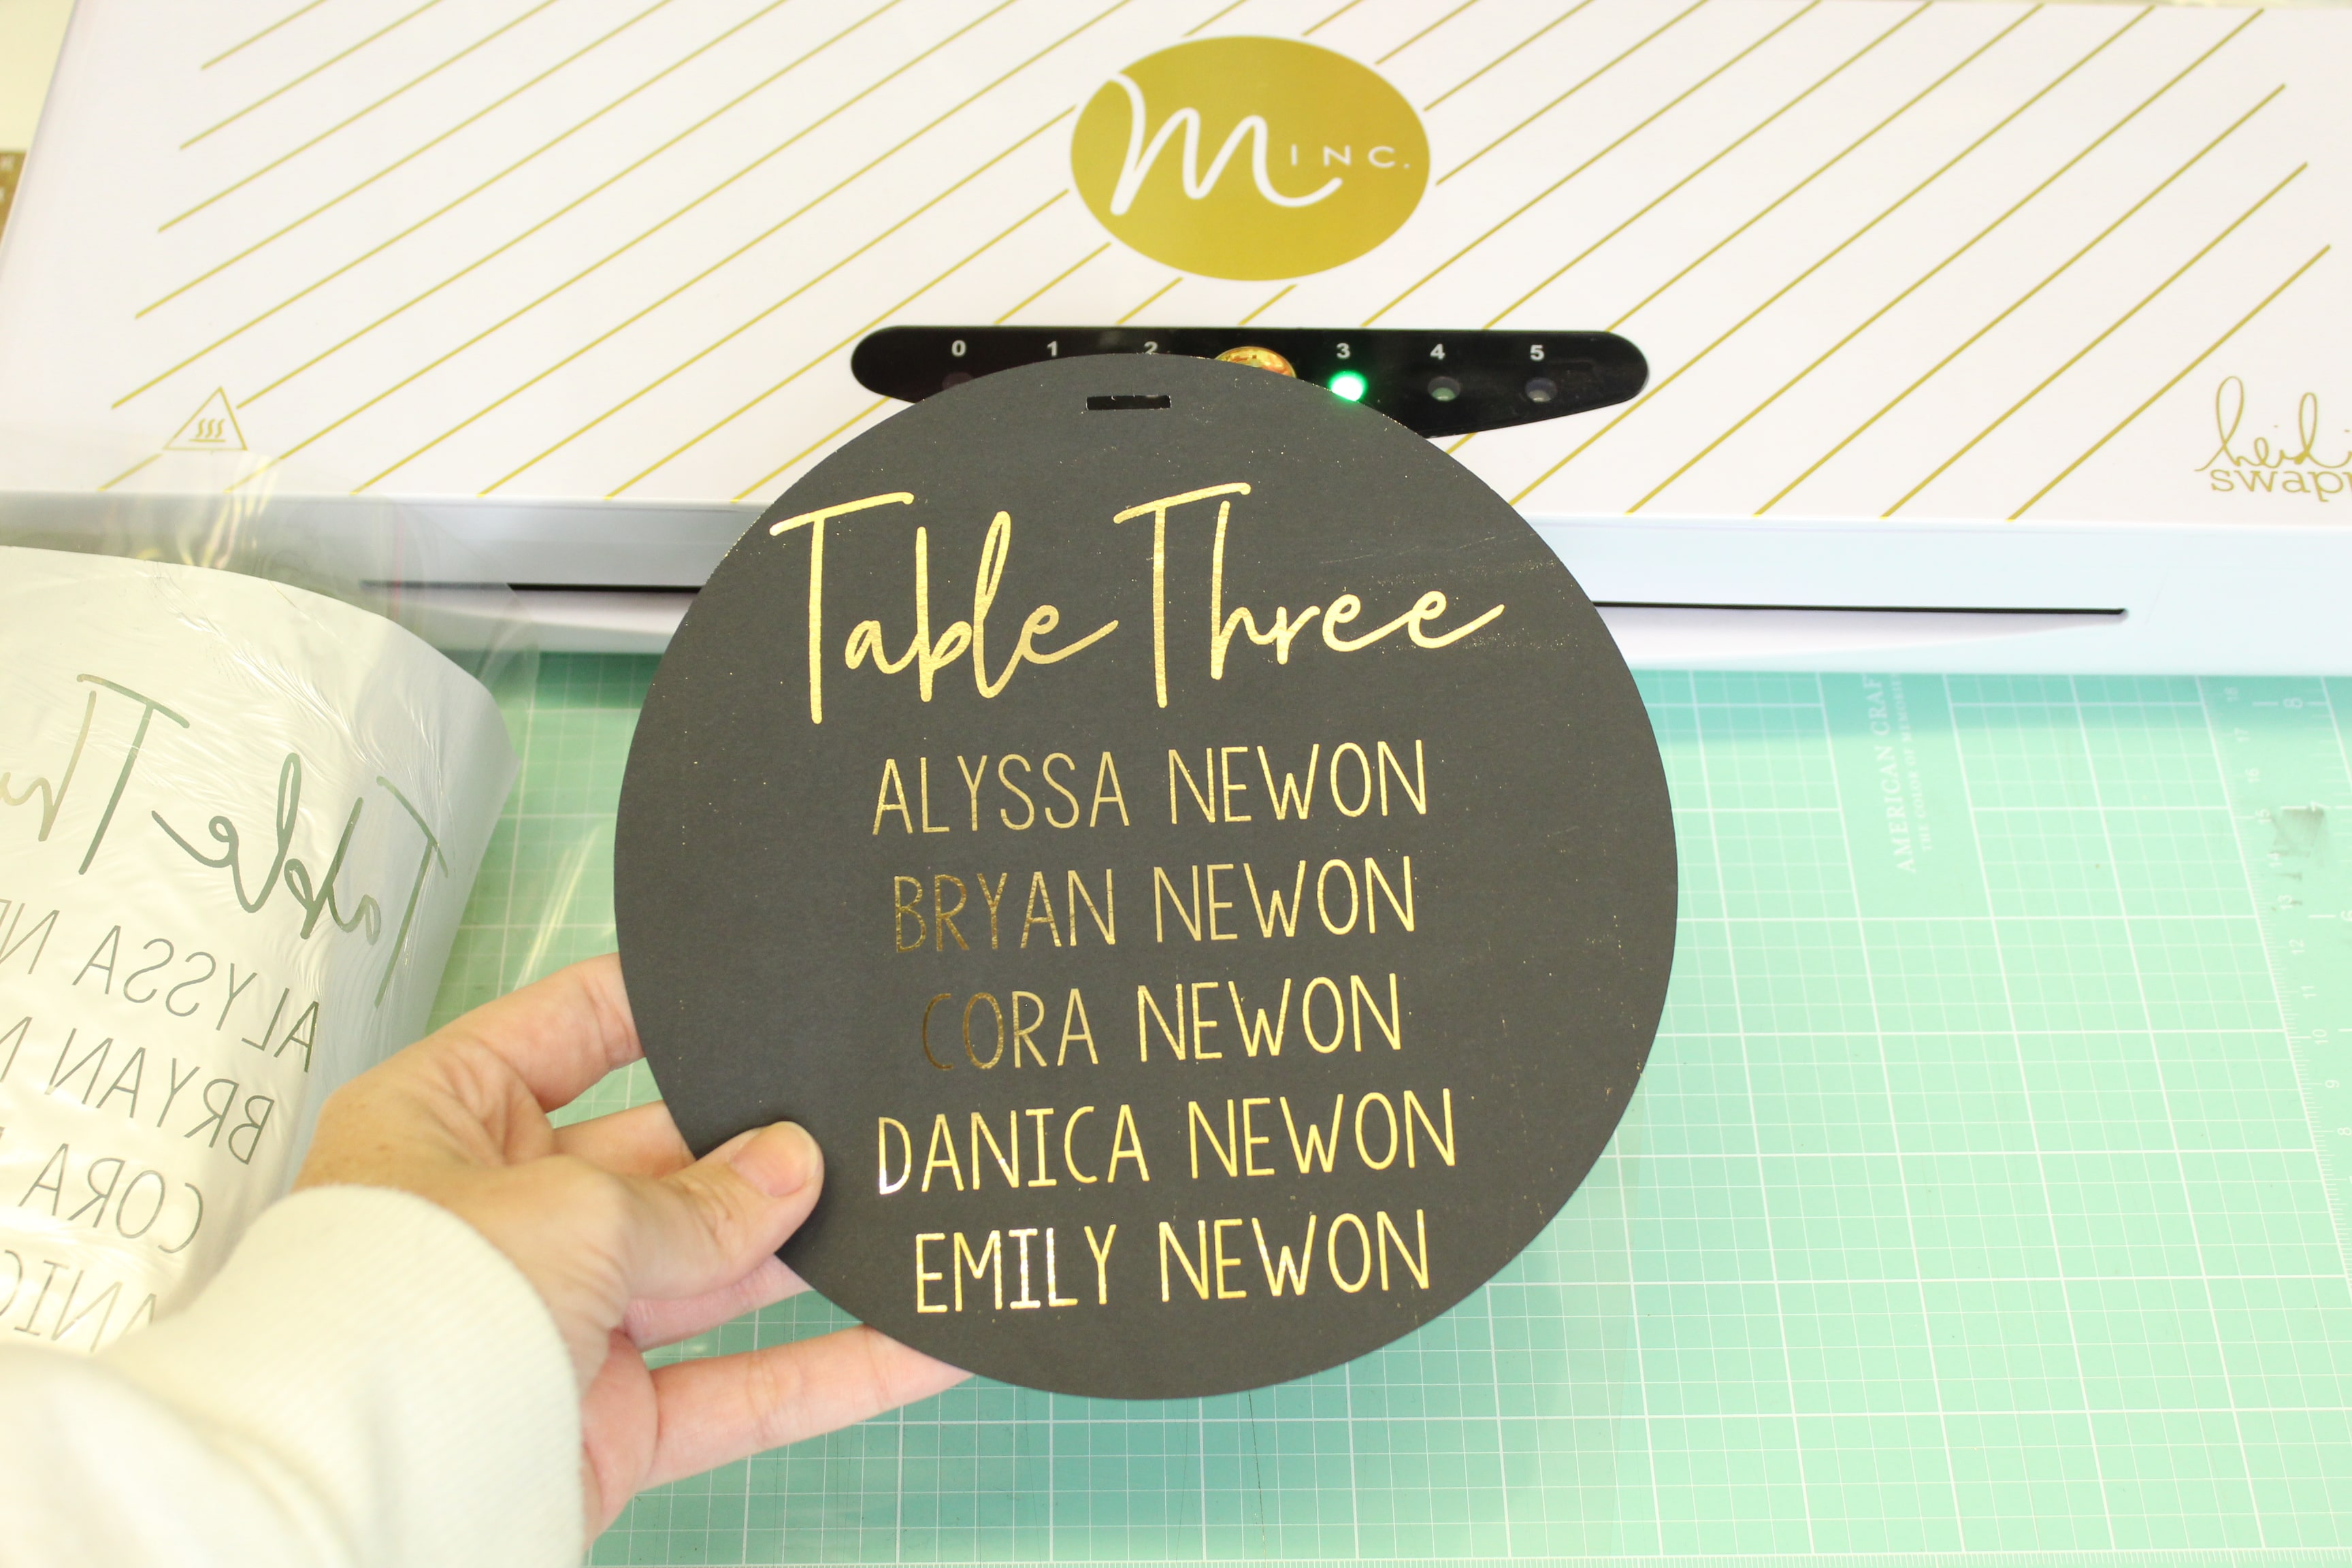
Print Design
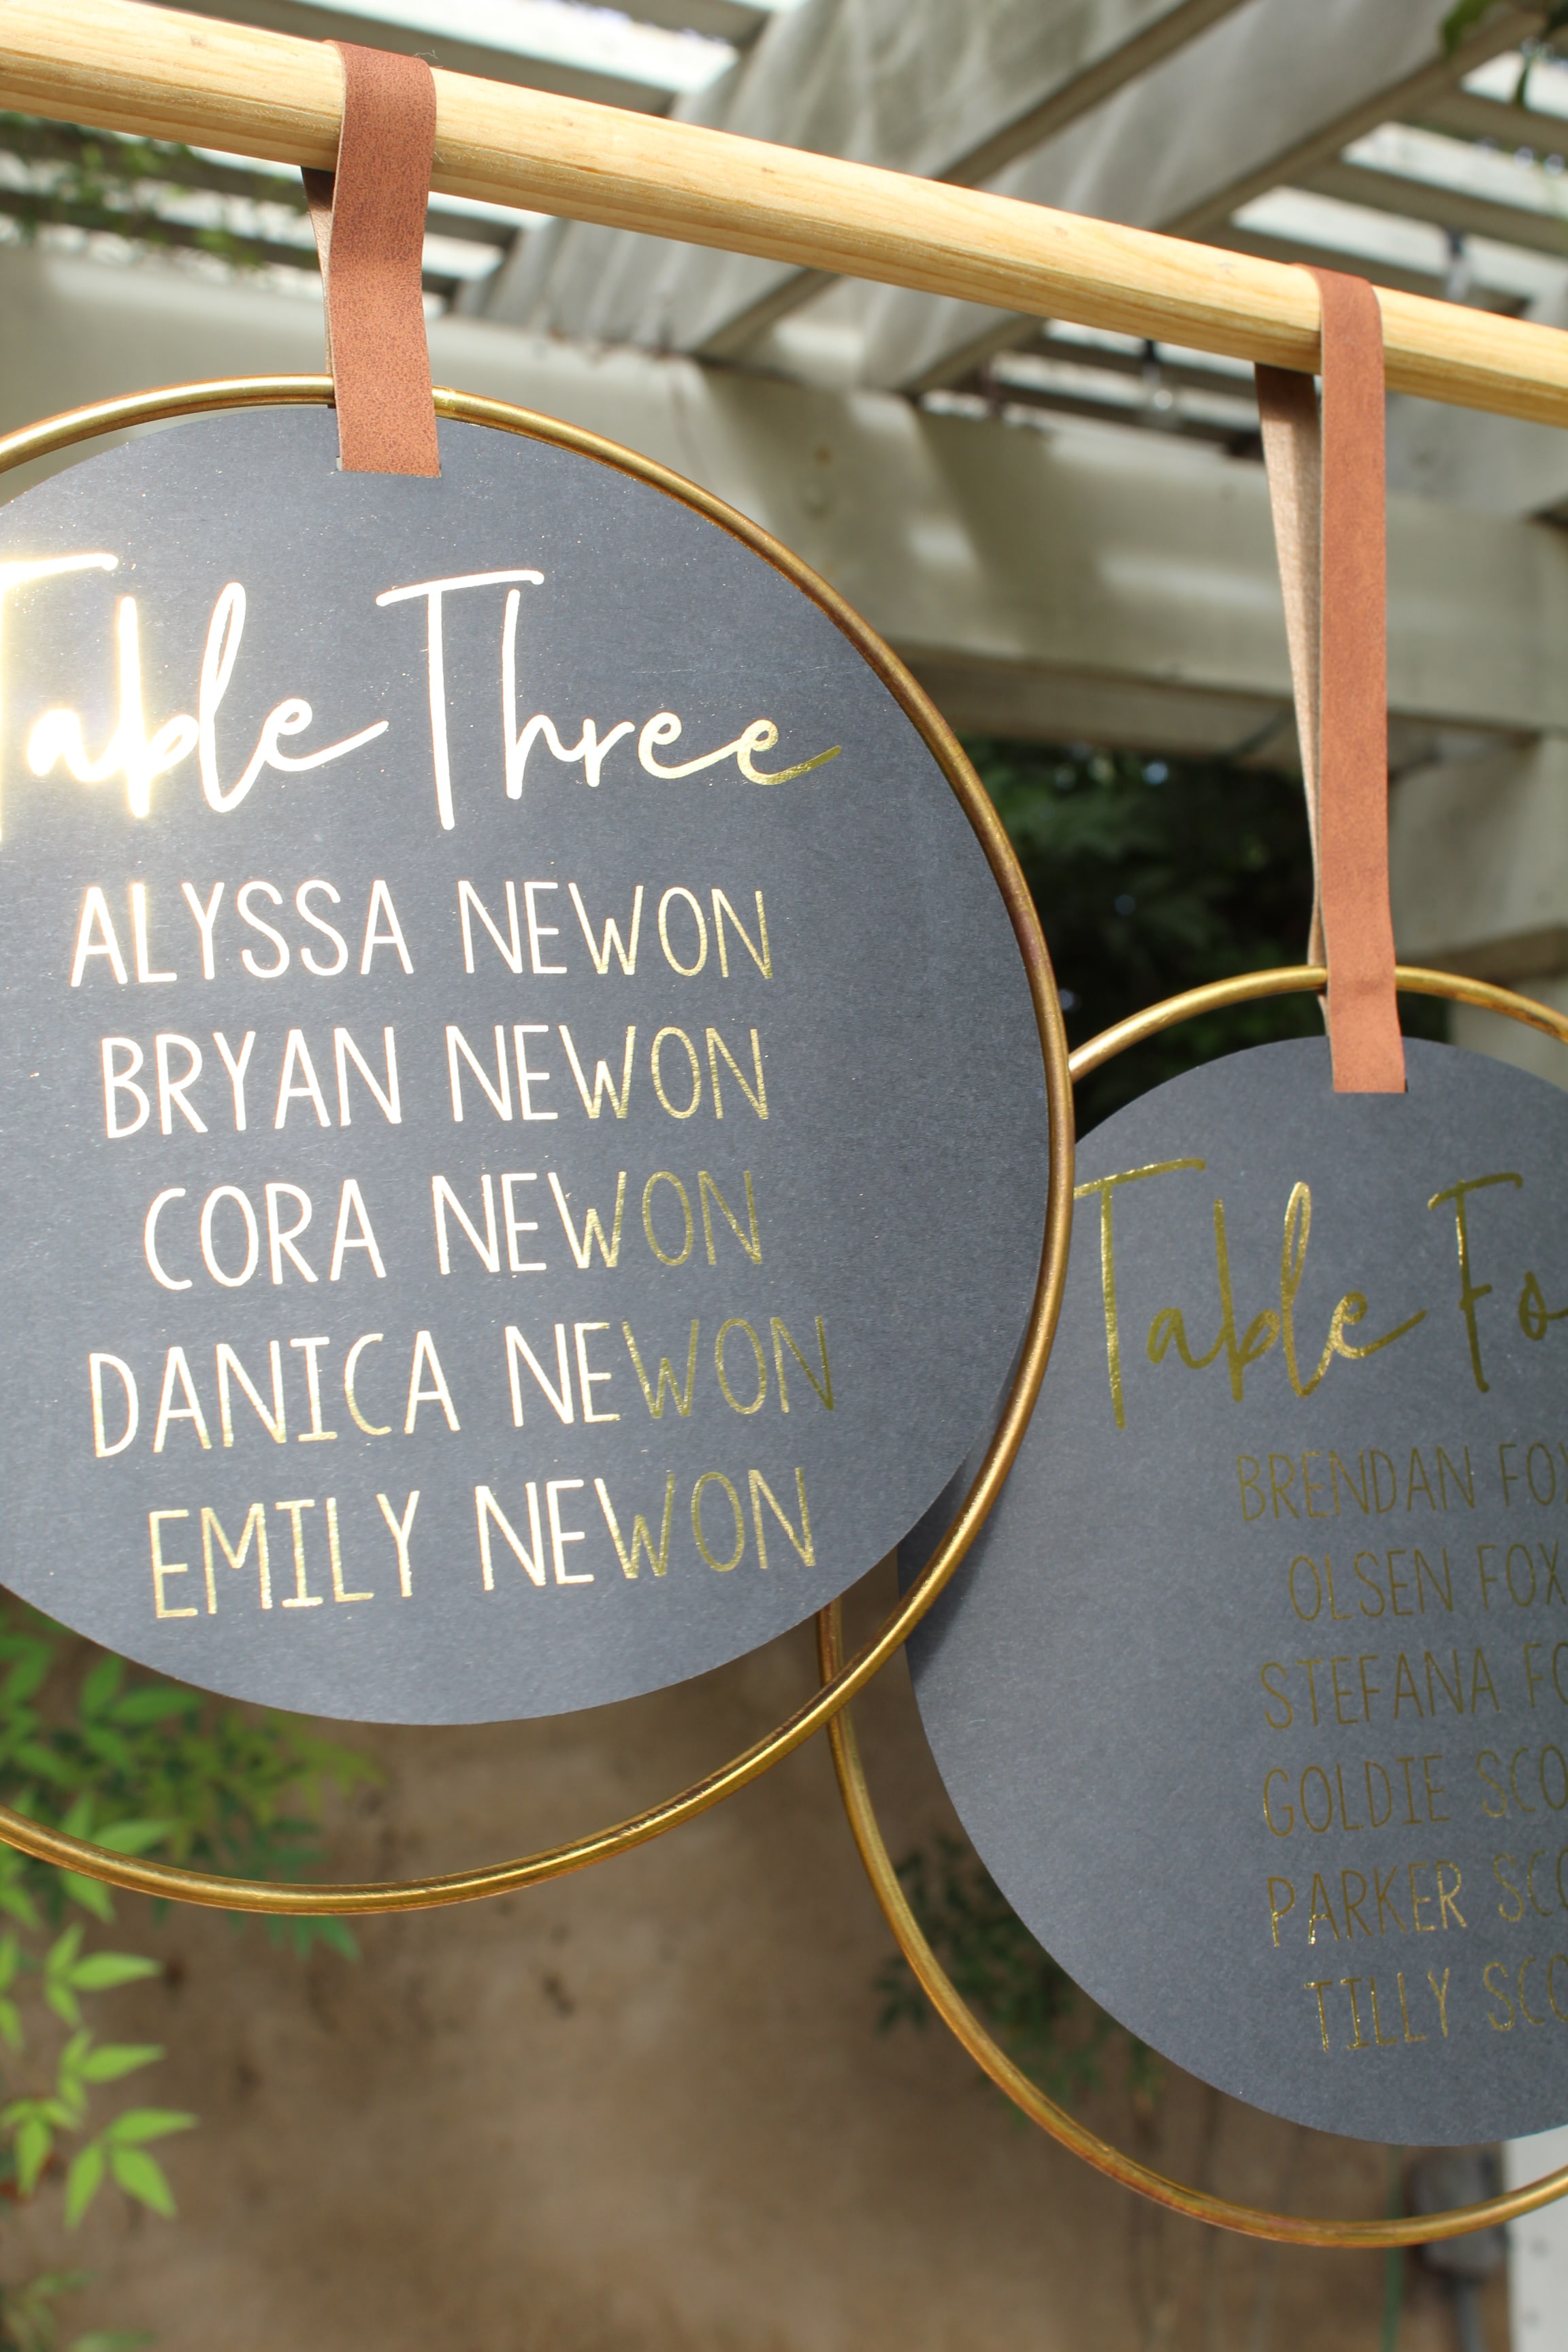
Once you’re happy with your design, print it. I wanted to up the wow factor a bit so I actually printed on black cardstock using my laserjet printer so that I could foil my design using my Heidi Swapp Minc machine (this step is totally optional though). It would also look lovely simply printed on regular cardstock. Keep in mind that only the Cricut Maker can cut on paper that isn’t white so if you have an Explore machine you will have to print on white cardstock.
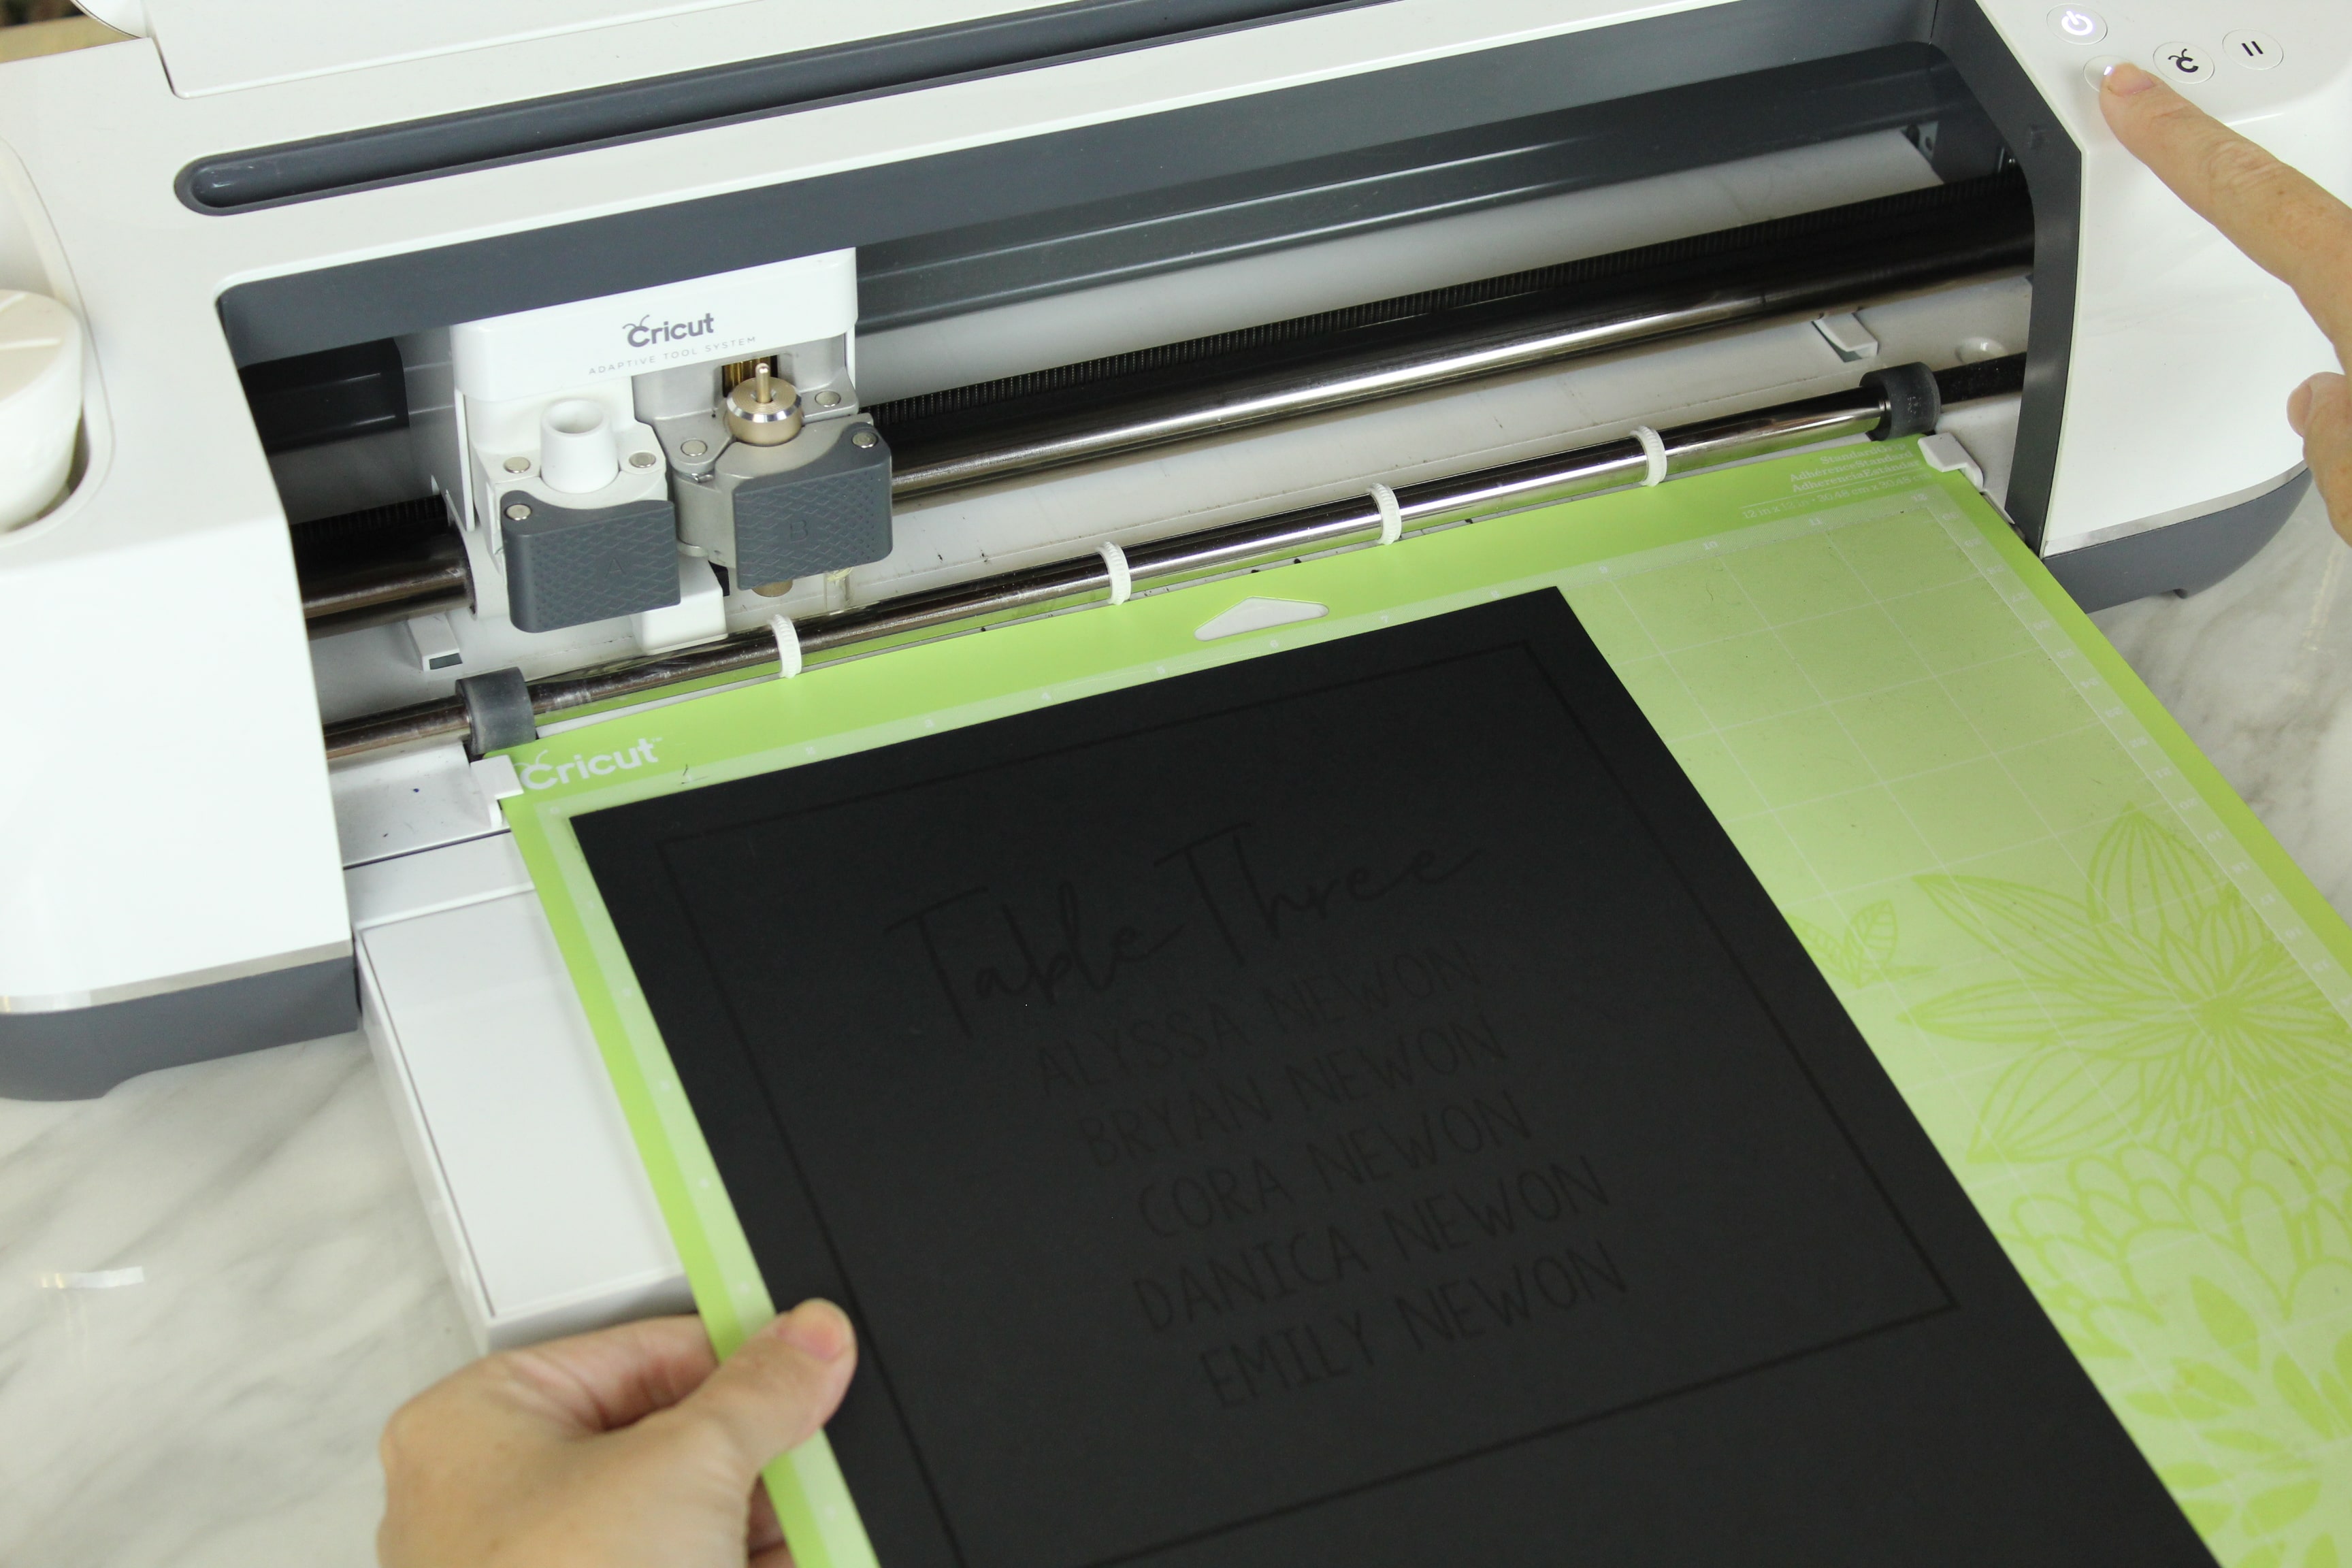
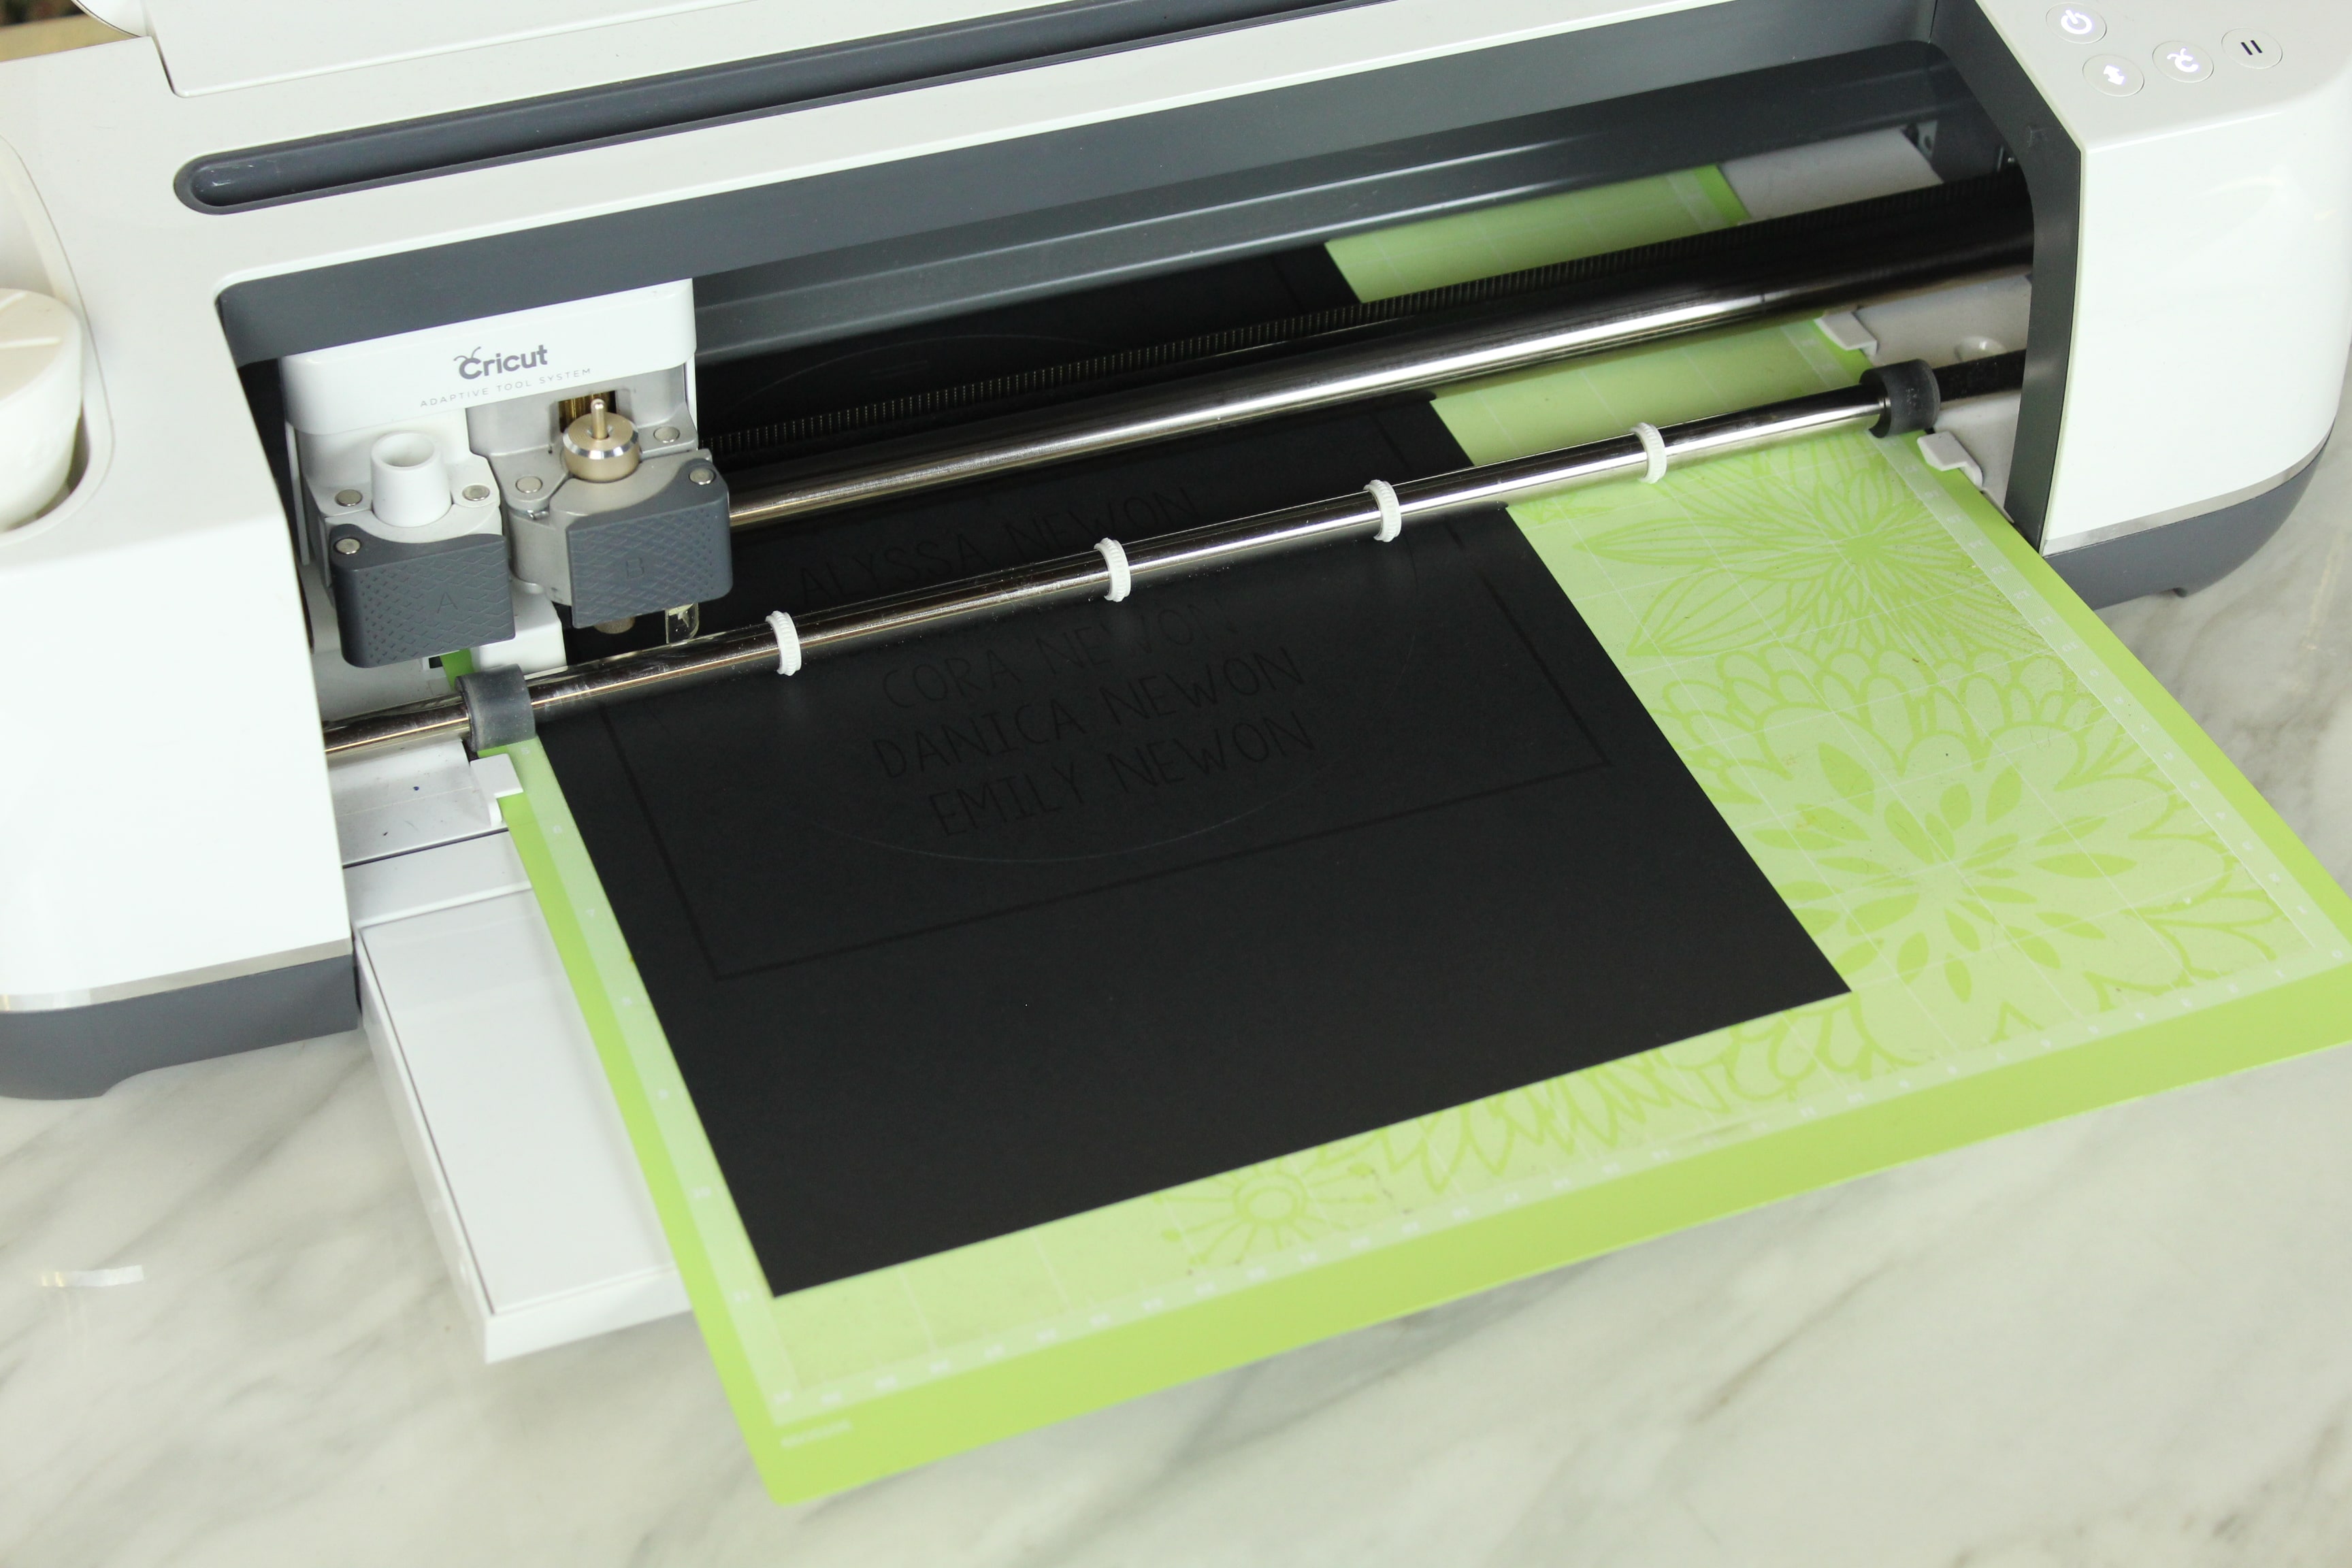
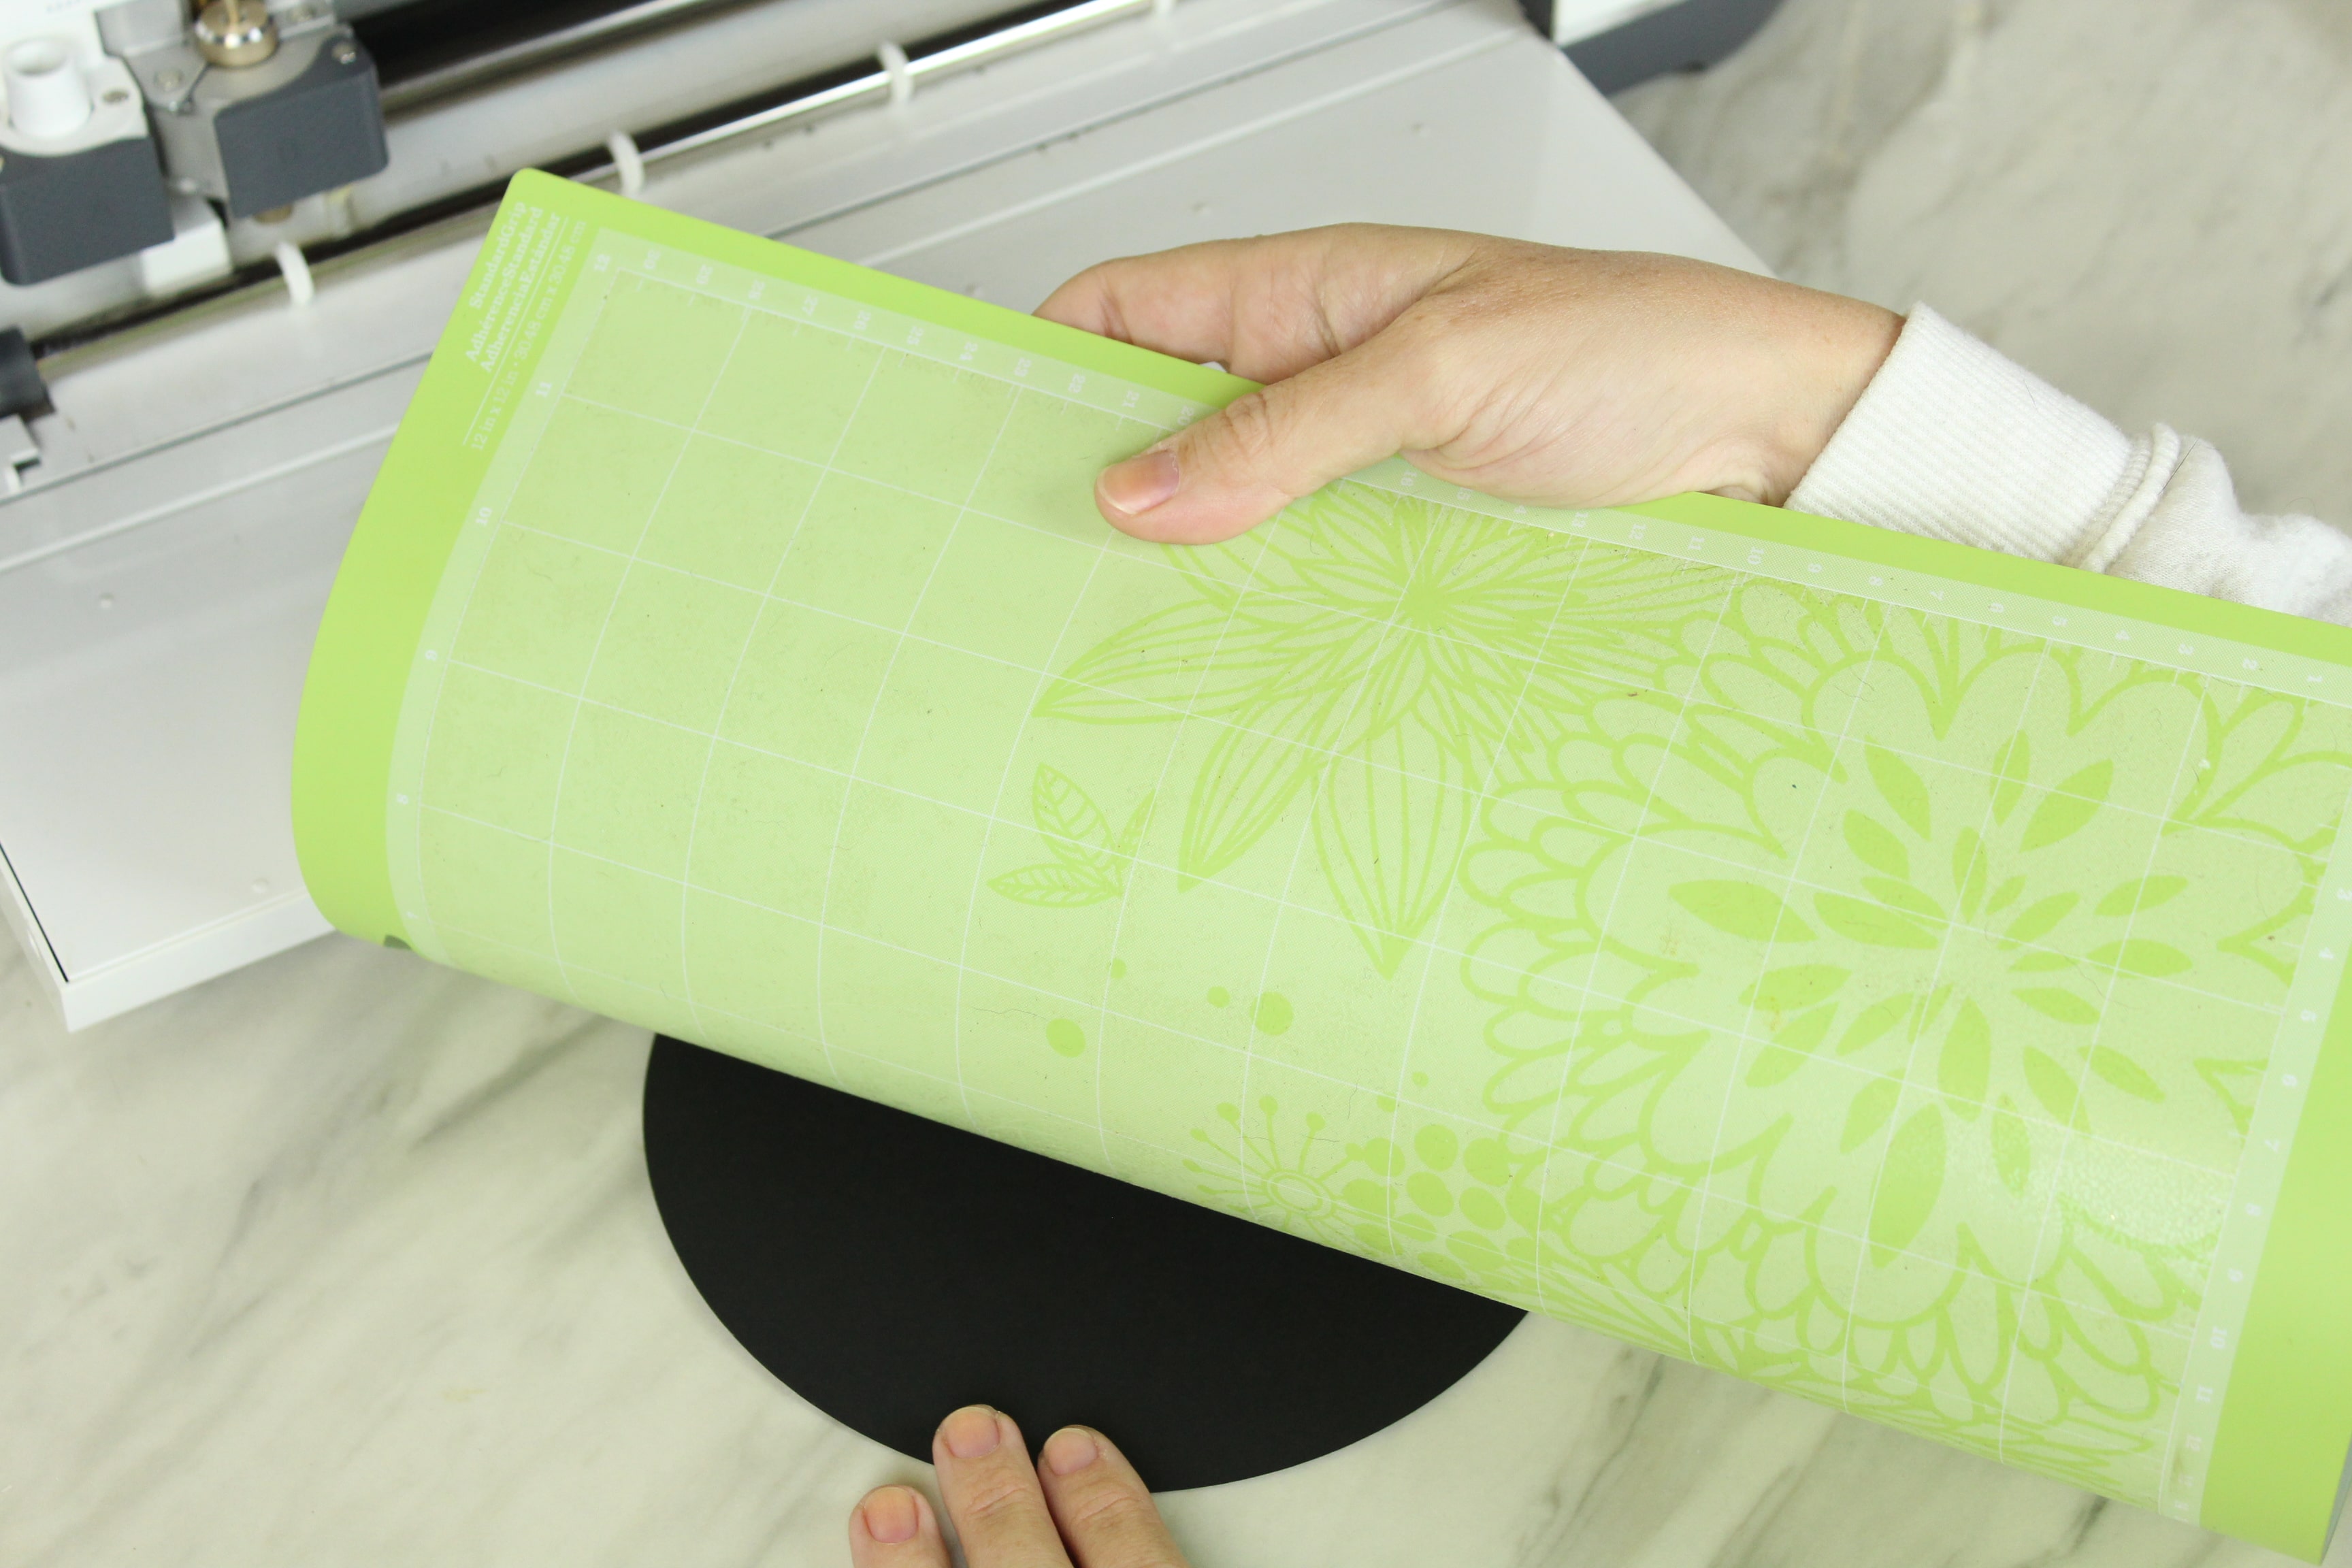
Cut Design
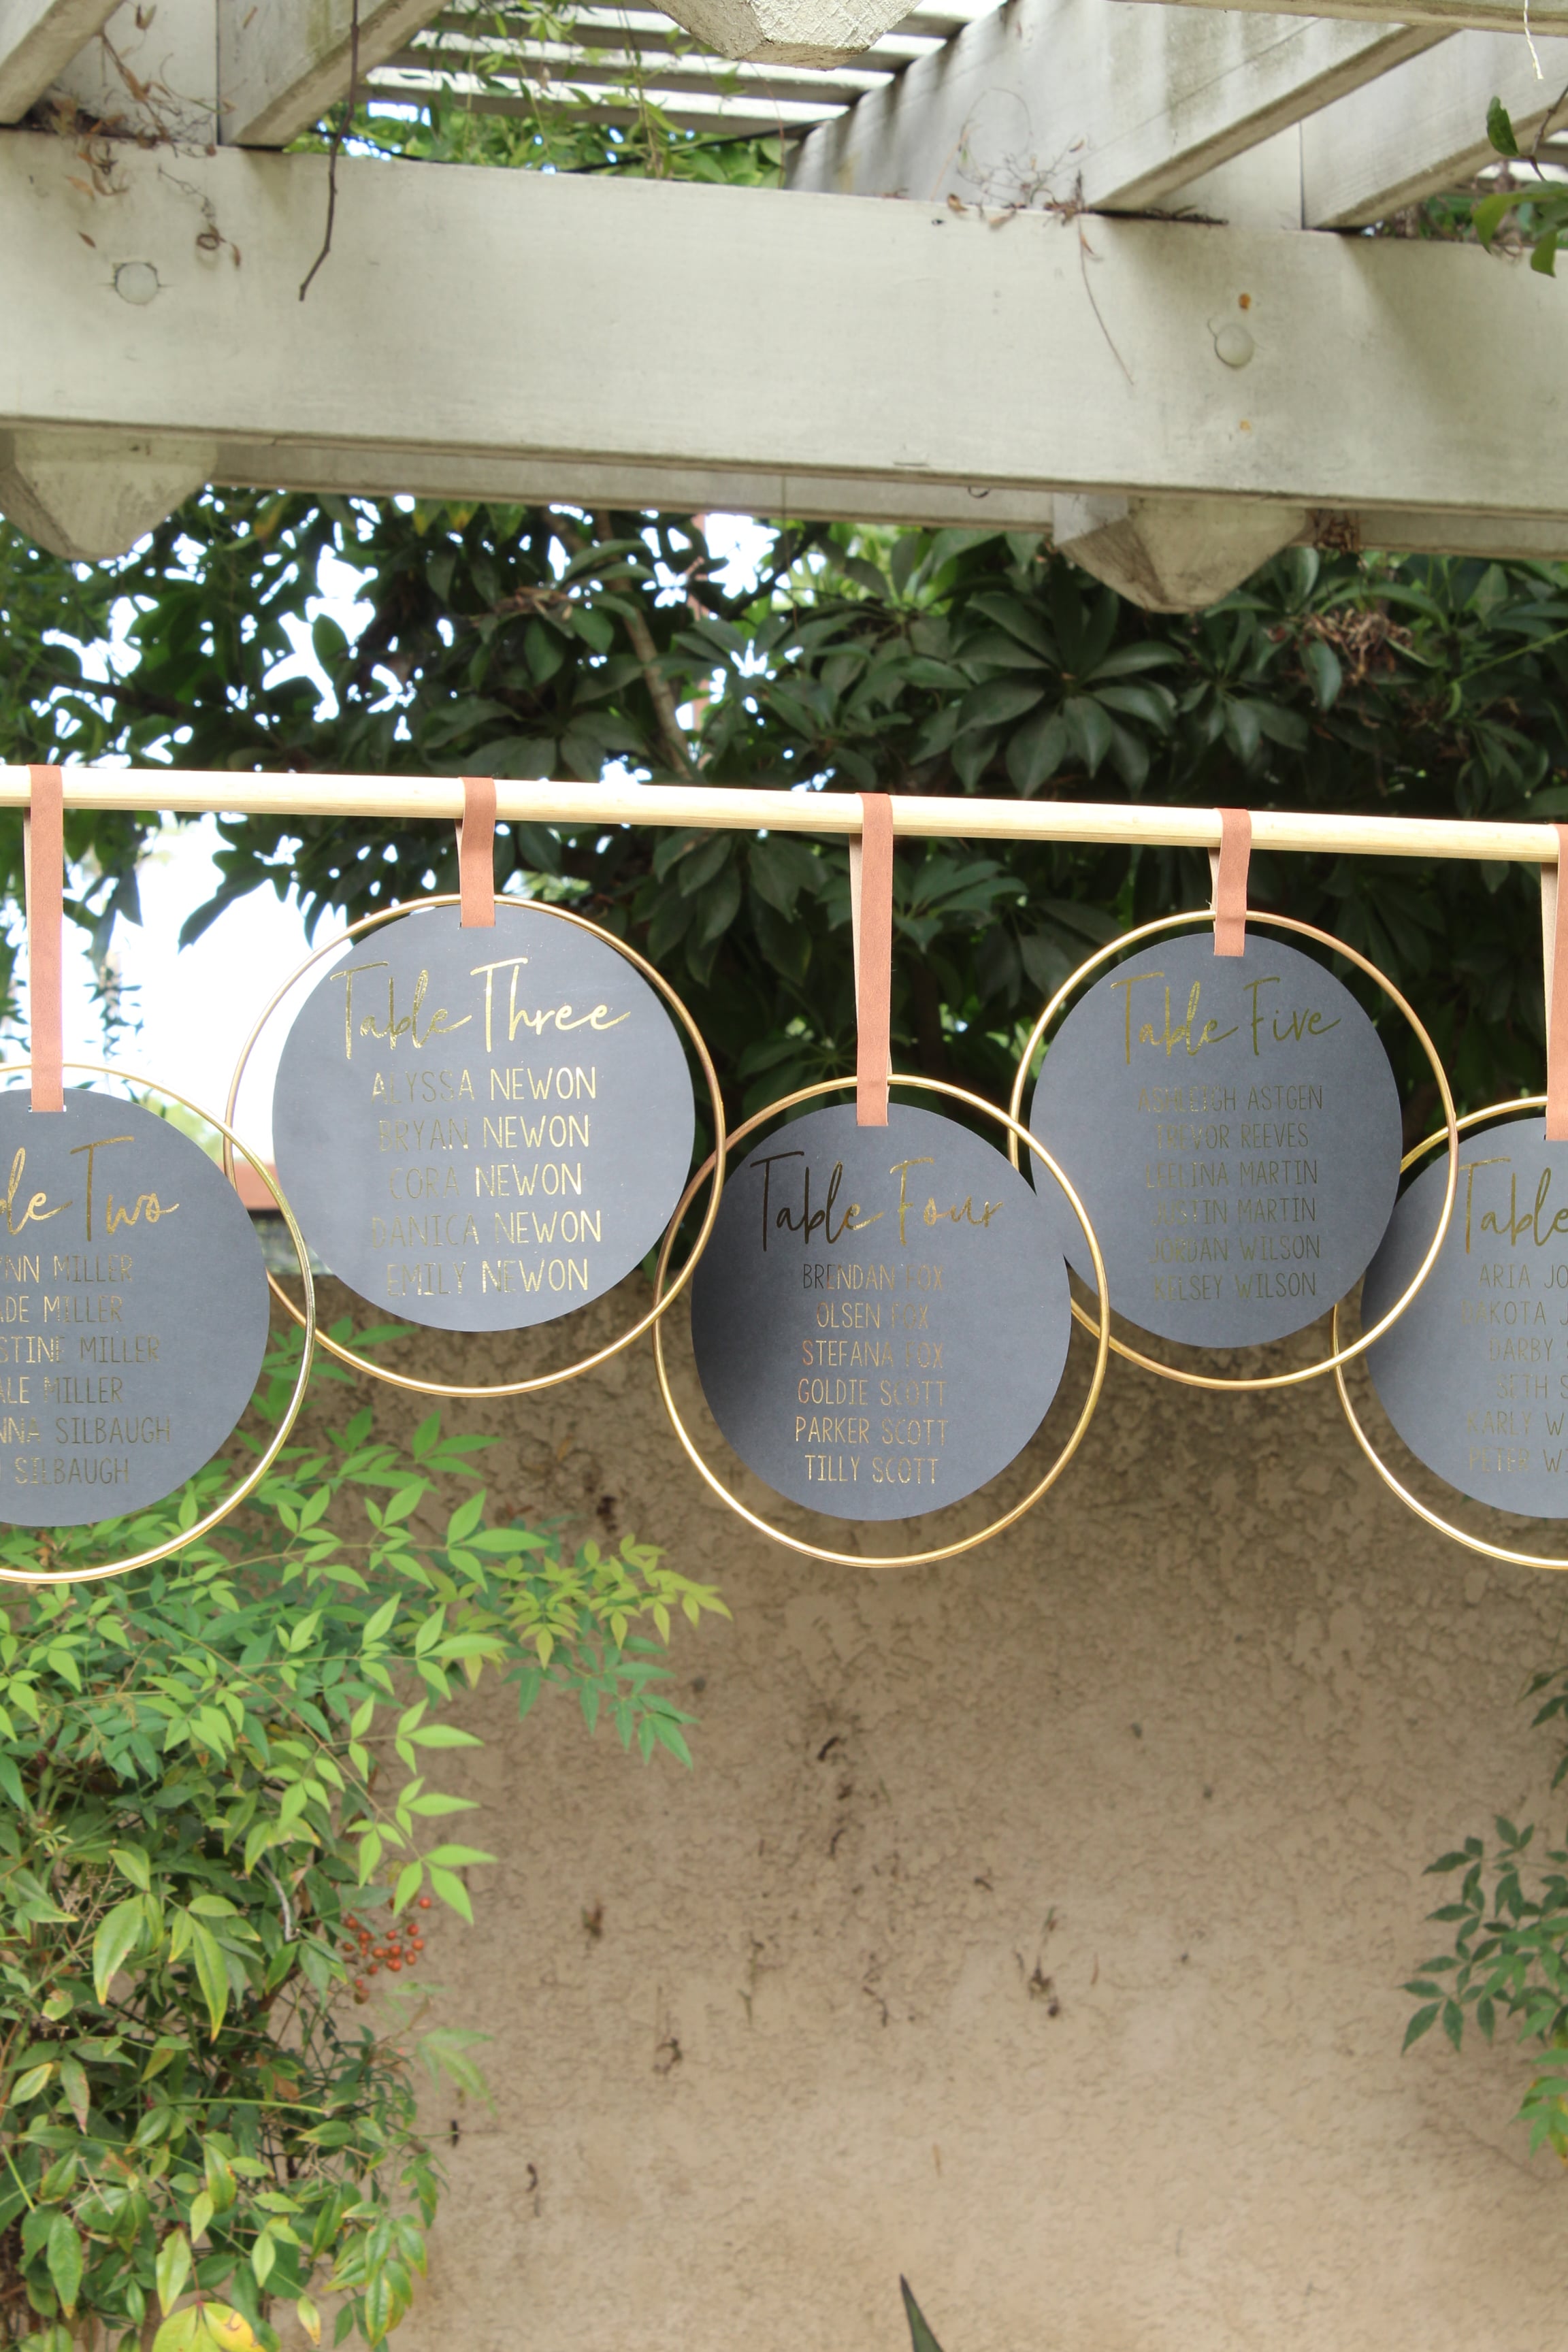
When your design is printed, place it on your cutting mat, feed it into your machine and let your Cricut do its thing. Sometimes it has a little trouble with the black cardstock, of the six tables that I did, I did end up having to recut one of them, but to me it’s still worth that awesome wow factor of the foil on the gold paper.
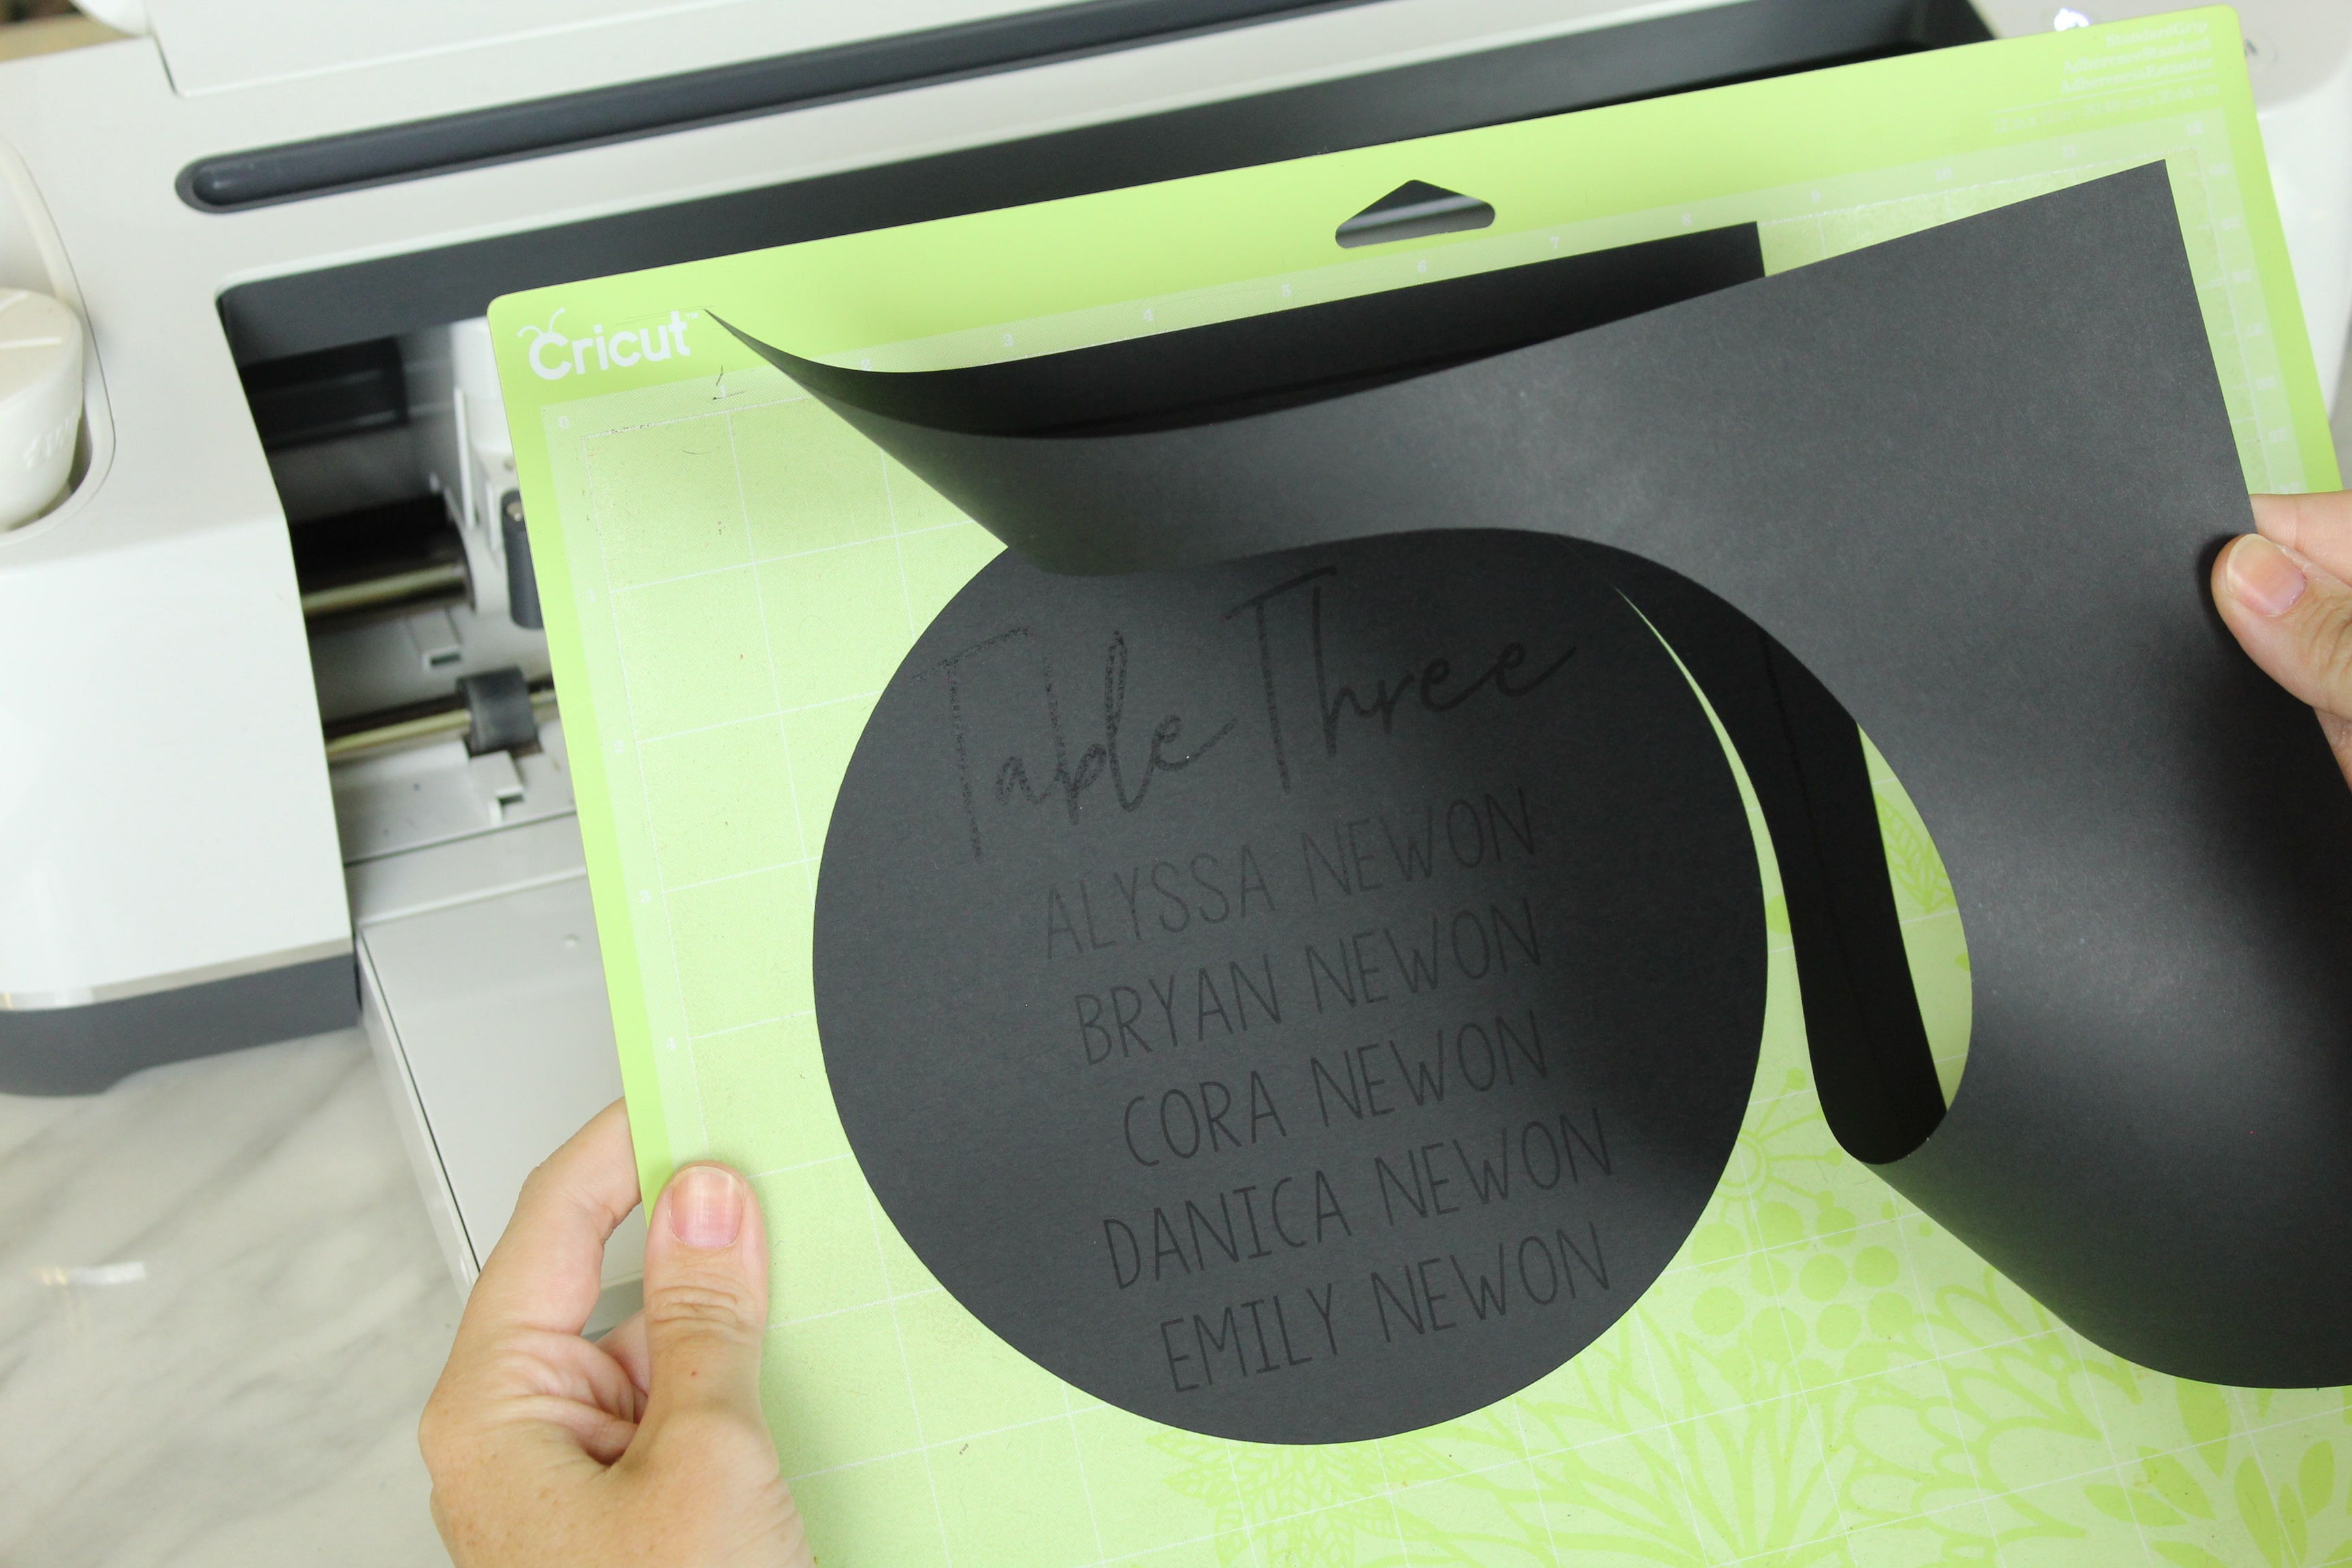
Once it’s cut remove your design from your mat. To prevent curling you’ll want to flip your mat over and pull your mat from your design.
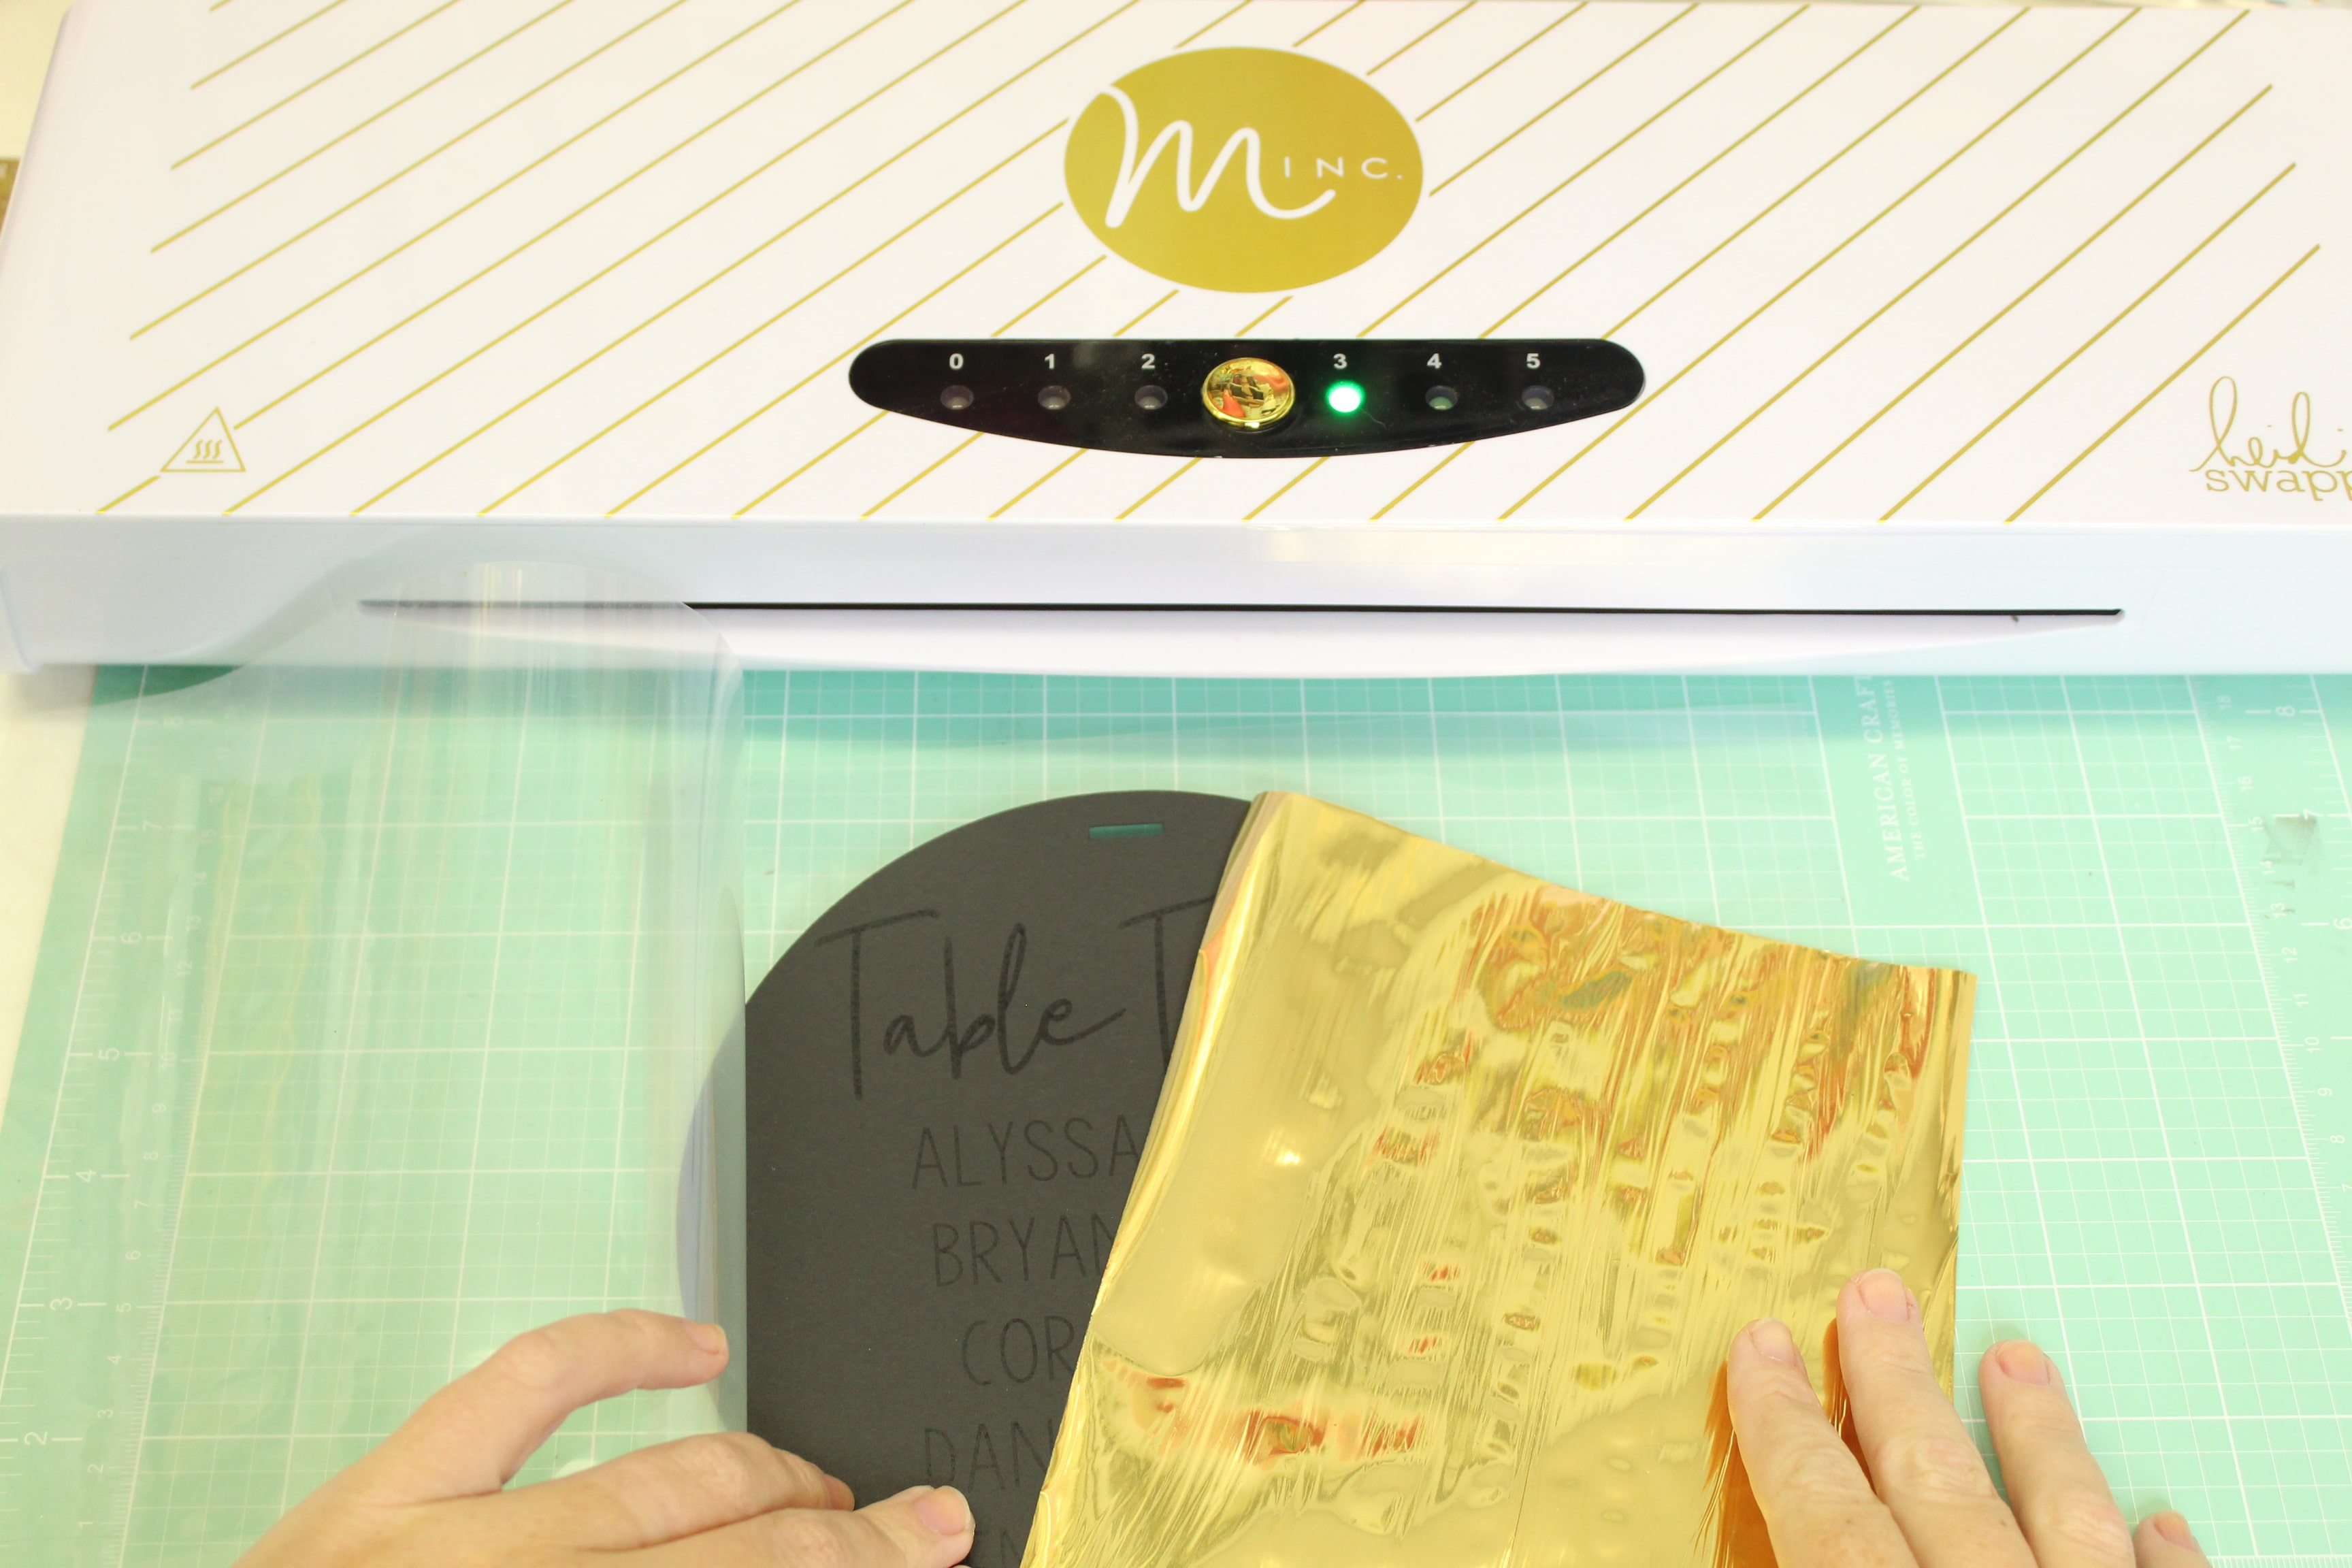
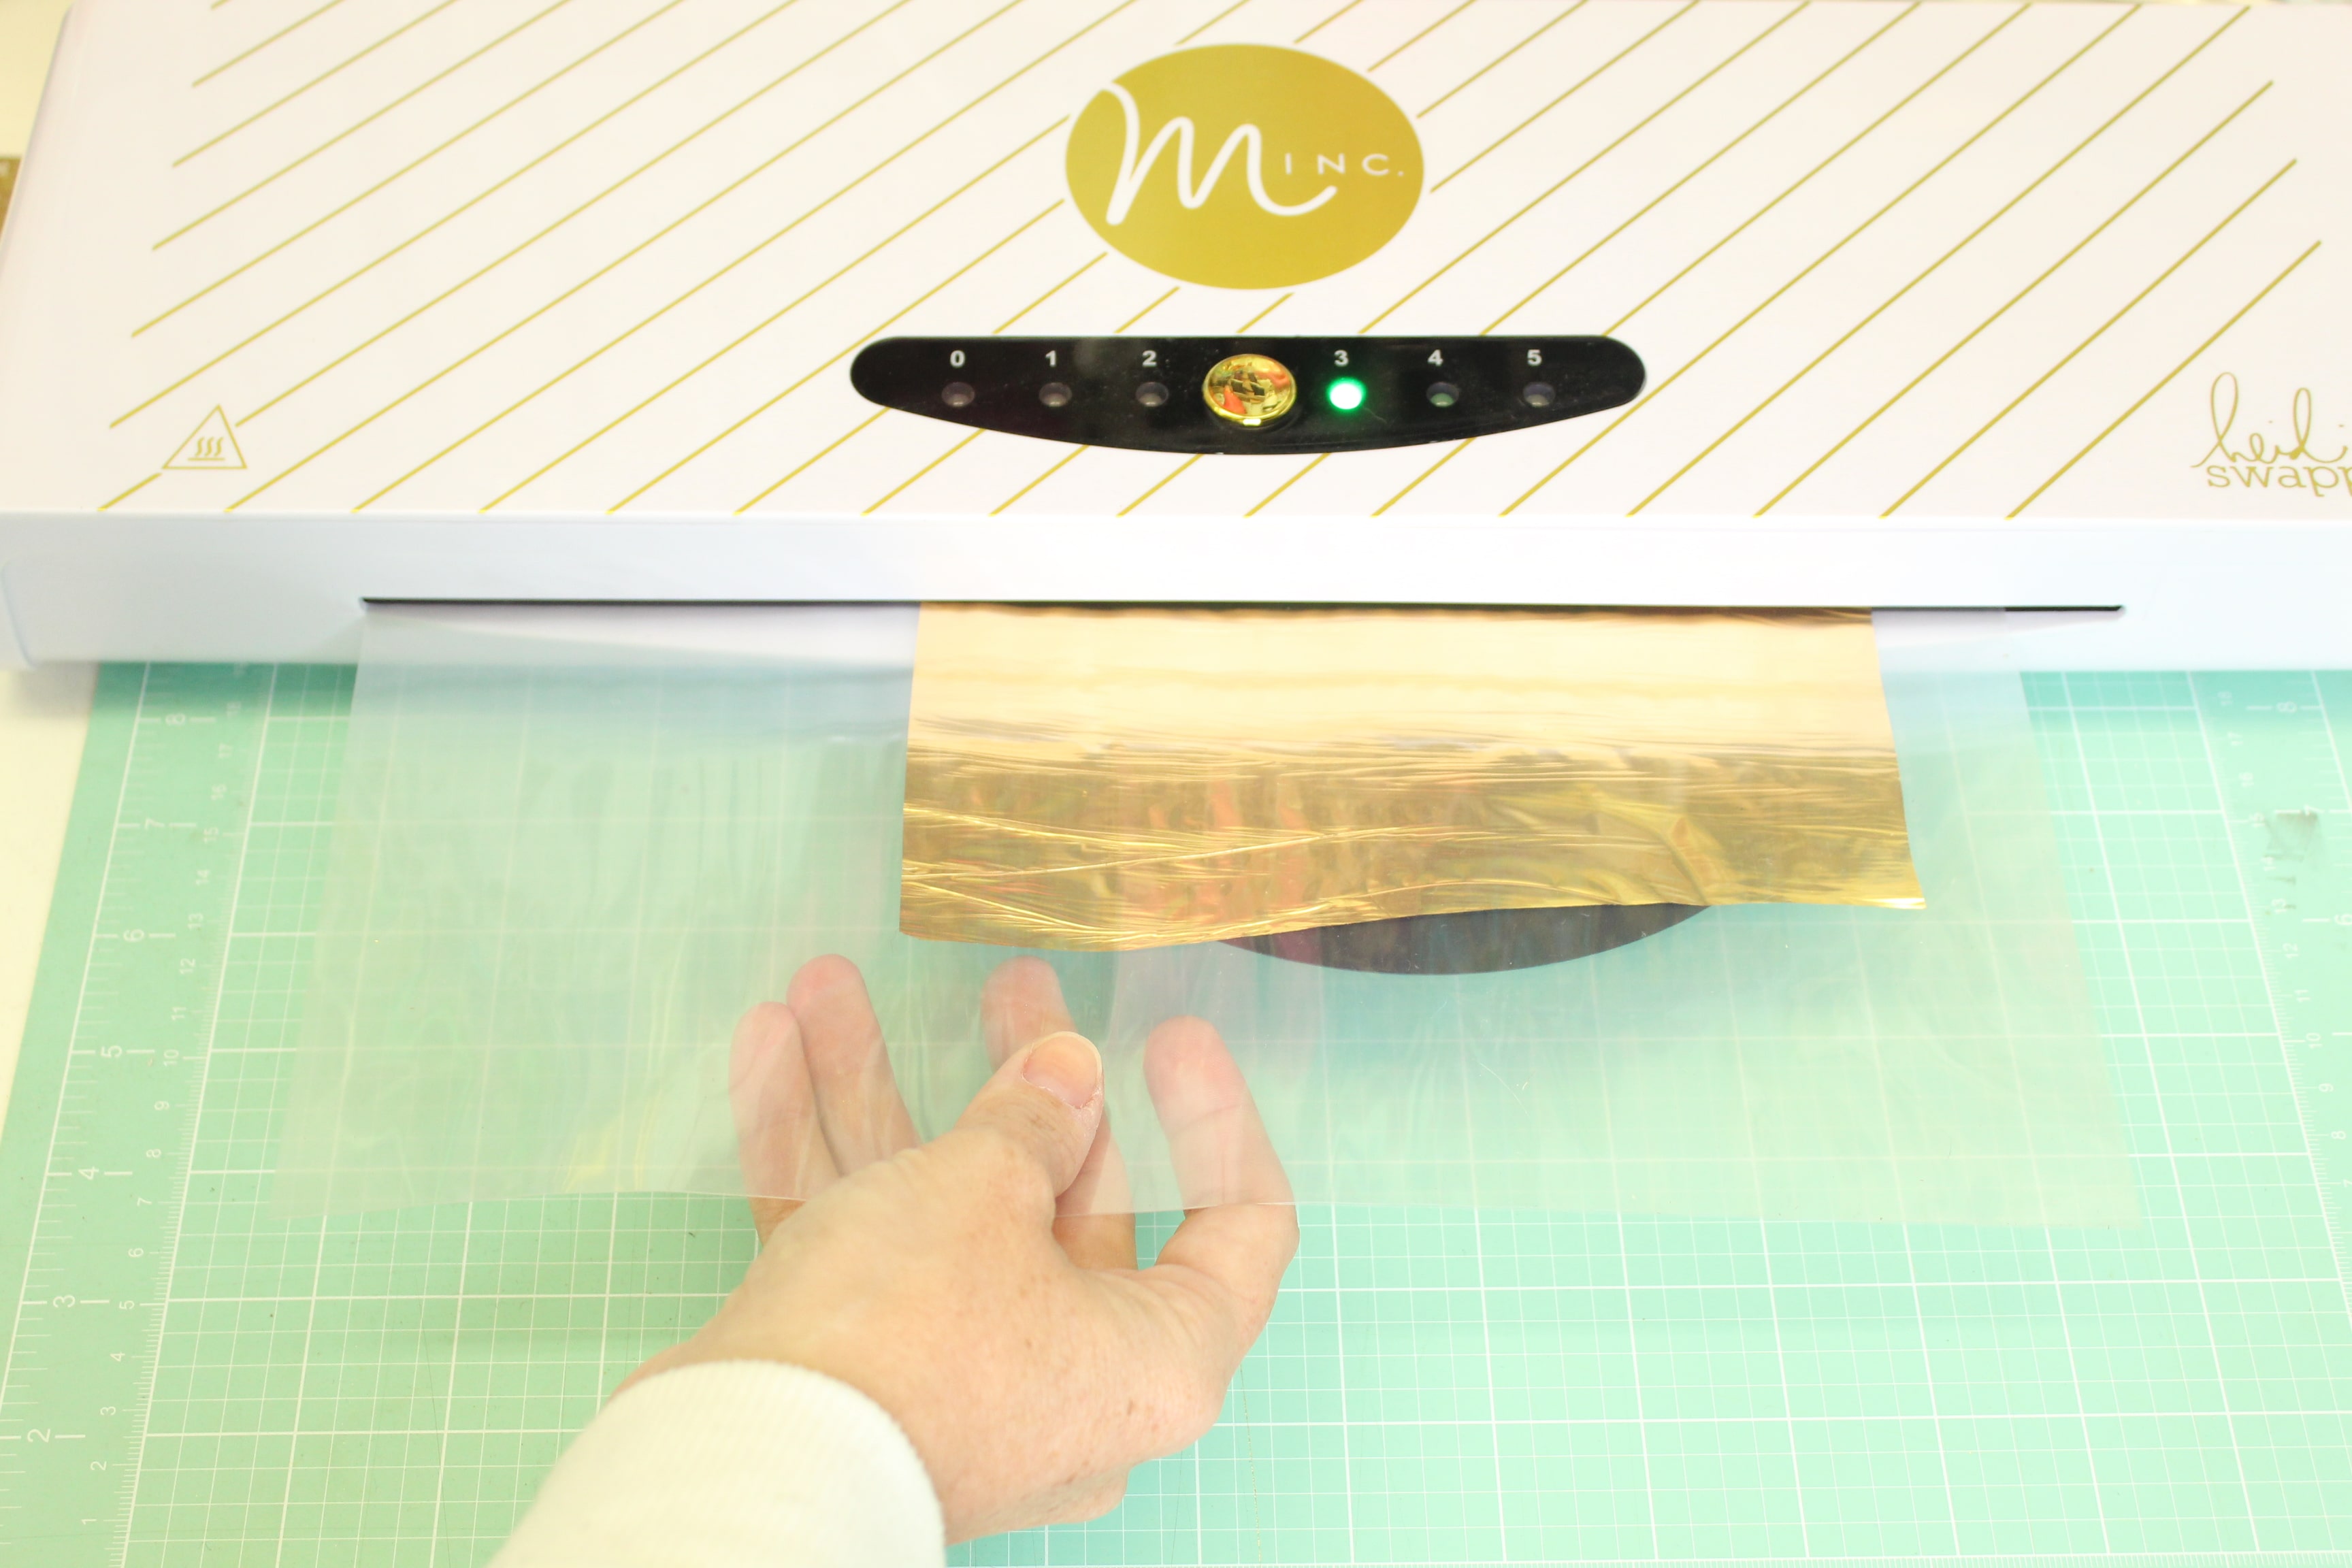
Foil Your Design
Like I mentioned, this is an option step but, in true Shea fashion, I must make all the things gold! My Heidi Swapp Minc is one of my craft room must haves. You simply cover the printed area with the foil, run it through the machine and voila! Gorgeous gold foil (or any other color foil you want to use! There are SO many!).
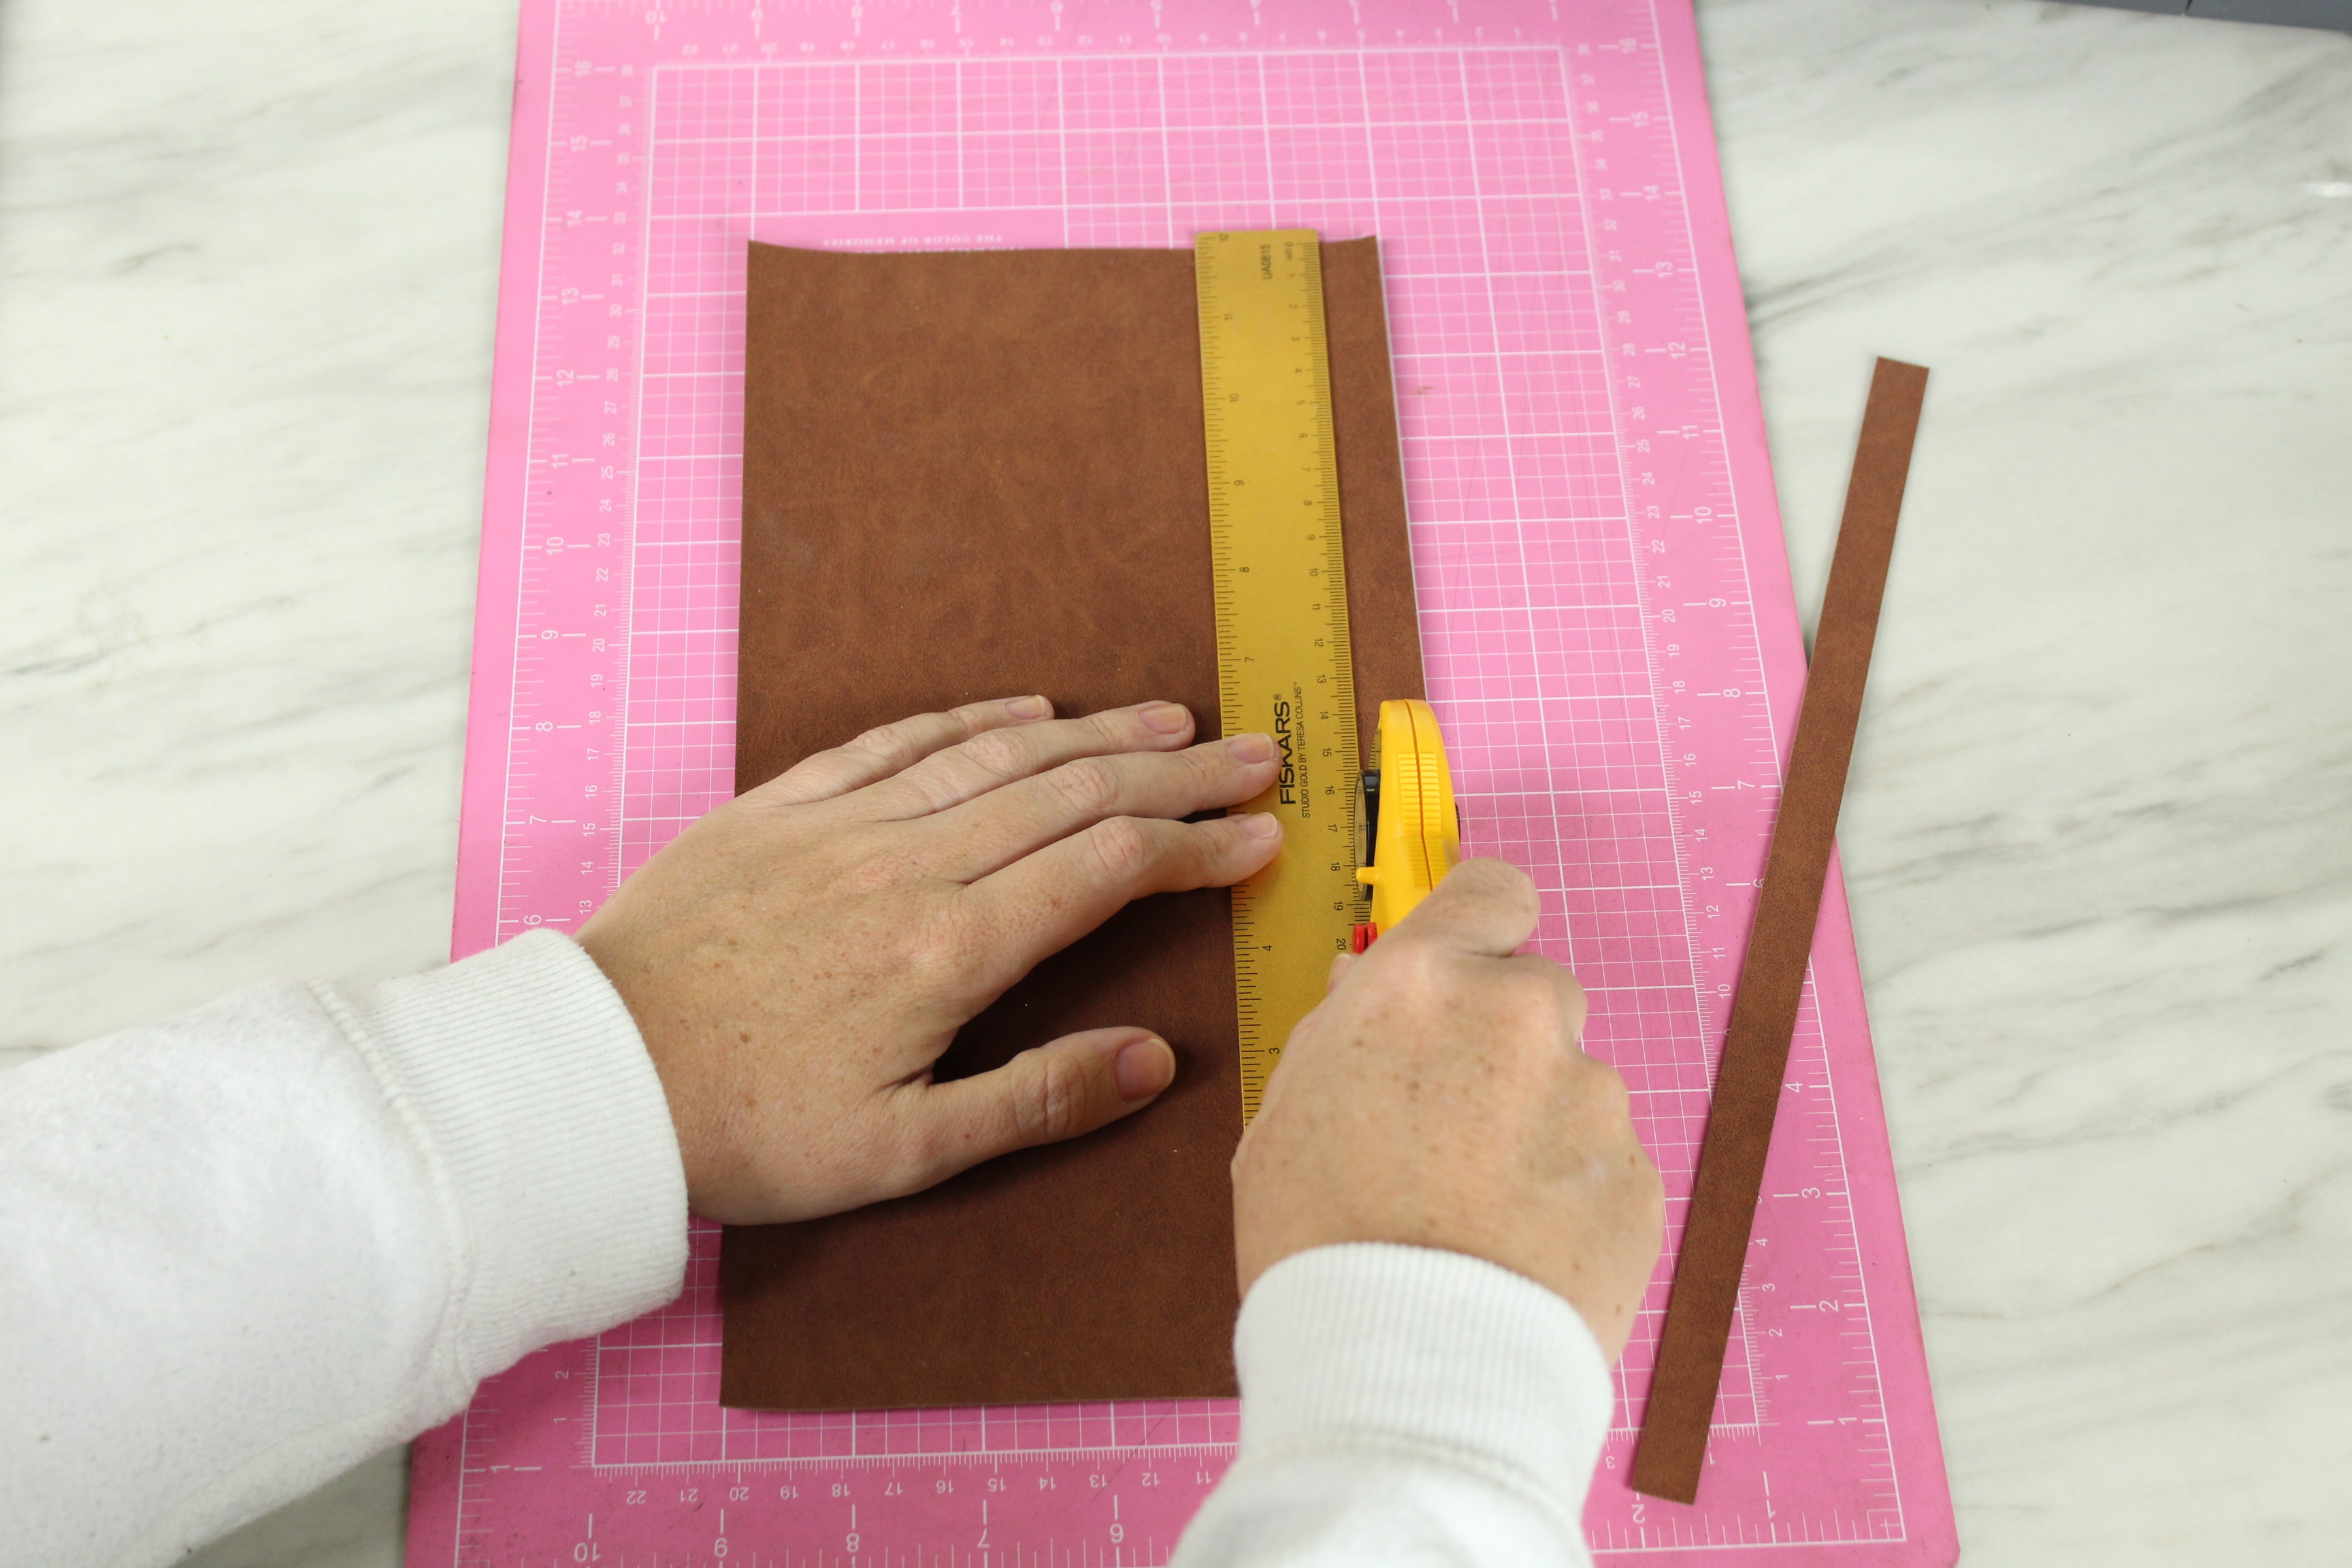
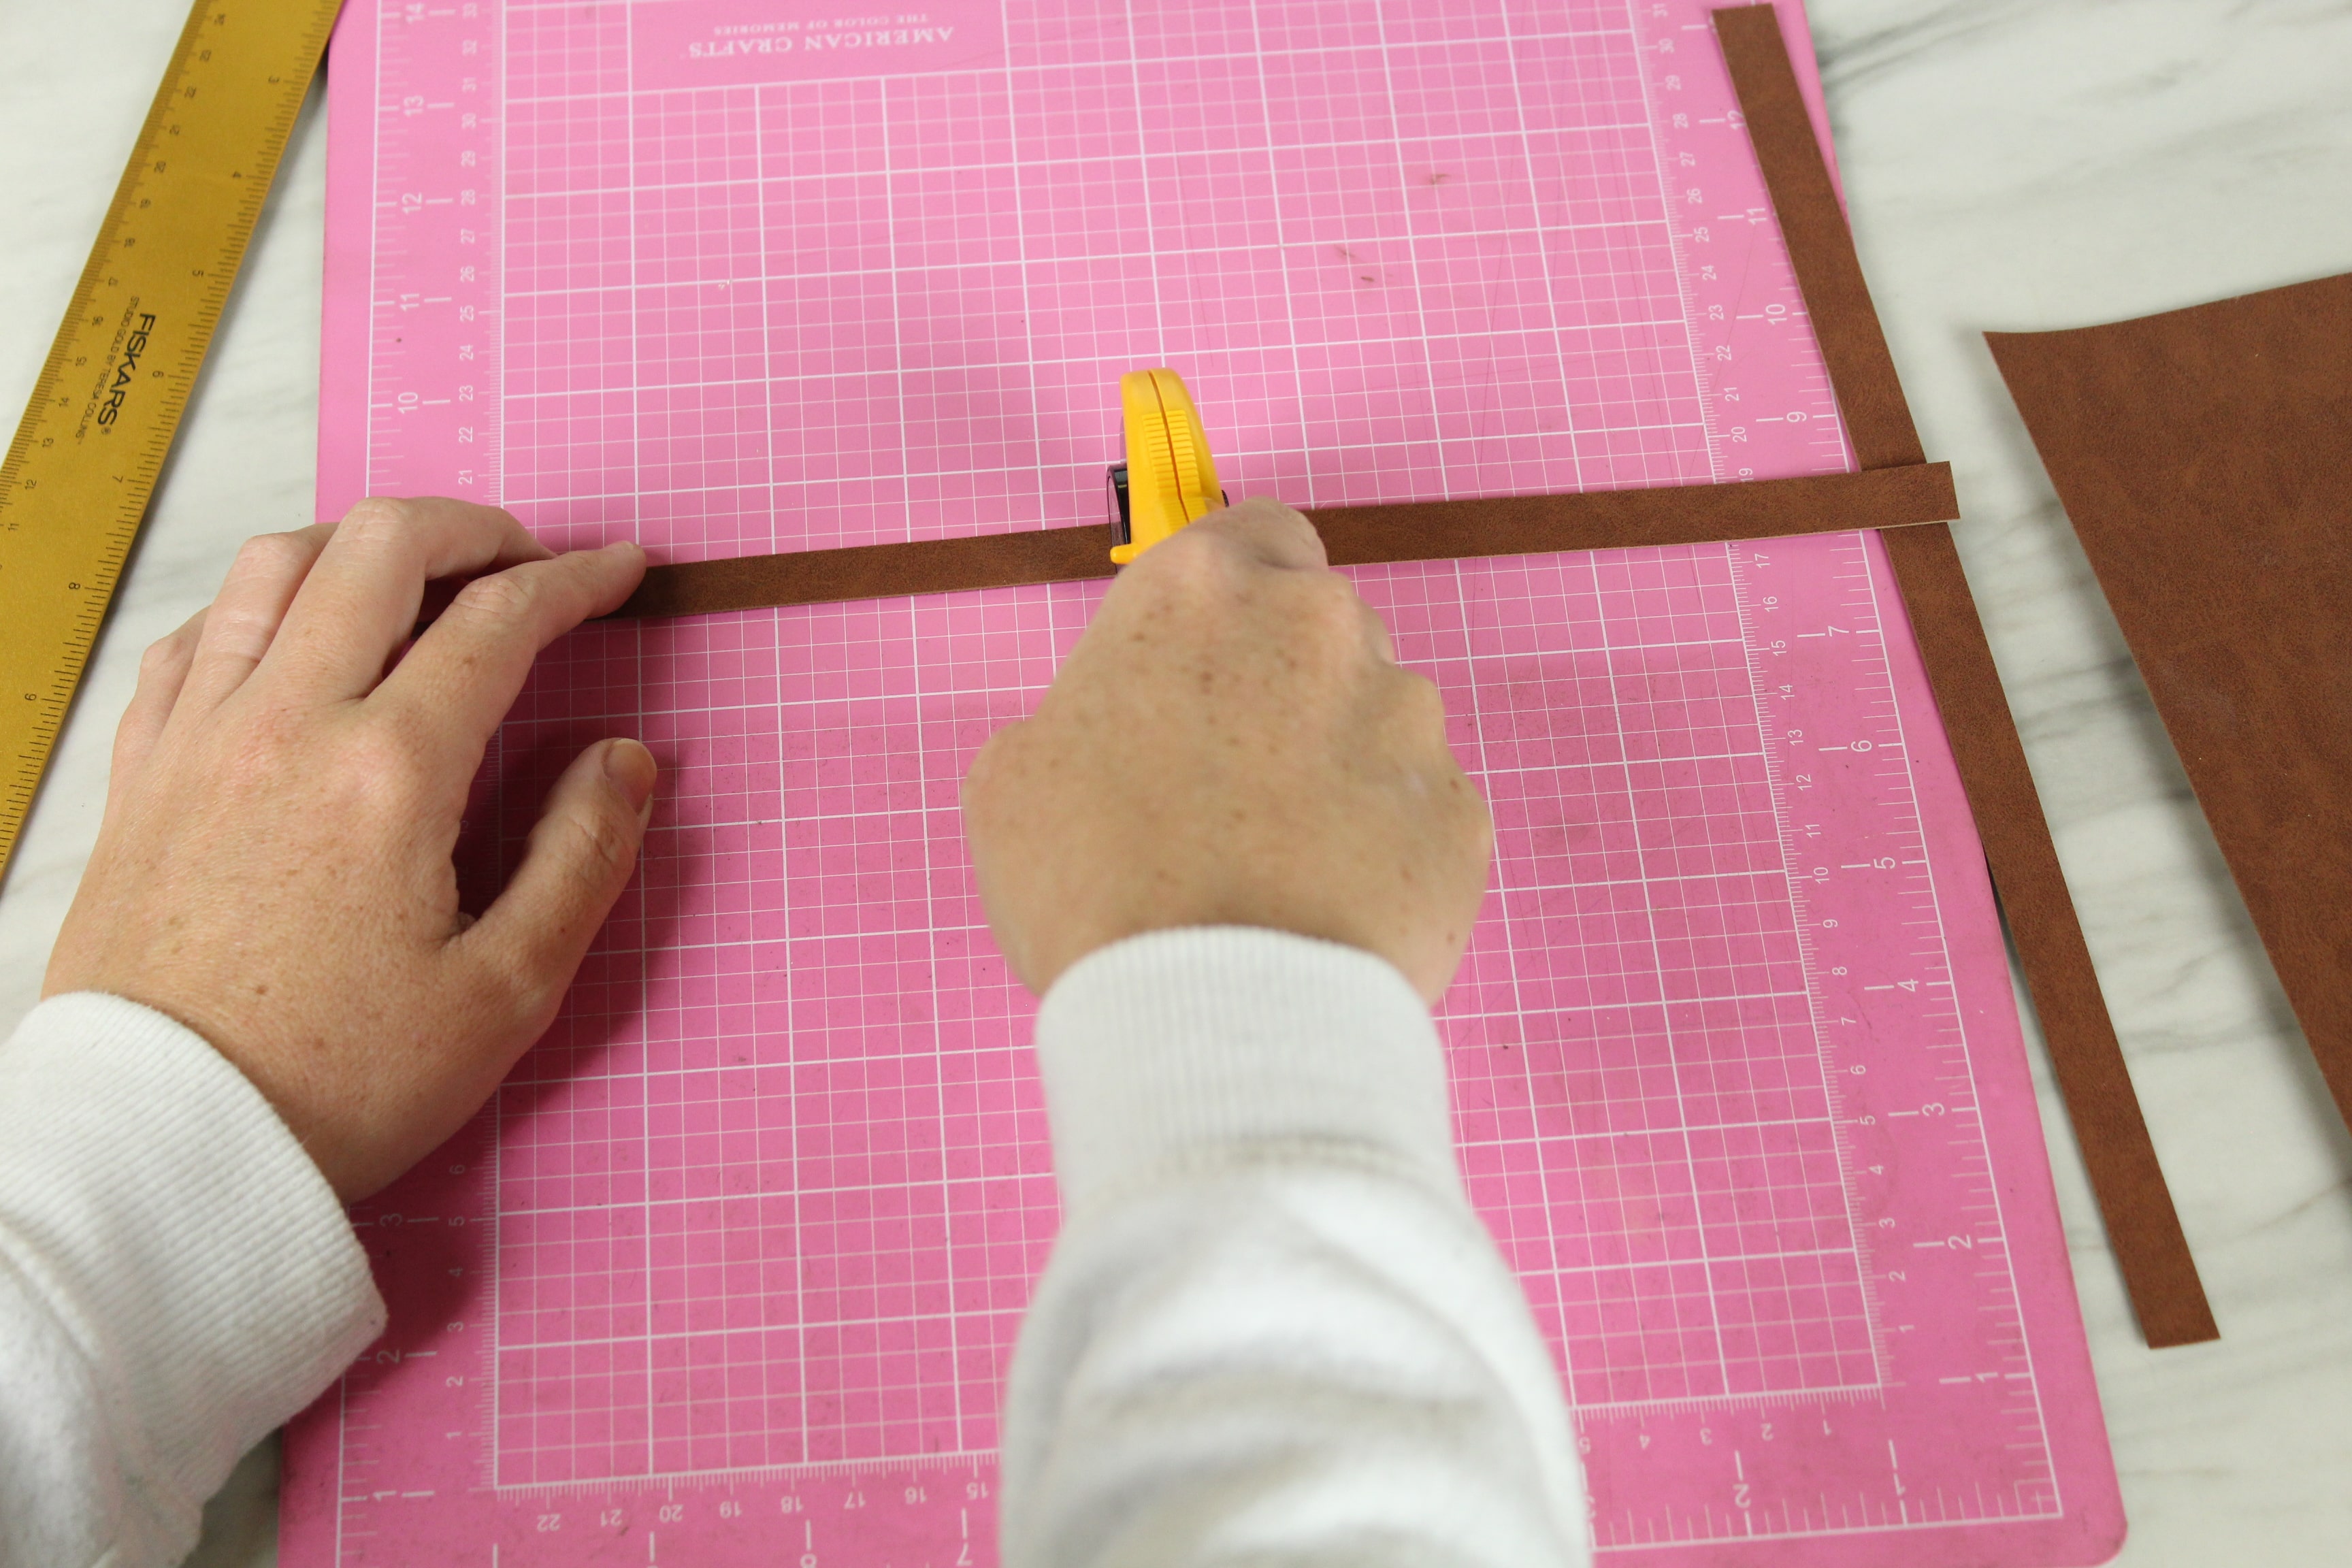
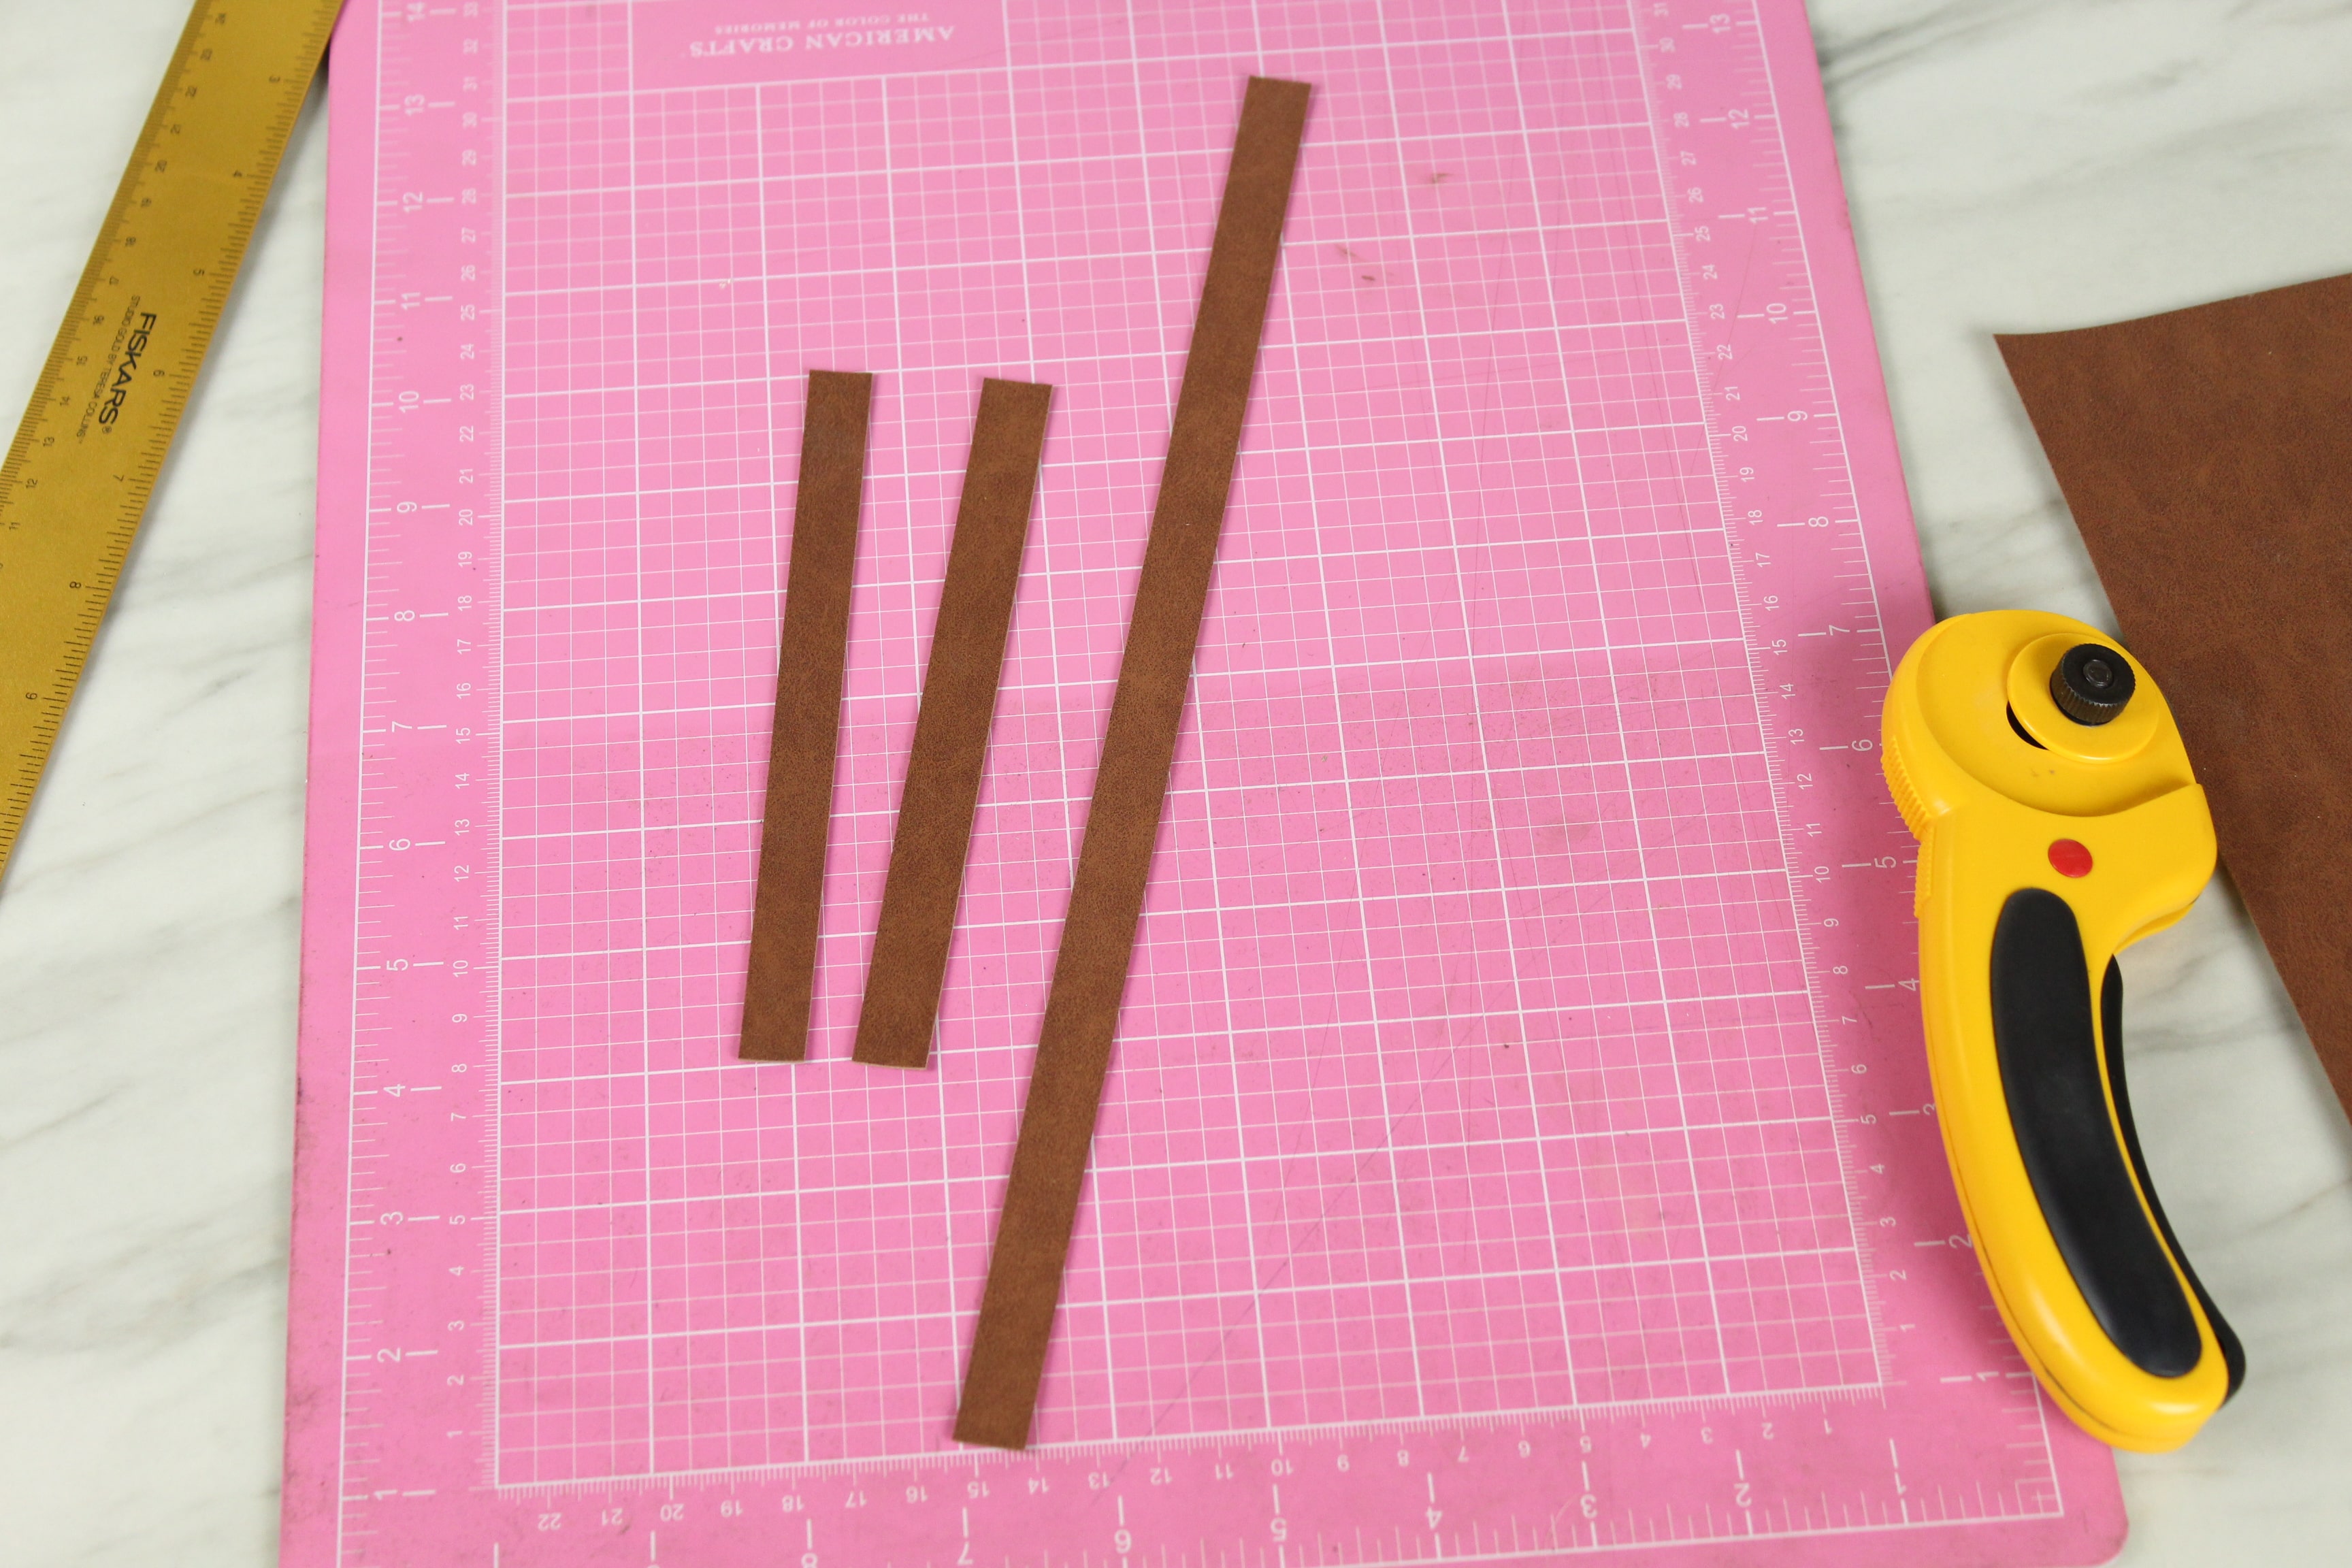
Cut Your Faux Suede
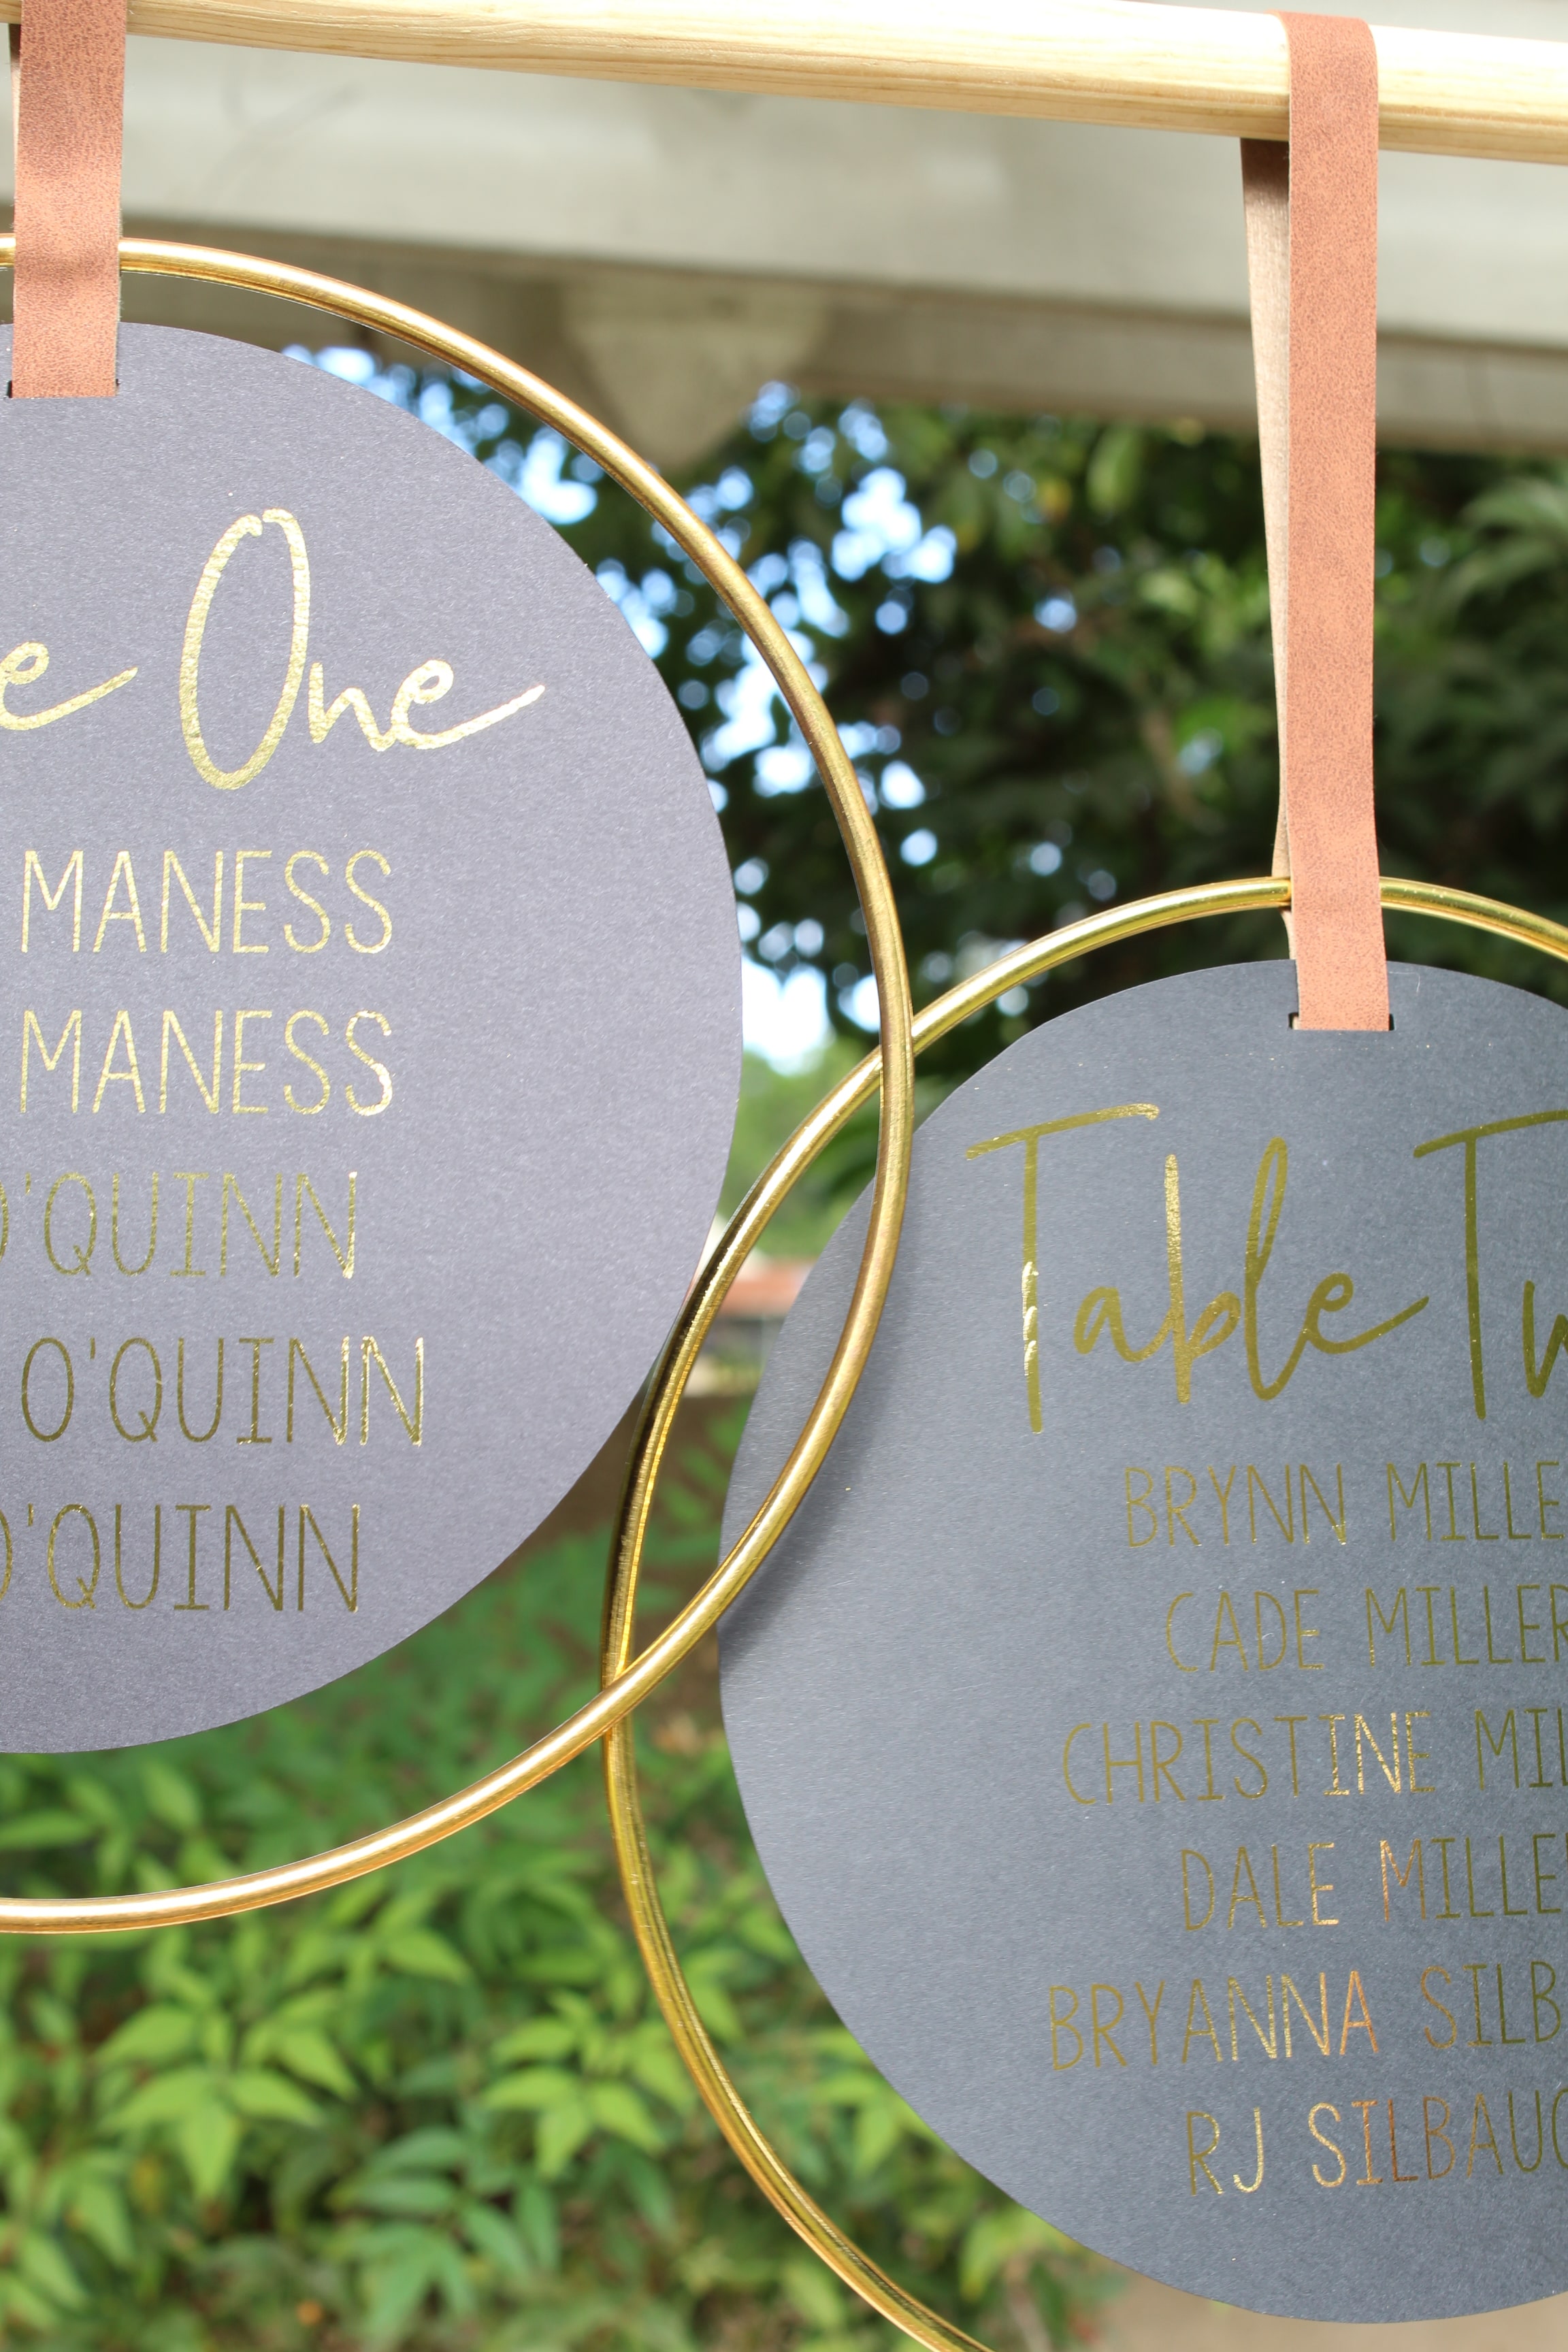
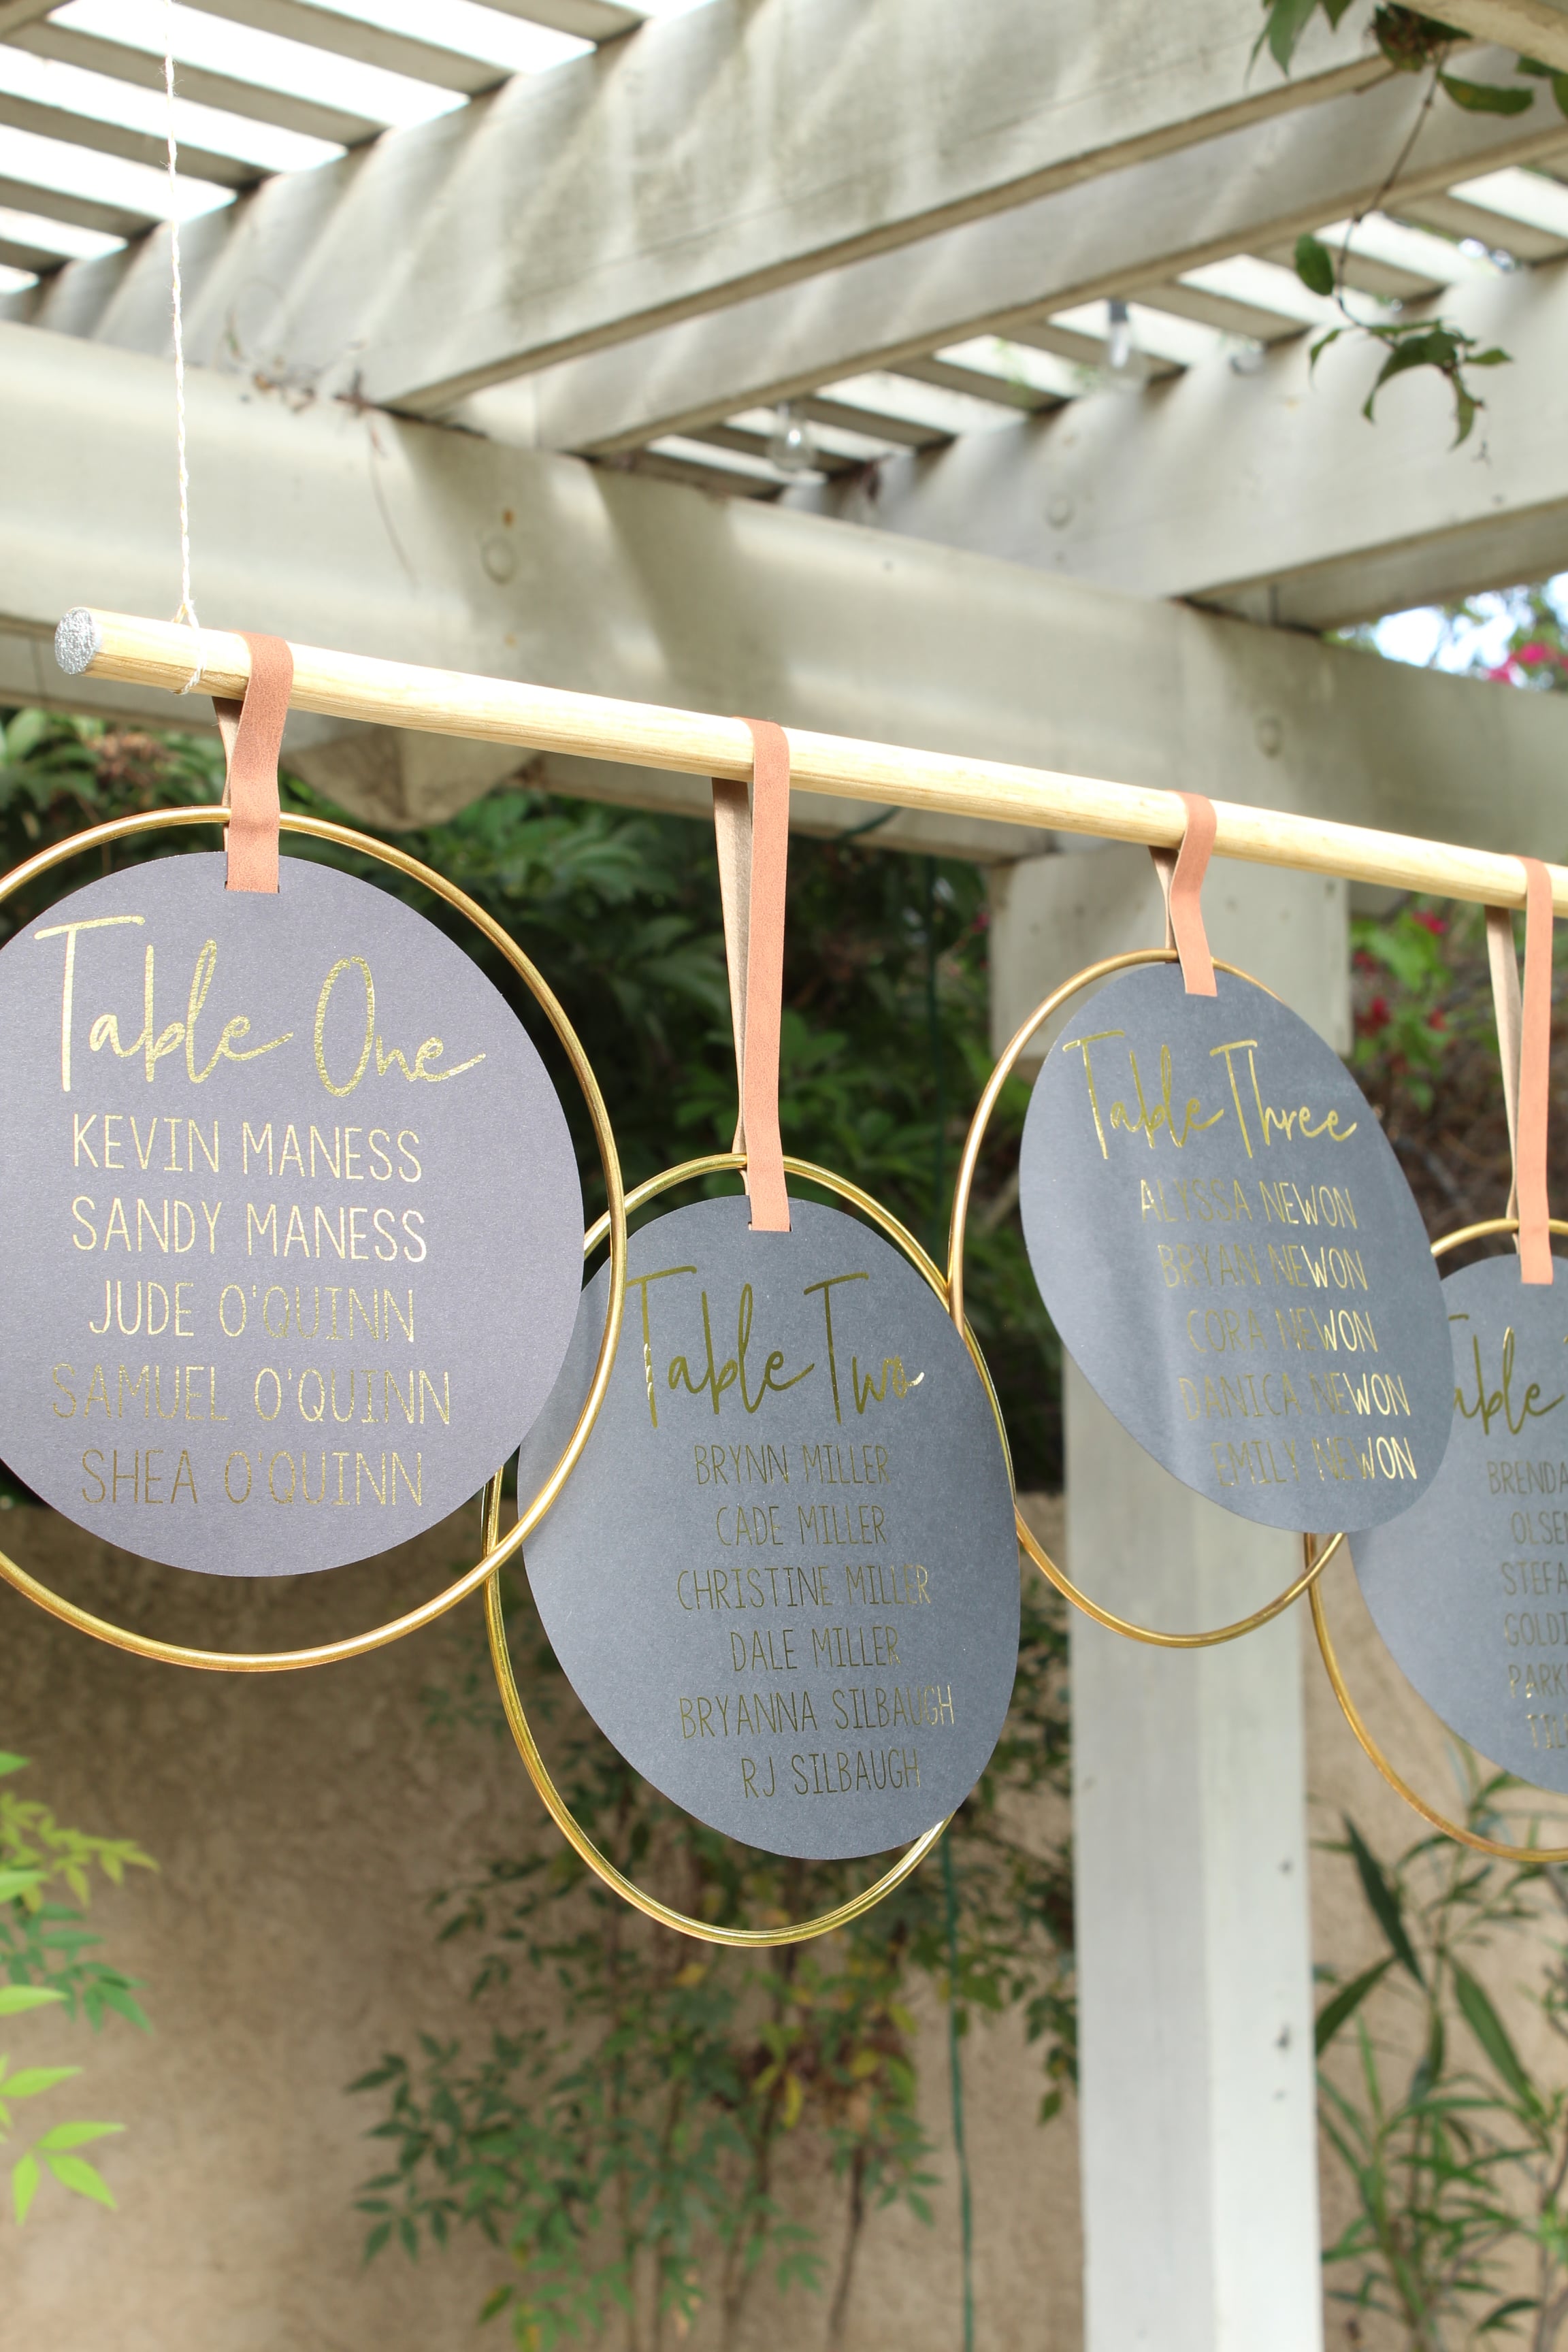
This Cricut faux suede is one of my go-to craft items. I used it for my Modern Drawer Pulls and I just keep finding other ways to use it. I love the modern feel it adds to my projects. Using a ruler and a rotary cutter, I cut it into 1/2″ strips. I left half of them 12 inches long and cut some of them in half, so that I could stagger the hoops.
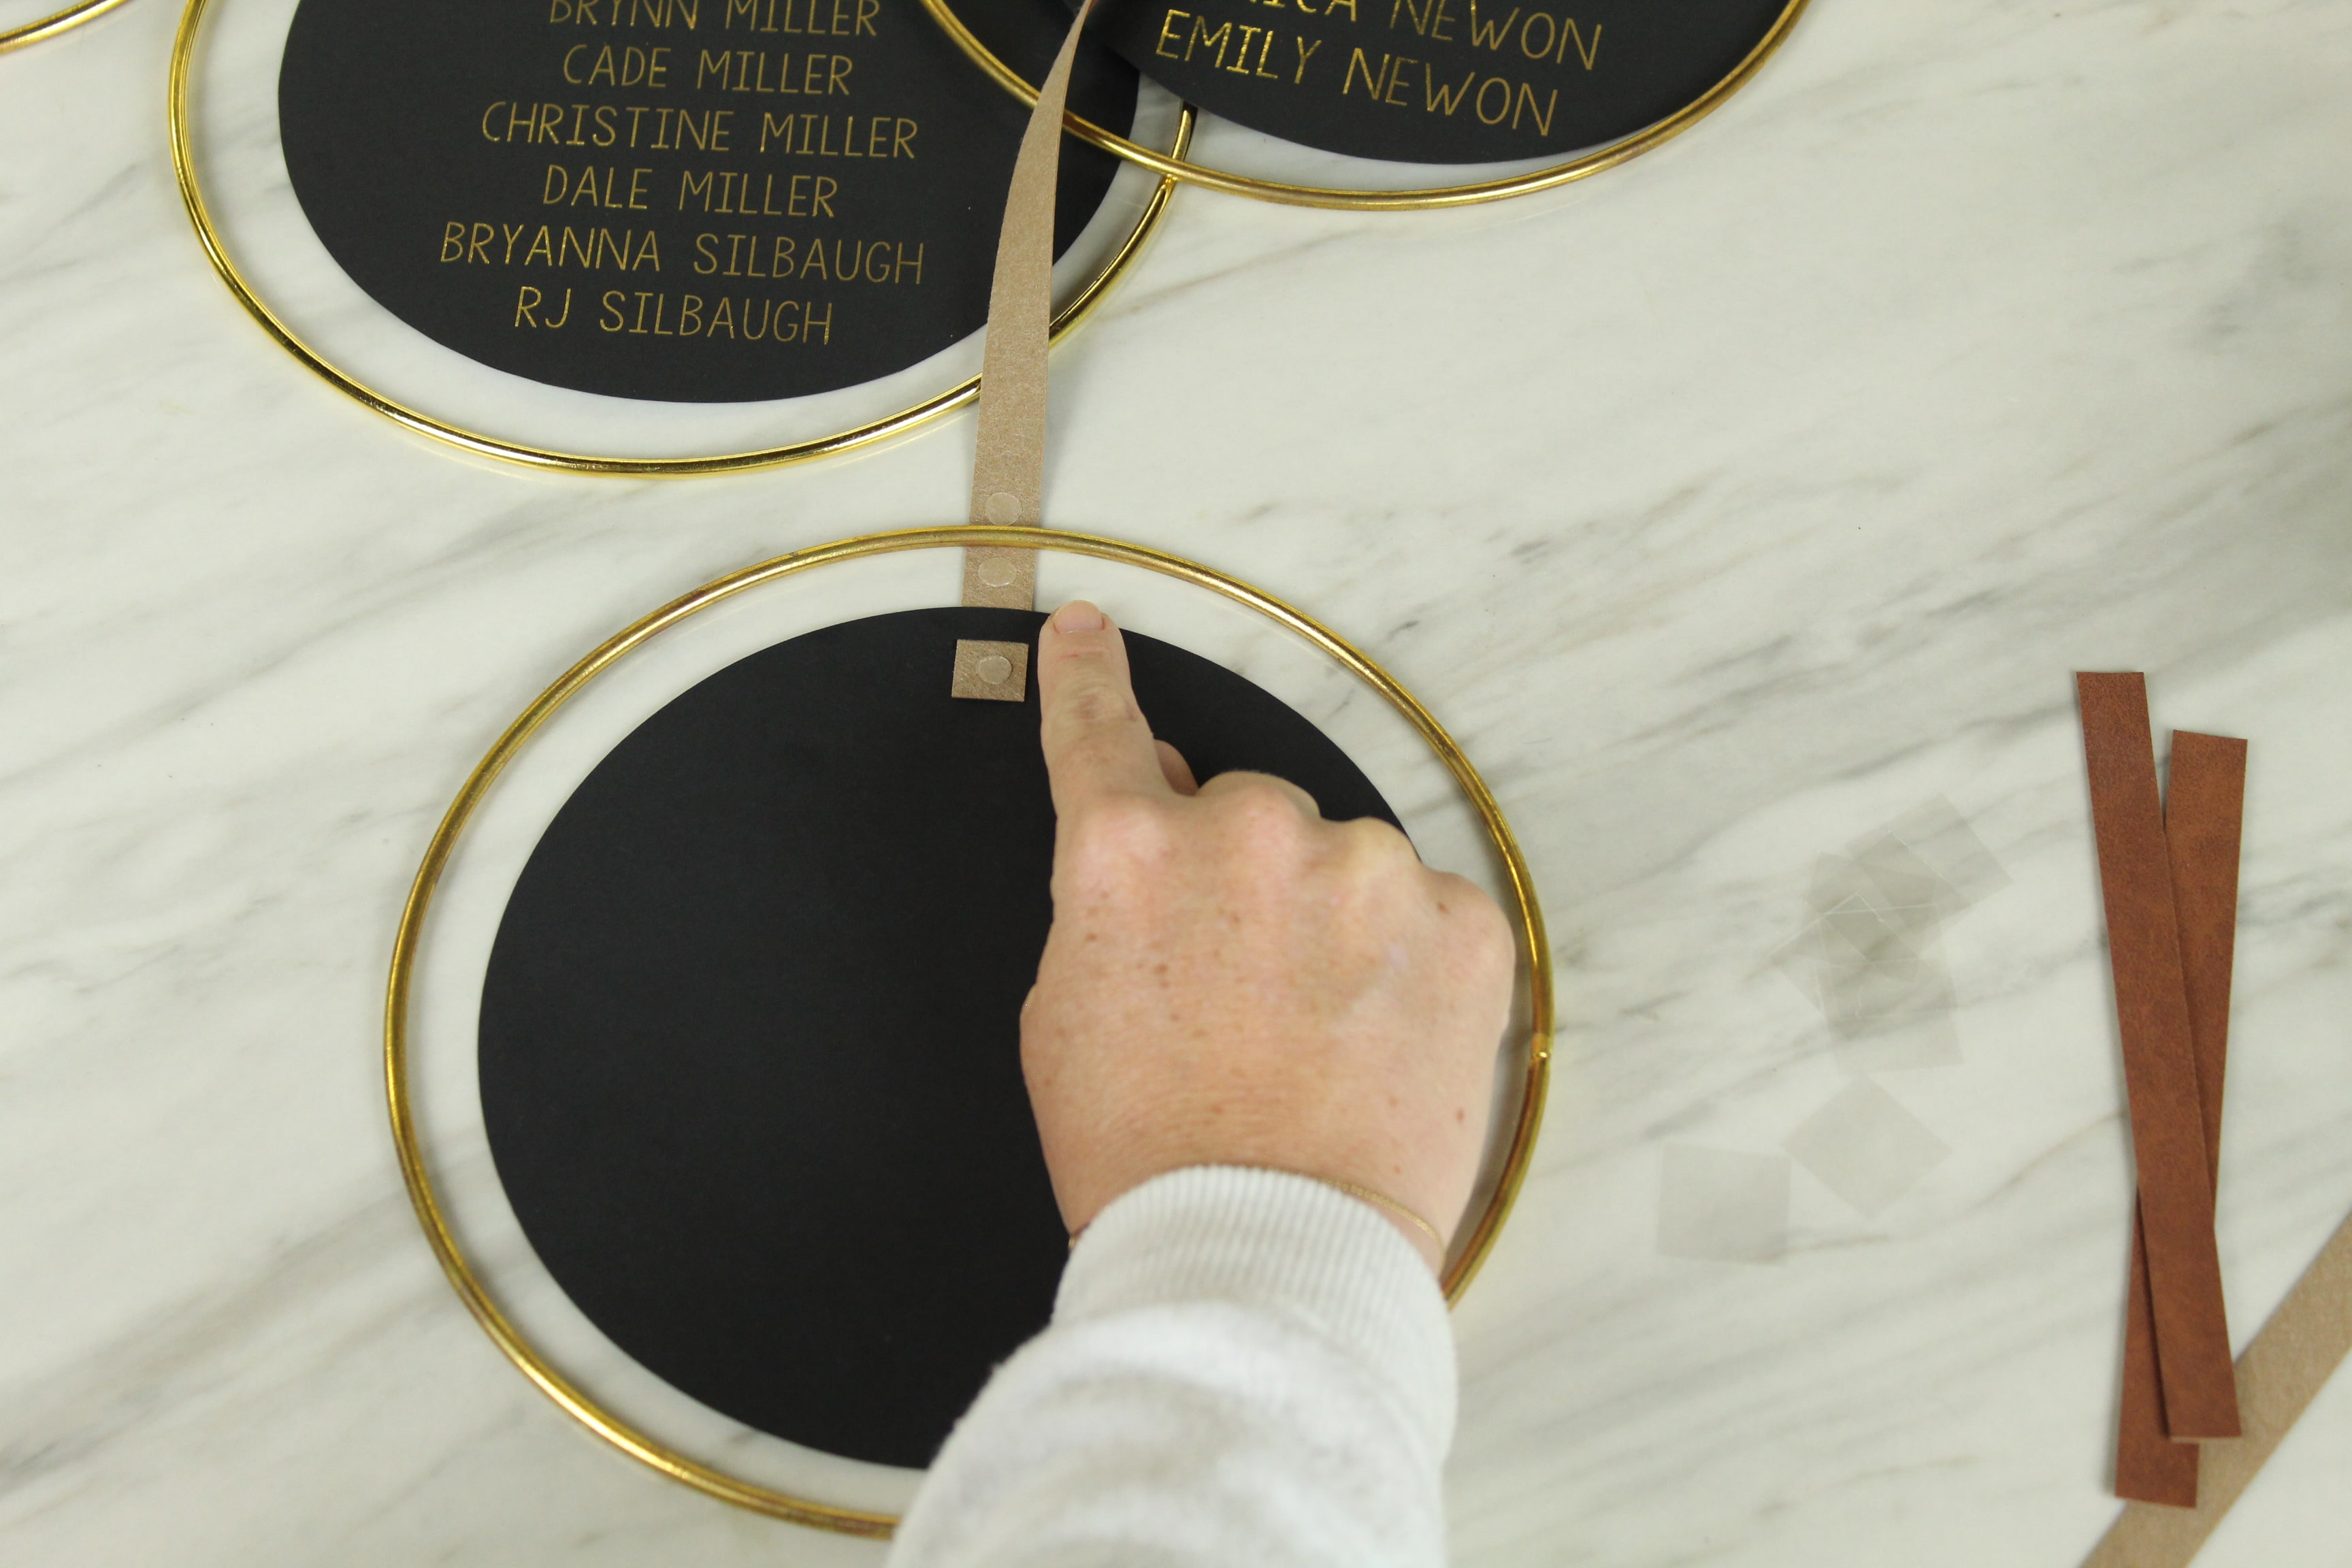
Add Adhesive
These little glue dots are magic, I swear. They are another go-to in my craft stash. I added four of them to each hoop. I’ll do my best to show you in photos where I added them. I started with one on the paper just below the slit for the suede, to keep it in place.
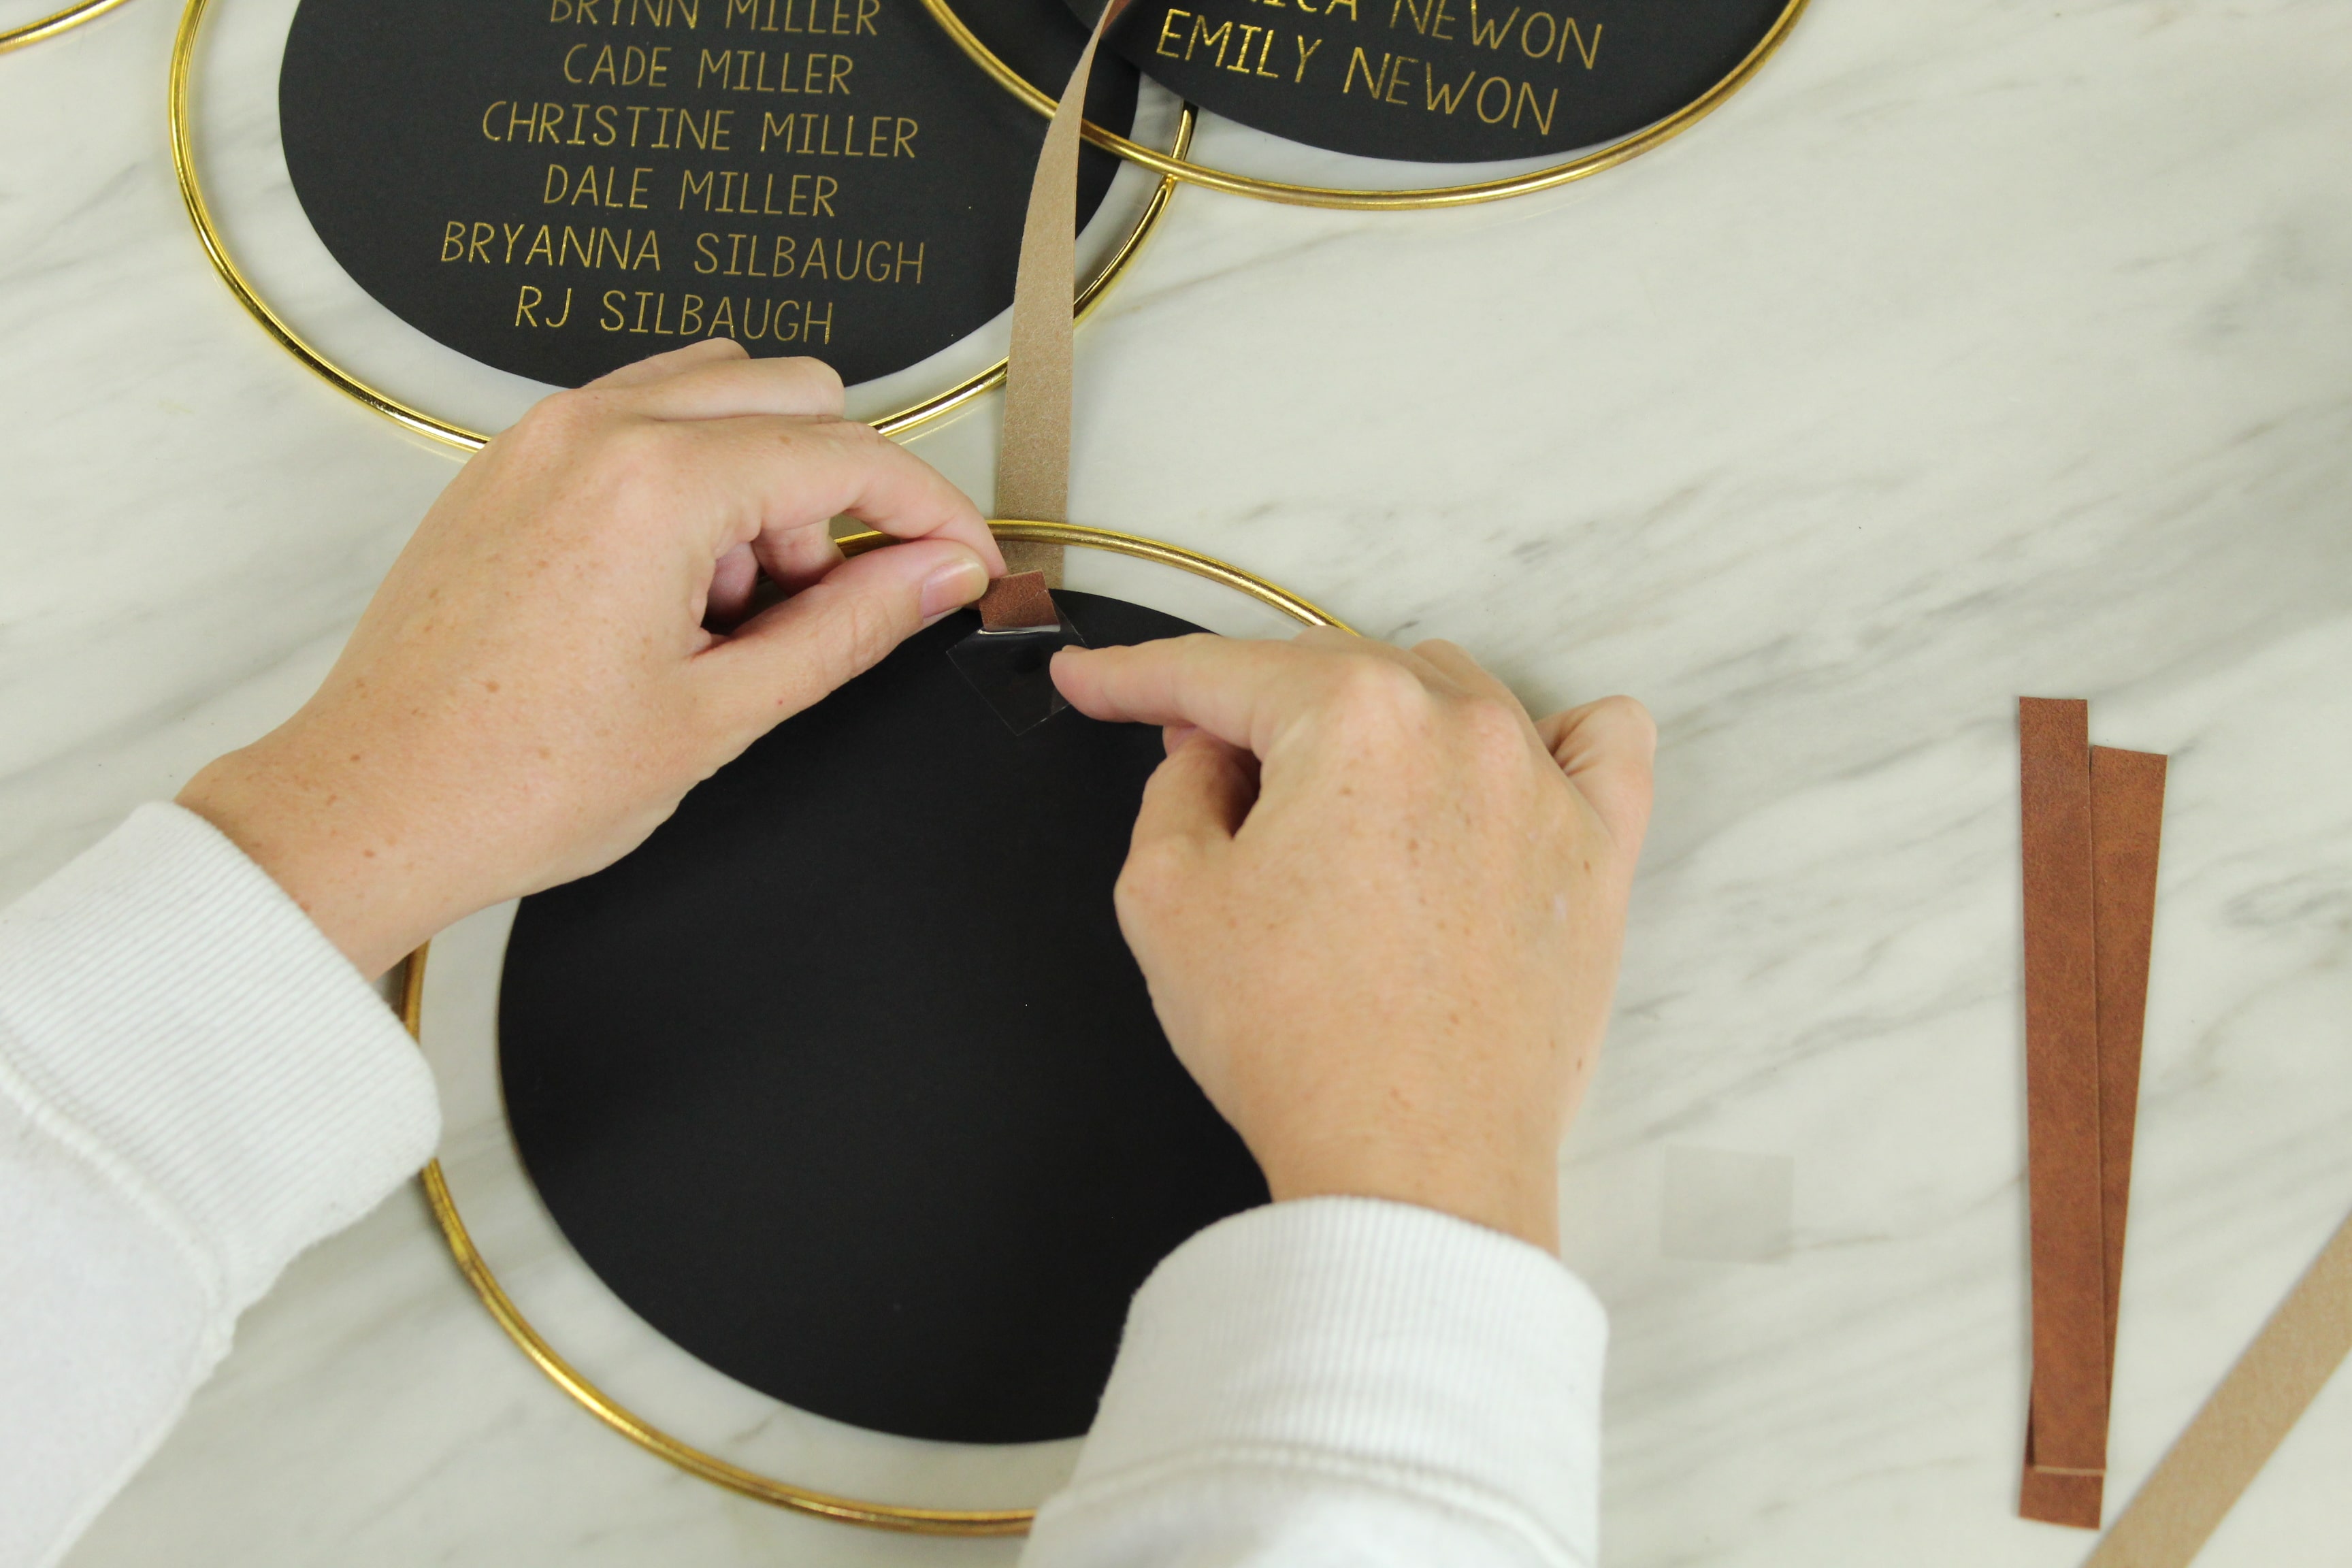
Then I added three more directly onto the suede. One on the very bottom, one just below where the hoop was going to sit, and one just above. Once they were all in place, I looped the suede around my dowel, folded it in half and stuck it to the glue dots.
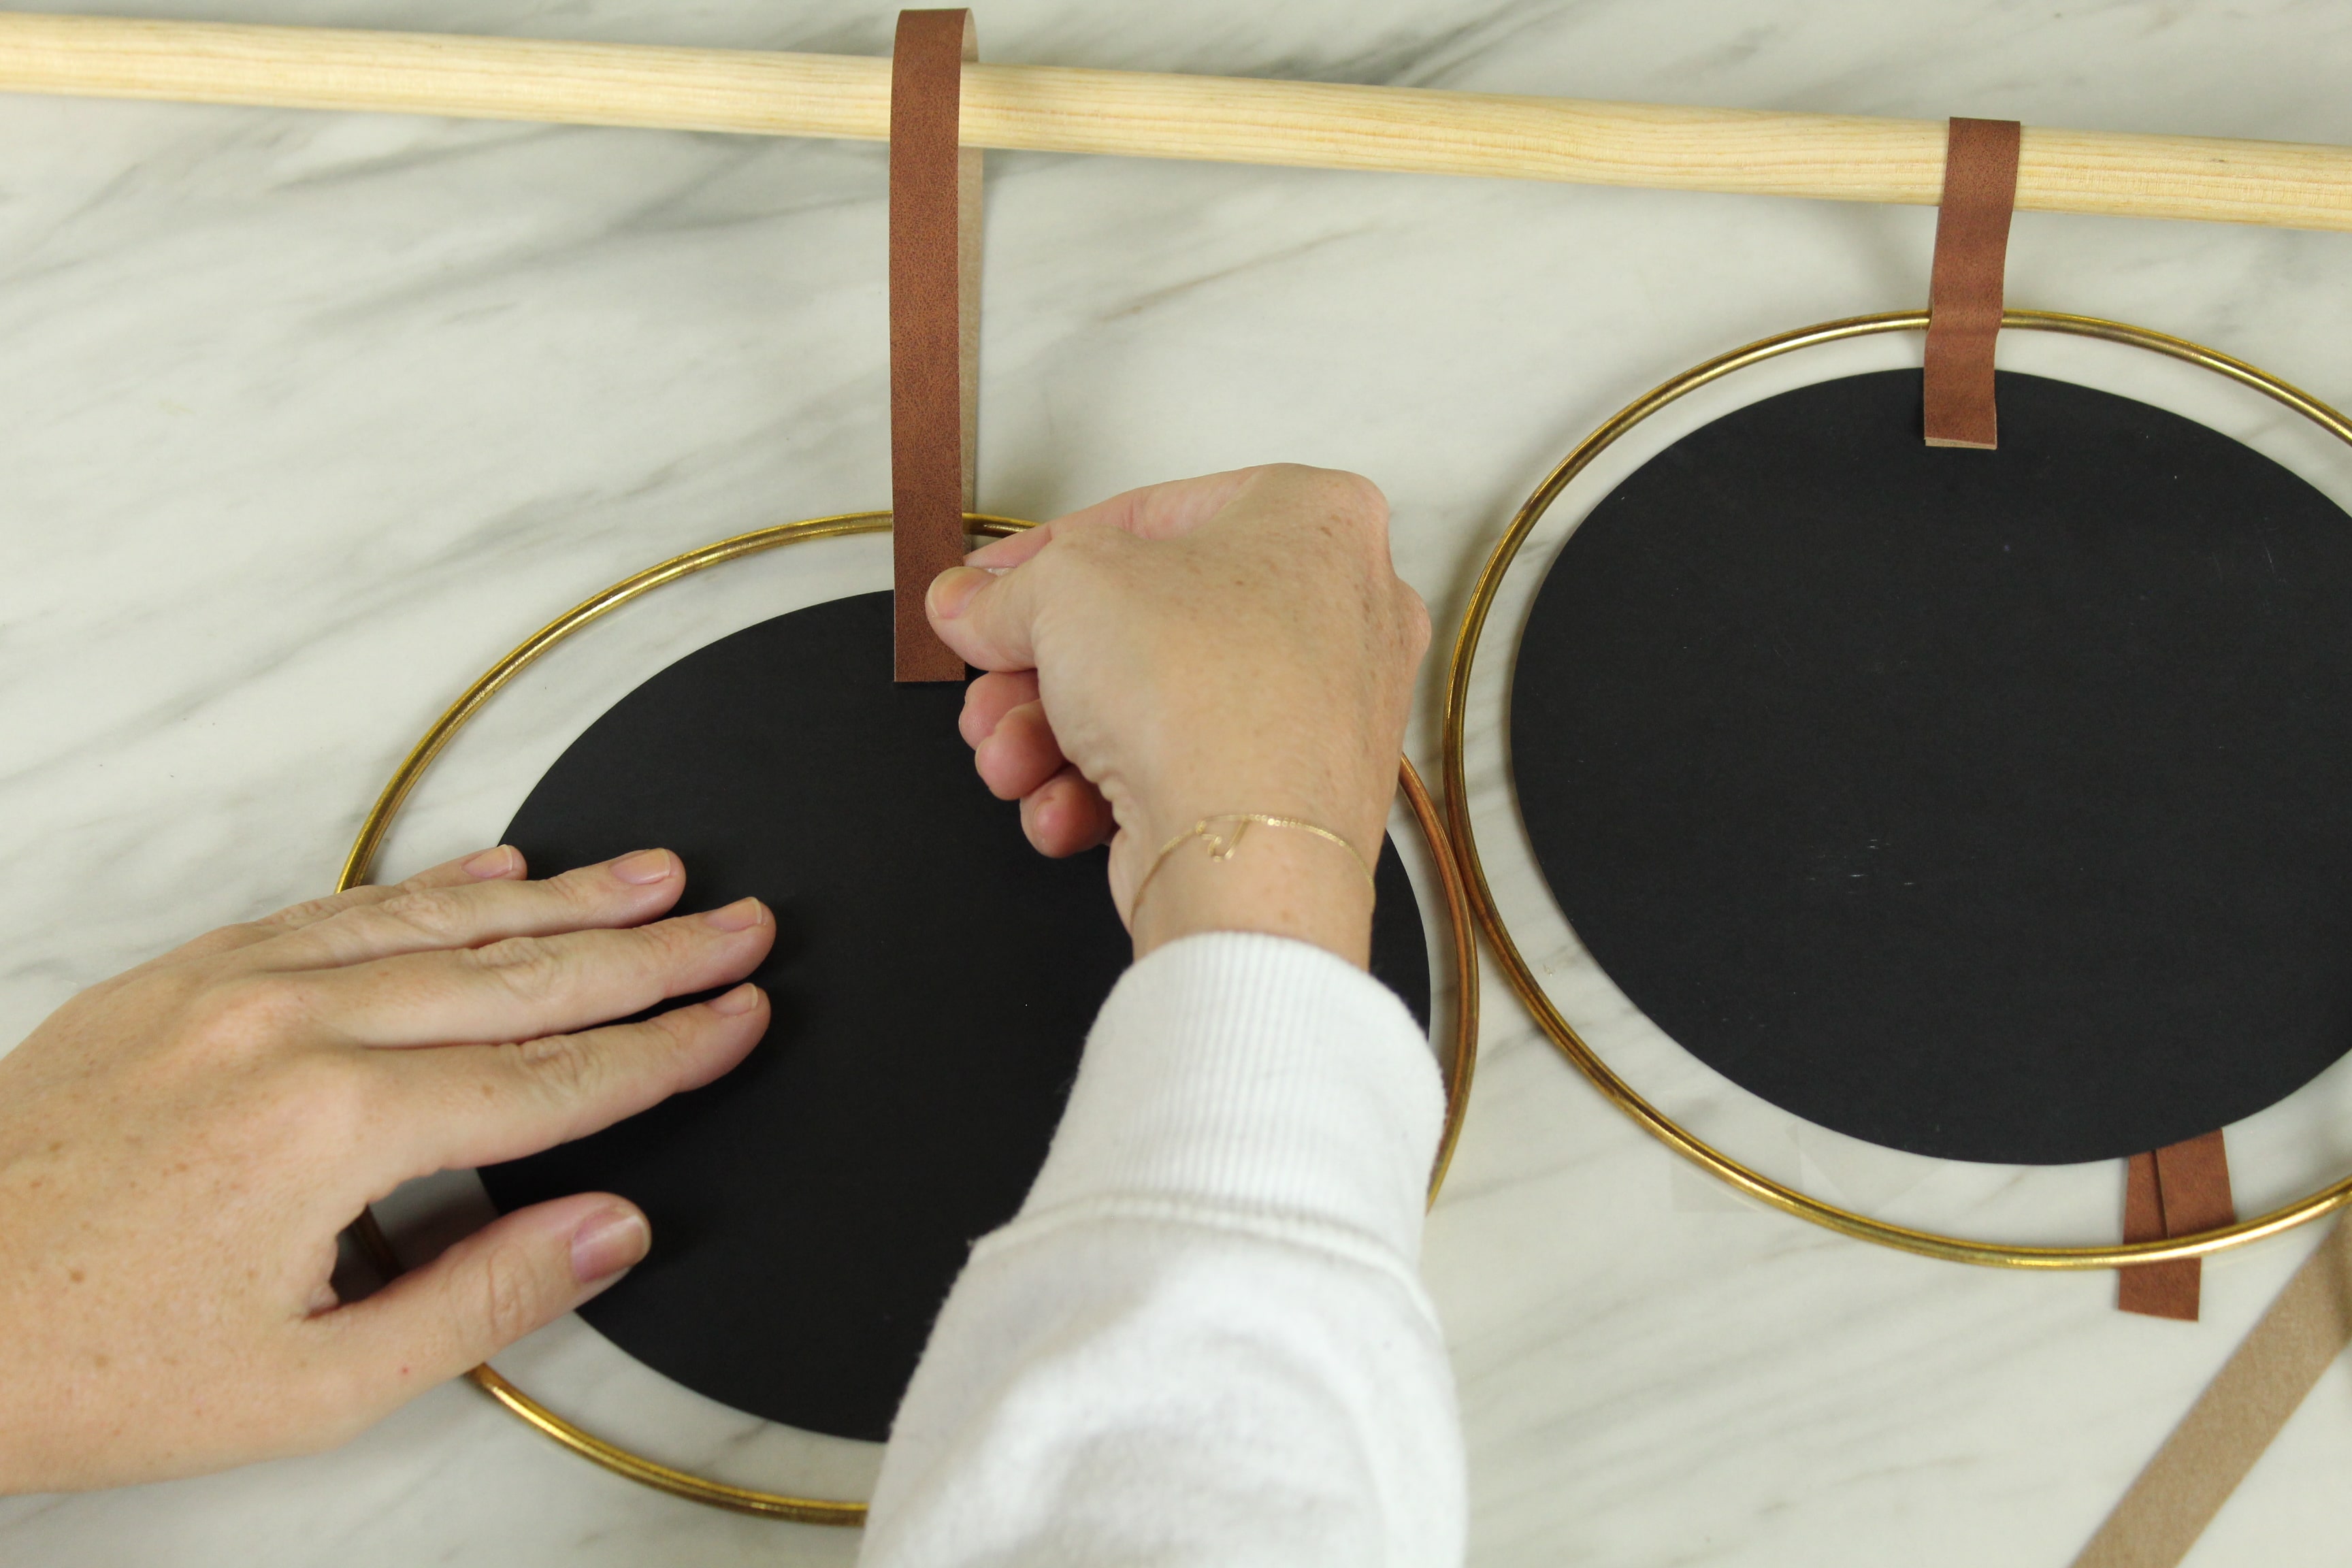
As I mentioned, I staggered the hoops, so every other one I used the 6 inch strips, and the 12 inch strips for the others.
Repeat the process for all your tables and that’s it! Once you get them all on your dowel, you’re done! Depending on how many tables you have, you can add more hoops do the bottom of the originals, or you can get another dowel, it’s totally up to you! To hang mine I simply used some bakers twine but you could use regular twine, fishing line, yarn, whatever best goes with the vibe of your event!
I had so much fun creating this DIY, I haven’t gotten to do any wedding crafting for six years (almost exactly…Happy anniversary to me this Sunday!). I hope you enjoyed it and I can’t wait to see how you make it your own! If you have any questions don’t hesitate to leave a comment!
You can find the Cricut Design Space file HERE
If you create one of our projects, please share a picture with us on Instagram or Twitter using the hashtag #somethingturquoisediy, we regularly reshare our favorites! Your profile will need to be public for us to see it otherwise, you can always DM us!
DIY Tutorial Credits
Photography + DIY Tutorial: Shea O’Quinn of Not So Cli-Shea // Cricut Maker and accessories courtesy of Cricut // Macrame Hoops & Minc Foil: Joann // Cardstock & Wood Dowel: Michaels // Heidi Swapp Minc & Glue Dots: Tuesday Morning // HP Laserjet Printer: Amazon (discontinued)
Shop The Supplies:
Find the supplies you’ll need for this project from our affiliate links below:


Comments