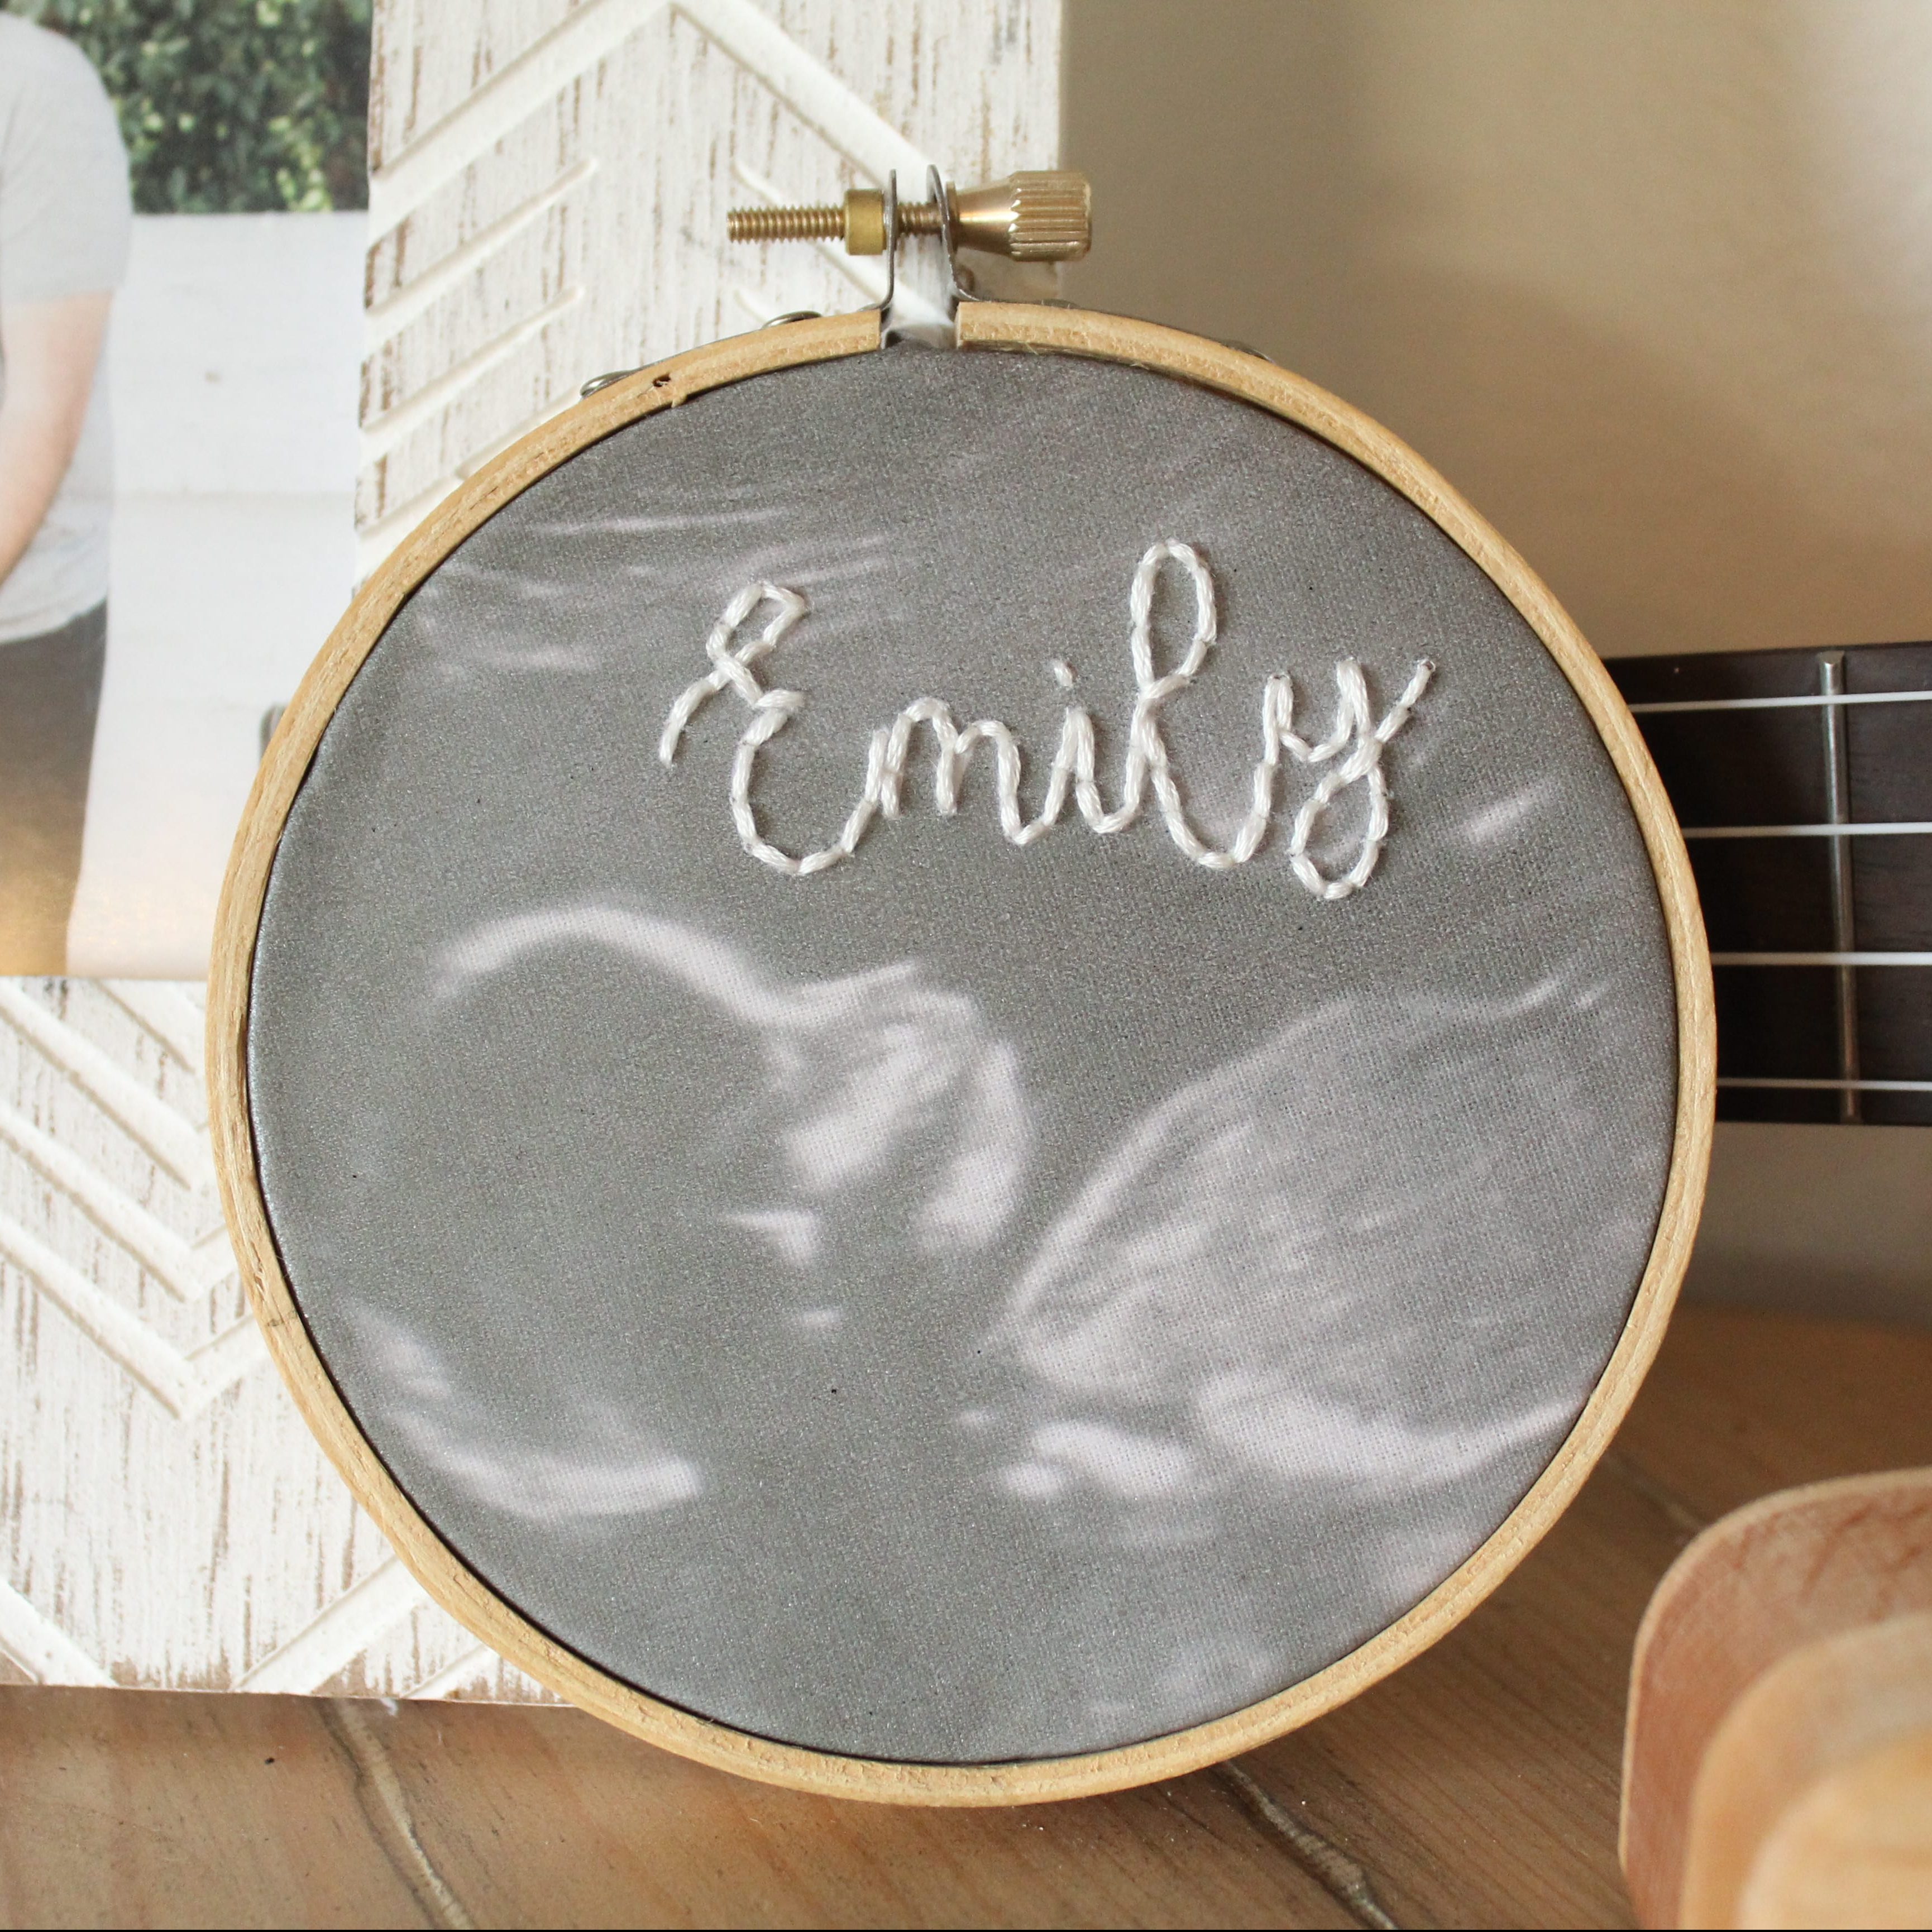

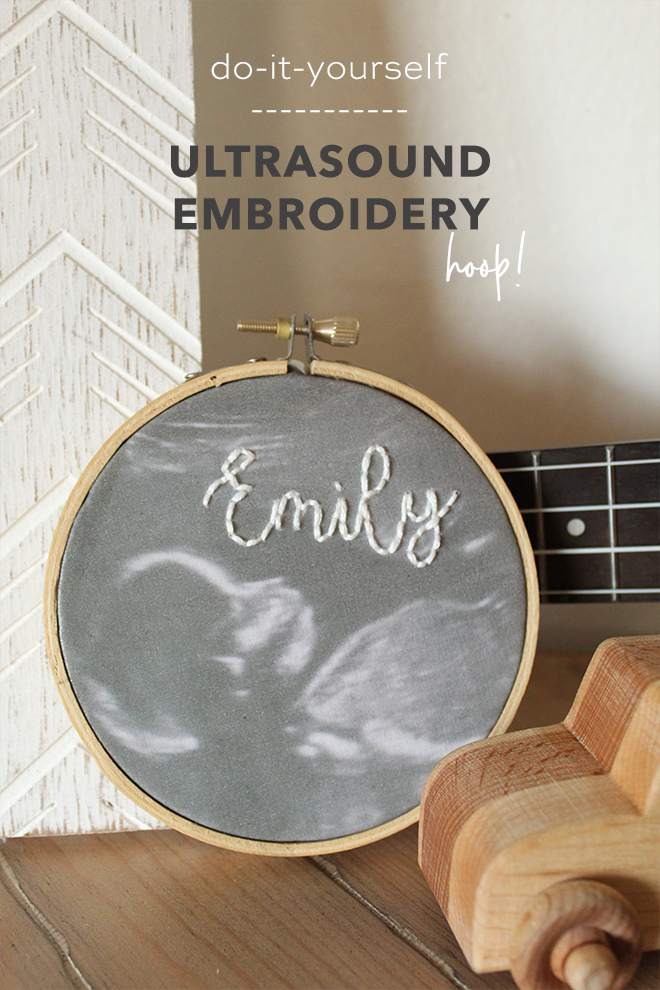
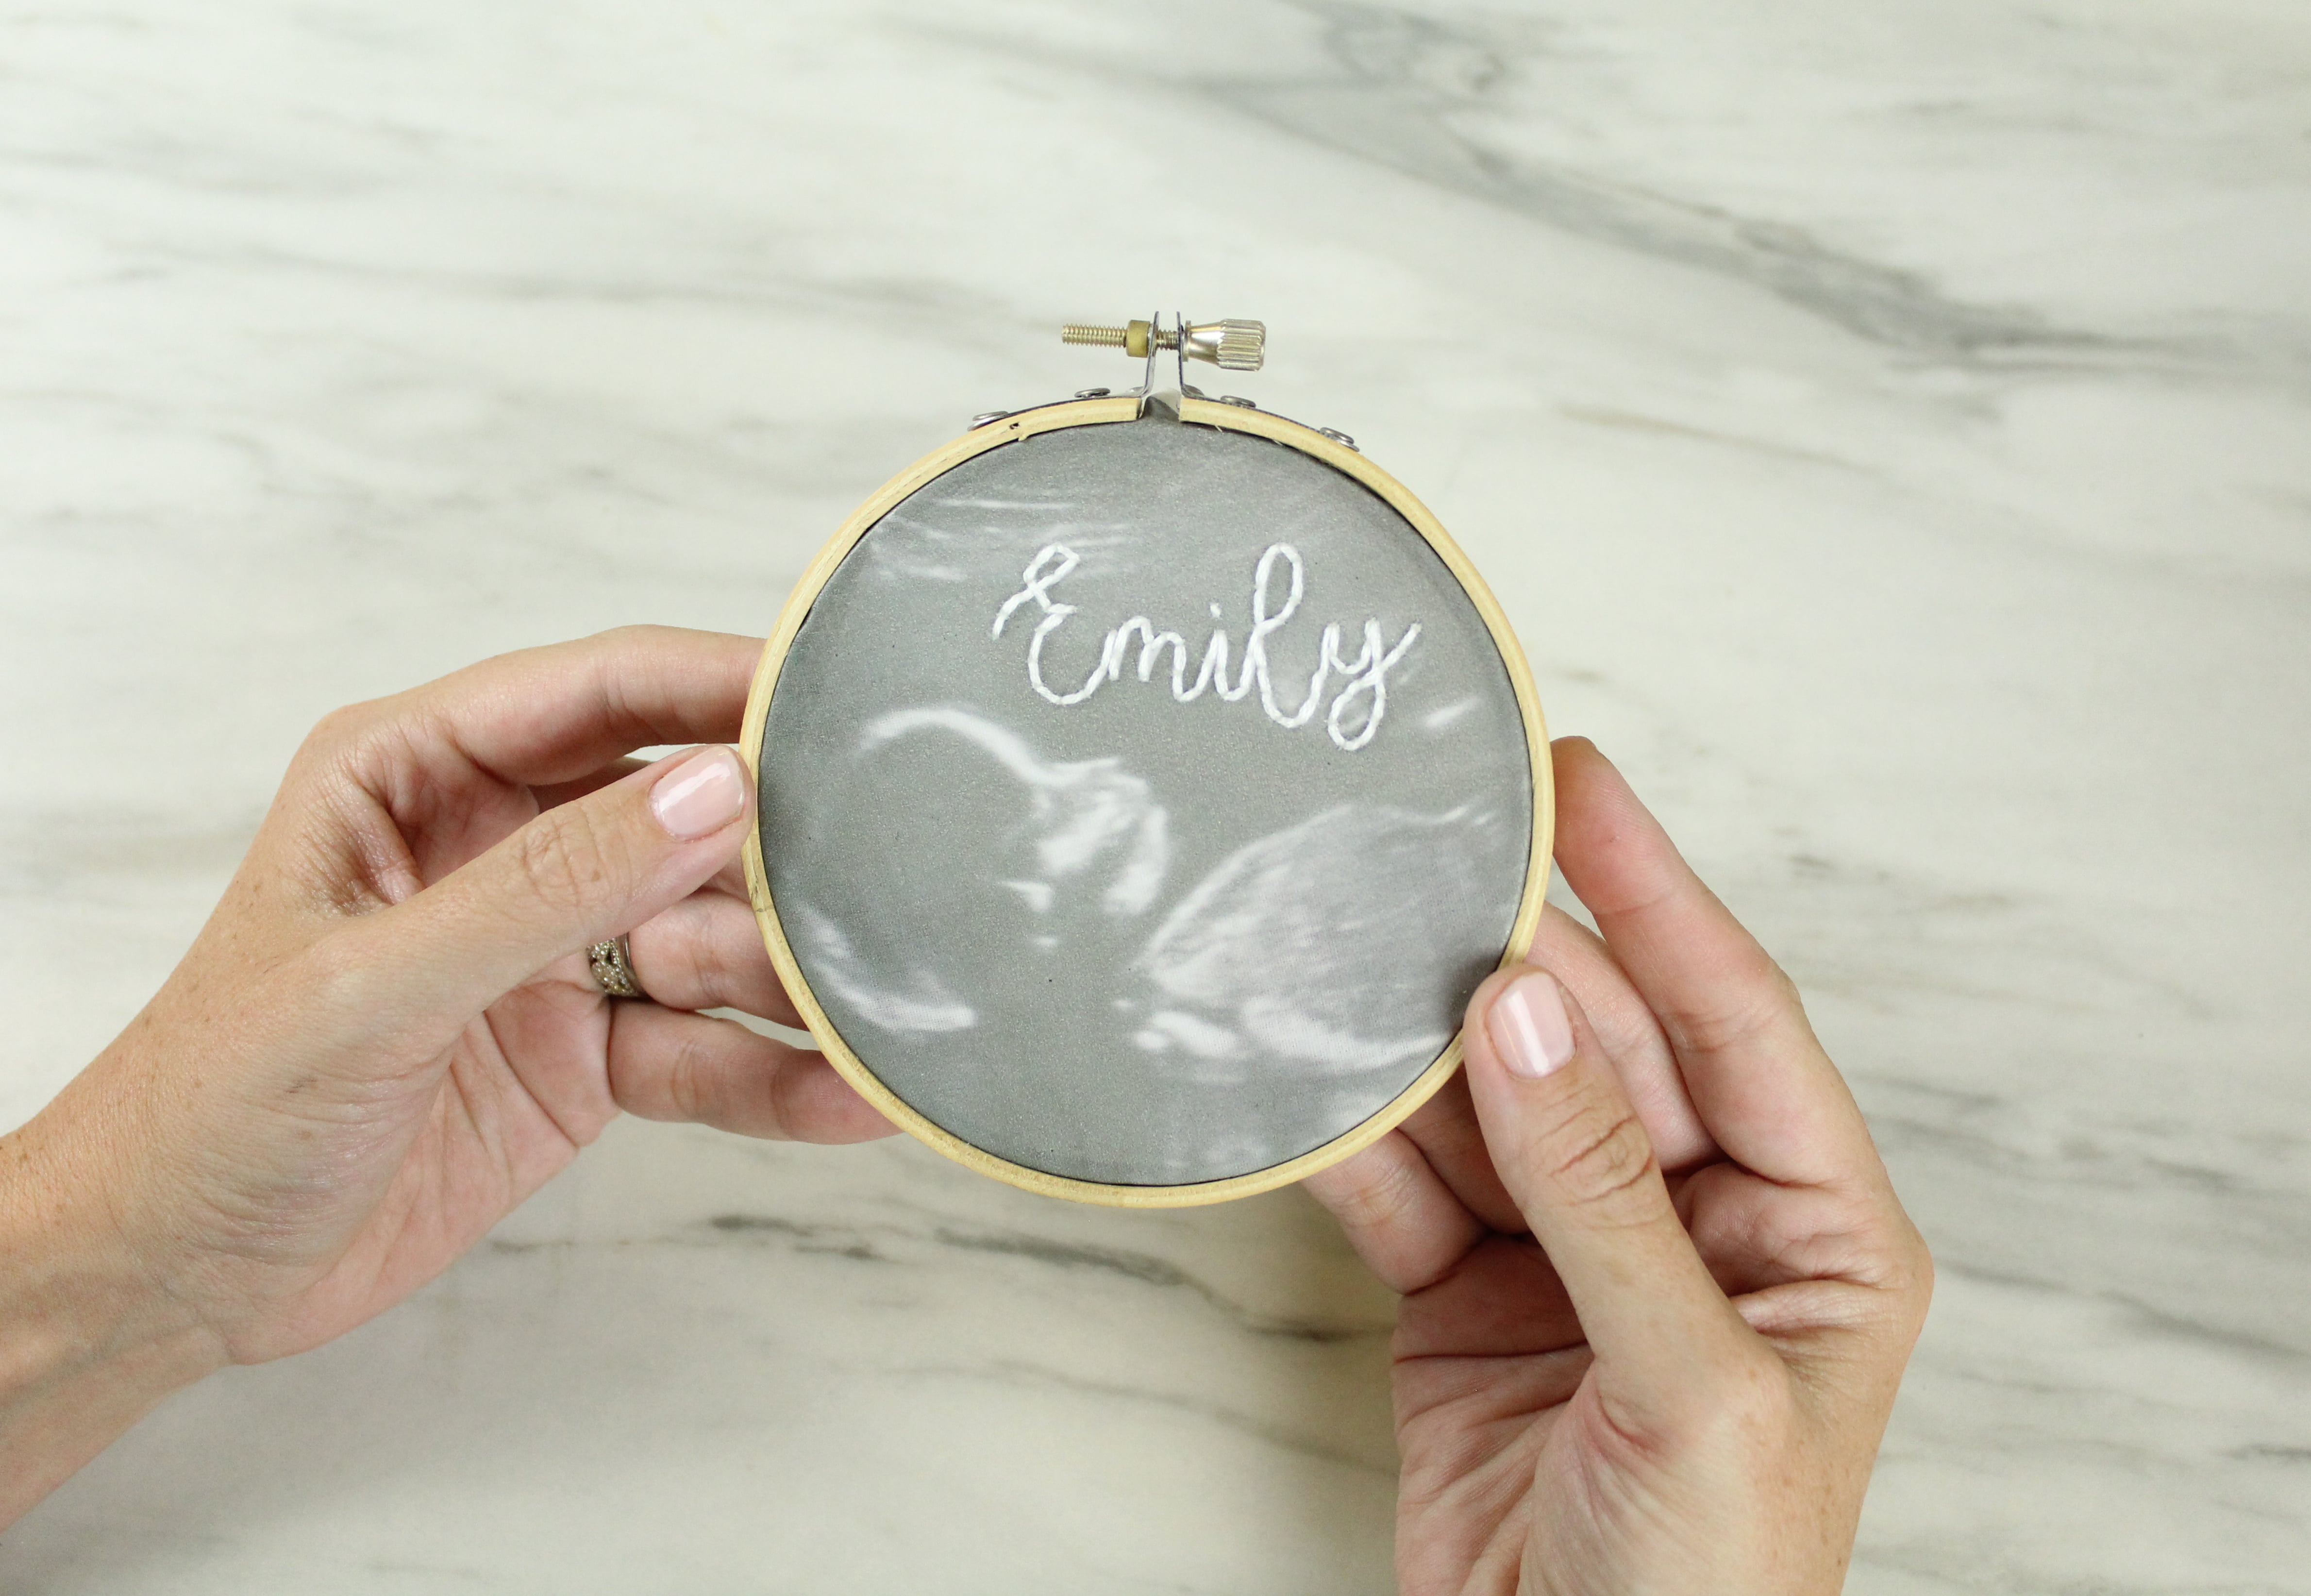
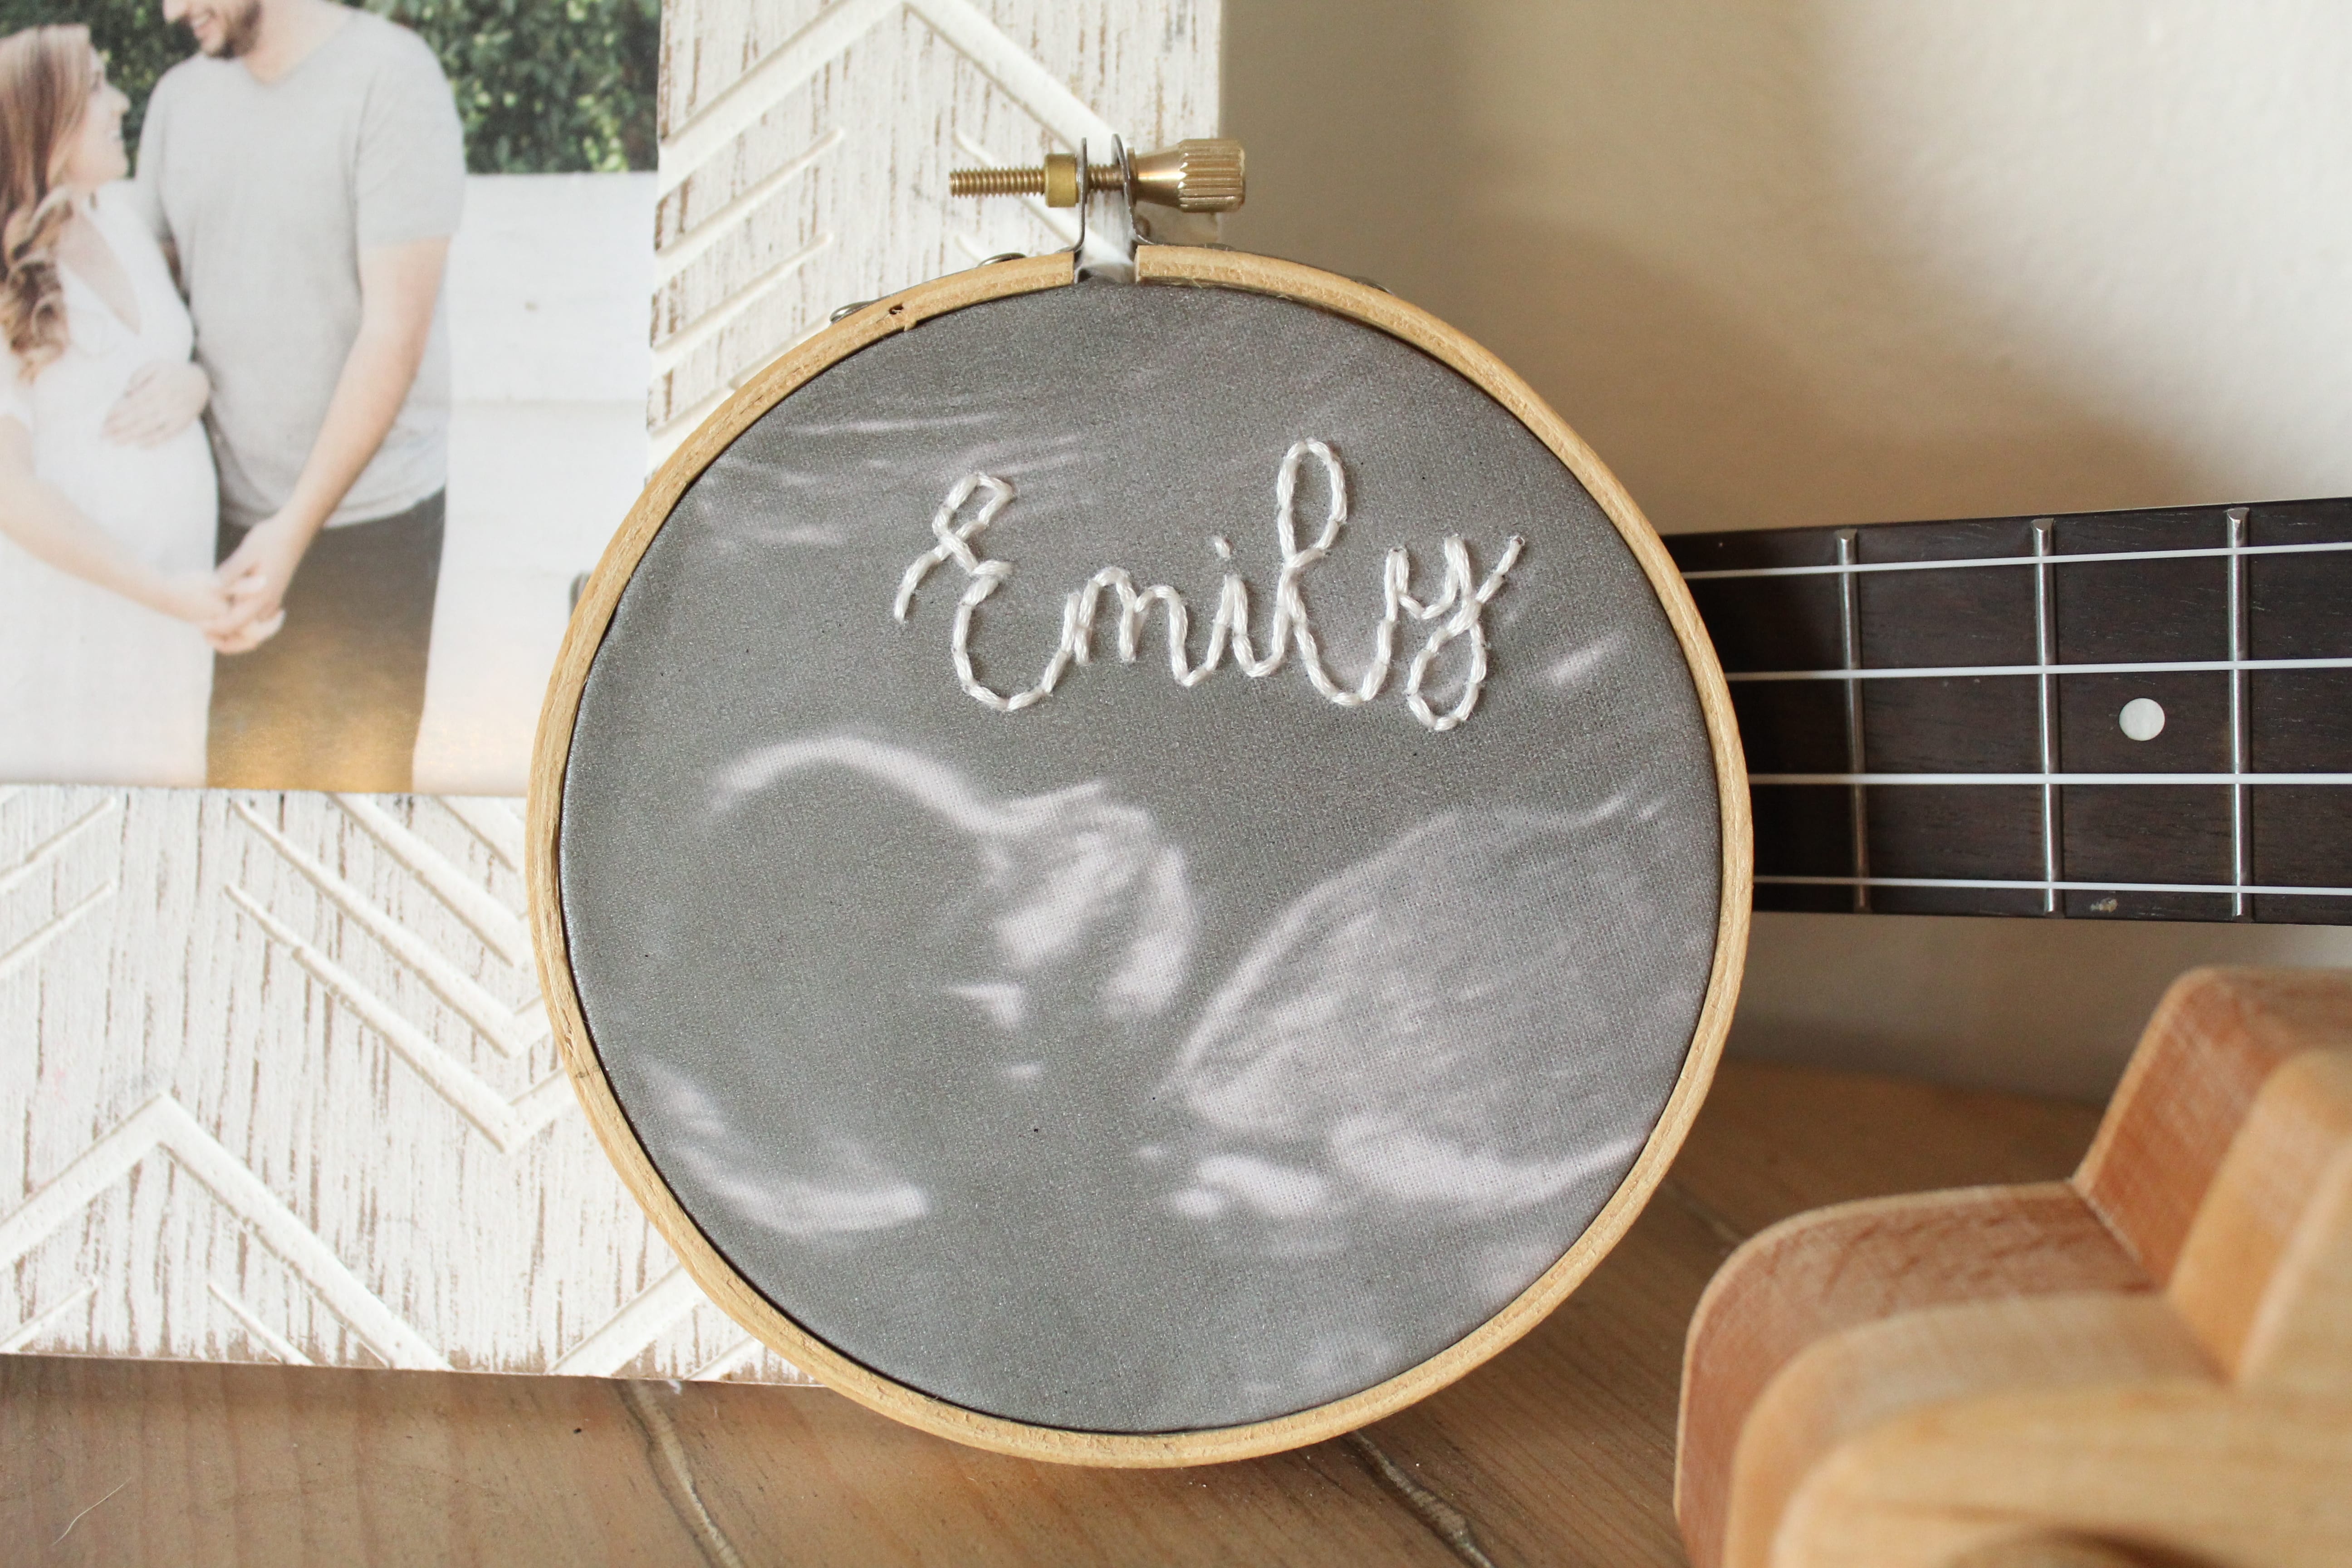
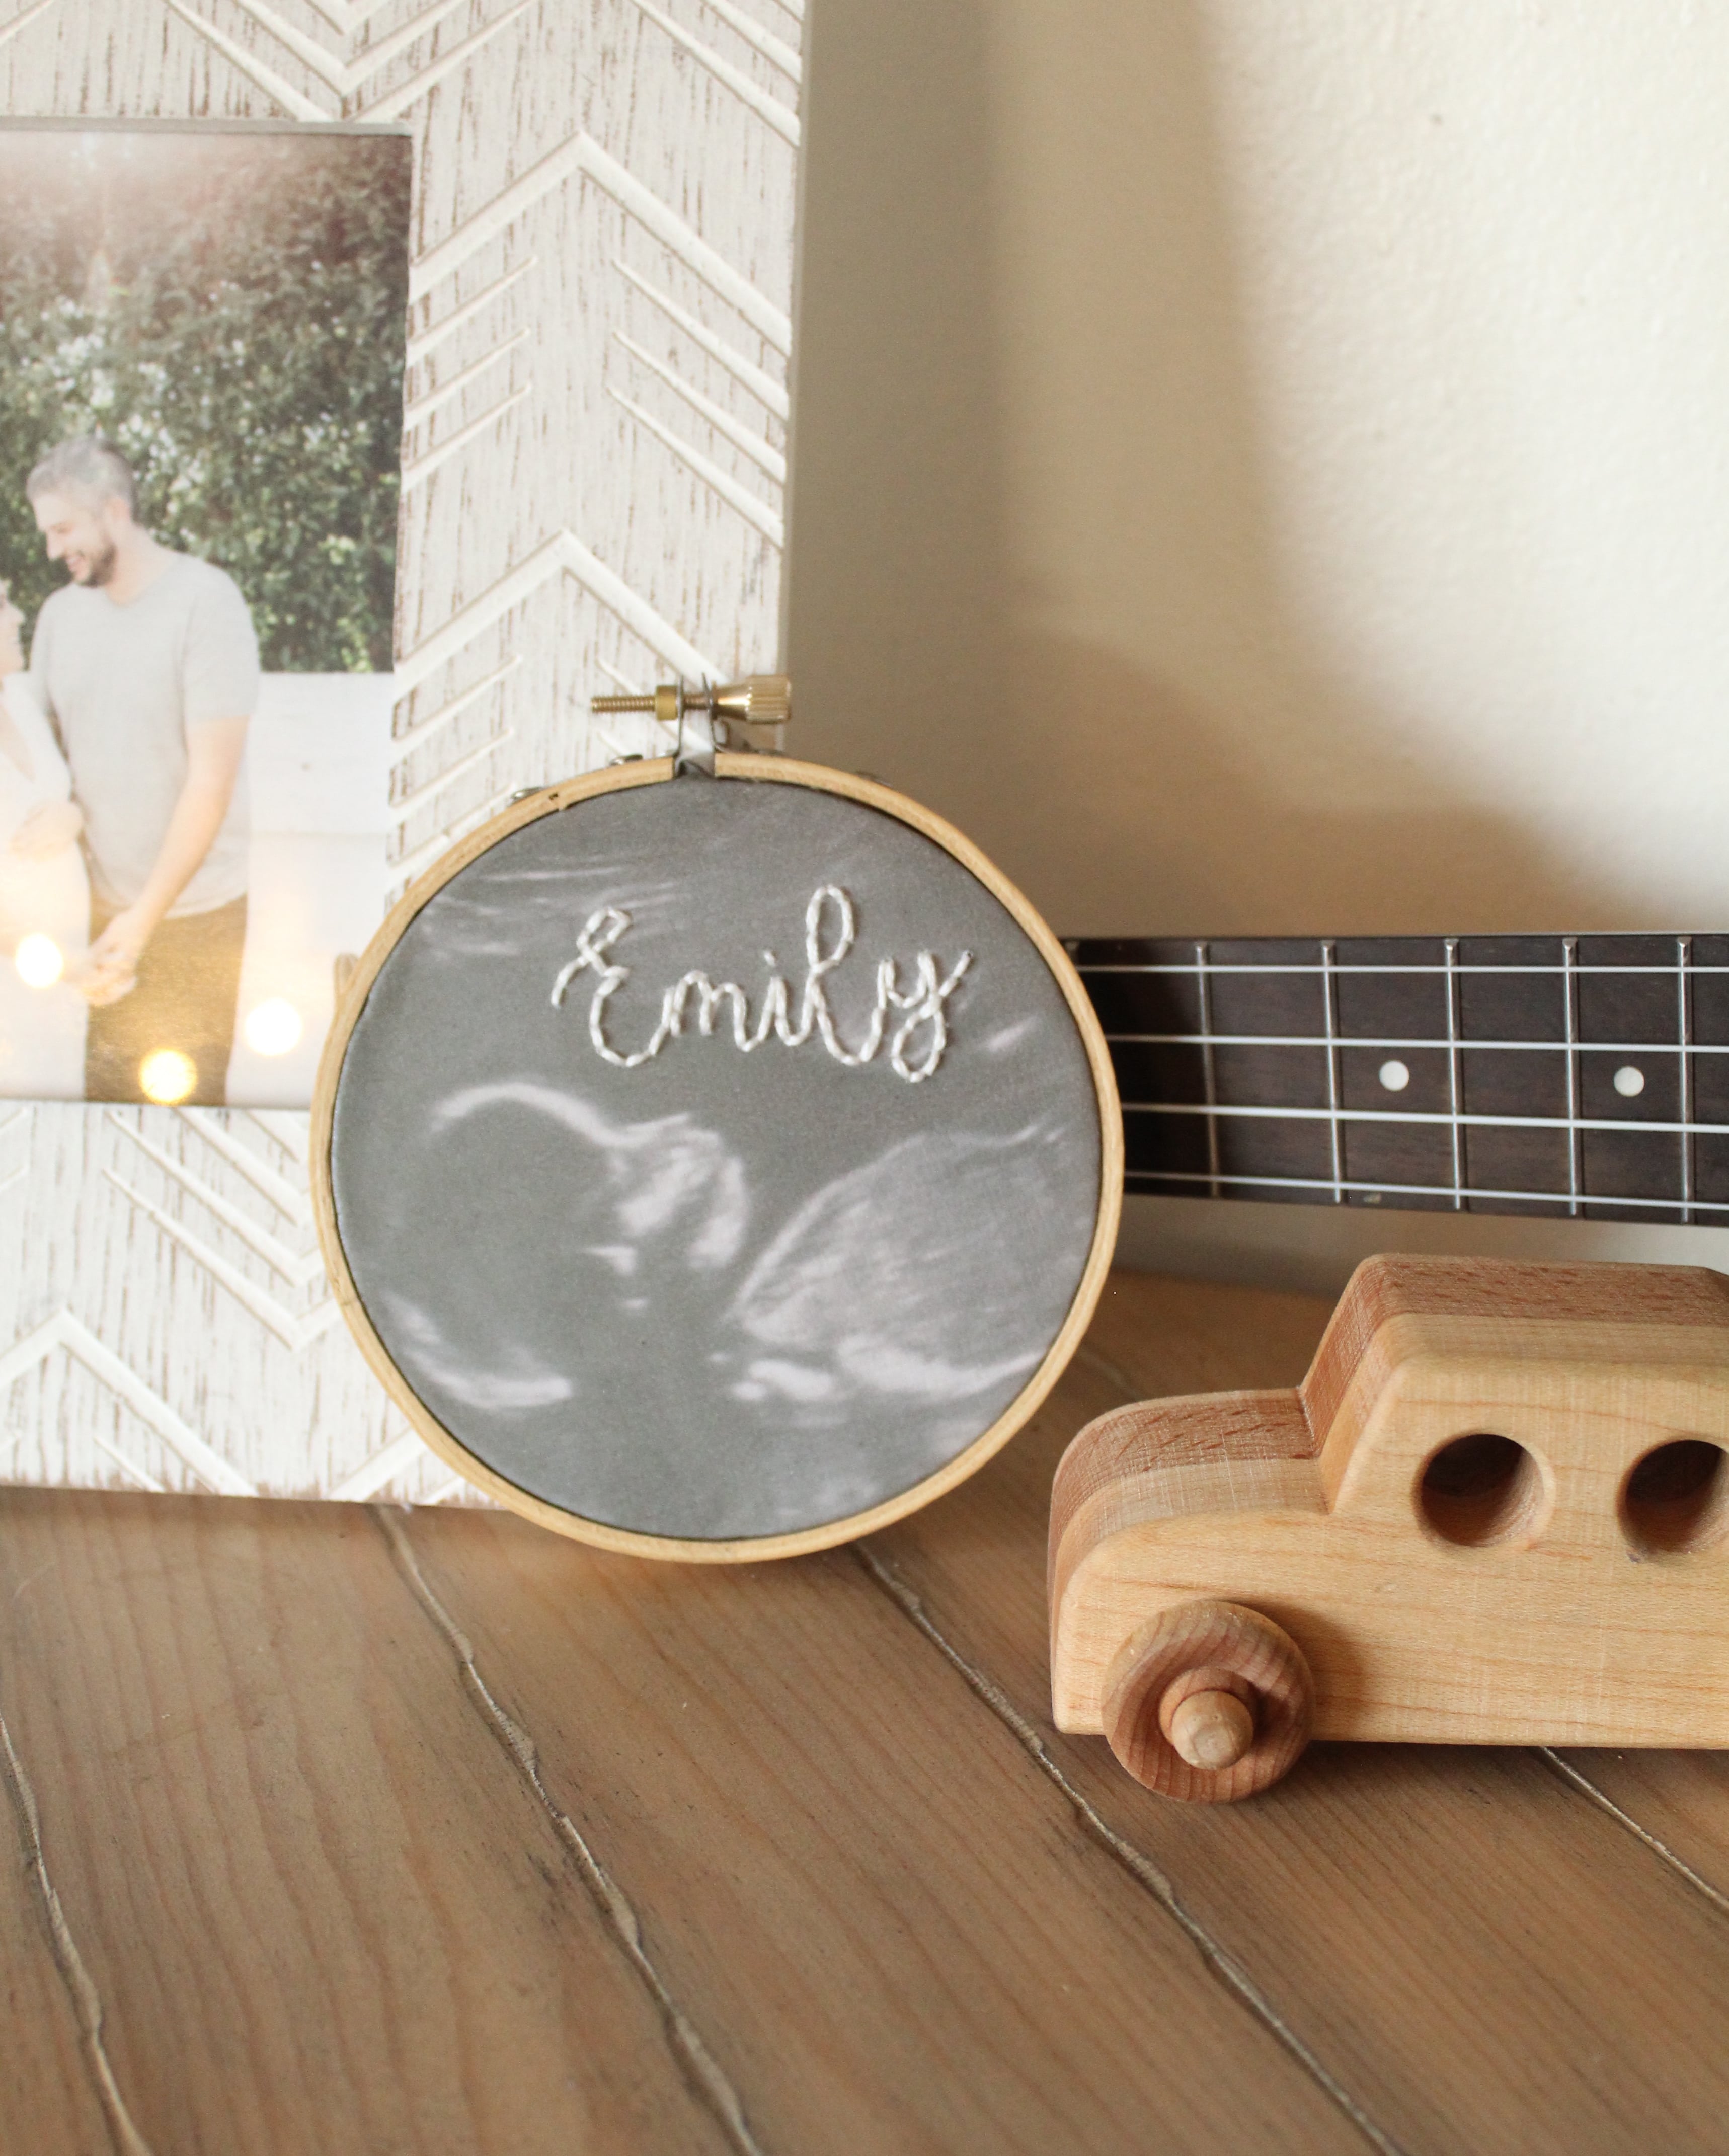
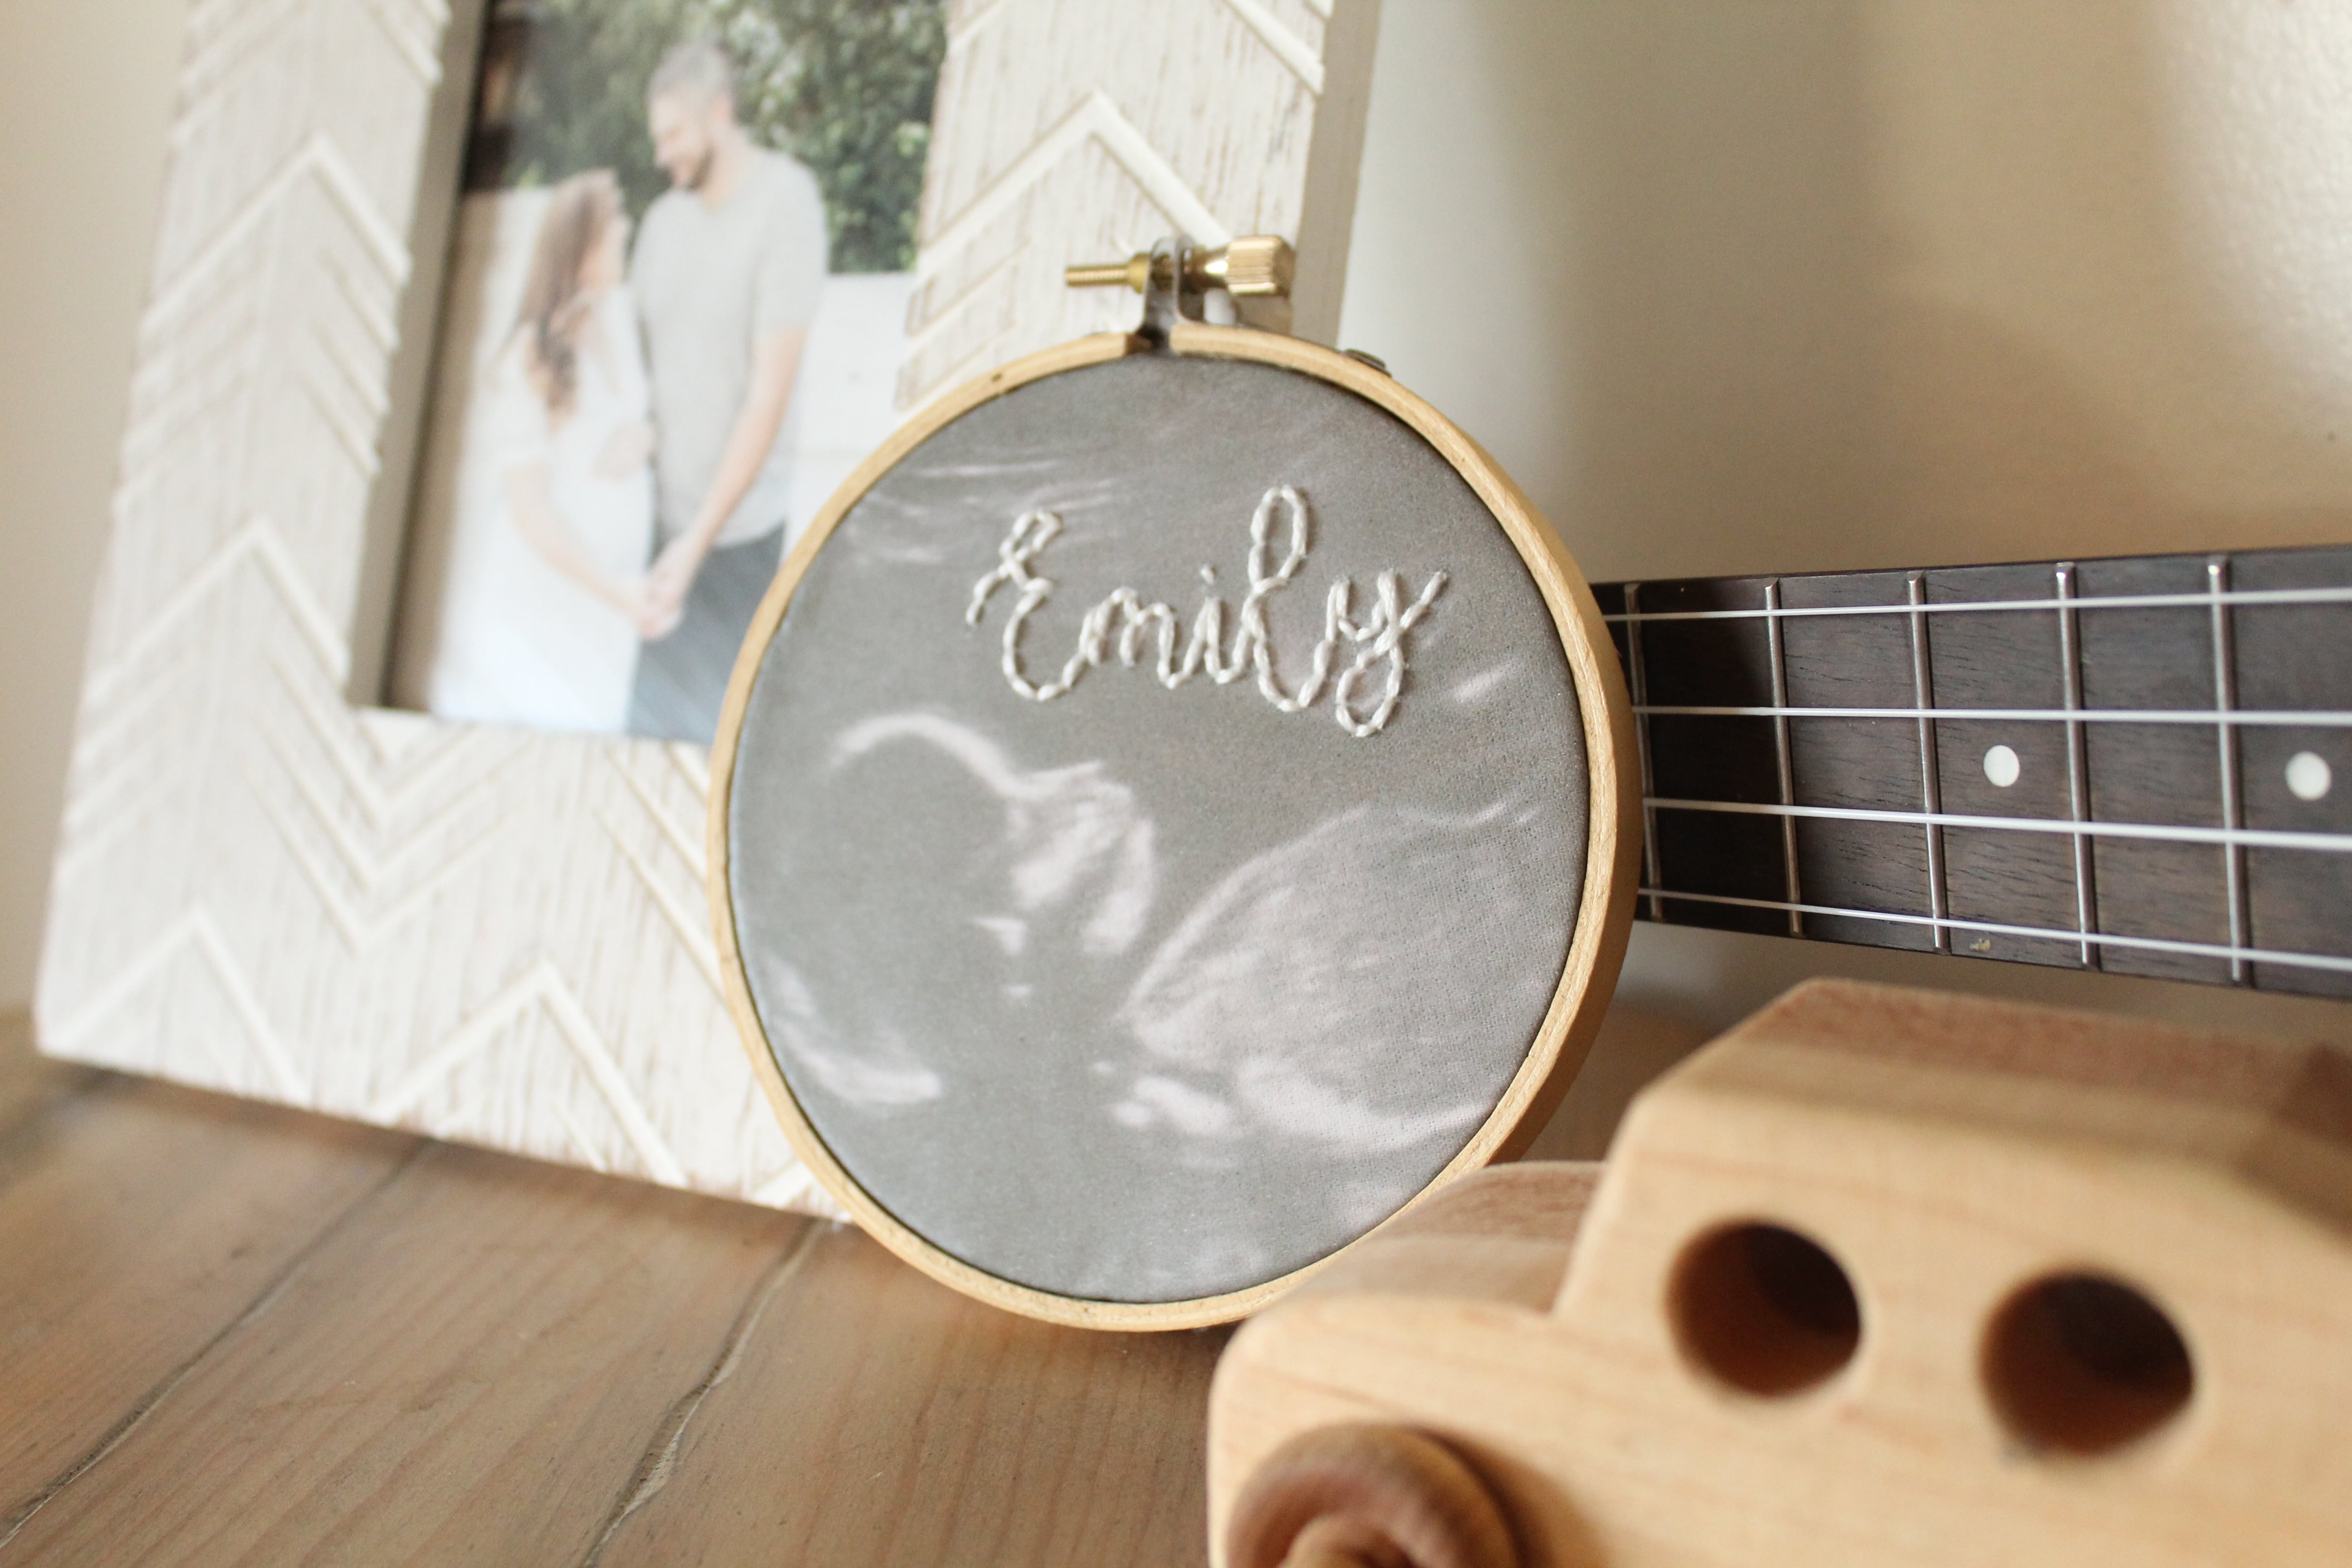
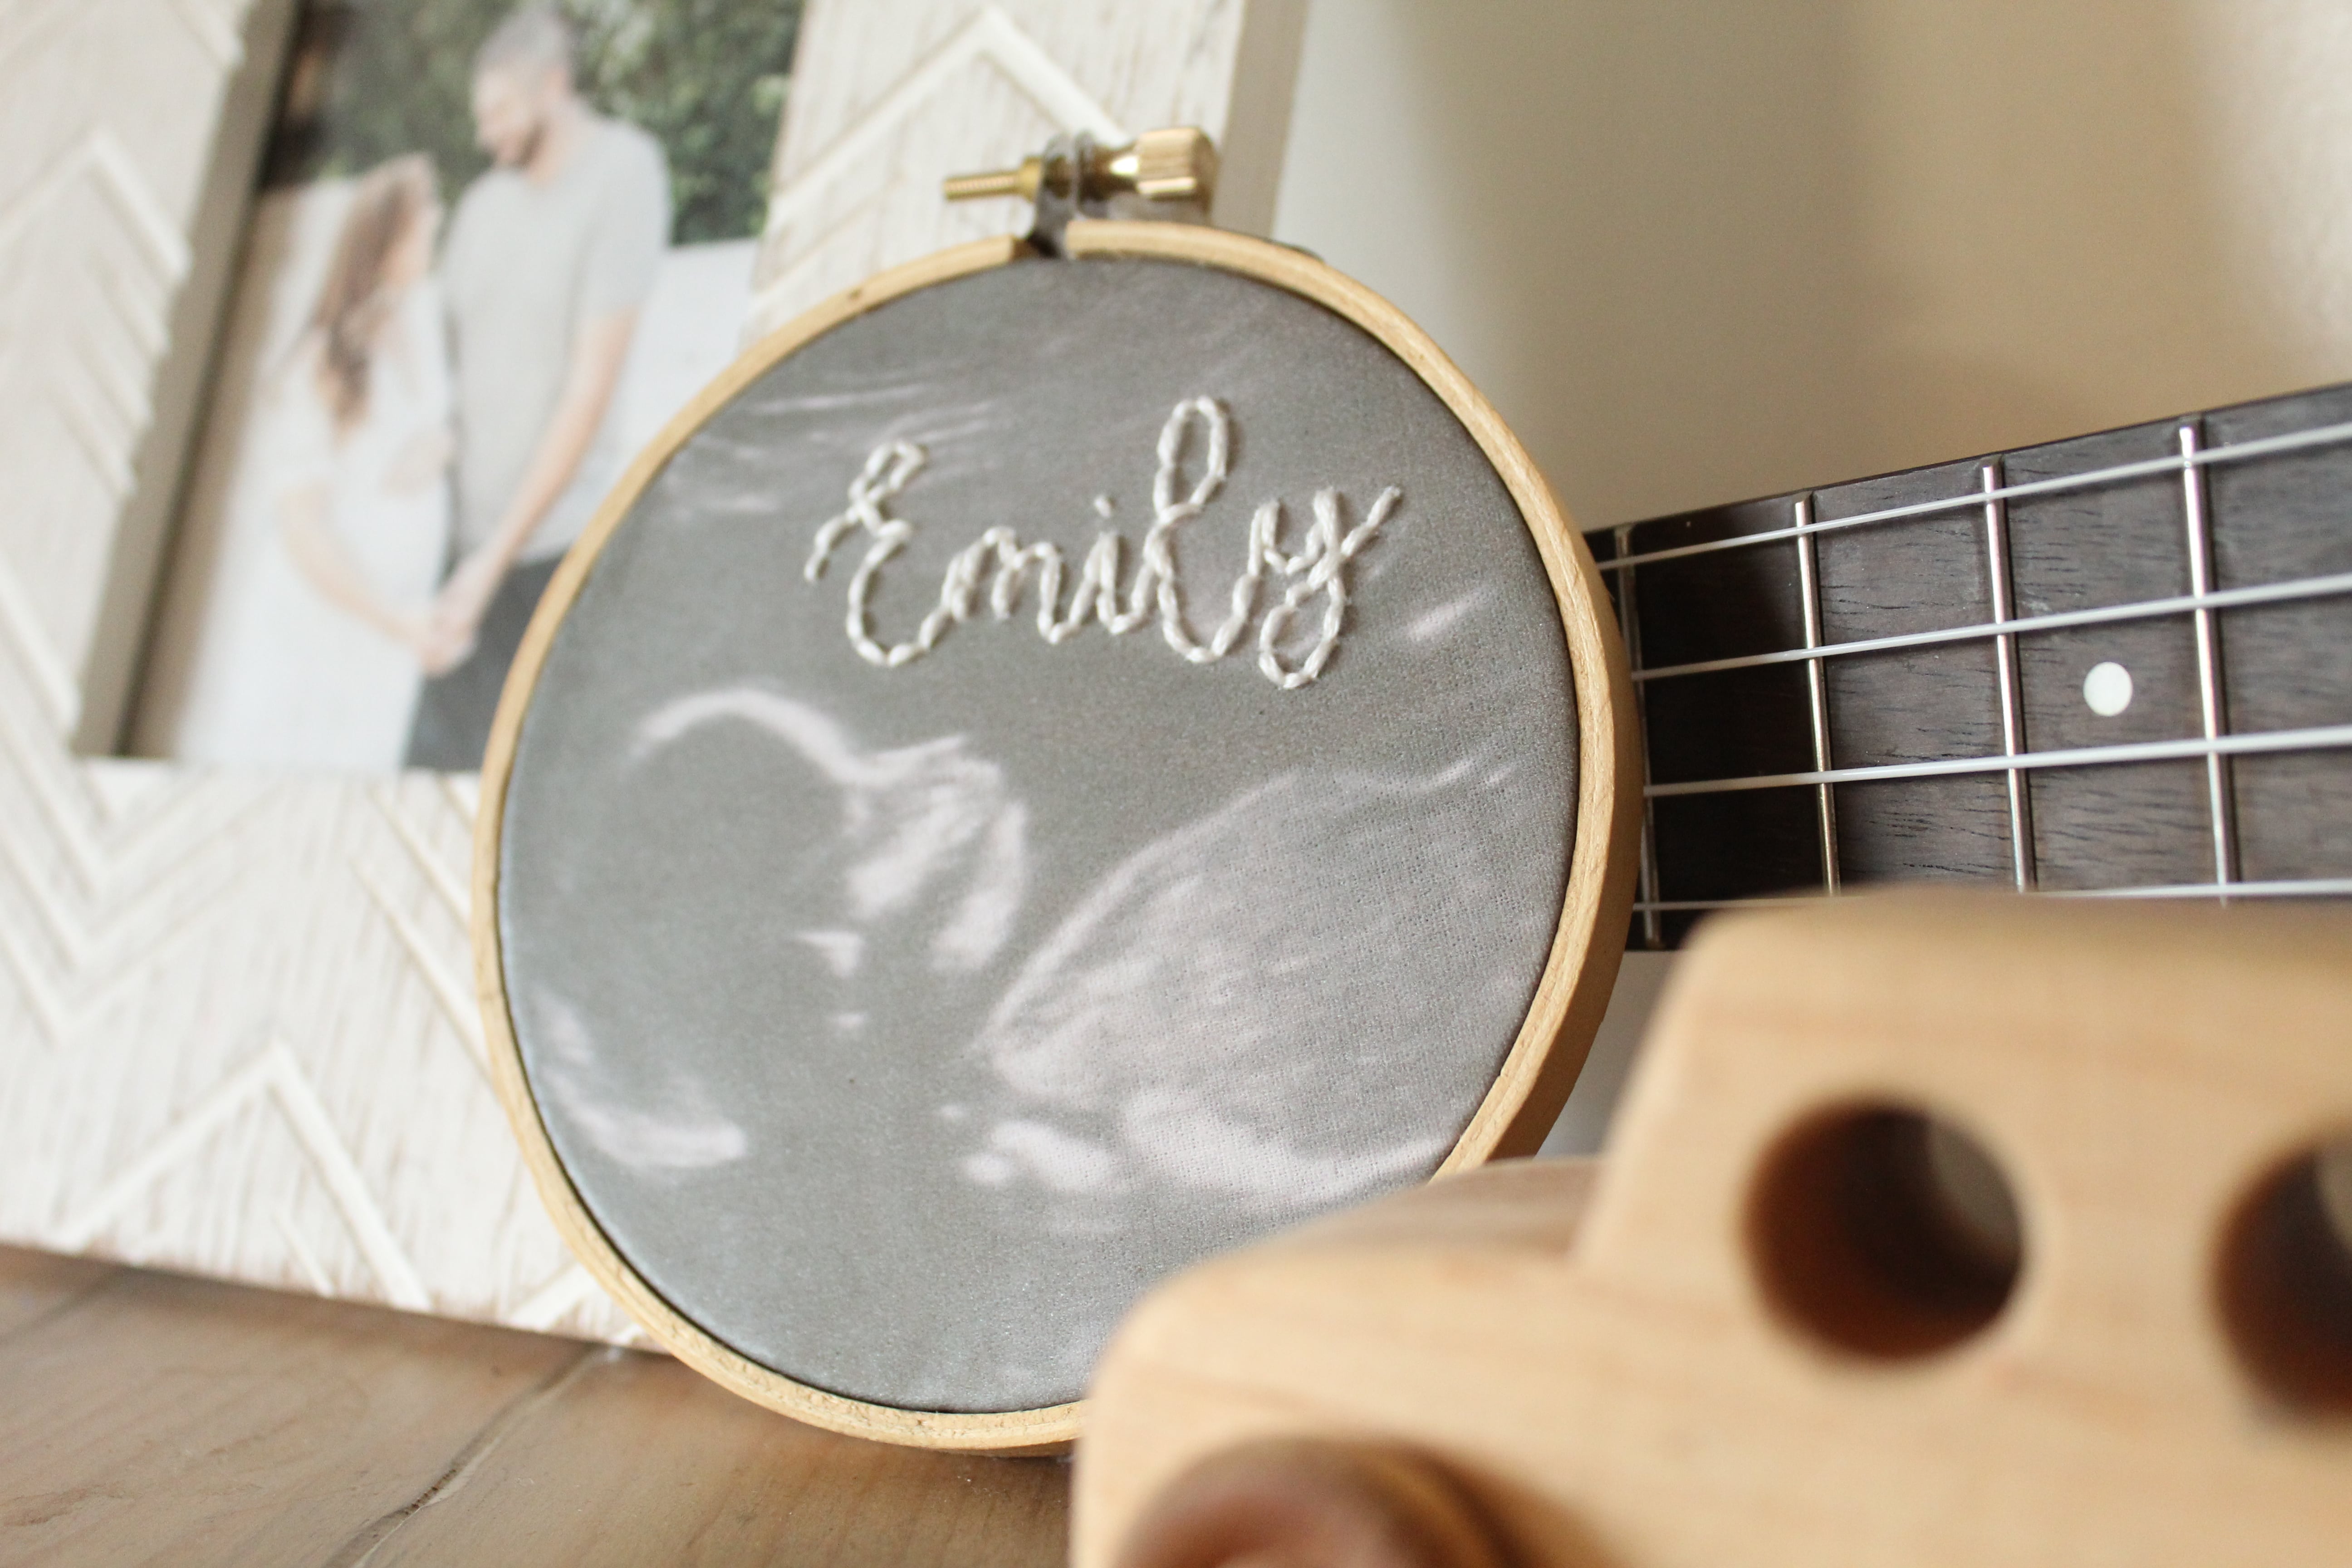
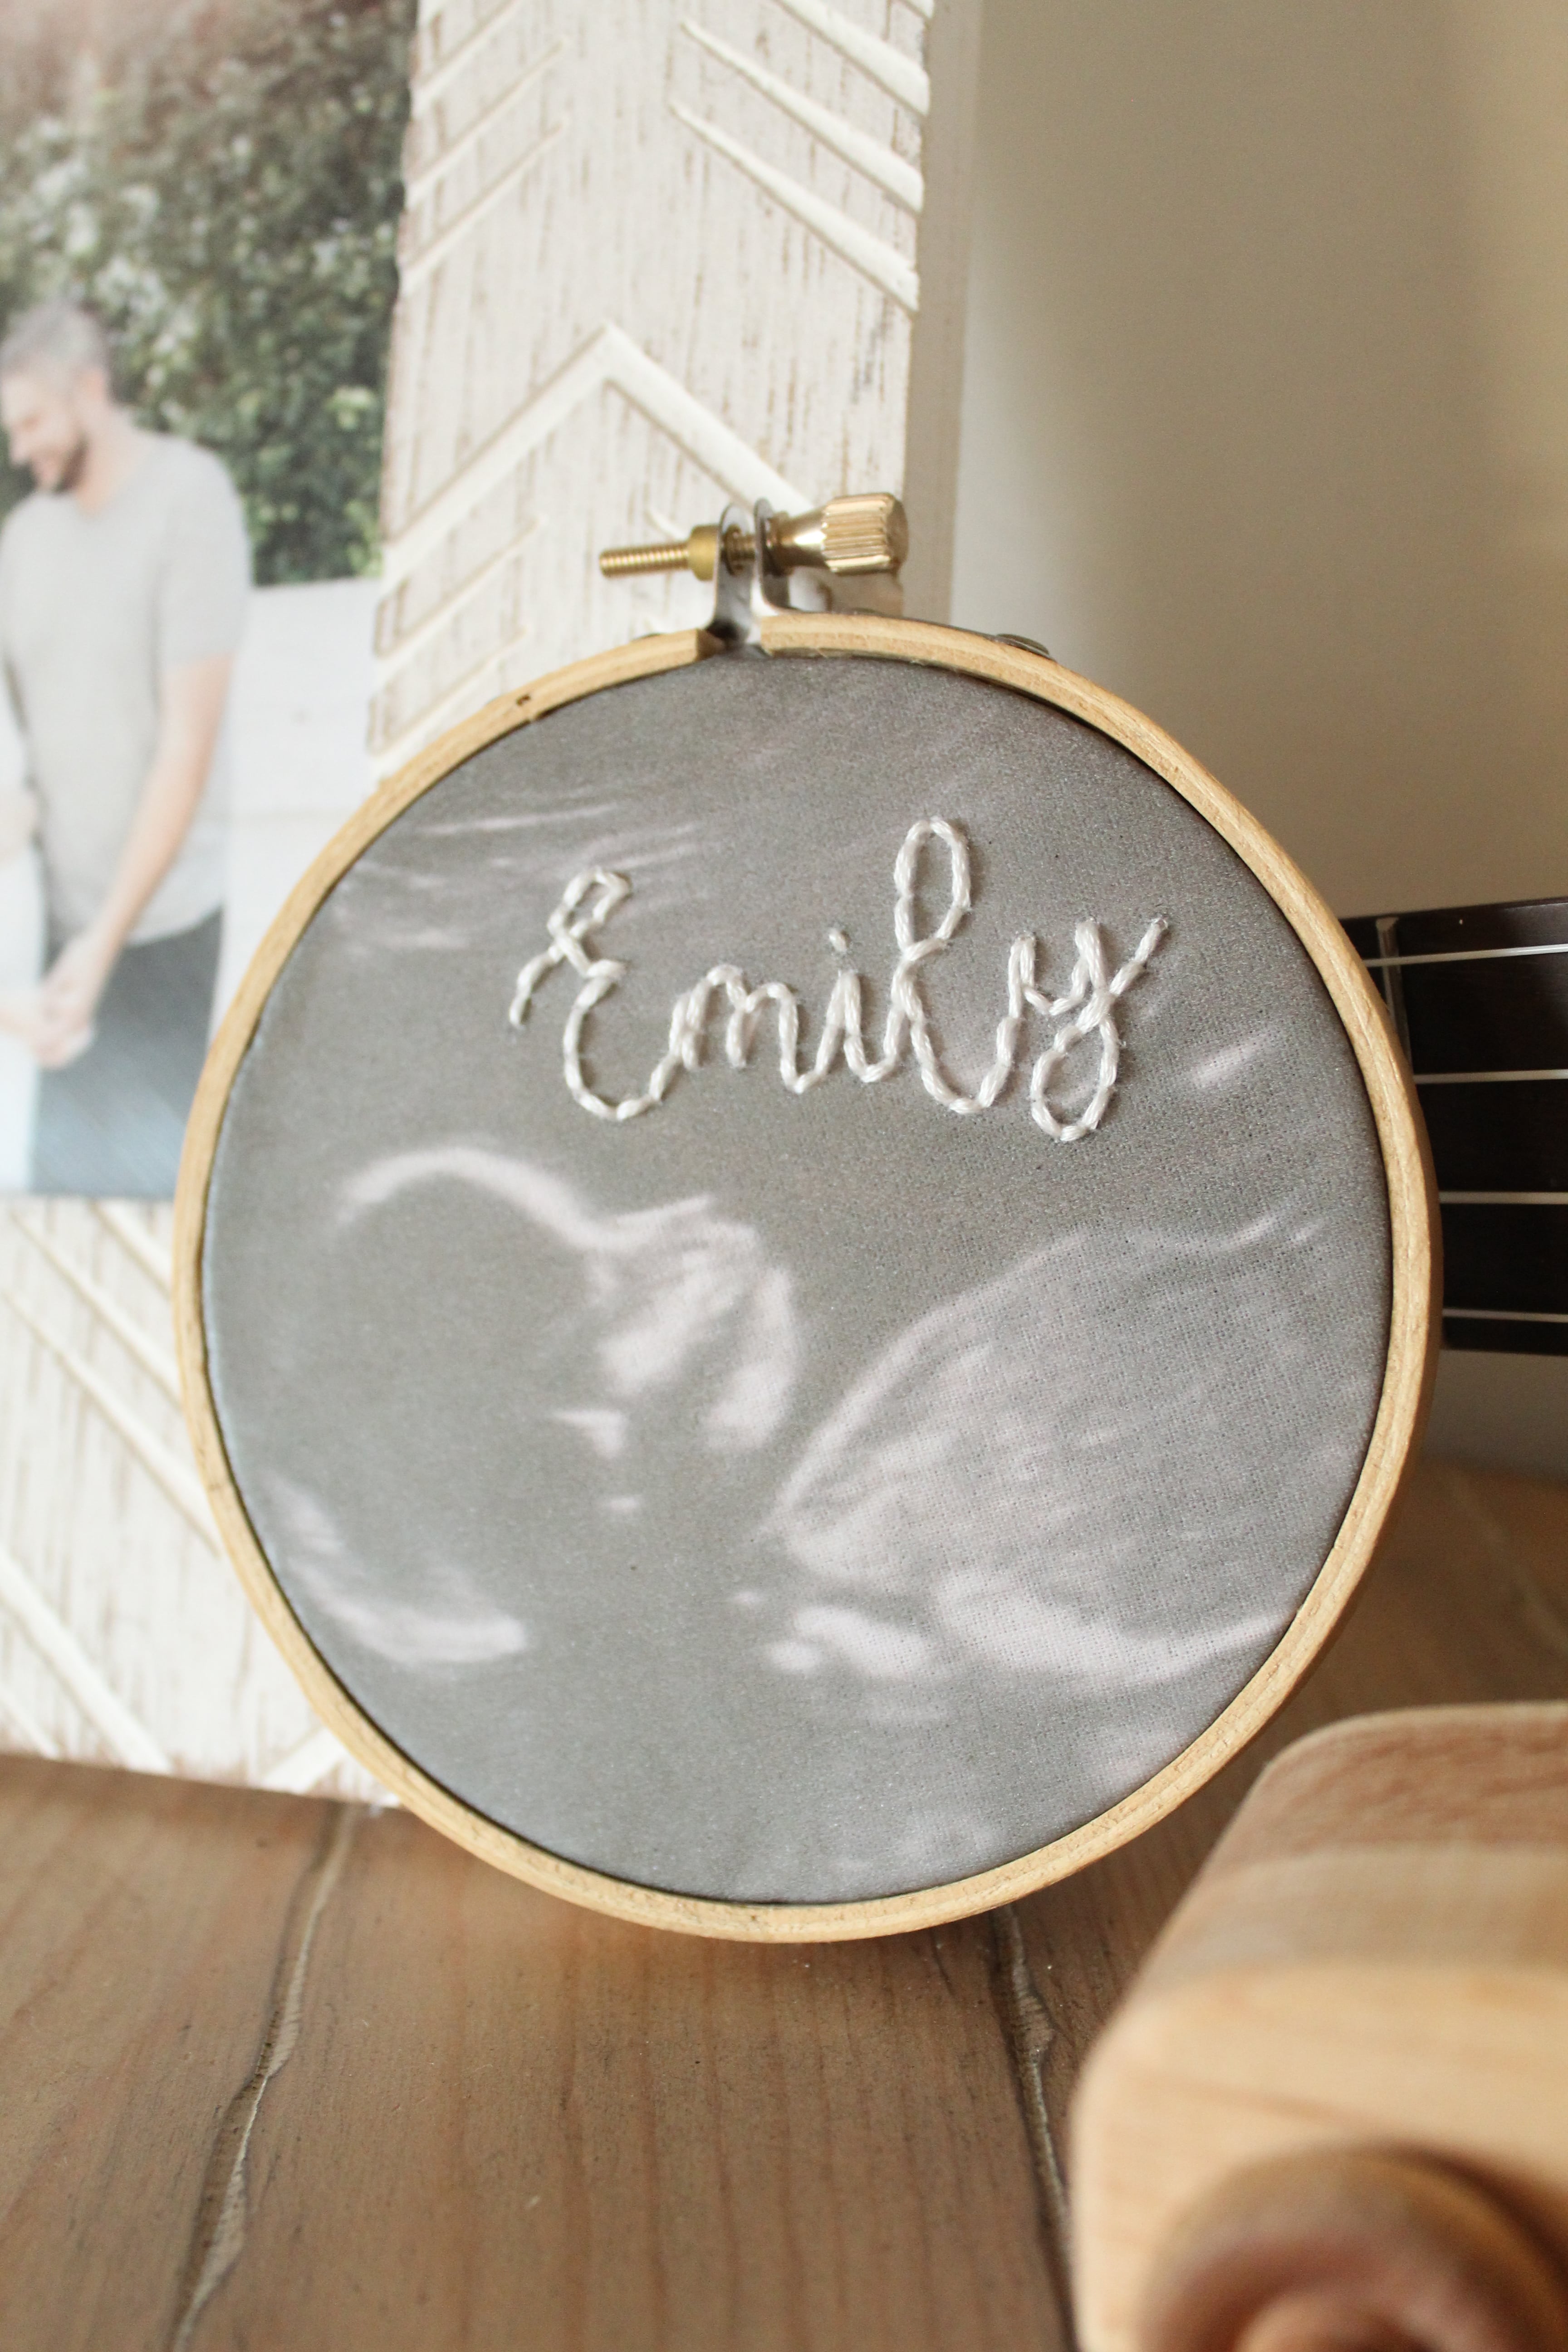
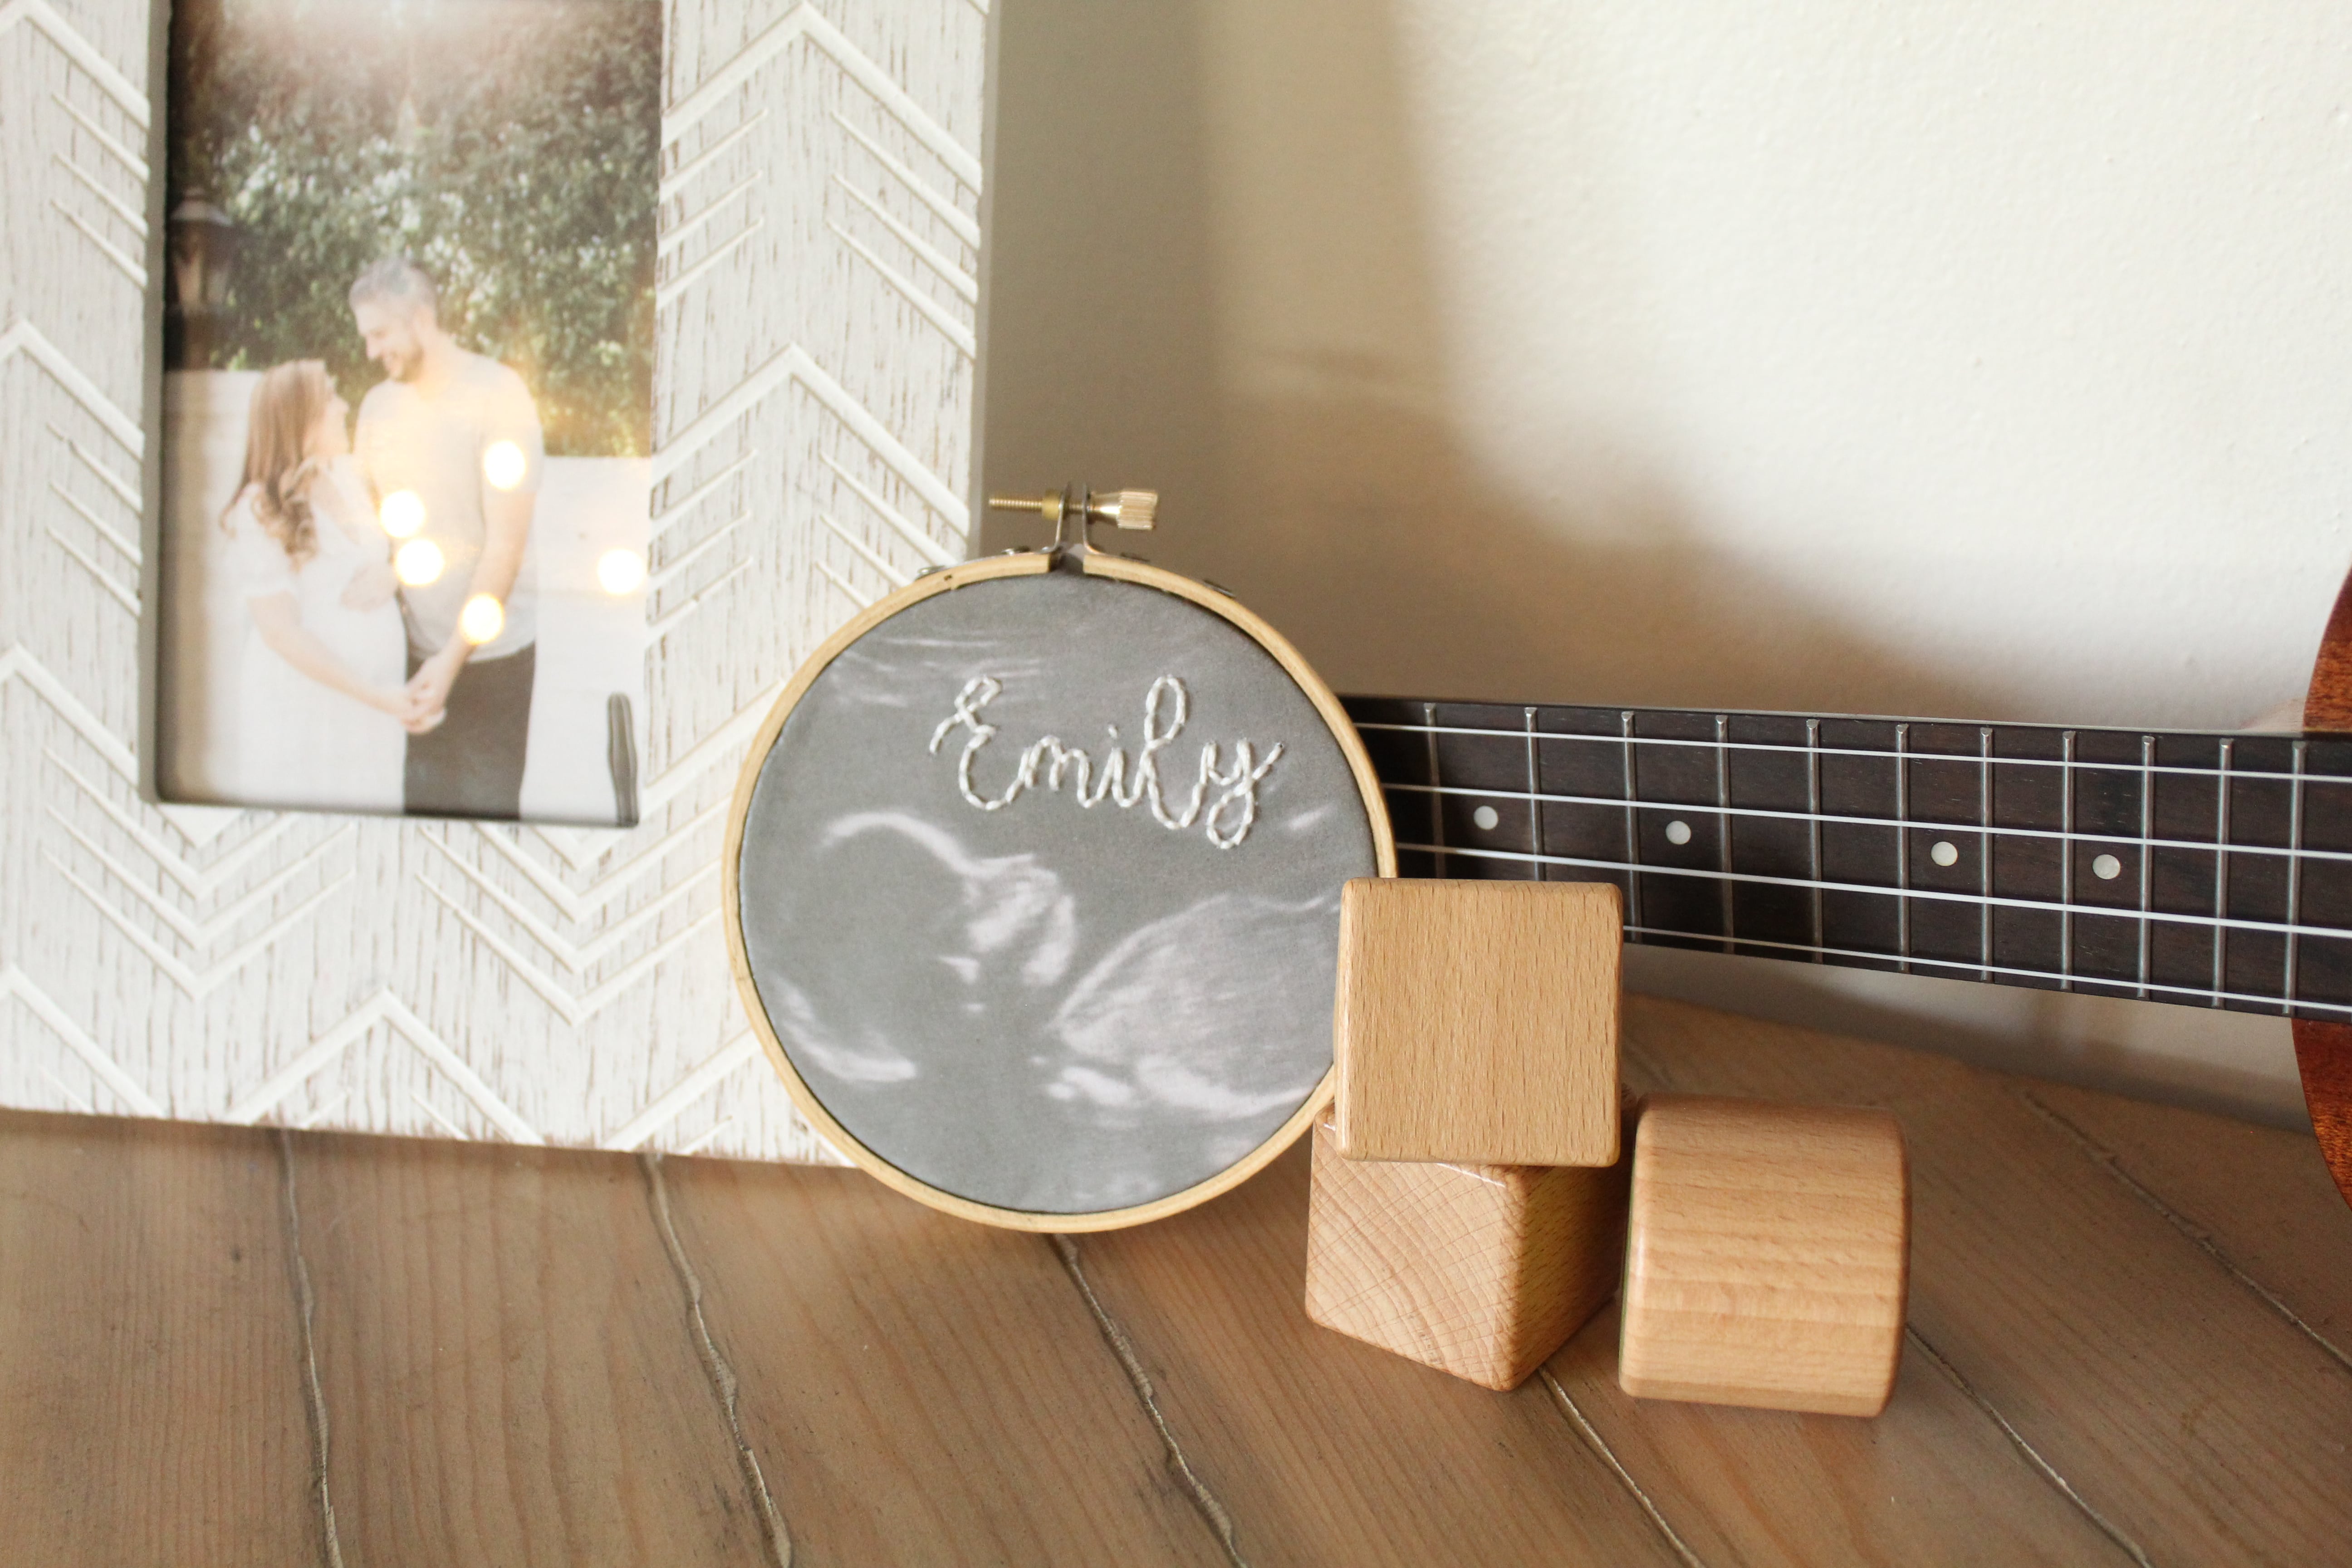
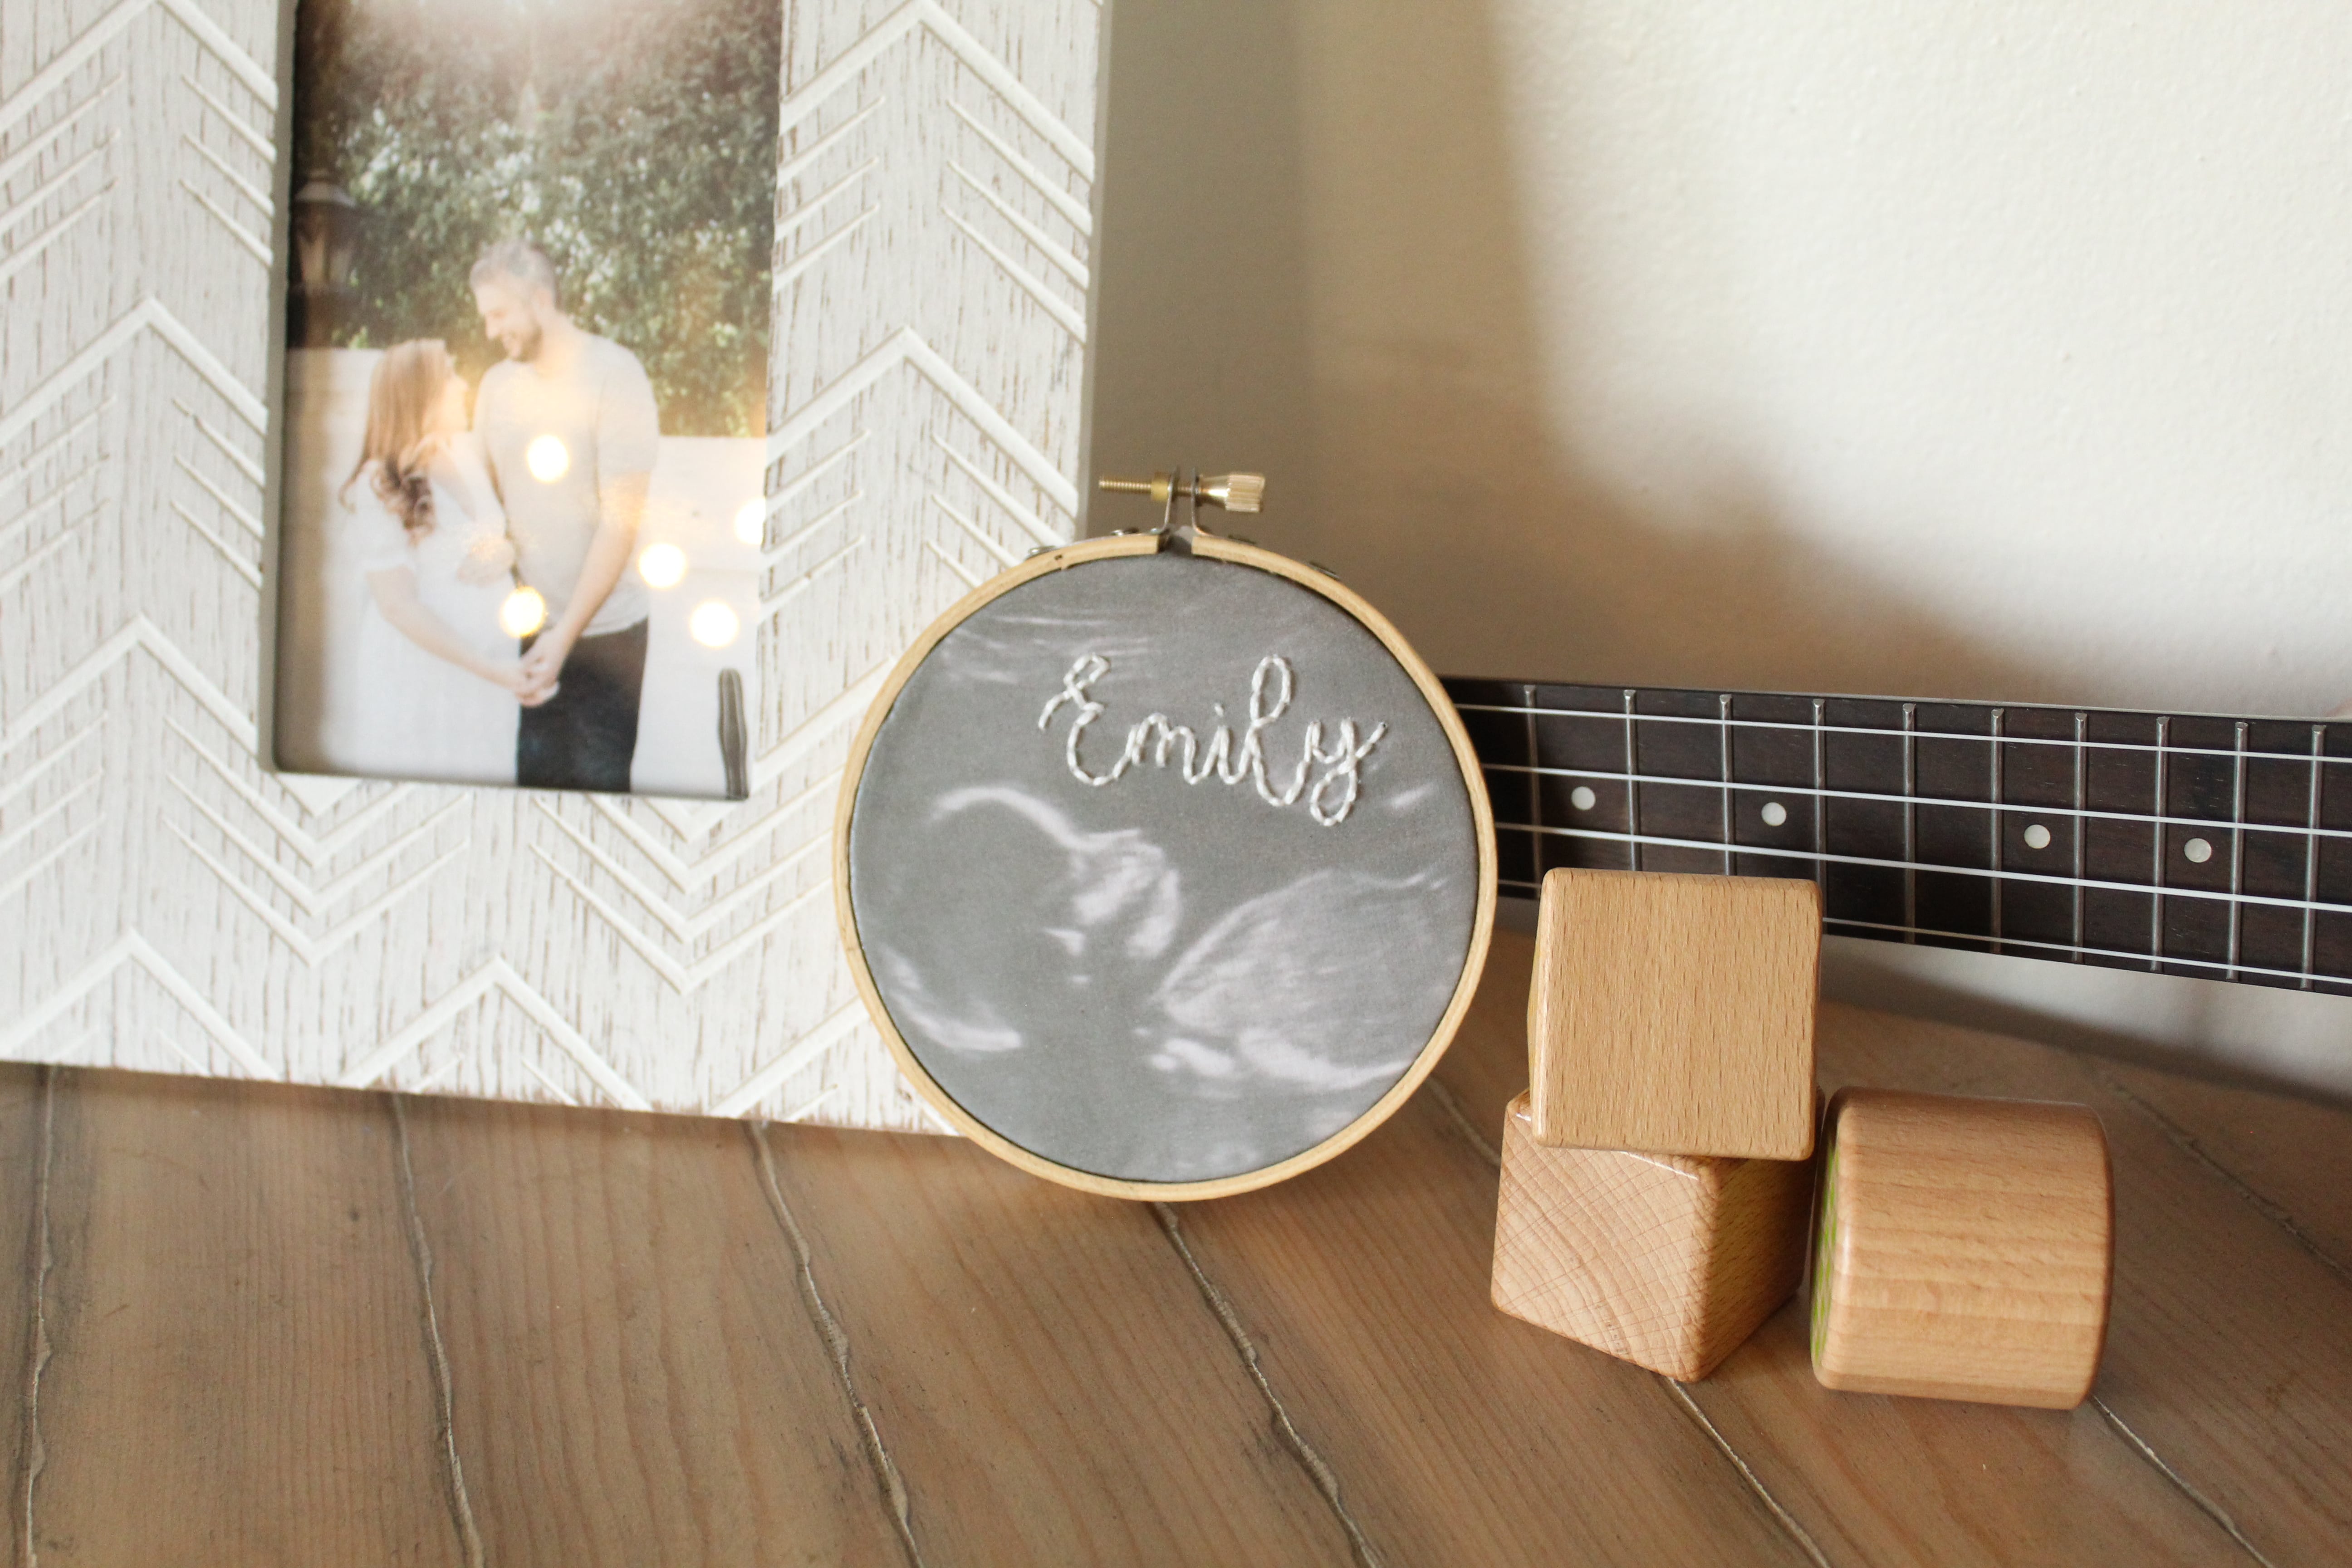
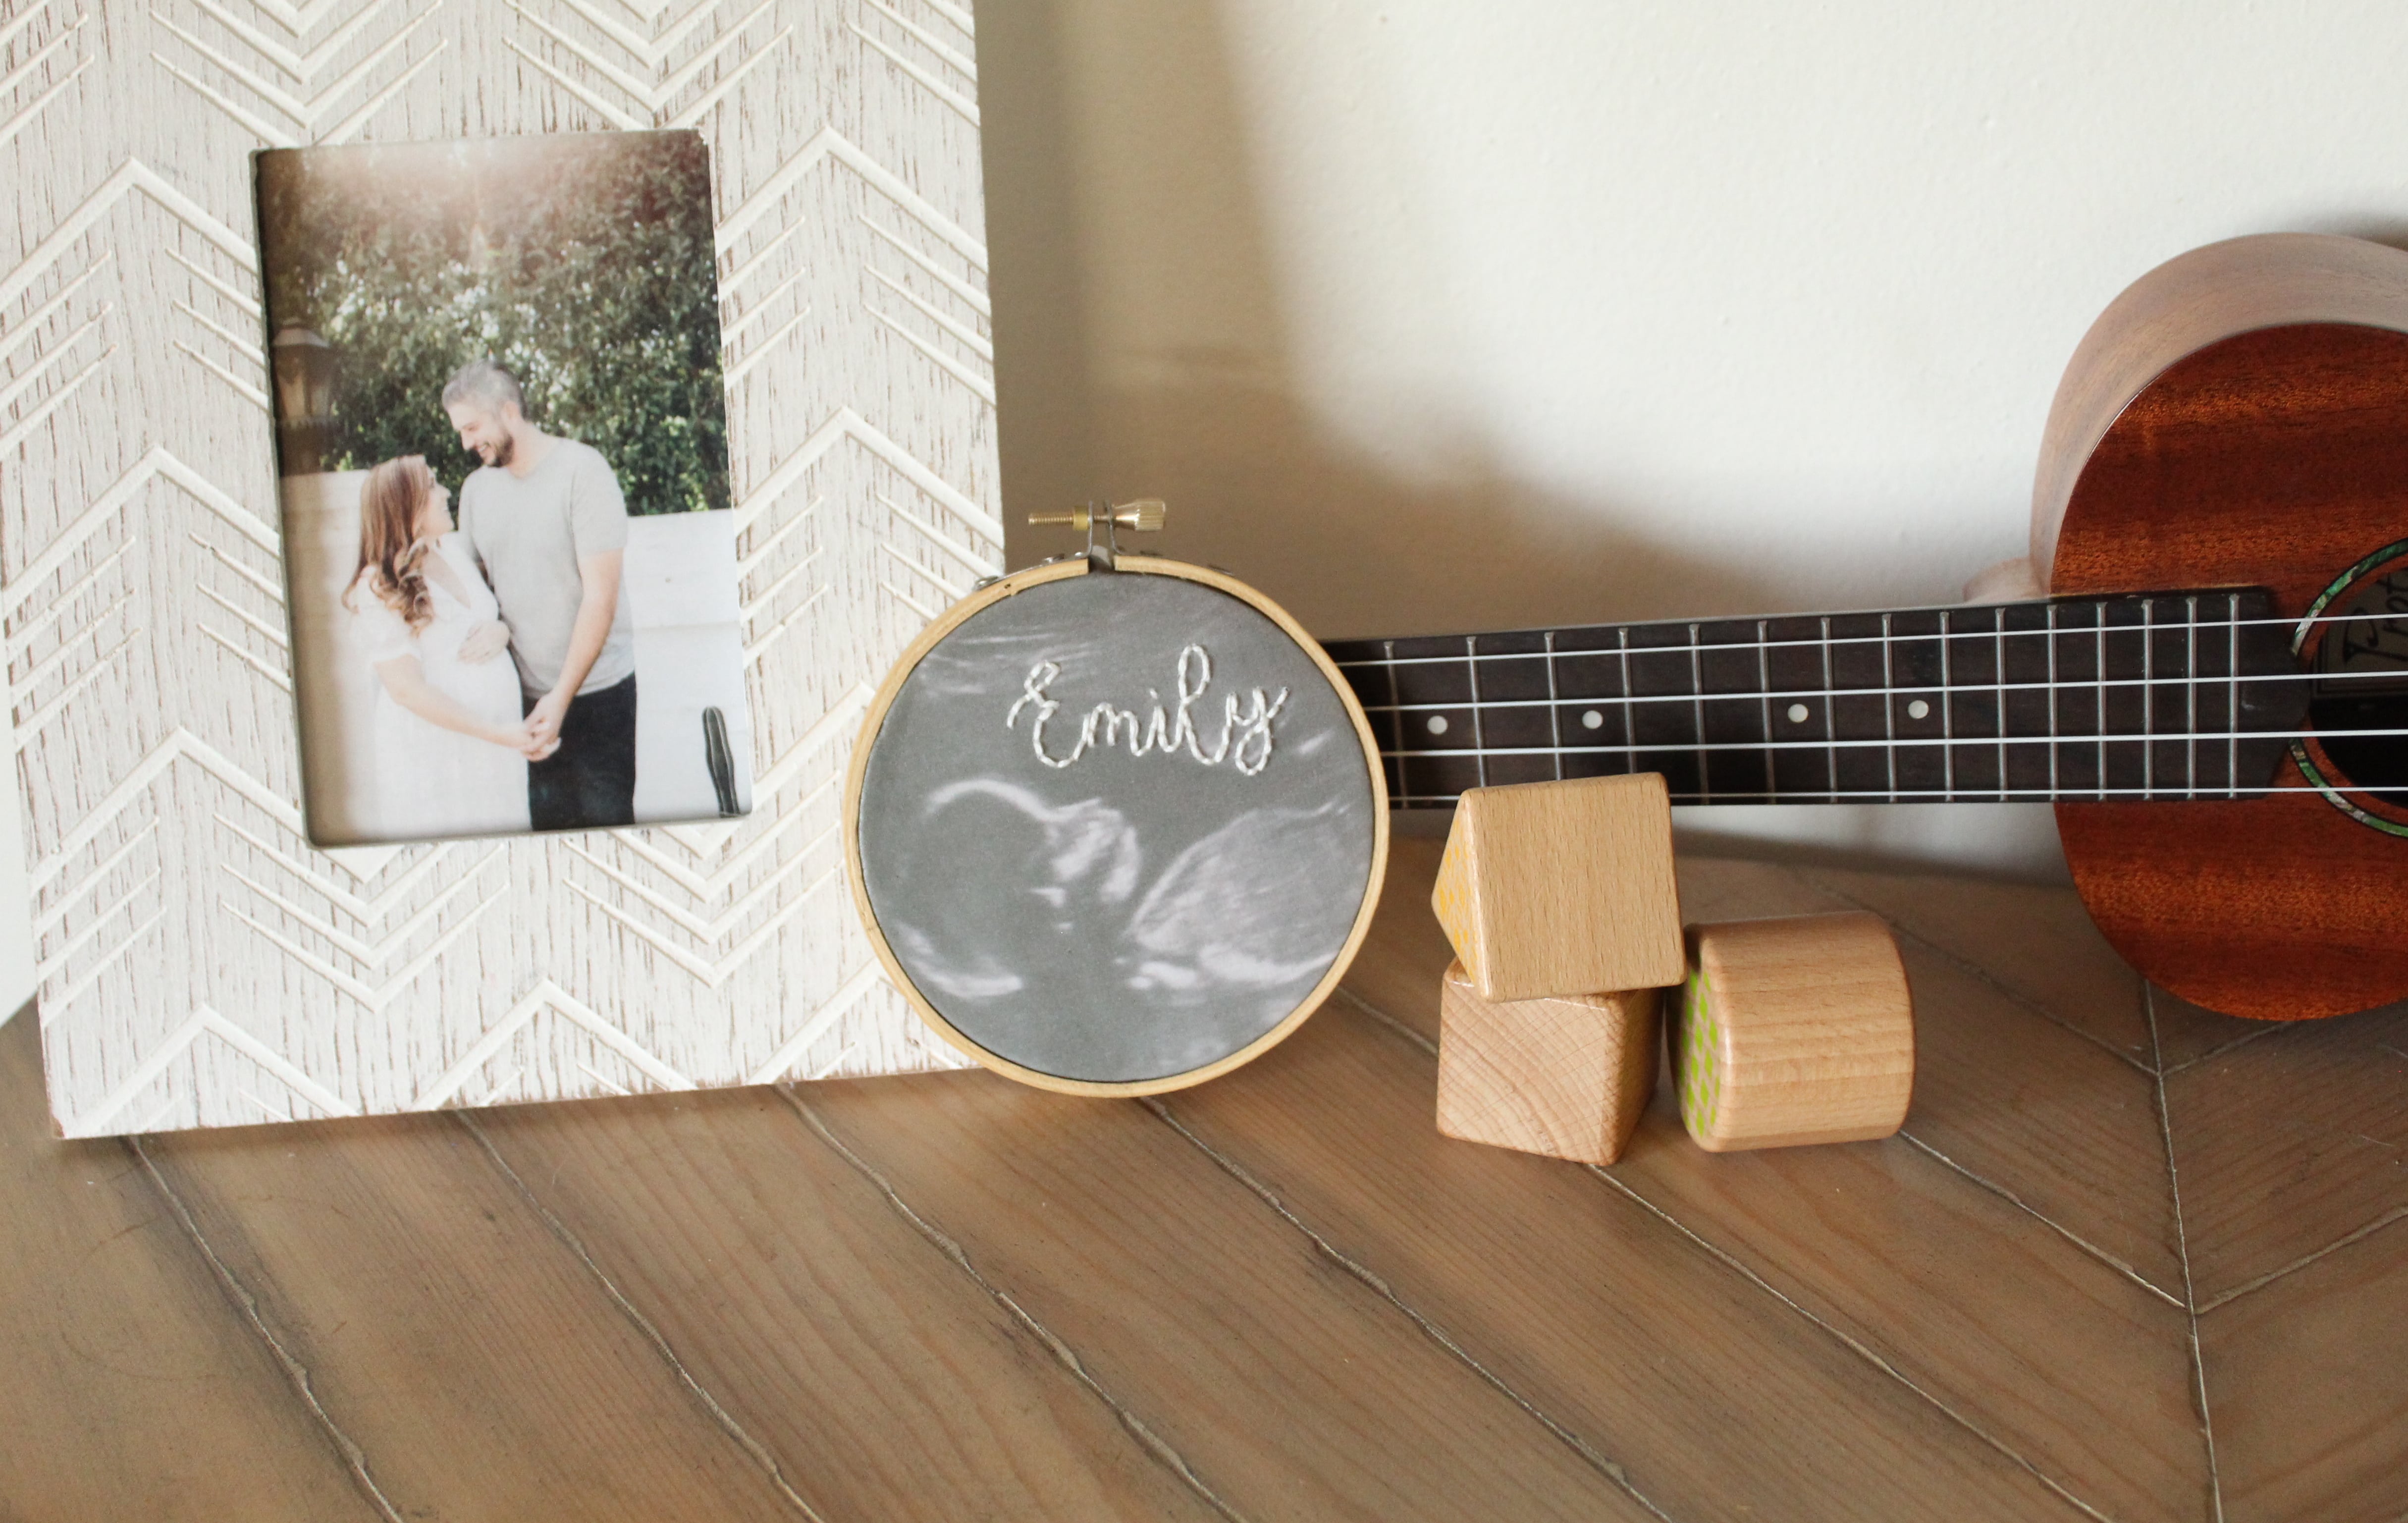
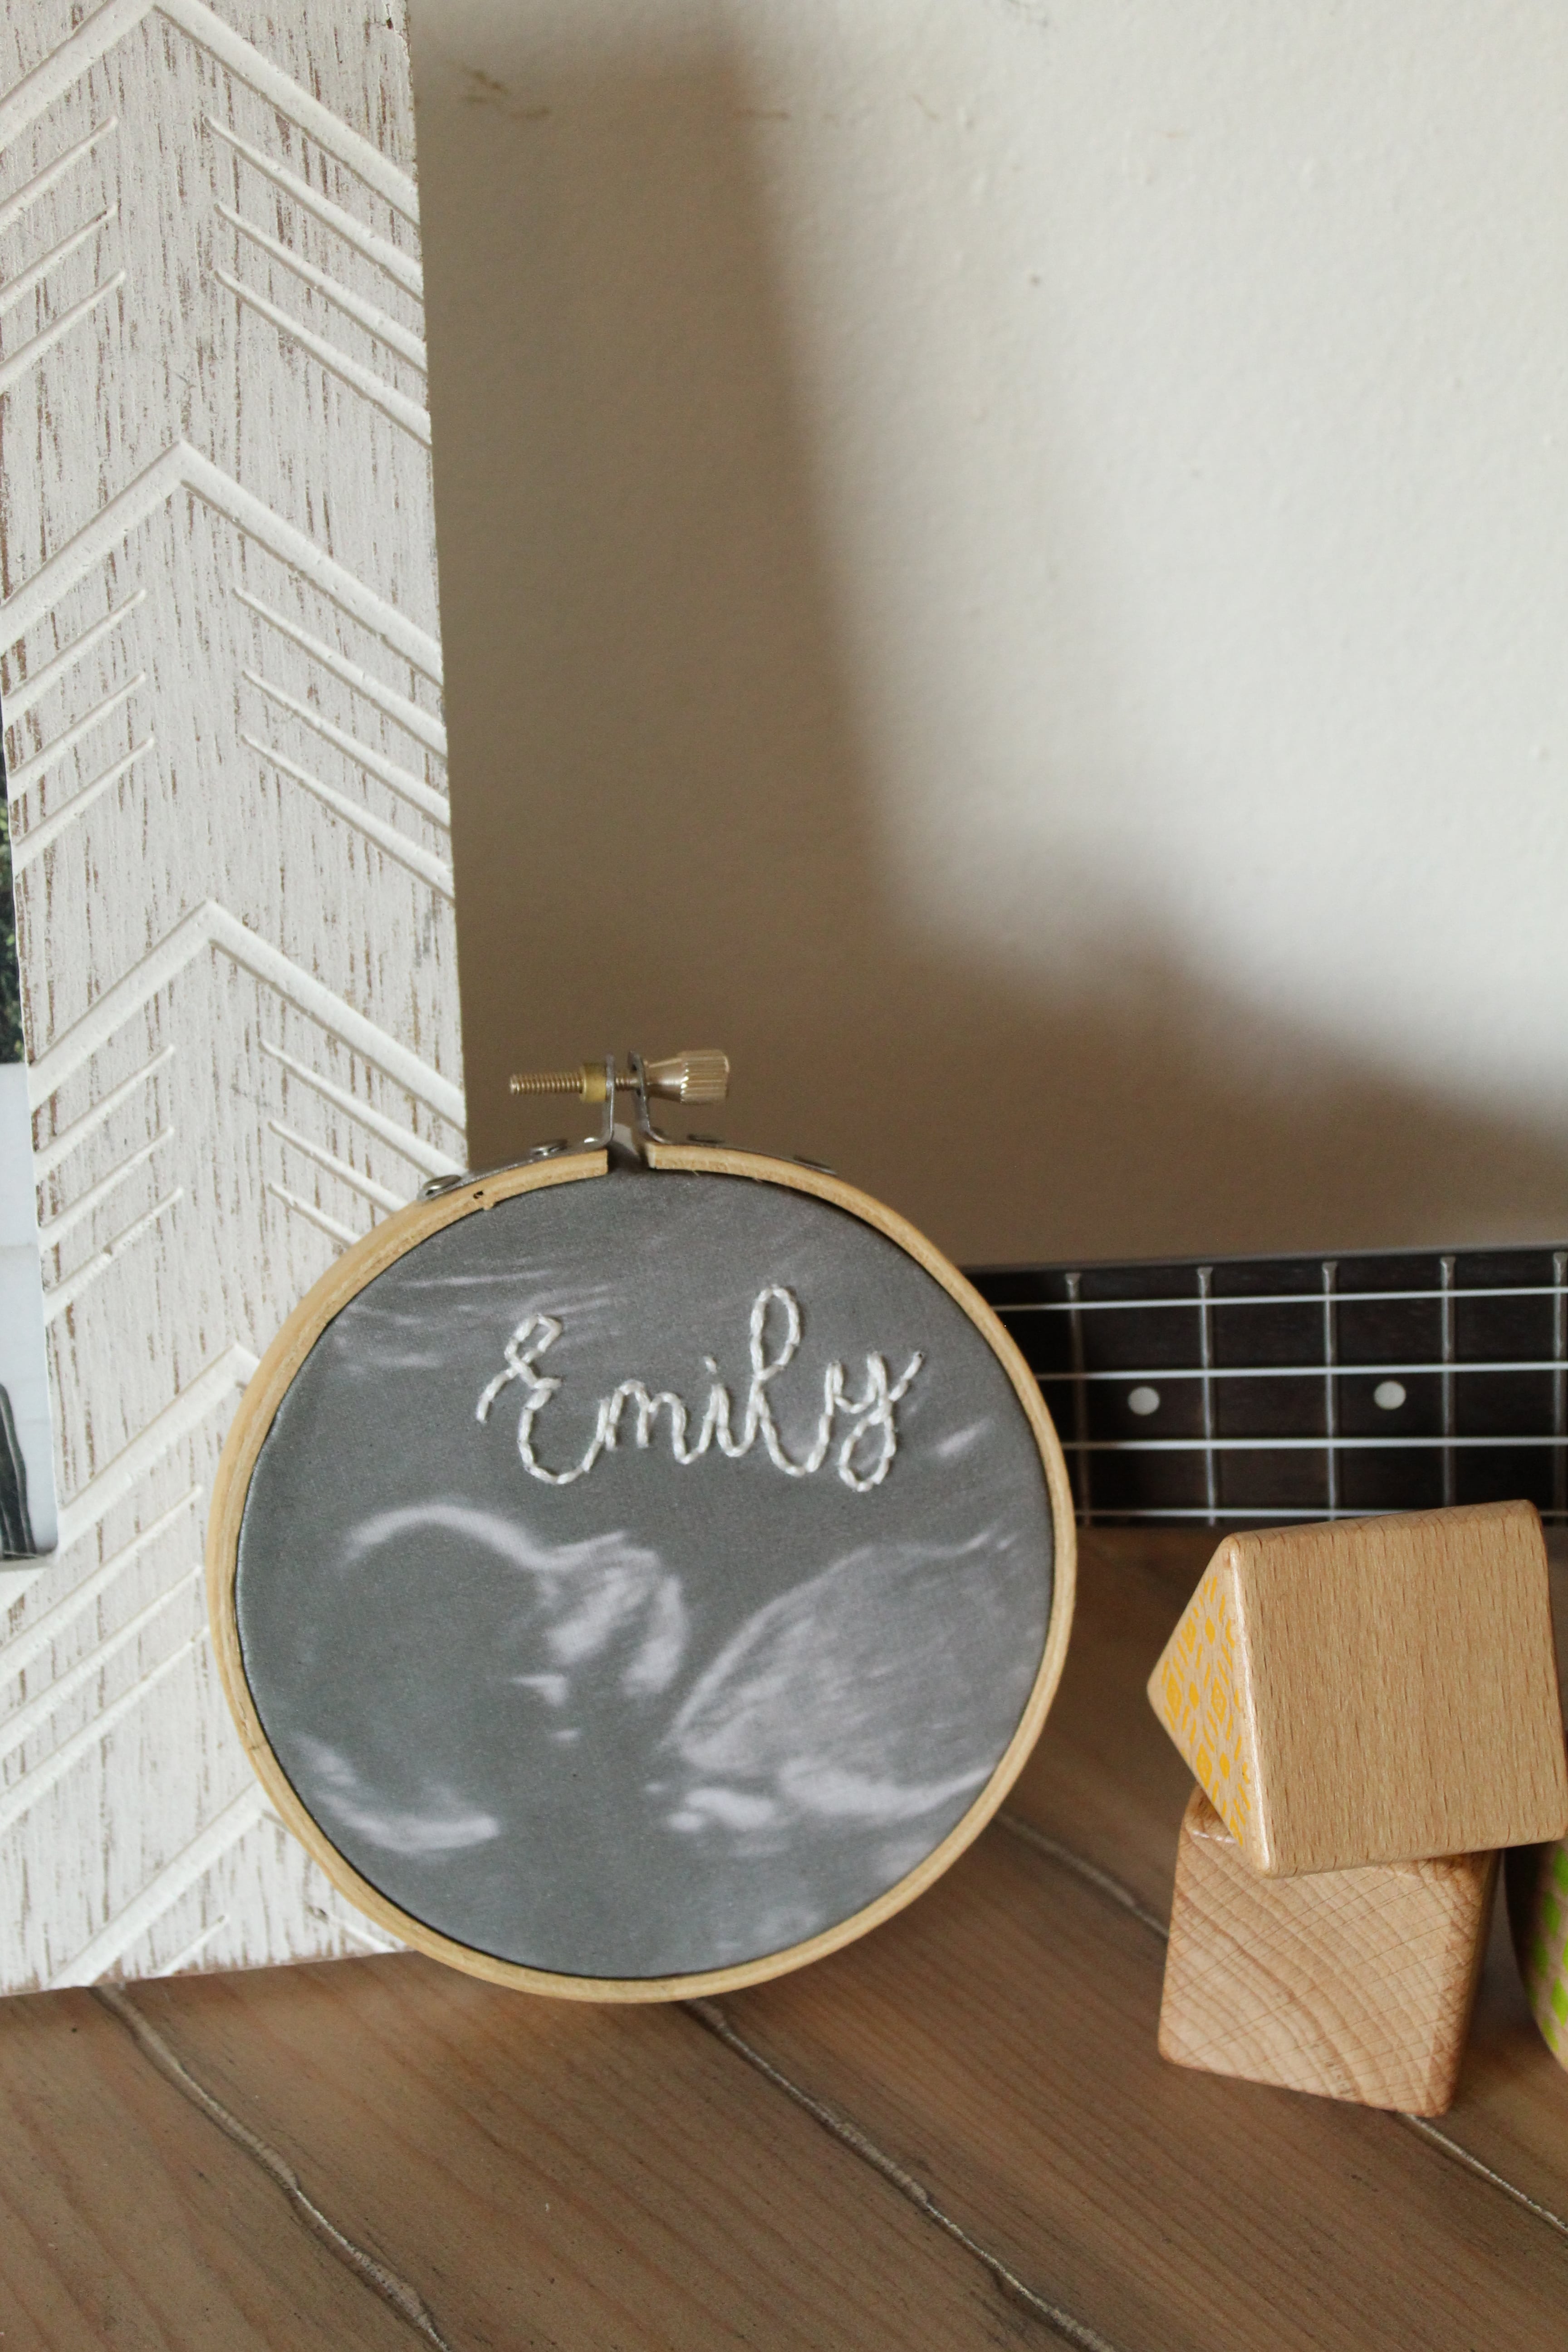
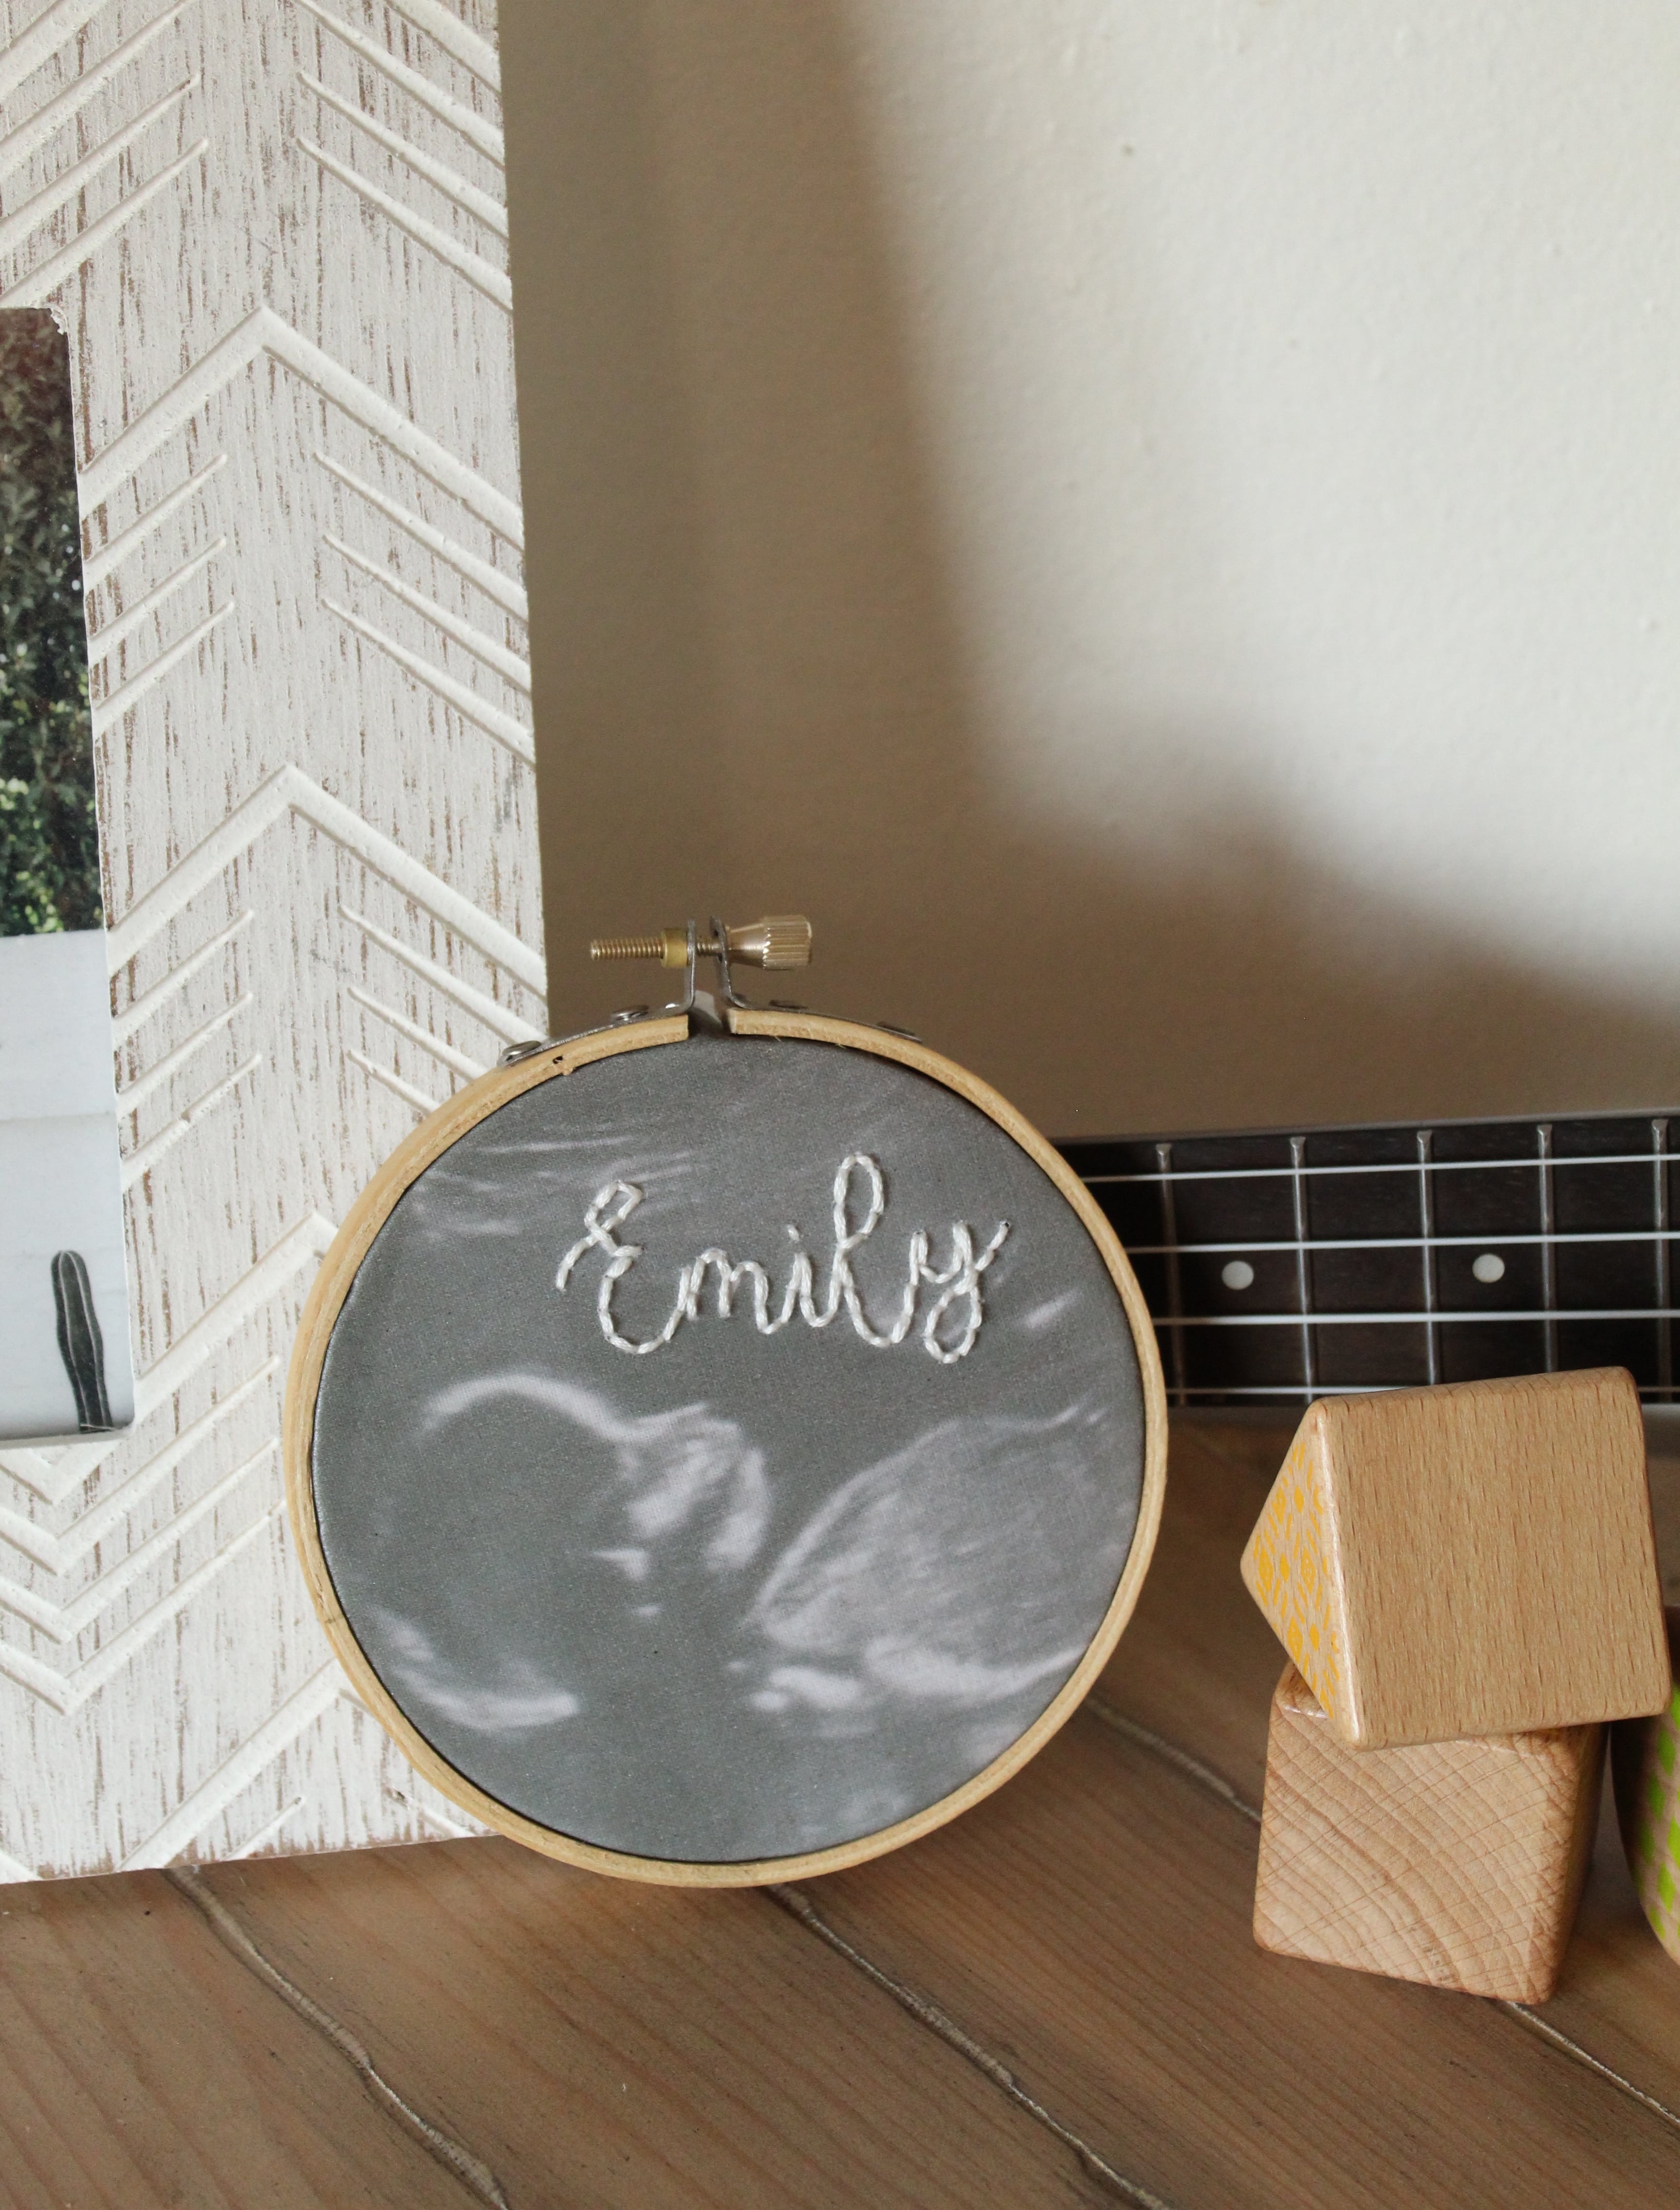
DIY Ultrasound Embroidery Hoop
Hi crafty friends! Shea back with another simple DIY for all you mama’s who want a unique way to display your little ones first photo (in utero). Those little strips of ultrasound photos they give you are so odd. They don’t quite fit in a picture frame so what do you do with them? I found the perfect solution. Create some totally custom art of course!
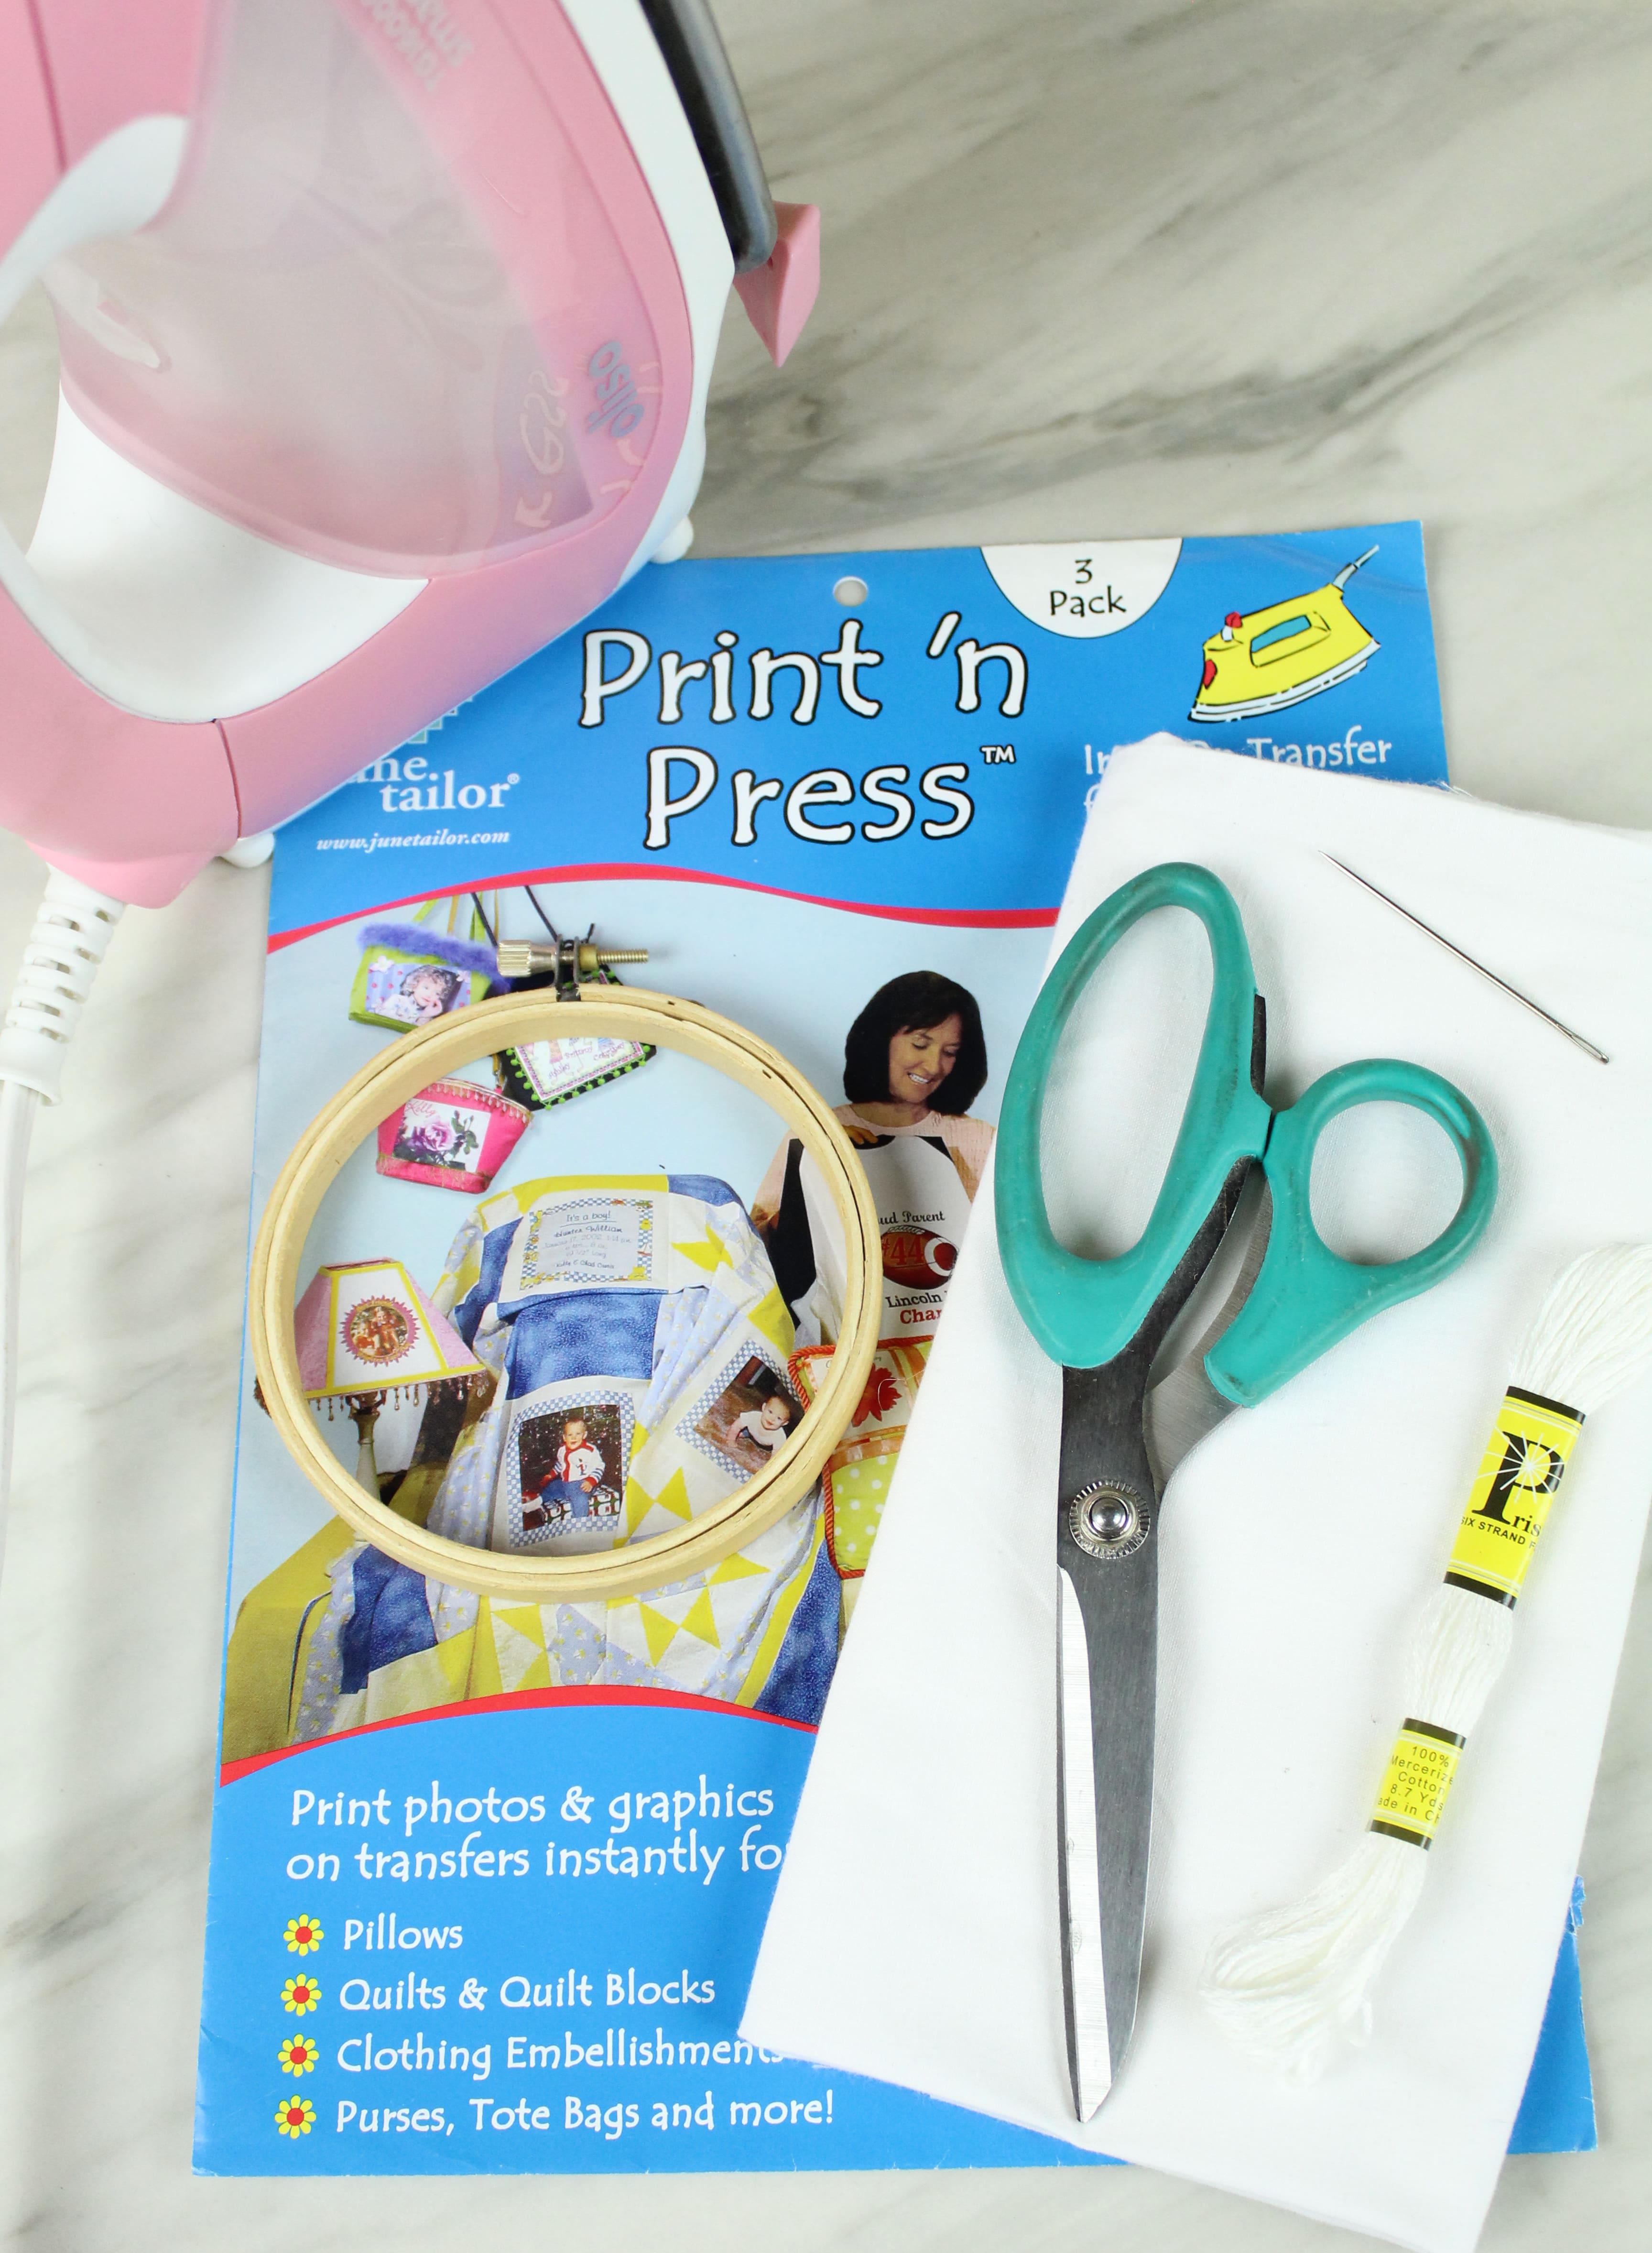
Supplies:
- Iron On Transfer Sheet
- White Cotton Fabric *Crafters Tip- I like to find mine in the remnants section
- Embroidery Hoop in your choice of size (I used 3 inch for this project)
- Embroidery Floss in your choice of color (Keeping in mind you want it to be visible on black)
- Embroidery Needle
- Fabric Scissors
- Iron
- Printer/Scanner
Design Your Project
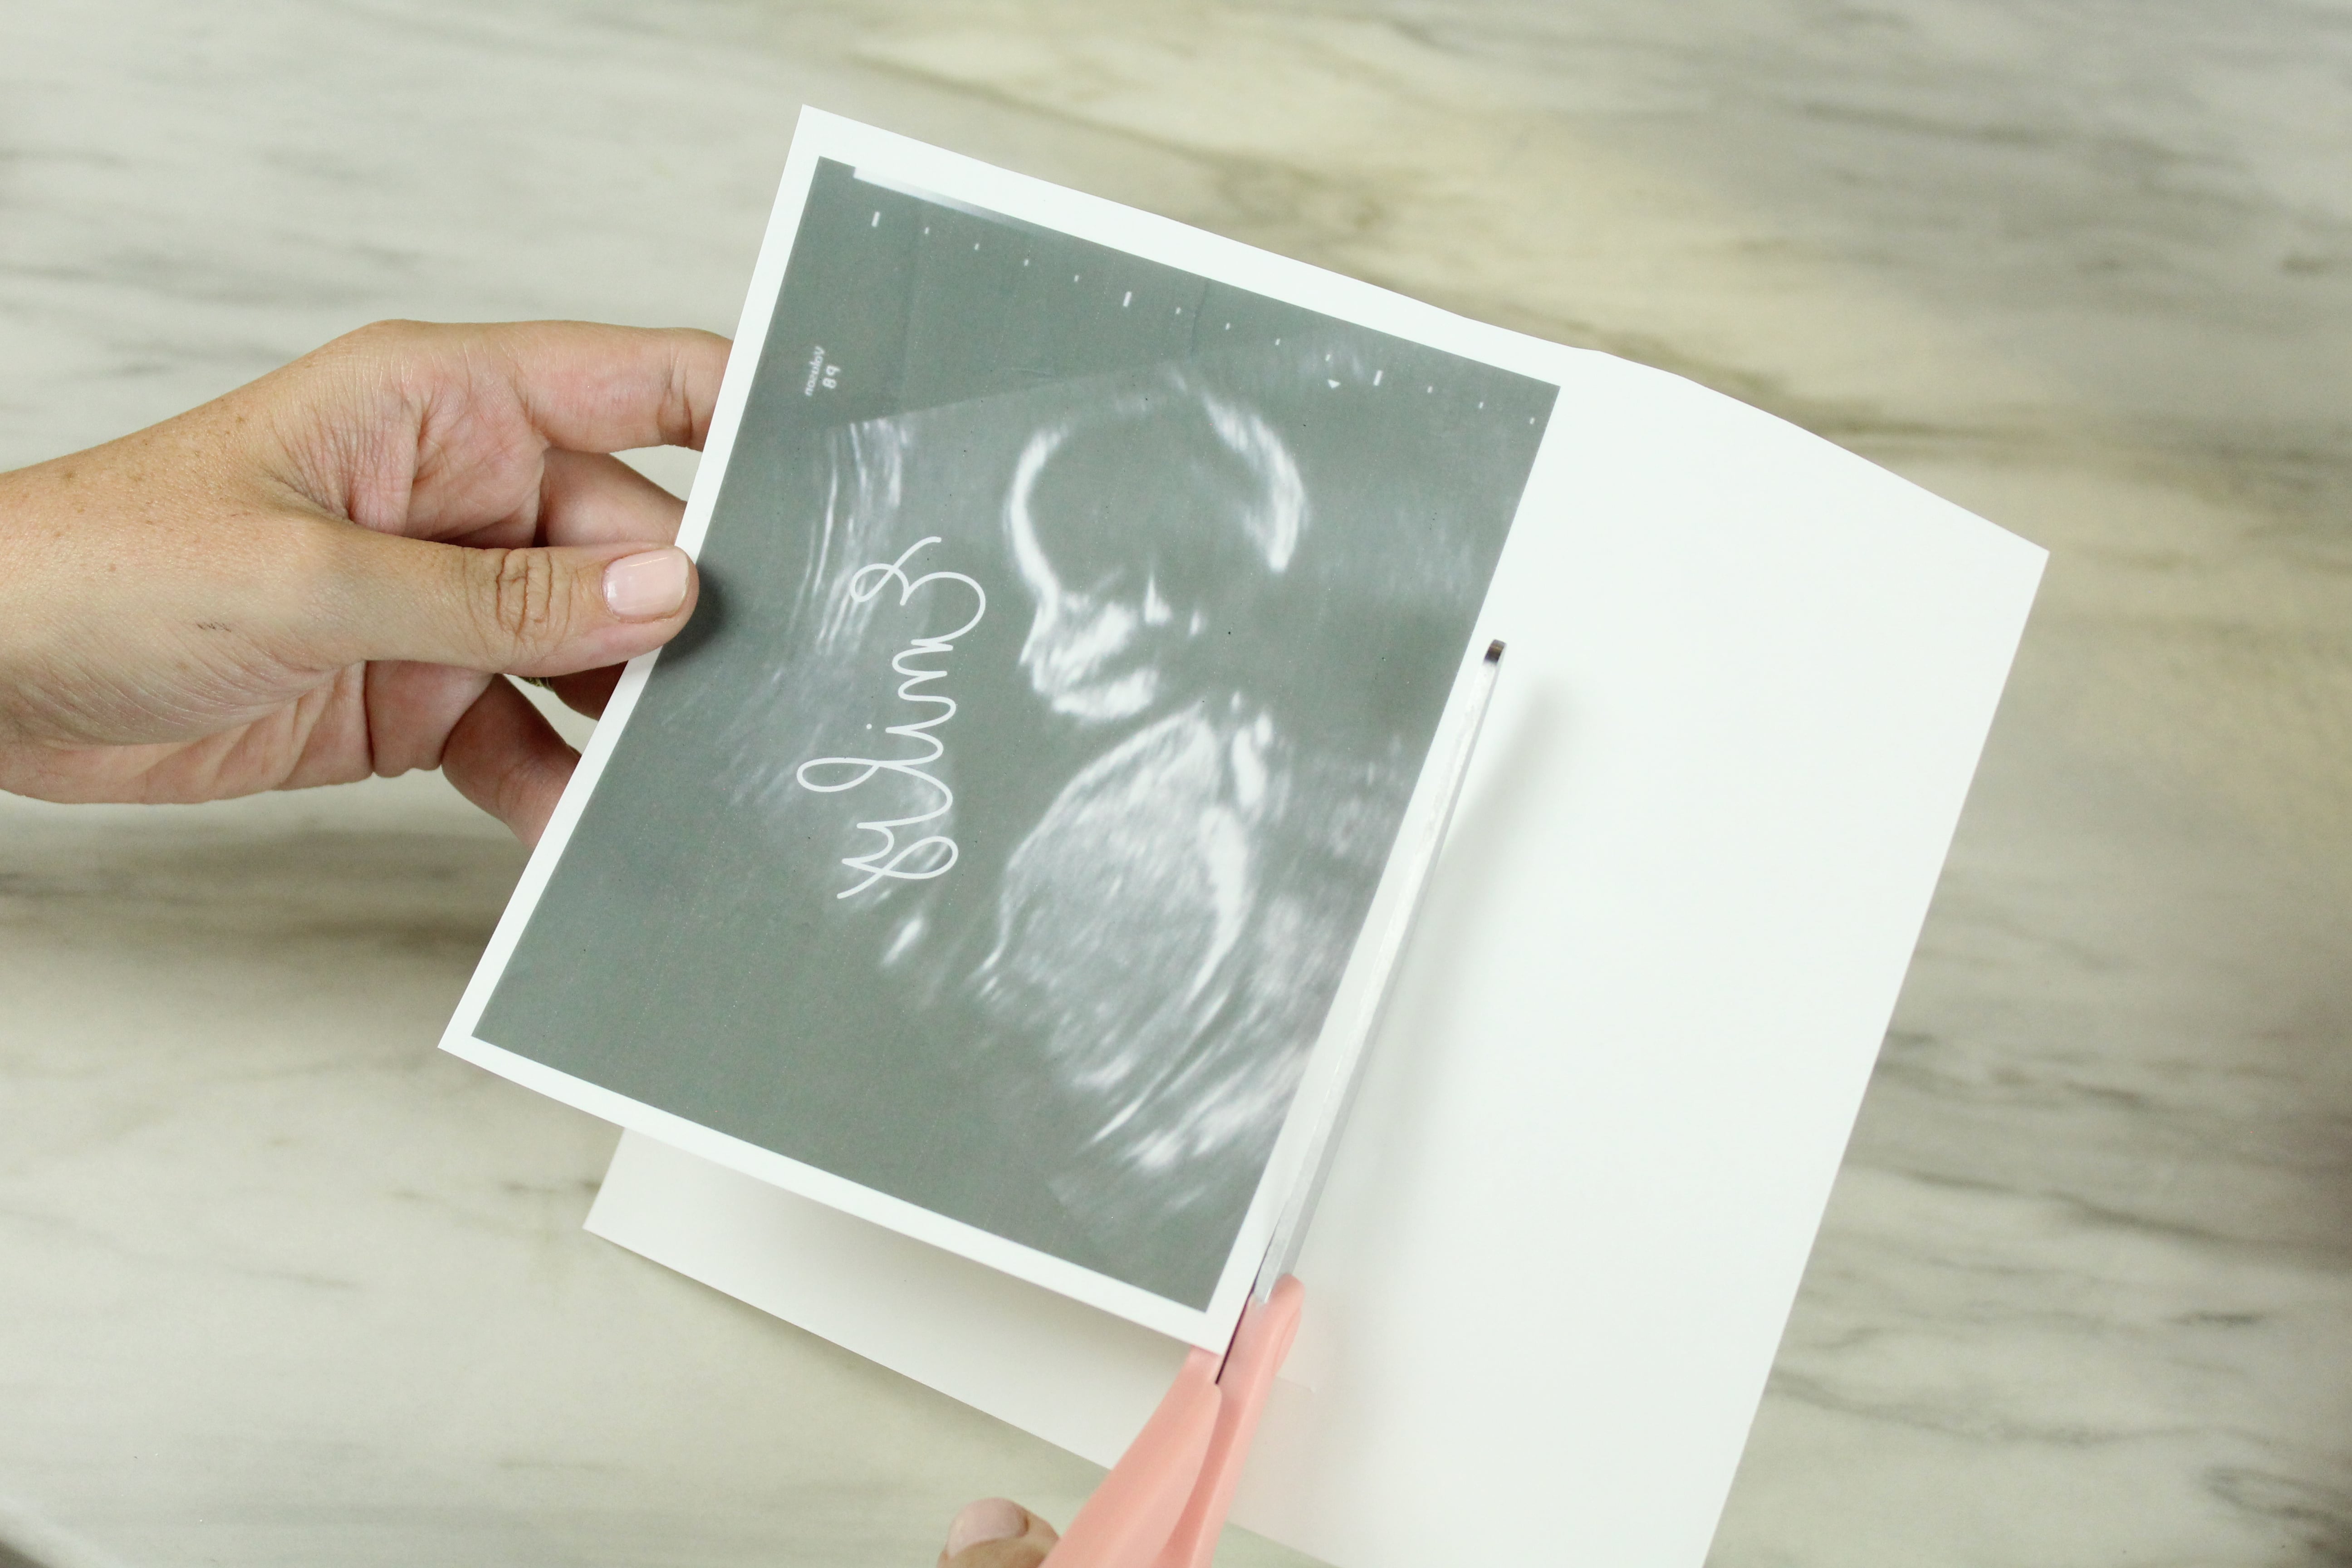
Using whatever software you are comfortable with, design your project. (I simply used Microsoft Word, yes! You can use Word for design, Word and PowerPoint are actually two of my favorites.). Start by scanning your ultrasound photo and inserting it into your document. Once you add it, play around with the sizing. I find it easiest to add a temporary circle to my document that is the size of my hoop so that I can play around with placement and make sure that it will fit how I want it to. In a light grey or white, add your text (this is going to be your guide when embroidering… it’s kind of a sneaky way to cheat to make sure your embroidery looks good.) When you’re happy with your design don’t forget to mirror both the photo and the text.
Note: Mirroring the text in Microsoft Office can be a little tricky so I took a screenshot of where you do it. Change the X rotation in the bottom right to be 180 and you’re all set!
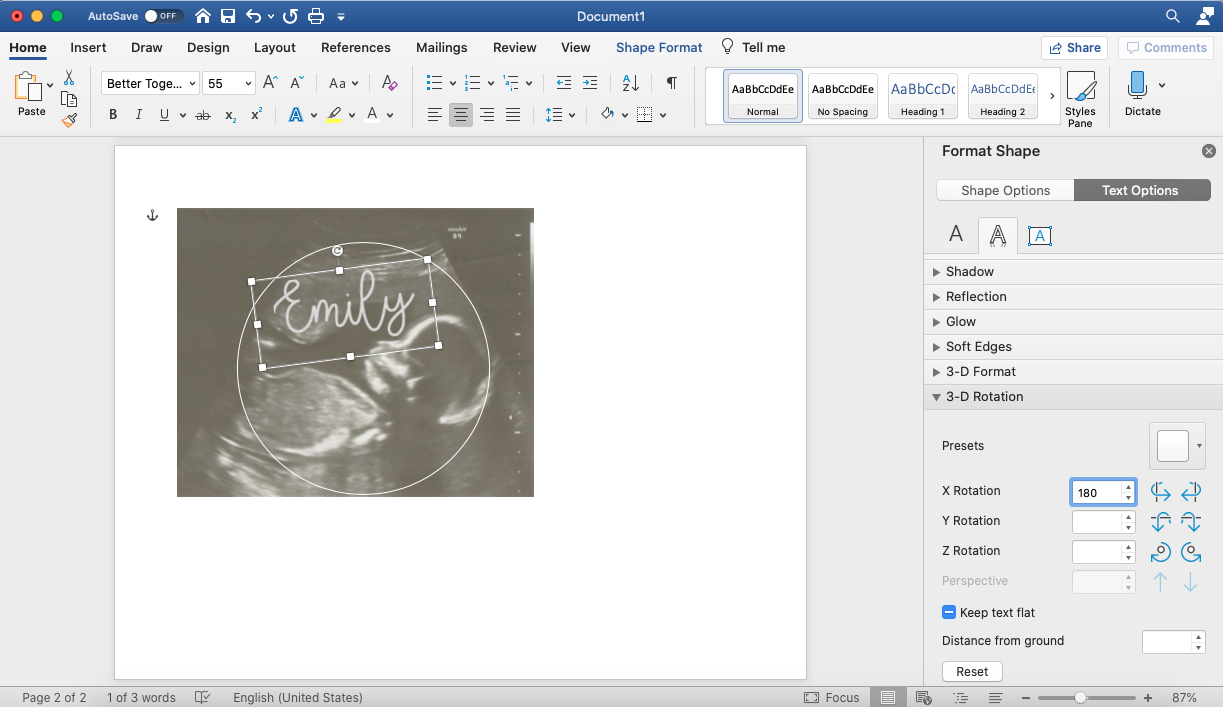
(Once both items are mirrored you may need to move them around again as they may have shifted slightly.) When you are happy with your design, remove your temporary circle and it’s time to print!
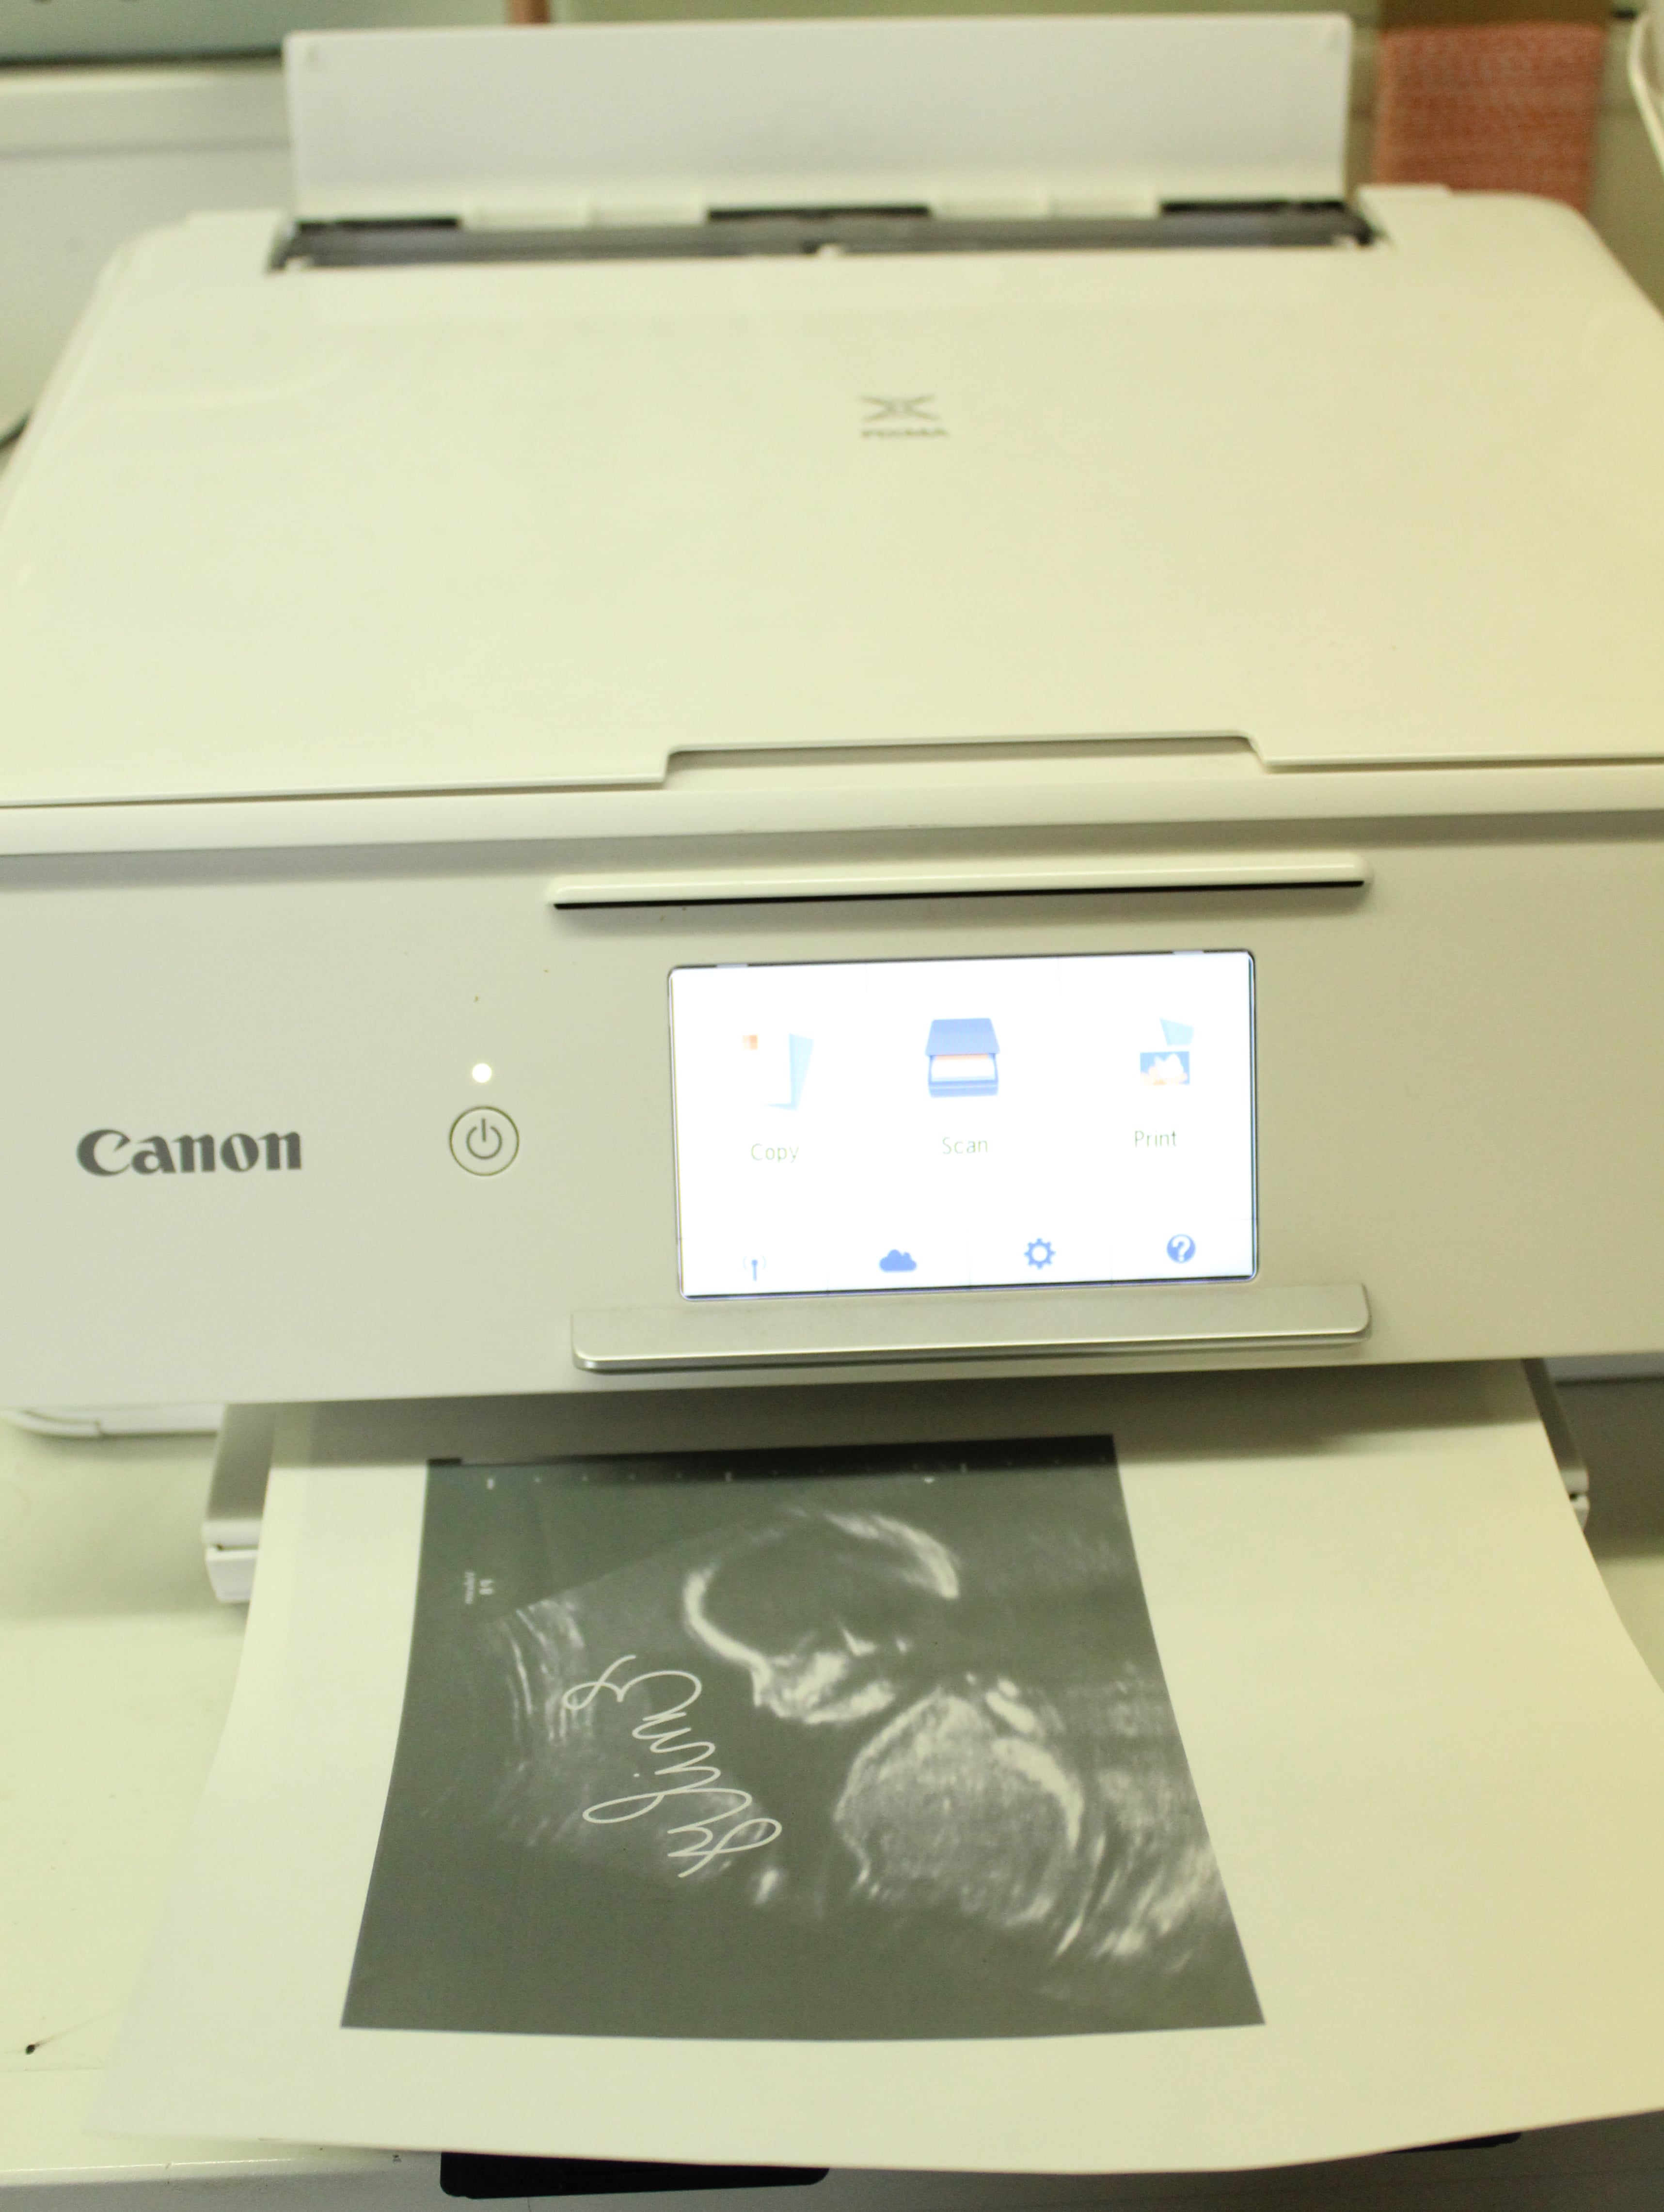
Print Your Project
Be sure to read through the instructions on your particular Iron-On Transfer sheets as they may vary from brand to brand. I generally prefer to load all of my speciality printing through the rear tray of my printer to prevent any unnecessary bending.
Iron On Your Transfer Sheet
Trim your fabric down to size, giving your self an extra inch or two on all sides. Iron it to remove any creases.
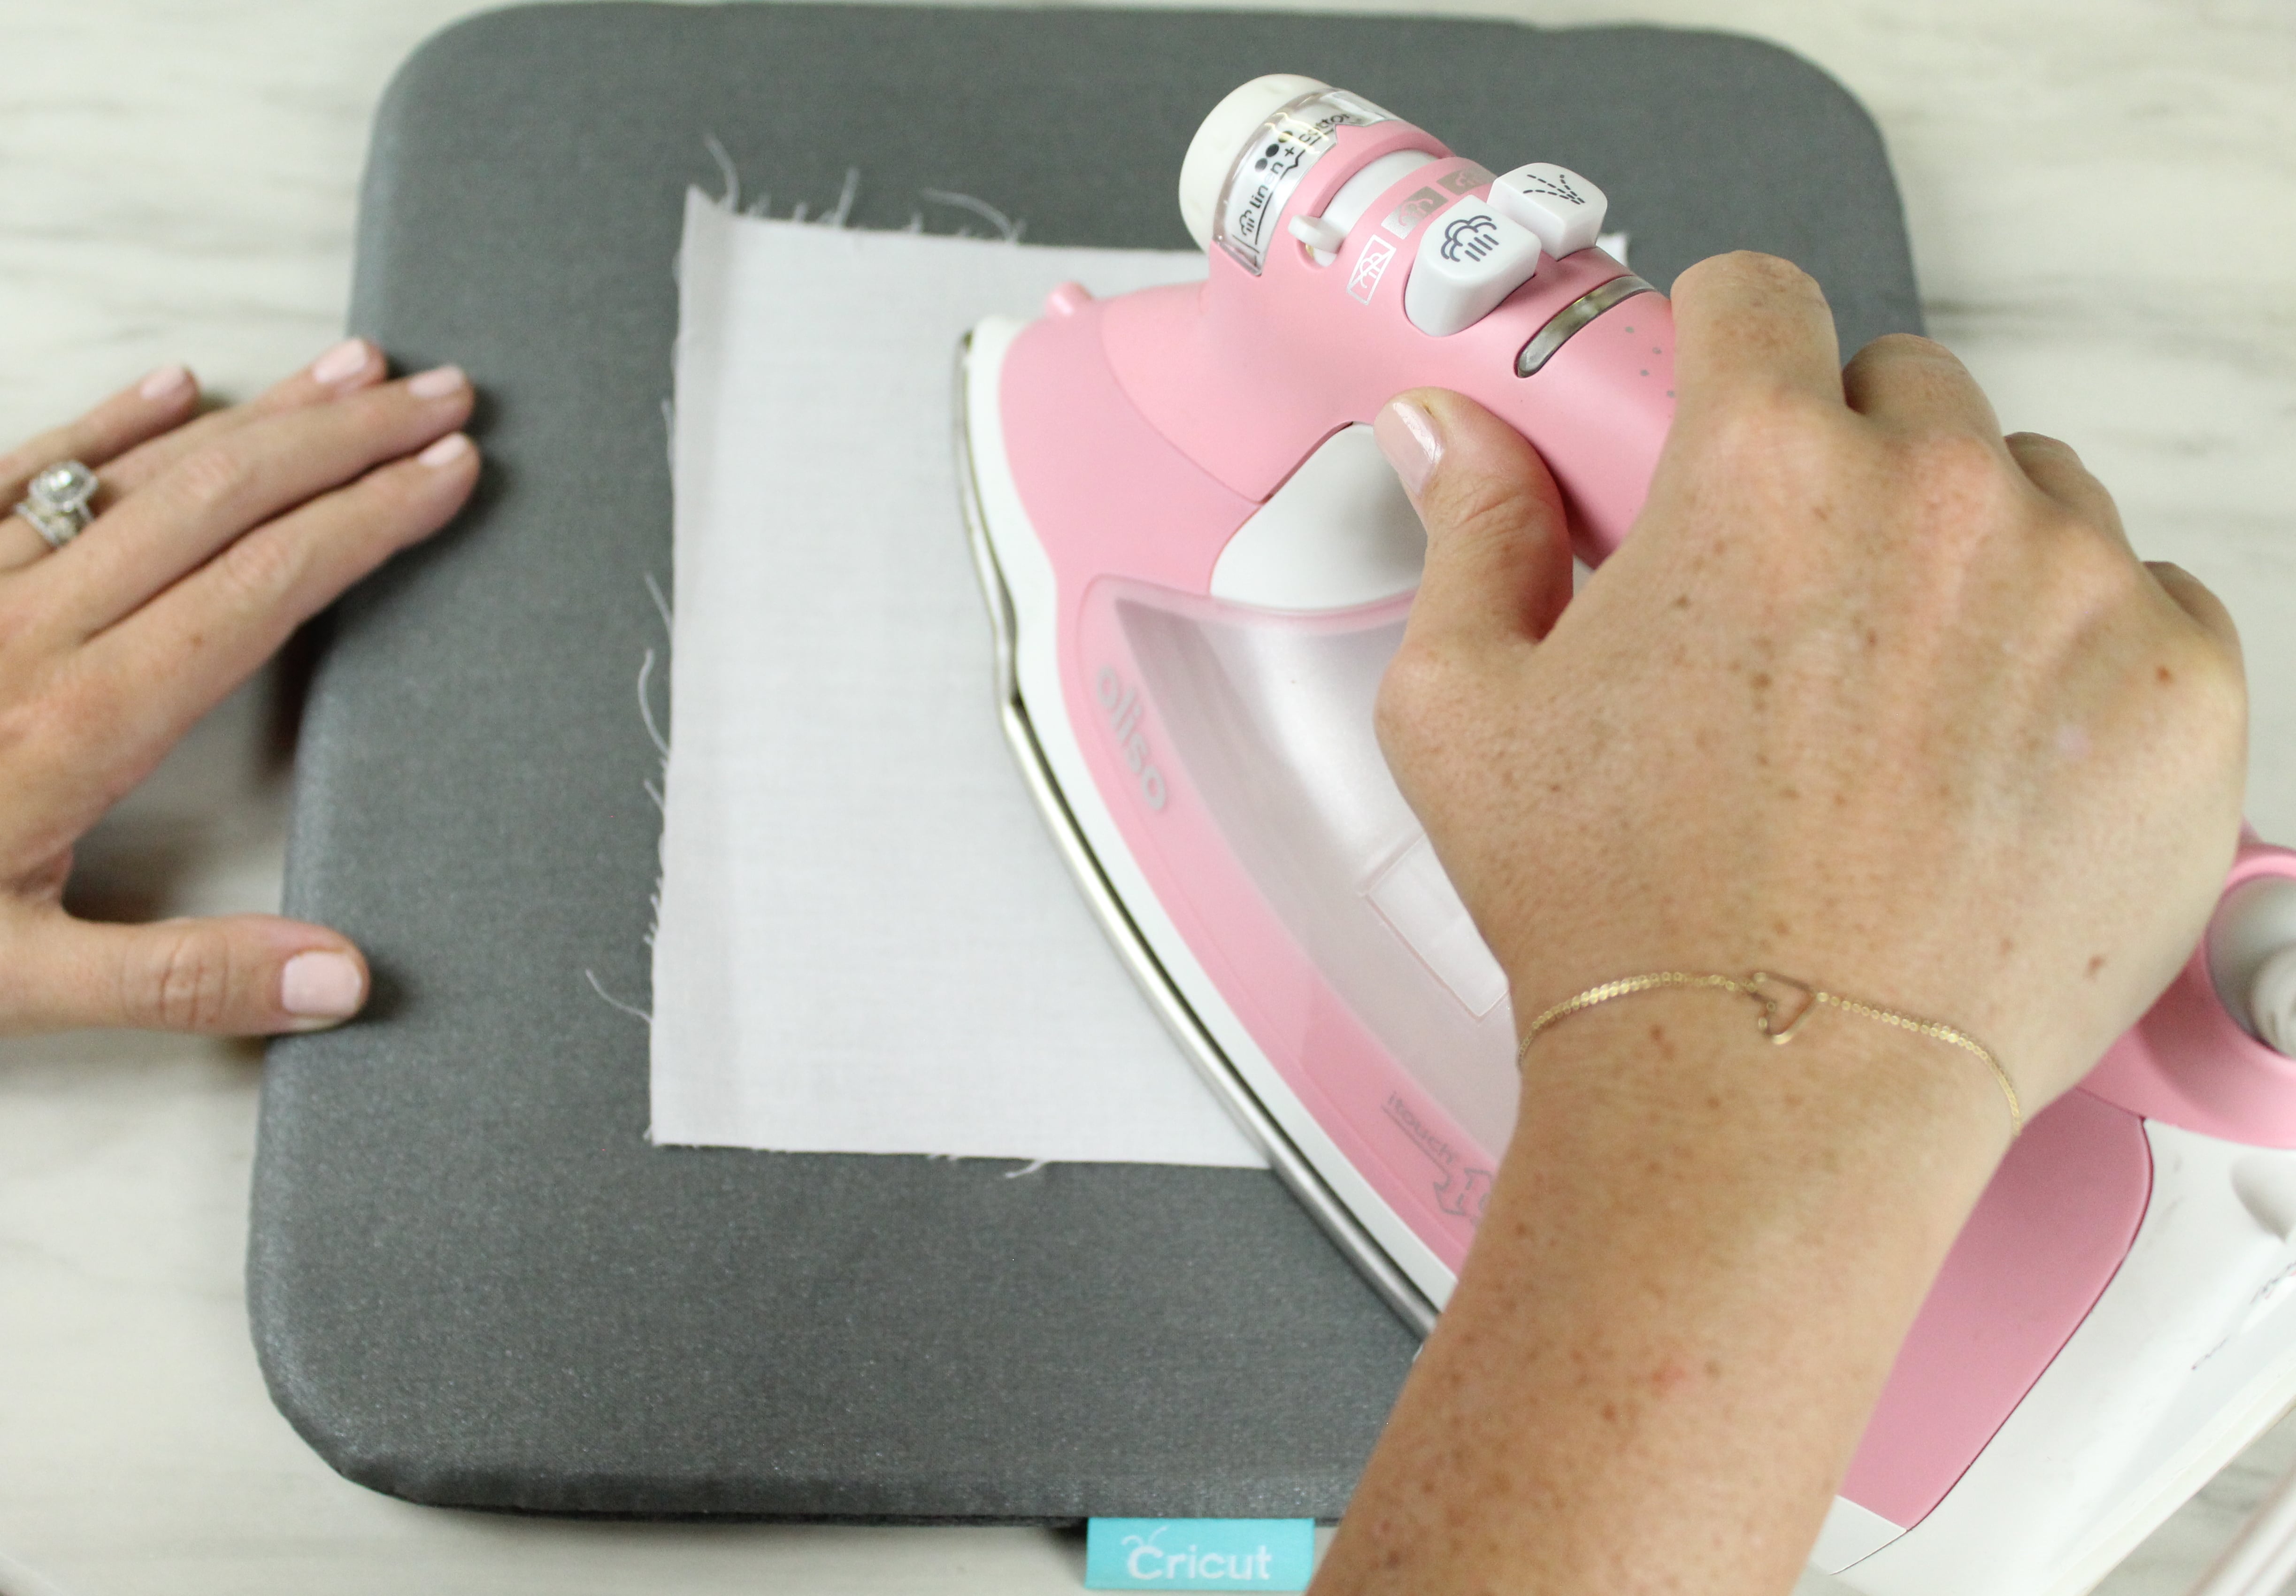
Also trim down your iron on transfer sheet.
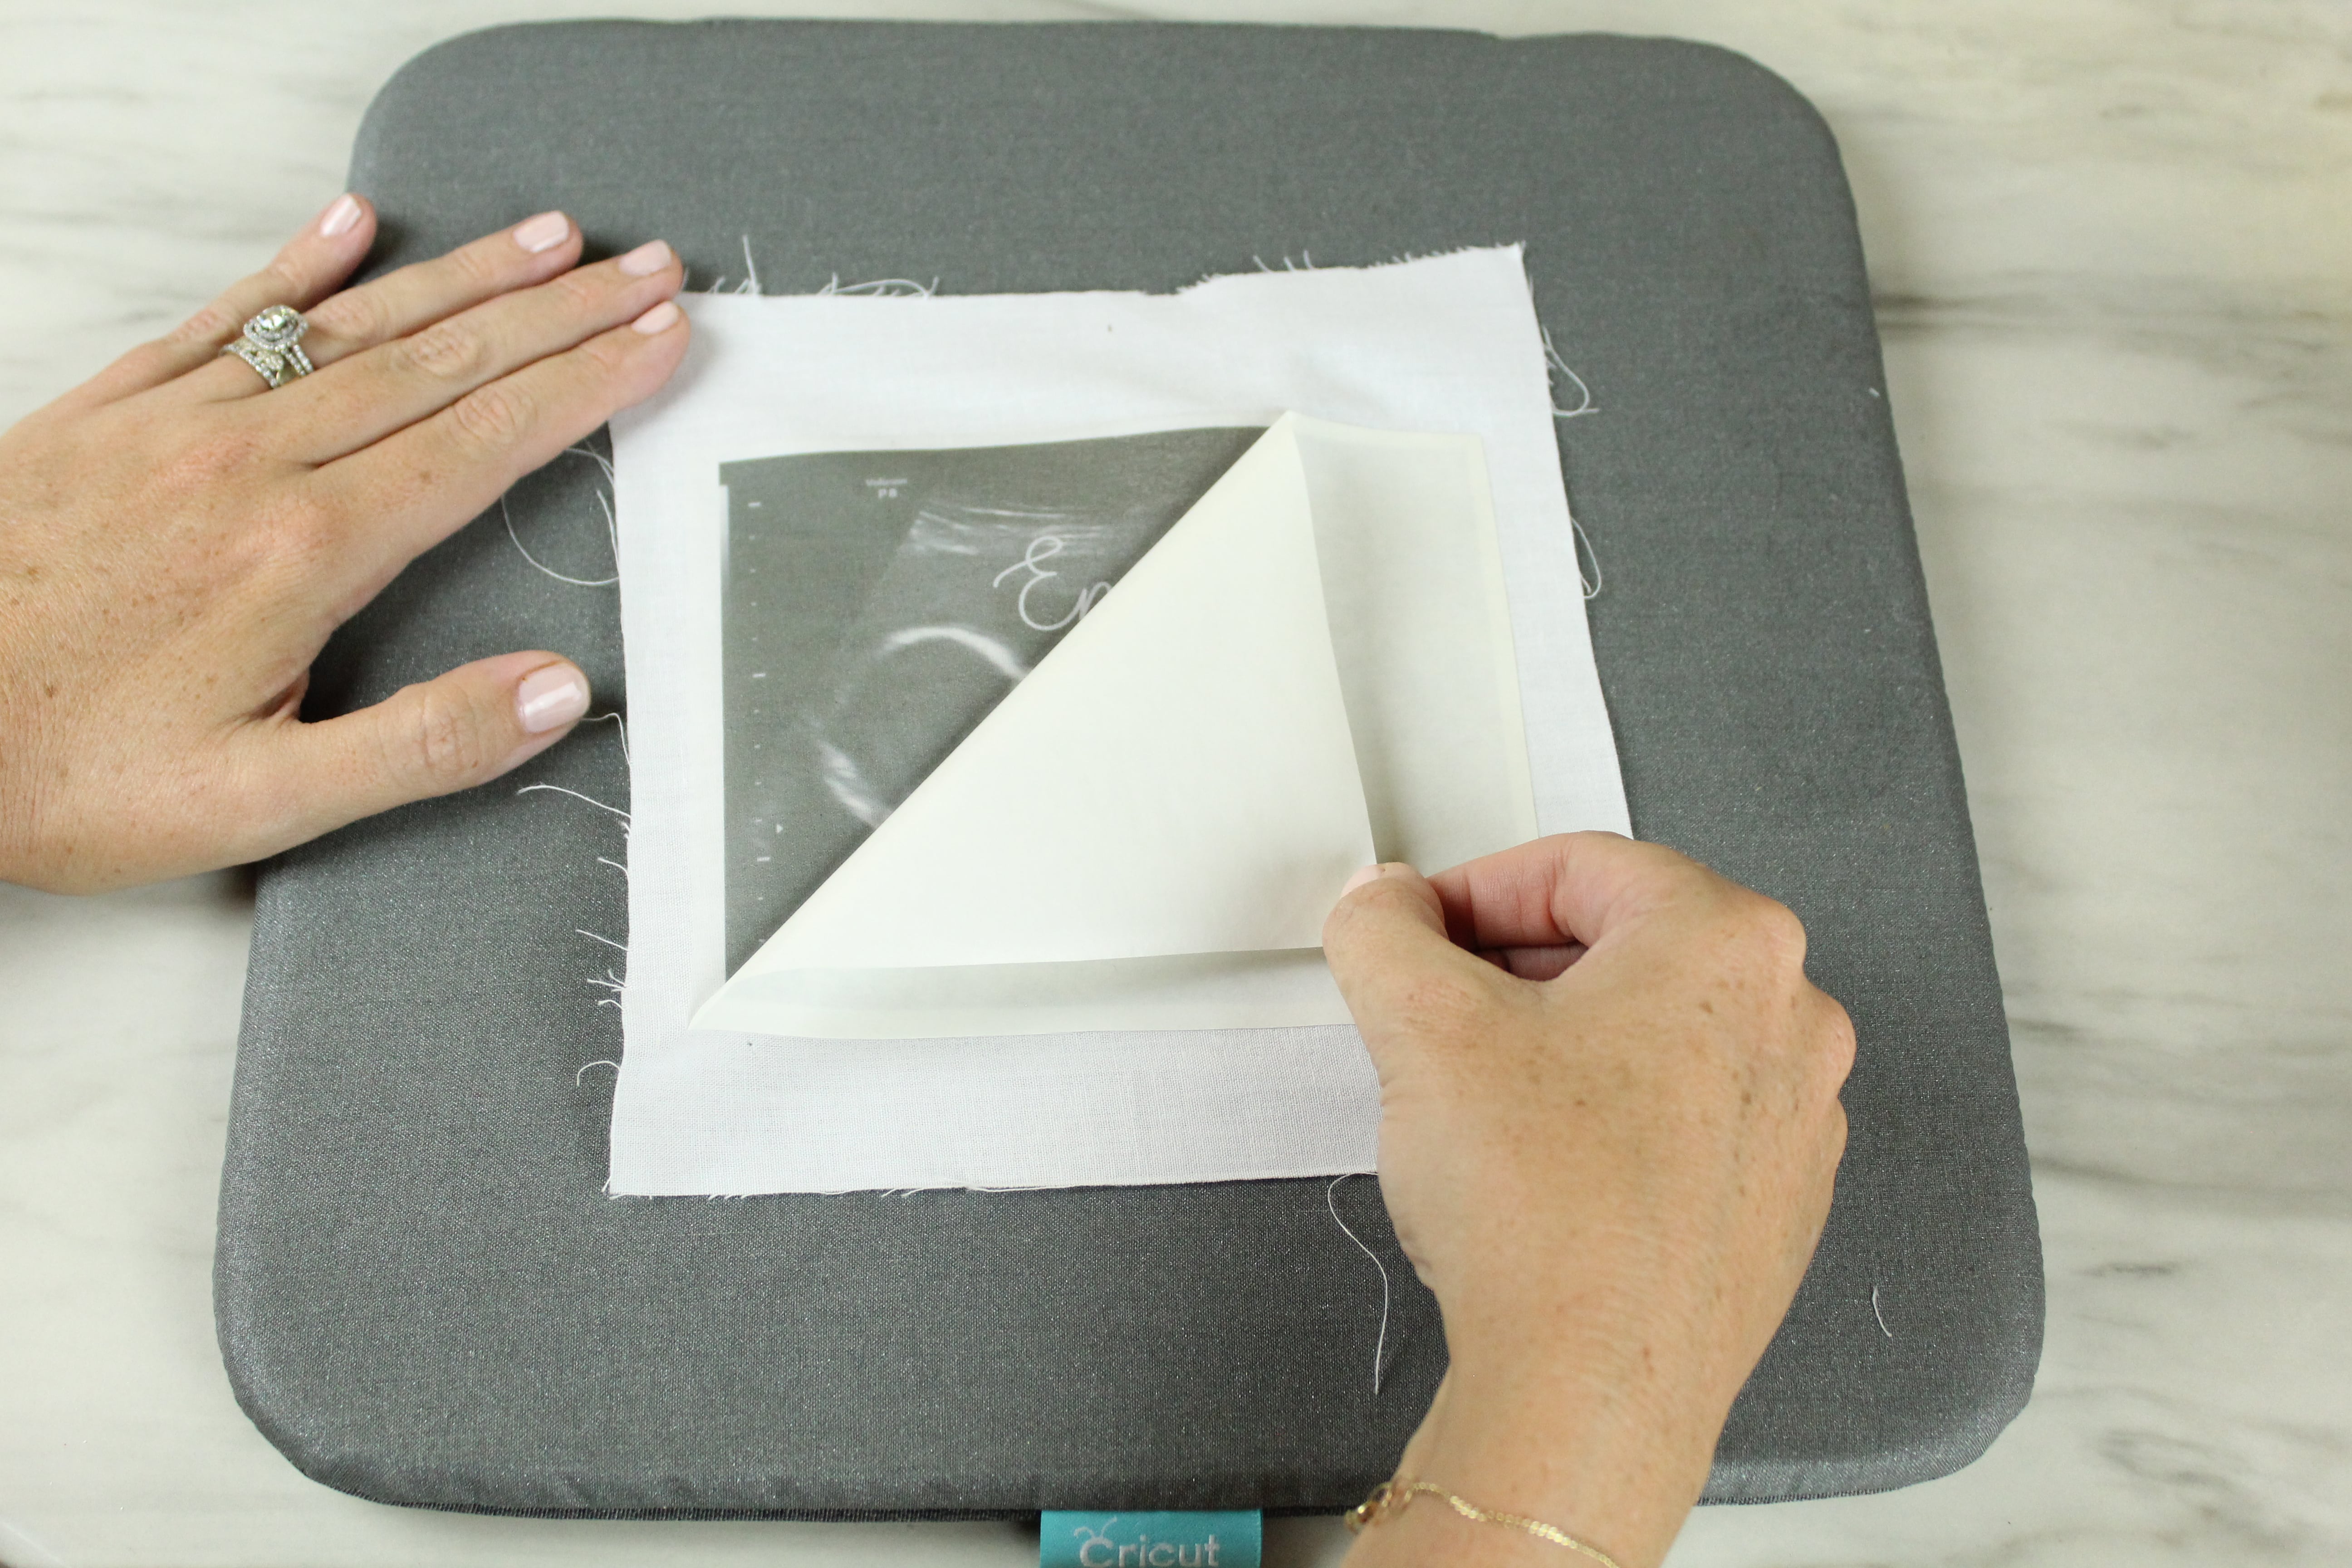
Place your transfer face down and iron it according to the manufacturers directions. Mine was a simple 15-20 second press.
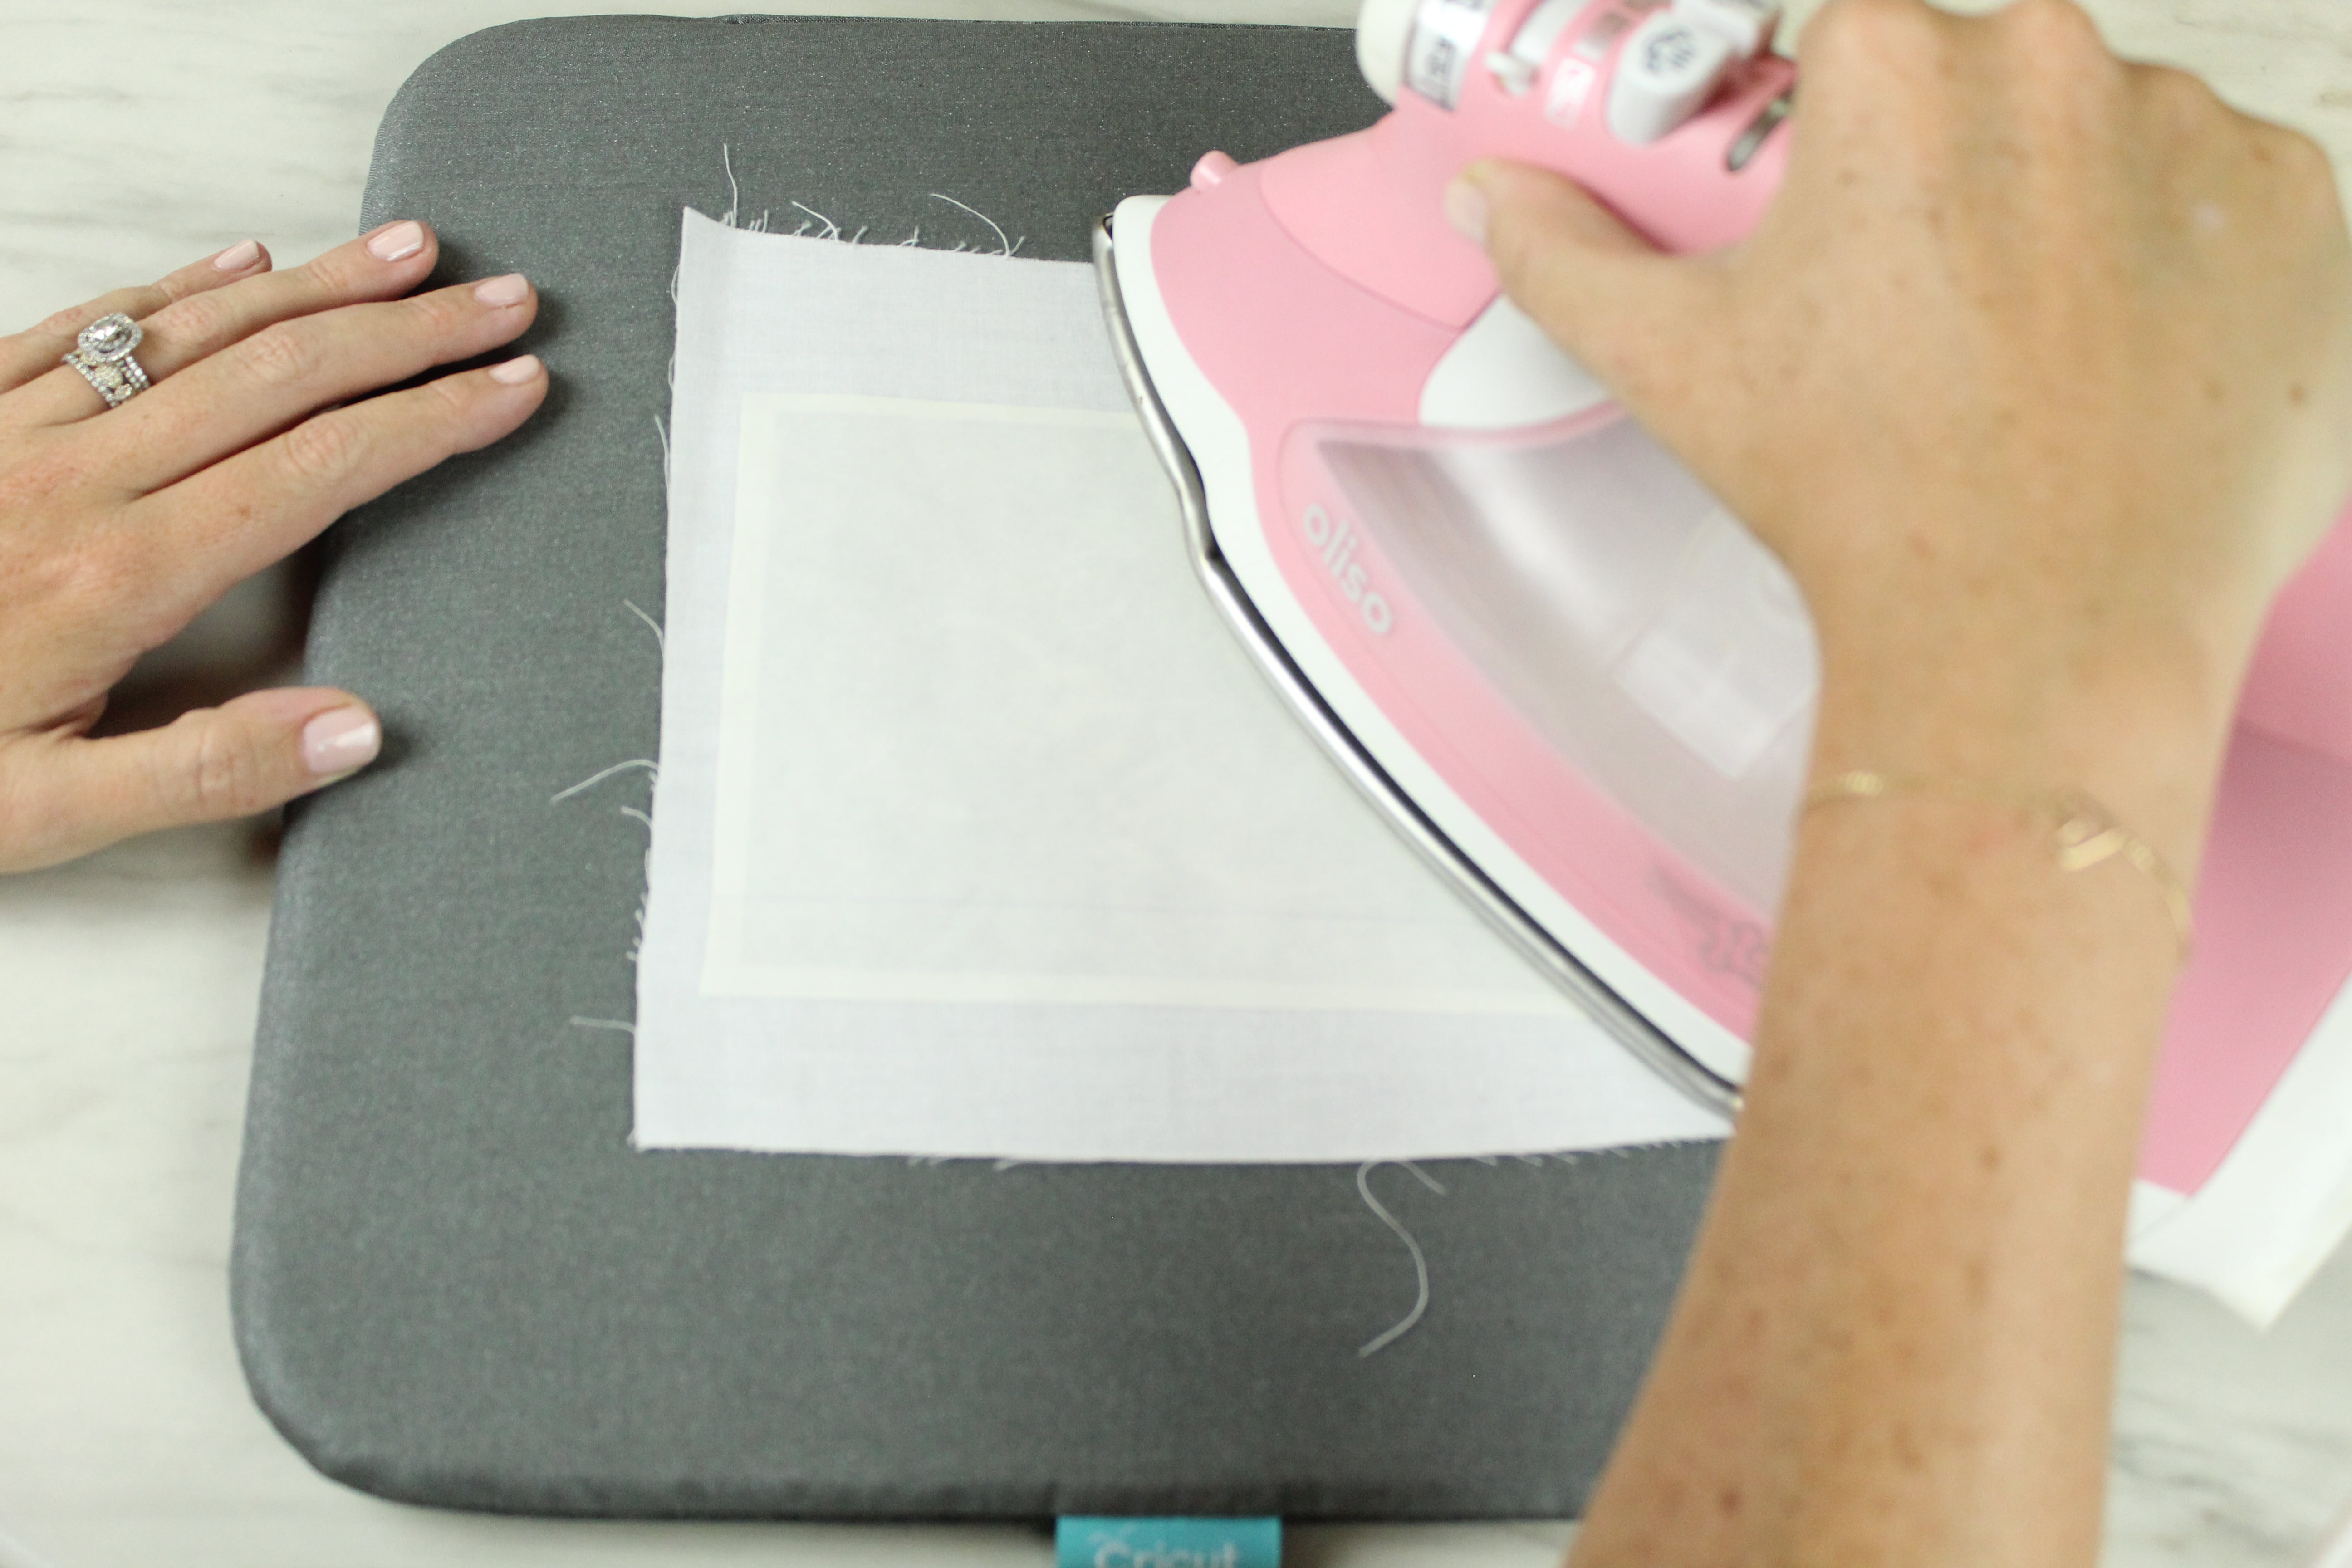
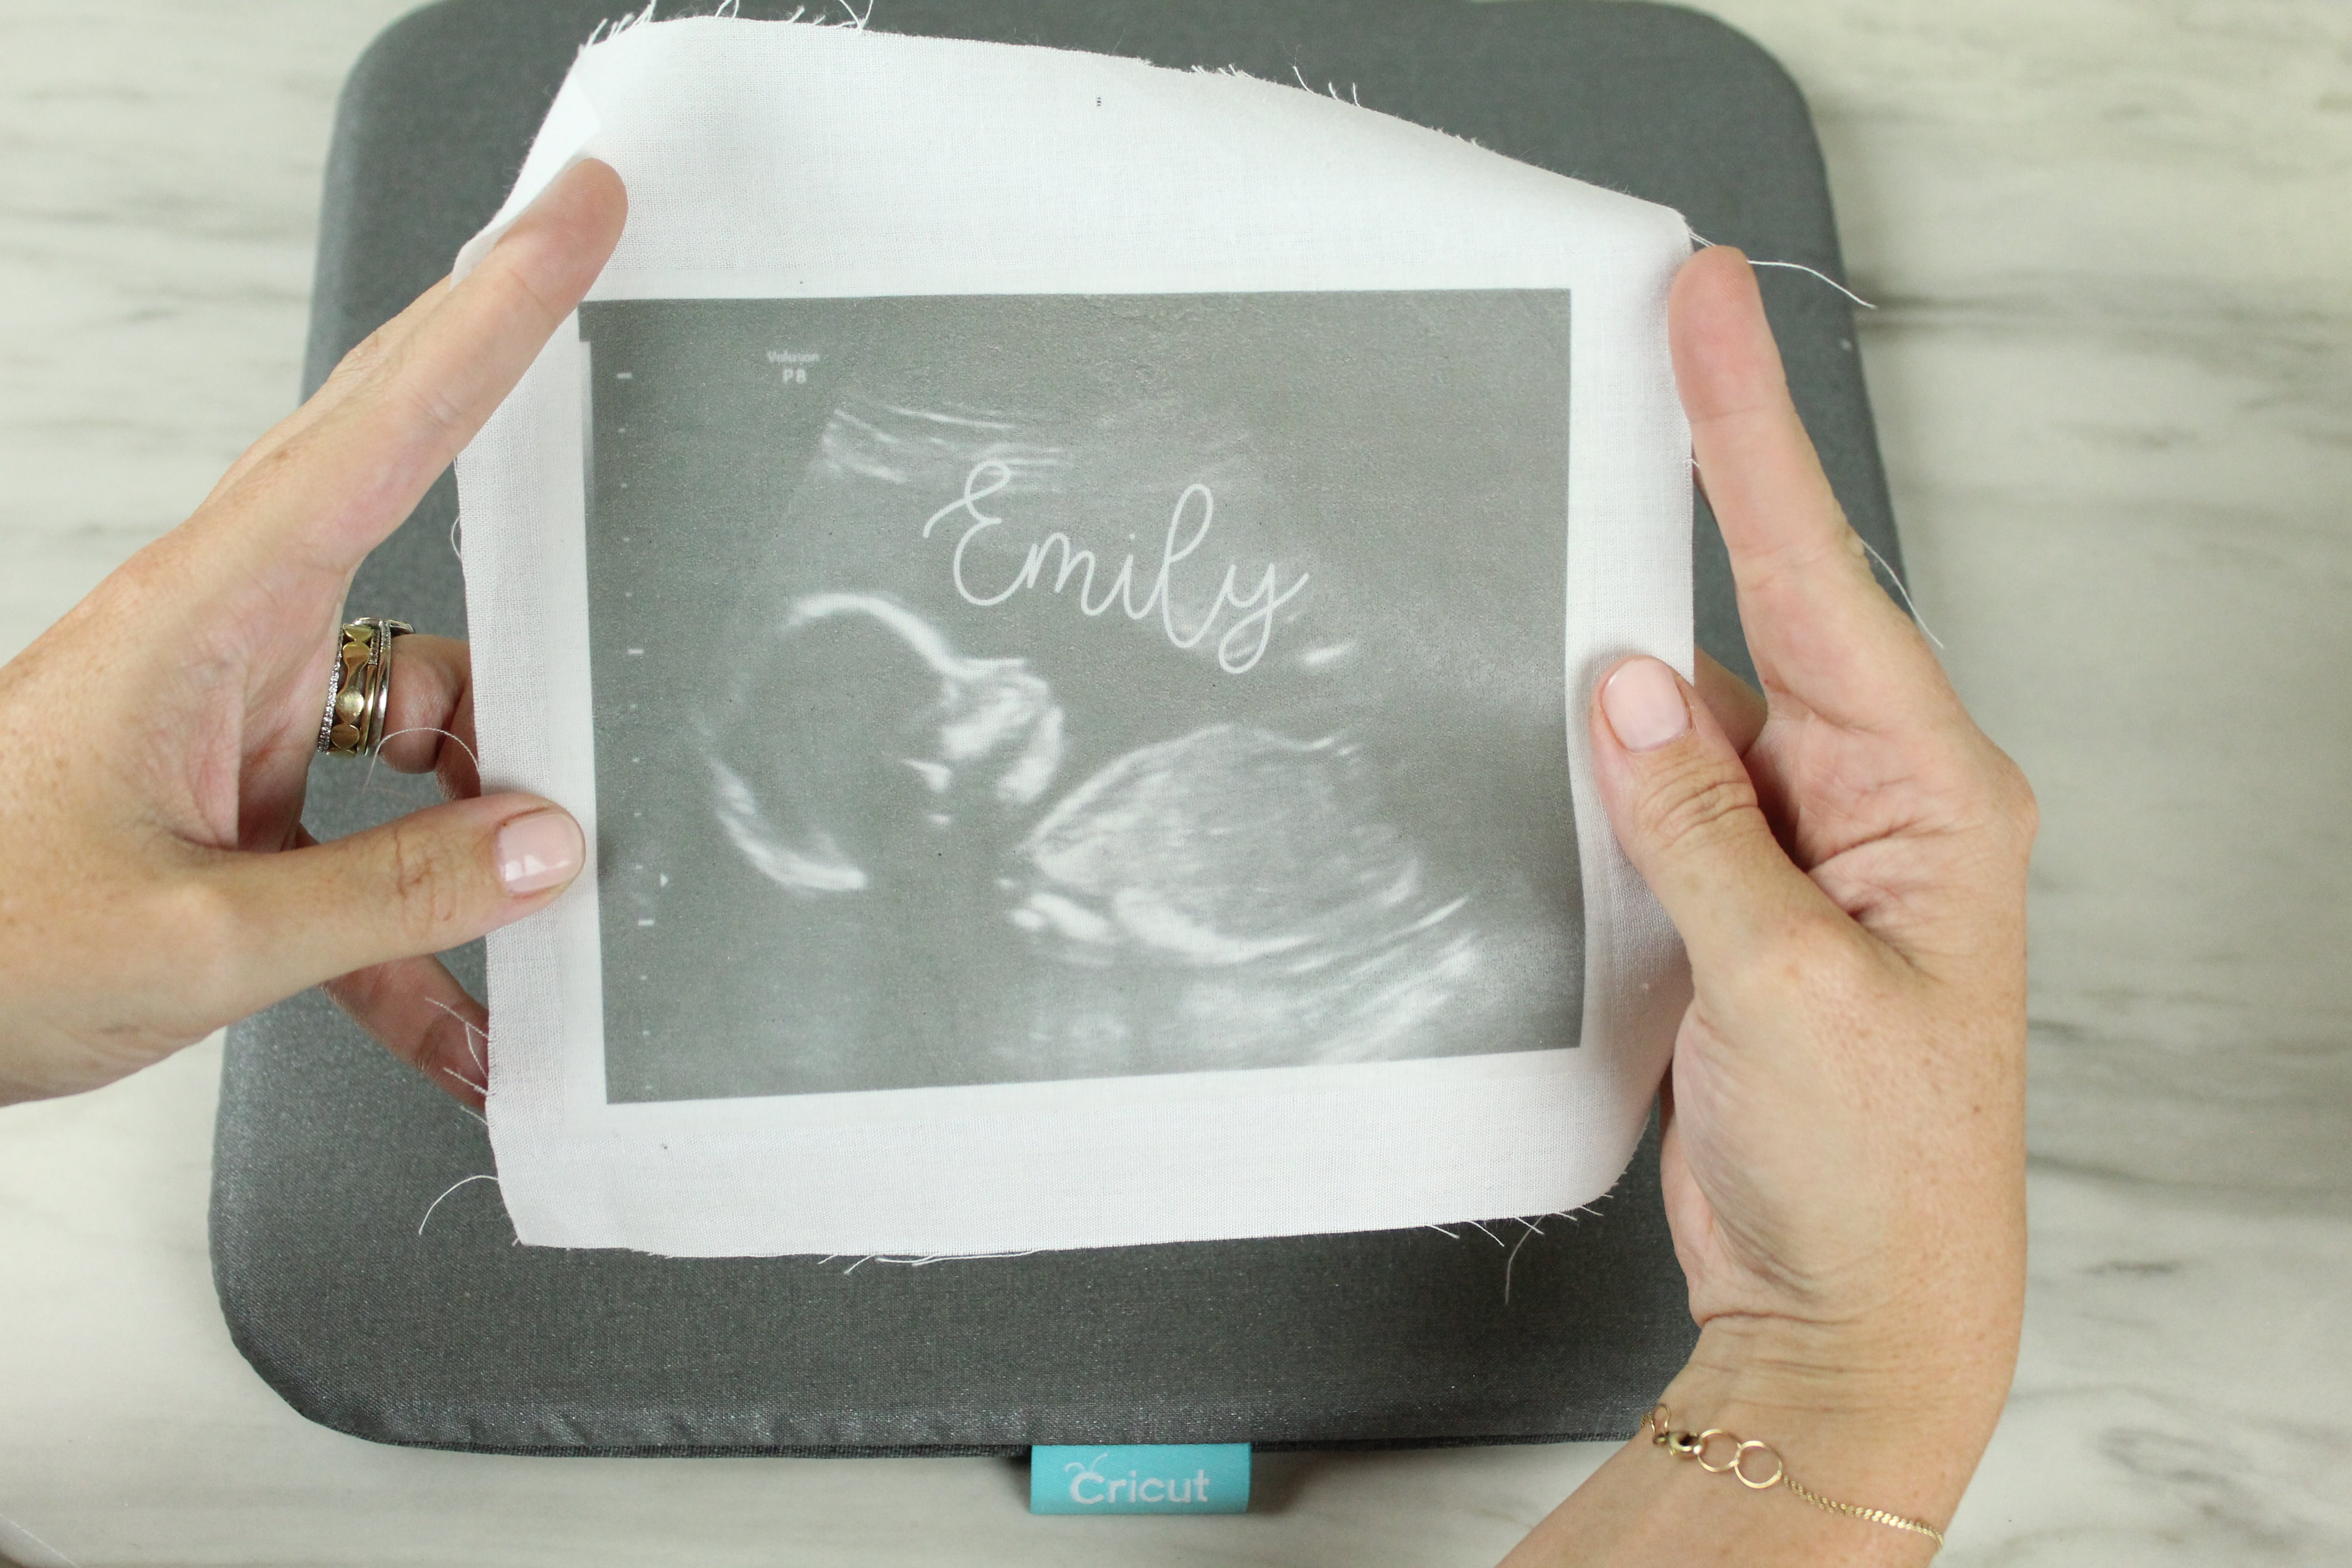
After letting it cool, remove the backing.
And there you have it! Easy, right?
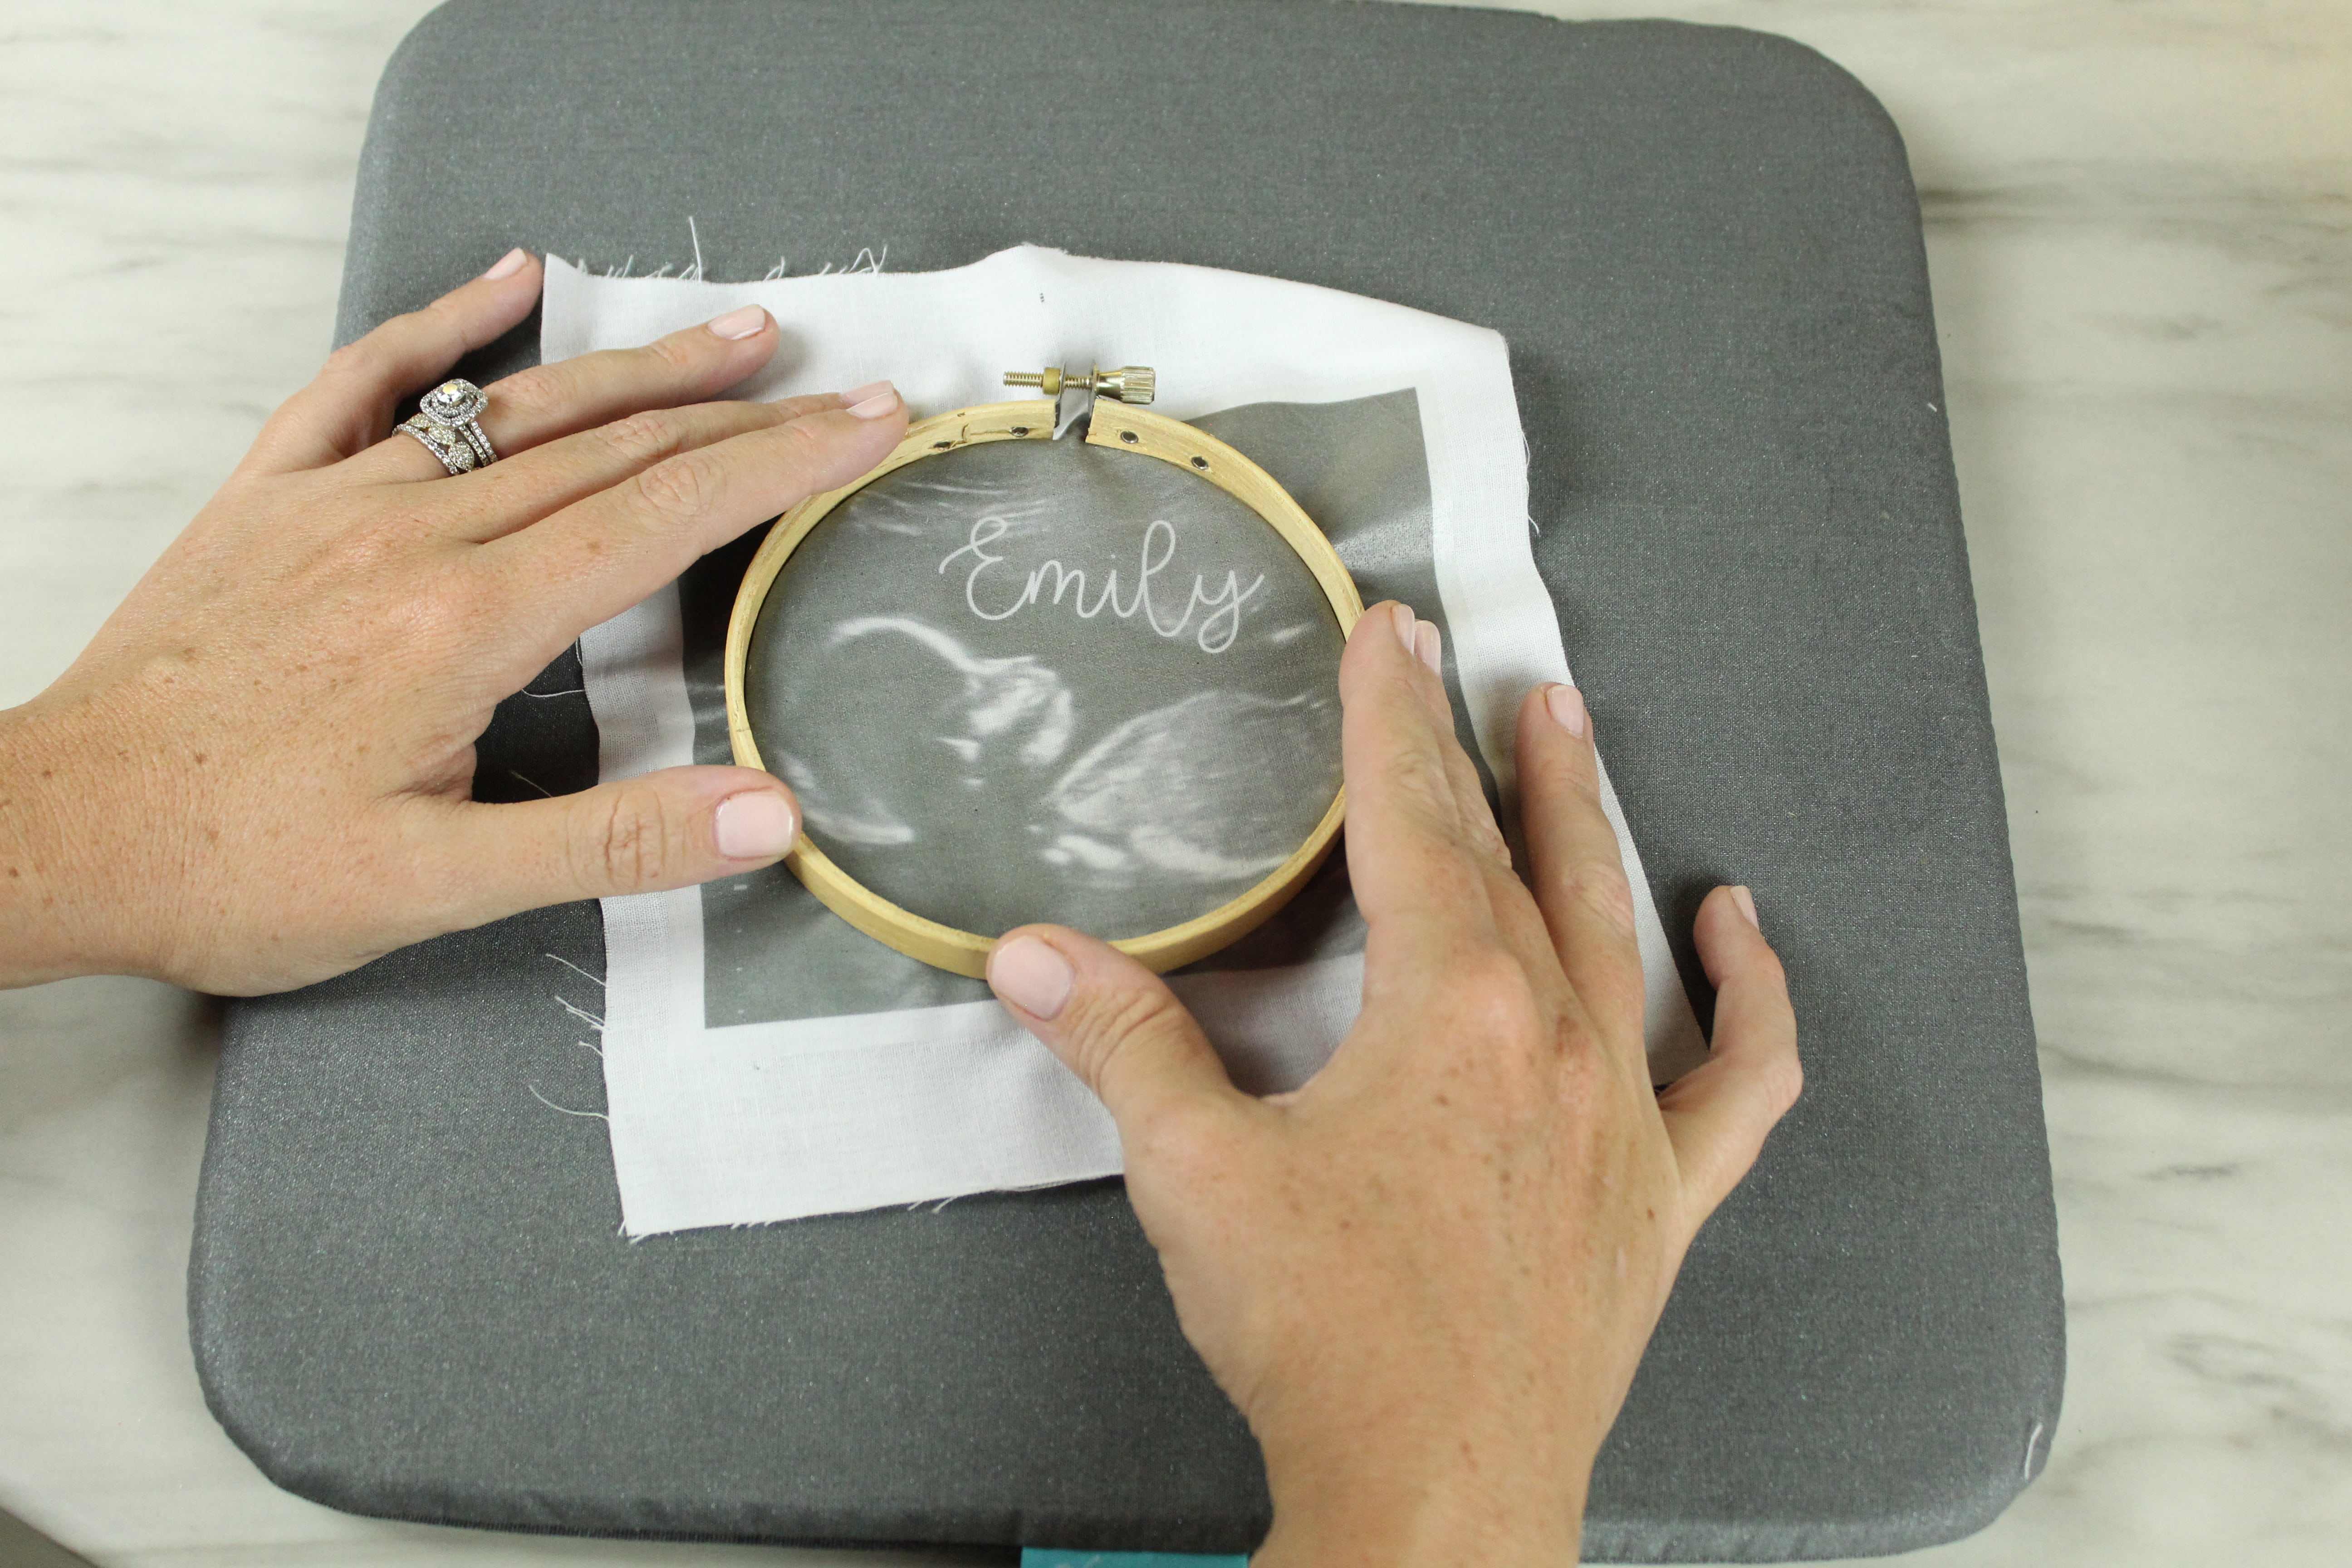
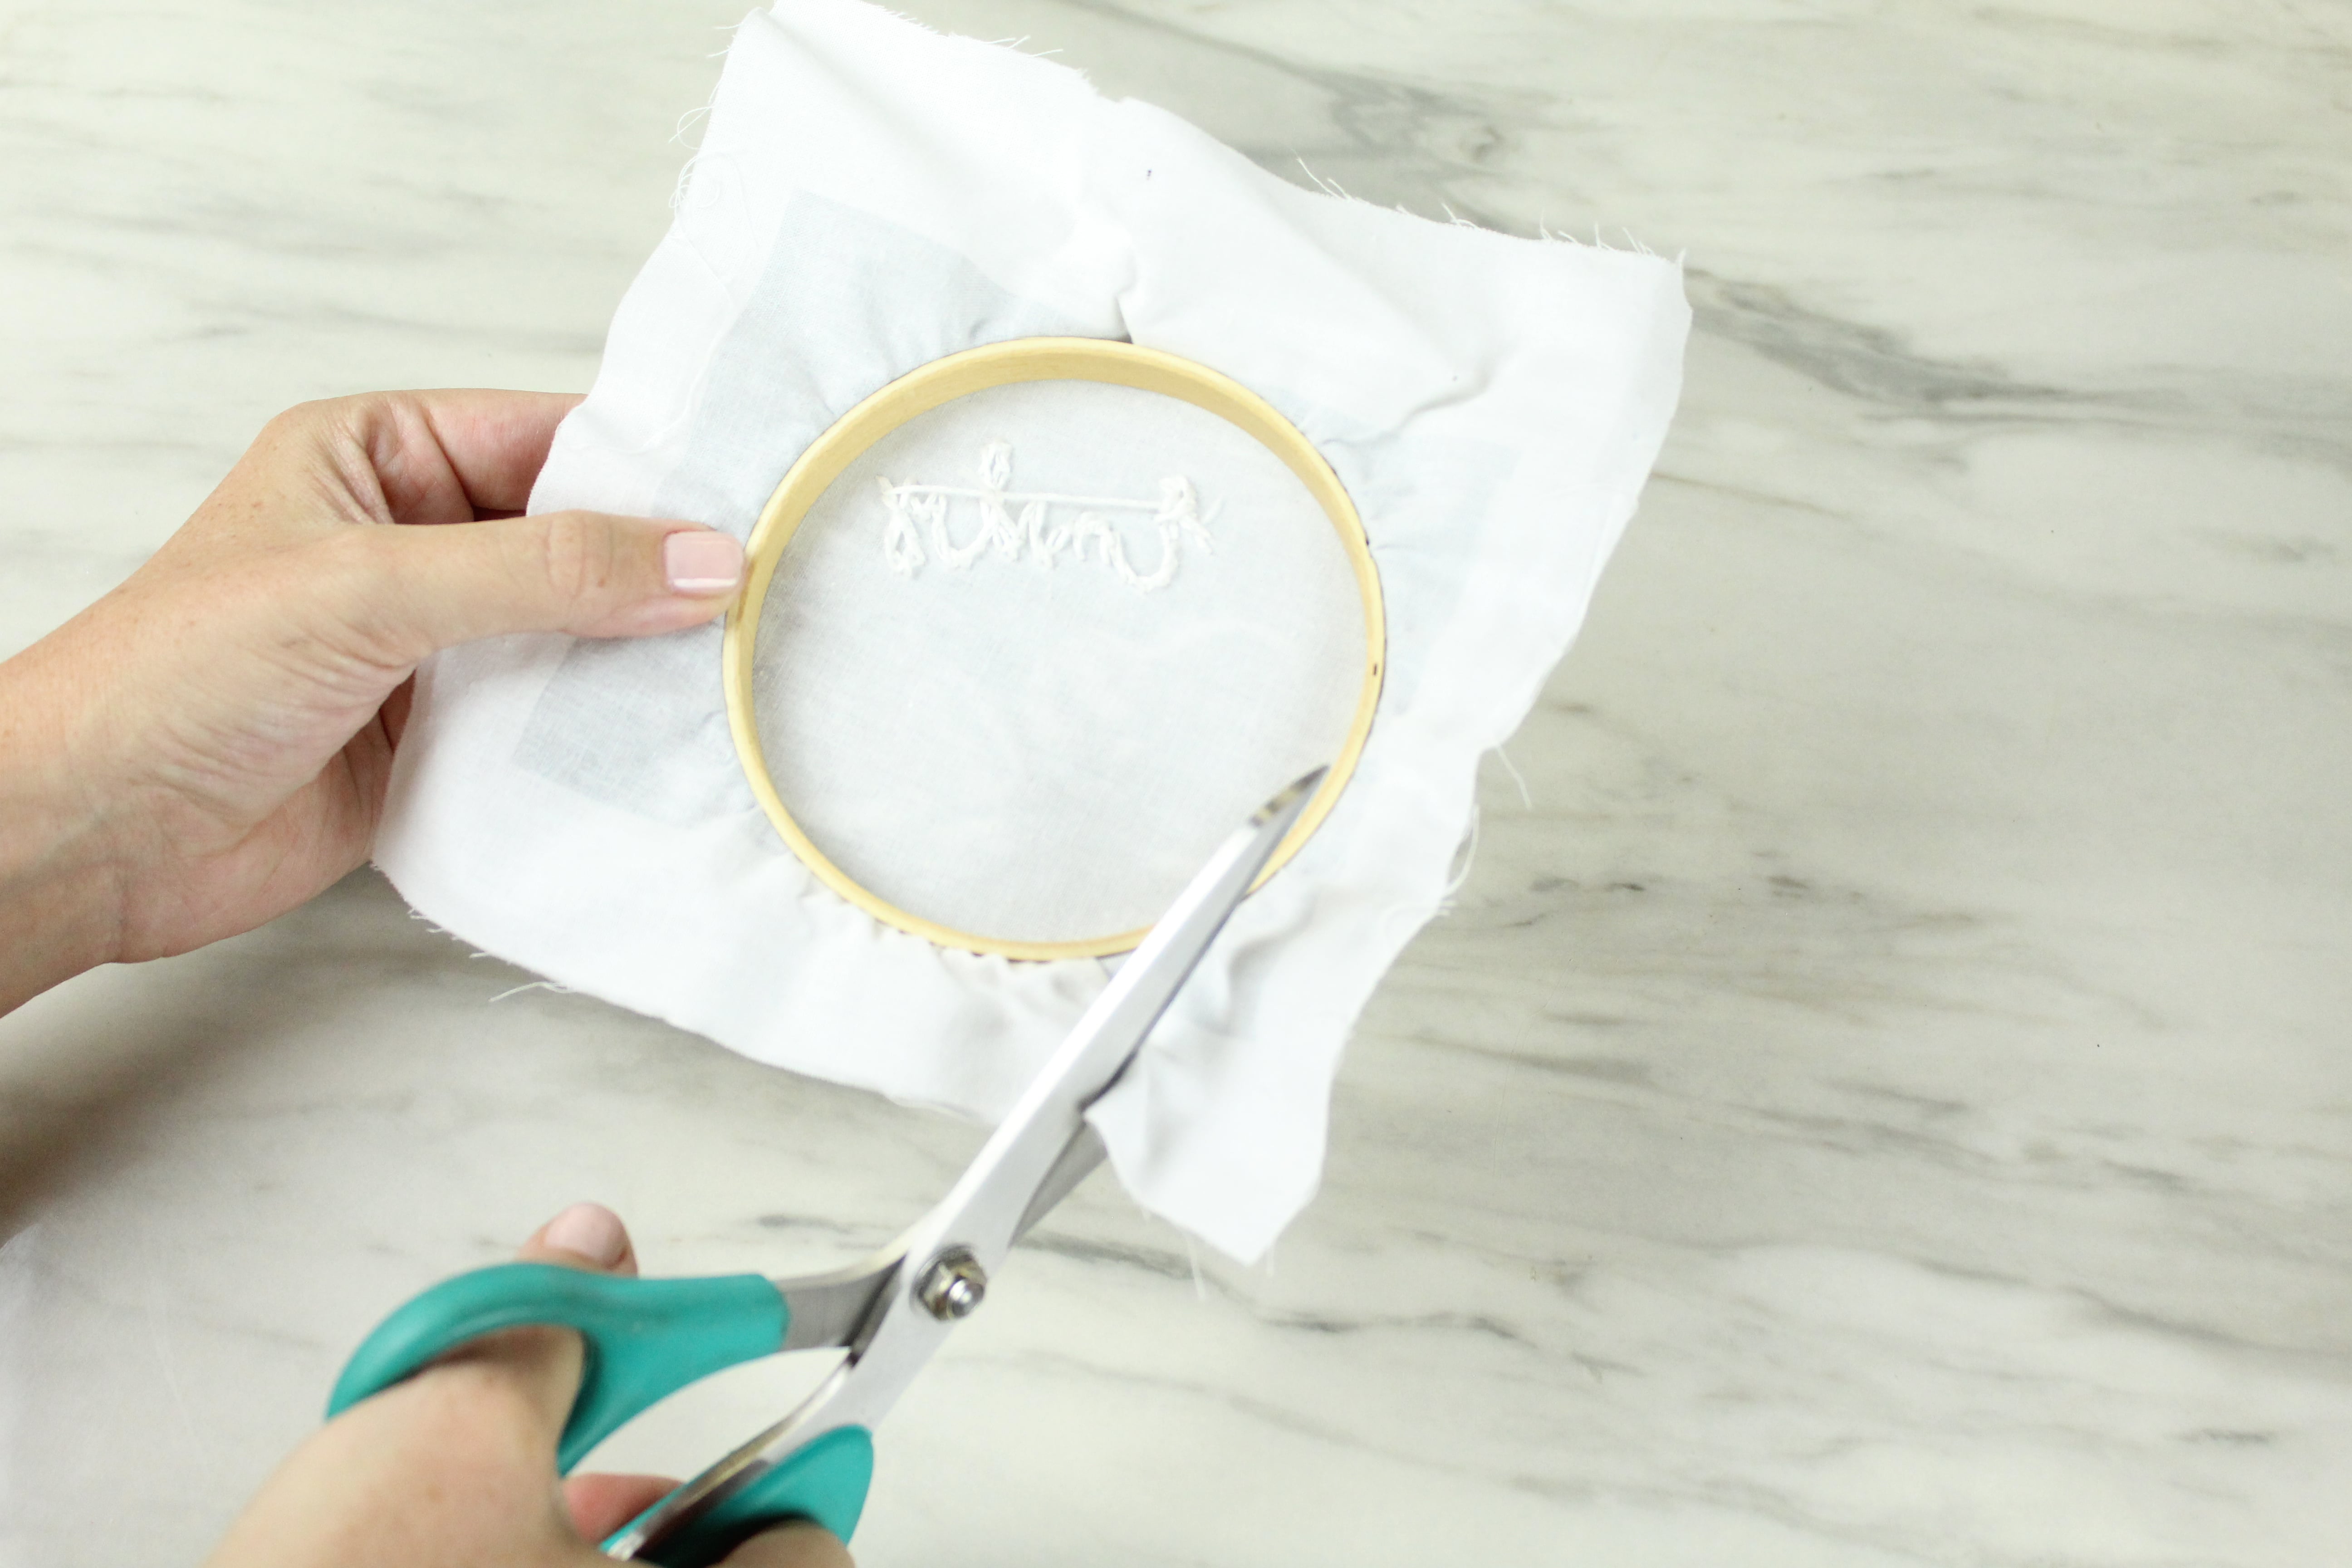
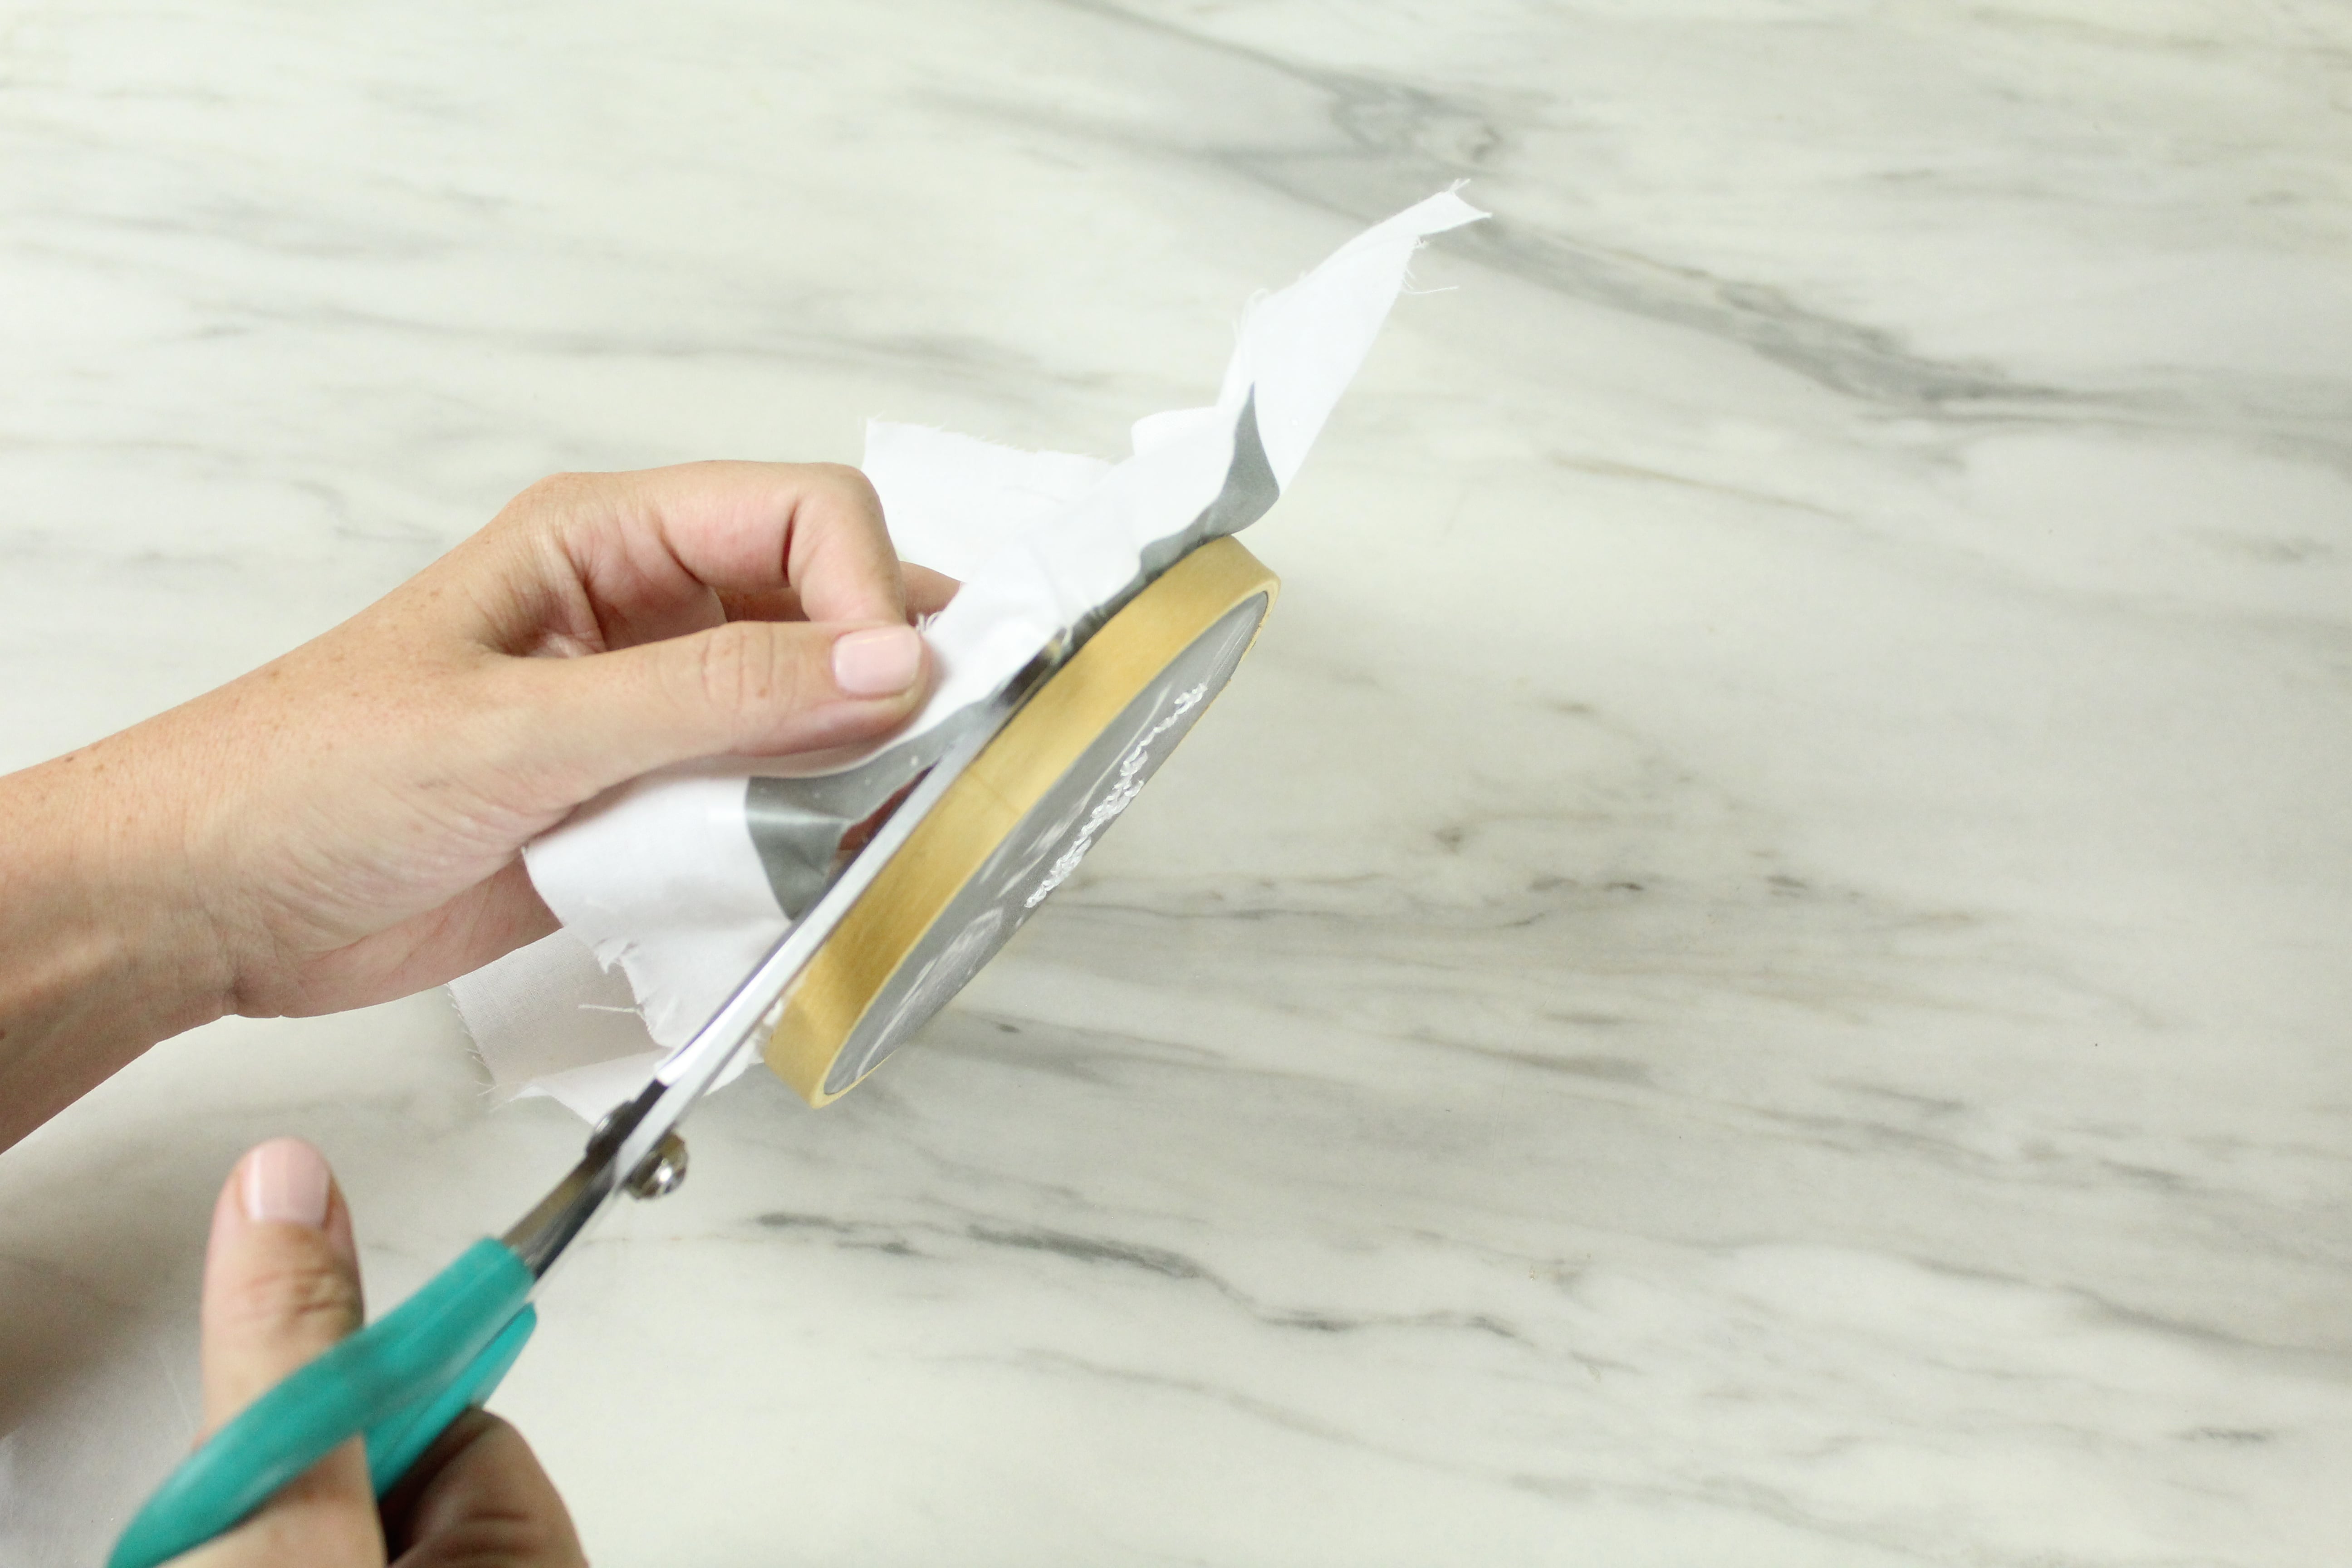
Add to Hoop
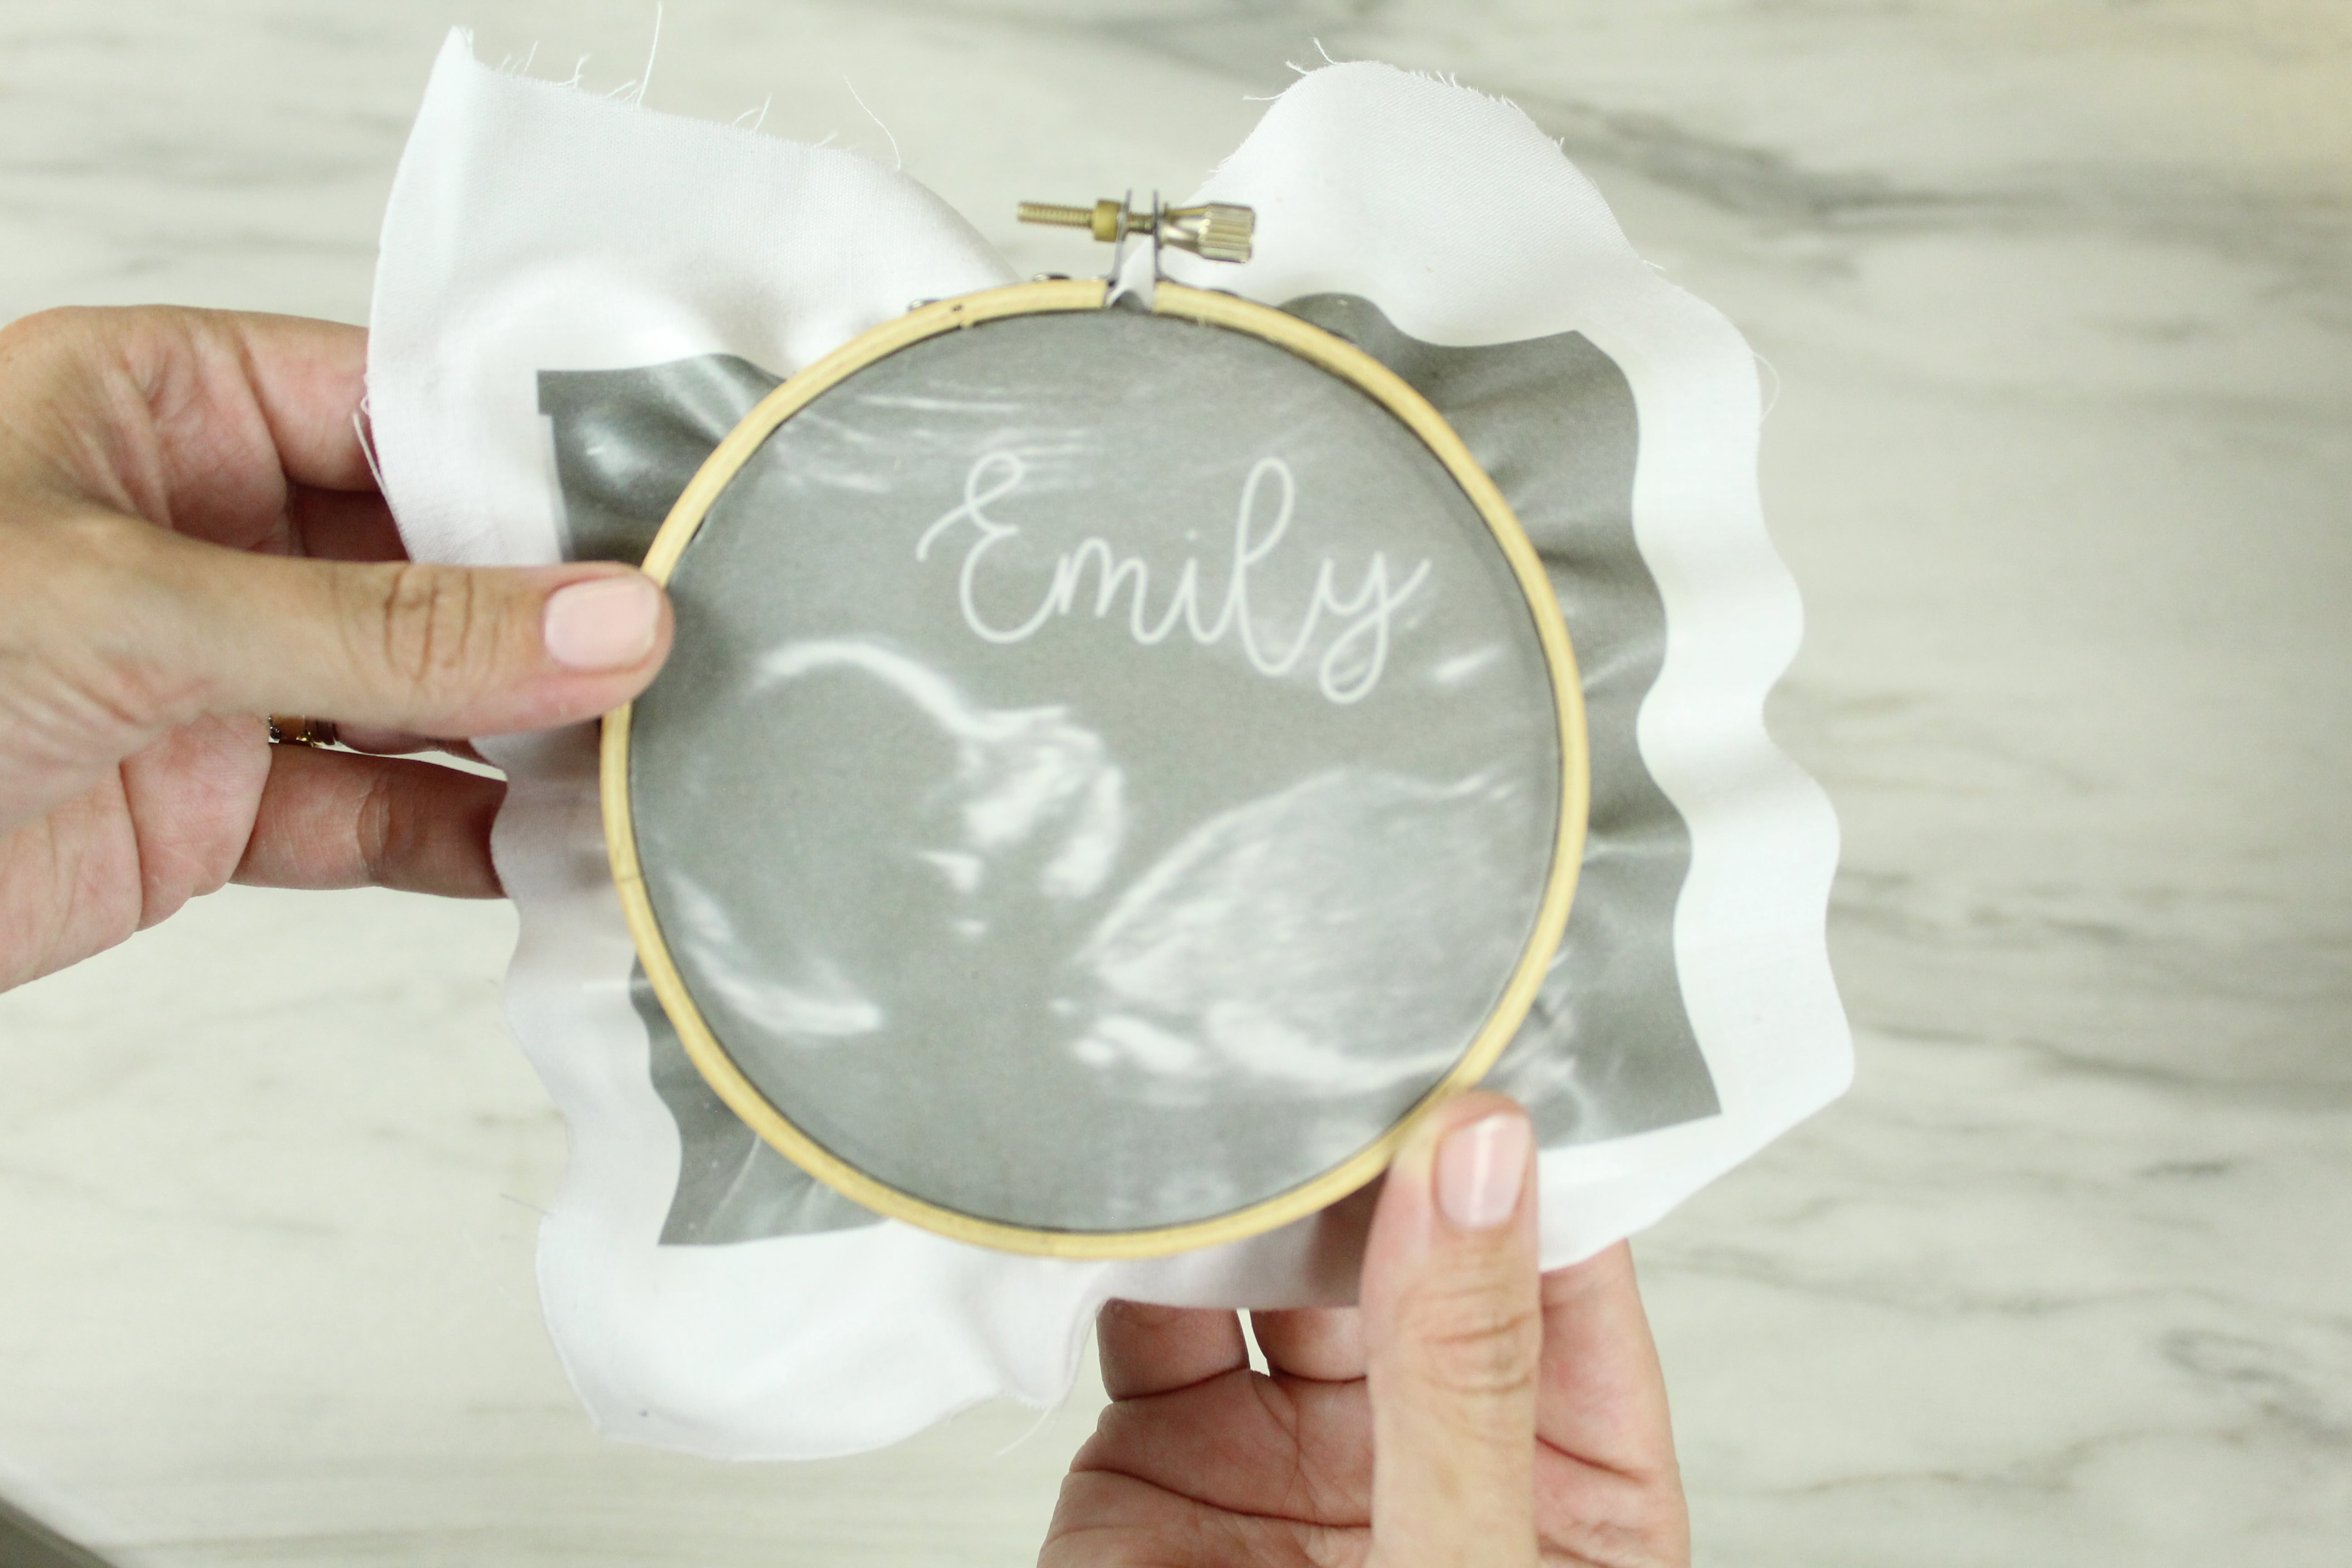
Open up your embroidery hoop and decide where you like your image while it lays on top of the smaller ring. Once you’re happy, place the larger ring over top and tighten it into place. You may need to pull the fabric taught in a few places before tightening it all the way.
Time to Embroider!
Technically you can be done with this project if embroidery is scary for you, but if not, let’s embroider! Using a backstitch, simply follow the outline created by adding the text to your project. I’m a visual learner and find it hard to show exactly how to do this stitch in photos, so here is a simple tutorial I found on YouTube to show you how to do a backstitch. I find this font (better together) is a fun font with a handwritten feel which I love, but you are more than welcome to use a font that suits you and your project.
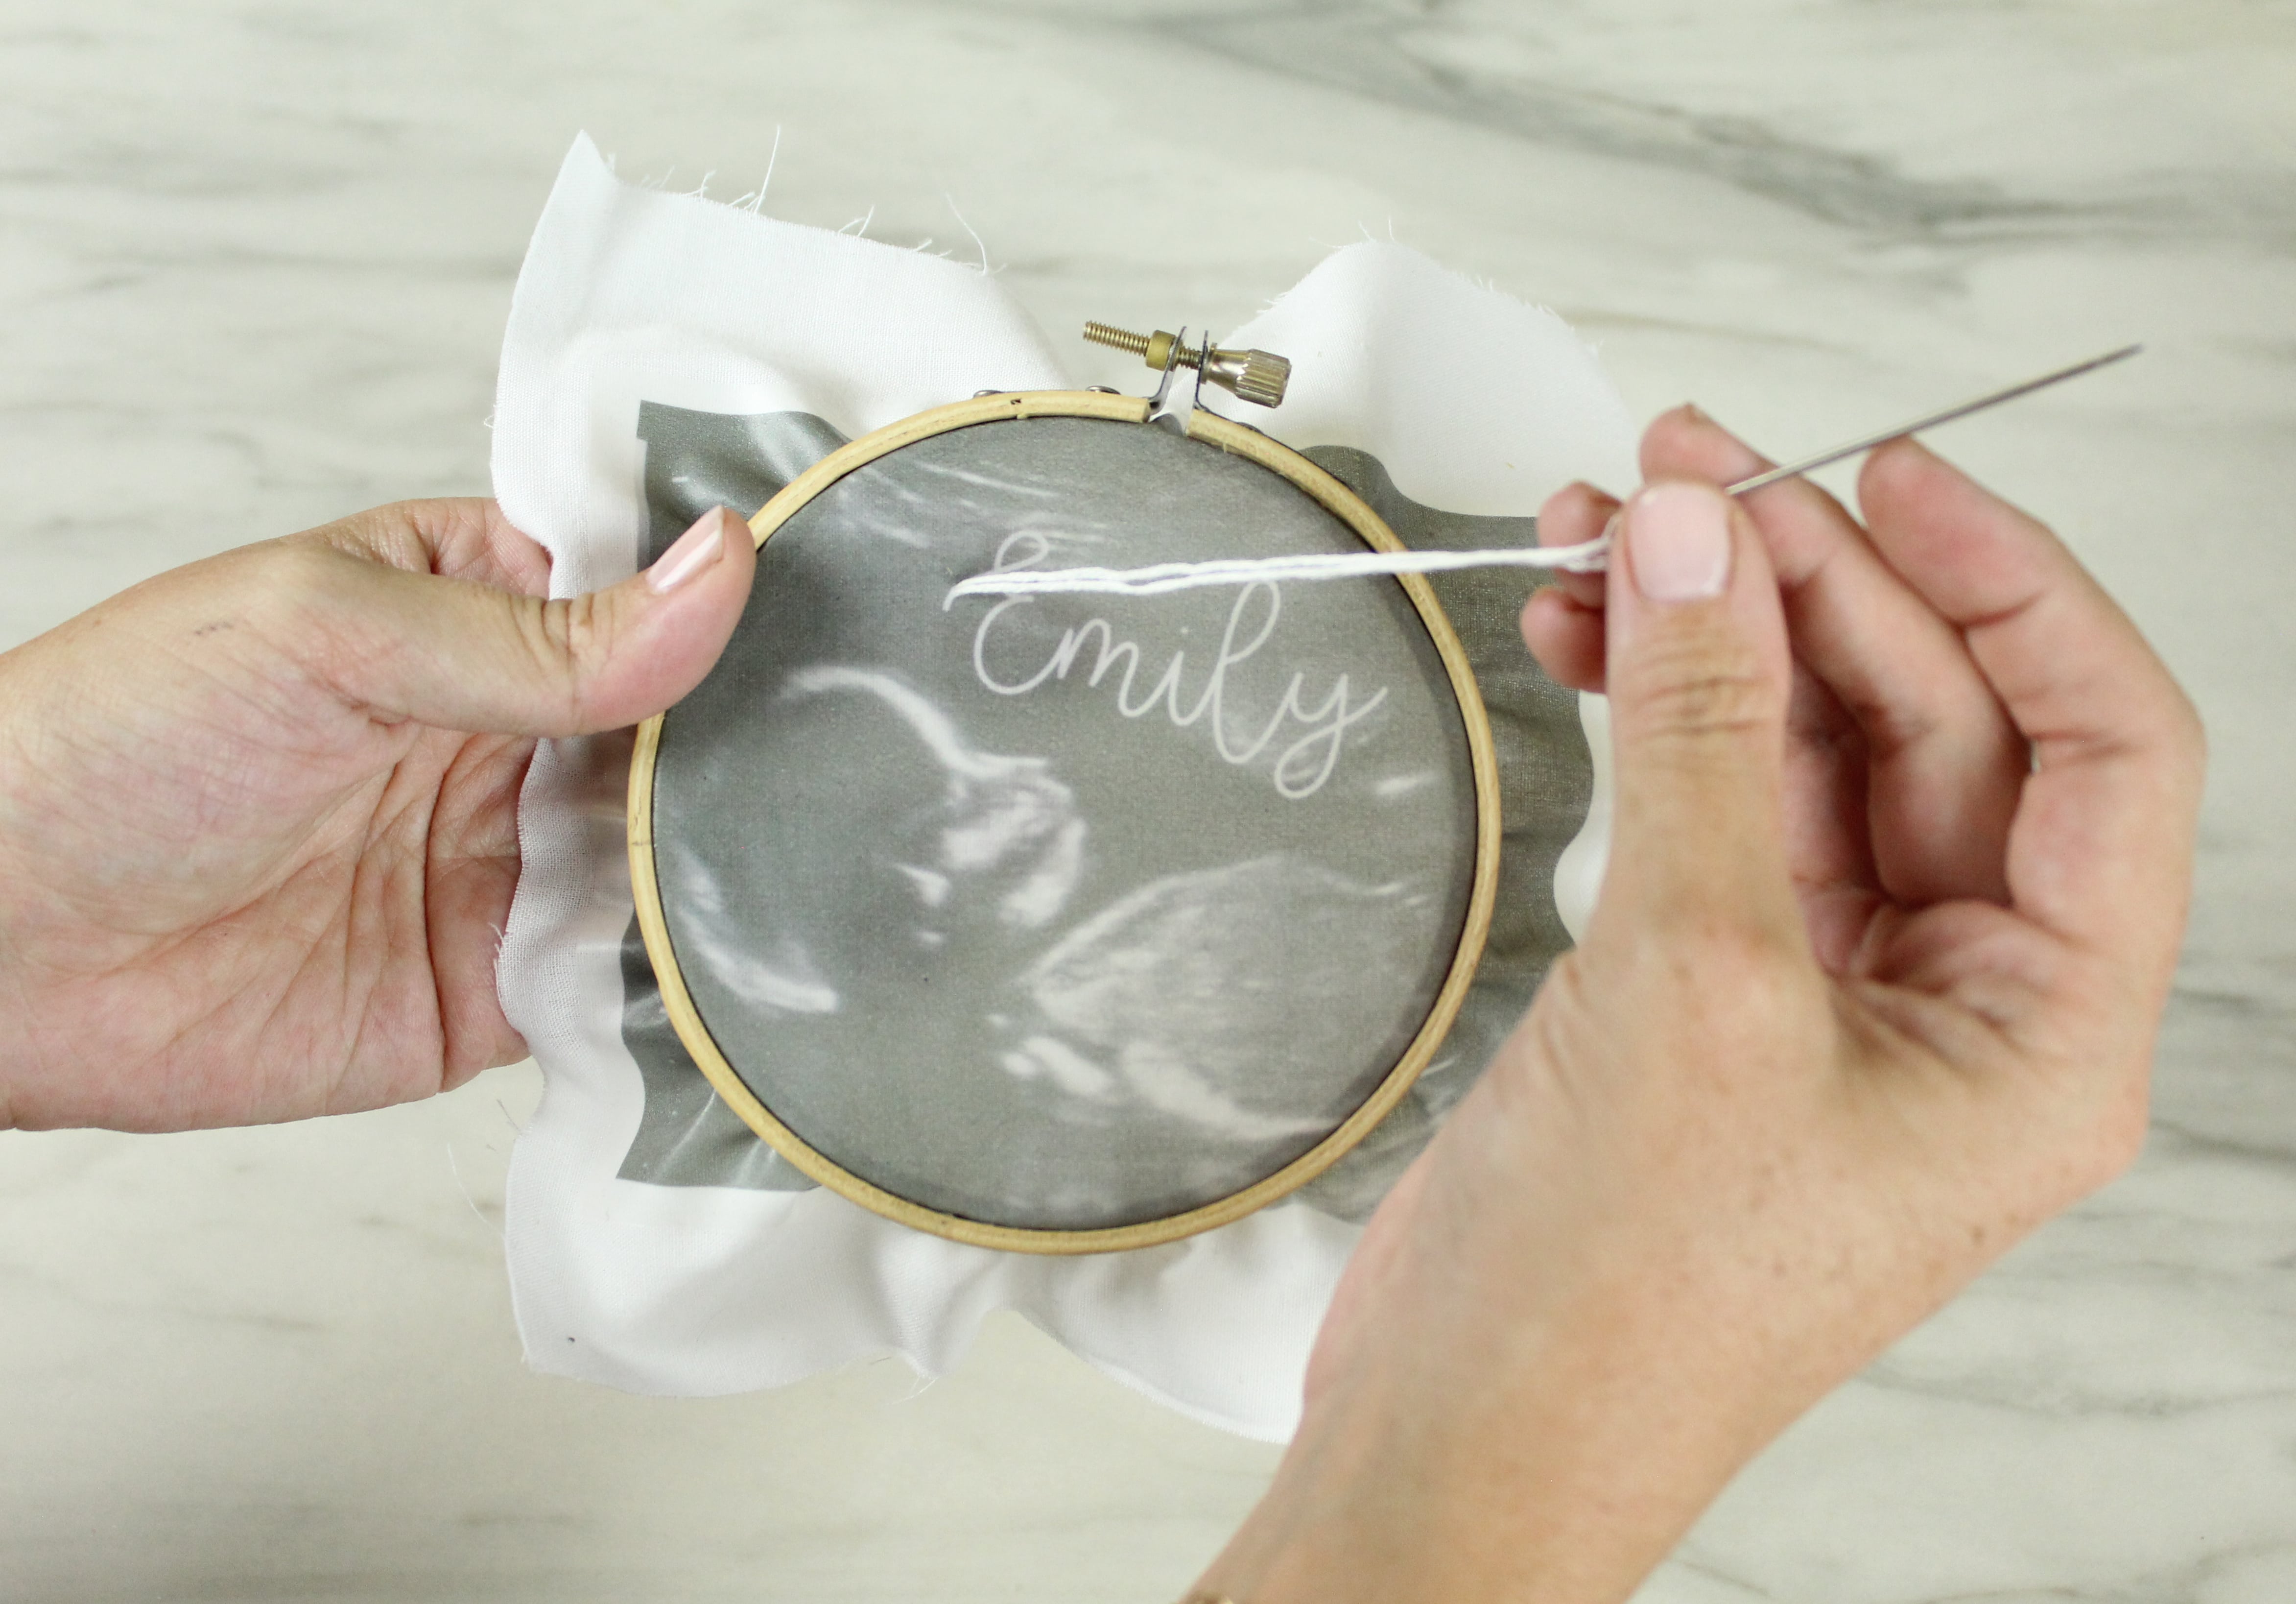
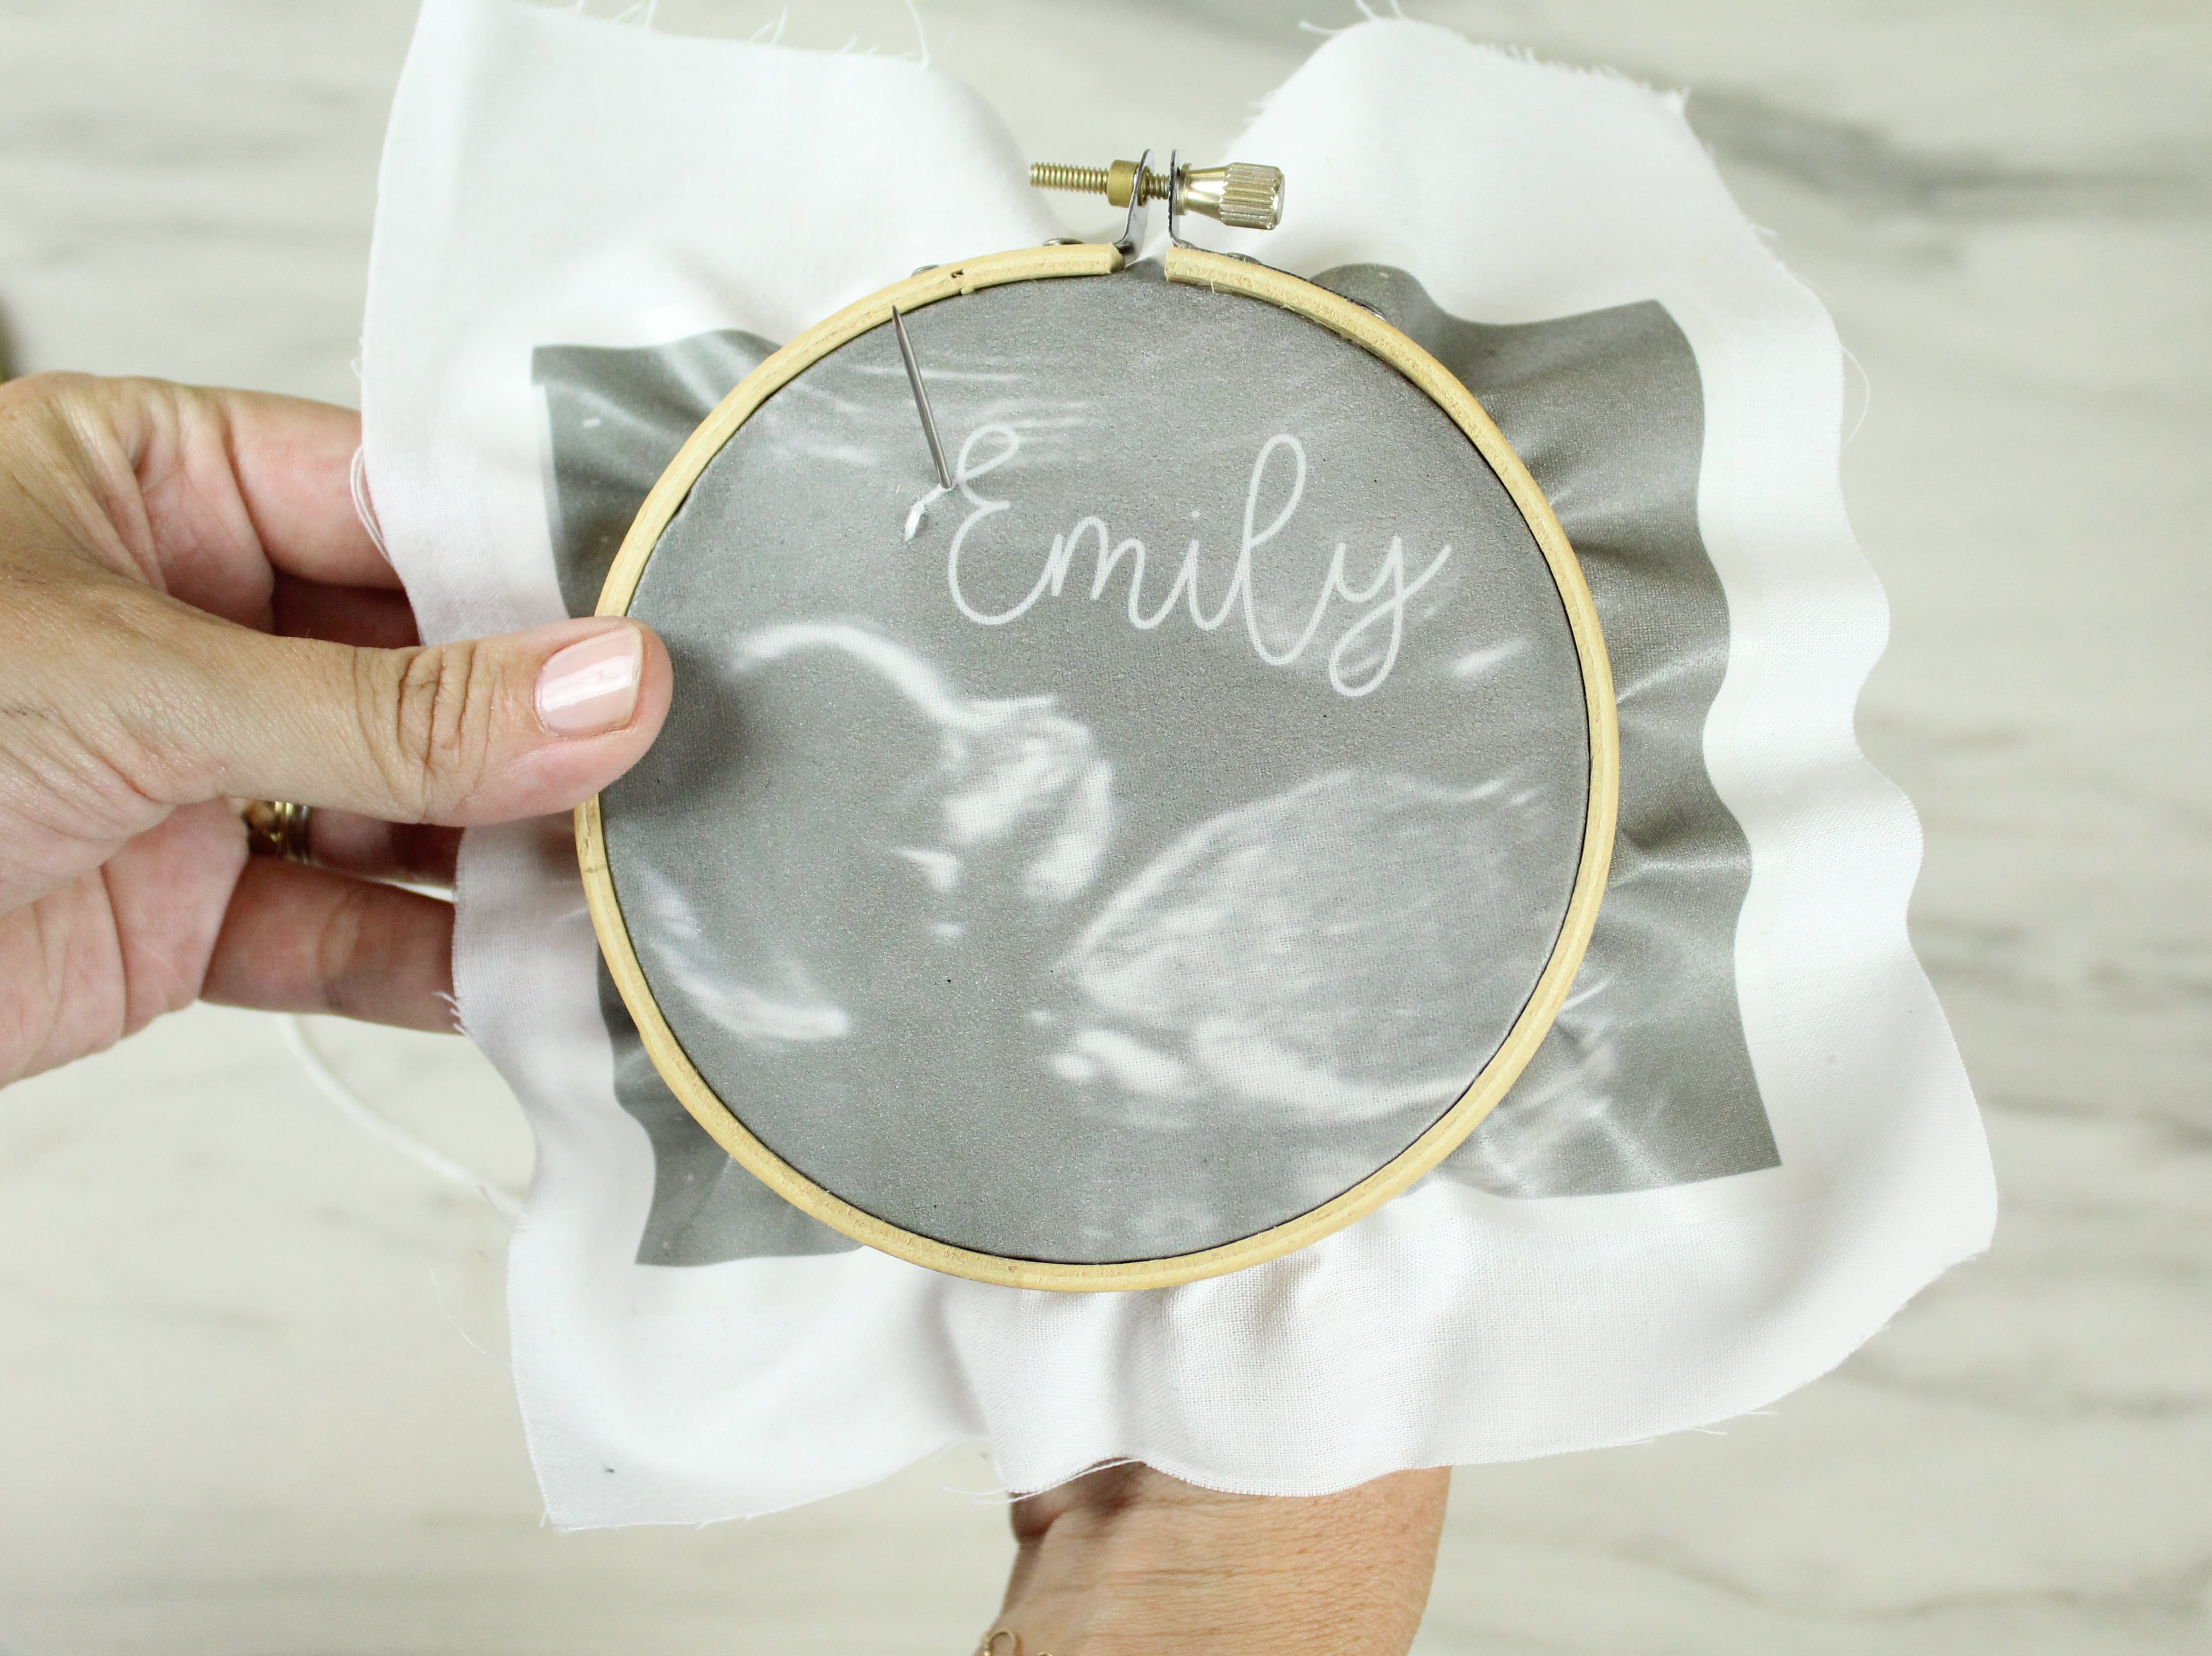
A couple of tips on embroidery. One, start with plenty of floss, but don’t worry, if you run out, starting a new stitch is no big deal. Also, leave a bit of floss at the beginning if your project so that you can tie it in a knot with your end strand. And lastly, take your time! If you rush you can get your floss all tangled and knotted. Be sure to check the back of your project as you go to prevent any tangles.
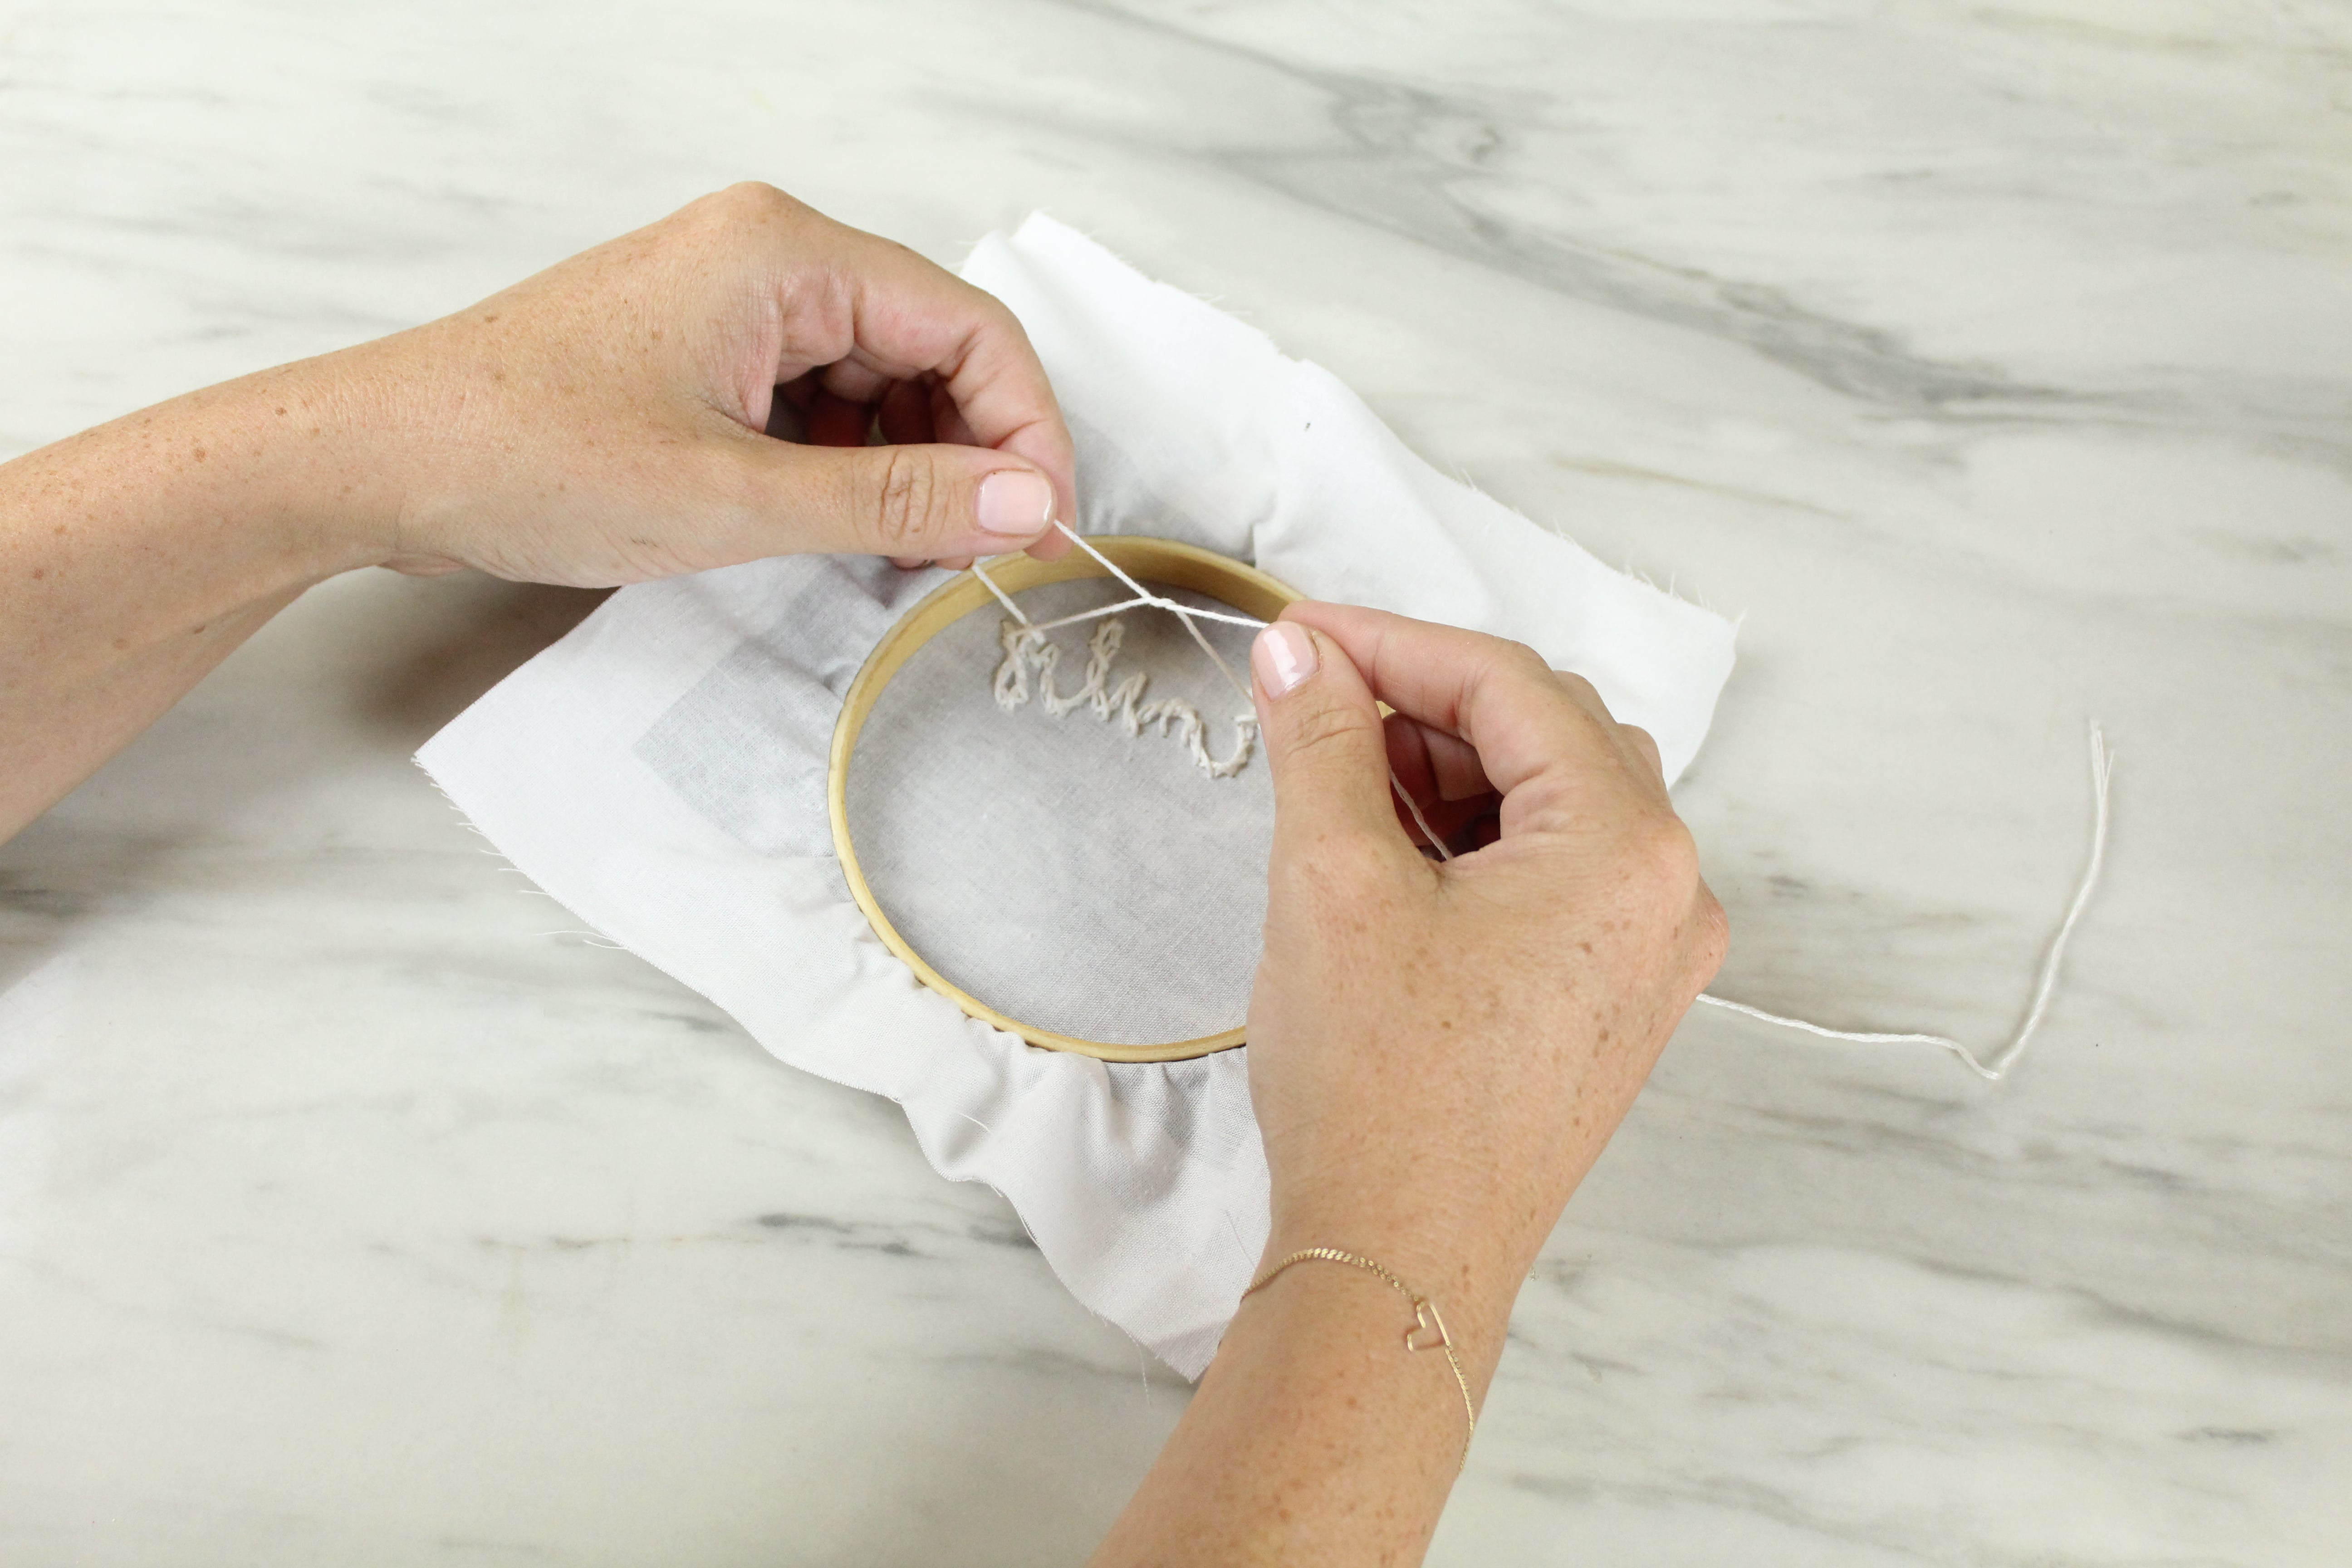
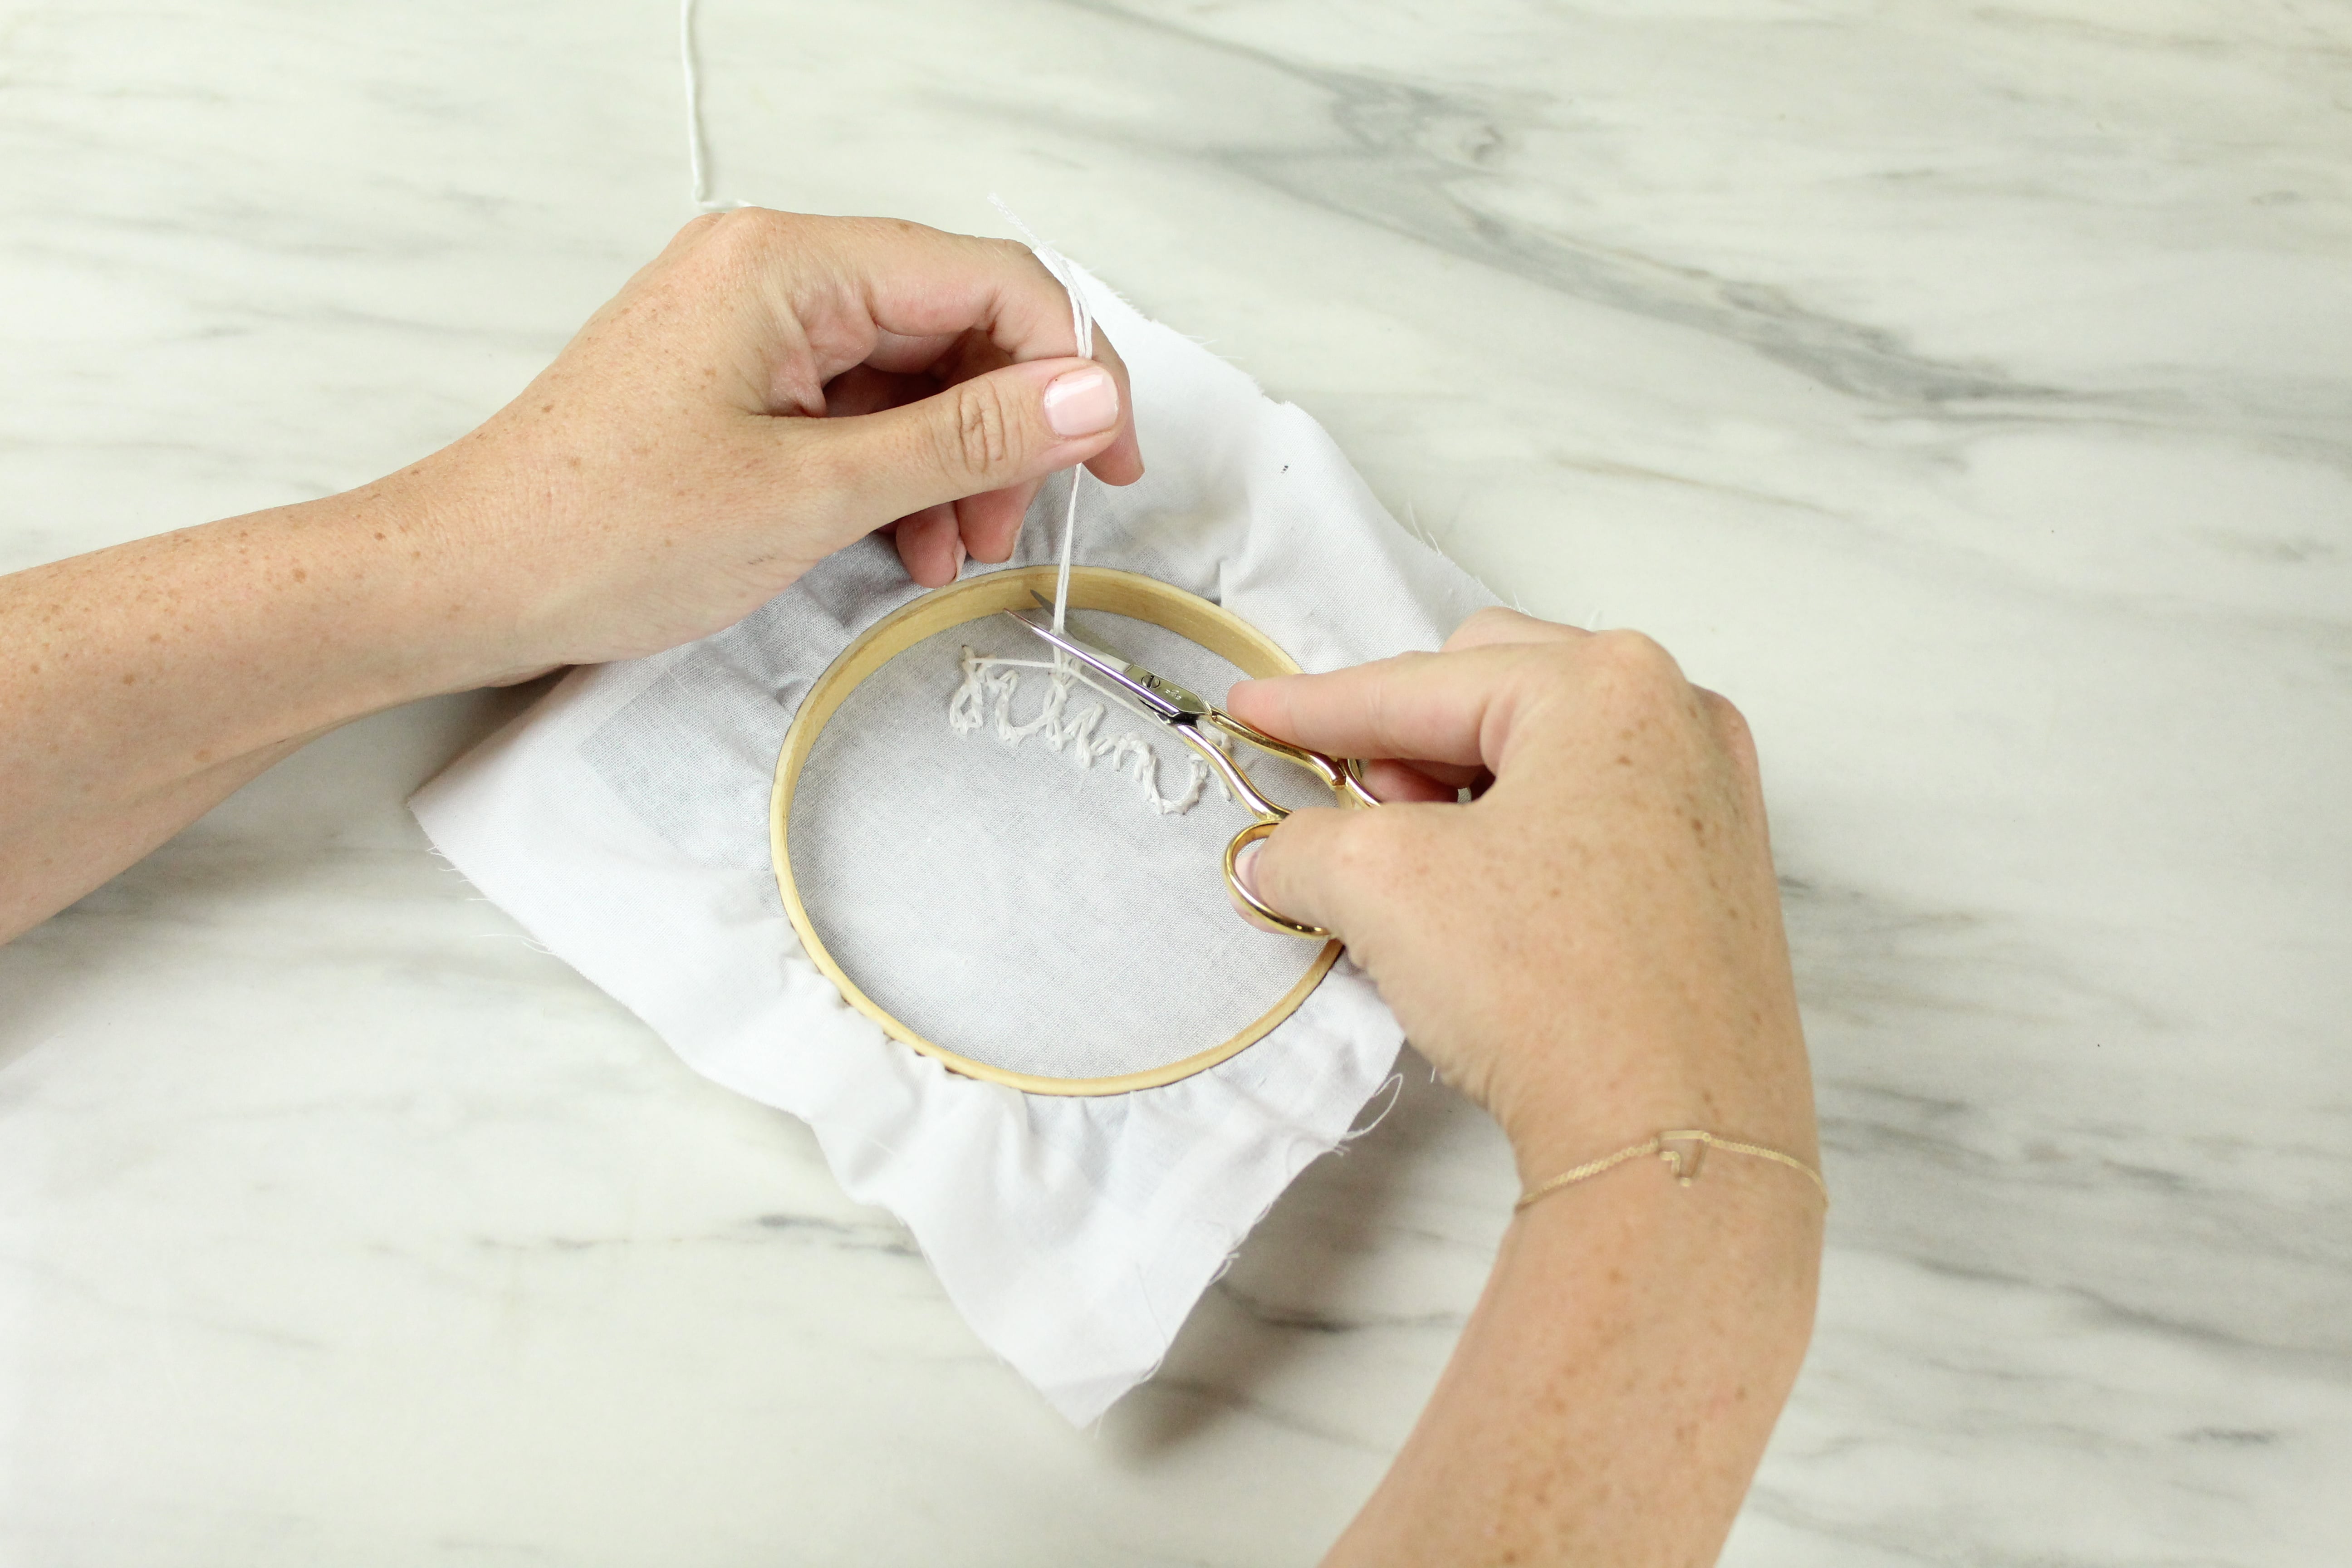
And once you’re done stitching, knot off your floss and trim.
Then trim your excess fabric and you’re done!!
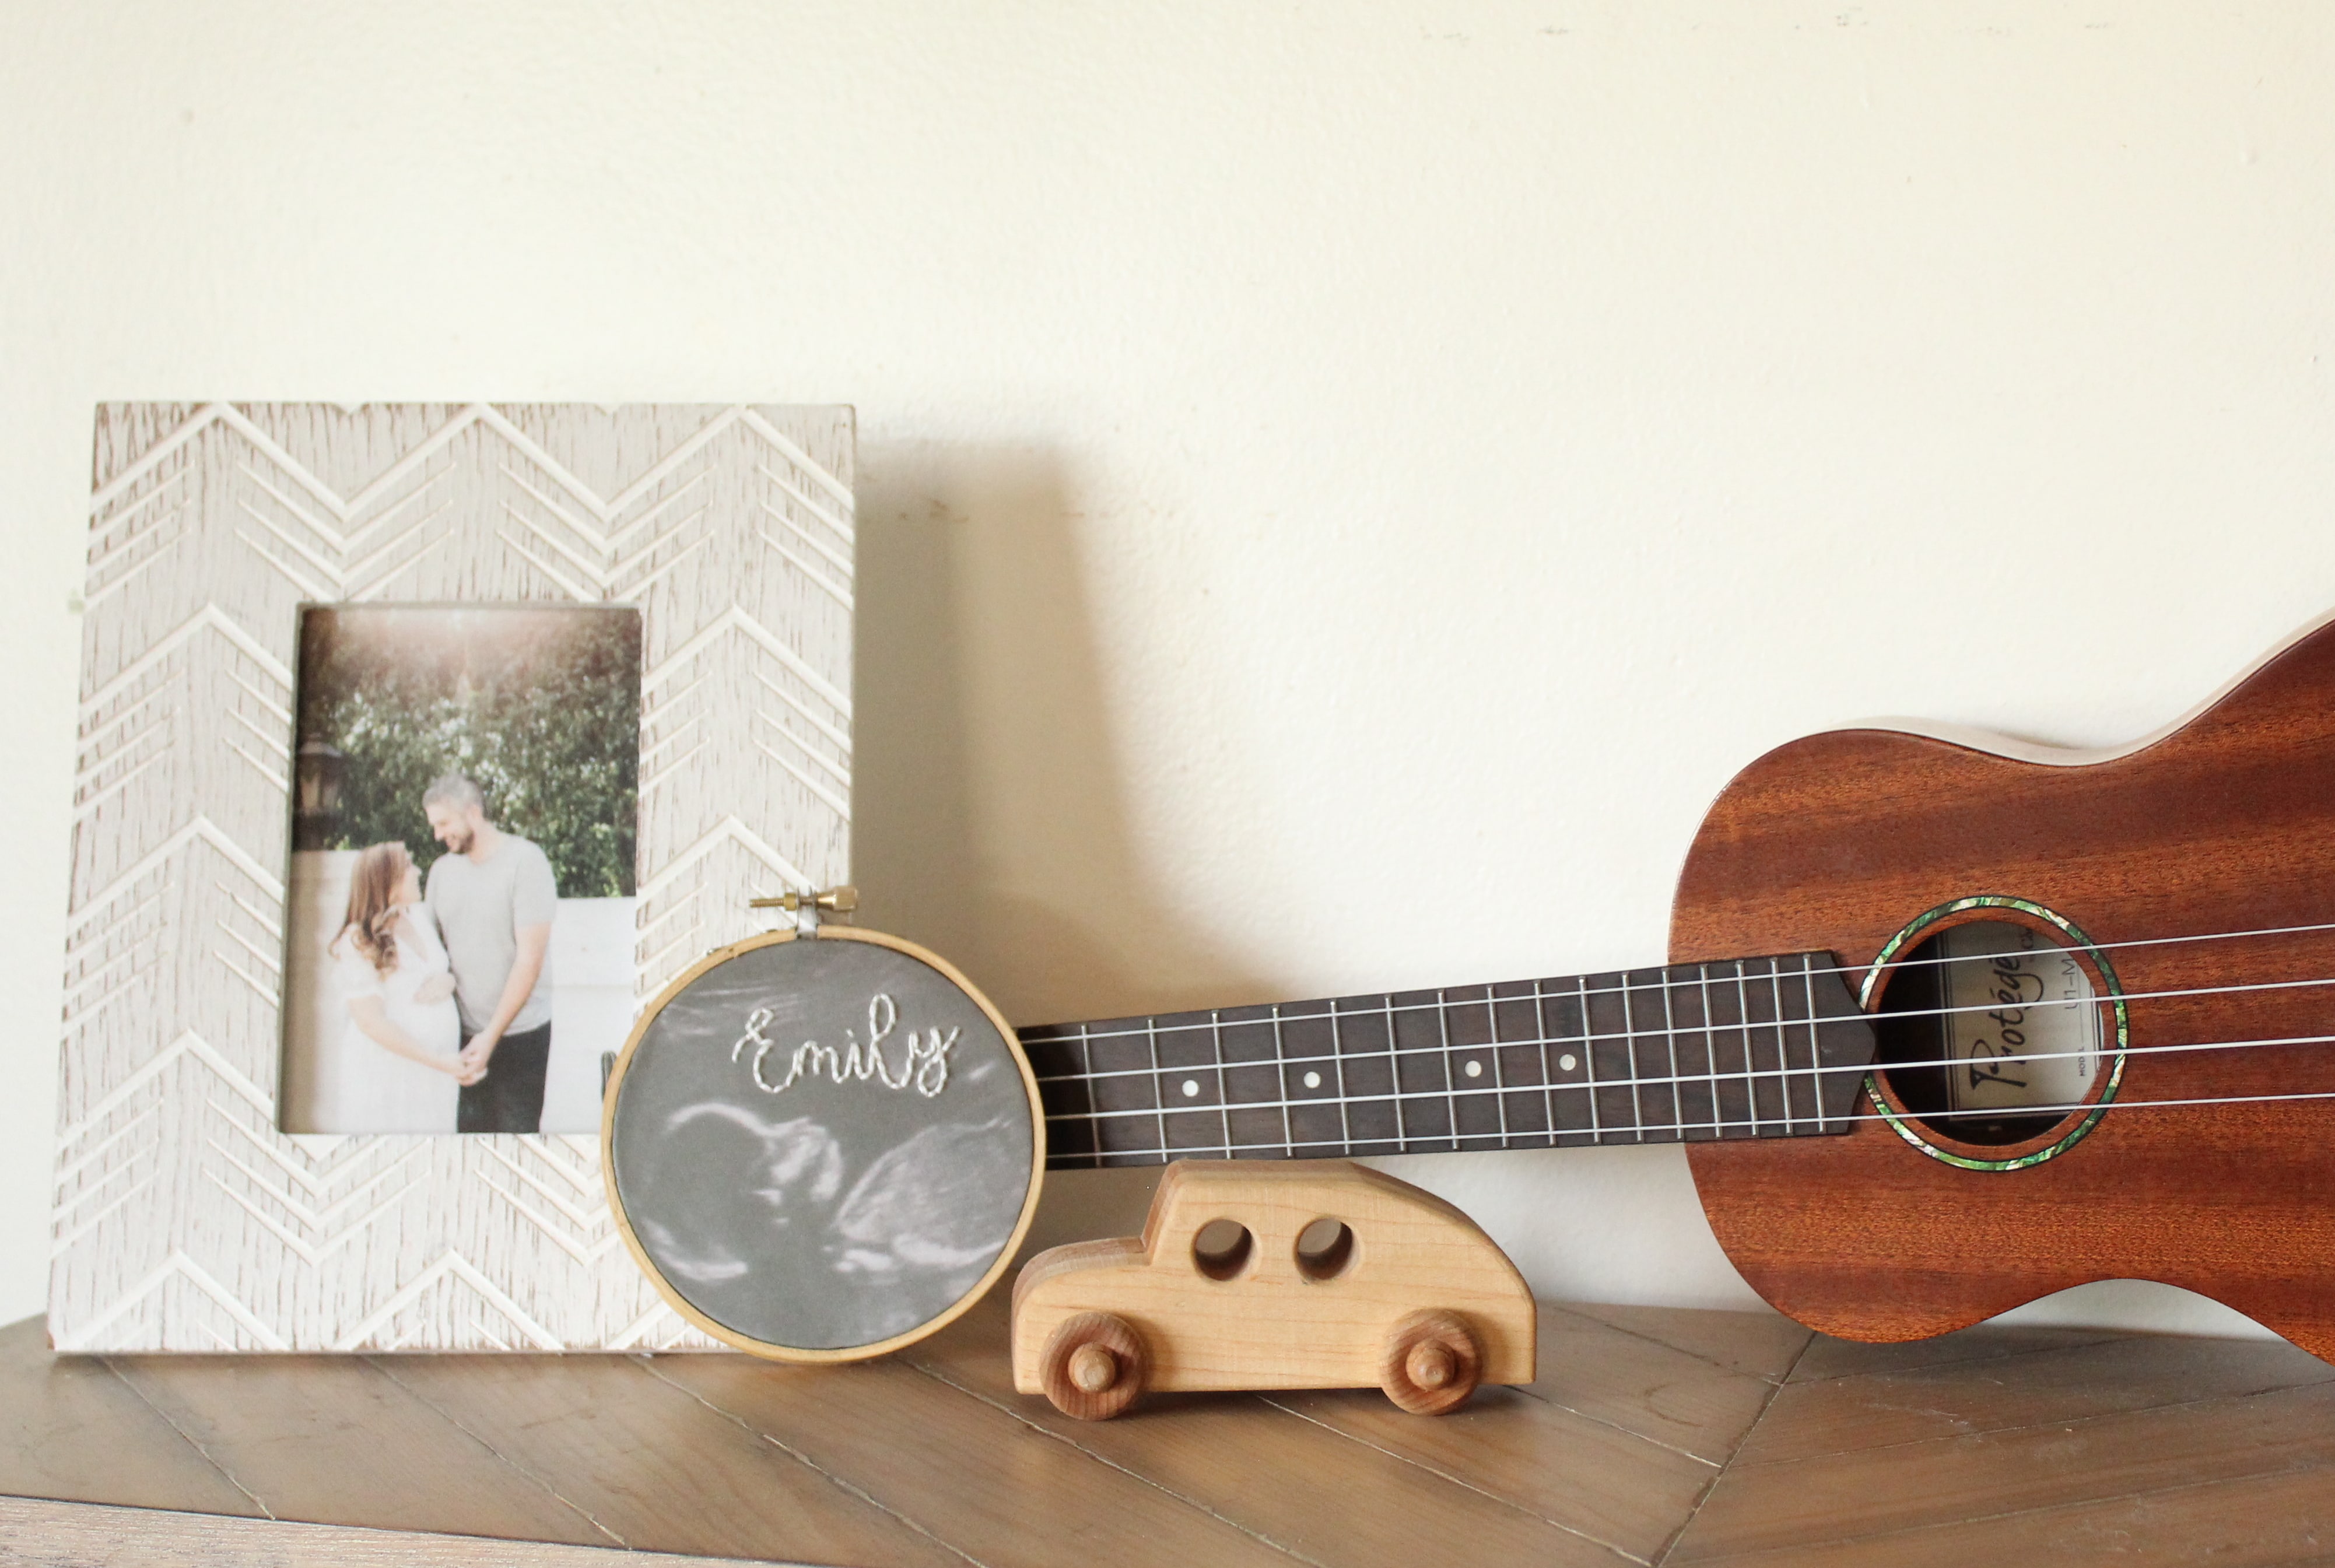
No Baby? No Problem!
This project doesn’t have to be an ultrasound photo, it could be whatever you want! I’ve done them for friends engagement parties using a photo from their engagement, friends who have bought new homes using a photo of their new home, as ornaments for friends using their holiday card photos, the possibilities are endless! It’s such a fun and simple way to make a special photo even more special!


If you create one of our projects, please share a picture with us on Instagram or Twitter using the hashtag #somethingturquoisediy, we regularly reshare our favorites! Your profile will need to be public for us to see it otherwise, you can always DM us!
DIY Tutorial Credits
Photography + DIY Tutorial: Shea O’Quinn of Not So Cli-Shea // Iron On Transfer Sheet: JoAnn (similar) // White Cotton Fabric: Remnant section at JoAnn // Embroidery Hoop: JoAnn // Embroidery Floss: JoAnn // Embroidery Needle: Joann // Fabric Scissors: M&L Fabrics // Iron: HSN (similar) // Printer/Scanner: Courtesy of Canon
Shop The Supplies:
Find the supplies you’ll need for this project from our affiliate links below:


Comments