
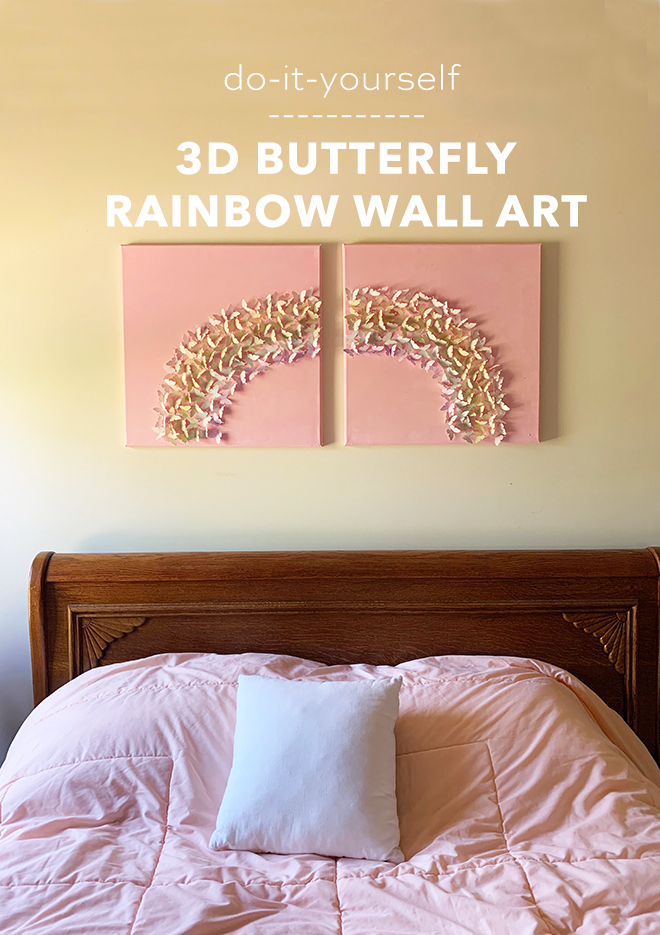
DIY 3D Butterfly Rainbow Art
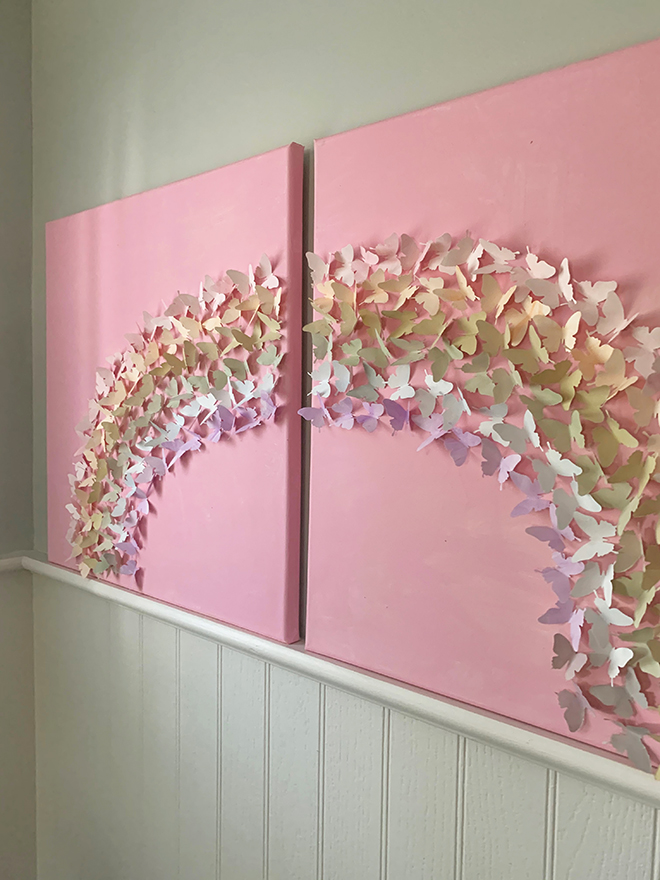
If you have kiddos, chances are you’ve exhausted your project idea list by now. I know I’m out of ideas for my two little boys, so I enlisted the help of my niece to create this fun and simple wall art. I love it because it combines several trendy motifs, rainbows and butterflies. My niece loves that it’s colorful, and I like that it’s rainbow without being primary colored and predictable. The watercolor paints makes the color muted and irregular in the best way. The 3D aspect of this piece makes it special. You can absolutely make this on a single canvas, but I love the trending diptych, a series of two parts that combine to make one piece of art. You could also change this up and make the background your kiddo’s favorite color or leave the canvas white for a more muted look.
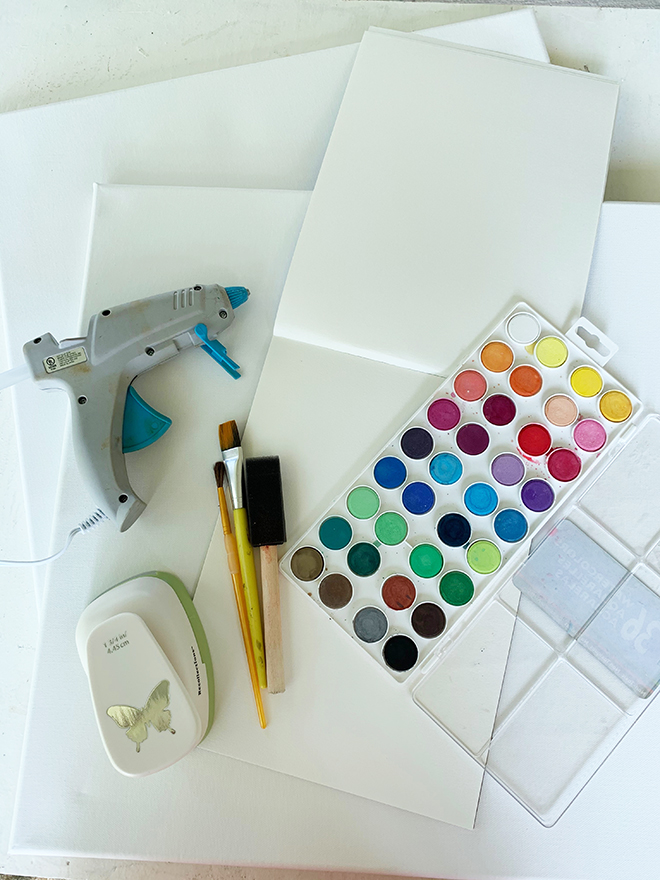
SUPPLIES:
- canvases (I used two 20×20)
- watercolor paper
- watercolor paint set
- paint brushes
- butterfly punch
- glue gun+ glue
- acrylic paint
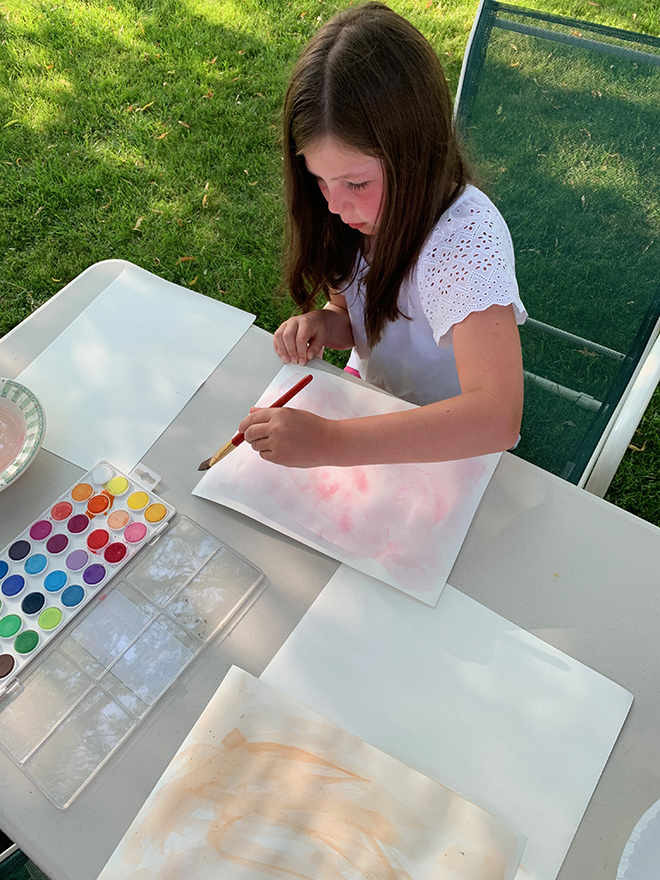
PAINT THE WATERCOLOR PAPER
Paint the front and back of the watercolor paper. I recomend using watercolor paper, it gets less wavy, takes the color better and its easier to punch with smooth, crisp edges. I used two sheets for each color of the rainbow. The color does not have to be perfect or even, in fact, I think it looks better the more varied it is.
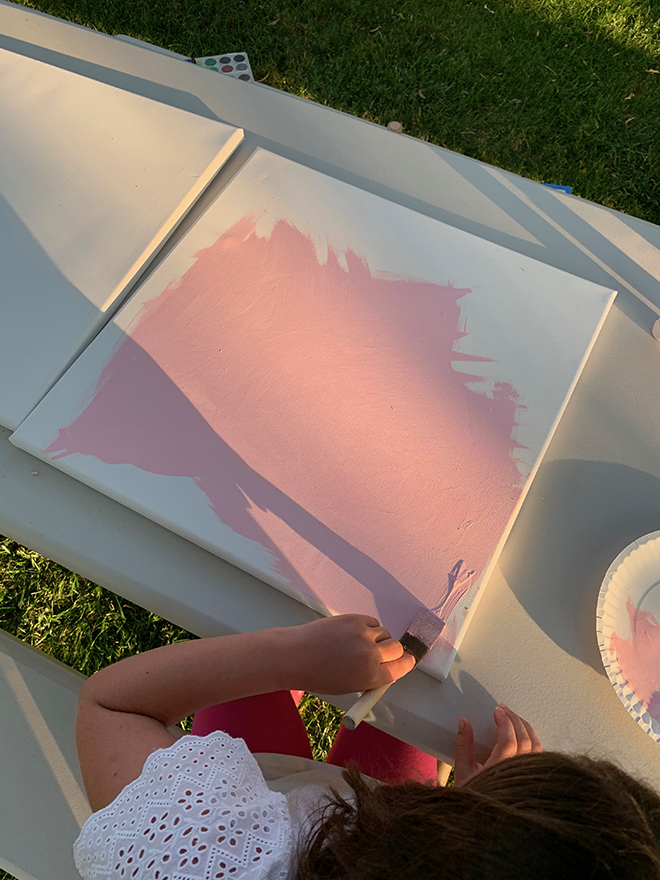
PAINT THE CANVASES
While you are waiting for the watercolor to dry paint your canvases. This step is optional, but as much as I resist, I find most kids love color. My niece opted for a light pink. Don’t forget to paint the edges too!
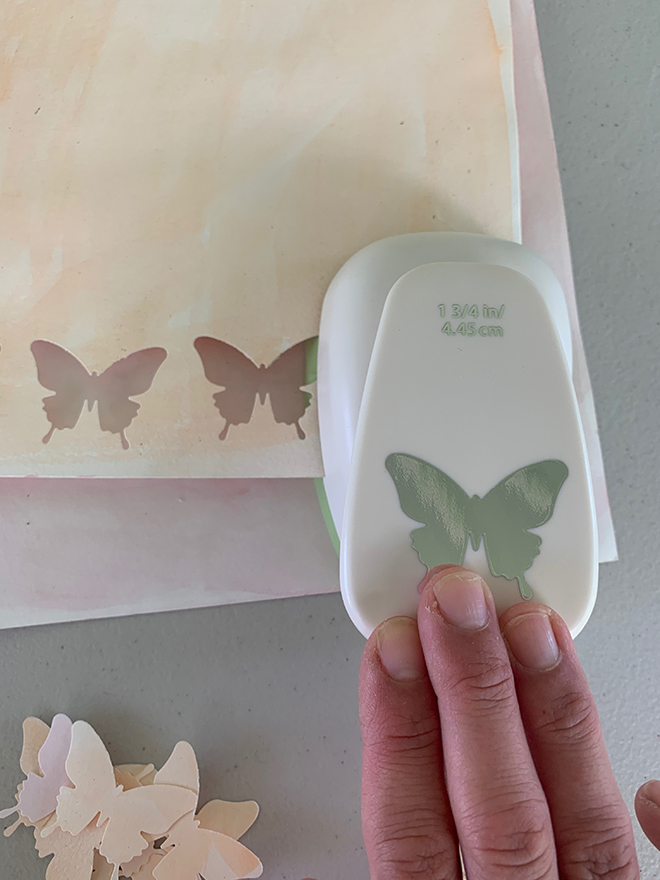
PUNCH THE BUTTERFLIES
Once the watercolor paper is dry, use the punch to cut out the butterflies.
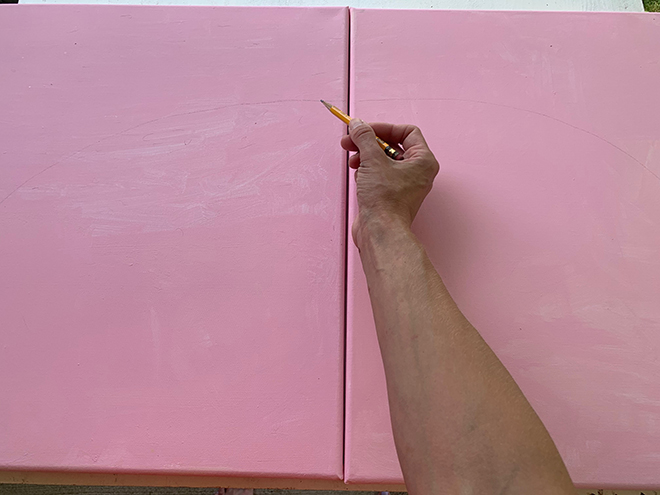
DRAW YOUR RAINBOW
Next draw a light outline of the top color of your rainbow shape. It may be helpful to use a string or to find a large round object to trace.
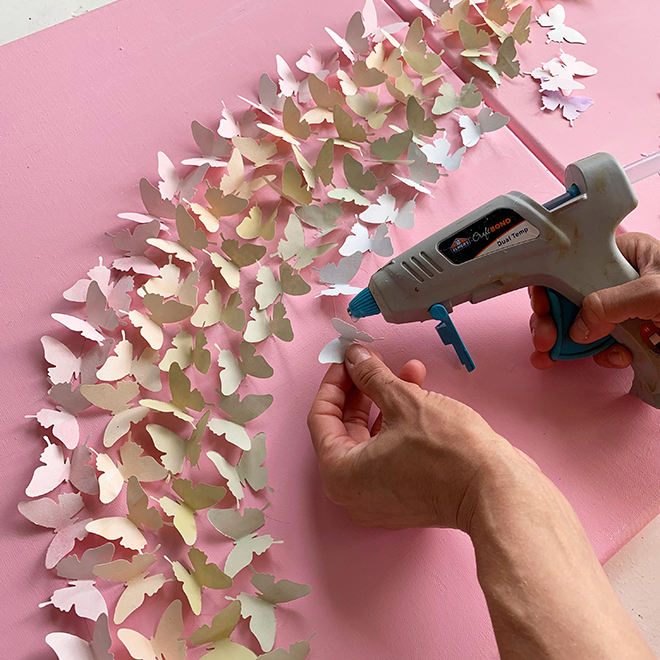
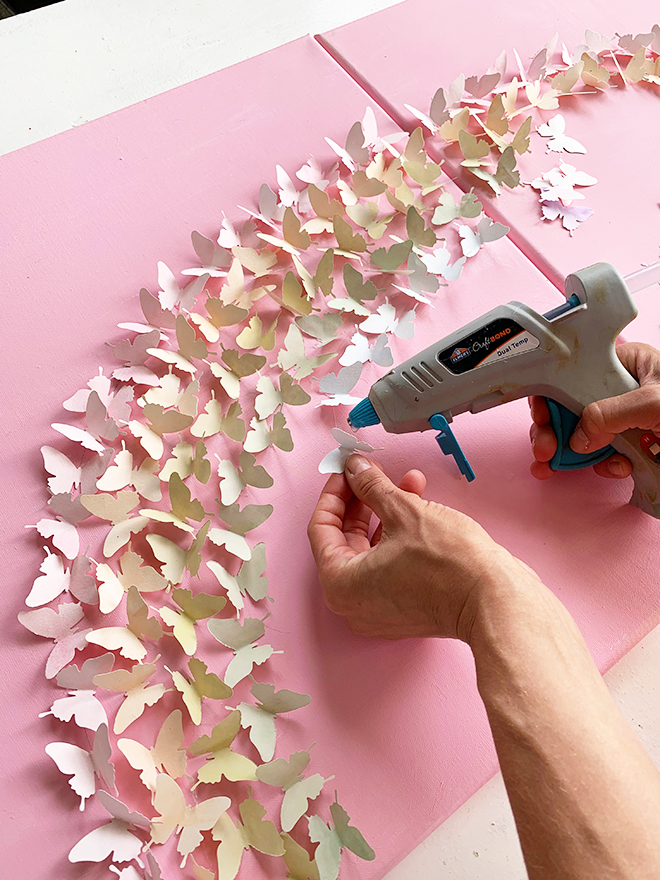
GLUE ON THE BUTTERFLIES
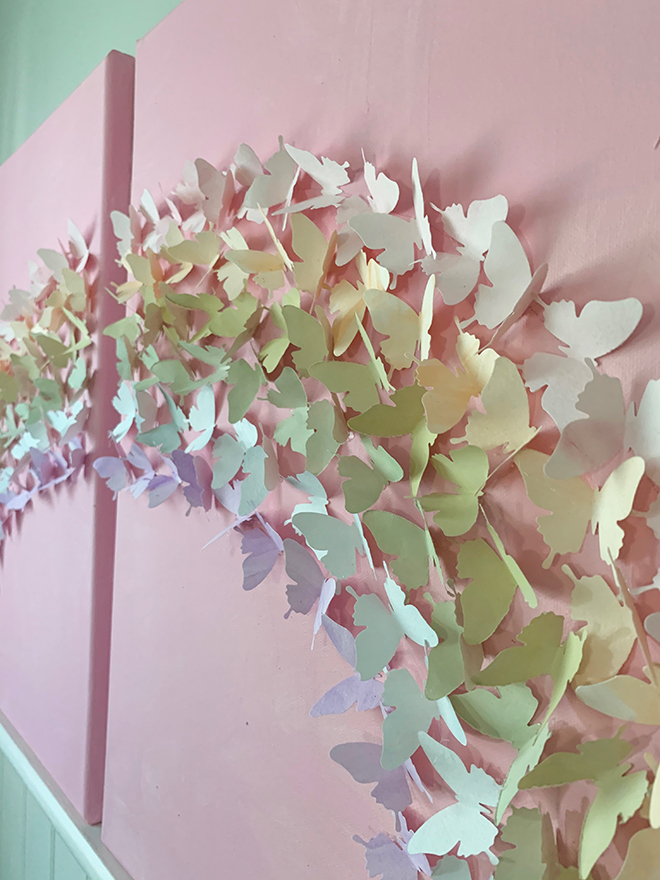
Follow the line you drew and start gluing down the butterflies. Fold each one, and then put a dot of hot glue on the crease. Place them in all directions and keep them fairly close together. Once the first color is glued the entire arch of the rainbow, move on to the second color and so on until all the butterflies are placed in the rainbow. Keep the direction of the butterflies sporadic.
DIY TUTORIAL CREDITS
photography + DIY tutorial: Lauren Koster of Lauren Koster Creative


Comments