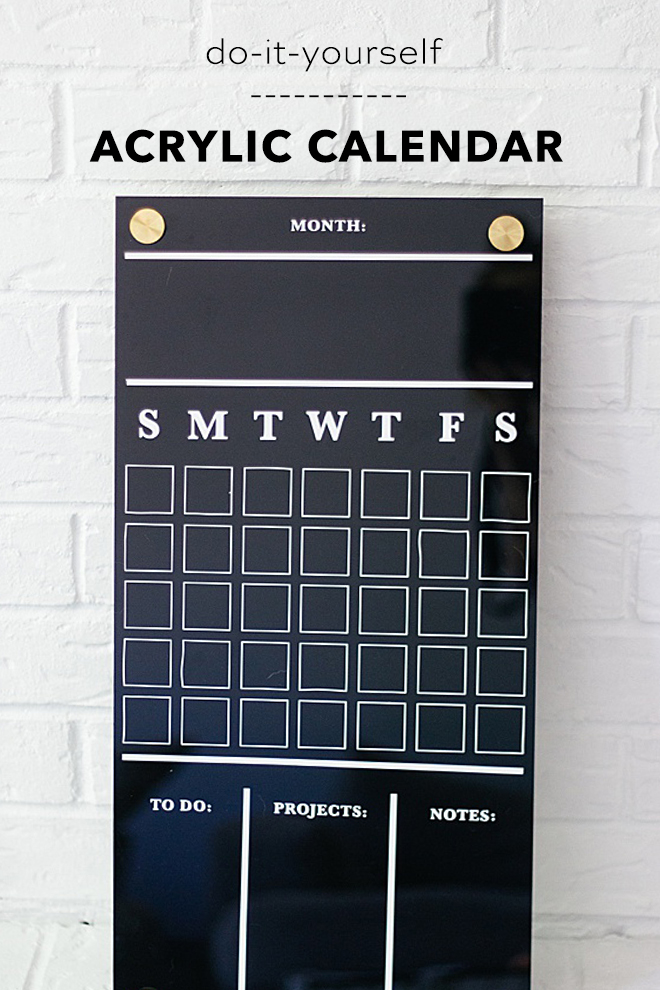

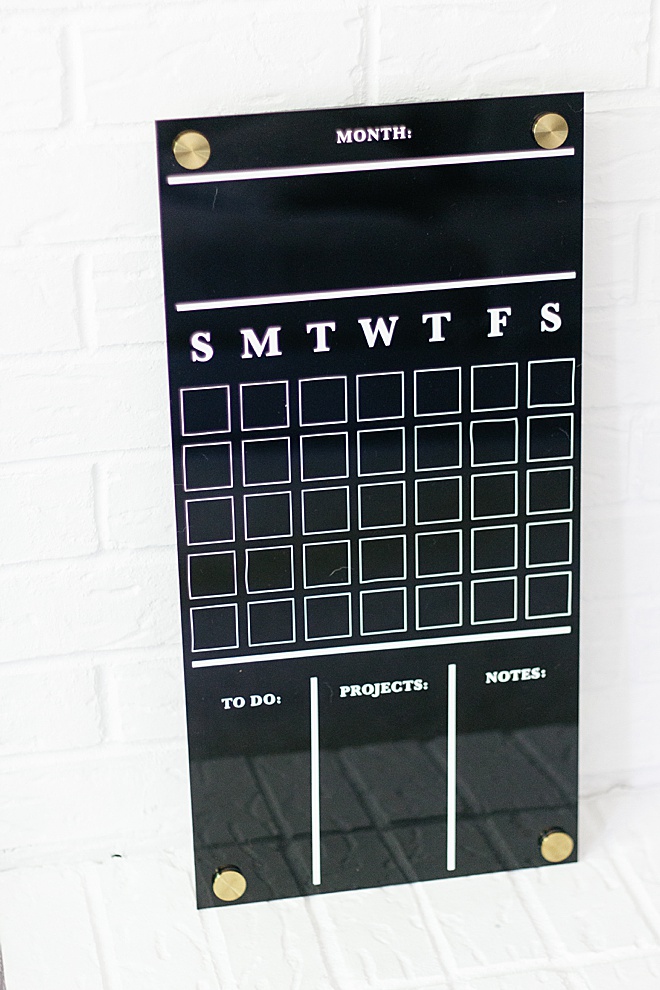
DIY Acrylic Wall Calendar
Hey everyone, Carli Hein from Hein & Dandy! For some reason, I always buy my paper calendars in the summer months halfway through the year. I am getting tired of buying new ones all the time! That gave me the inspiration to have a forever calendar on my wall. Especially exciting now that we are able to start planning and getting things up on the calendar! We made this tutorial super easy with a free .png file to create with your Cricut. Let’s get crafting!
SUPPLIES:
- Acrylic Panel
- Standoff Hardware
- Cricut
- Cricut Mat
- Vinyl
- Transfer Tape
- Cricut Tools
- Chalk Marker
- Our FREE Cricut Cut File at the end of the post
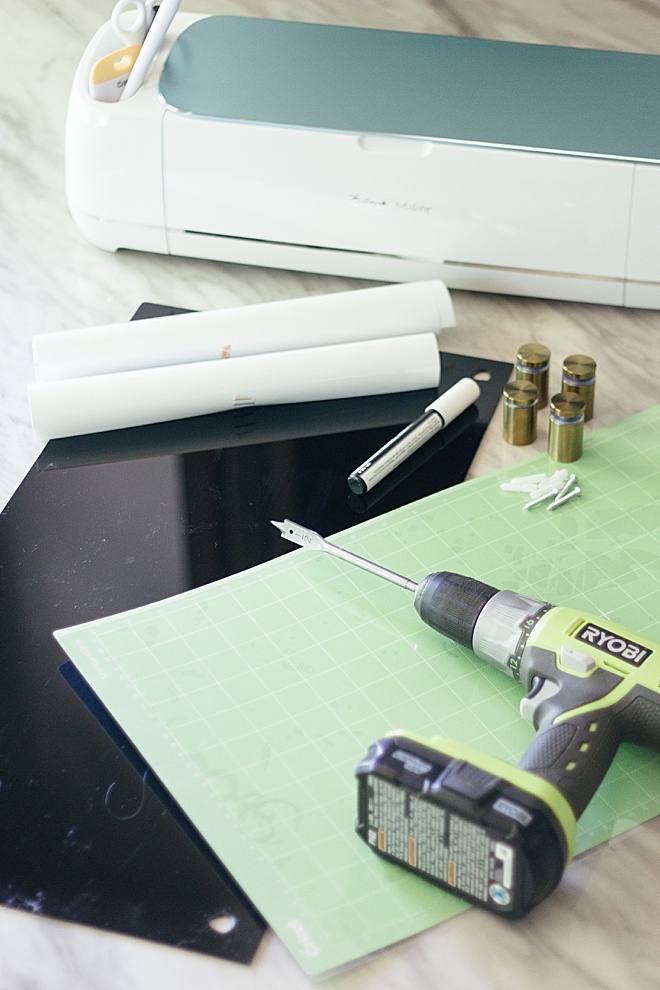
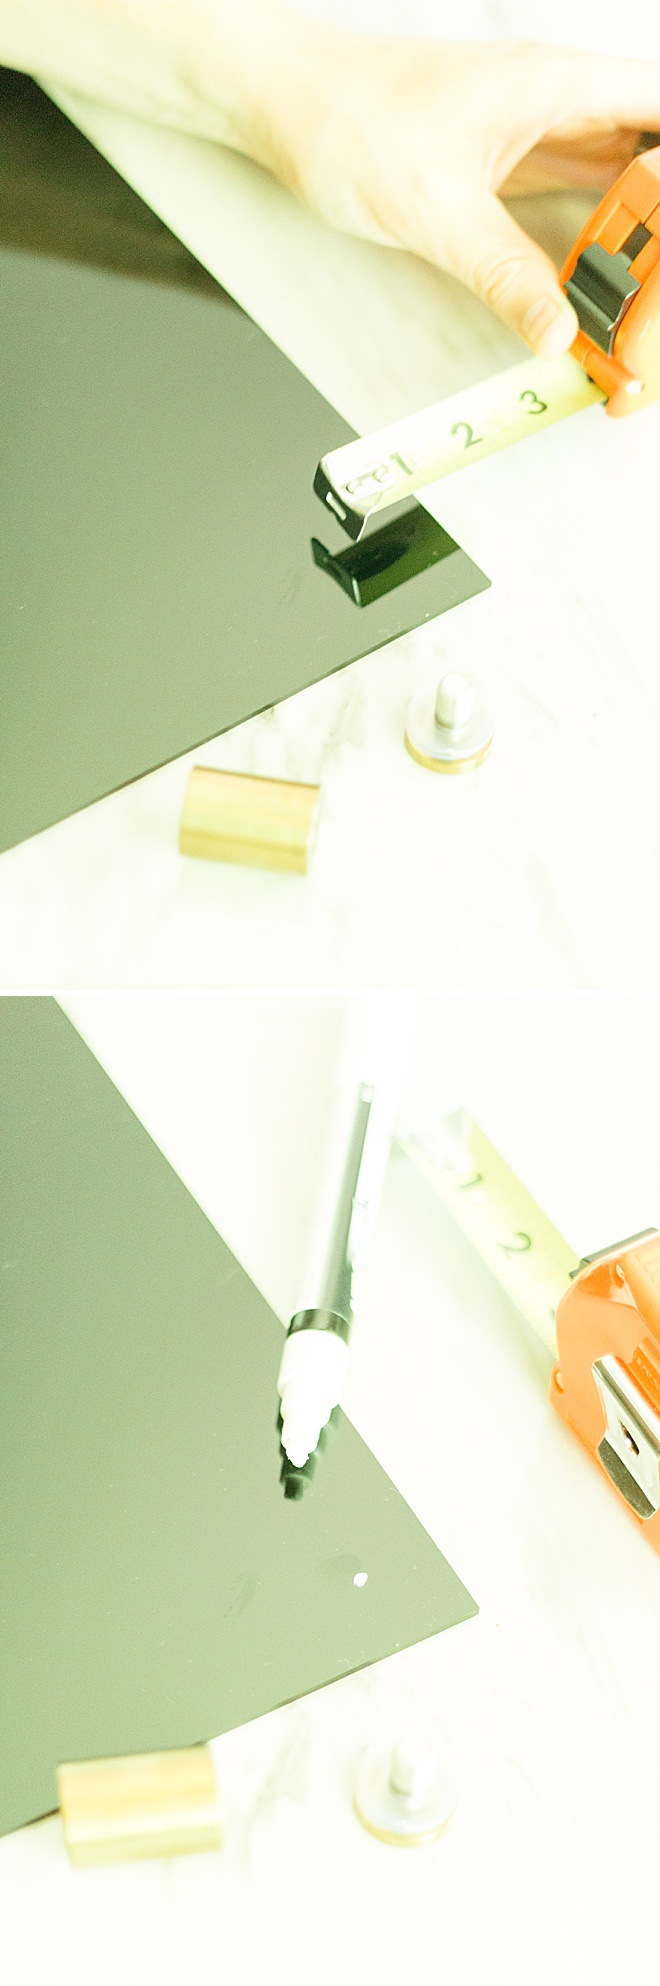
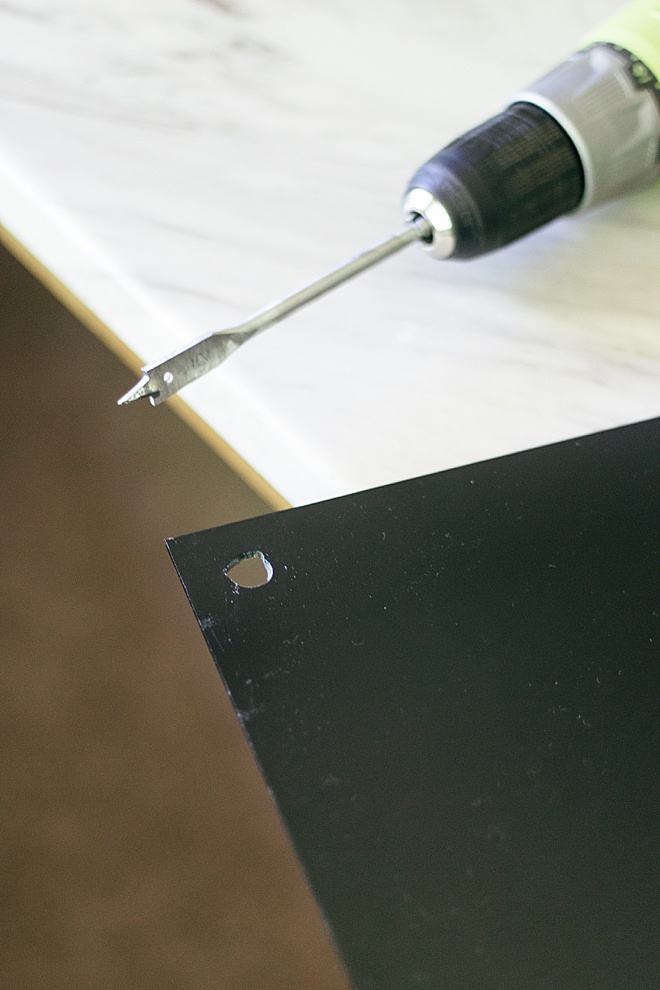
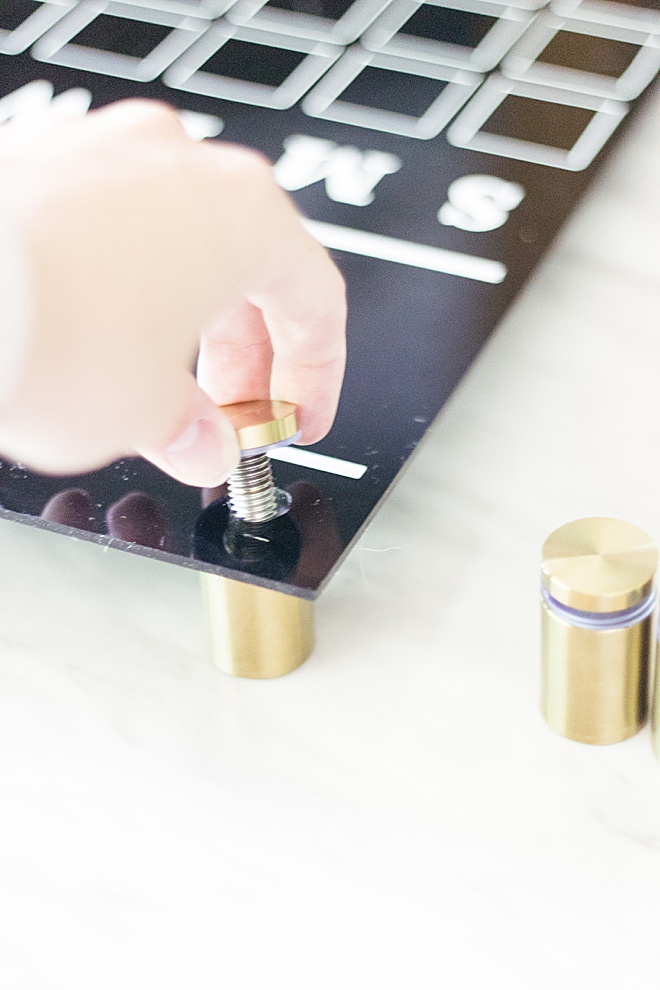
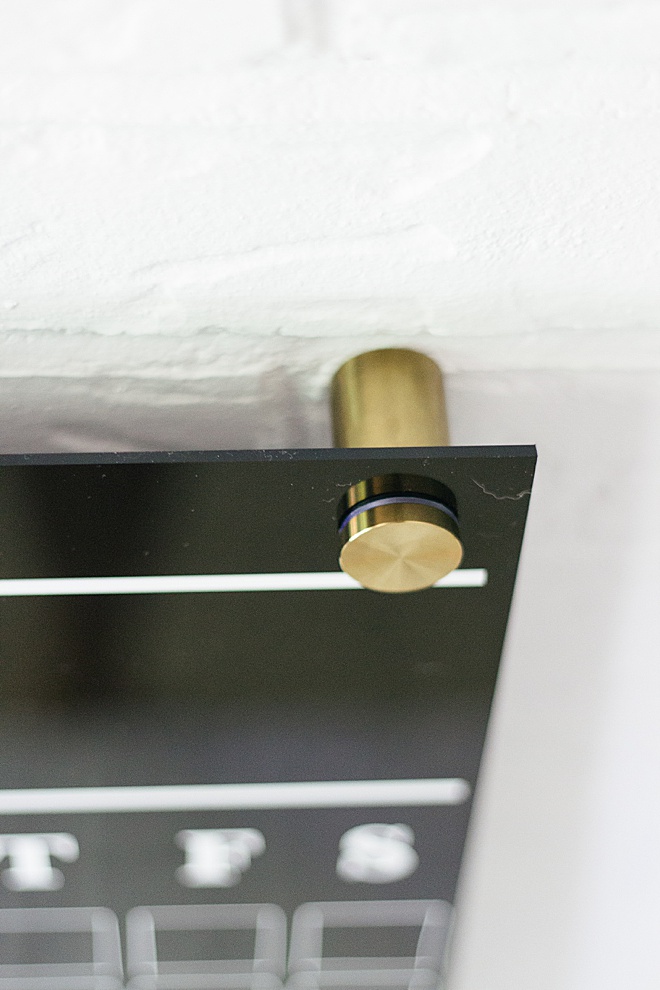
Drill
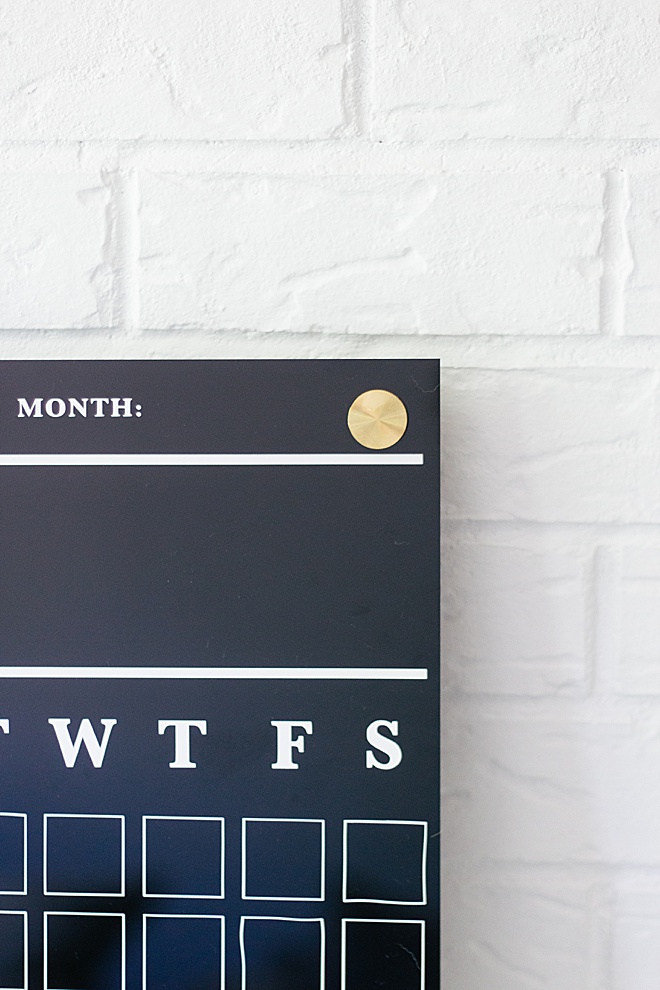
Use a drill bit large enough to get the standoff hardware screw through. Make a mark one and a half inches on each side and make a little mark with your chalk marker and drill the hole.
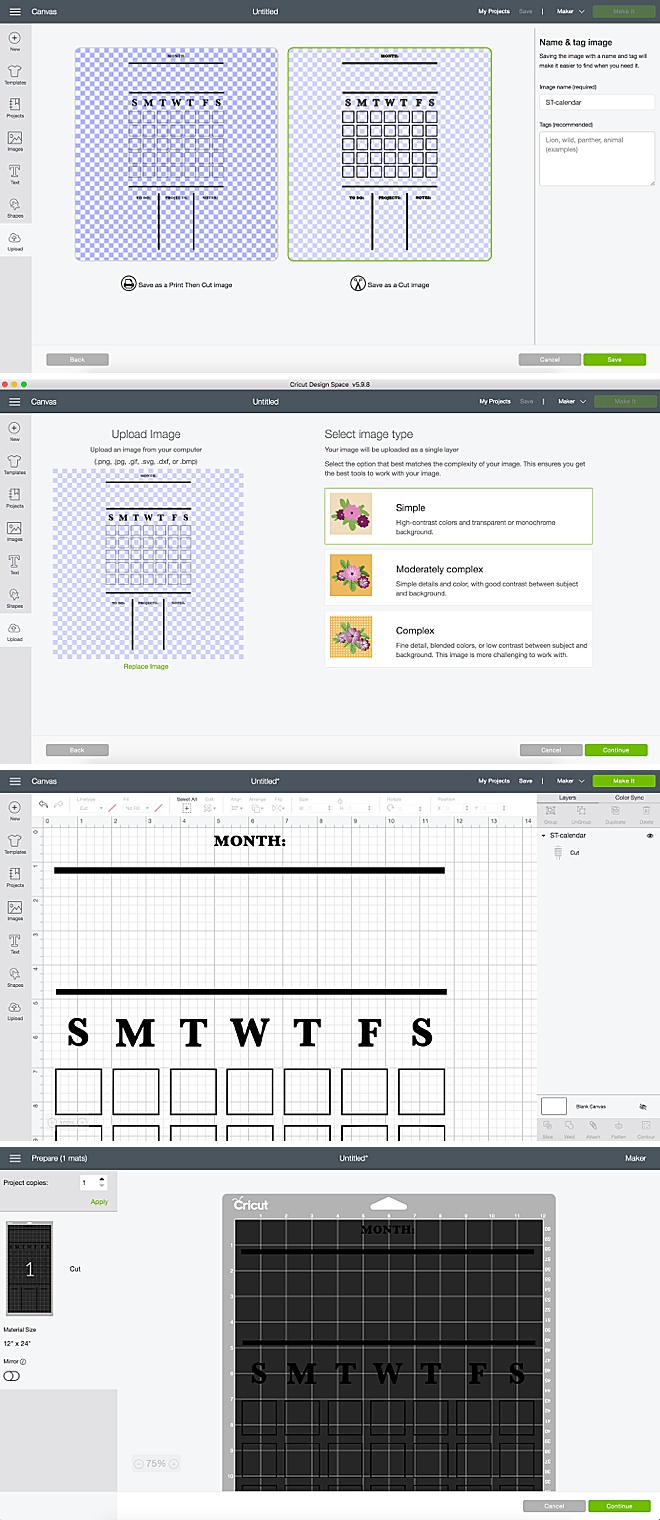
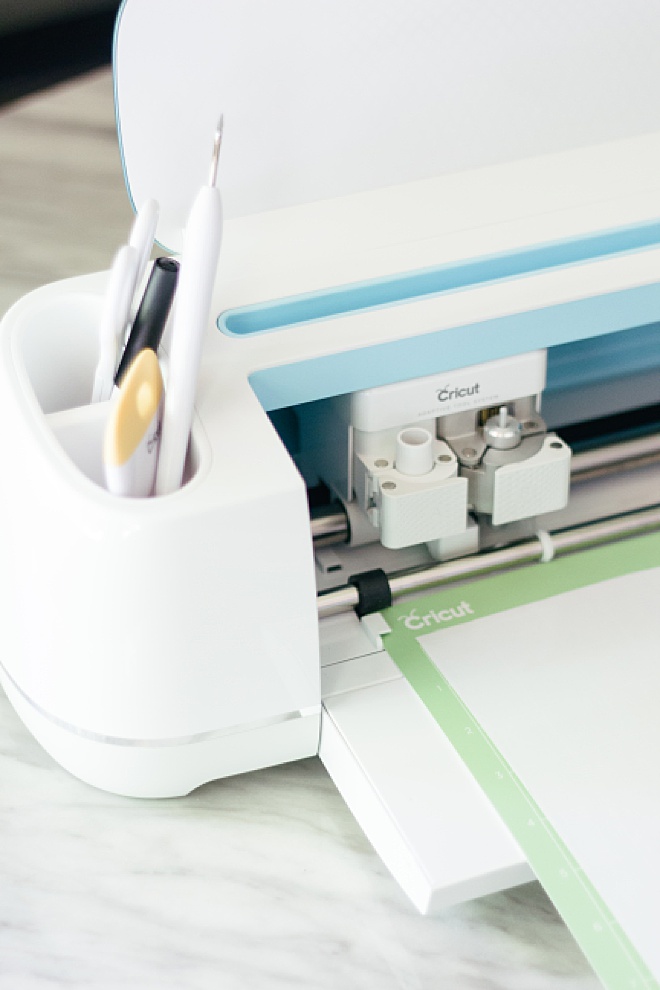
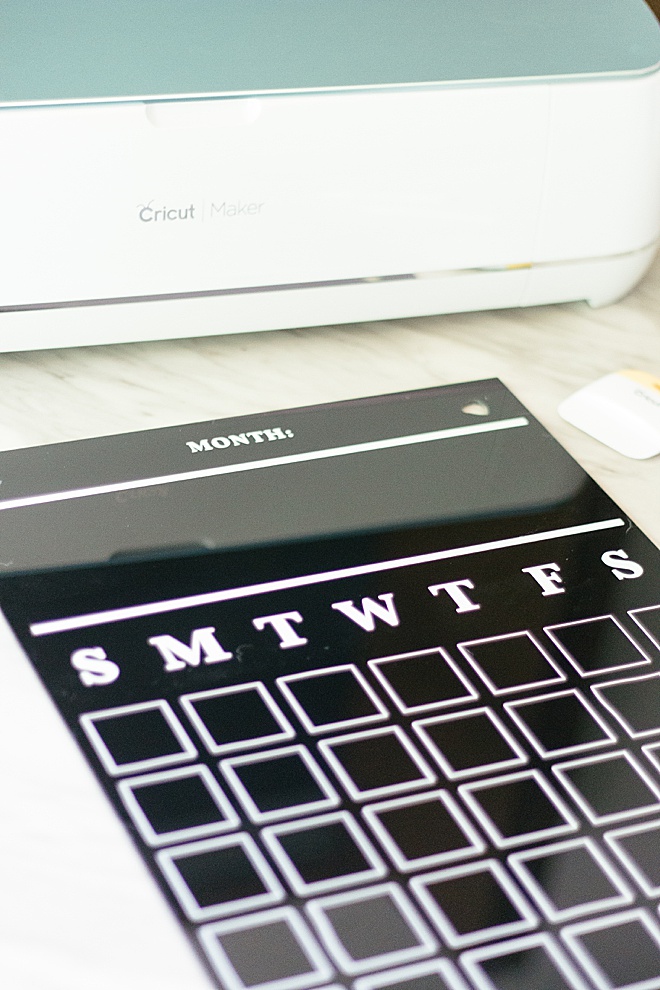
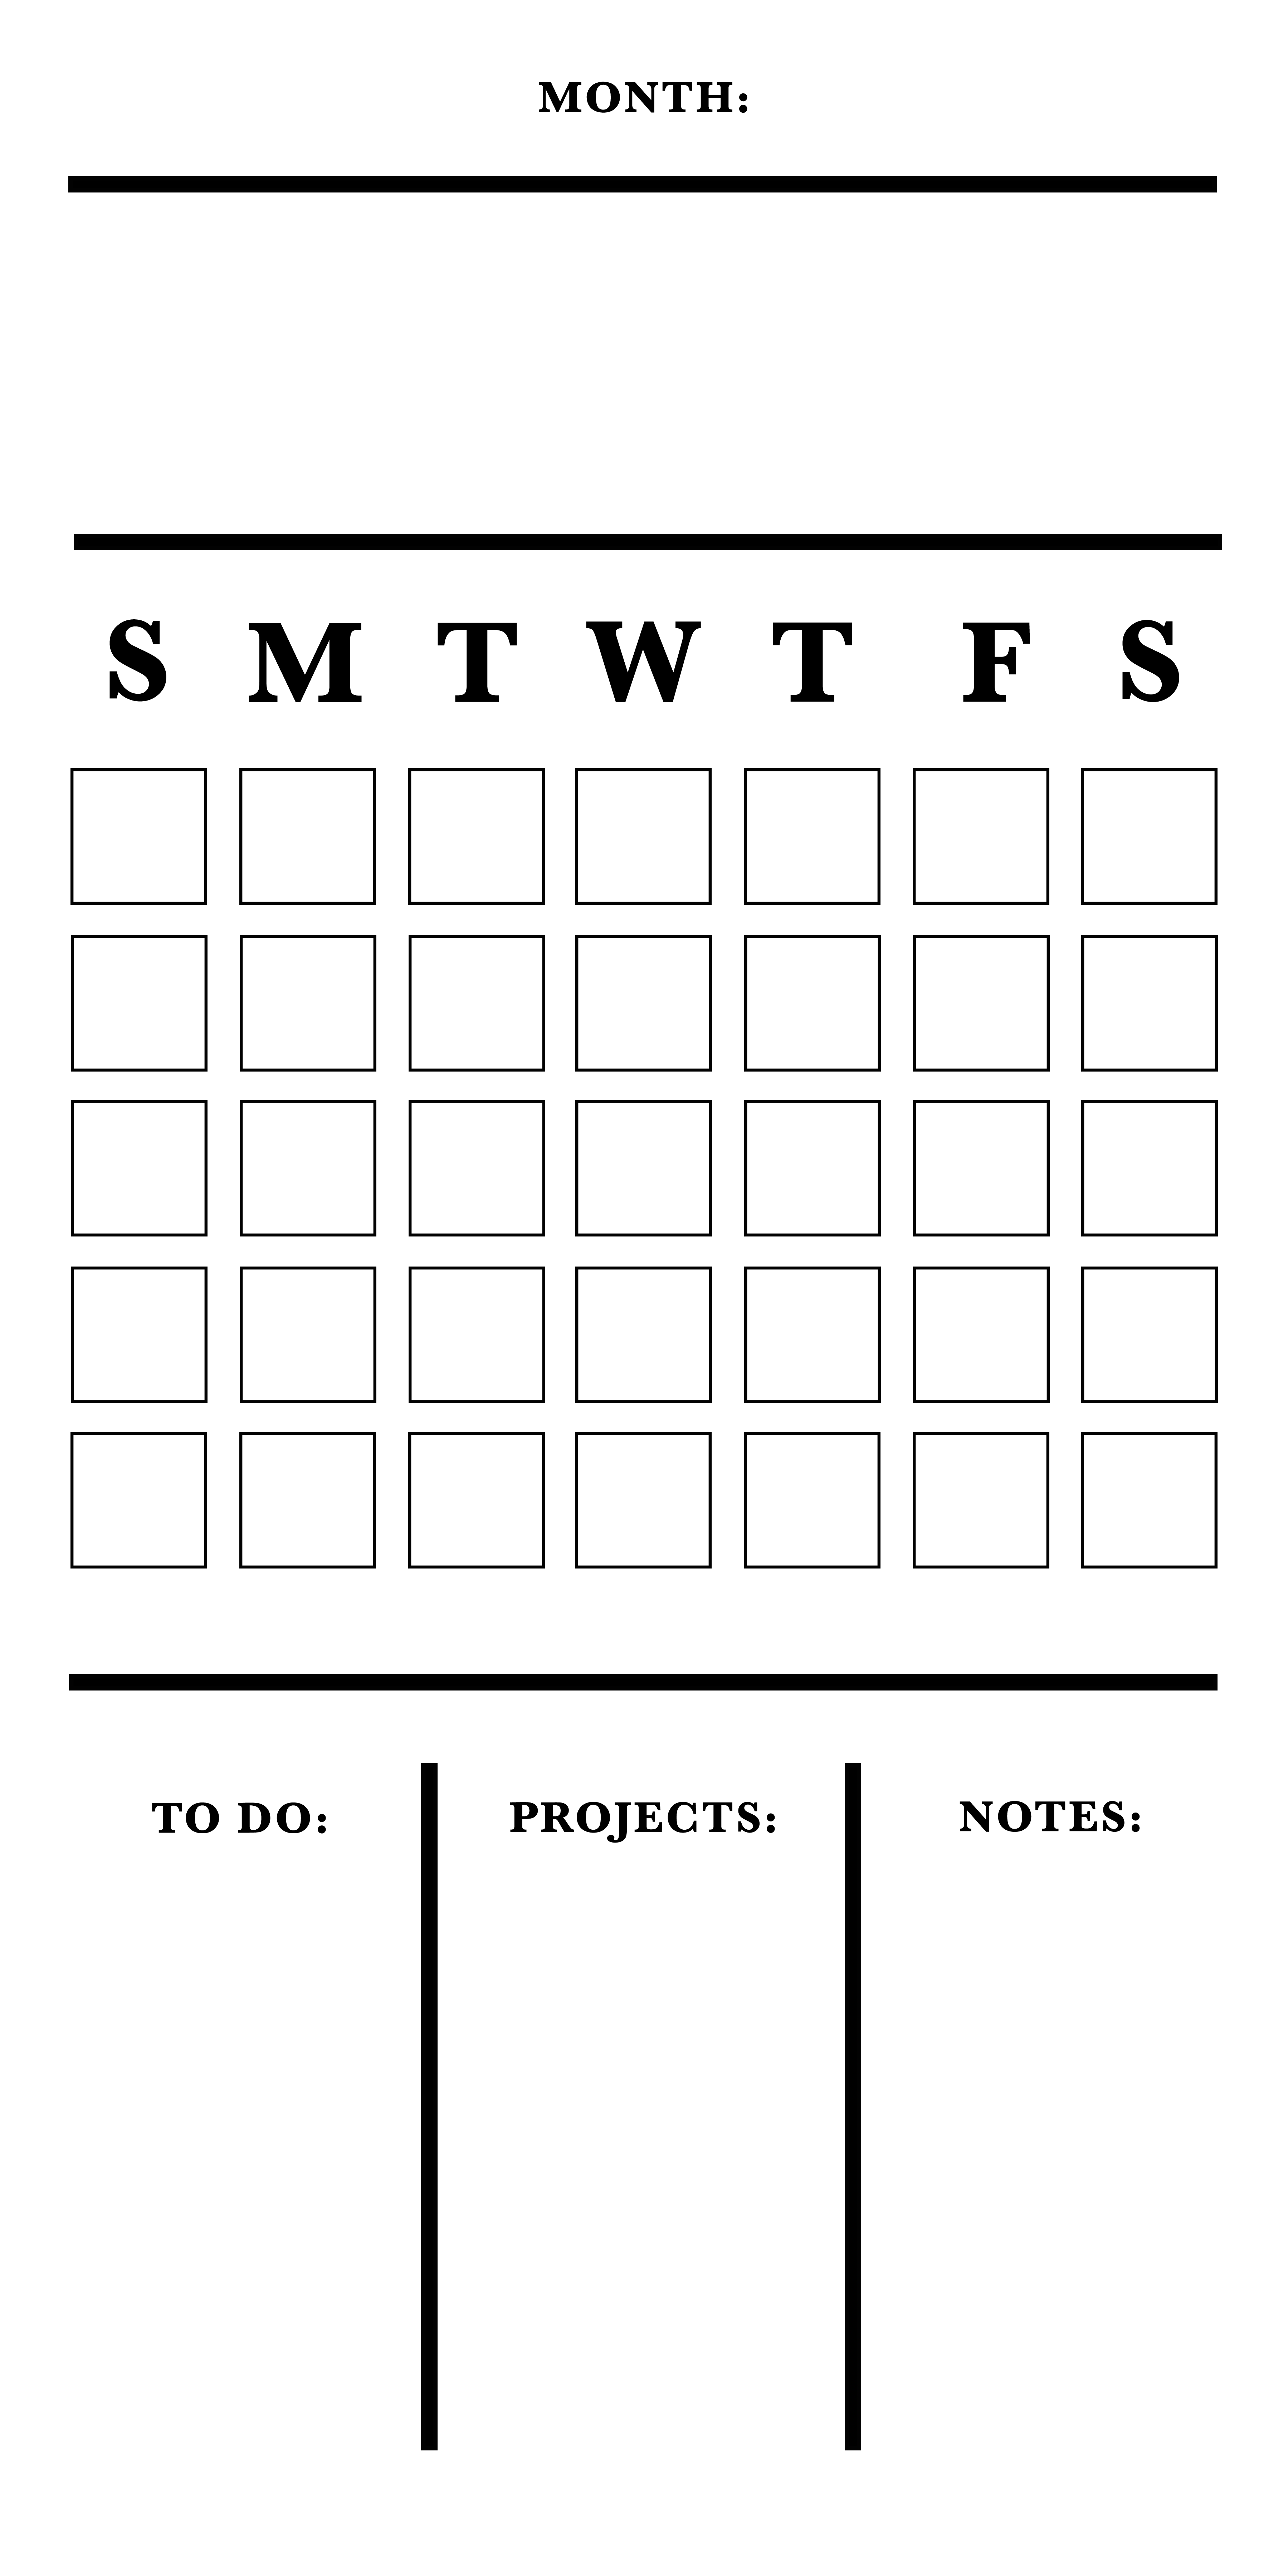
Cut with Cricut
Download the FREE Cricut cut file at the end of this post. Add it to your design space and save it as a cut file and let your Cricut do the hard work.
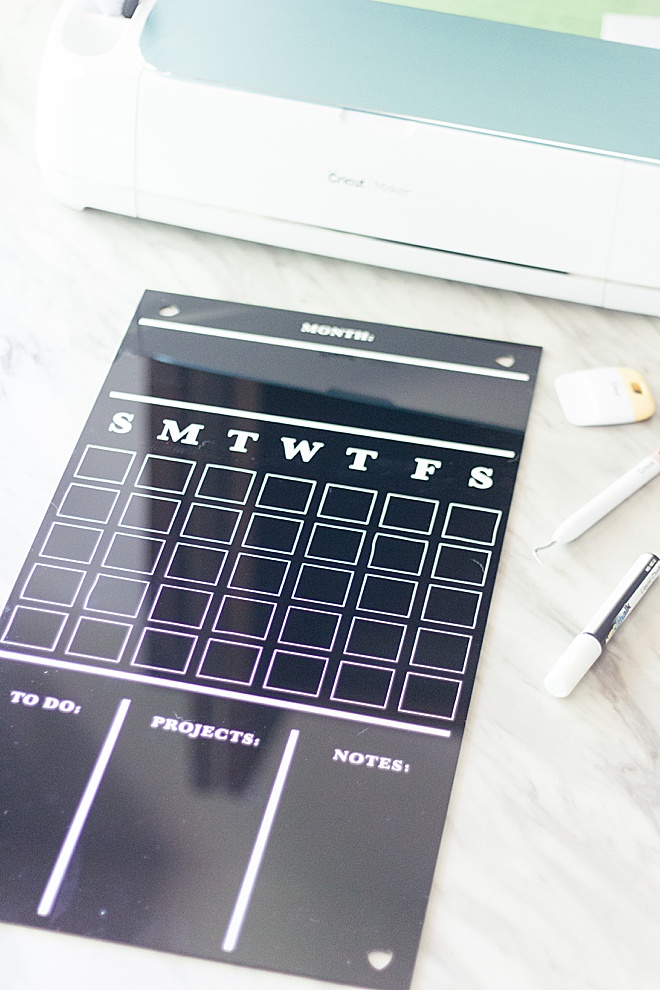
Transfer
Weed the design and be extra careful around the small date boxes, they tear easily.
Once the design is weeded and only the calendar is left on the sheet, put the transfer tape over the design and smooth out all the bubbles.
Peel back the transfer tape so the entire design is picked up. Align the design over the acrylic sheet and lay down the design.


Hardware
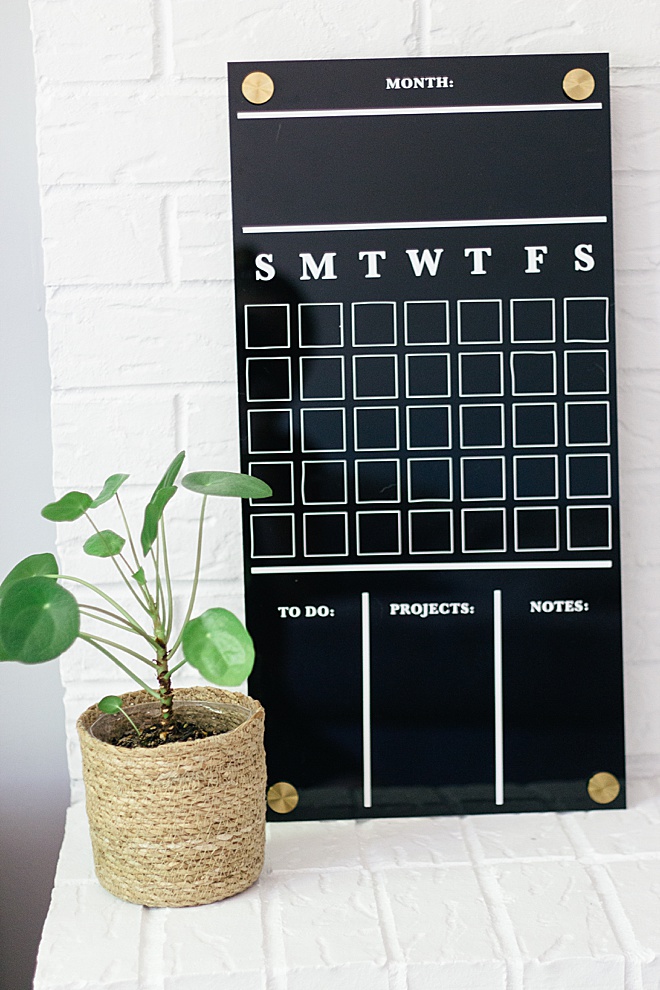
Hang
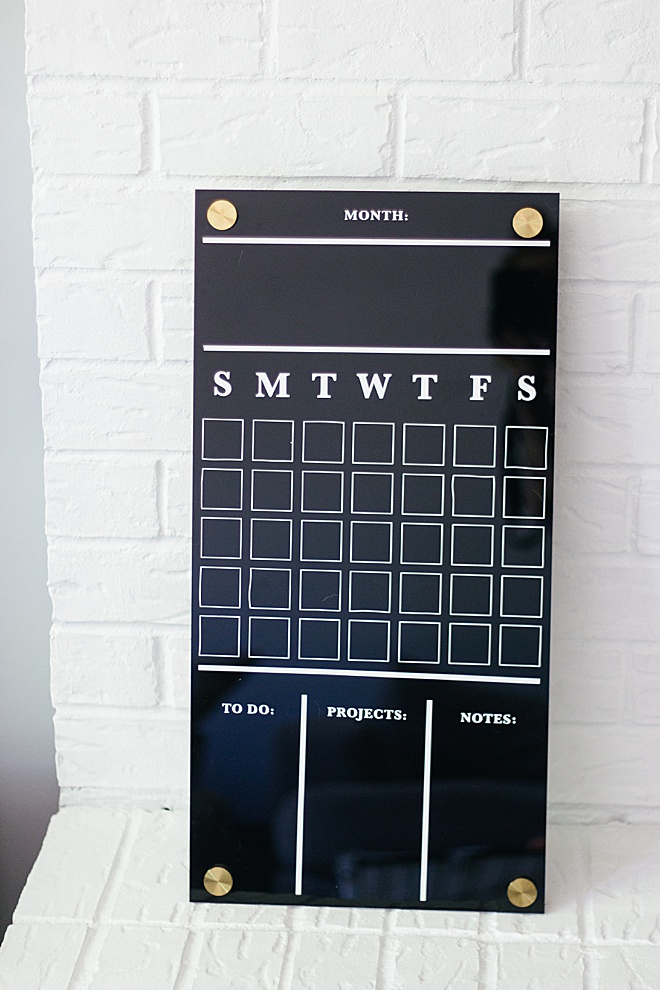
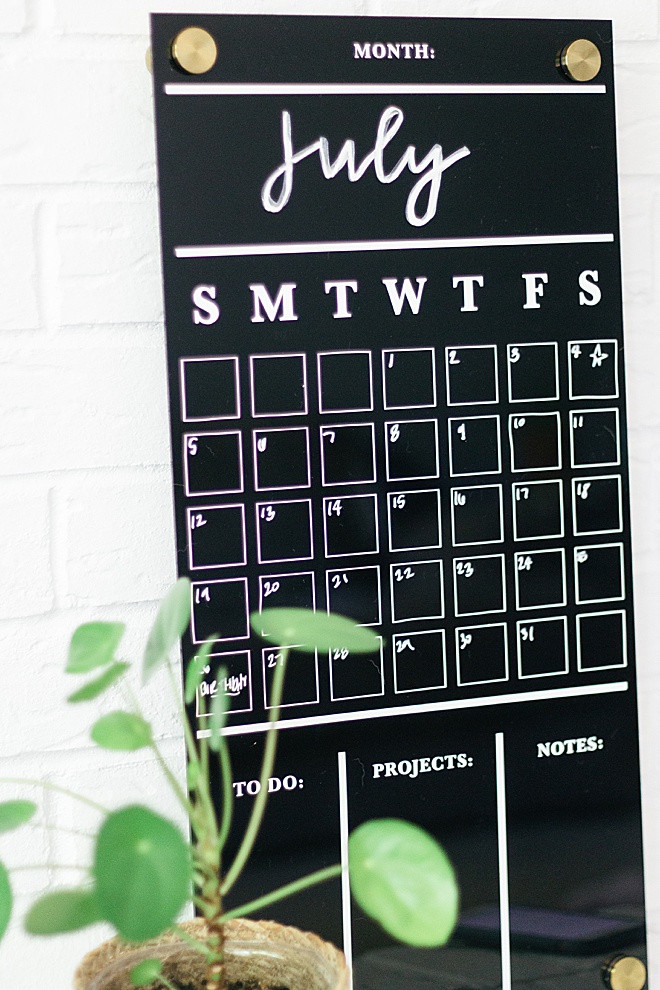
Start Planning


Hein & Dandy is a blog founded on crafts and creative writing, inspired by adventure and wellness. Make sure to check out our website for new projects and inspiration!
As with all our DIY tutorials, if you create one of our projects please send us a picture – We Love Seeing Your Creativity! If you use Instagram or Twitter please use the hashtag #SomethingTurquoiseDIY and it will show up on our Get Social page. Happy Crafting!
DIY Tutorial Credits
Photography + DIY Tutorial: Carli Hein of Hein & Dandy // Standoff Hardware: Amazon // Acrylic Panel: Amazon // Cricut Mat: Amazon // Cricut: Amazon // Vinyl: Amazon
Shop The Supplies:
Find the supplies you’ll need for this project from our affiliate links below:


Comments