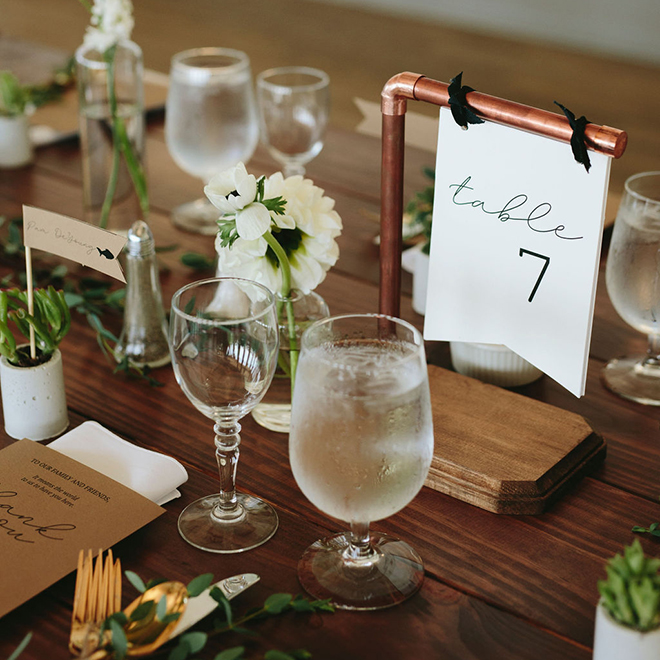

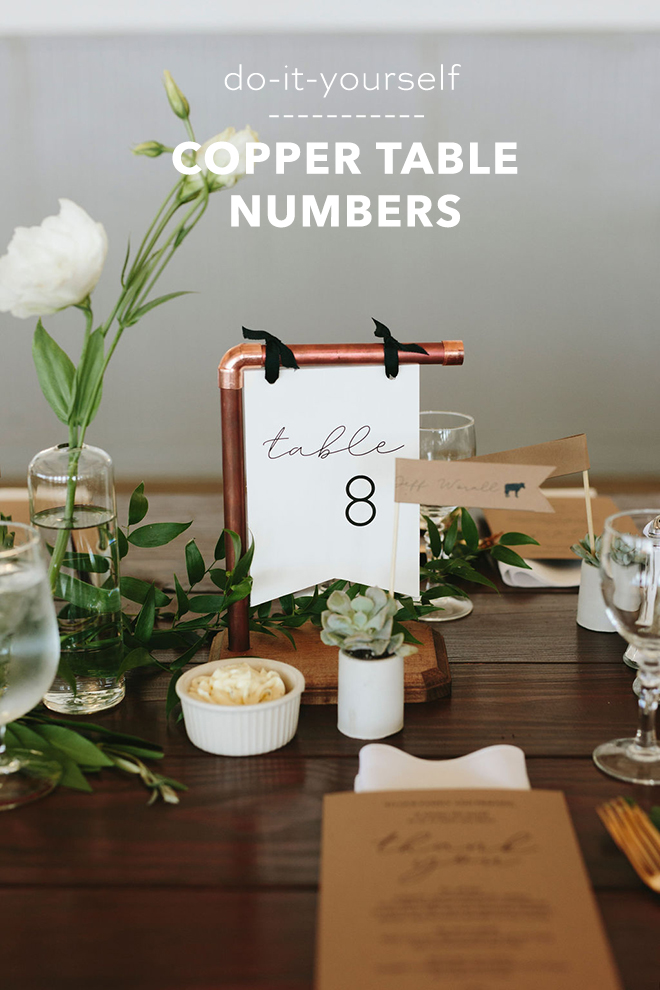
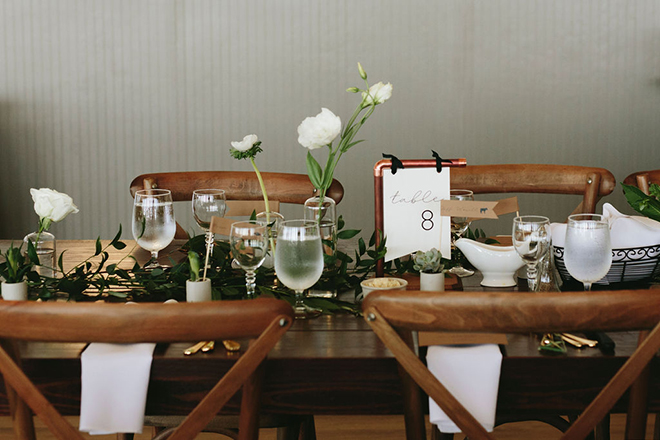
DIY Industrial Copper Table Numbers
As a wedding designer I LOVE table numbers. They are such a great place to bring in personality and a special detail. I think it’s such a missed opportunity when numbers are printed off and placed into a frame. I created this set of table numbers for a couple who’s wedding was a perfect mix of laidback and polished, industrial and garden. The design is simple but brings some flair and the touch of copper is perfection. Scroll to see the step by step.
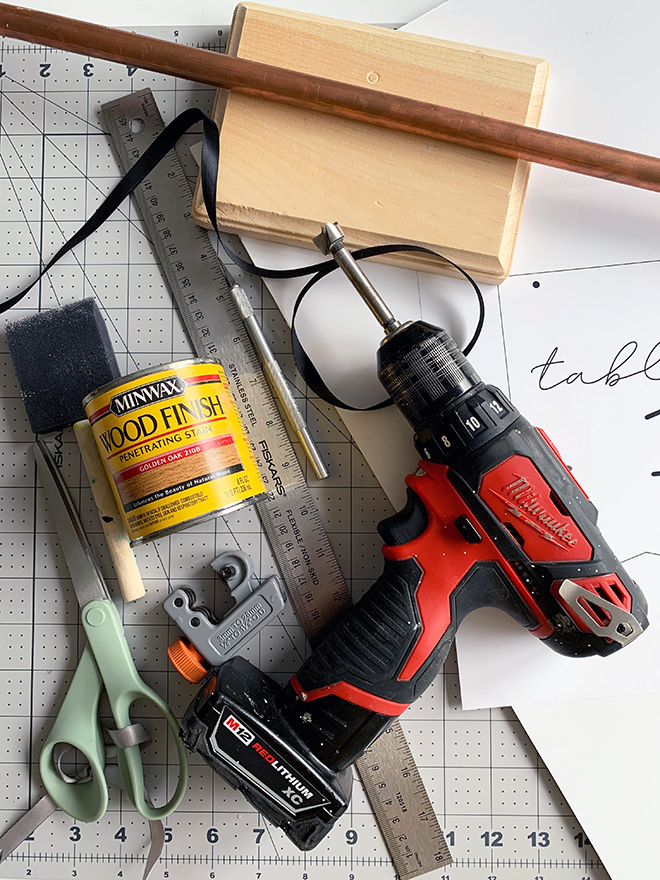
SUPPLIES:
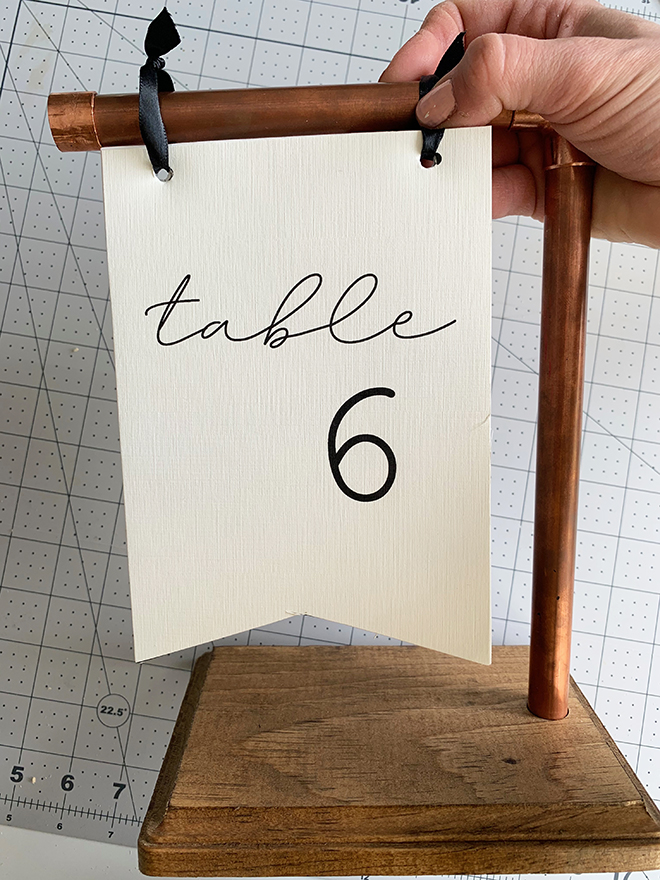
- wood plaque
- 1/2″ copper pipe
- pipe cutter
- drill
- 1/2″ drill bit
- 1/2″ copper elbows
- 1/2″ copper caps
- card stock I have used both linen texture and glossy card stock, but you want a good quality paper
- printable table number file
- foam board
- rubber cement or spray adhesive
- stain
- foam brush or rag
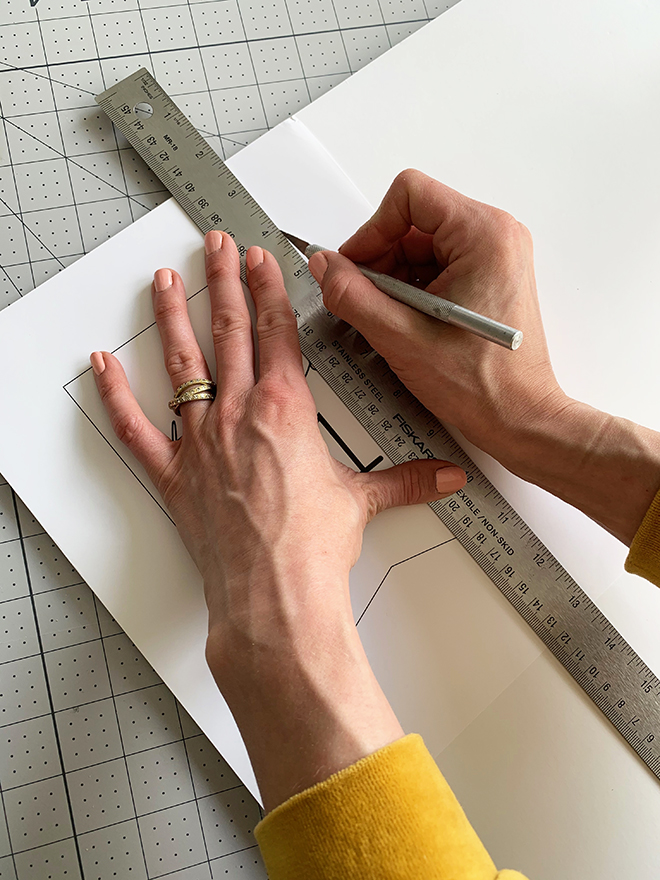
- ruler
- scissors
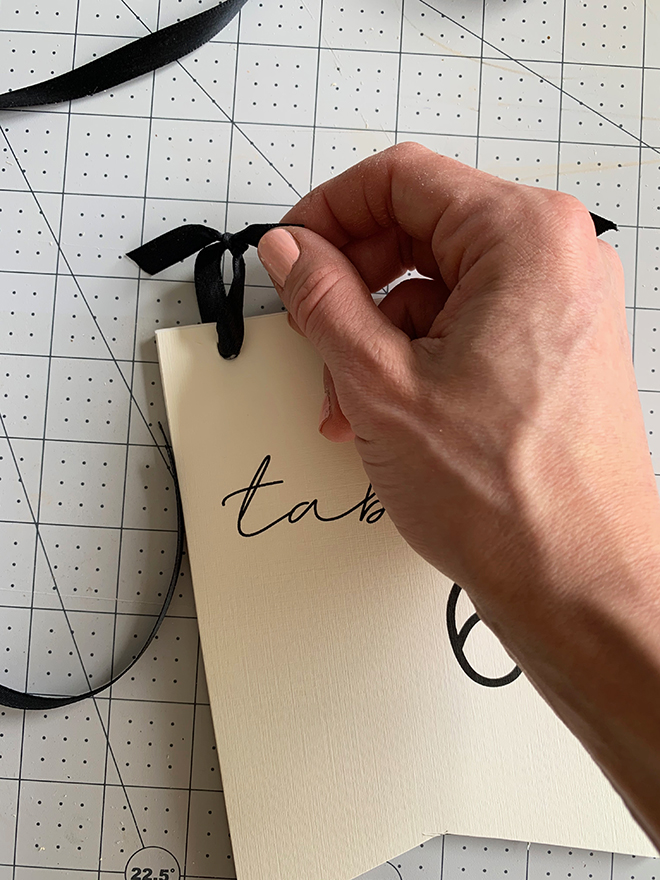
- ribbon
- hole punch
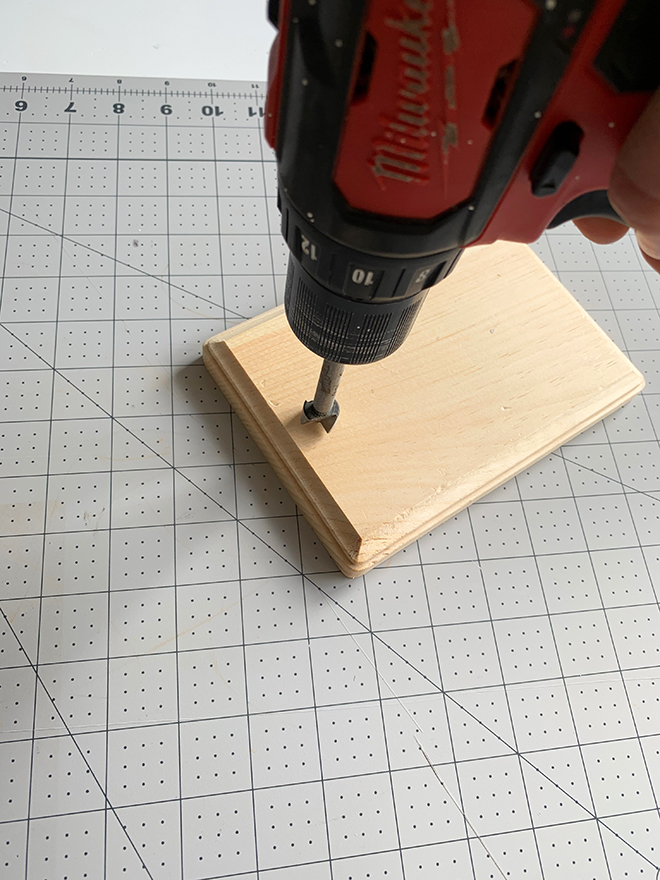
DRILL
Drill a hole in the center of one edge of the wood plaque. Drill 3/4 of the way to bottom. Pro tip: place a wood block under the plaque incase you do accidentally drill through.
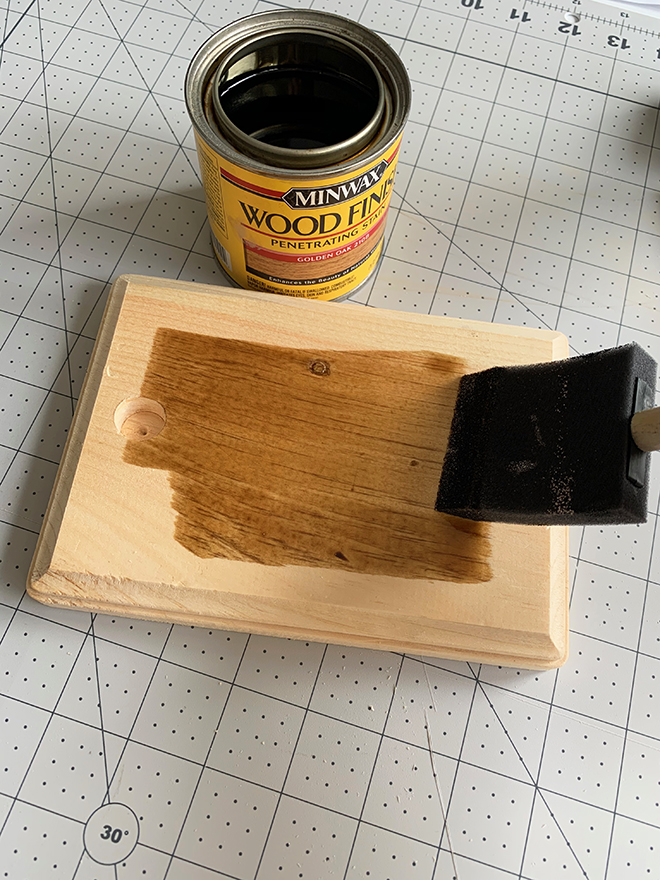
STAIN
Use a foam brush or rag to stain wood plaque.
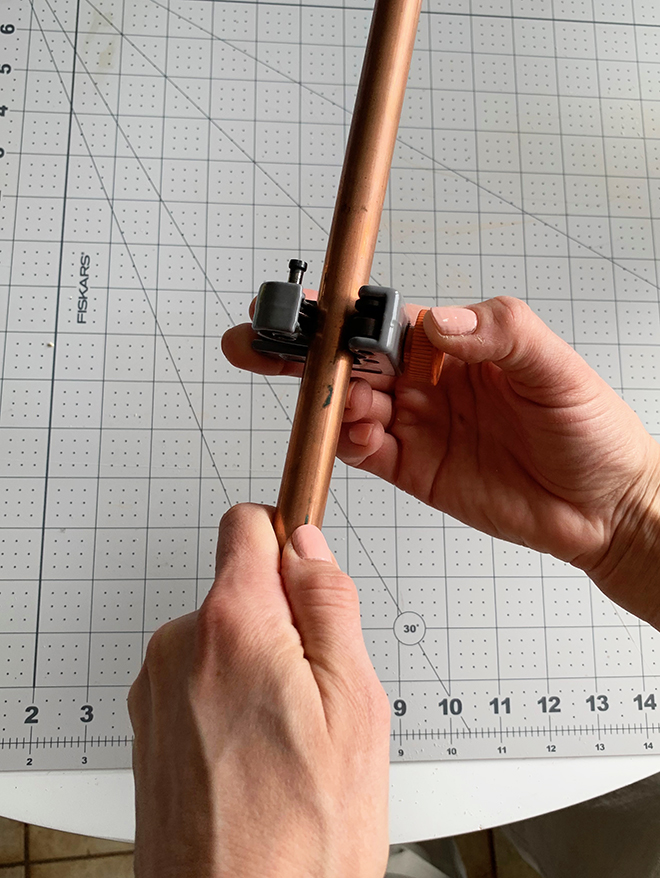
CUT
Use the pipe cutter to cut two pieces of pipe for each table number, one 6″ piece and one 9″ piece.
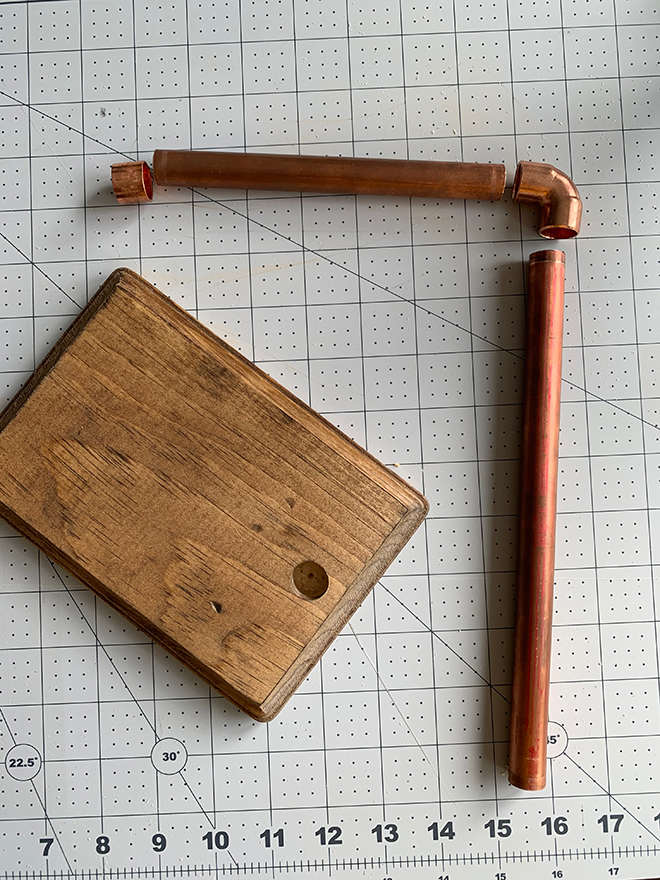
ASSEMBLE
Connect the two copper pipe pieces with an elbow. Add a cap to the end of the shorter pipe piece. Insert assembled copper stand into hole in wood plaque.
PRINT & CUT
Download the free printable and print 2 copies on cardstock. Use spray adhesive to attach 1 print out to foam board. Use an exacto knife to cut. Once cut, adhere the second print out on the back. And punch holes using a standard hole punch.
TIE
String ribbon through the holes and tie.
ATTACH
Attach the table number to the stand.

DIY Tutorial Credits
DIY Tutorial + Wedding Design: Lauren Koster Creative // wedding photos: Morning Wild Photography // floral design: Linnaea Floral // venue: Camp Blodgett


Comments