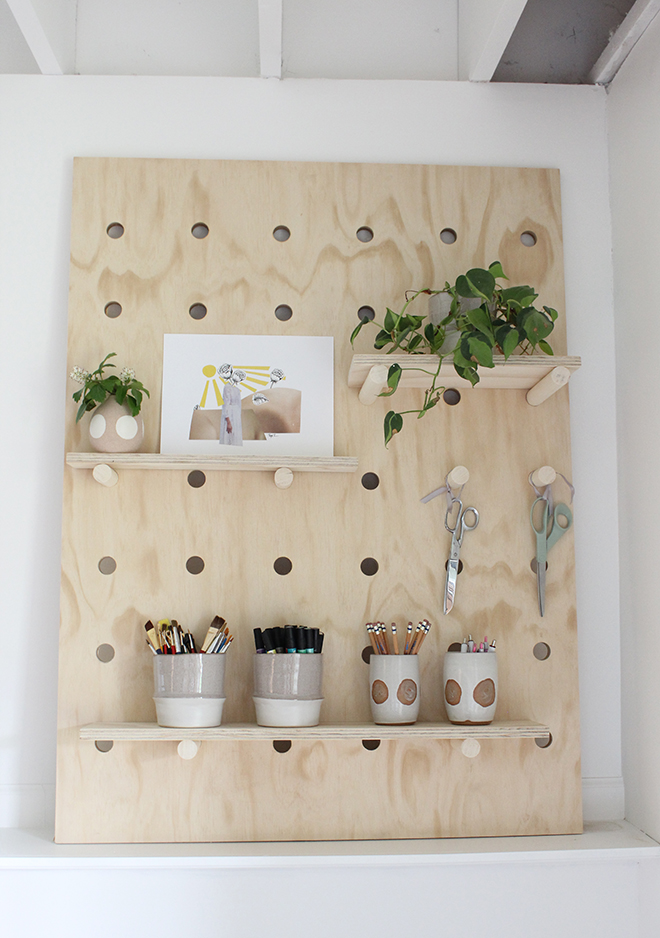

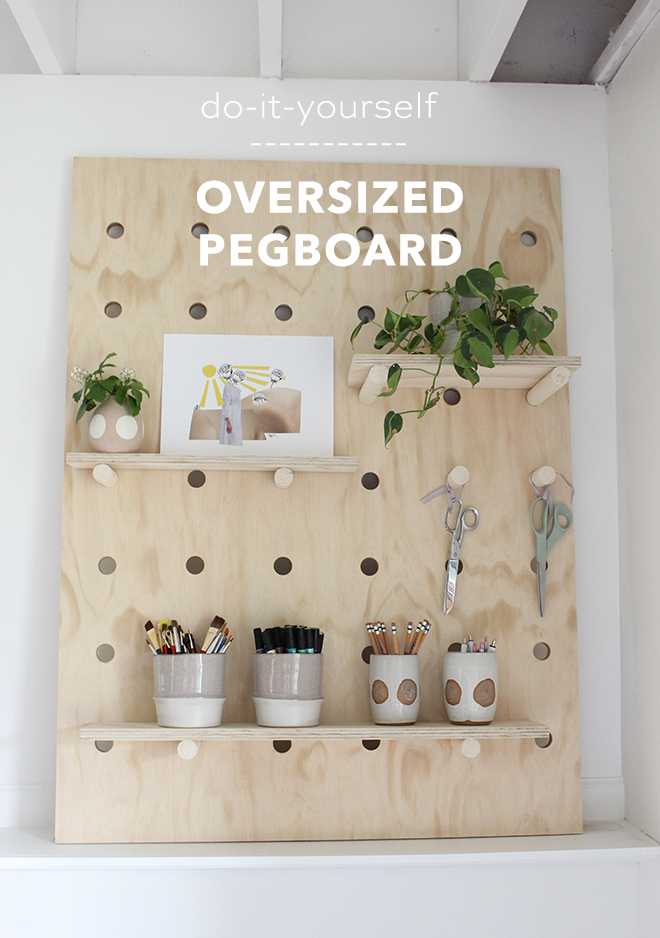
DIY Oversized Pegboard
Most of the world is working from home at the moment and the majority of us could benefit from a little extra organization in the home office department. I know I could!! I created this oversized pegboard wall to house my supplies and free up precious desk space. This is a great project to utilize wall space if you are working in a small room. Of course, this project isn’t limited to the home office. Style it in an entry way, with a mail drop zone, key pegs and a place to hang your purse or in a bedroom with photographs and knickknacks. The best part is that you can move it and change it up whenever you get the urge to refresh! Where in your home would you put this project?
Supplies:
- 3/4″ plywood (I used this pine quality) cut to desired size
- drill
- drill bit (I used 1 1/4″)
- drill guide
- pre-drilled peg board (optional)
- scrap plywood for shelves
- table or circular saw
- tape, any you have on hand
- miter or hand saw
- dowel (same size as drill bit, I used 1 1/4″)
- sanding block or electric sander
- polyurethane
- foam or paint brush
- hanging hardware
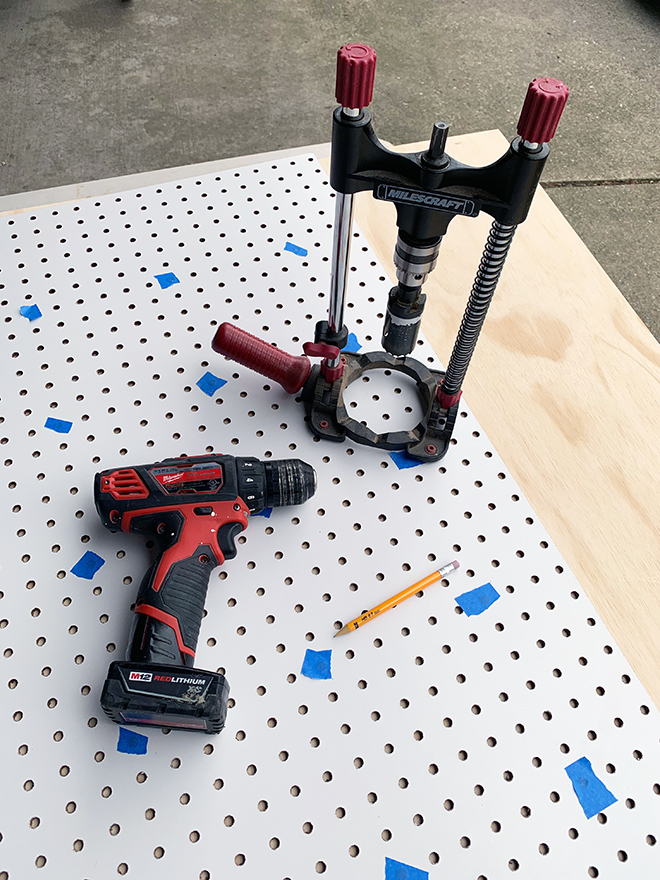
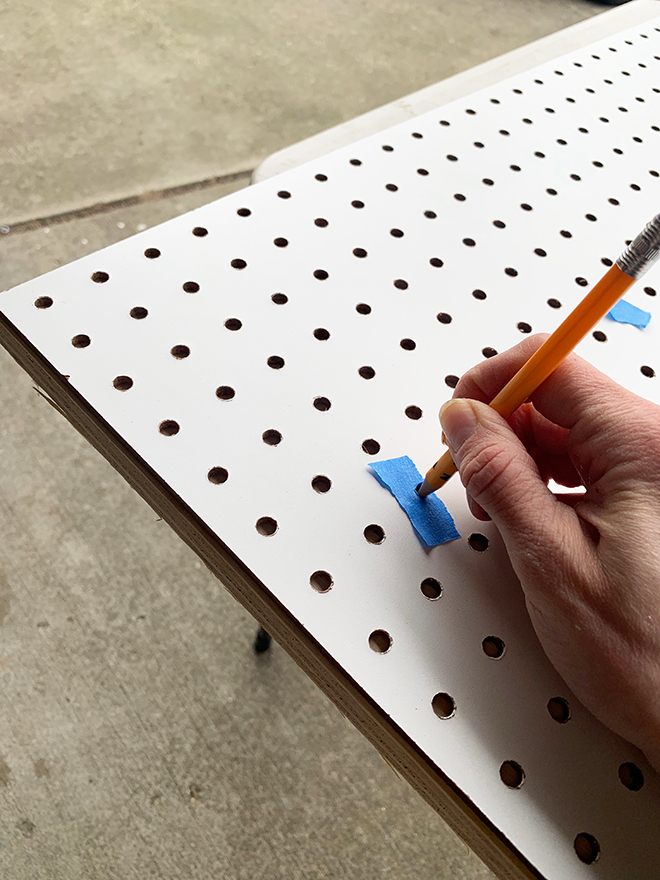
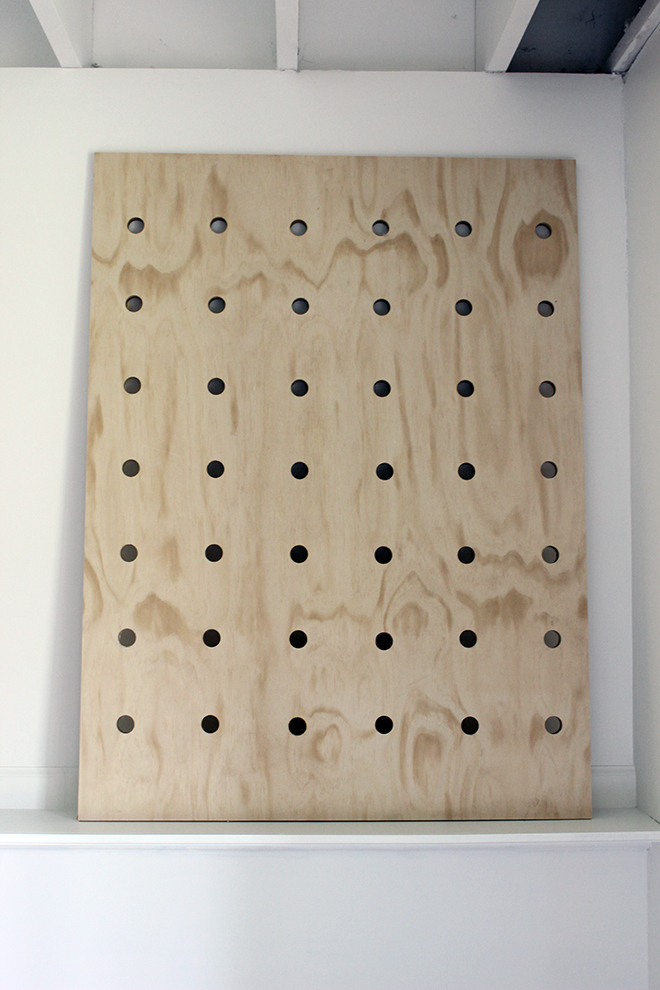
MARK YOUR DRILL HOLES
Begin with the plywood cut to the size you want your board to be. I had them cut mine at the hardware store, but you can use a table or circular saw. Decide on the spacing of your holes and mark your pre-drilled peg board by taping over the holes, I marked every 6 inches (5 holes between tape marks). Don’t forget to consider the total width overall to be sure you have the desired amount of spacing around the edges. Line up the corner of the peg board with the corner of the plywood. Poke your pencil through the tape to make the mark.
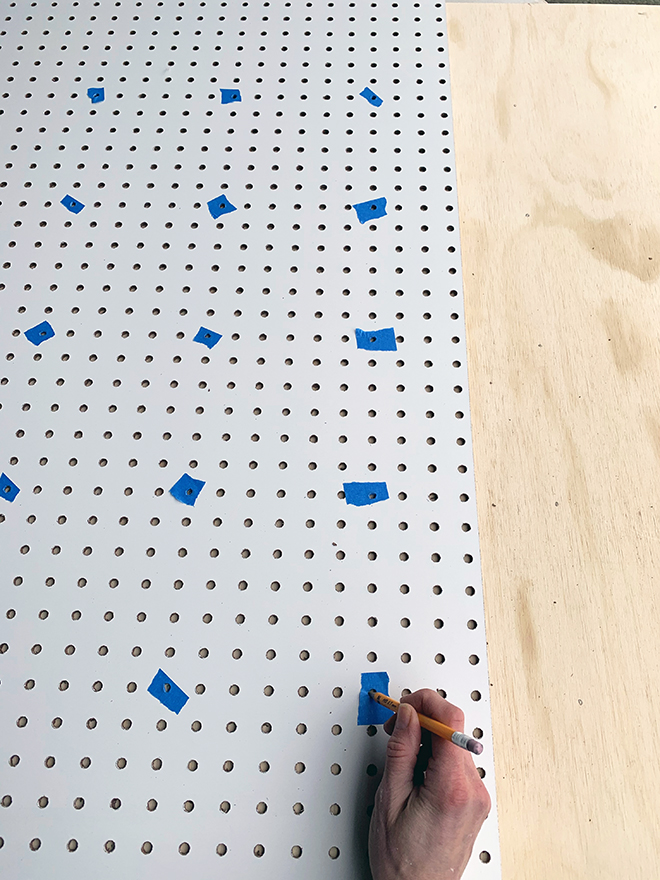
DOUBLE CHECK YOUR WORK
If your plywood is wider than your pegboard, you will have to line up marks and move your pegboard guide over to mark the rest of the plywood. Once you make all of your marks lift up pegboard and double check your spacing before you begin drilling.
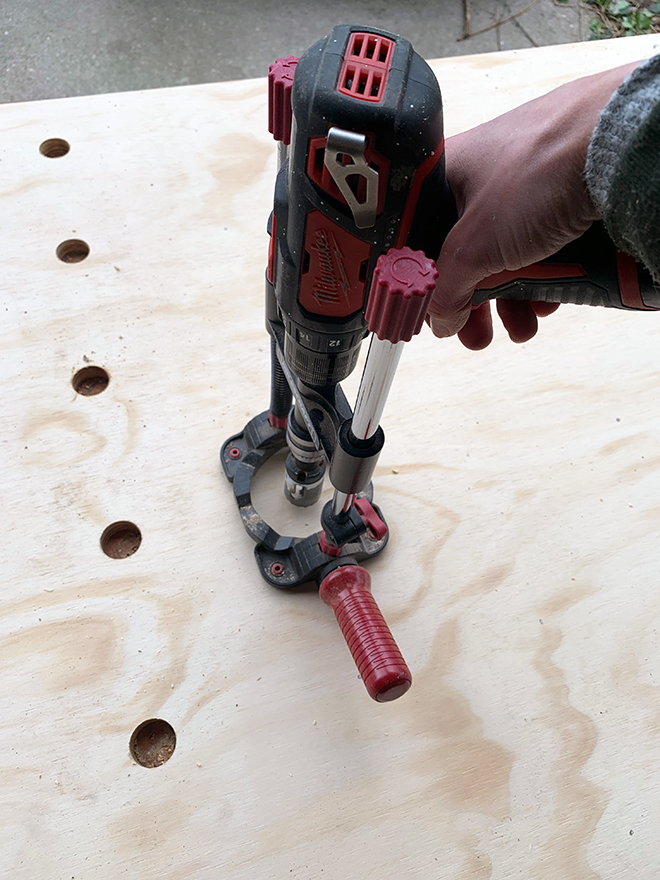
DRILL HOLES
Set up the drill guide with the drill and bit, then begin drilling the holes. Note that it make take some time. I had to charge my drill twice for my 3’x4′ pegboard. Also, make sure your board is elevated on a sawhorse so you don’t drill into the surface below the plywood.
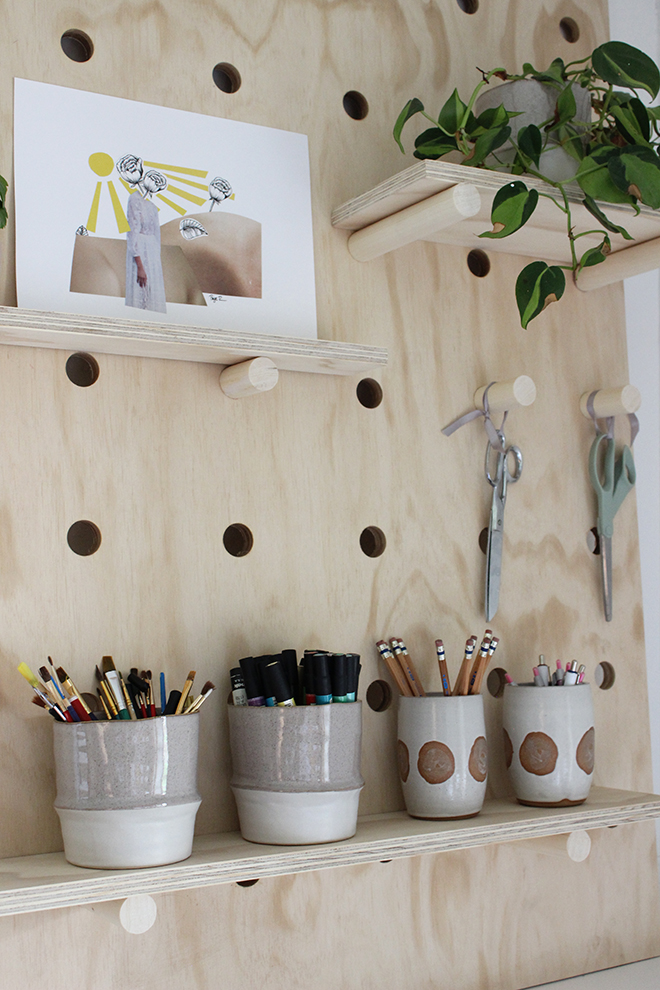
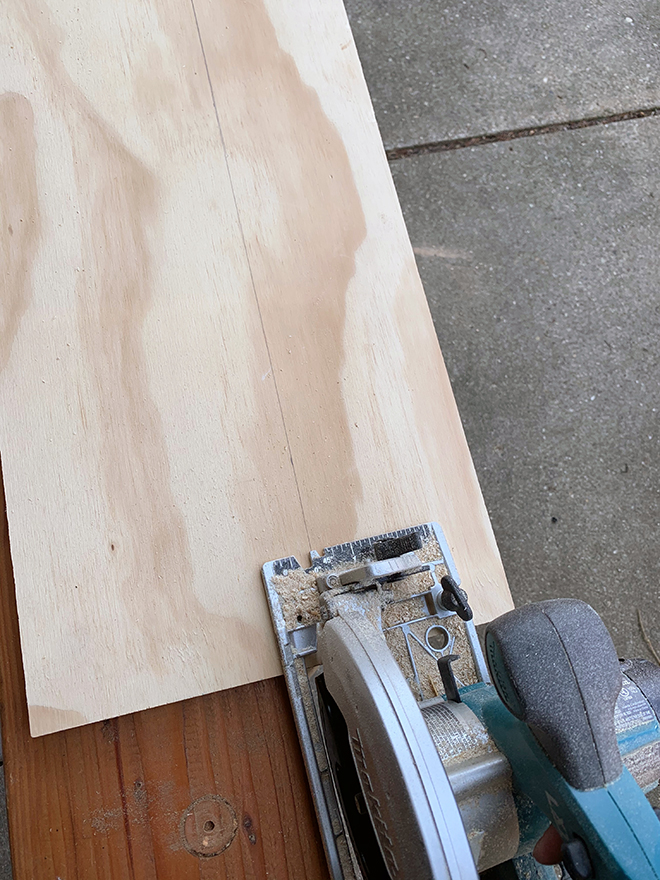
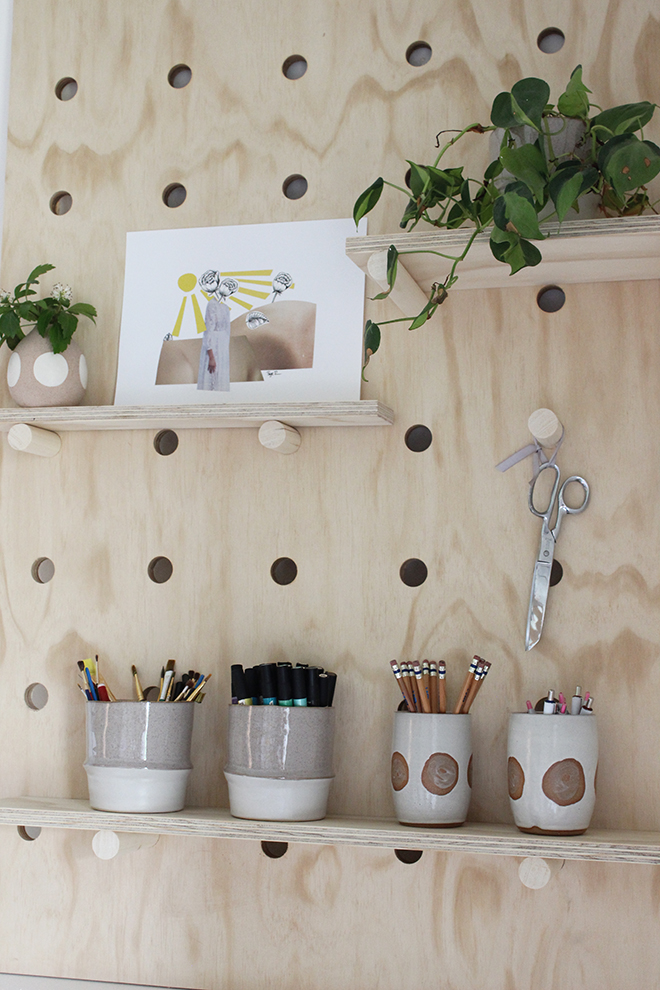
CUT SHELVES
Use your table or circular saw to cut the shelves. The depth and width of your shelves will depend on what you are planning to style it with. My shelves were 3″, 5″ and 6″, and I cut in varying lengths so I could play around with styling and function.
CUT THE BRACKETS
Use a miter saw (or a hand saw) to cut the dowels. Figure out what shelves you plan to use – you will need two brackets for each shelf and the length will depend on the depth of the shelves. Cut dowels to the depth of shelves plus 3/4″. I cut the left over dowel to 2″ pieces to hang scissors.

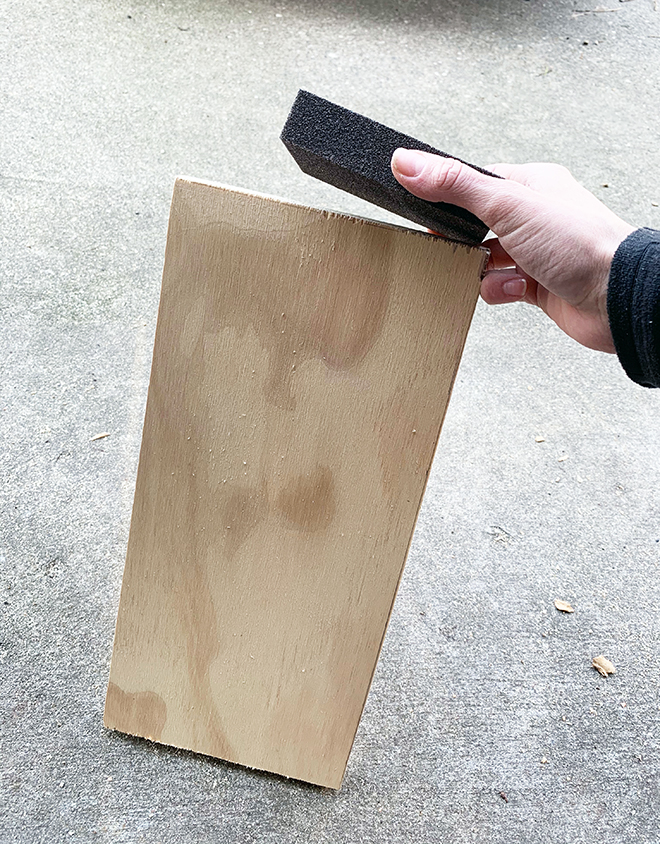
DON’T FORGET TO SAND!
Use a sanding block or electric sander to sand all your pieces – pegboard, shelves and dowels.
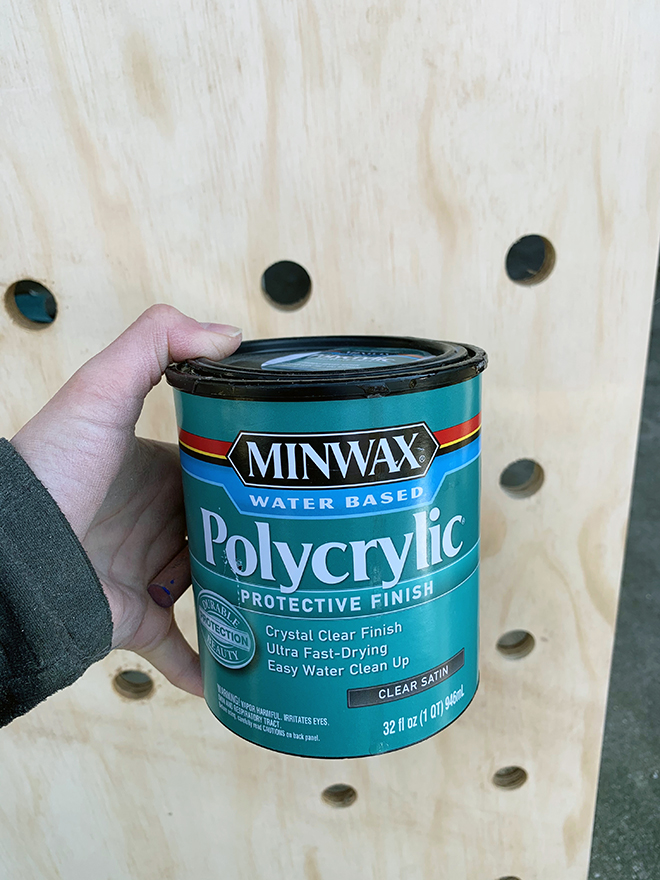
POLYURETHANE YOUR PROJECT
This step takes a little time, but it will make the project last much longer and be a lot easier to wipe clean. Use foam brush or paint brush meant for polyurethane to coat – pegboard, shelves and dowels. Once dry, use fine grit sand paper to sand and apply a second coat if necessary.
ATTACH TO THE WALL
You will need wood screws or drywall anchors to fix to the wall. Even if your board sits on the floor and leans against the wall, this step is really important. You need to fix the shelf to the wall so the board does not fall over.
STYLE AND ORGANIZE!
Now the fun part. Play around with the shelf placement, move around the dowels and different shelves you cut, add your decor and style to taste!


Comments