
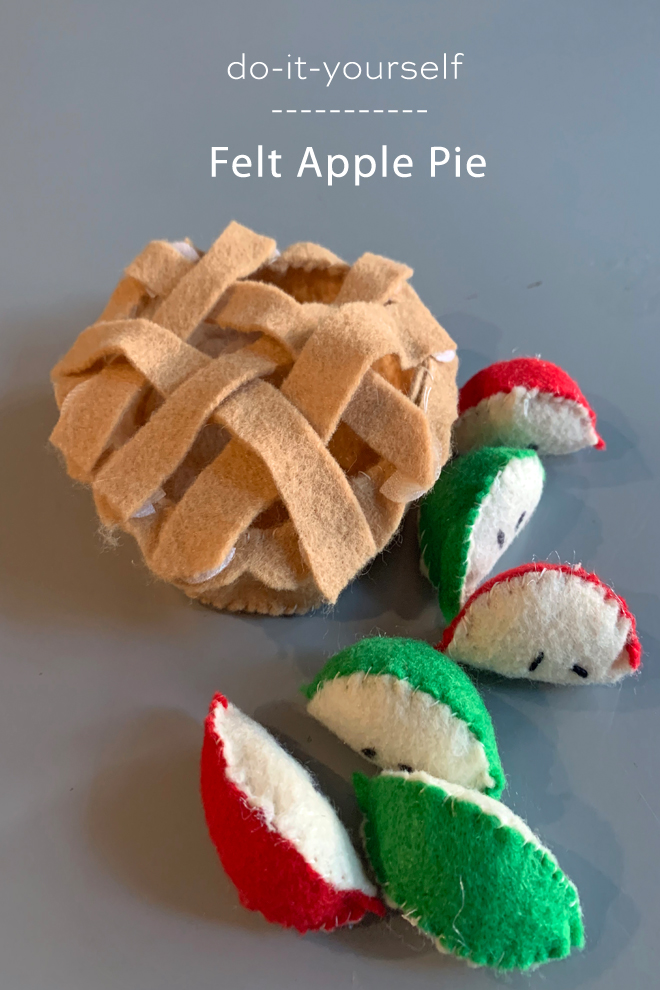
How to Make a Felt Apple Pie
Pretend food has always been a huge part of my daughter’s daily play. She cooks for her baby dolls, her dad and even tried to feed our cats when she was younger! We have a very large collection of pretend food but I personally love handmade felt food the best. There is something so endearing about the little details that go into the creations. With the holidays around the corner, I have been getting all my plans set for Thanksgiving and Christmas. Since I no longer host Thanksgiving (the joys of having a tiny house that has no dining room), our side is tasked with bringing pies. Over the years I have really loved taking on the responsibility and always make as many of the pies as I can from scratch. My personal favorite has always been apple pie so this year I decided that I wanted to make a felt apple pie for my five-year-old to play with leading up to the holidays. Why can’t her dolls that best part of dessert?!
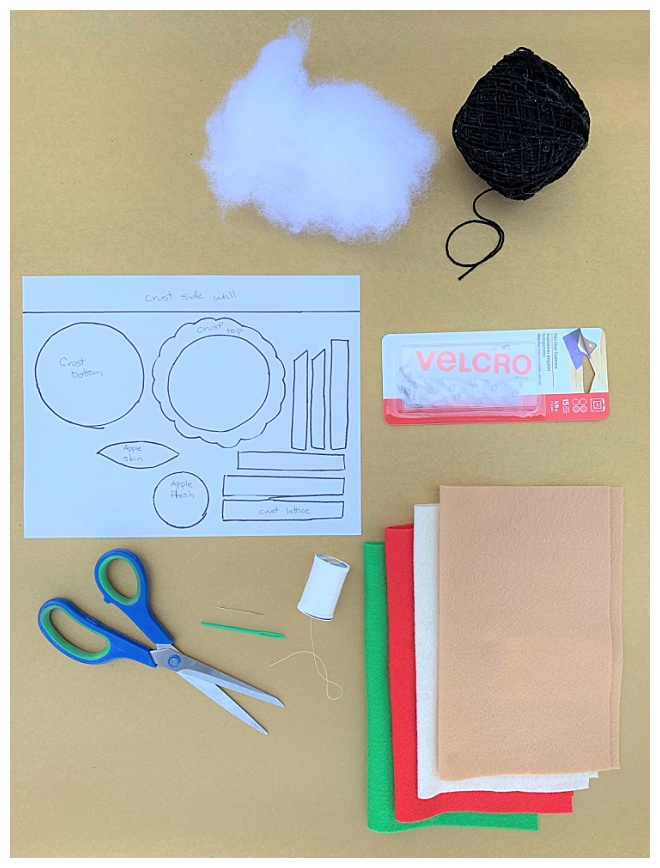
SUPPLIES:
- Felt in tan
- Felt in antique white
- Felt in apple green
- Felt in red
- Black yarn
- White cotton tread
- Sewing needle
- Fiber fill
- Clear velcro dots
- Pattern
Pie Crust
I created the free pattern printable so the pie crust can be made from one sheet of felt. You can download the pattern HERE.
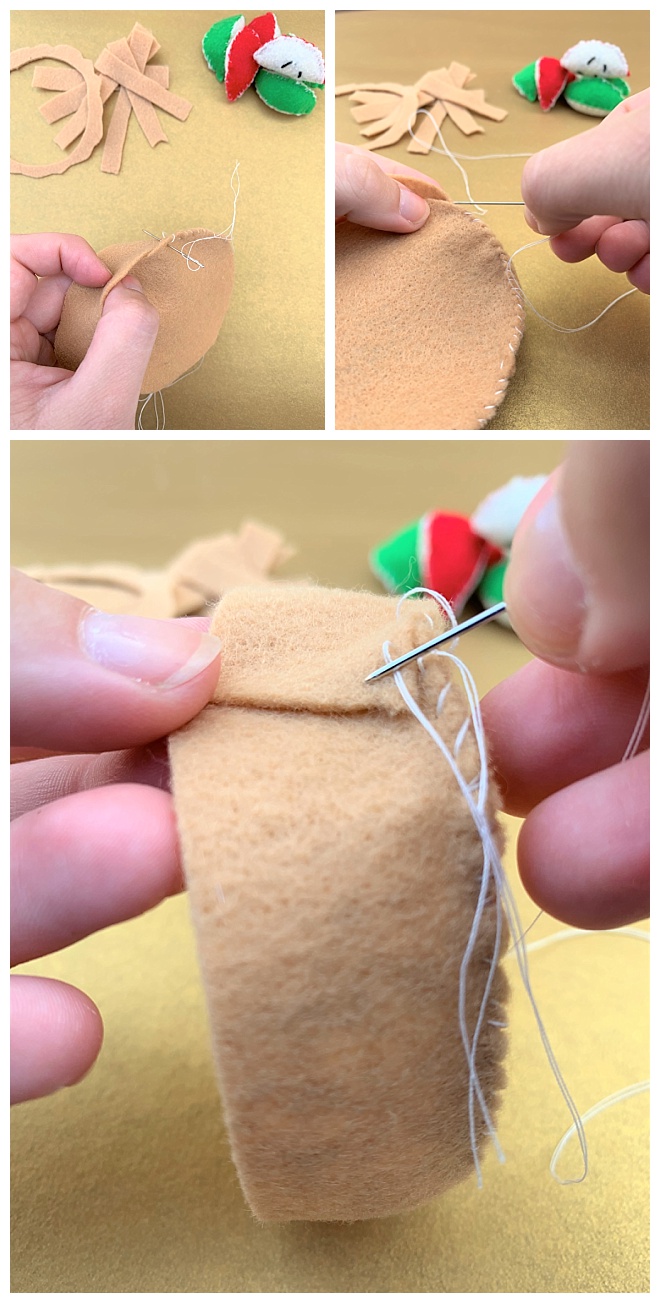
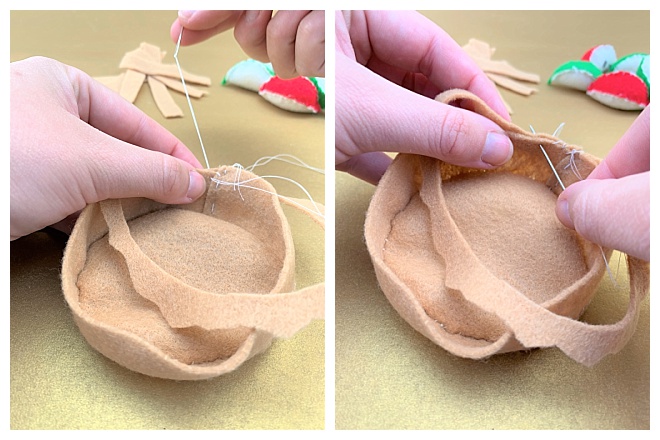
Once you have downloaded and printed the pattern, cut the pieces to create the pie crust. Start by sewing the bottom of the pie crust to the pie crust outer wall. You can do this on a sewing machine or by hand. I choose to sew the project by hand because it was easiest for me to do while watching Netflix with my husband after my daughter went to bed. Most of my craft projects are done while she is at dance or sleeping which means I tend to take my time and do most of the work by hand. It is a great way for me to destress! After the pie crust bottom and outer walls are connected, attach the top edge to the pie outer wall. This small lip will be perfect when we attach the top lattice crust, but we will come back to that in a bit. Once you have the bottom pie crust, pie crust outer wall and pie crust top edge, you have the basic pie created!
Apple Filling
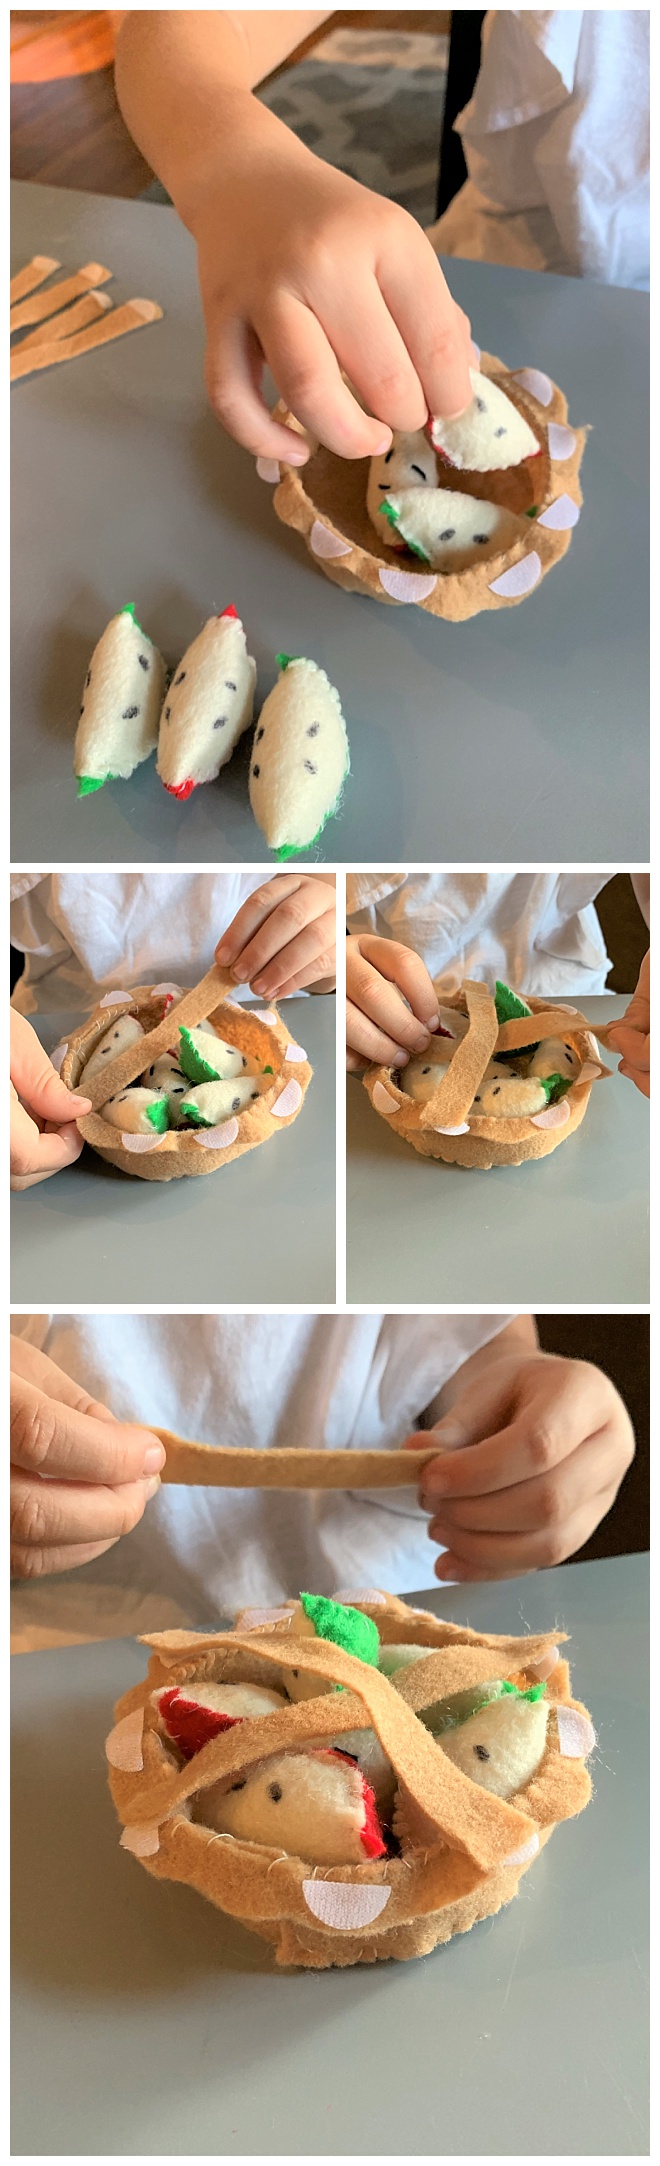
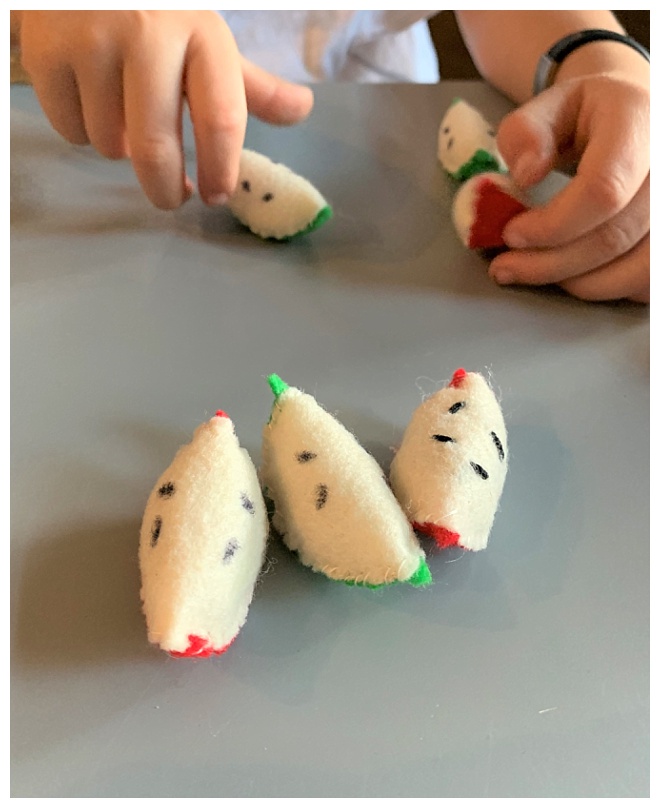
I find sliced felt fruit so cute! I truly want to make all kinds of varieties and have felt fruit salad all the time. These apples are very simple to make. I wanted to create a mix of green and red apple slices for our pie. I understand that in real life the apples are peeled and no seeds are used BUT I wanted to add the color and recognizability of the pieces. Also, creating the two-color apple slices opens up the opportunity to work on color sorting and AB pattern making (red, green, red, green, red, green pattern). Both of these skills are taught heavily in preschool.
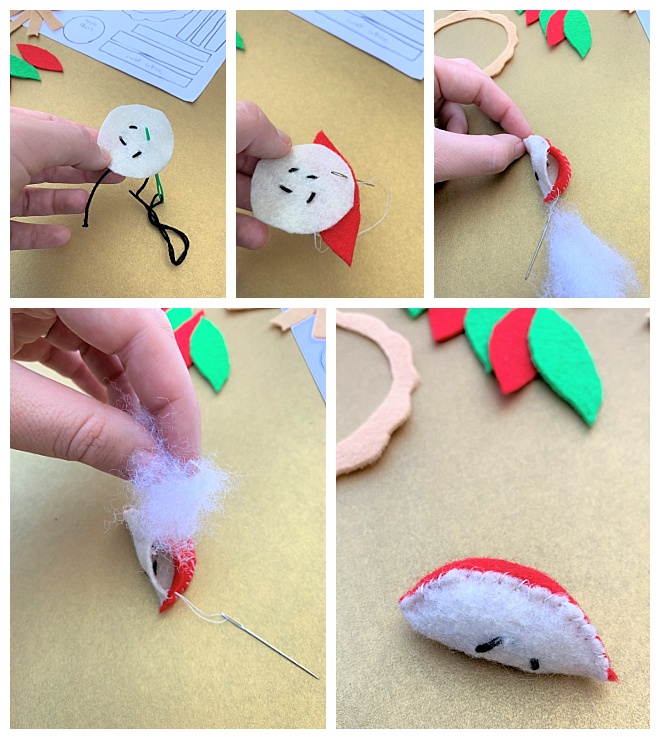
Start by cutting out the round apple centers in the antique white felt. I decided to make six apple slices for my pie, three green, and three red. After I cut the apple skin out of my red and apple green felt I placed them aside to work on the apple seeds.
Using a large eye yarn needle, I created four apple seeds on each apple center by sewing black lines on the antique white felt circle. Once I made four apple seeds on each apple center I carefully sewed the apple skin to the center.
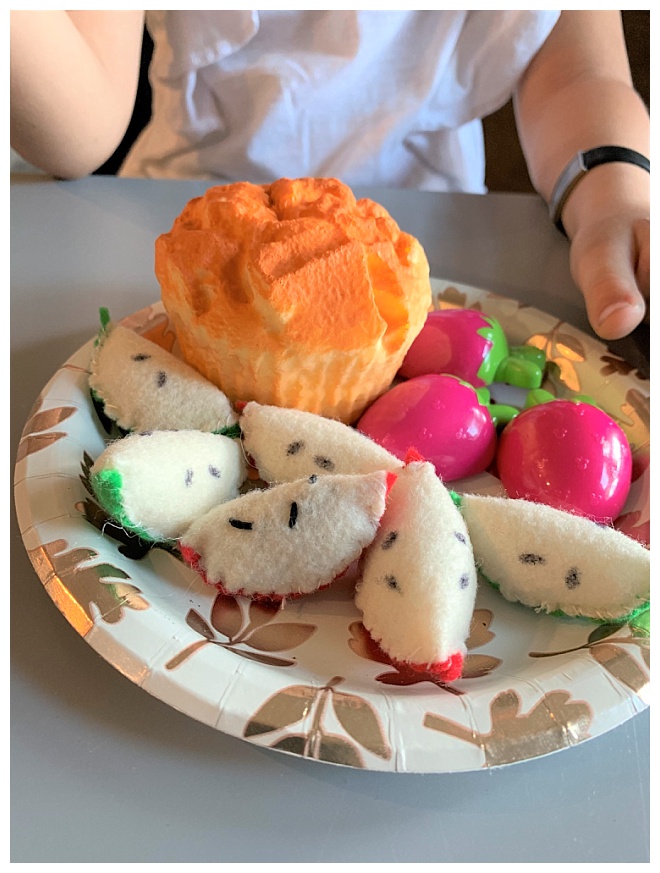
It was easiest for me to start in the center of the long apple skin making my way around the edge of the apple skin and apple center. As I reached the beginning of my sewn apple skin I filled the small opening with fiber fill fluff to add fluffiness. I then finished attaching the apple skin to the apple peel. All you have to do is repeat these steps five times and your apple pie filling is done!
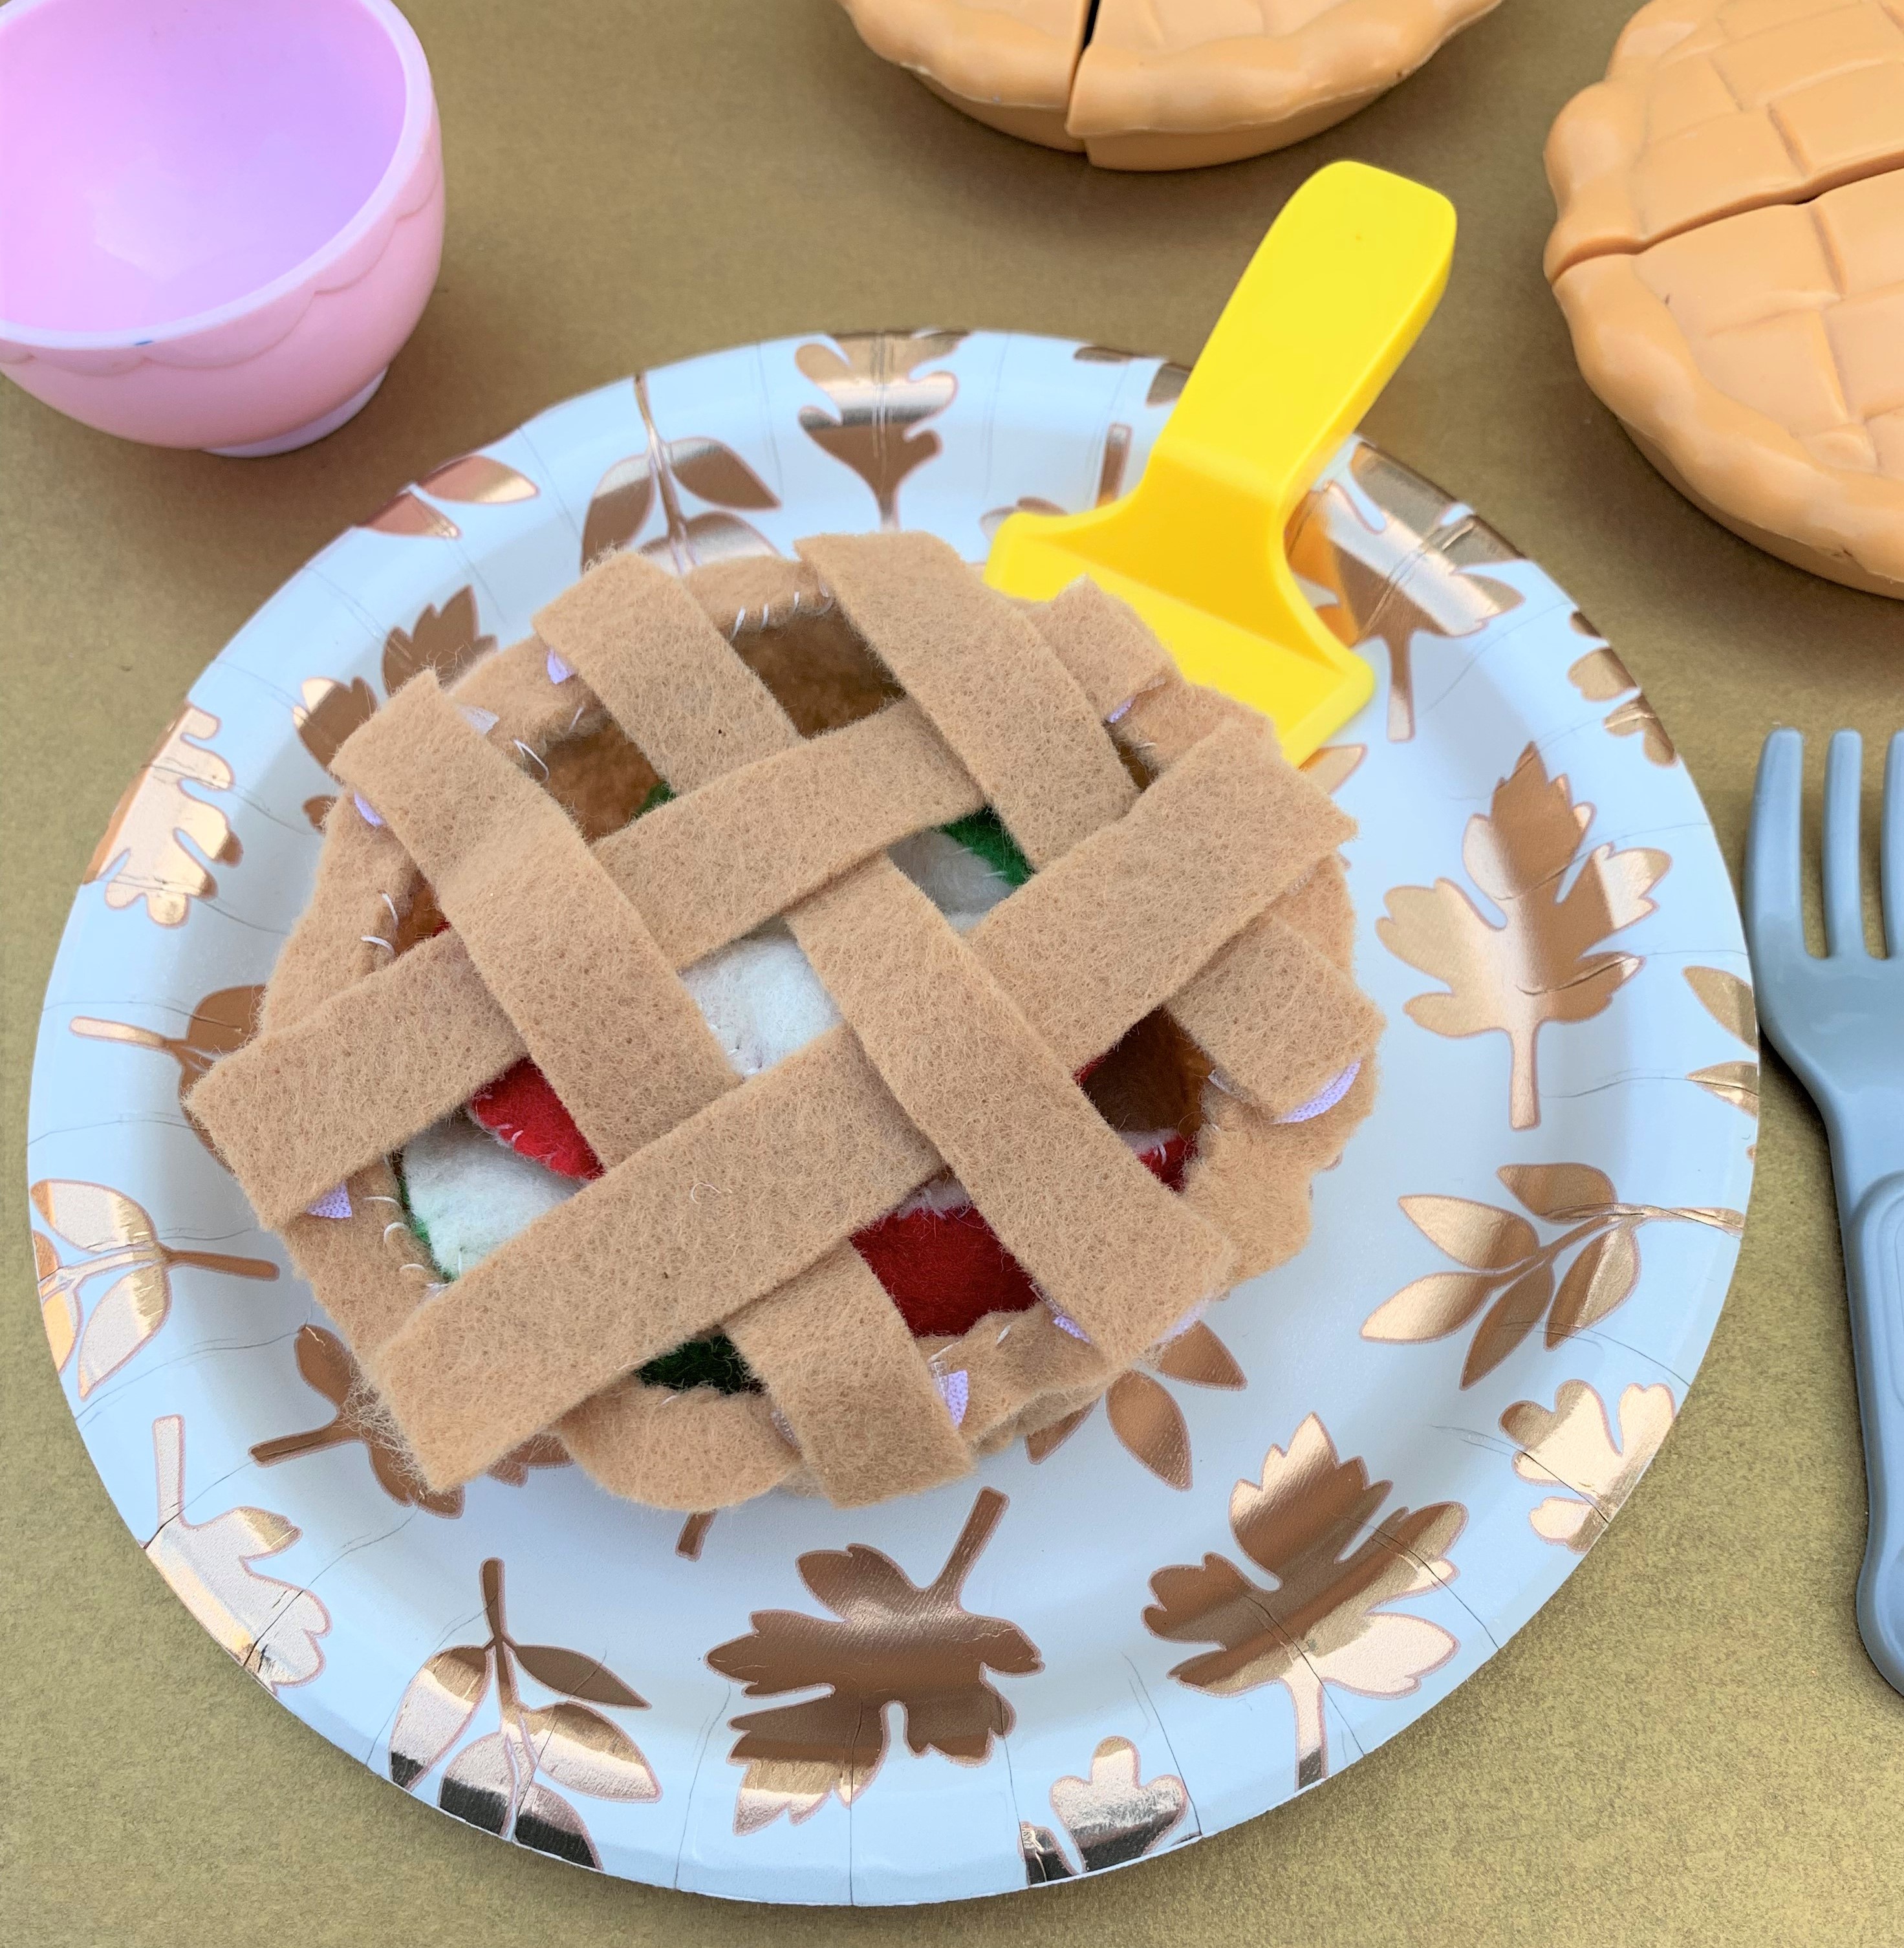
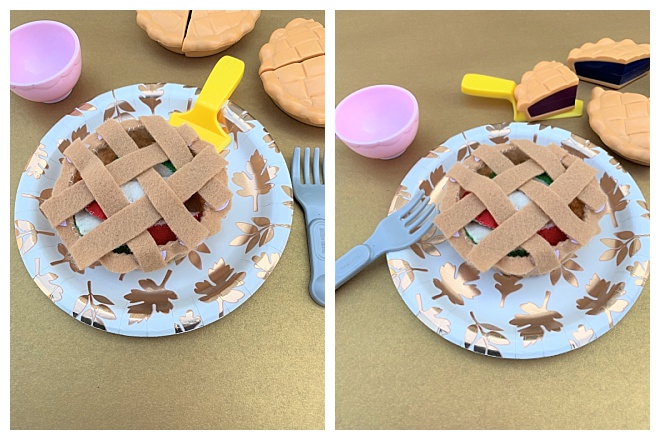
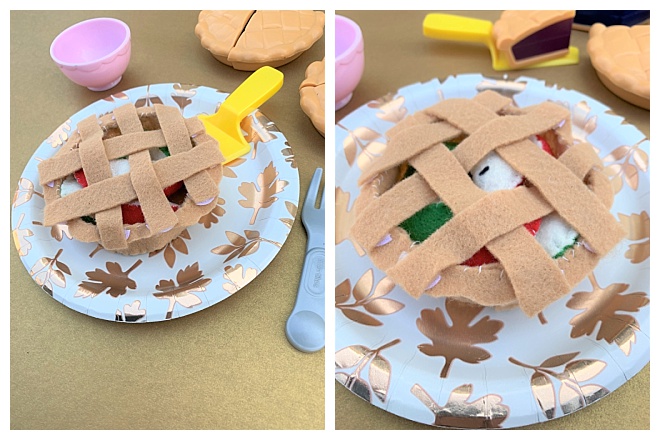
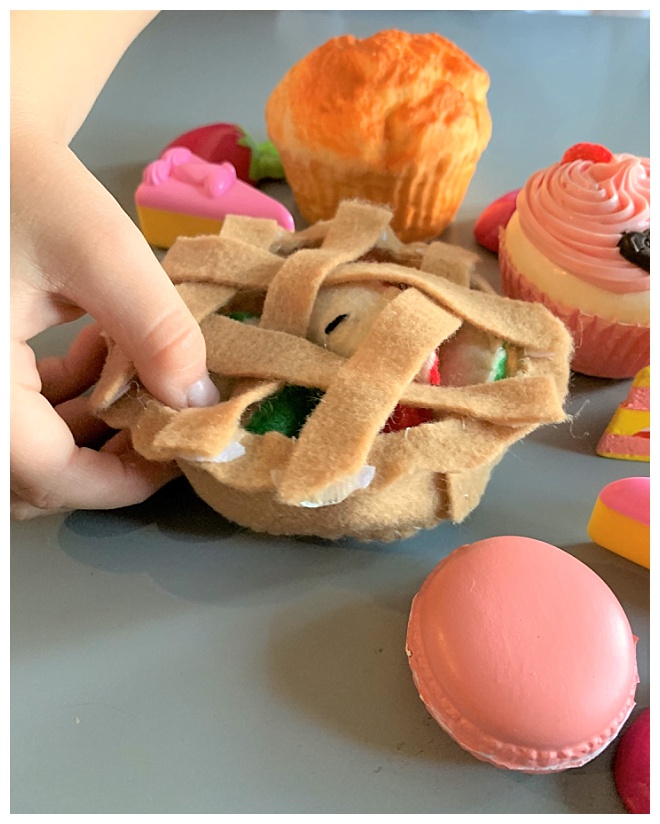
Lattice Pie Topping
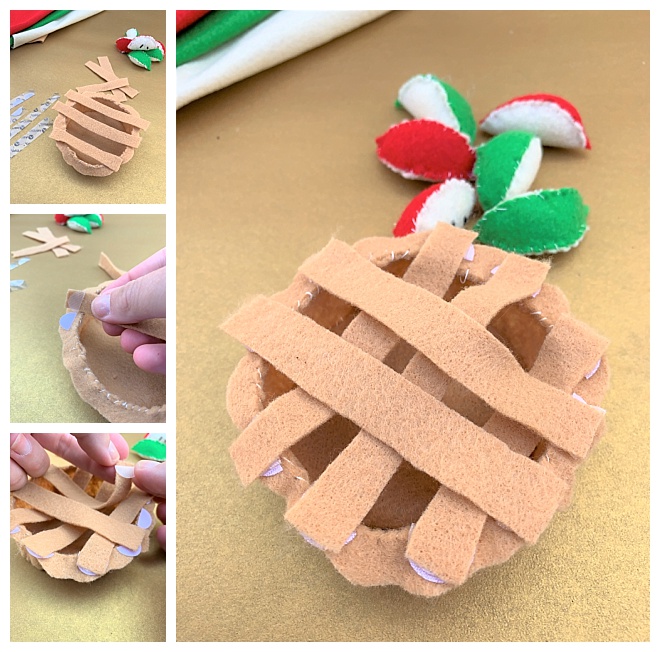
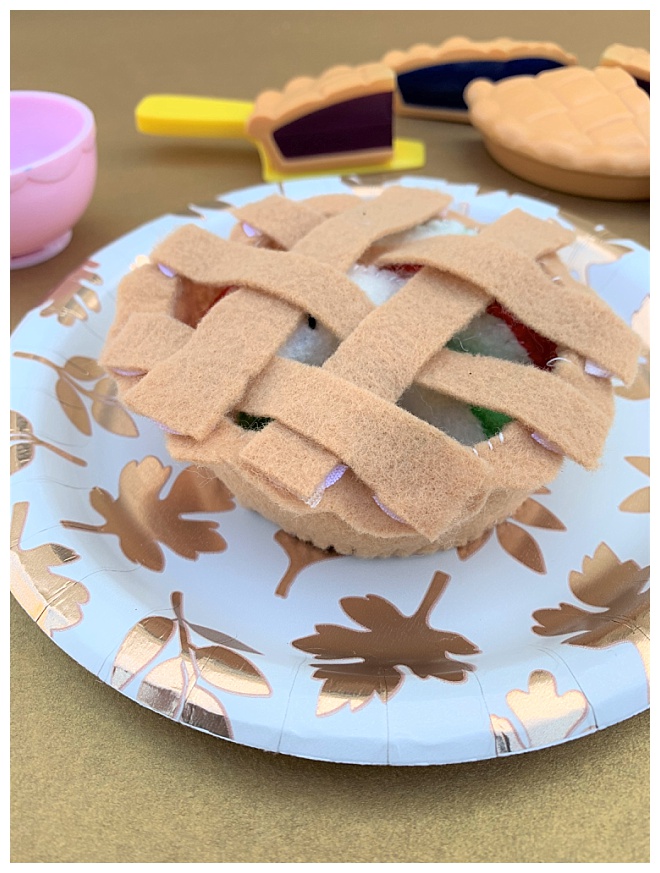
Cut the remaining pattern pieces from your tan felt. There are six “lattice top” pieces in a variety of lengths. Once you have all the pieces cut, lay them across the top of your pie crust to determine where you would like the Velcro dots to attach. I wanted to create space between the lattice work so we could still see the apples in the filling. Once I was happy with the lay our I placed the self sick Velcro dots on the pie crust and each side of the lattice pieces. If you feel that the self sick Velcro is not cutting it, you can add a few stitches to each velcro dot and secure them to the felt better.
I also wanted to take advantage of playtime and add in a touch of fine motor work. I encouraged my daughter to weave the pieces together instead of simply layering the lattice work on top of the filling. By weaving the top she worked hand-eye coordination, dexterity, and patience.
Play Time
My daughter was so excited when I presented her with this pretend pie! She has also been playing with the apple slices without the pie crust so I will most likely need to make her more apples to play with at some point. It means so much more to me to have my daughter play with something I created just for her then for her to play with another mass-marketed toy. I also love the fact that it is opened ended and the pieces can be used in a variety of ways. For instance, instead of the apple slices, you can use blue or red pompoms for blueberries or cherries. The apple slices can also be made in yellow with white seeds to make lemon slices. There are truly many different ways you can use this simple felt pie recipe!

As with all our DIY tutorials, if you create one of our projects please send us a picture – We Love Seeing Your Creativity! If you use Instagram or Twitter please use the hashtag #SomethingTurquoiseDIY and it will show up on our Get Social page. Happy Crafting!
DIY Tutorial Credits
Photography + DIY Tutorial: Jacki Davis for Something Turquoise // Felt Sheets: Amazon // Yarn: Amazon // Fiber Fill: Amazon // Sewing Needles: Amazon // Thread: Amazon // Clear Velcro Dots: Amazon
Shop The Supplies:
Find the supplies you’ll need for this project from our affiliate links below:
Download the Crust Pattern Here


Comments