
How To Make Toddler Busy Boards With Fiskars DIY Tools
-Sponsored Post-
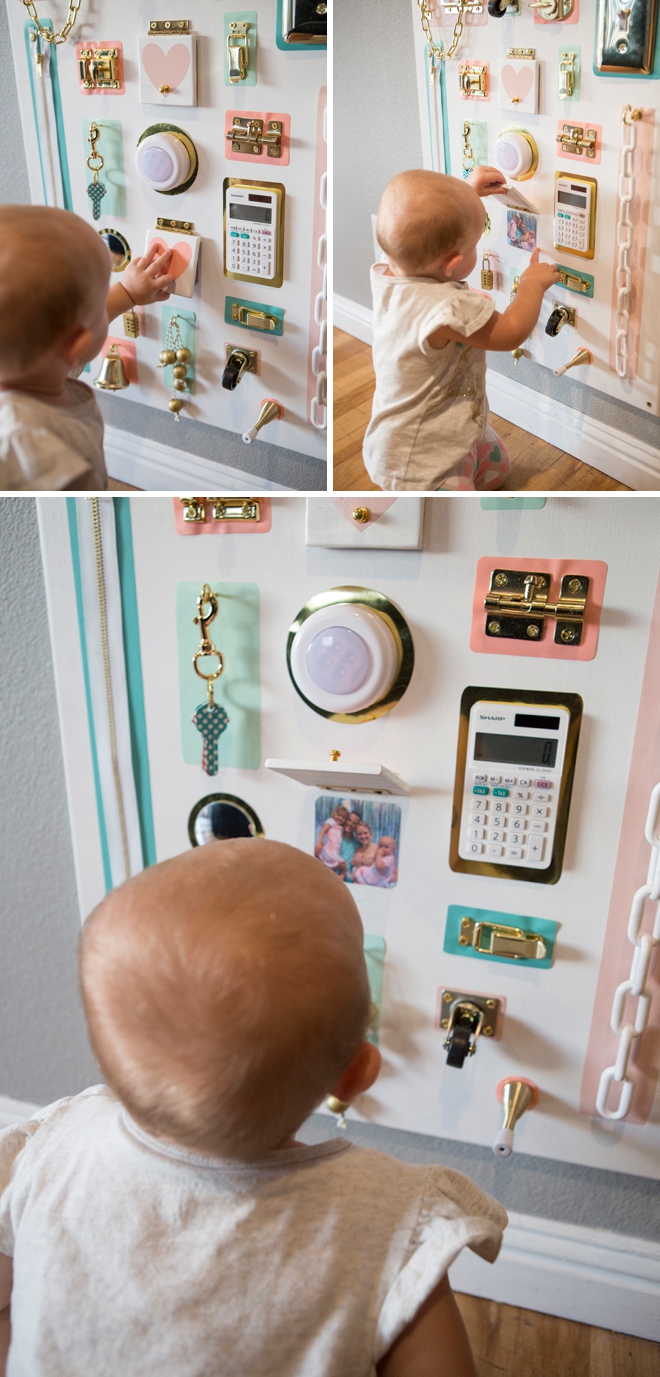
Let me start by saying this project is definitely a labor of love, but seeing my littles be enthralled with both boards made it all worth it. I’ve partnered with Fiskars to bring you this step by step look at how you can easily make your own toddler busy boards without using power tools, both for in your home and on the go. I say easy because they really are easy to make, however, it took me some time to find matching hardware for both boards, to paint everything perfectly, to find unique things that would interest them, and so on. I’m using my [Fiskars DIY Precision Tools][2] to get the job done, and I sure am glad I had them to lean on to make this project a success!
Fiskars DIY Tools
Today I’m using quite a few of my new Precision DIY Tools from Fiskars. I was honored to be a part of the team that actually helped refine and bring these tools to market, so they’re extra special to me. They have so many uses from weddings to home decor, but today they’re helping me create adorable activity boards for my babies!
The full line of tools is available at Fiskars.com, Amazon and JoAnn; and select Fiskars DIY tools are available at Michaels, Hobby Lobby, and Target!
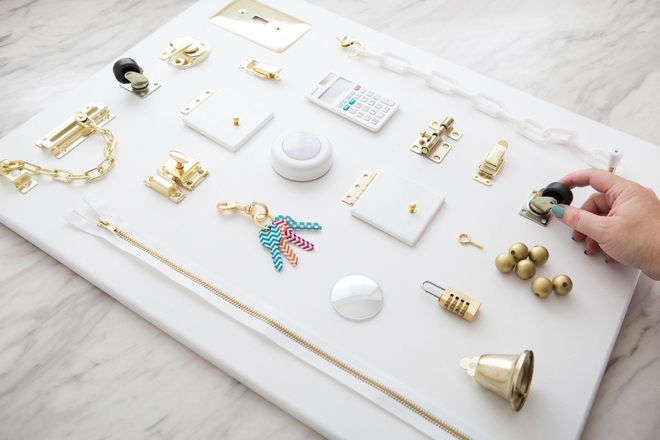
SUPPLIES:
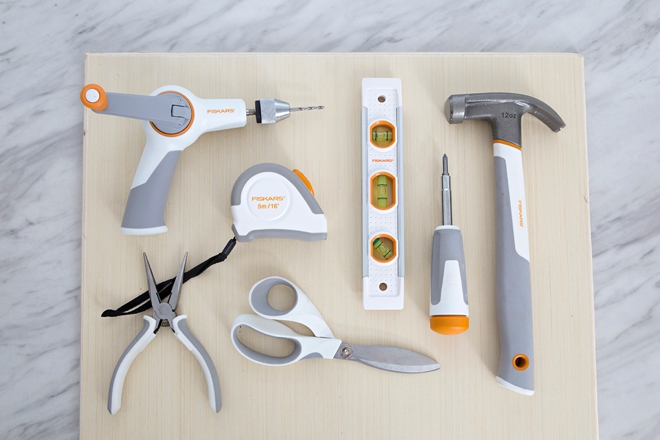
- Fiskars Precision Hammer
- Fiskars Precision Hand Drill
- Fiskars Precision Screwdriver
- Fiskars Precision Level
- Fiskars Tape Measure
- Fiskars Precision Wire Cutters
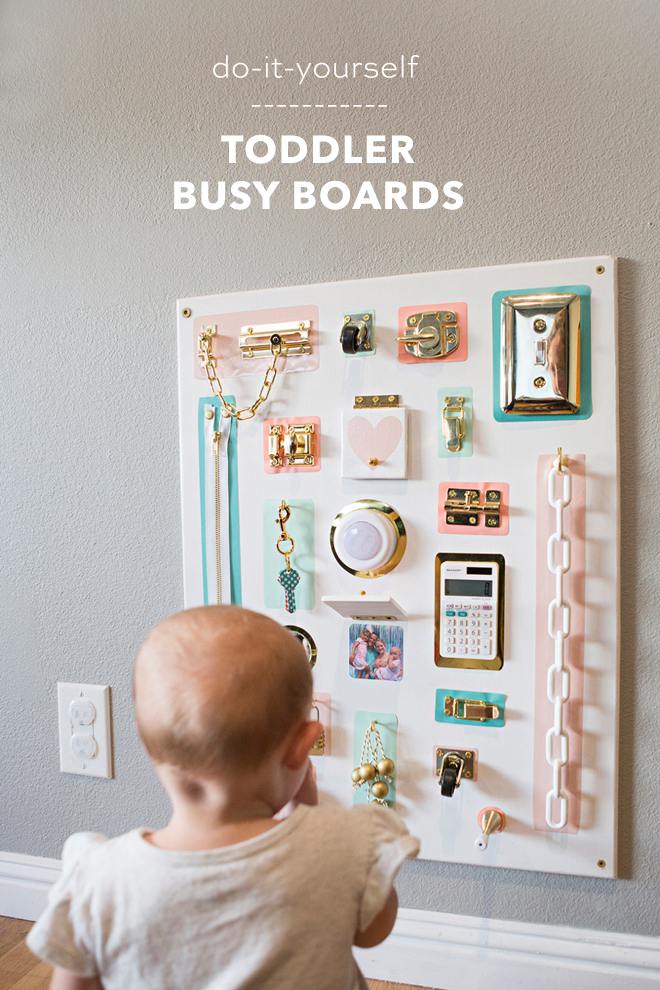
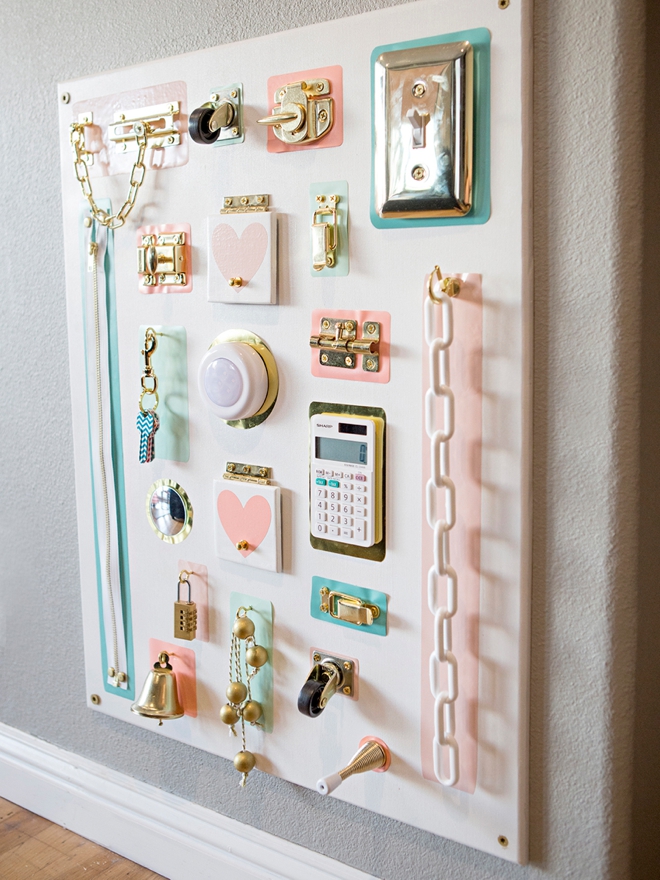
- 3/4″ Plywood, cut to any size you’d like (I did 18″ x 26″)
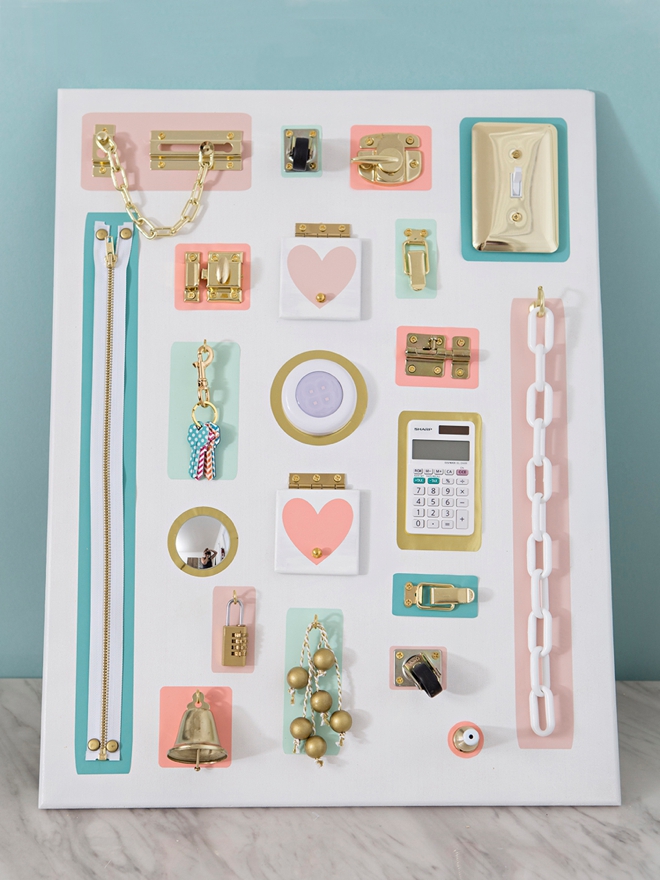
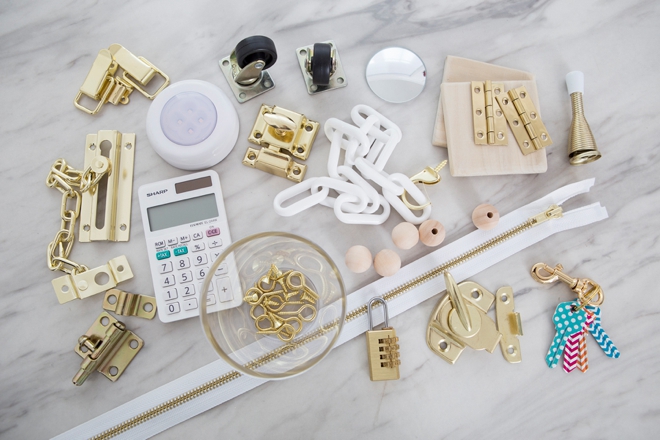
OTHER SUPPLIES:
- Gate hook
- Hinges
- Light Switch
- Calculator
- Press-on Light
- Mirror
- Bell
- Lock
- Plastic Chain
- Wheels
- Zipper
- Any and all the fun things!
- Eyelet hooks, screws, and glue for attaching items
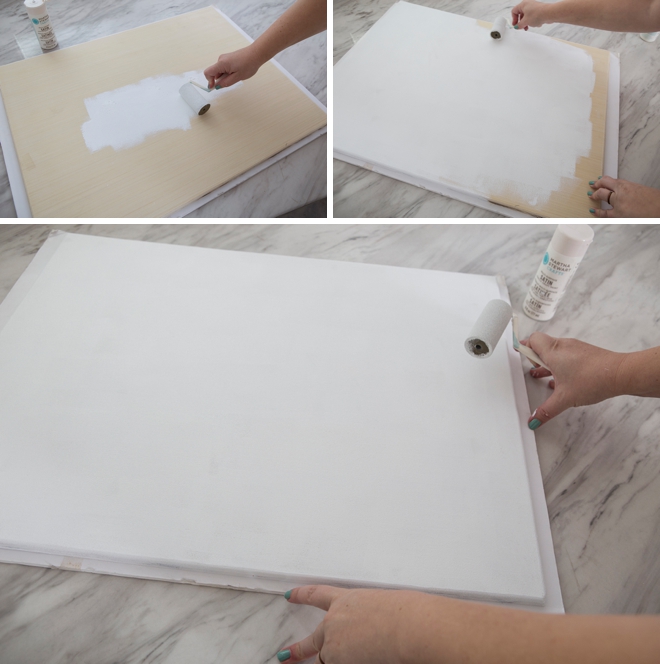
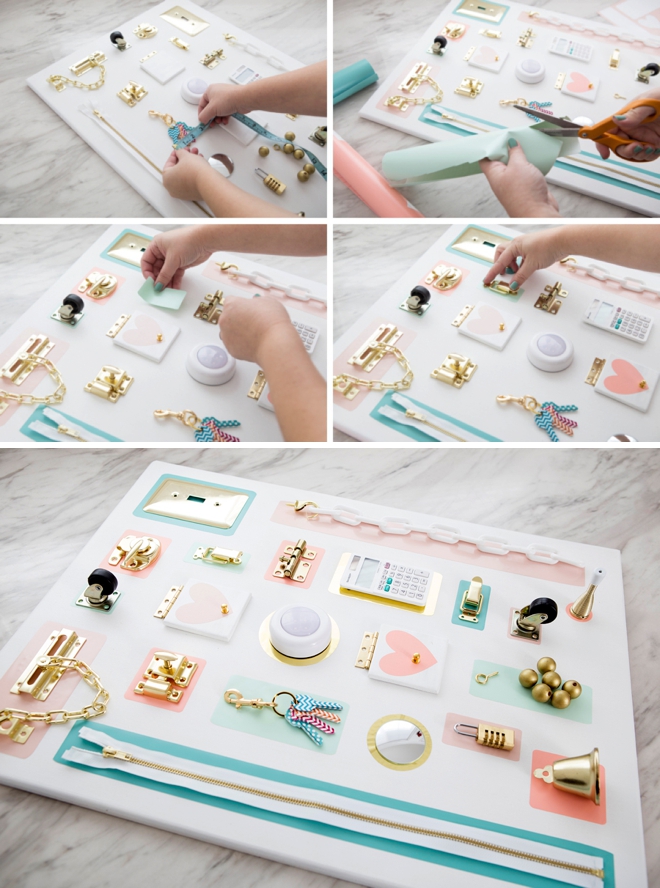
Prep + Paint
The hubs cut a piece of craft plywood for me at 18″ x 26″, but you can easily have the employees at your local hardware store do the cut for you. Then sand and paint!
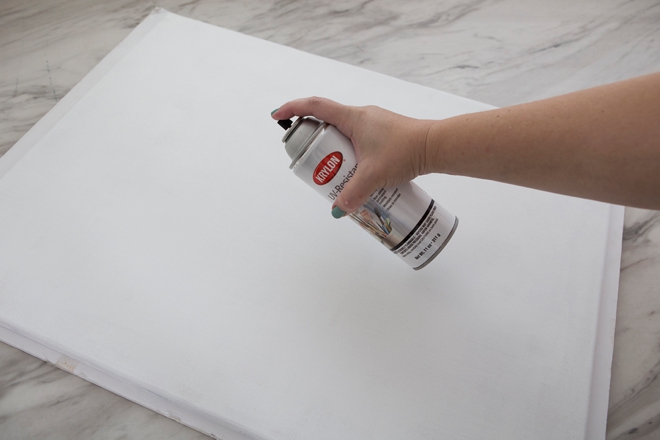
Seal
Since the girls will be all over this board I sealed it with a clear acrylic gloss spray. Two coats.
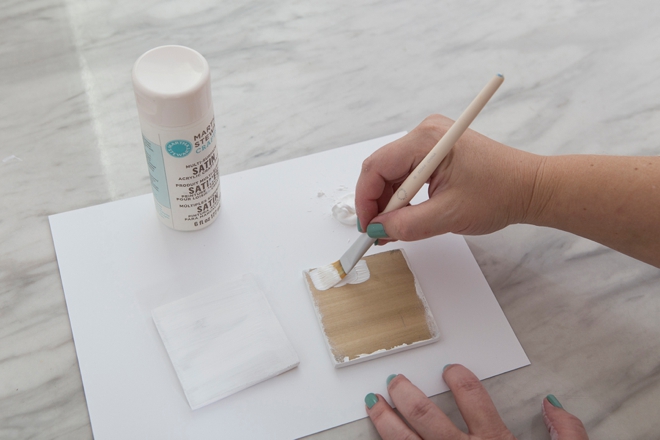
Paint Other Little Details
I made two little 3″ square wood plaques to put on hinges and hide pictures underneath, those needed paint and sealer too. Along with wooden balls, which I painted on bbq skewers.
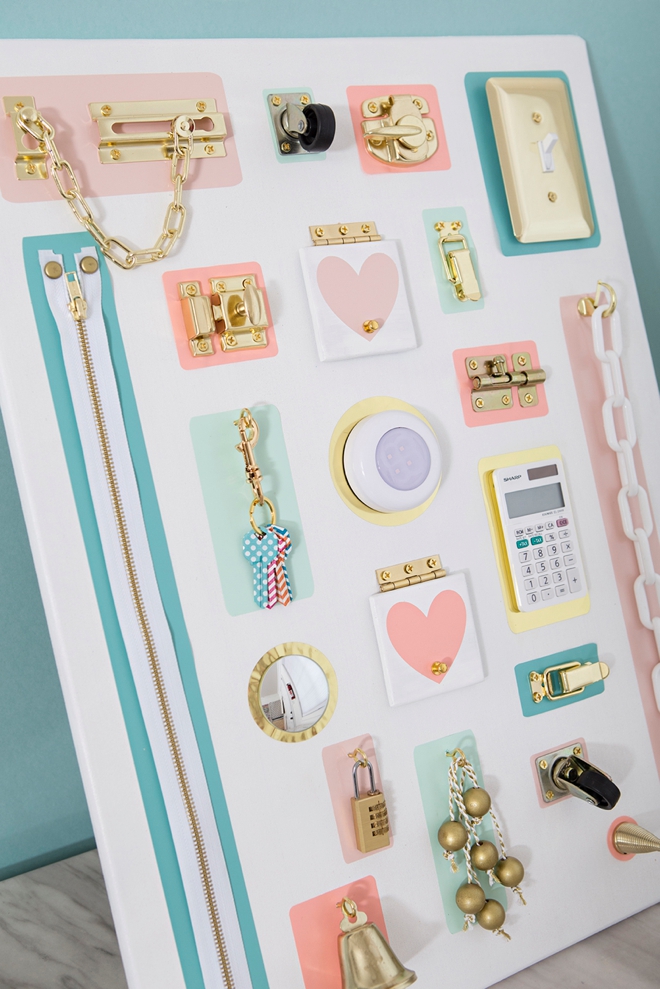
Decide On Your Layout
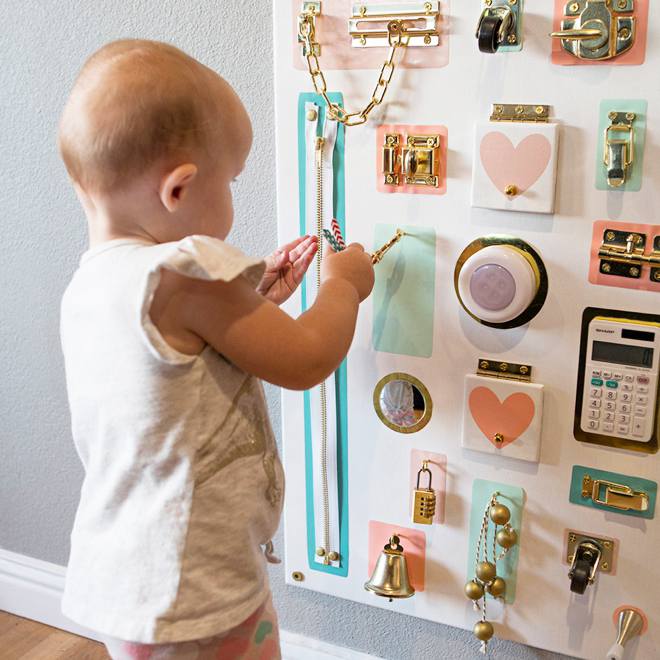
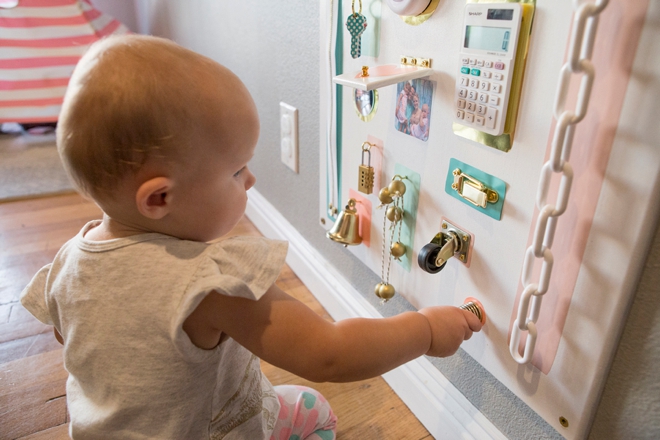
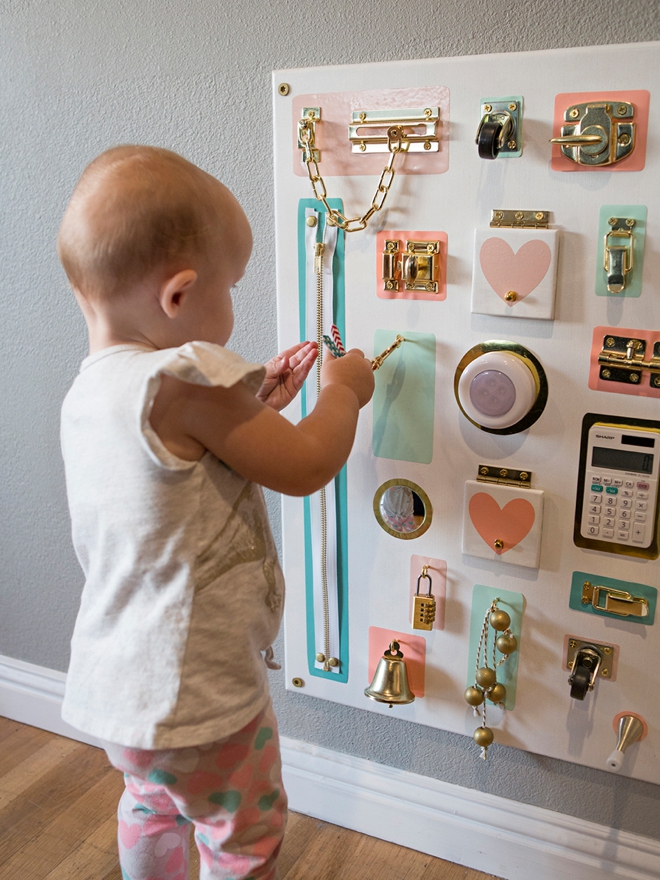
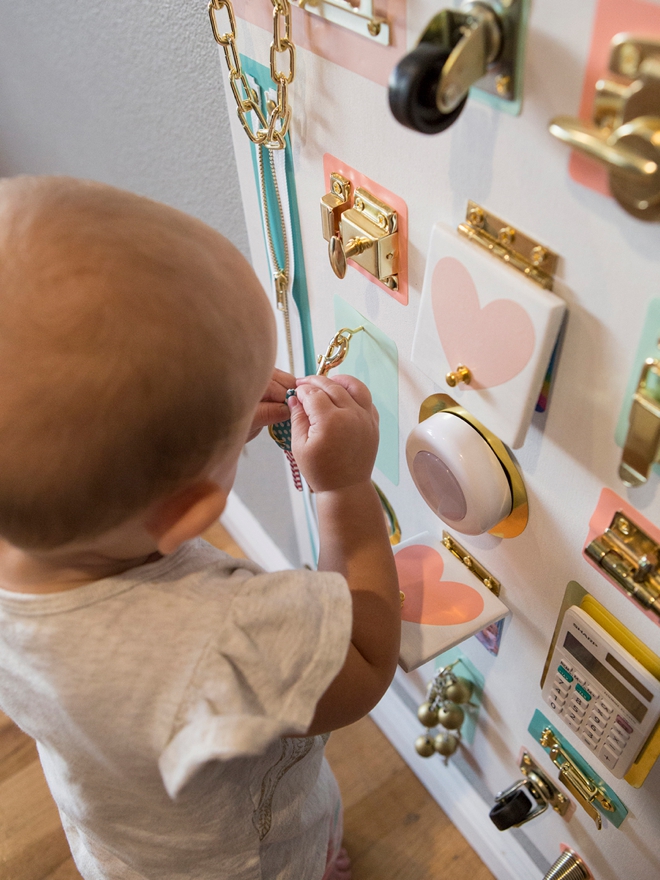
This took me a while. First trip back from the hardware store, I knew I needed more things. So I went back and also did a little Amazon shopping. I looked for things that would be interesting to kids, but that they don’t normally get to play with. Give yourself time to decide on all these items. See what you have laying around your house that you can use too!
Vinyl Decals
To add color to the board, I cut pieces of vinyl stickers to place underneath each item.
Crafters Update: the girls have been playing (or what feels like attacking, lol) the items on this board for about 10 days now and they have started to pick and peel at the vinyl stickers! If I did this again, I would just paint a colorful design on the board instead!
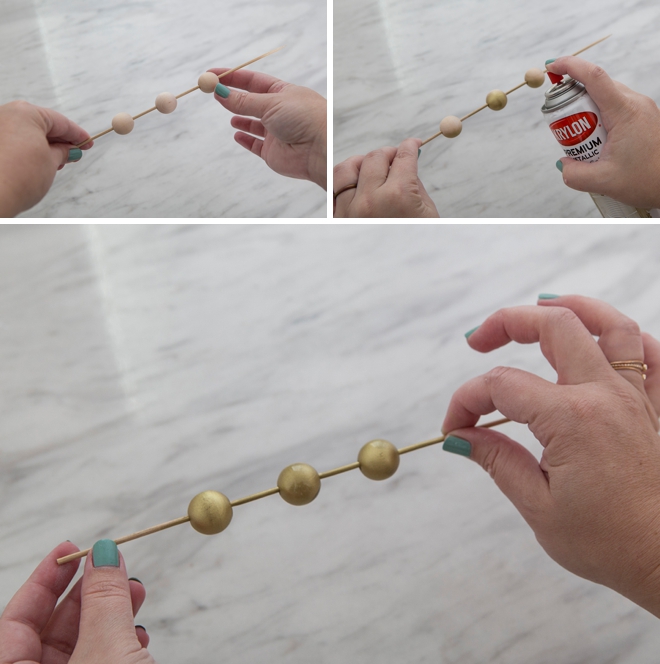
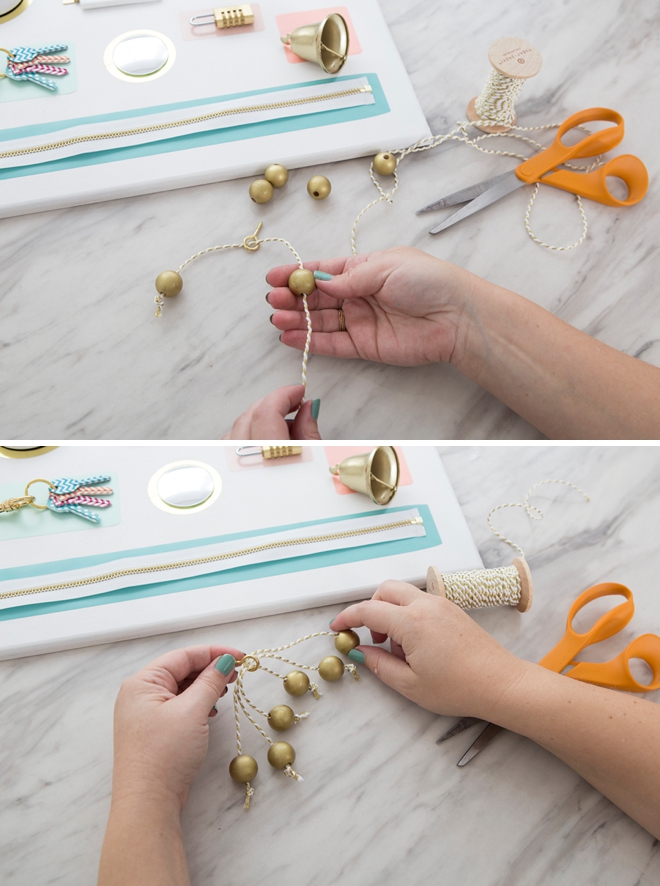
Wooden Beads
I painted 6 wooden beads and strung them on metallic twine. To make things easy on myself I tied a knot in the twine, added a bead, then strung it through an eyelet screw, then added the second bead and knot. That way they were all strung onto the screw from the beginning.
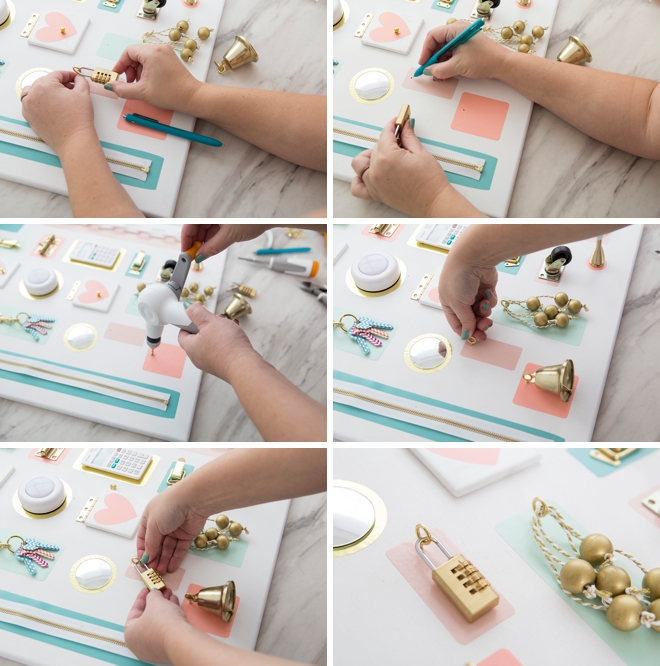
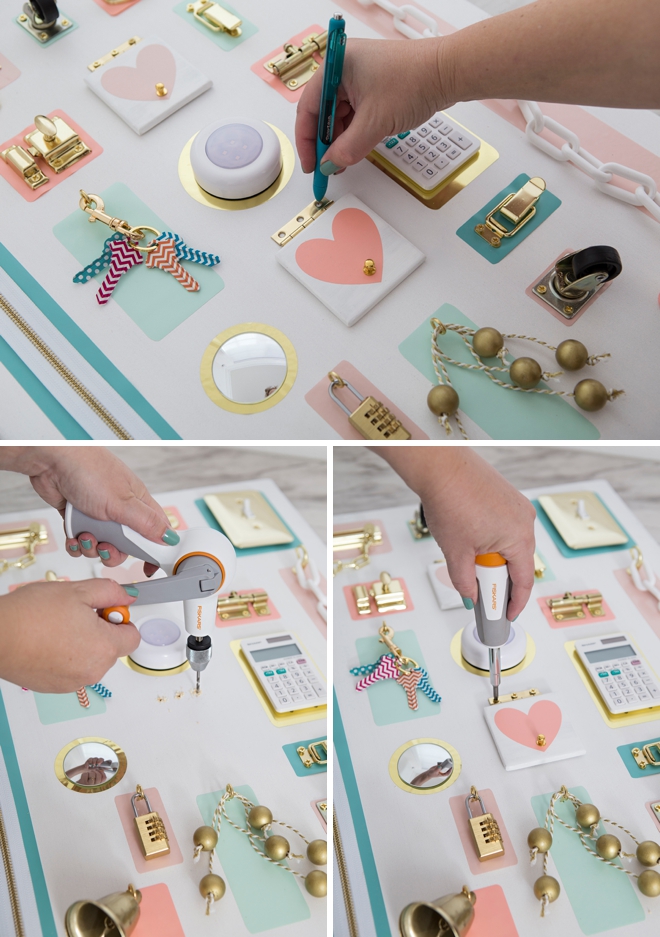
Eyelet Screws
Next up, attaching/hanging other items from eyelet screws. Think of eyelet screws like “closed cup hooks”. I hung a lock, a bell, plastic chain, keys, and the beads off of eyelet screws. First I marked where the screw should go, then I drilled a small pilot hole using the awesome Fiskars Precision Hand Drill, then screwed the eyelet screws in by hand. Let me tell you, this hand drill takes almost no effort at all and has a huge impact, which is exactly what you can expect from this new line of tools.
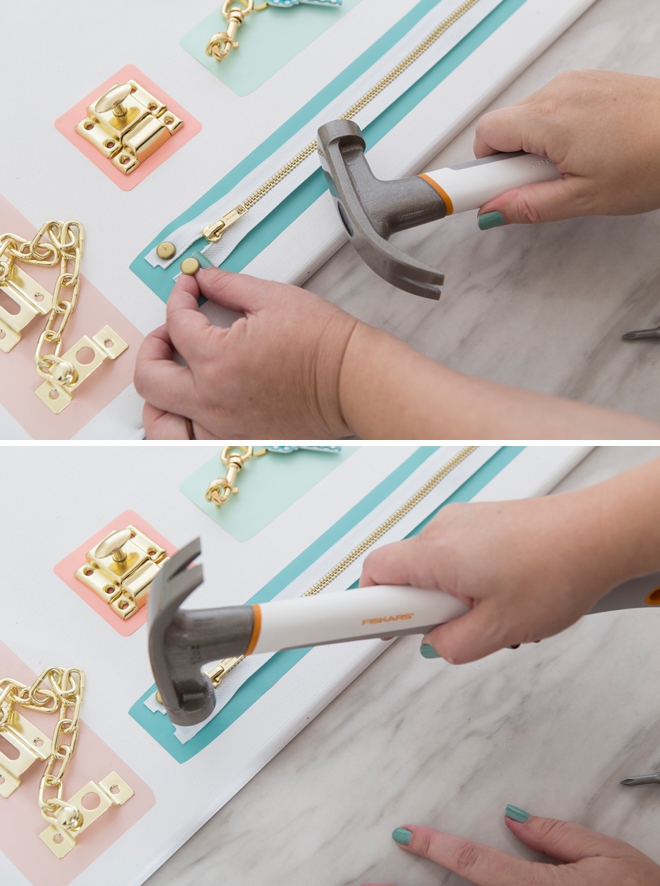
Zipper
To add the zipper I used my Precision Hammer and some gold furniture tacks. I simply tacked each of the four corners of the zipper down to the board, simple and secure.
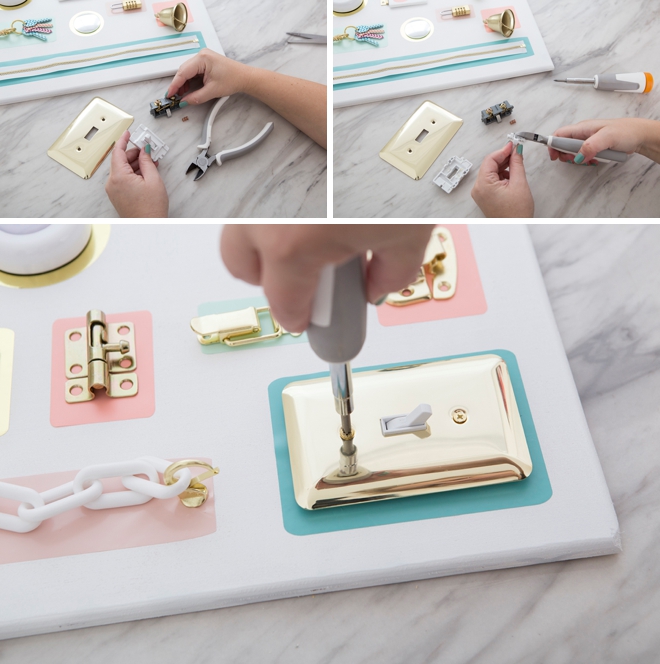
The Light Switch
Tricky. I’ve seen lots of boards with light switches, and the girls love switching lights on and off, so I threw one in the cart. However, to make this work I had to painstakingly break apart the light switch so that only the switch remained. My Precision Wire Cutters did the trick but to make sure that the switch still works, it couldn’t be flush against the board. Visual bummer, but it works so I’m over it.
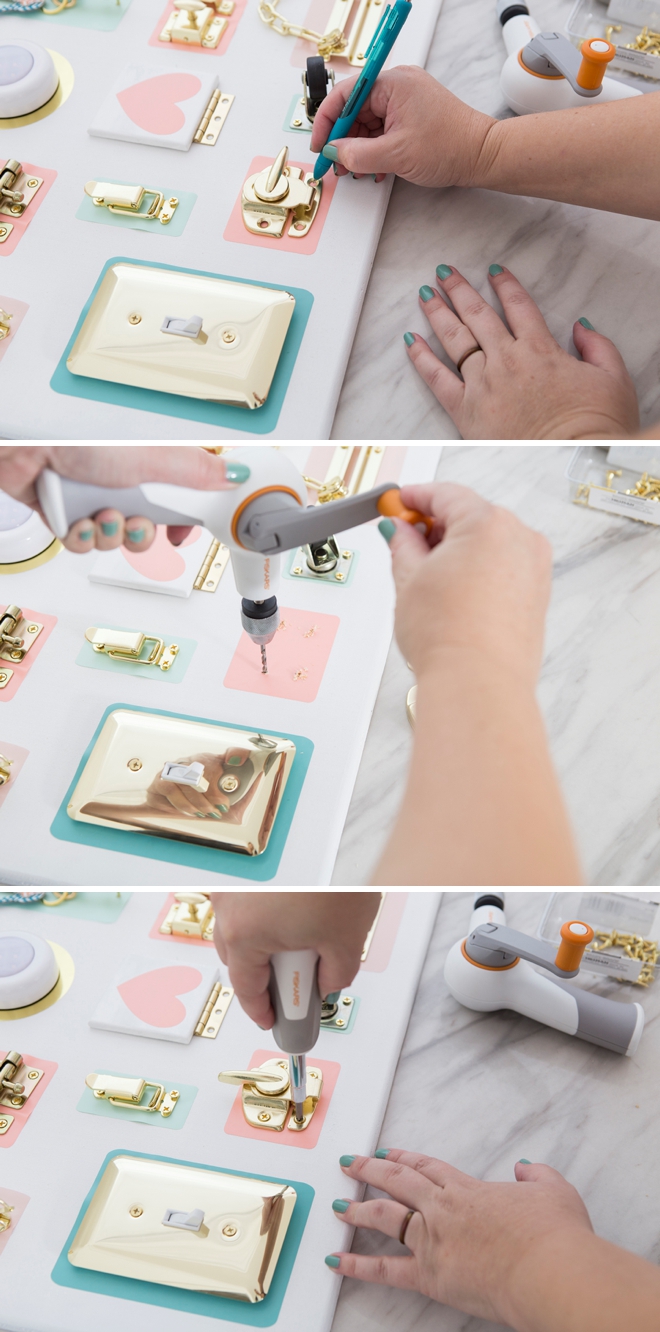
Screw On The Rest
The rest of the items could all be added with screws. I did glue on 3 things using E6000 Glue, the calculator, light, and mirror. First I marked the screw holes, then hand-drilled pilot holes and used my Precision Screw Driver to add all the screws. I did have to buy shorter screws because most of everything that came in the packaging were too long for the 3/4″ board.
Picture Flaps
I added hinges to the 3″ square wood plaques, along with heart stickers and tiny gold knobs that I glued on. Drilled small pilot holes first, then added my screws.
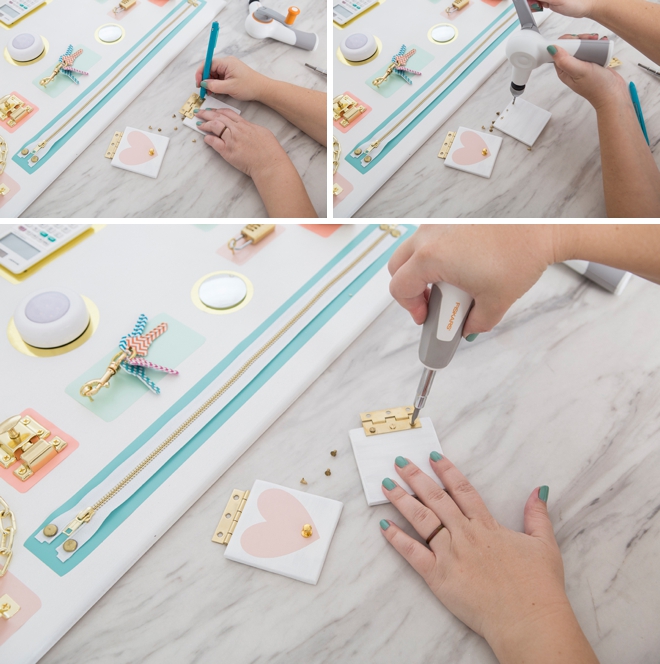
Then attached them to the board by the hinges.
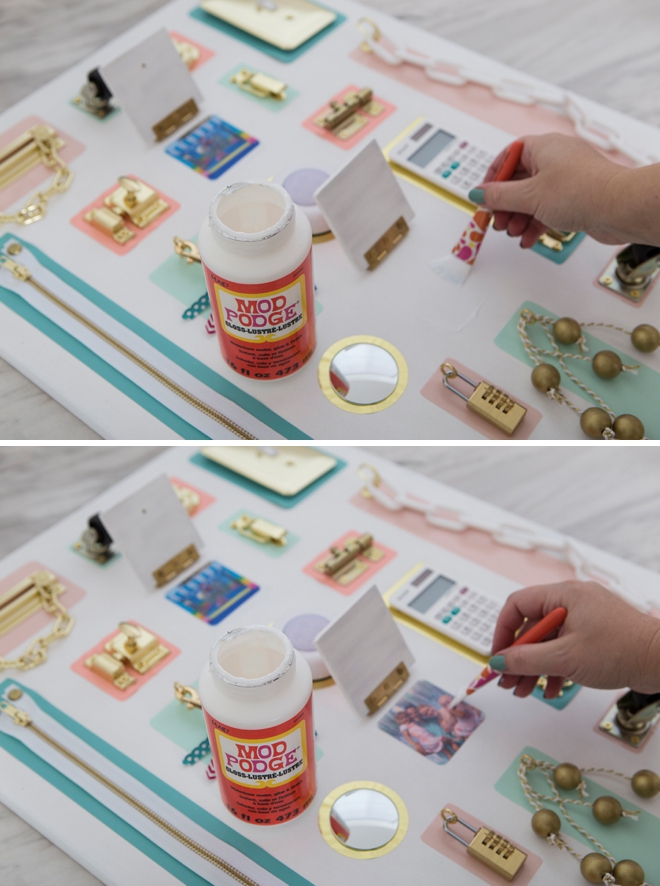
Mod Podge Photos
I printed two family pictures at 2.5″ square and used Mod Podge to adhere them to the board, underneath the wood flaps. Apply a coat of glue to the board and the backside of the photo, then apply two coats on top of the photo to secure. This turned out to be one of Hadley’s favorite features of the board!
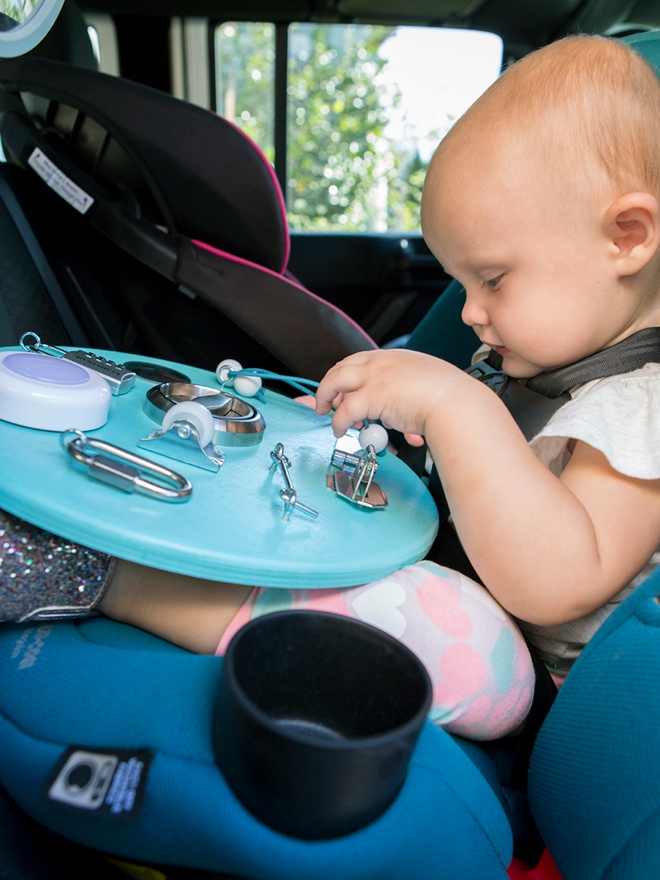
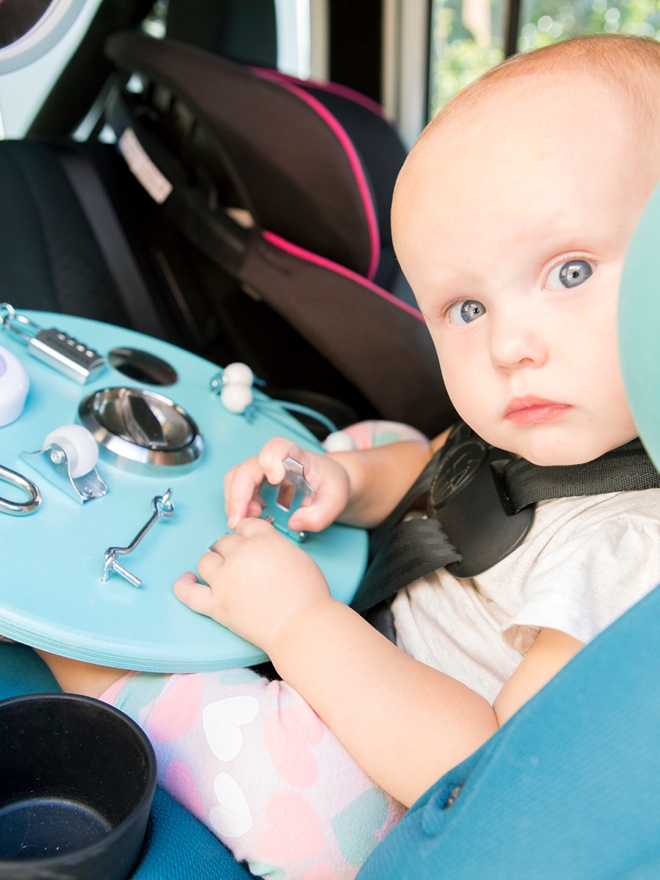
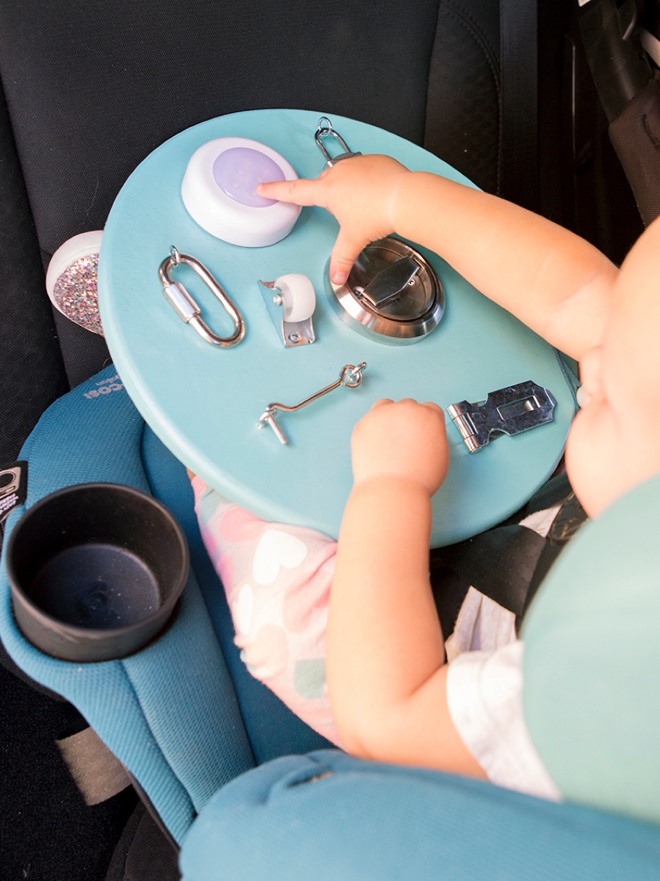
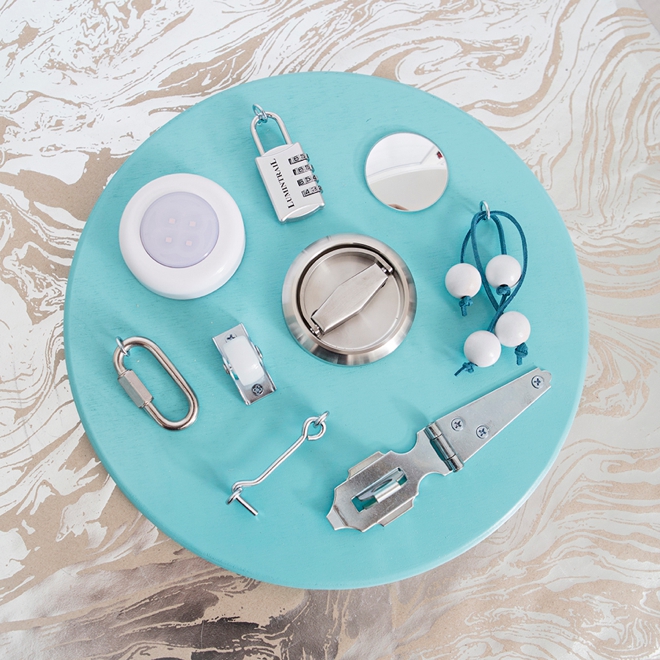
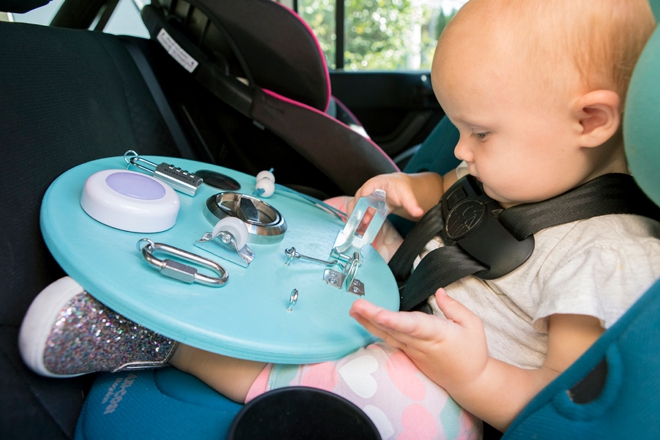
On-The-Go Board
Need to keep your littles busy on a long car ride? Or at the DMV, or anywhere else that isn’t at home. Make a smaller board with some of their favorite items, or entirely different items. I made sure that this board fit comfortably on Hadley’s lap while in her carseat… and that the colors matched my Jeep, lol. She doesn’t enjoy the car unless big sissy Ava is sitting next to her, so hearing her make noise while playing with the board and mumble to herself is music to my ears!
DIY Tutorial Sponsored By:

Known for its iconic Orange-Handled Scissors™, Fiskars is a 369-year-old company that empowers everyday creativity through purposeful design. Fiskars is a leader in the DIY industry with tools spanning the categories of crafting & sewing, gardening & yard care, kids & school, and cooking. In addition to providing scissors, punches, trimmers, rotary cutters and many other tools, Fiskars shares inspiring project ideas to help DIY-ers do what they love using tools that make projects easier.
As with all our DIY tutorials, if you create one of our projects please send us a picture – We Love Seeing Your Creativity! If you use Instagram or Twitter please use the hashtag #SomethingTurquoiseDIY and it will show up on our [Get Social][3] page. Happy Crafting!
DIY Tutorial Credits
Photography + DIY Tutorial: [Jen Causey][4] of Something Turquoise // Fiskars DIY Tools: courtesy of Fiskars // Gold + Silver Hardware: Lowes // Mini Press-on Lights: [Amazon][5] // White Calculator: [Amazon][6] // Blind Spot Mirrors: [Amazon][7] // Nail Polish: OPI – [Withstands the Test of Thyme][8]
Shop The Supplies:
Find the supplies you’ll need for this project from our affiliate links below:


Comments