
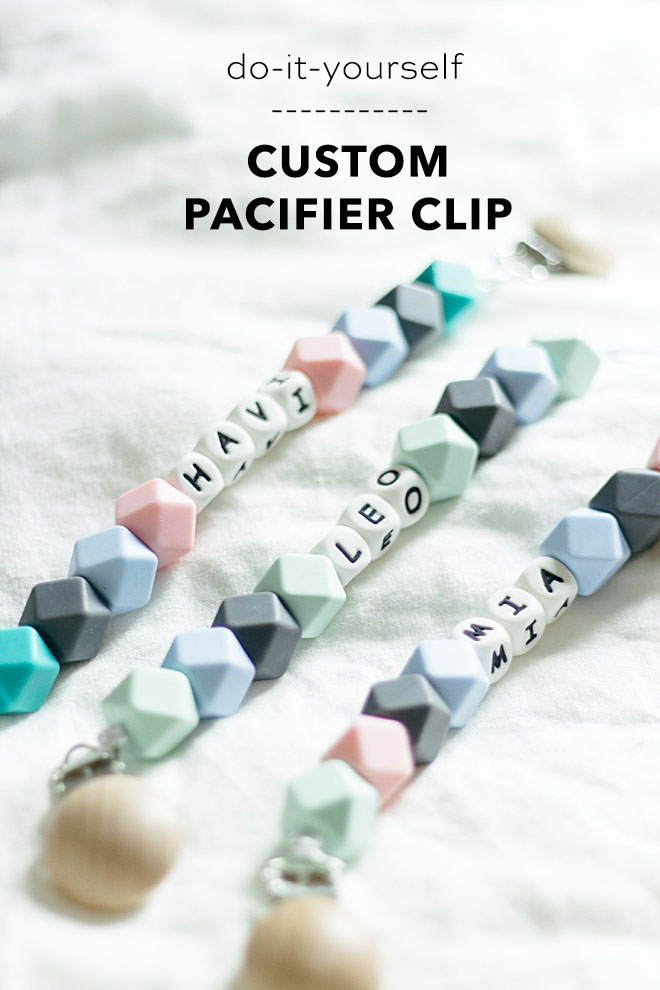
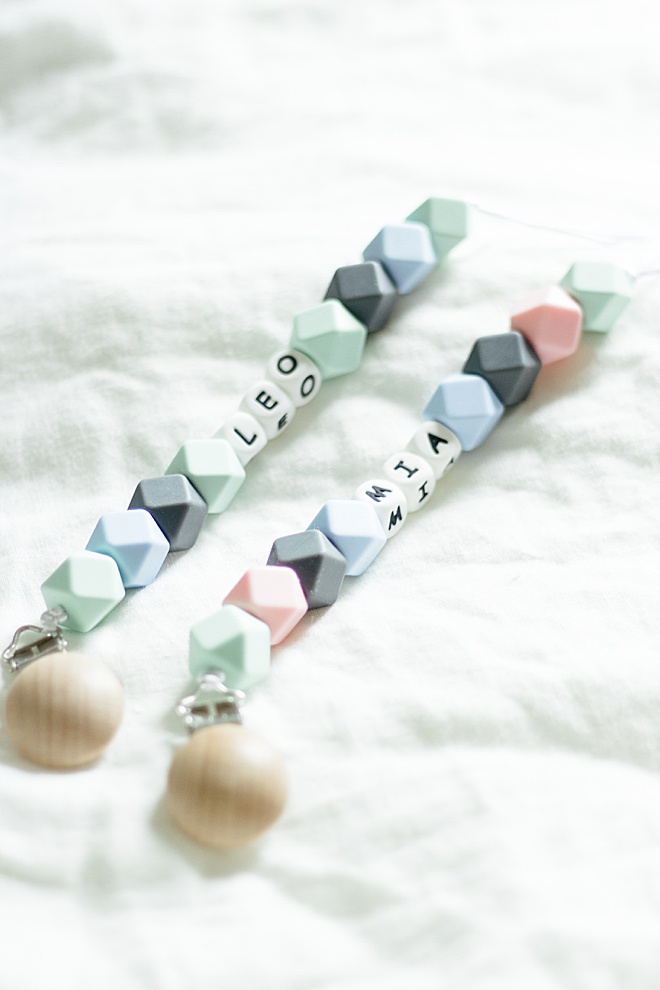
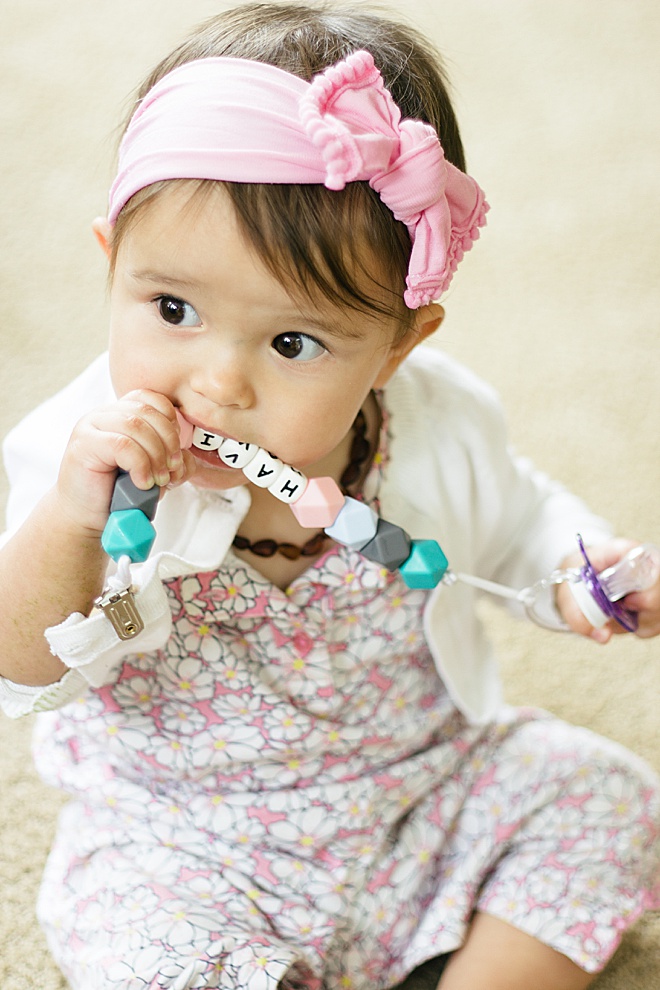
How To Make Adorable, Custom Name Pacifier Clips
I am Carli Hein from Hein & Dandy, a DIY blog focused around every day life! I am now six months pregnant and ever since I found out I have been so excited to make DIY baby projects! It has been so amazing to grow with Something Turquoise and start creating for the entire family. When I think of baby projects, my mind automatically goes to personalization! It’s so fun once you know the name of your baby to start adding their name to everything. Since I am only six months pregnant, I thought of what my friend’s babies might like and what my baby will eventually want to have too. So today I am walking you through how to make a personalized teething pacifier clip. Let’s get started!
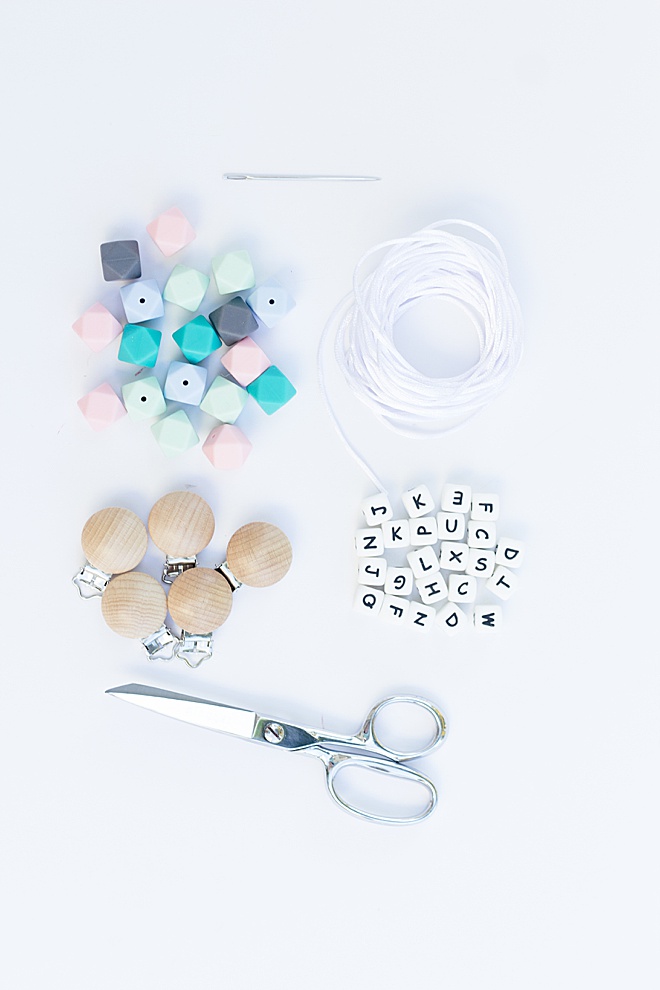
SUPPLIES:
- Letter Beads
- Colorful Beads
- String
- Wood Clips
- Large Needle
- Scissors
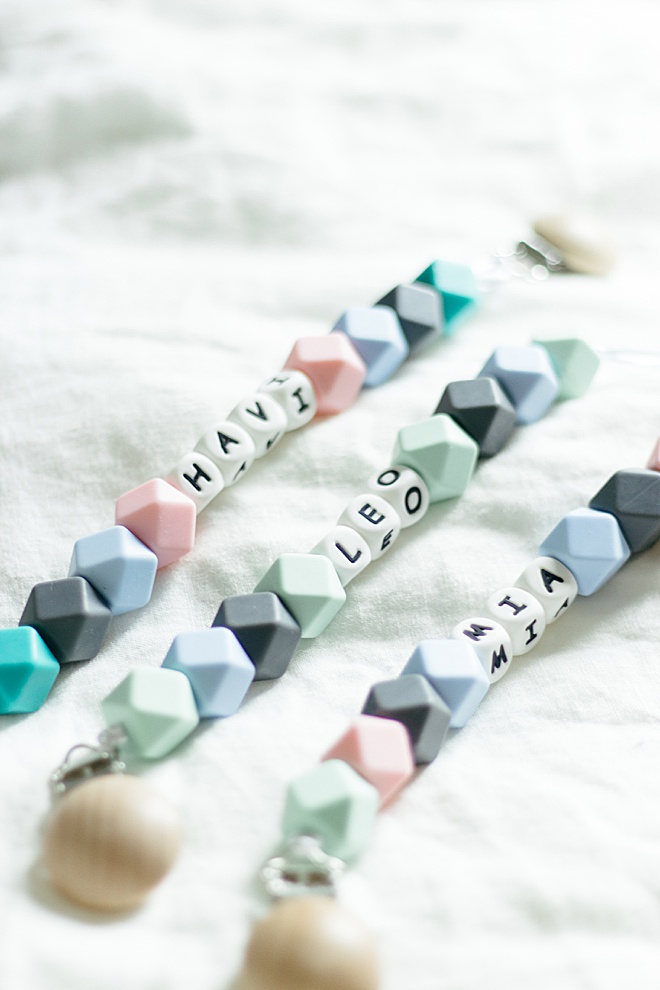
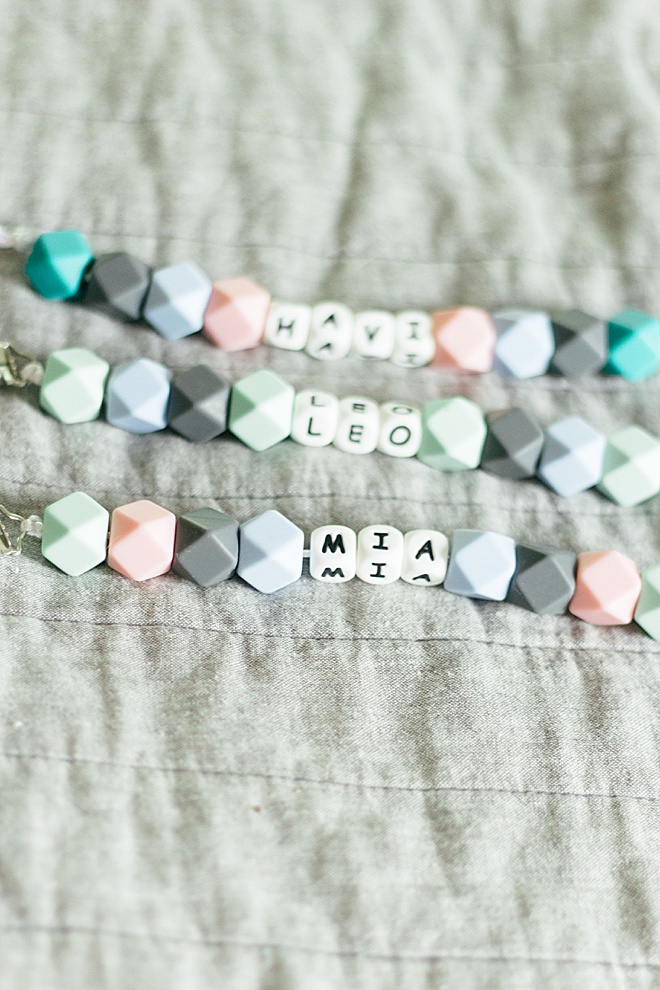
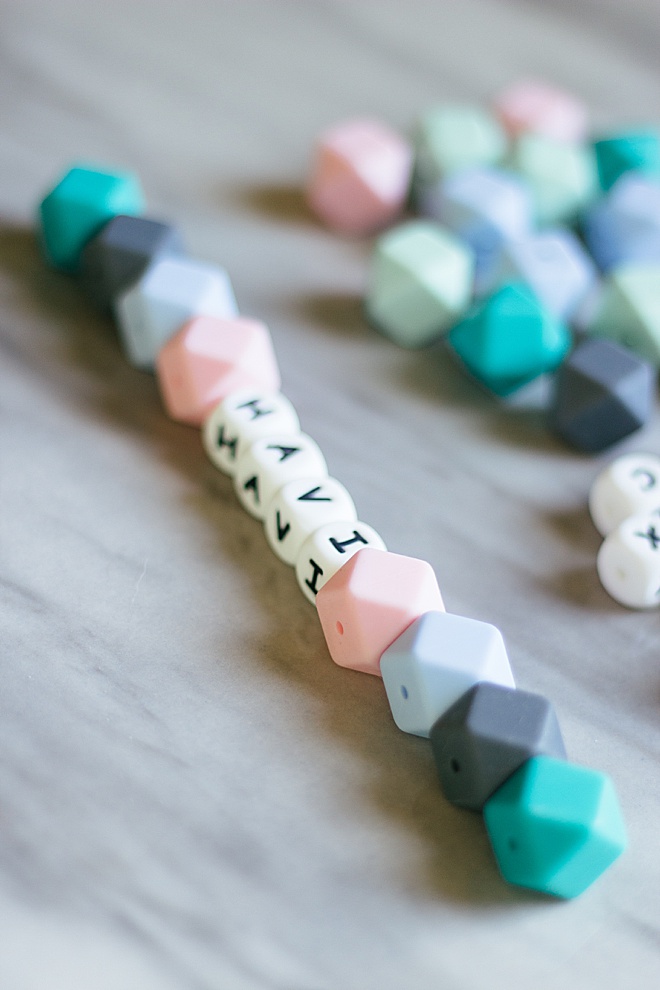
Name
The letter pack has all the letters you need but if you are planning on making multiple clips, I’d suggest getting a couple packs to make sure you get every letter you need. These beads are BPA free and super cute, modern but still childlike. Find all the letters for the baby’s name and arrange them properly.

Colors
This pack of beads has so many great colors. You can organize them however you wish. I chose to do a mirror pattern for mine using. You can also do every other color a different color or use the same color for the entire clip. This is where you can get creative!
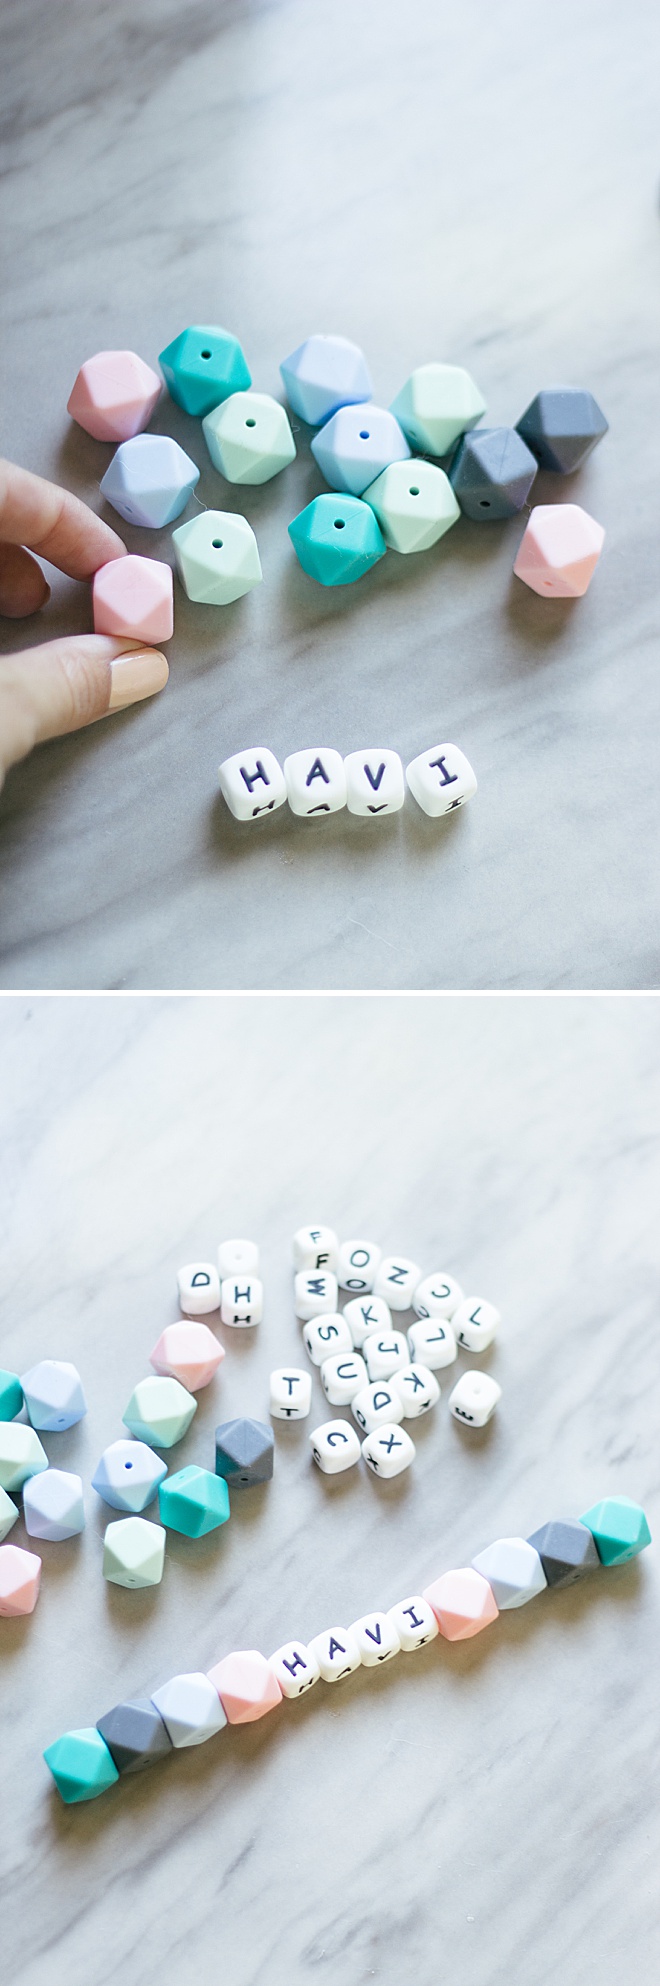
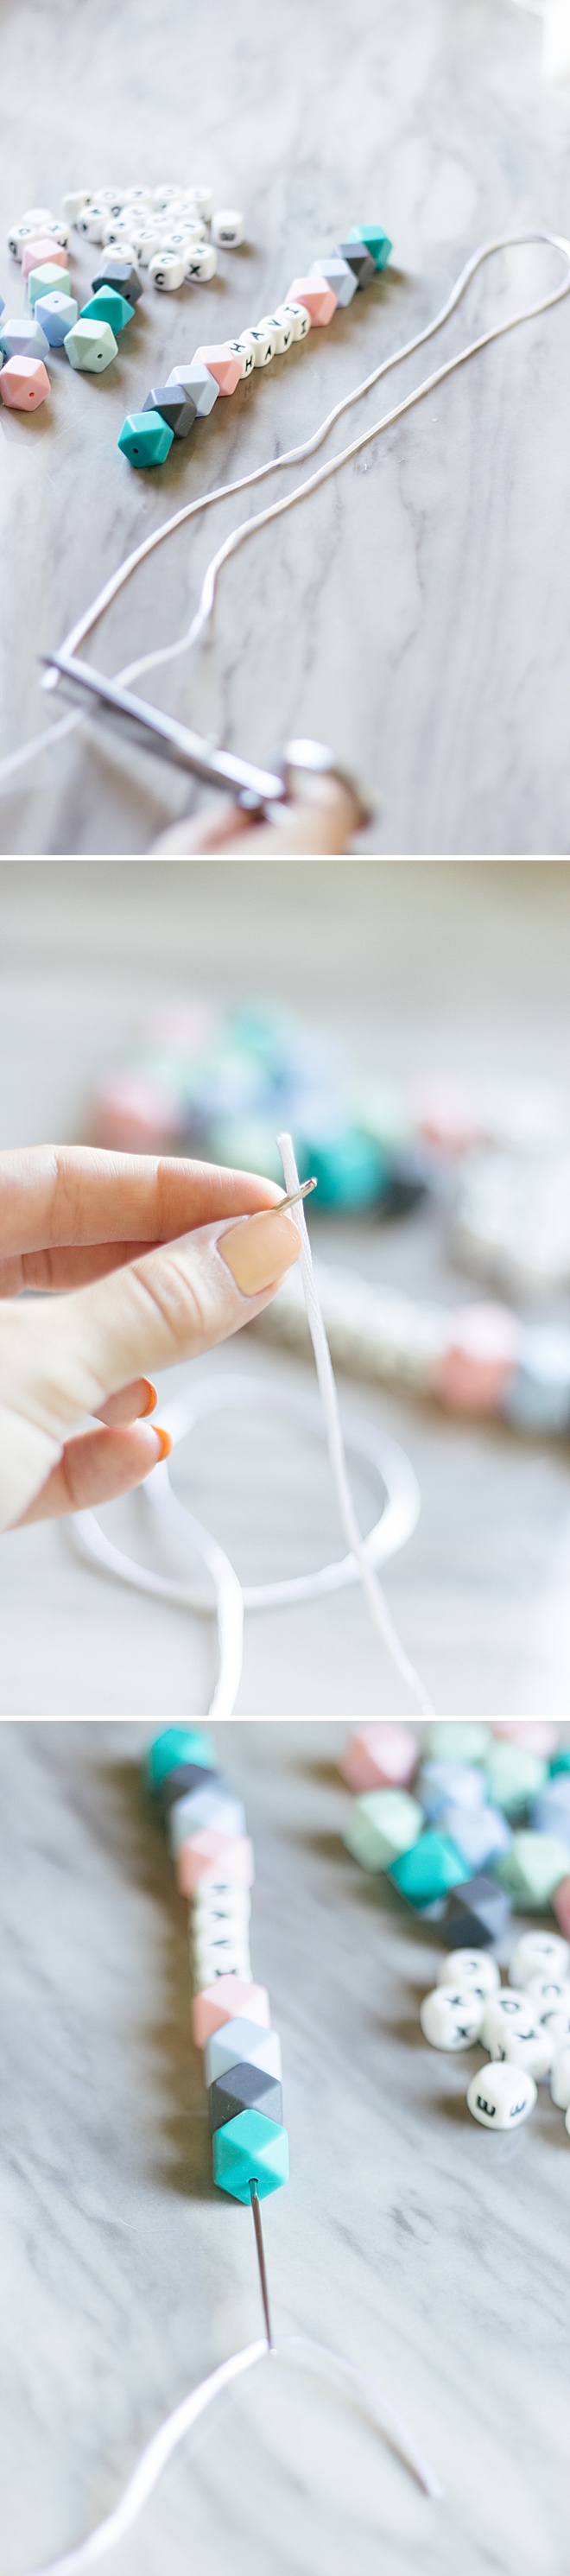
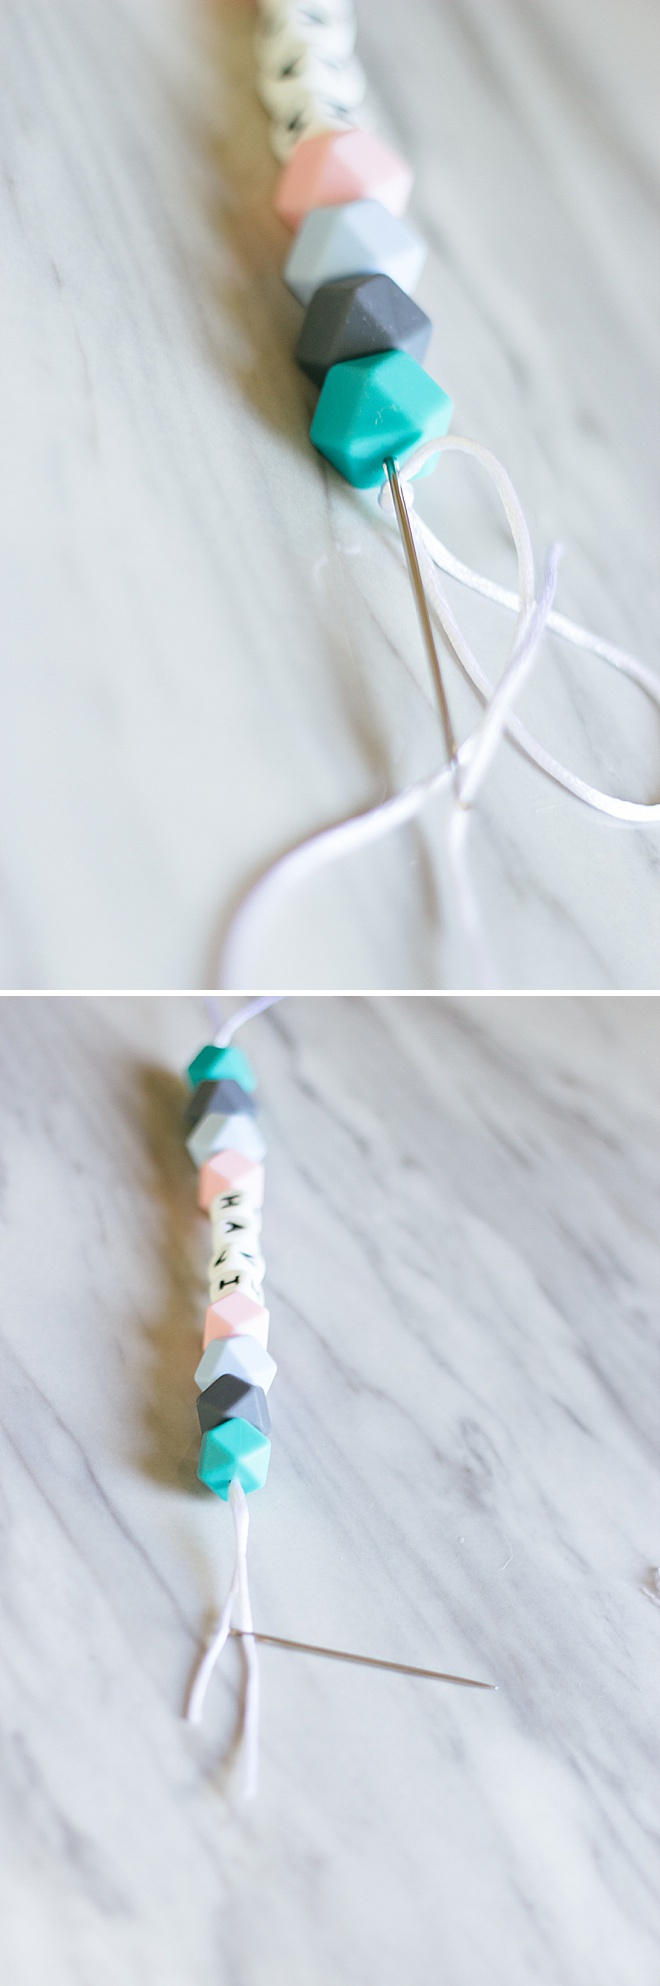
Thread
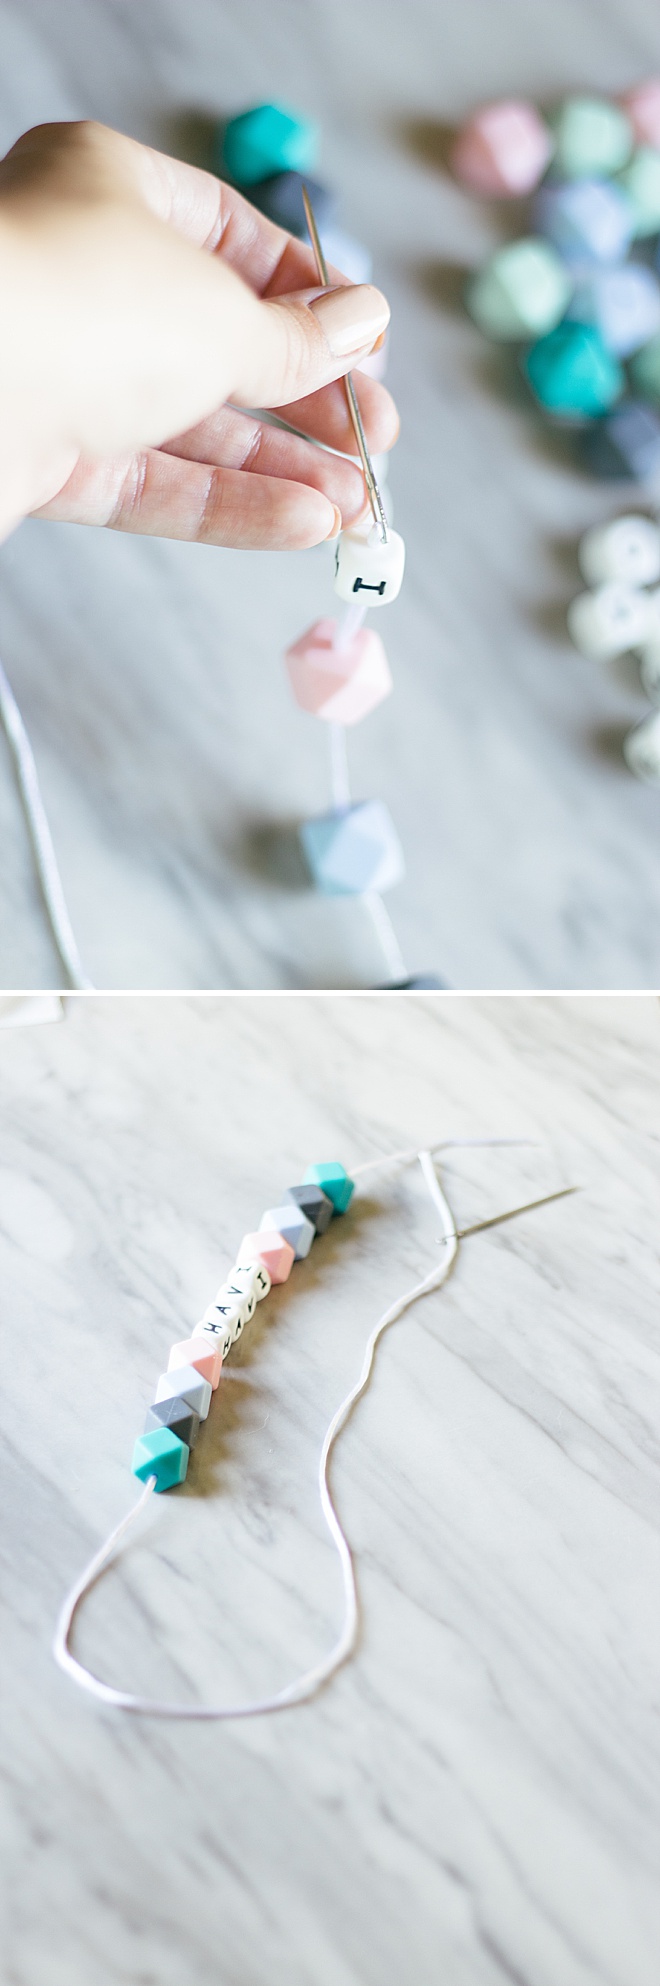
Lay out the string along the beads to measure how much you need. Give a little extra on each end for knots and cut off the extra. Using the big needle, thread your string through. Put each bead on one at a time and pull through onto the string.
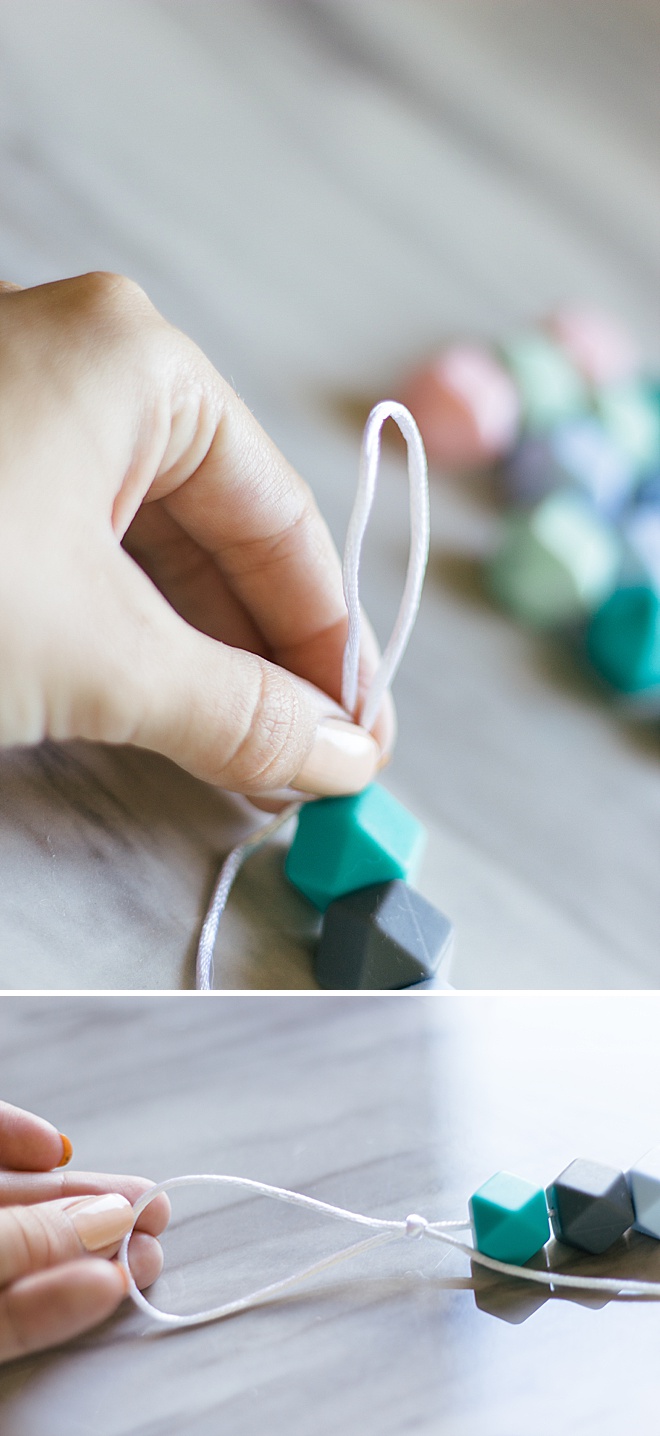
Hoop
Once all the beads have gone through, make a loop at the end. Tie a knot big enough that all the beads will be able to pass through when putting it on the pacifier.
Thread through
Once the knot is tied, bring the needle back through the beads. This can be a bit tricky so take your time.
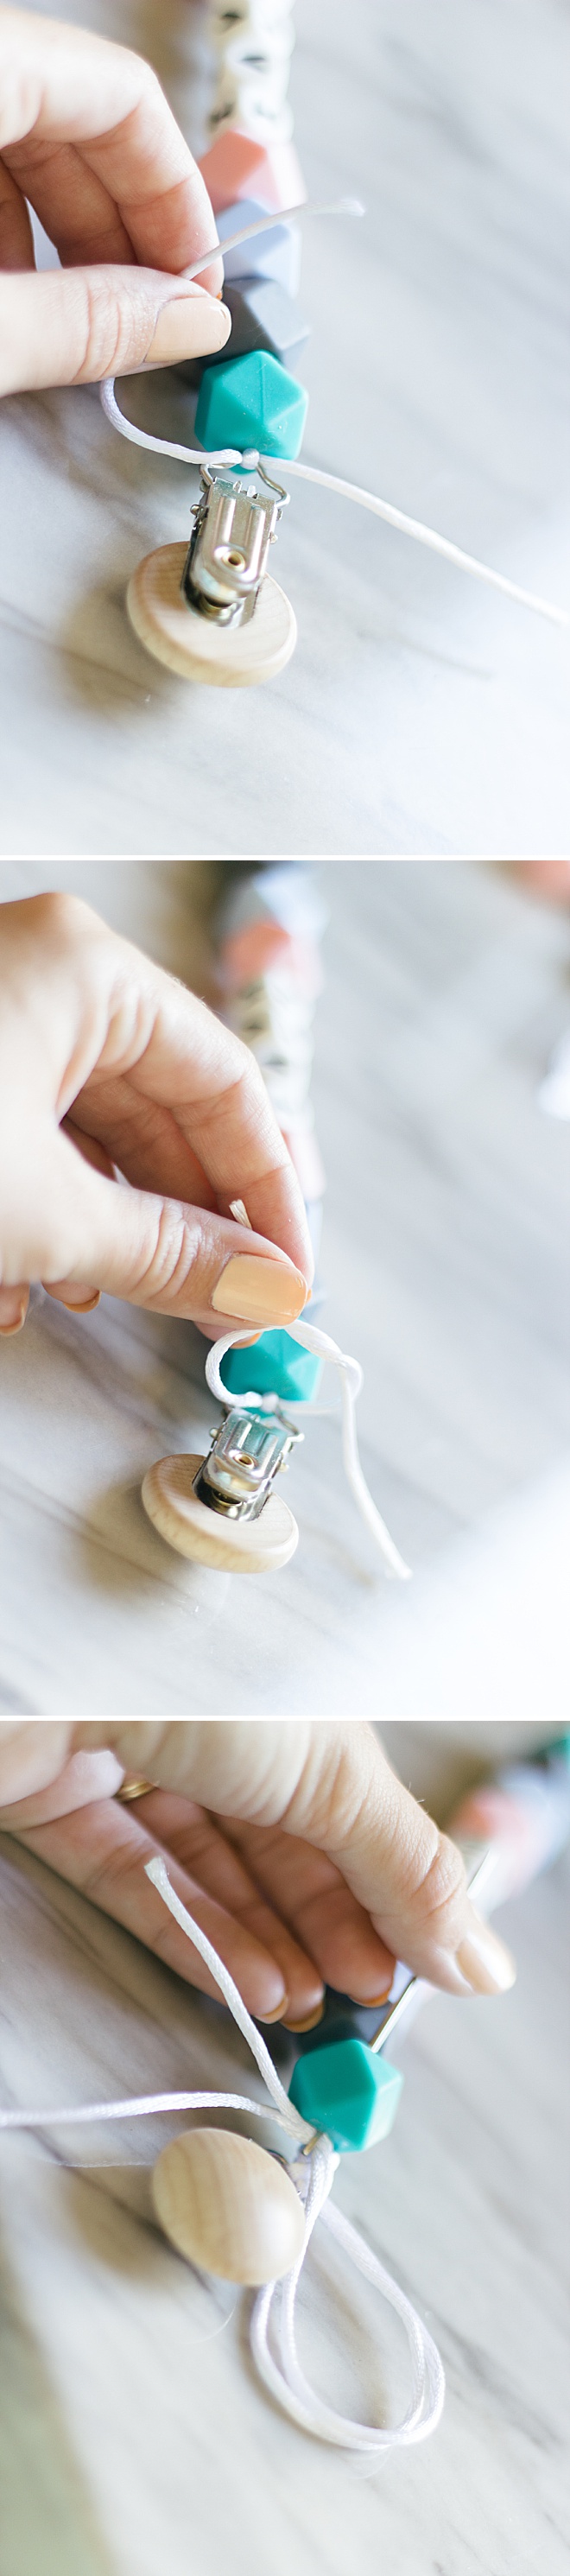
Knot
Knot your wood clip at the end of the beads. Put both strands of string in the needle and string back through the last bead and cut off the extra string.
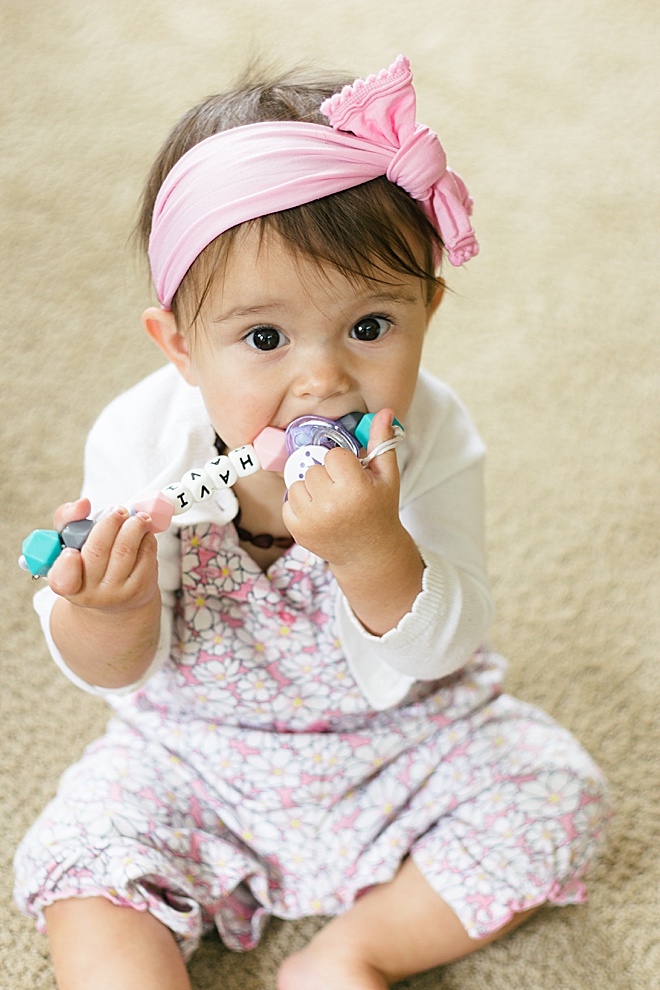
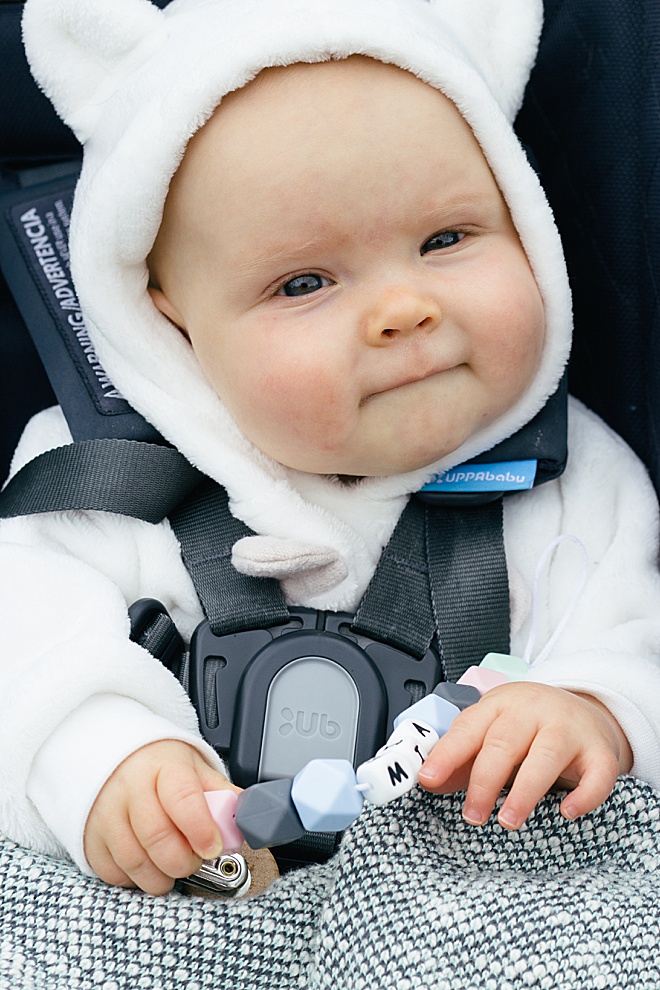
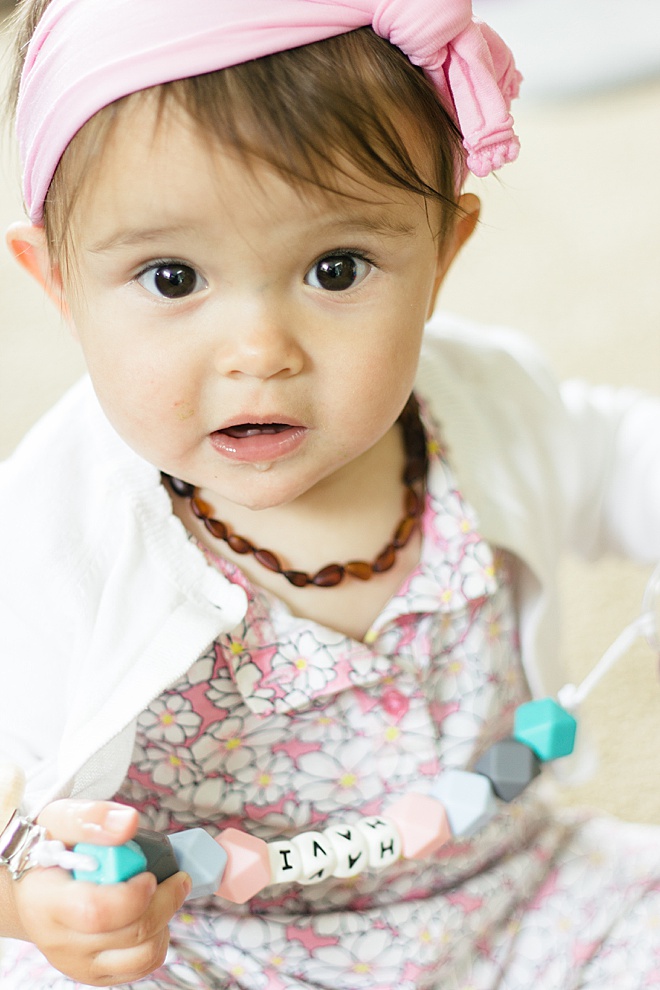
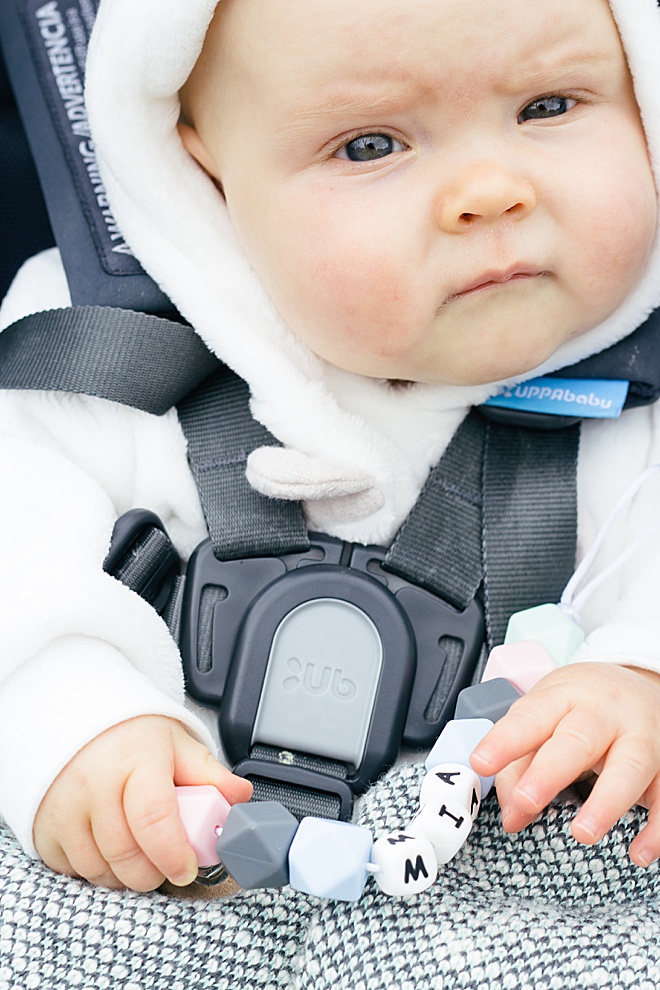
Clip to your Baby

Hein & Dandy is a blog founded on crafts and creative writing, inspired by adventure and wellness. Make sure to check out our website for new projects and inspiration!
As with all our DIY tutorials, if you create one of our projects please send us a picture – We Love Seeing Your Creativity! If you use Instagram or Twitter please use the hashtag #SomethingTurquoiseDIY and it will show up on our Get Social page. Happy Crafting!
DIY Tutorial Credits
Photography + DIY Tutorial: Carli Hein of Hein & Dandy // Letter Beads:Amazon // Wood Clips:Amazon // Geometric Beads:Amazon // String:Amazon
Shop The Supplies:
Find the supplies you’ll need for this project from our affiliate links below:


Comments