

DIY Wedding Table Wreath Centerpieces With FiftyFlowers.com
-Sponsored Post-
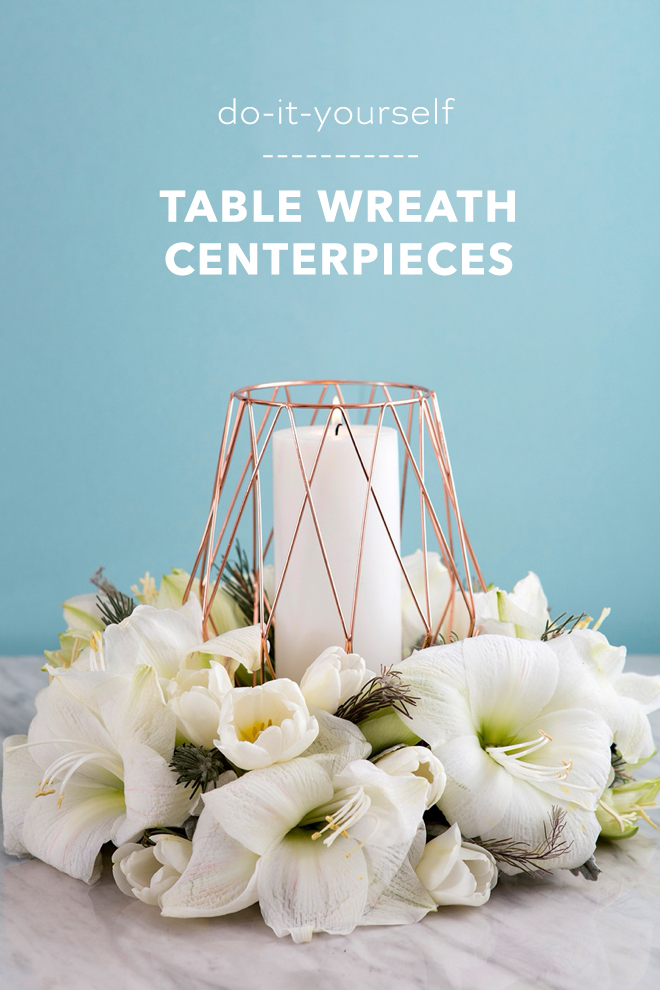
For our seventh and final DIY Flower feature with FiftyFlowers for this year (I cannot believe that the year is almost over), we’re showing you how to create gorgeous wreath style centerpieces! These table-wreaths would be perfect for your engagement party, bridal shower, or the holidays. They are incredibly easy to make, so even if you’ve never worked with flowers before, you’ll do just fine, especially with the flowers we’re using as they don’t require much work. If you like this centerpiece idea, then you’ll love what we created for my baby shower too!
Water Source
Since these arrangements have been created in Oasis (special flower foam) they have a water source and that means they’ll stay fresh for days. You can even continue to add water to the foam and potentially keep the arrangement fresh for up to a week. If you use tulips as we did, they will actually continue to grow after they’ve been cut and arranged!
SUPPLIES:
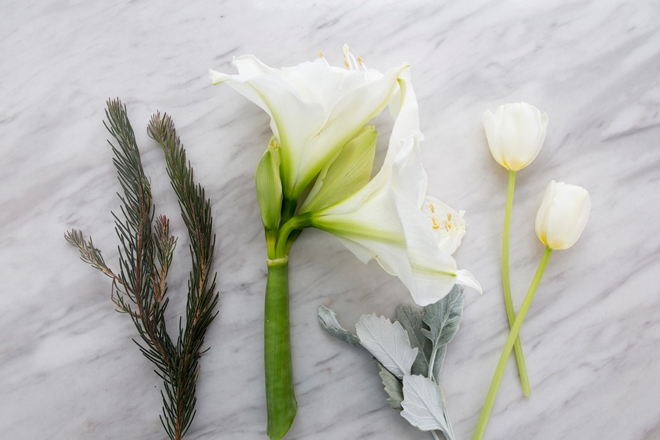
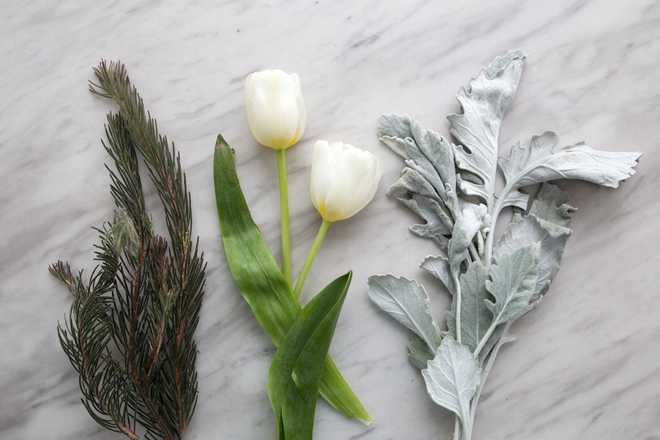
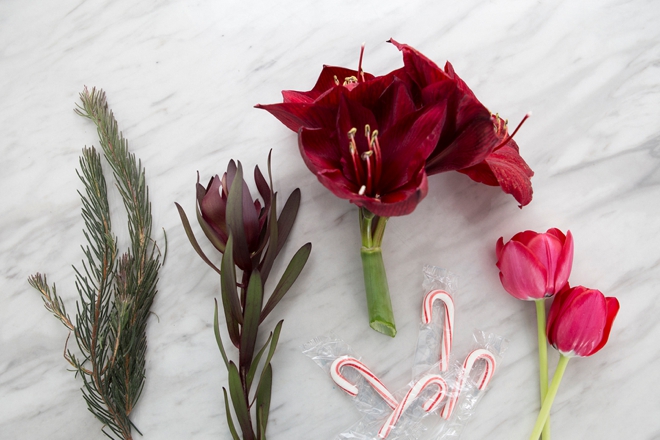
- Fresh flowers from FiftyFlowers.com, Amaryllis, Tulips, Safari Sunset, Dusty Miller, Curly Pine
- Oasis Rings, we used 6″ and 8.5″
- Floral Knife or Pruning Shears
- Vases, candles, holiday items… something pretty for the centers!
- Optional: candy canes, waterproof floral tape, and toothpicks
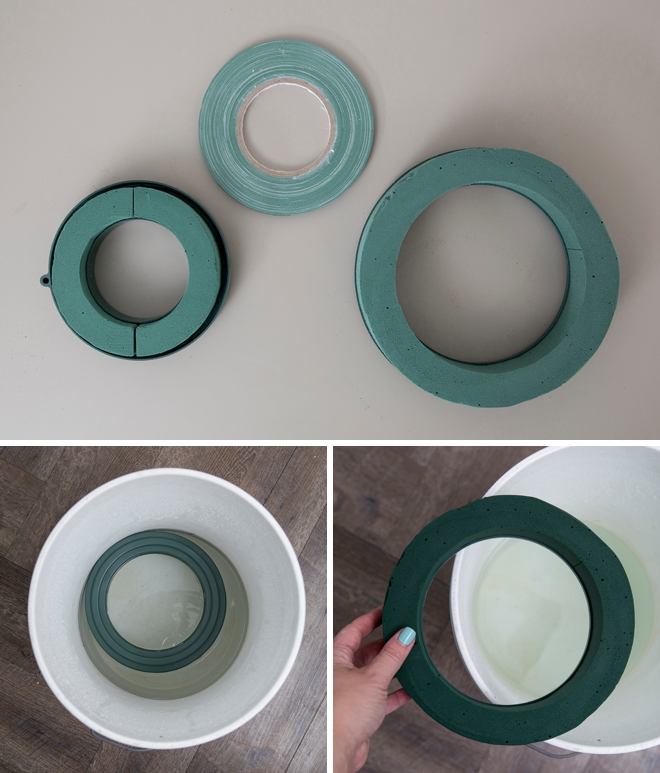
Oasis
Oasis is a special type of rigid foam that flower stems can be secured in during flower arranging. It also provides a water source for the flowers to draw from, keeping them fresh. Water can be added to the foam for days after the arrangement is complete, just like a vase. It comes in many different shapes and sizes to fit your unique projects. Today we’re using the “ring” style in 6″ and 8.5″.
Fill up a bucket with water and place the oasis on top. Don’t press it under the water, it will quickly absorb it naturally. In the case of the rings that have plastic bottoms, you’ll want to put them foam down in the water. To fully absorb the water it only takes a few minutes. A few Oasis tips:
- You can’t re-soak Oasis after it’s initial first soak
- Do not push your fingers into it – If you insert and remove flowers from the foam it creates holes that can’t be fixed
- Do not pour Oasis water down the drain or it could cause a clog
- When you push flower stems into wet Oasis it causes water displacement and pushes the water out onto your table
- Add water to the Oasis arrangements every 1-2 days
Rehydrating
FiftyFlowers is a farm to customer, wholesale flower company. Which means that your flowers are shipped straight to you from the farm! They will arrive in large cardboard boxes.
- Using hardware store buckets, fill them up 1/4 of the way with water, make sure they are clean to start with.
- Carefully unbox and unpackage your flowers, per the instructions from FiftyFlowers. Each flower is different and their team can walk you through the prep for each flower if needed.
- It is 100% normal for your flowers to look a bit tired and lifeless, they’ve been on a long journey to you.
- Give each stem a fresh diagonal cut and place in the water to rehydrate for 4-12 hours.
- Keep out of the heat and sun while rehydrating.
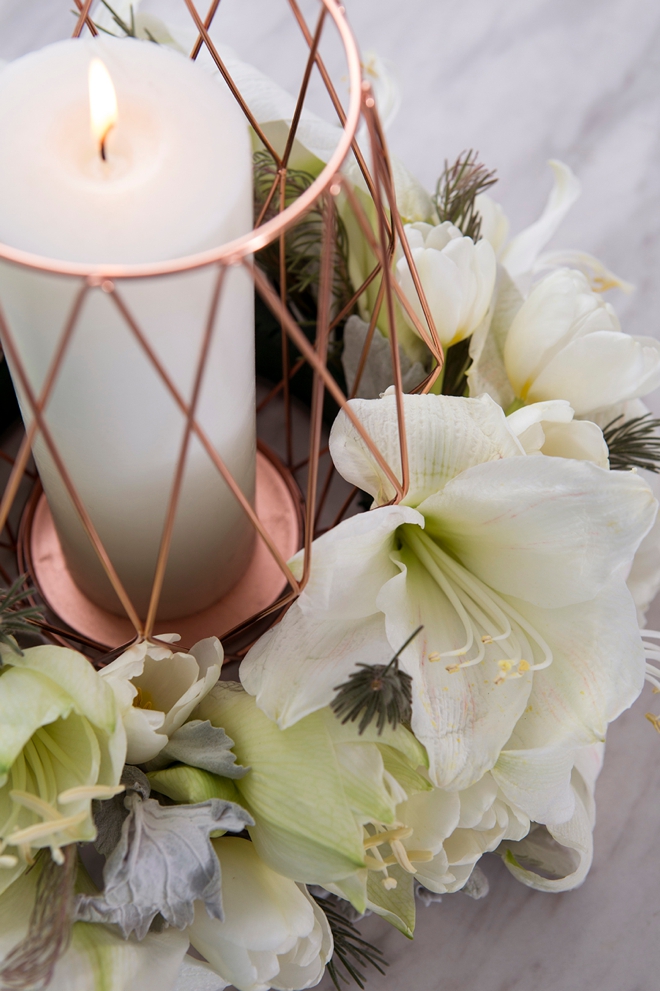
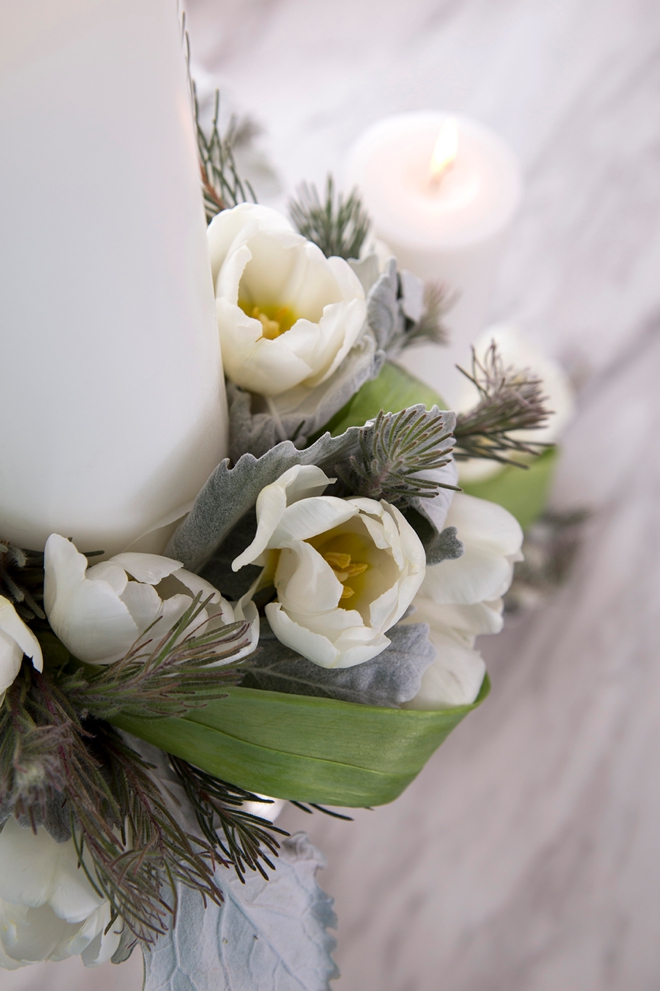
Table Wreath With Candle Centerpiece
For the first arrangement, we used:
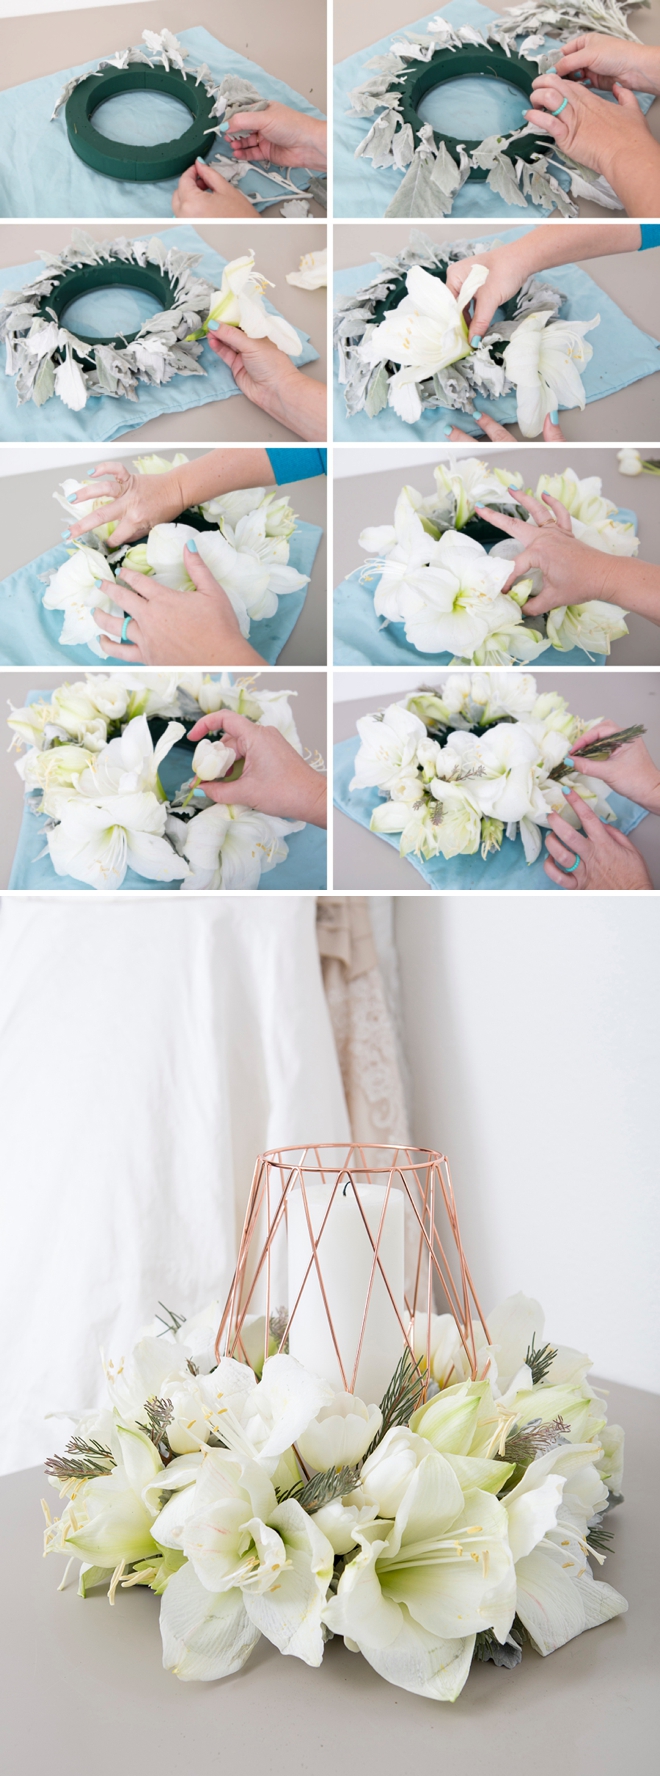
Add The Flowers
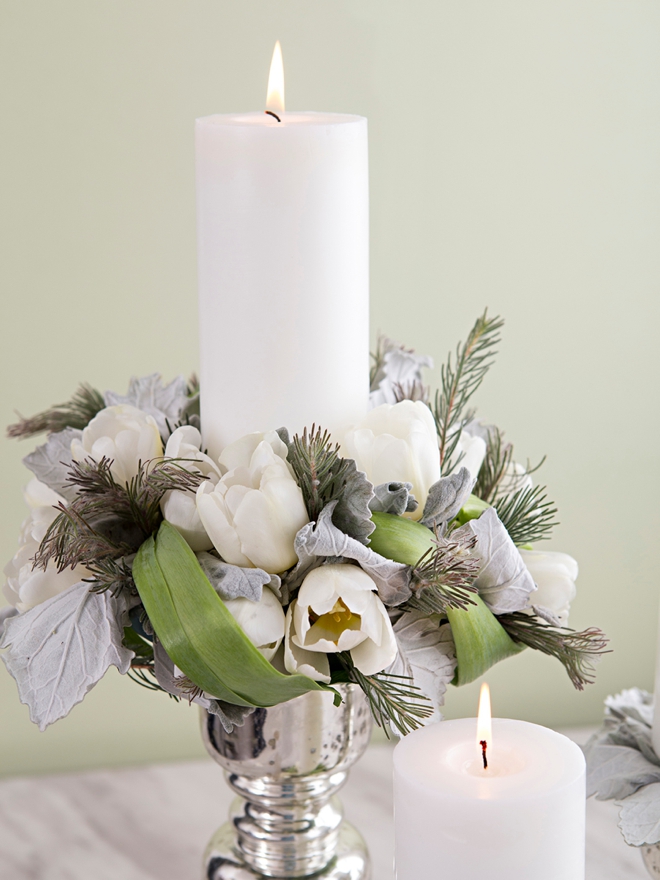
For these wreath style centerpieces we’ll start by creating a base of foliage using the Dusty Miller. These leaves tend to be pretty floppy and soft so push the stems into the Oasis at the base of the leaf. Next add your large focal flowers, in this case the White Amaryllis. Fill in the holes in between the large white flower using the White Tulips, then finish the design by adding a few sprigs of Curly Pine here and there. Look over your arrangement to make sure that all the Oasis is covered, if you can see the foam – keep adding flowers and foliage!
- Start with leaves
- Then add large flowers
- Next add smaller flowers
- Make sure no foam is visible
- Add detail flowers, leaves, or berries
Crafters Tip: I created the arrangement on a towel because as flower stems are added to the Oasis, water is pushed out and onto the table, the towel soaks it up!
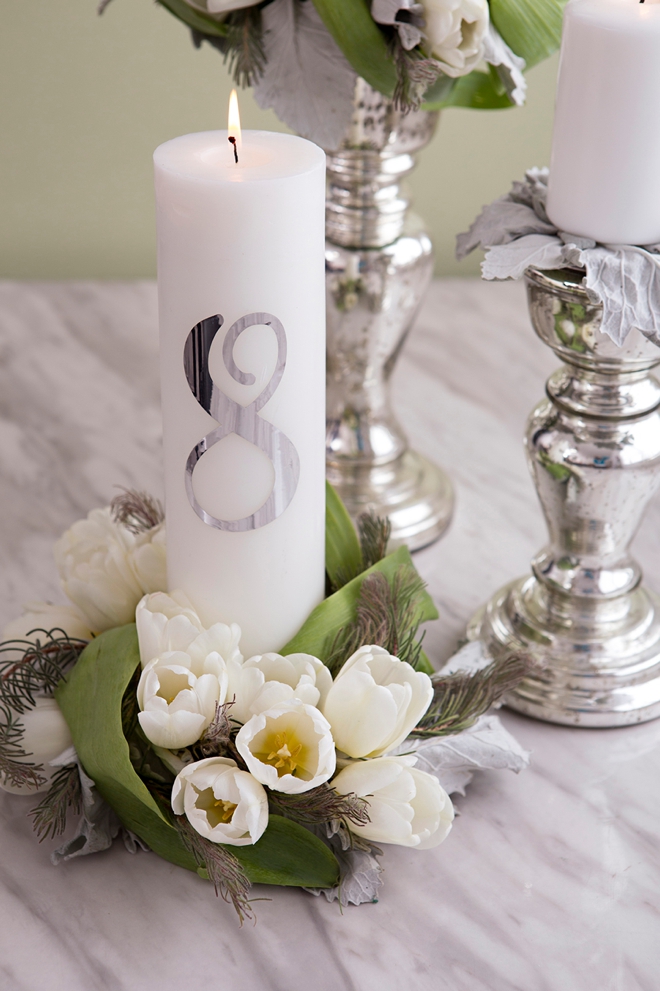
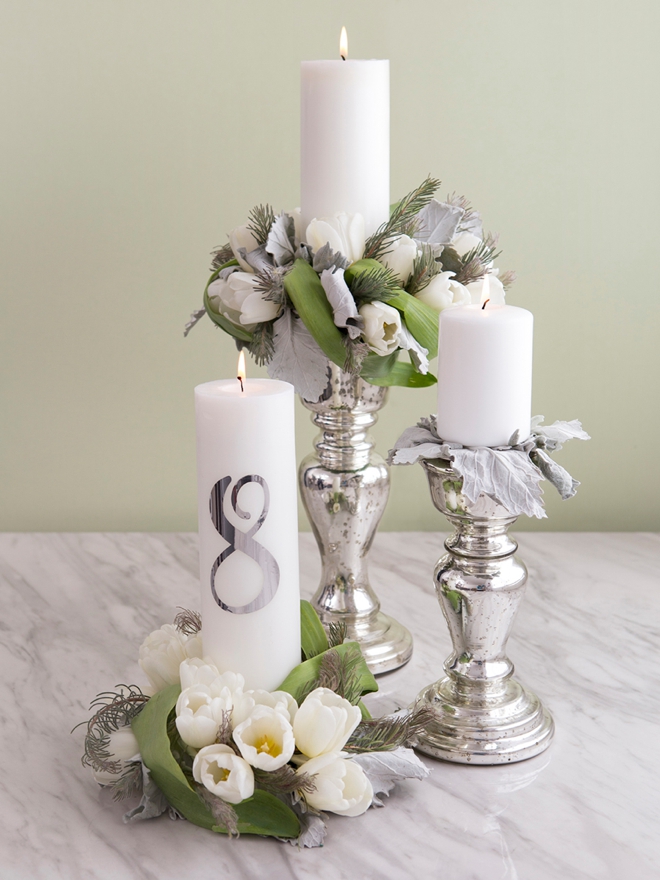
3 Piece Table Number Arrangement
For the table number centerpiece we used:
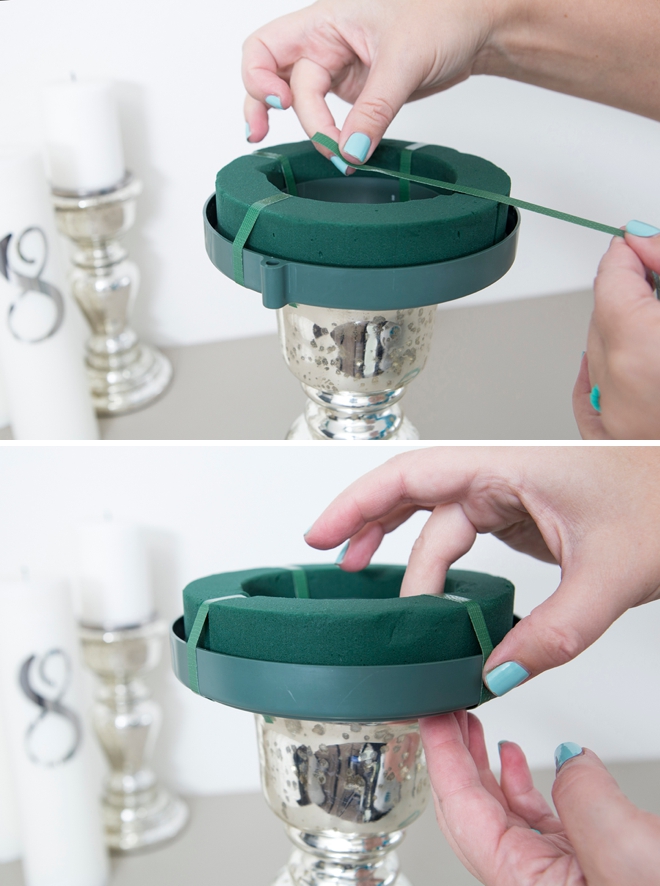
Secure To The Stand
The difference in this arrangement from the first is that one of the wreaths is elevated and on top of a candle holder. To secure the Oasis ring to the candle holder we taped it to the base using water proof flower tape. Soak the Oasis before you tape it to the stand, then use the same arranging techniques as above!
I cut the table number out of silver metallic foil vinyl using my Cricut Maker.
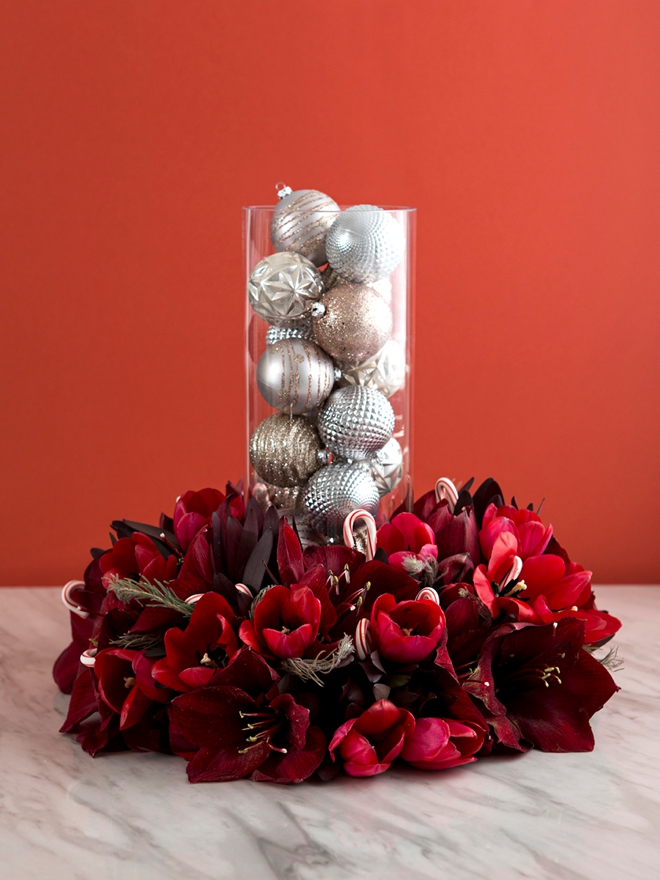
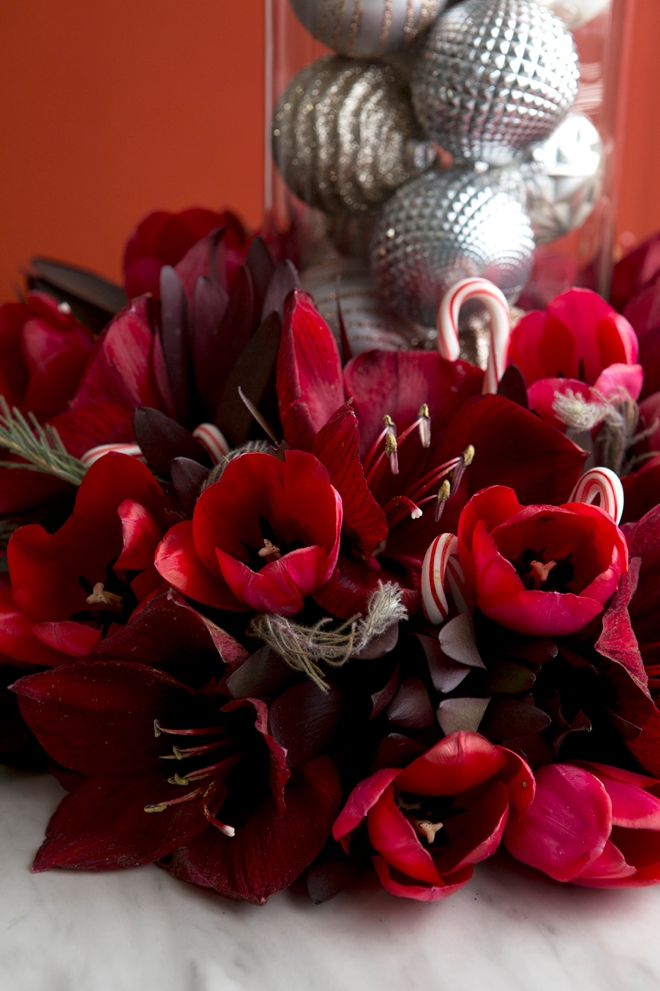
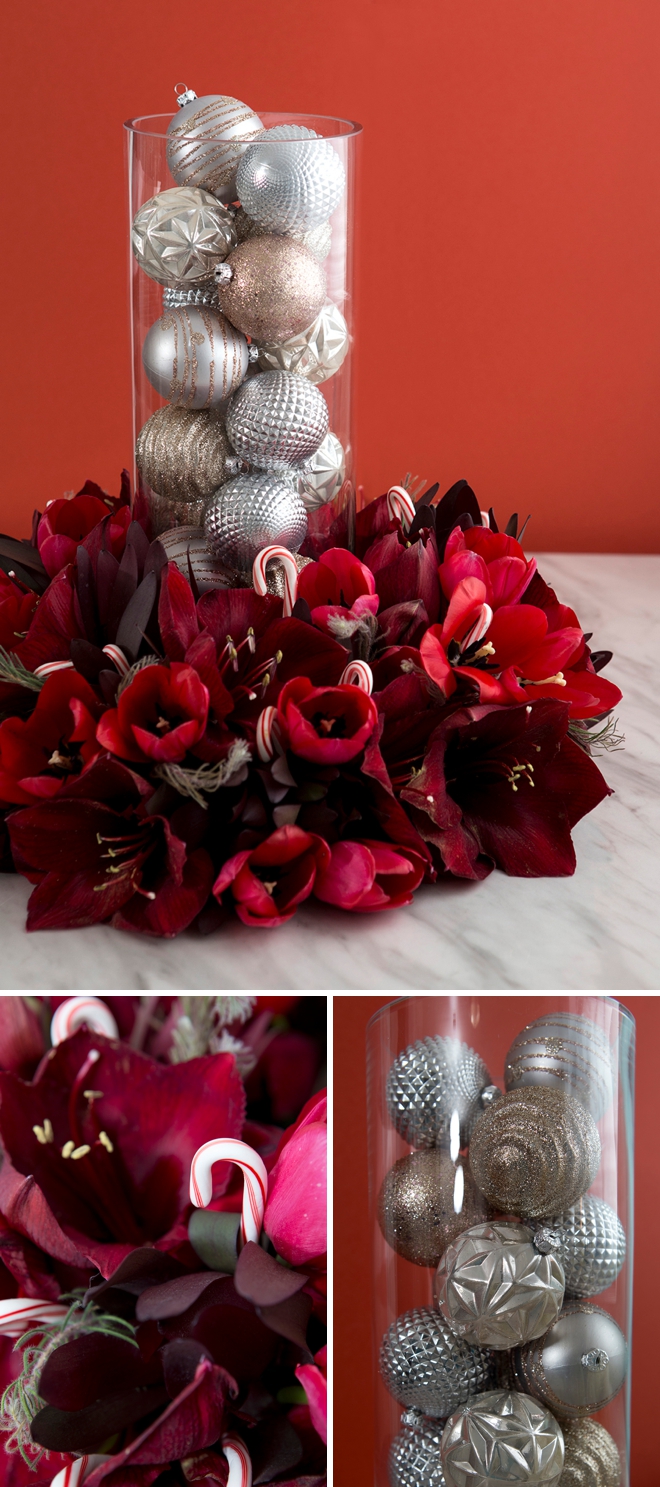
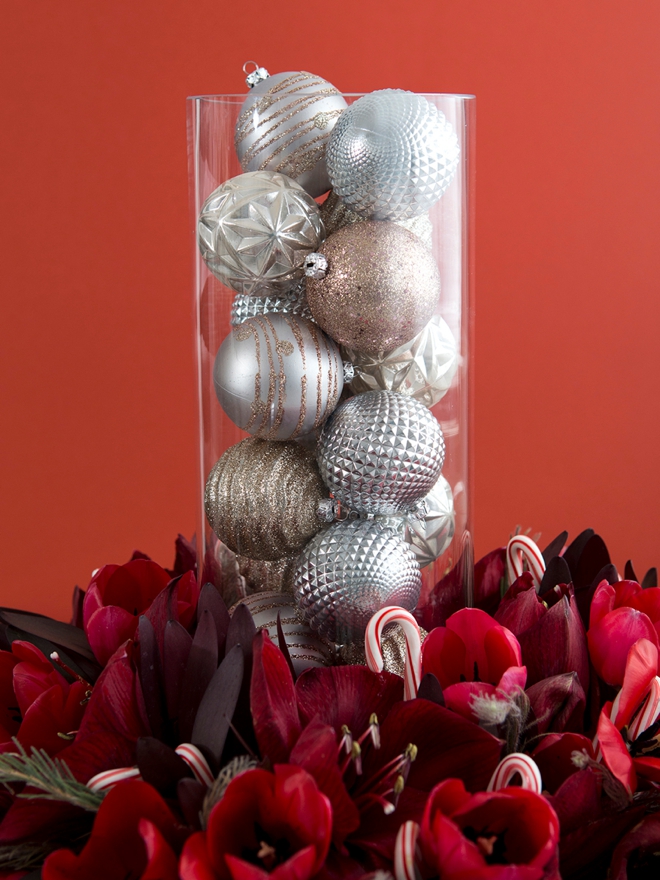
Candy Cane Centerpiece
For the holiday arrangement we used:
- Curly Pine
- Safari Sunset
- Red Amaryllis
- Red Tulips
- 8.5″ Oasis Ring
- Candy Canes
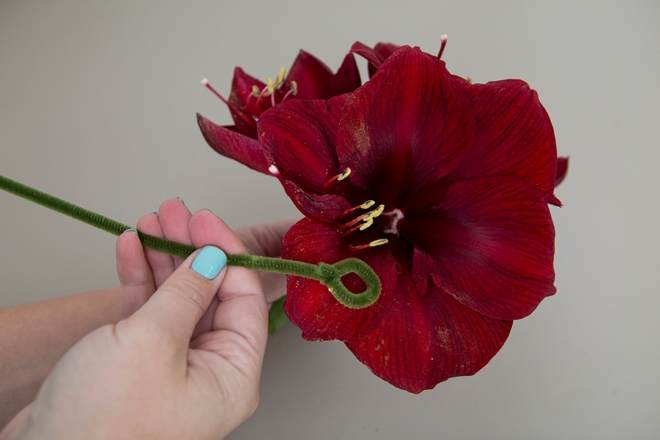
Pollen Tip
To properly remove pollen from flower petals, round the end of a Chenille Stem (pipe cleaner) and wipe it across the pollen. You might want to simply wipe the pollen off with your fingers but this will bruise and eventually brown the flower petals because of the oils on your skin!
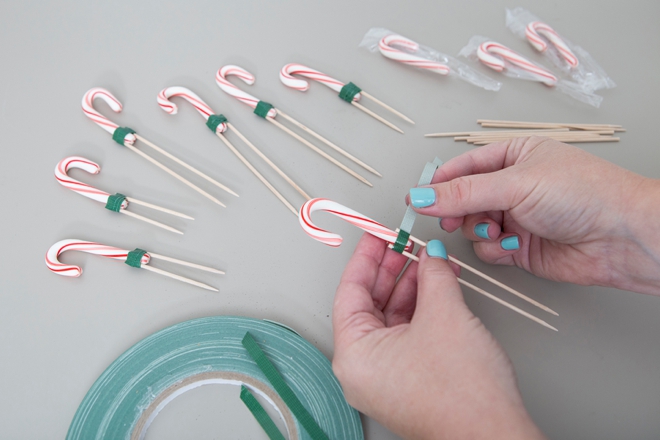
Candy Cane Wrap
Tape toothpicks to the ends of candy canes using waterproof floral tape to create arrangement embellishments that will stay in place in the foam!
Arrange this holiday centerpiece using the same tips and flower order as the first arrangement. Add Christmas ornaments to a large glass vase for the focal piece.
Wreaths All Around
Wreath centerpieces are classic and timeless. They’re a gorgeous and wonderful choice for any type of special event. The options of what can be the centerpiece of them is endless, from candles to lanterns, and from Christmas ornaments to photo frames and table numbers – what will be in the center of your table wreaths?

DIY Tutorial Sponsored By:
FiftyFlowers is the customer-centric, online destination for wholesale wedding flowers, shipped fresh from the farm straight to your door! Inspired by the DIY bride, we offer an extensive selection of fresh flowers, greenery, and floral accessories because we believe anyone can create their own wedding flowers.
As with all our DIY tutorials, if you create one of our projects please send us a picture – We Love Seeing Your Creativity! If you use Instagram or Twitter please use the hashtag #SomethingTurquoiseDIY and it will show up on our Get Social page. Happy Crafting!
DIY Tutorial Credits
Photography + DIY Tutorial: Jen Causey of Something Turquoise // Flowers and Oasis Rings: courtesy of FiftyFlowers.com // Floral Design: Floral Design By Jacqueline Ahne // Vases: personal collection // Nail Polish: OPI – Withstands the Test of Thyme
Shop The Supplies:
Find the supplies you’ll need for this project from our affiliate links below:

Comments