
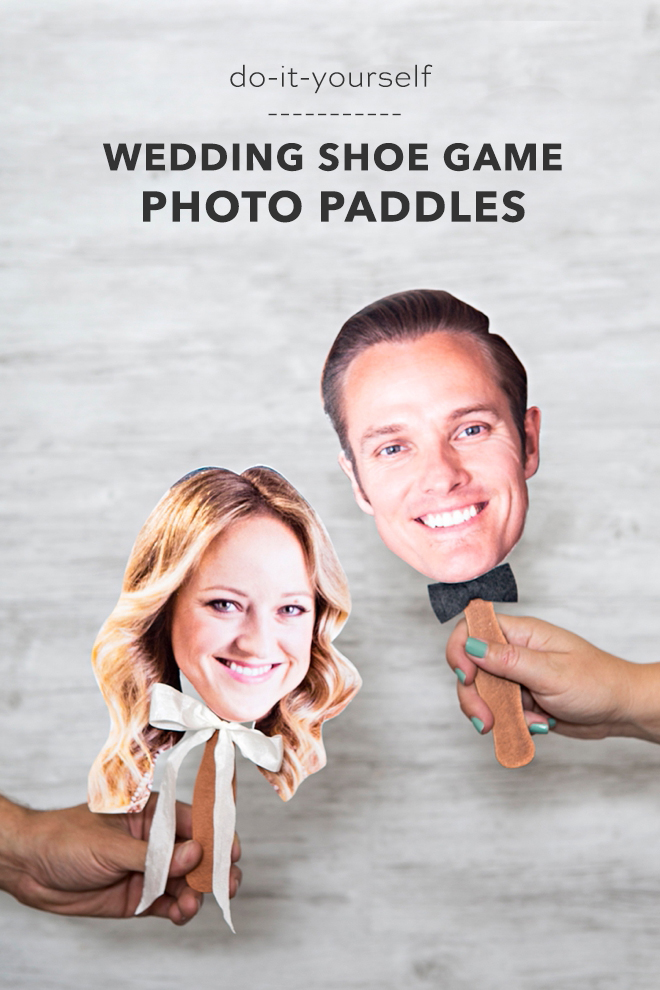
DIY Wedding Shoe Game Photo Paddles
-Sponsored Post-
Typically the “wedding shoe game” is played while the bride and groom each hold one another’s shoes, and raise them in the air to answer the questions being asked about one another. Who came up with this idea? Holding potentially dirty, smelly shoes to play with? What? Yuck. My vote is that you make these adorable photo paddles instead! We’ve partnered with Canon to bring you this easy DIY tutorial that shares how to make these paddles, step by step. Now all you need to do is pick what pretty pictures to use!
How To Play The Wedding Shoe Game
If you aren’t familiar, the wedding shoe game is played at your reception (or at your engagement party or co-ed bridal shower) after dinner and a few drinks have been enjoyed. The bride and groom sit back to back each holding one of their own shoes and one of their partners’ shoes. Then someone like the DJ asks them both a series of silly questions, they raise the correct shoe of who they think fits the answer the best and it turns into a hilarious he-said, she-said kind of thing.
We compiled a list a few years back of awesome questions if you want to use them and print out the list, visit this post.
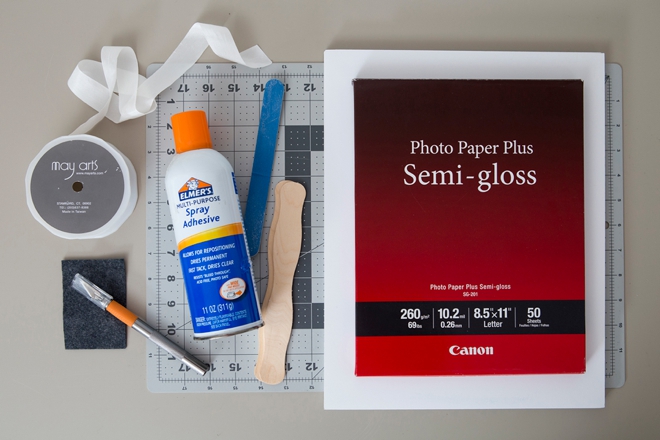
SUPPLIES:
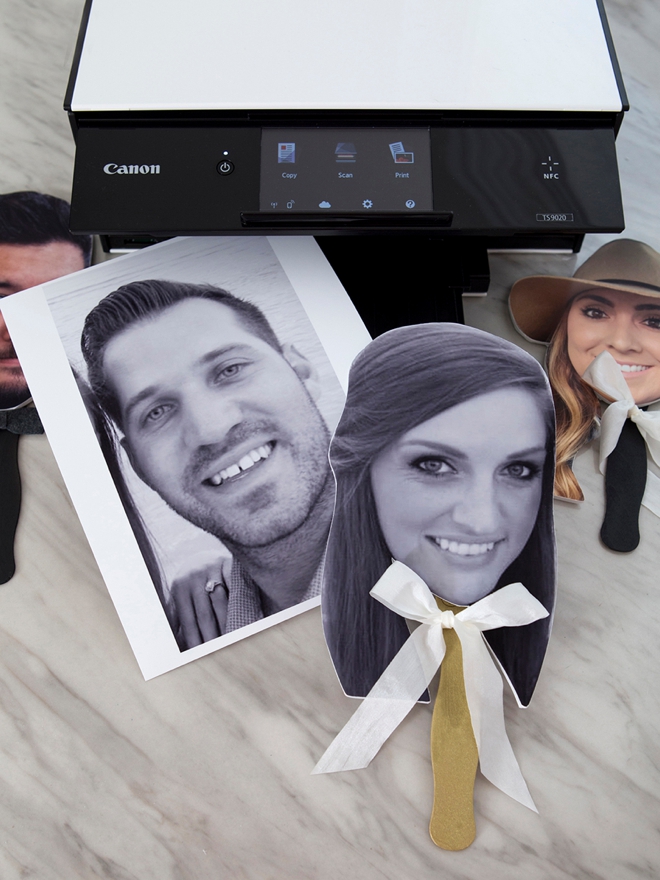
- Your Favorite Canon Printer, I used my TS9020!
- Canon 8.5″ x 11″ Semi-Gloss Photo Paper
- Foam Craft Boards
- Fan Handle Sticks
- Spray Adhesive
- Cutting Mat
- Craft Knife
- Glue Gun
- Ribbon
- Felt
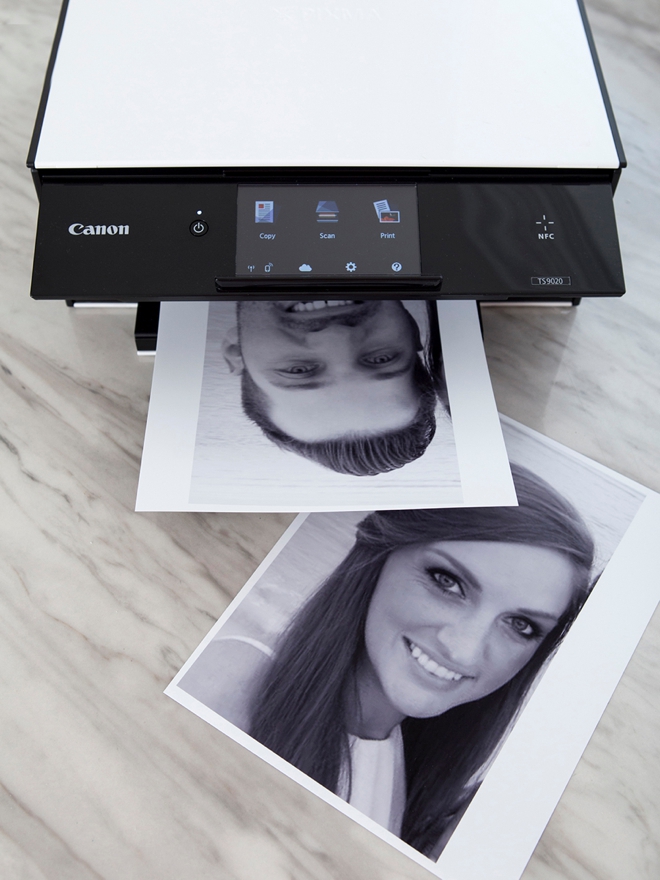
Print Your Photos
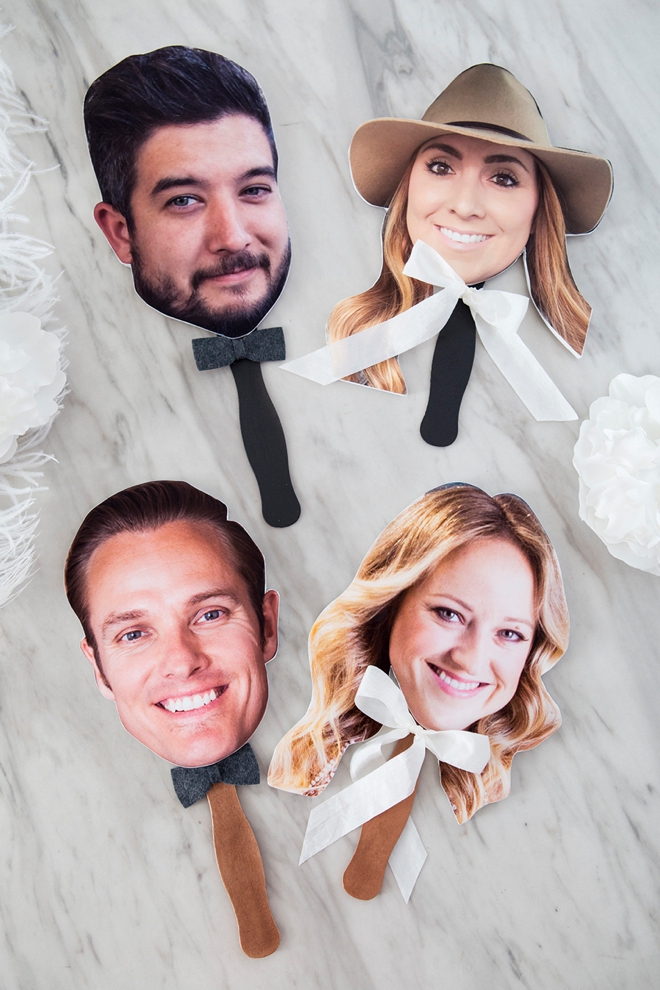
You’ll need to make a pair of paddles for each of you, so that’s four paddles total. Use your favorite photo editing software to blow up your favorite pictures of yourselves and print them on your Canon printer. Using Canon photo paper and it’s specific print setting will ensure the best possible print quality for your photos!
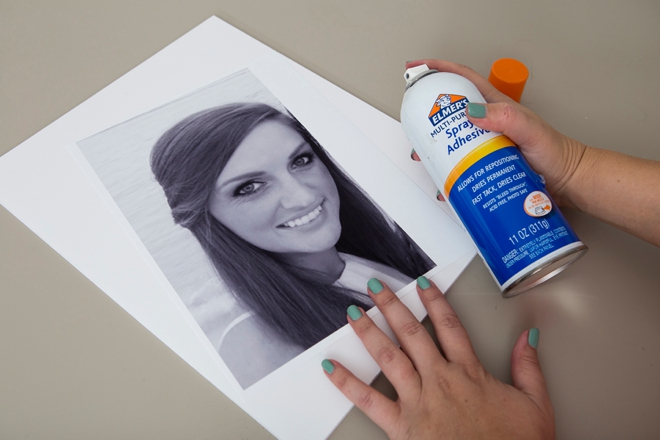
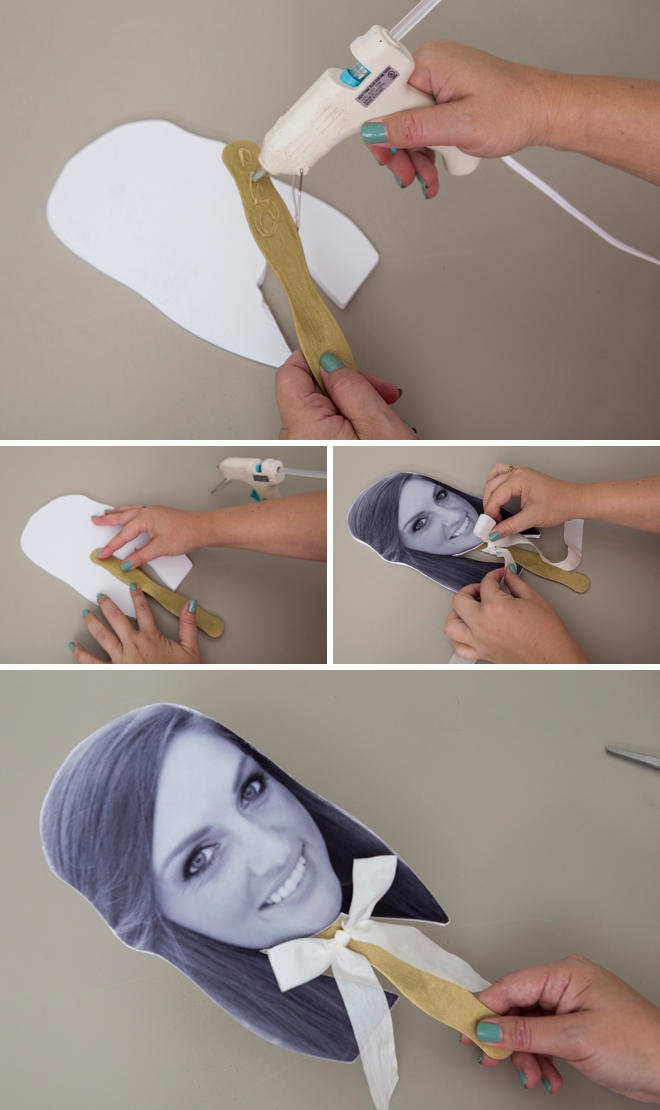
Adhere To A Foam Board
Use spray adhesive to adhere each photo to a foam craft board. Let it dry per the instructions before moving to the next step, it might take up to 10 minutes.
Cut Out
Using a craft knife on a cutting mat, carefully cut out each face! I’m laughing inside because these are just so fun and silly! Use a nail file to sand and smooth the edges.

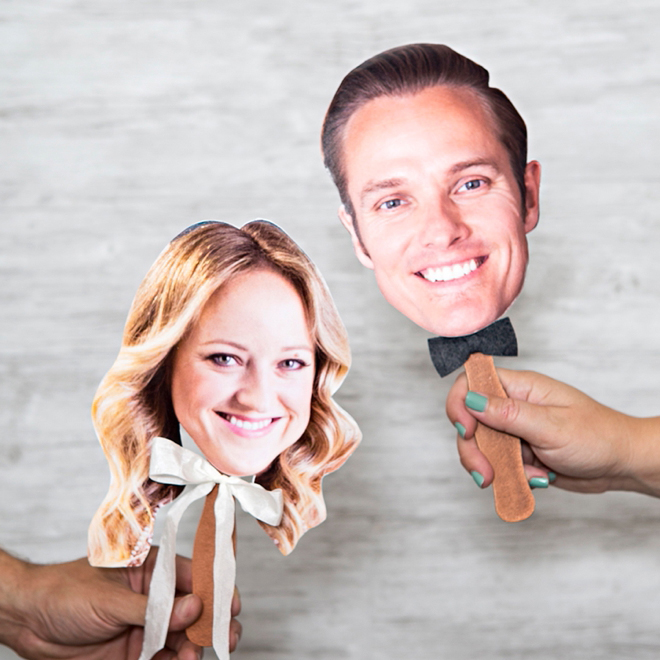
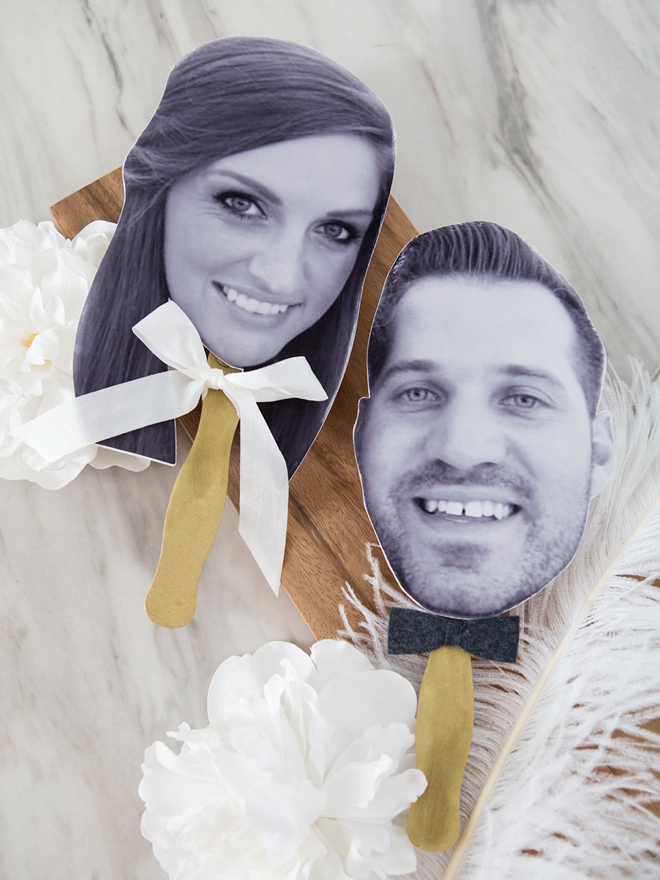
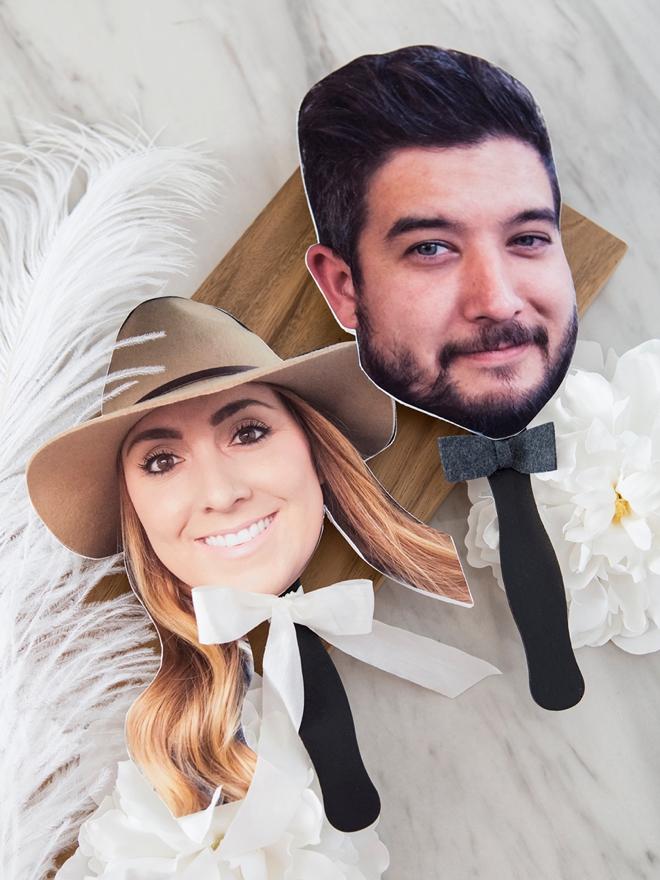
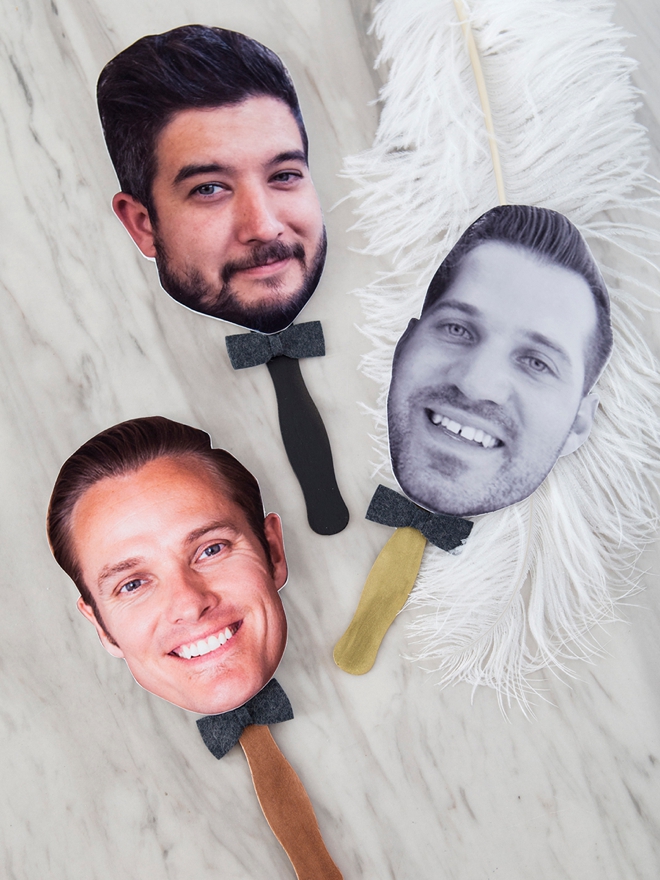
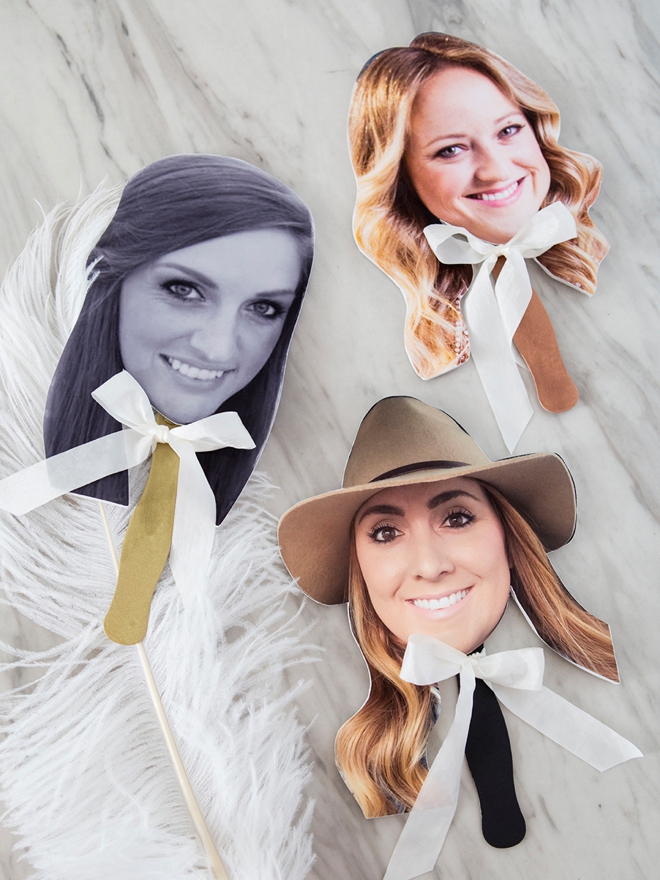
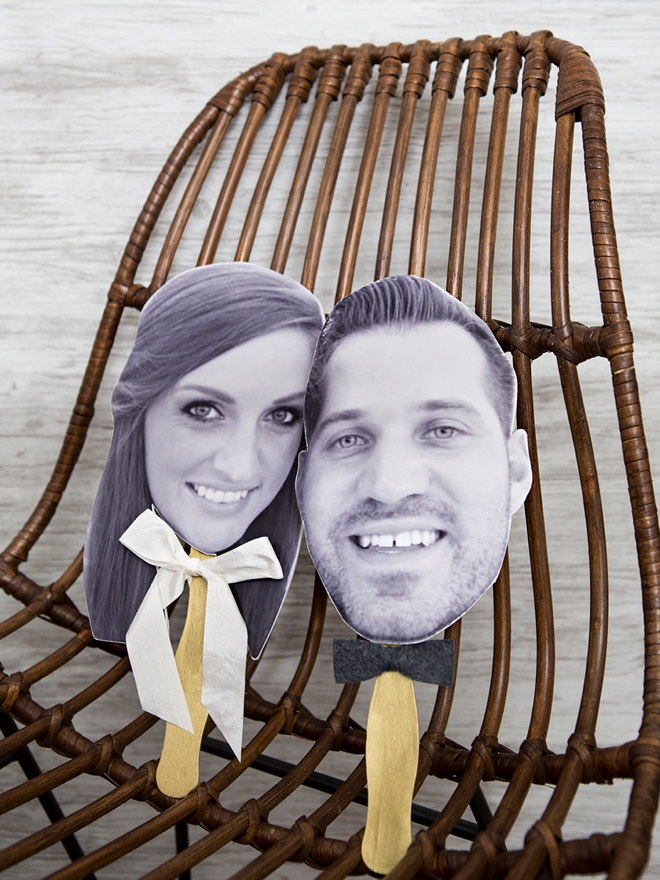
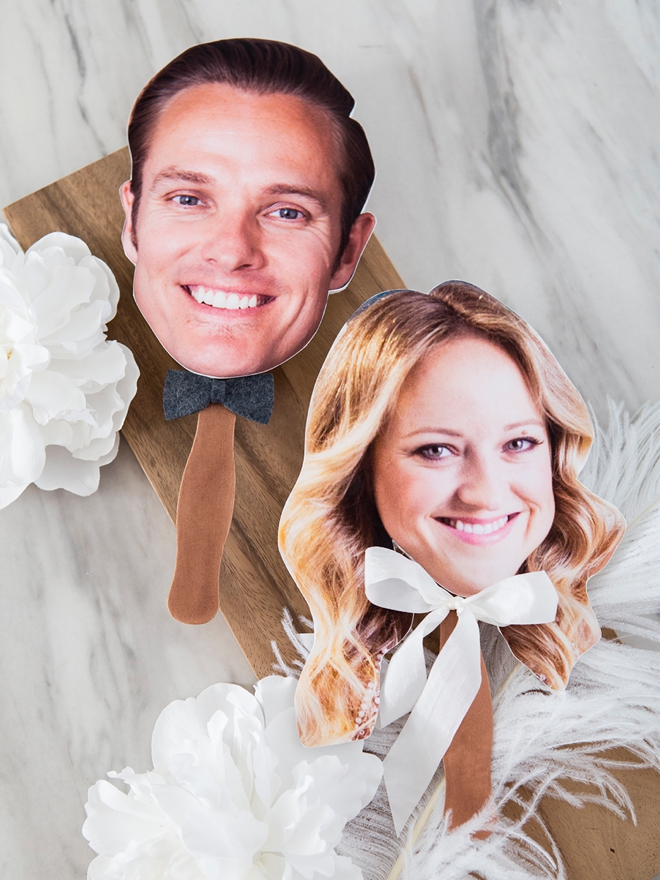
Handle + Bow
Hot glue a fan handle or tongue depressor onto the back of each photo head. I spray painted unfinished wood handles, gold, copper and black for this project. Then finish with a bow! For the guys, make a little bowtie using felt!

Straight On Photos
High quality photos that are shot with you looking directly at the camera will work the best. Possibly use some from your engagement shoot or if you can’t find any that will work, simply shoot a few with your smartphone. Taking a photo outside in the full shade, while the sun is out, usually provides great lighting for everyone, and the background doesn’t matter because you’ll be cutting out your faces!
DIY TUTORIAL SPONSORED BY:
Canon U.S.A., Inc. prides itself on allowing consumers to create and preserve beautiful imagery, from capture to print. With wireless technology and seamless printing capabilities, you can print your photos and printables with precision and ease.
As with all our DIY tutorials, if you create one of our projects please send us a picture – We Love Seeing Your Creativity! If you use Instagram or Twitter please use the hashtag #SomethingTurquoiseDIY and it will show up on our Get Social page. Happy Crafting!
DIY Tutorial Credits
Photography + DIY Tutorial: Jen Causey of Something Turquoise // Canon PIXMA TS9020 Photo Printer: courtesy of Canon // Foam Boards: Amazon // Fan Handle Sticks: Amazon // Spray Adhesive: Amazon // Fiskars Cutting Mat: Amazon // Fiskars Craft Knife: Amazon // 1″ Silk Ribbon: Amazon // Gray Felt: Benzie Design // Nail Polish: OPI – Withstands the Test of Thyme
Shop The Supplies:
Find the supplies you’ll need for this project from our affiliate links below:

Comments