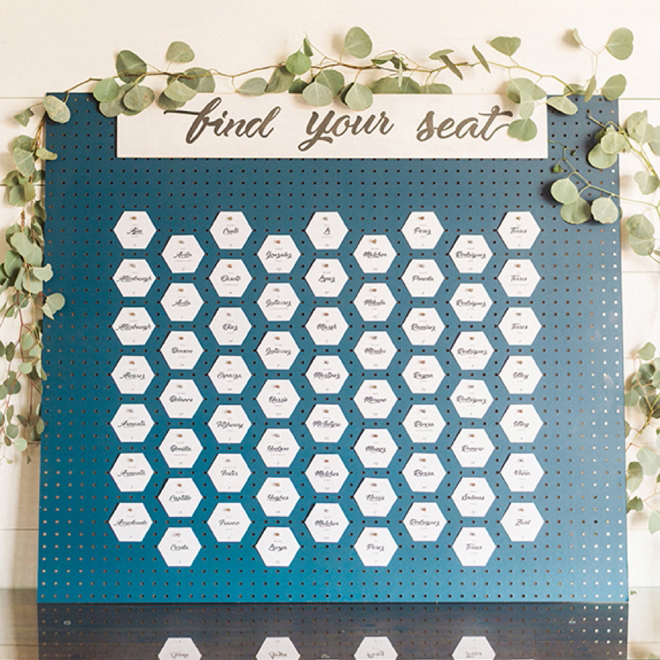

DIY Hexagon Pegboard Seating Chart
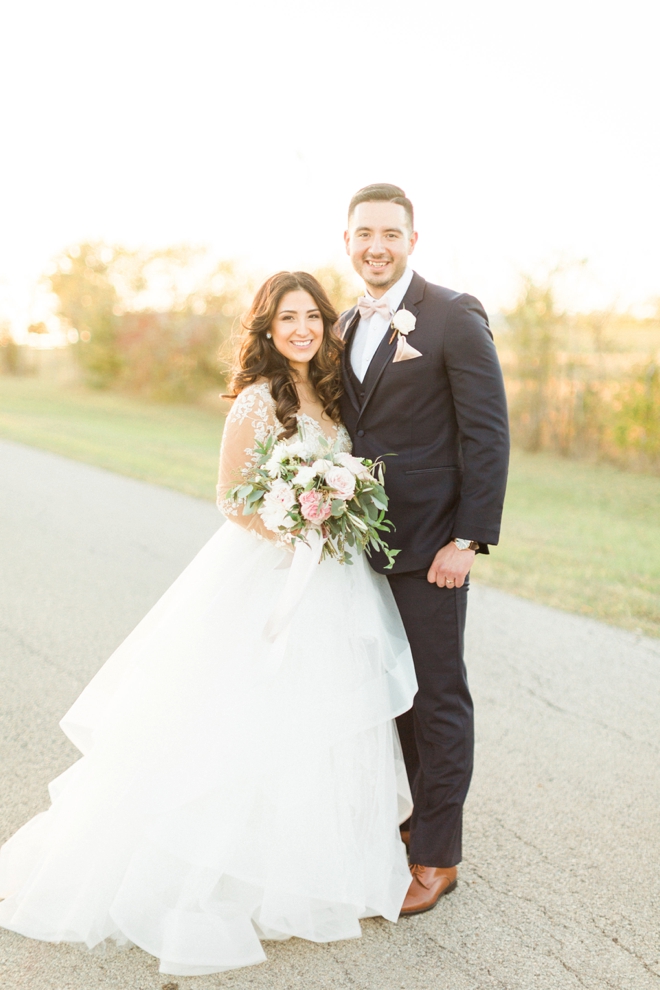
Hasn’t it just been a wonderful week, packed full of pretty!? Today I finally get to share the seating chart I created for our Bridal Blogger Brittany Altenbaugh’s (now Brittany Avila) wedding! She wanted something large and unique to match her mixed metals and hexagon theme. Together we dreamed up this awesome pegboard idea and I’m absolutely thrilled with how it looked at her event! Thanks to her, you get the same editable file that I sent to her and you can download it at the end of the post for free. ps. if you haven’t seen her entire wedding feature, make sure to stop by this post because it’s a jaw-dropper!
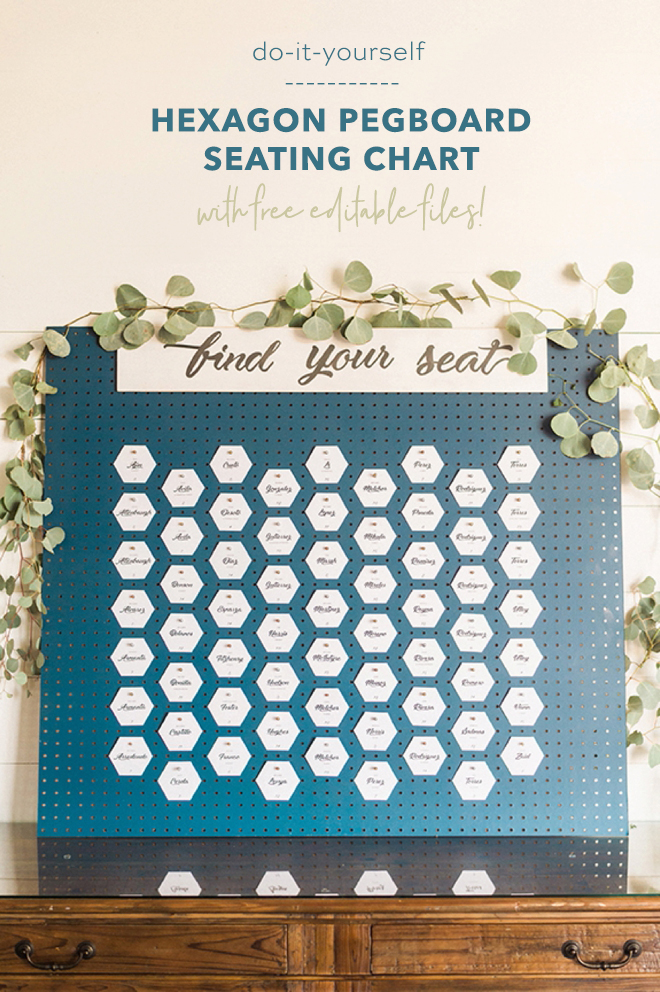
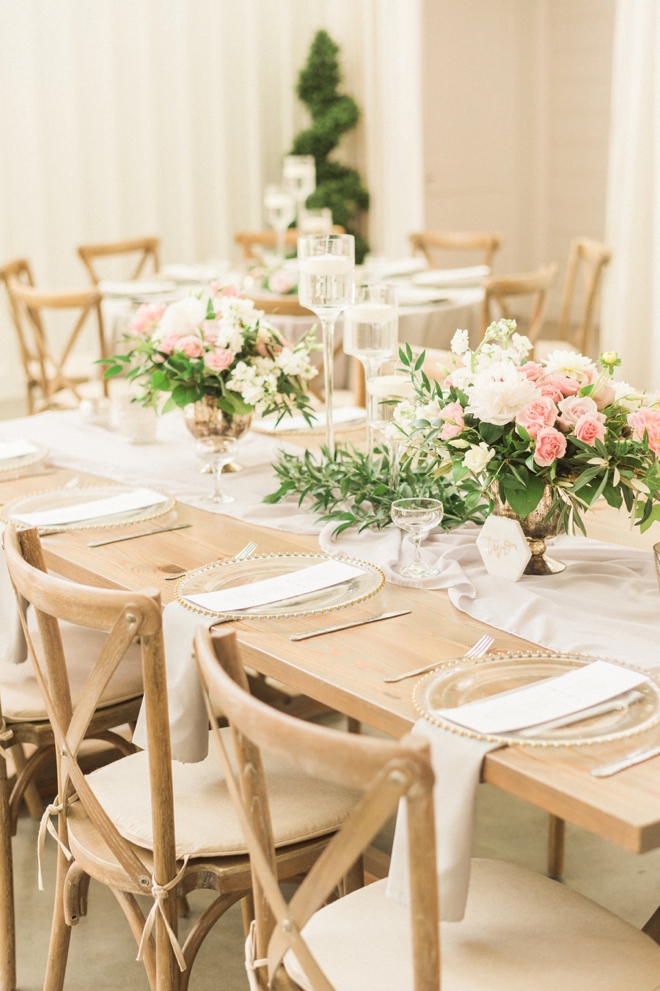
Hexagon Theme
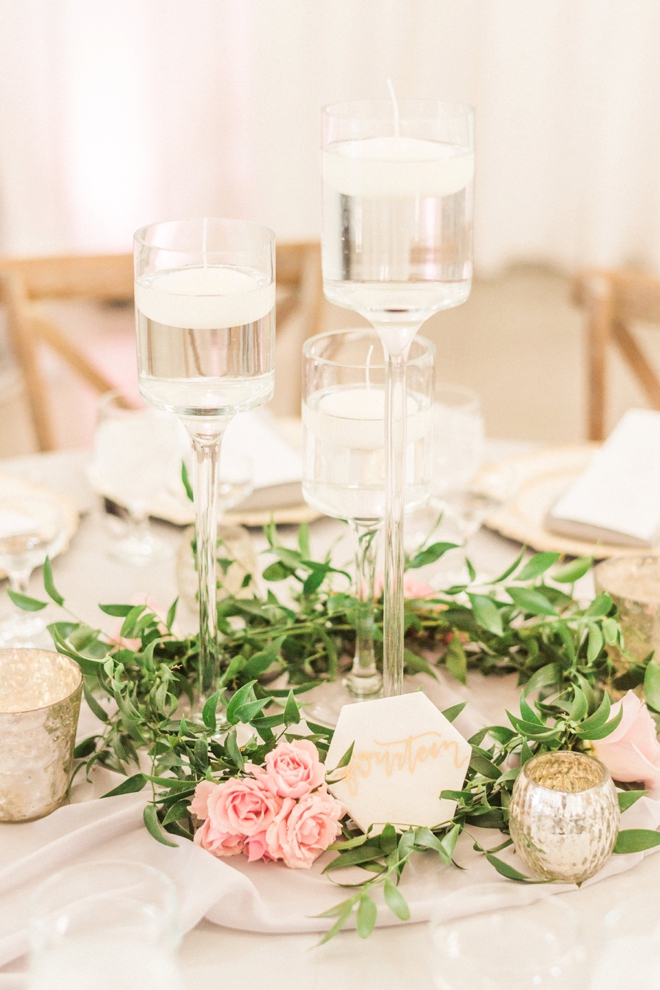
Brittany carried the hexagon theme throughout her entire event. The combination I want to point out here is the shape of the escort card and the shape of the table number, so fabulous!
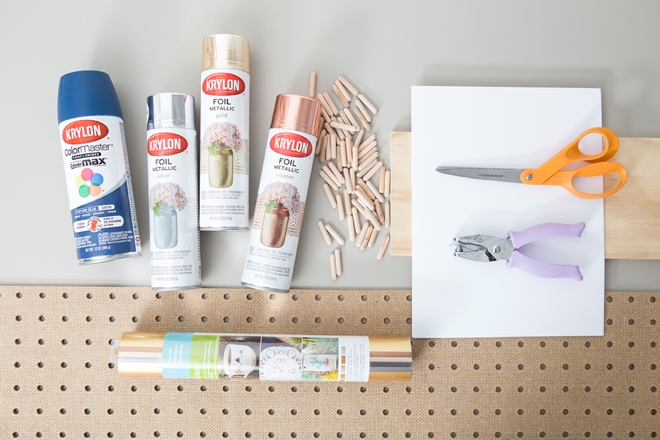
SUPPLIES:
- Large Pegboard
- Craft Dowels To Fit Your Pegboard
- Spray Paint To Match Your Event
- 8.5″ x 11″ White Cardstock (or light colored)
- 1/4″ Hole Punch
- Cricut Maker
- Cricut Vinyl
- Scissors
- Home Printer
- Our FREE editable file at the end of the post!
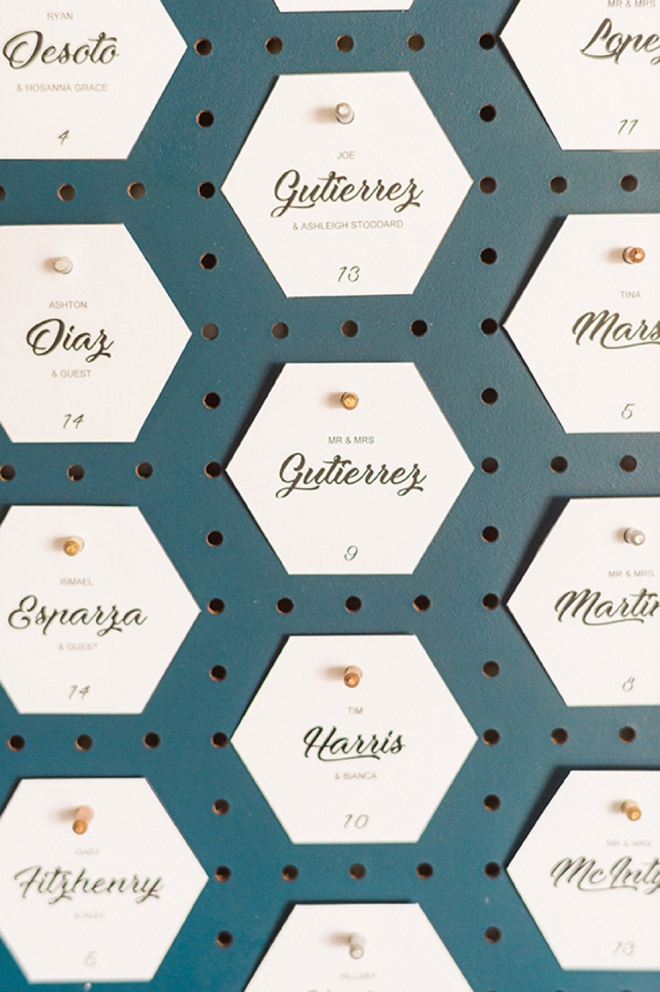
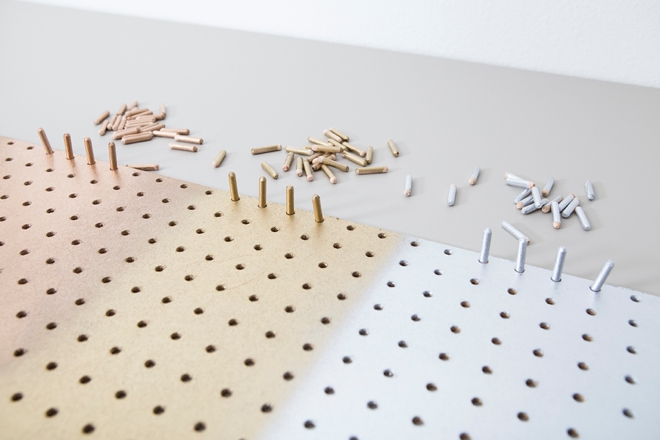
Paint Your Pegs
Part of Brittany’s wedding theme was mixed metals so I painted the pegs copper, gold and silver. I found it easiest to place them in the pegboard, paint, then flip them around and paint again.
Tip: Not all pegboards are created equal. Make sure to measure your peg holes and buy the right sized dowels to fit.
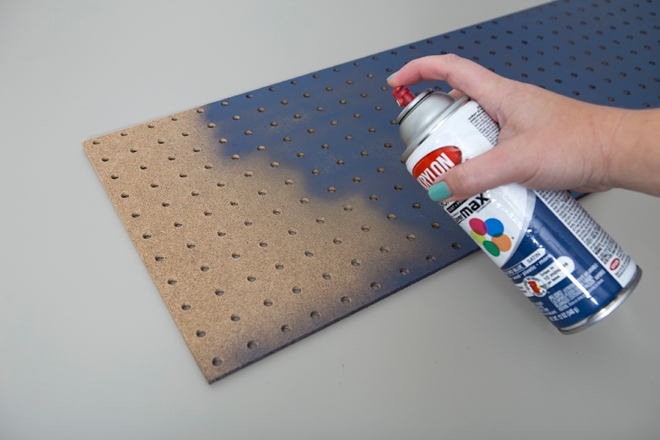
Paint Your Board
Using spray paint or a roller, paint your pegboard. Brittany only used half a 4′ x 8′ board. Layout all your seating cards to find out where you need to cut the board.
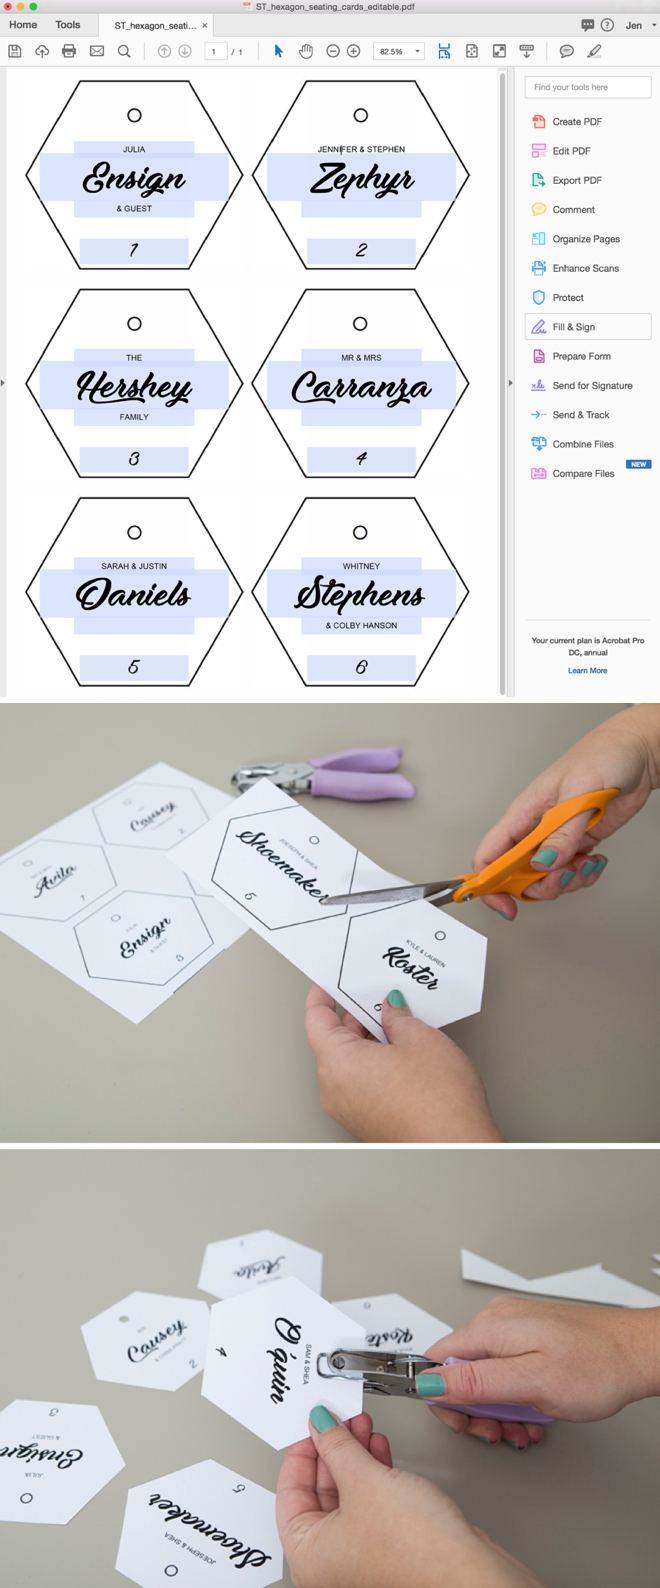
Edit, Print, Cut
Download our free editable file at the end of the post. Edit the file using Adobe Acrobat or Adobe Reader. Add your guests names and table numbers and then print onto 8.5″ x 11″ white cardstock. Cut out each card and then punch the hole where indicated.
Font: you’ll need to first download the free font Moonlights on the Beach
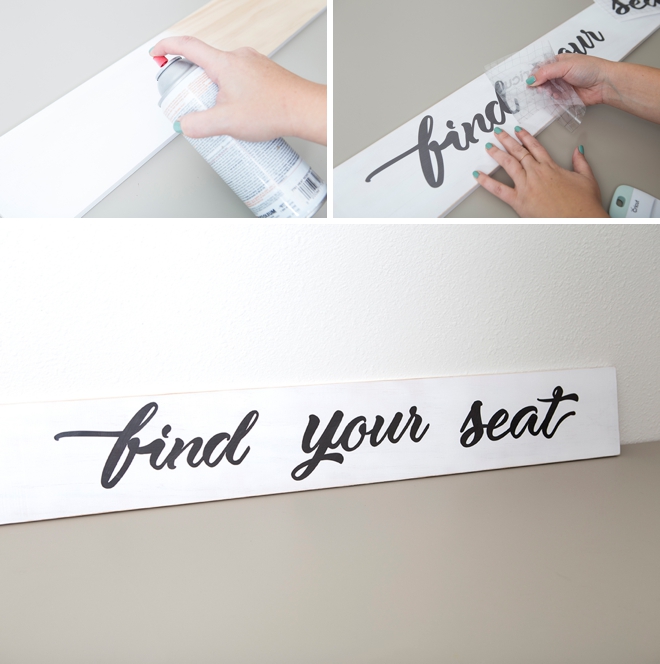
Find Your Seat
I used my Cricut Maker and the same Moonlights on the Beach font to make this sign. It was wood that I spray painted white, then cut the saying out of Dark Silver Stainless Foil Vinyl. Sticker on top of paint, so easy and so cute! Brittany attached the sign to the pegboard using these velcro picture hangers.
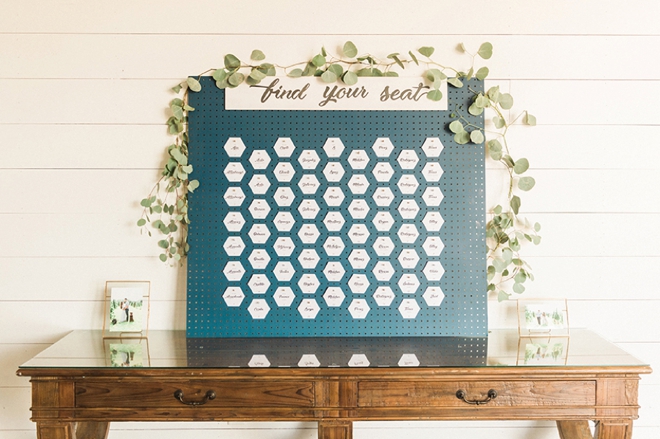
Display At Your Reception
If you have a really large wedding you could stand the full pegboard up on the floor, or if you have a half board like Brittany’s, leaning it on a table like this is perfect! Flanked by a few photos and eucalyptus, easy and chic!
Special Thanks
We’d like to send out a very special thanks to the Fulleylove Photography team for taking such gorgeous shots of our DIY hexagon pegboard seating chart in action at Brittany’s wedding! To see her full wedding feature, visit this post! xo

As with all our DIY tutorials, if you create one of our projects please send us a picture – We Love Seeing Your Creativity! If you use Instagram or Twitter please use the hashtag #SomethingTurquoiseDIY and it will show up on our Get Social page. Happy Crafting!
DIY Tutorial Credits
Step-Out Photography + DIY Tutorial: Jen Causey of Something Turquoise // Real Wedding Photography: Fulleylove Photography // Editable File Design: Julia Ensign // Spray Paint: Amazon // Wood Supplies: Orchard // Craft Dowels: Amazon // 8.5″ x 11″ White Cardstock: Amazon // 1/4″ Hole Punch: Fiskars // Nail Polish: OPI – Withstands the Test of Thyme
Shop The Supplies:
Find the supplies you’ll need for this project from our affiliate links below:

Comments