
DIY | Scalloped Charger + Napkin Ring Seating Card
-Sponsored Post-
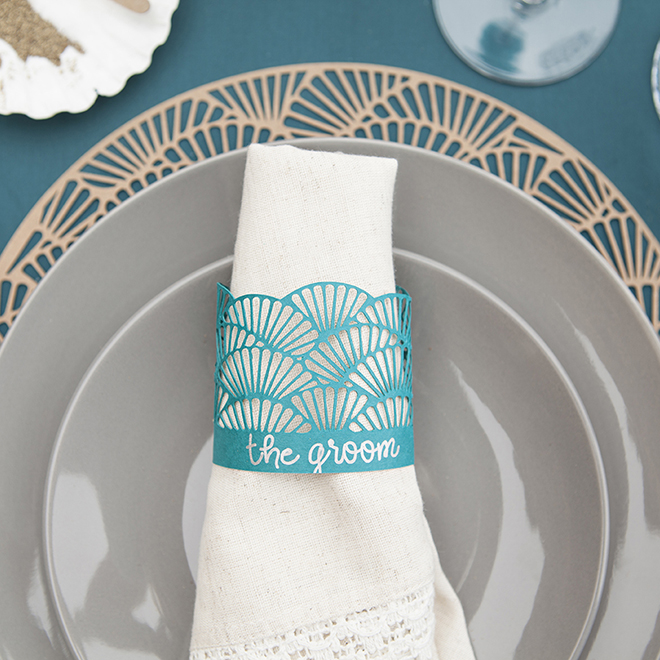
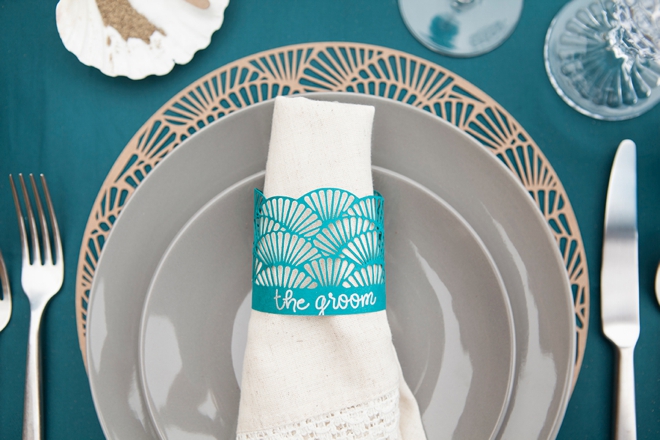
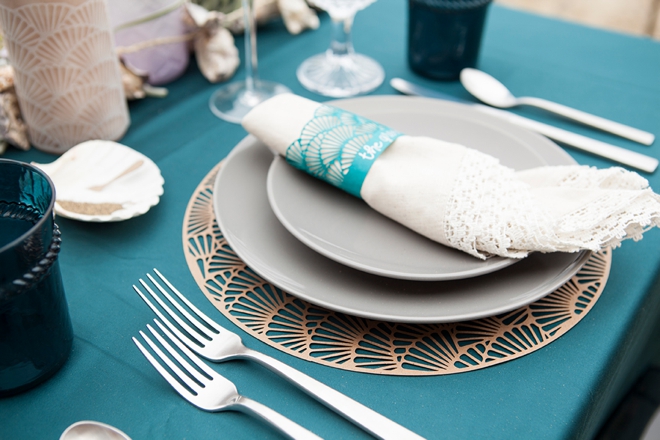
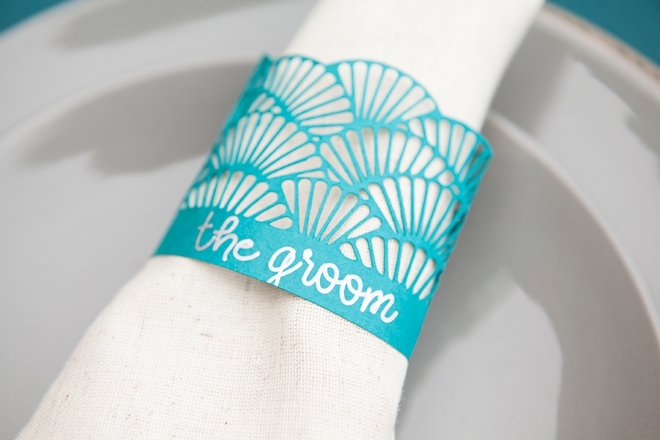
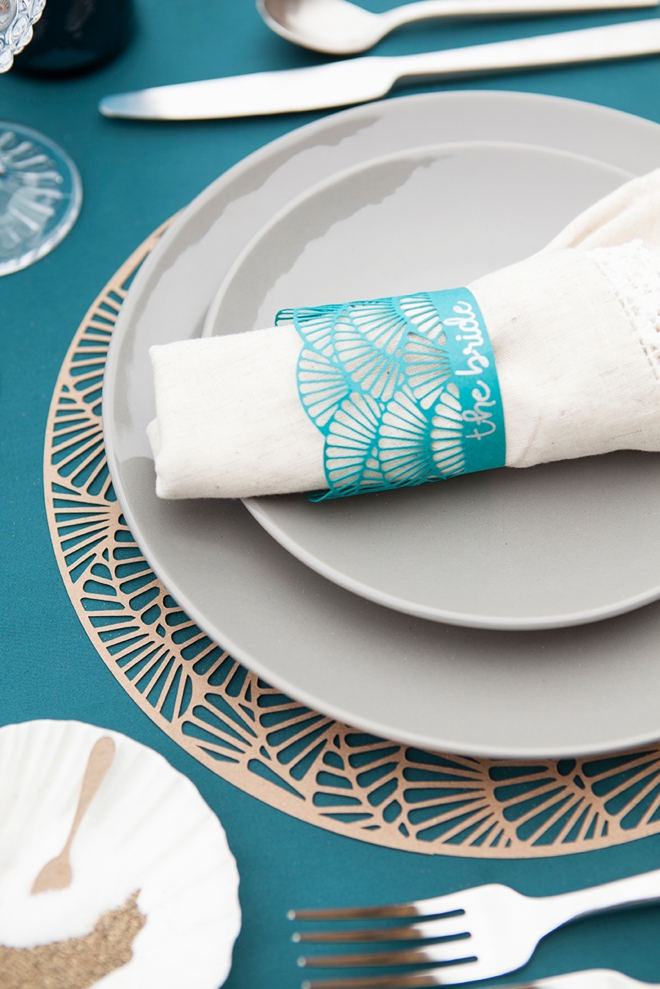
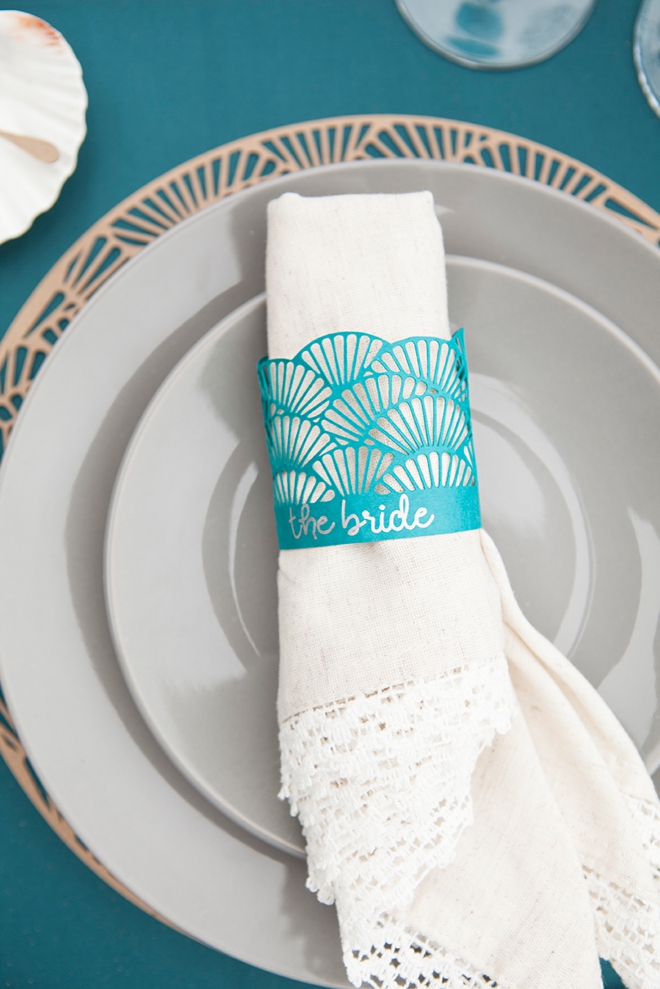
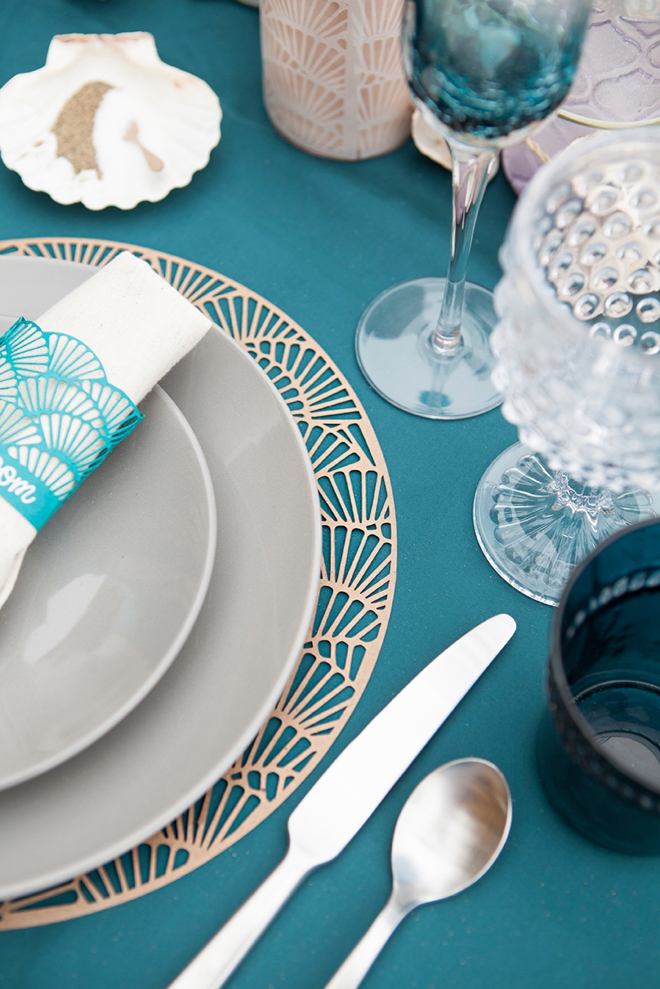
It’s all about the little details. The extra special touches that will make your event truly unique. To embellish this tablescape, I didn’t want to use just any chargers or napkin rings… so using the same scallop design from the candle wraps my designer and I created this DIY Scalloped Charger + Napkin Ring Set. The best part is that the napkin ring actually doubles as a seating card; our Cricut Explore Air is to blame for this projects fabulousness of course.
Click HERE to find the full styled wedding inspiration shoot that this project is from!
The Pen Tool
In case you didn’t know, you can actually put a pen in the Cricut Explore Air and it will write whatever you want! Which is what we did for this project…
SUPPLIES:
- Cricut Explore Air
- 8.5″ x 11″ Cardstock or 12″ x 12″ Cardstock
- Cricut Pen Set
- Adhesive
- Napkins
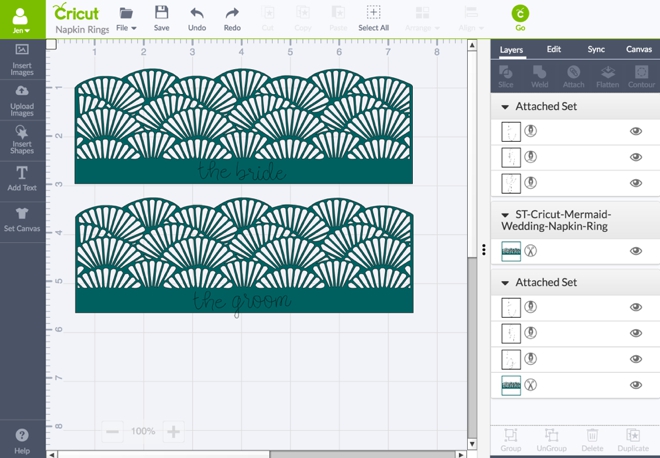
Import Into Design Space
Download our free SVG file at the end of the post and upload it into Cricut Design Space. The napkin ring is 2.5″ x 7″ naturally, but you can drag the files to make them larger if you need to. Here are the Design Space steps:
- Add a “text” layer and type each persons name (I used Cricut font “Chloe”).
- Size the text over the blank area on the bottom of the design and make sure that in the layers panel the “write” icon is selected.
- Select the individual napkin ring and the text and hit “attach”. This tells the Cricut to write the text on that specific part of the napkin ring.
Do those 3 steps above for as many napkin rings as you need to make!
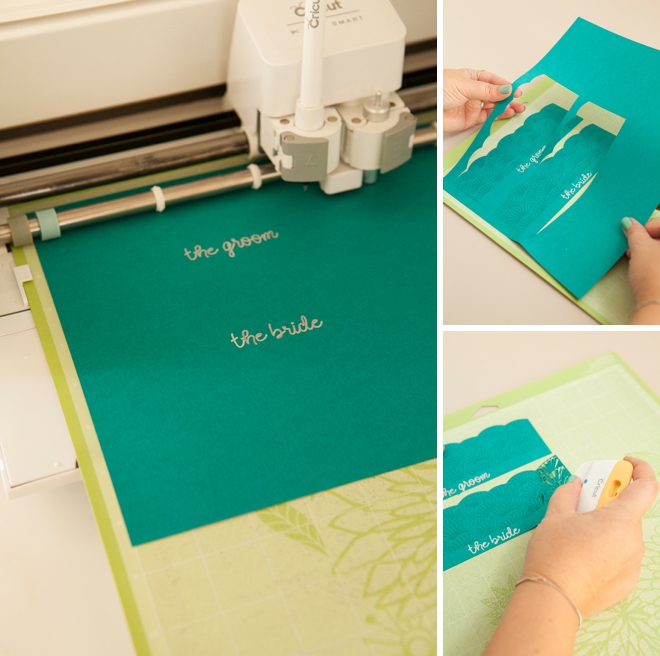
Cut + Write
Once you’ve got your text and design figured out, put your choice of pen into the Cricut, press GO and watch it do it’s magic! Then carefully remove each napkin ring from the cutting mat.
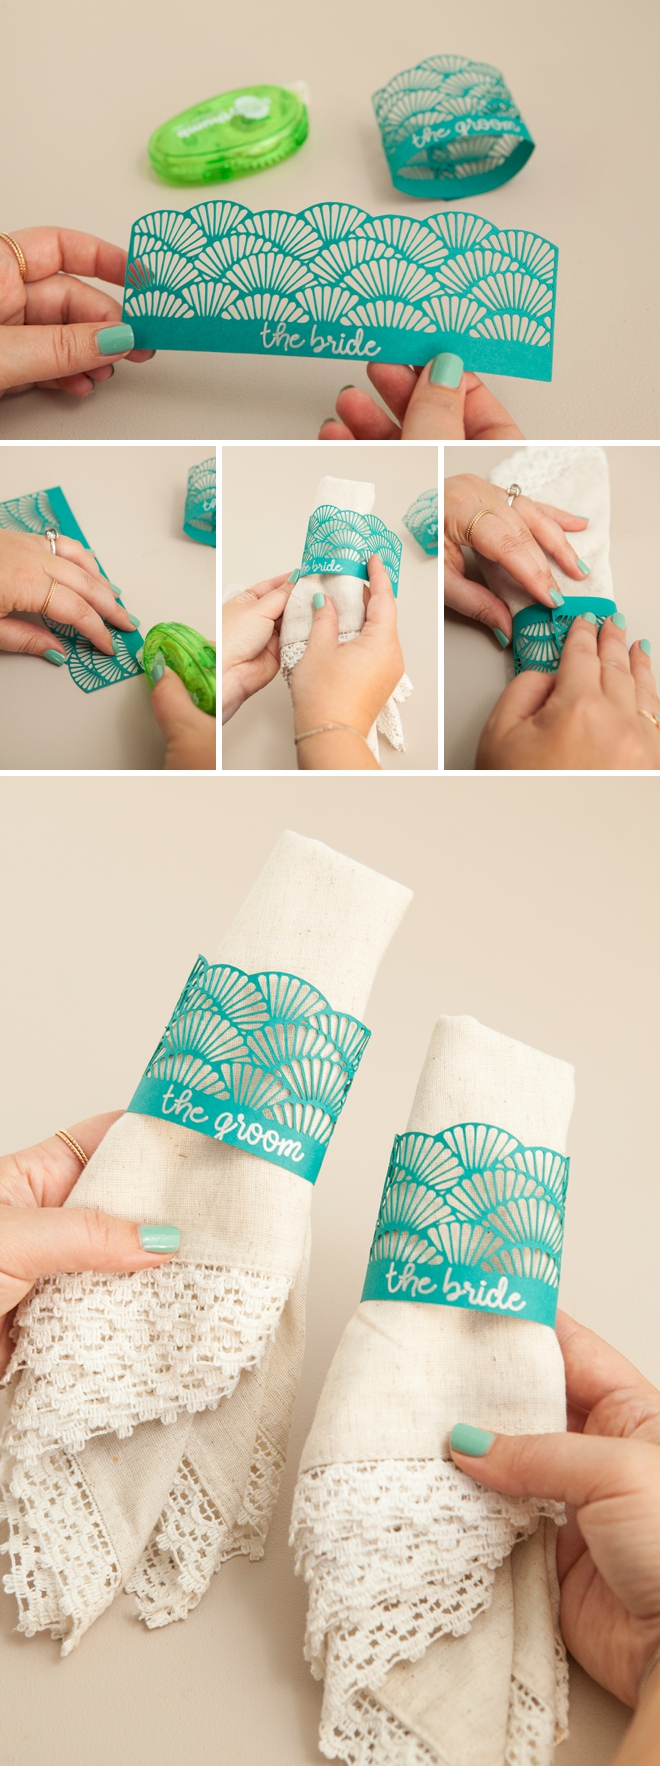
Assemble
Add your favorite adhesive to the backside of the design and wrap around your choice of napkin! Super simple right?! If making these for your wedding or a large event, you might want to delegate someone to wrap these the day of, so that they don’t get squashed in transit.
SUPPLIES:
- Cricut Explore Air
- 12″ x 12″ Cardstock (must be 12 x 12!)
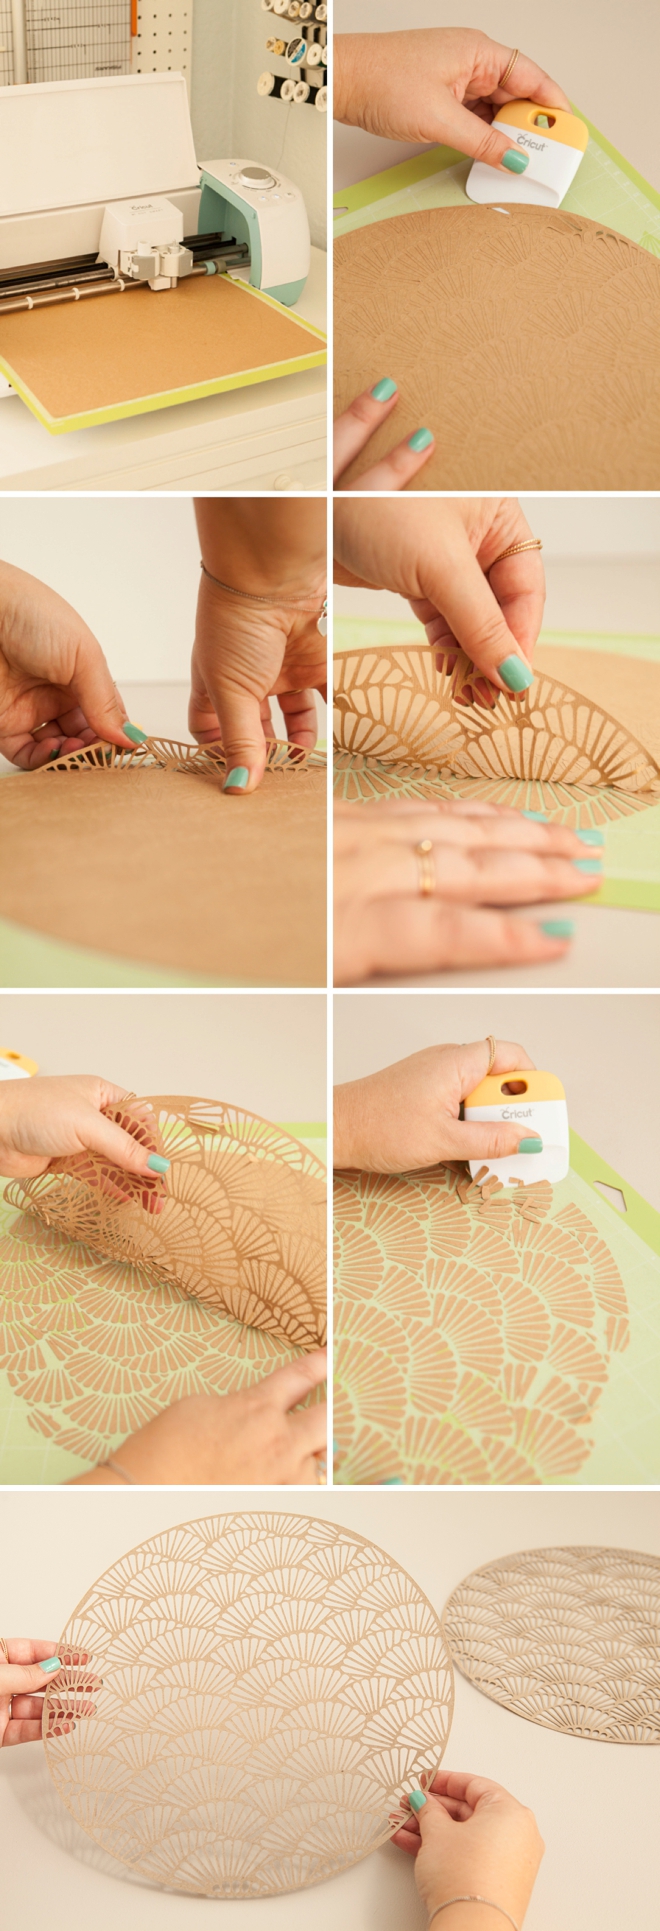
Import Into Design Space
Download our free SVG file at the end of the post and upload it into Cricut Design Space. The charger is sized to 11.5″ round and so you’ll need to use 12″ x 12″ cardstock for this item. Here I’m showing that you can edit the color, to keep you organized while cutting.

Cut + Remove
Your Cricut is really doing all the hard work for you with this project. It will take around 10 minutes for this file to be fully cut. After it’s done, carefully remove the charger from the cut mat and then clean up the left over cut bits… then display under your choice of plate!
Cheap + Easy
Since all you need is paper… this project is super cheap and crazy easy, which means you won’t feel bad about throwing the items away after your event!
Click HERE to find the full styled wedding inspiration shoot that this project is from!


—–> Huge Wedding Giveaway <—–
Throughout the ENTIRE month of September, Cricut has partnered with amazing brands to bring you over $10,000 in prizes for your dream wedding! They have also partnered with amazing wedding and craft bloggers to bring you fabulous DIY wedding tutorials and inspiration! Seriously gals, this month is going to be craft-fabulous! Here’s what you could win:
- Week One (this week): $1500 towards a gorgeous, eco-friendly Celia Grace wedding dress!
- Week Two: $1500 “DIY Dream Wedding Bundle” including a Cricut Explore Air & Canon iP8720 Crafting Printer and SO much more!
- Week Three: $1500 in wholesale wedding flowers from FiftyFlowers.com!
- Week Four: Grand Prize. All the prizes above + a romantic Sandals Honeymoon to your destination of choice!
Click HERE to enter to win! Your friends can also “nominate” you to win!*
As with all our DIY tutorials, if you create one of our projects please send us a picture – We Love Seeing Your Creativity! If you use Instagram or Twitter please use the hashtag #SomethingTurquoiseDIY and it will show up on our Get Social page. Happy Crafting!
DIY Tutorial Credits
Photography + DIY Tutorial: Jen Carreiro of Something Turquoise // Projects Created Using The: Cricut Explore Air // Seaside Pen Set: Cricut // Design Files: Julia Ensign // Napkins: Pier One // Paper: Paper Source // Wholesale Flowers: FiftyFlowers.com // Plates: Target // Nail Polish: OPI – Withstands the Test of Thyme
Shop The Supplies:
Find the supplies you’ll need for this project from our affiliate links below:

Comments