
DIY | Scalloped Vellum Candle Wraps
-Sponsored Post-
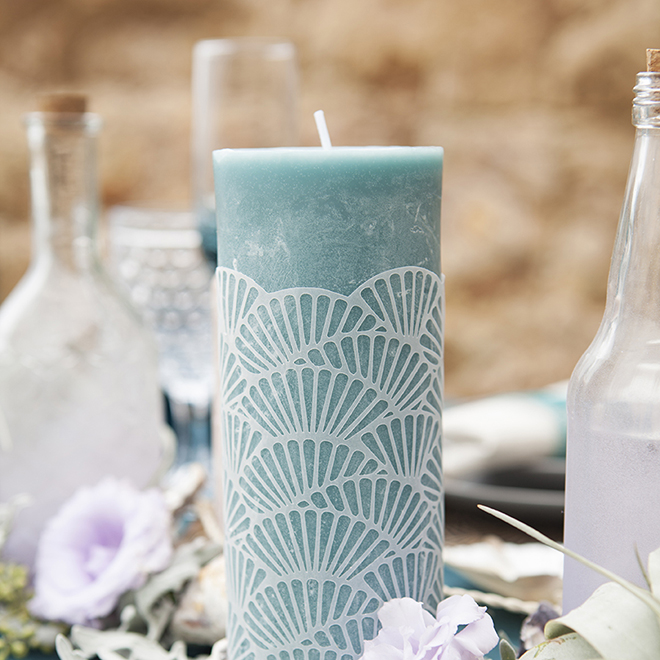
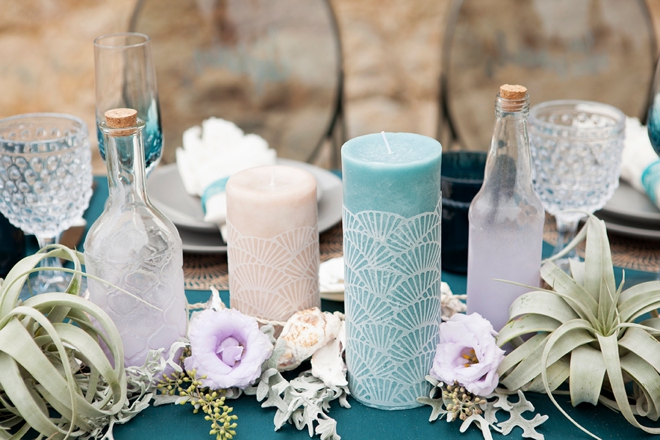
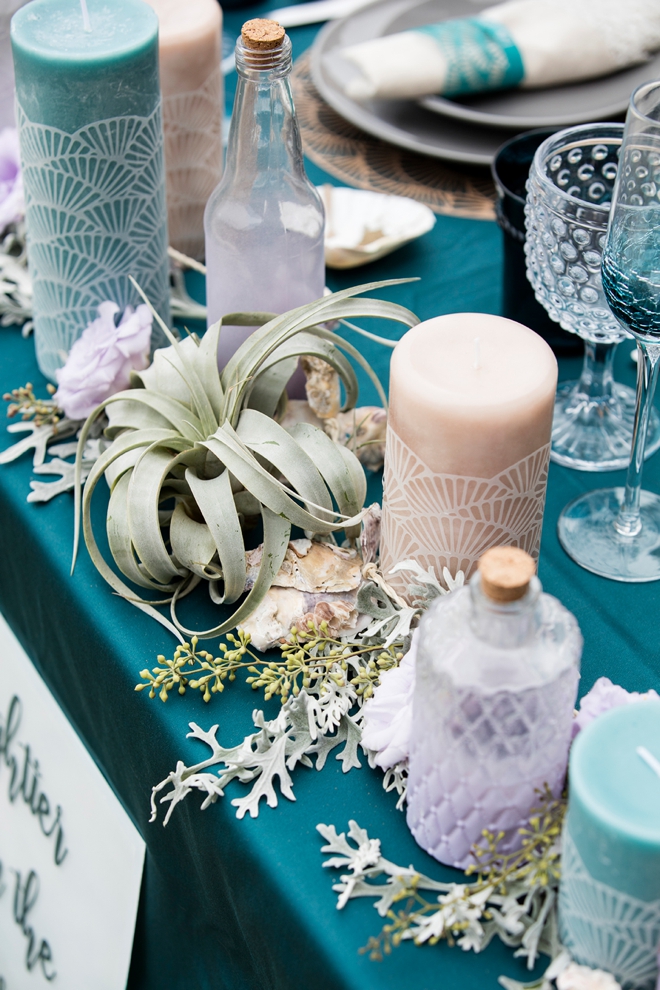
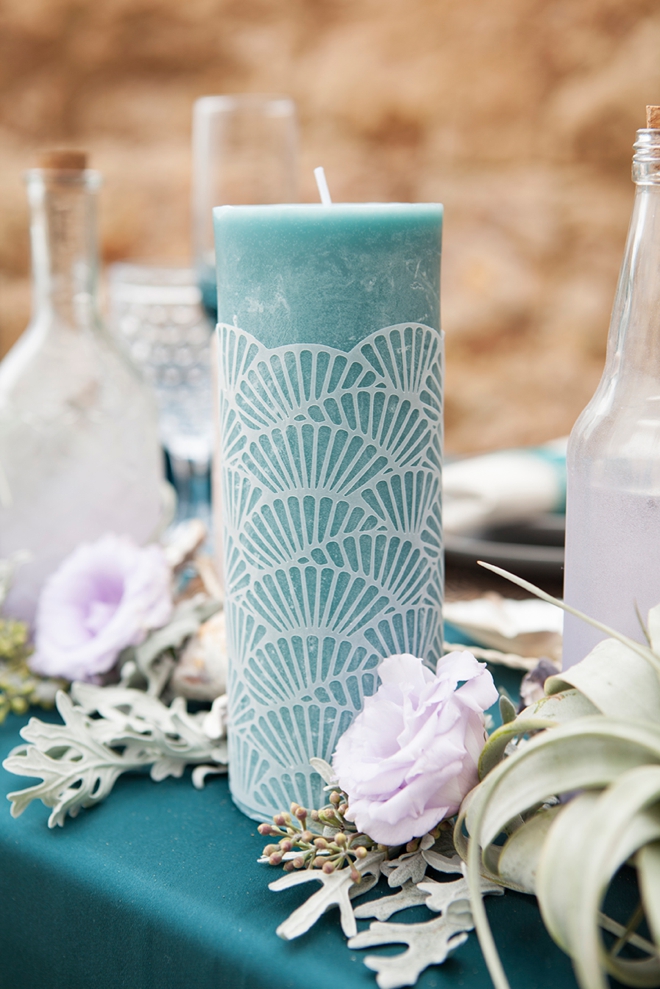
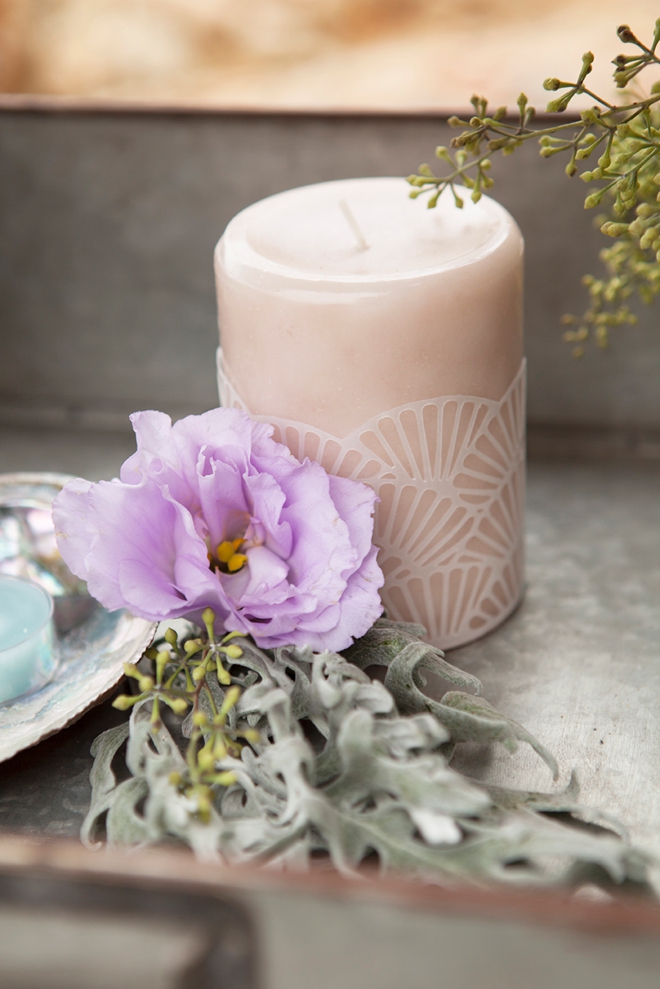
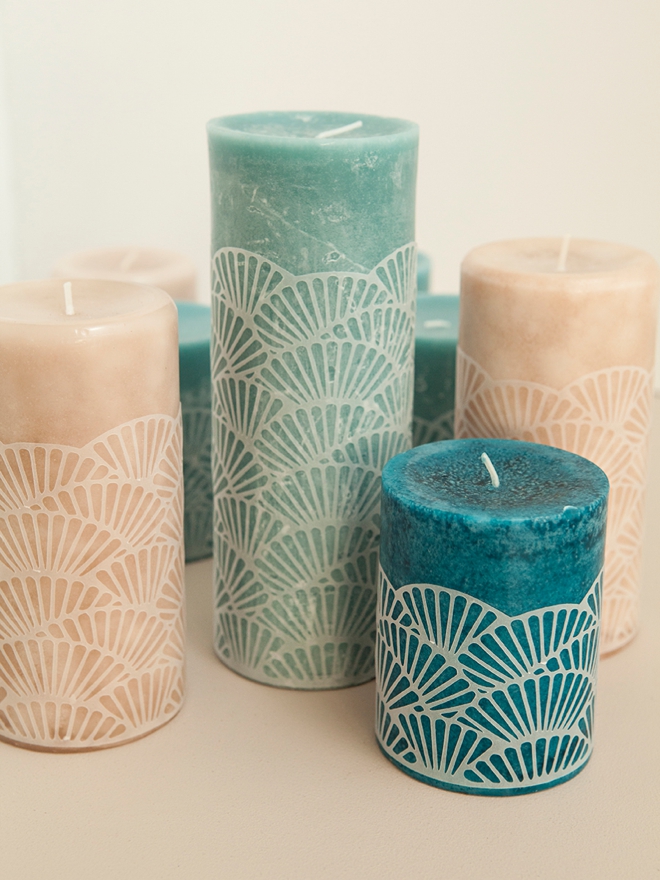
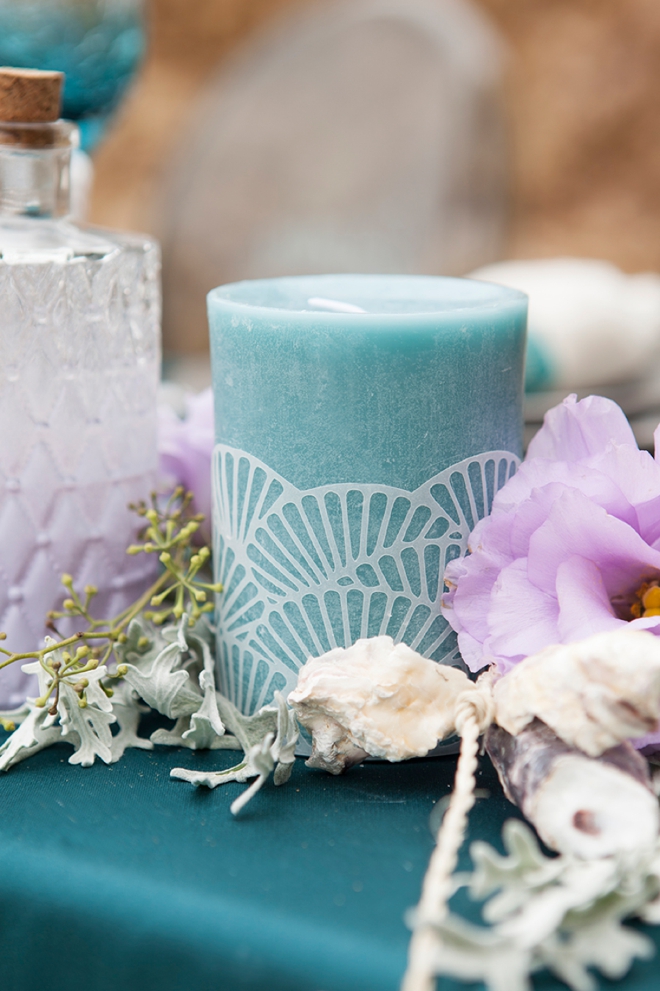
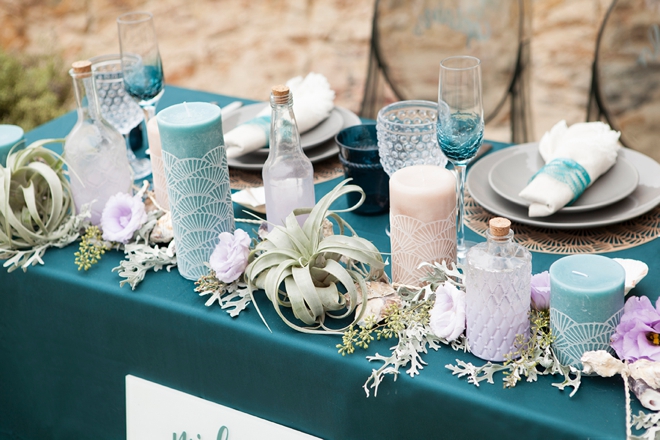
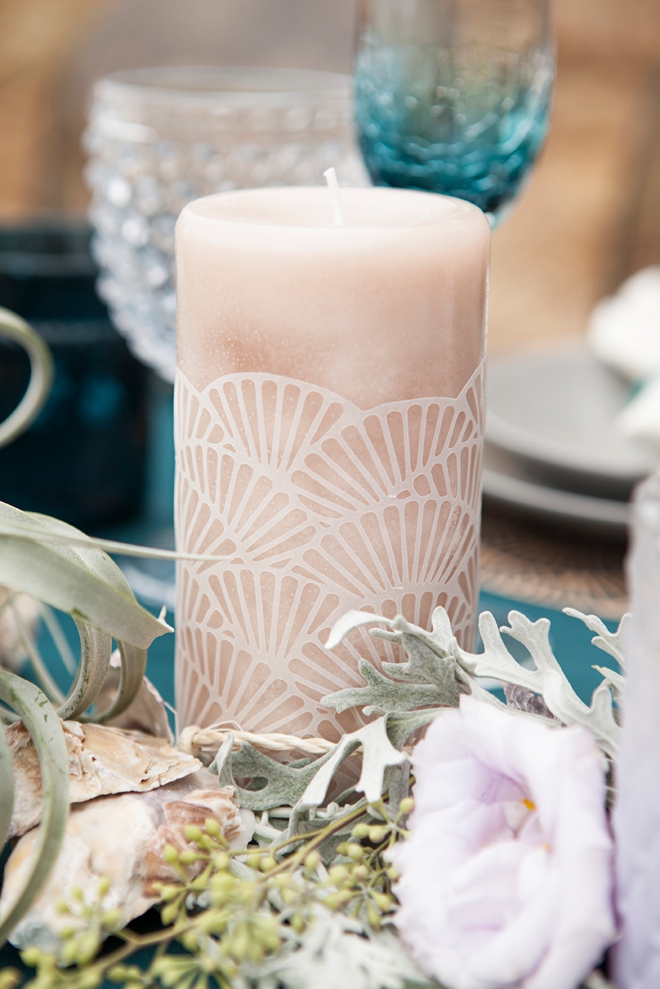
For me, a big part of “DIY” is taking something simple and embellishing it to fit my own unique style. For the most part, I’m not satisfied with store bought items and normally always tweak a little something here or there to make it more “me”. Which is exactly what I did with these gorgeous, DIY Scalloped Candle Wraps. Using our free SVG cut files, you can embellish literally any candle using any type of paper, in one simple step with your trusty Cricut Explore Air. My candles are from Pier One, but these wraps can be cut down to fit any candle whether they’re from the Dollar Store or Pottery Barn… you can even use these scallop wraps on the outside of glass hurricanes!
Click HERE to find the full styled wedding inspiration shoot that this project is from!
Exquisit Detail
This project is the perfect example of just how amazing the Cricut Explore Air is and what kind of delicate and detailed cuts it can produce.
SUPPLIES:
- Cricut Explore Air
- 8.5″ x 11″ Vellum (or paper of your choice)
- Pillar Candles
- Adhesive
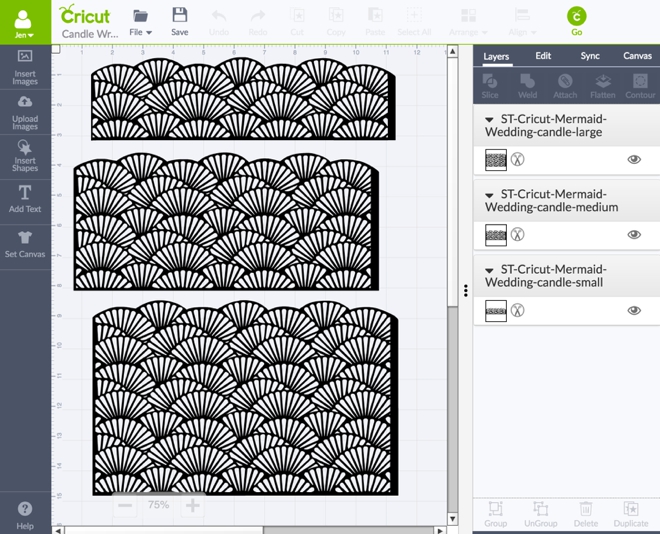
Import Into Design Space
Download our free SVG files at the end of the post and upload them into Cricut Design Space. I have three sizes that are specifically designed to fit the typical sizes of pillar candles:
Short: 2.75″ x 10″
Medium: 4.5″ x 10″
Tall: 6.5″ x 10″
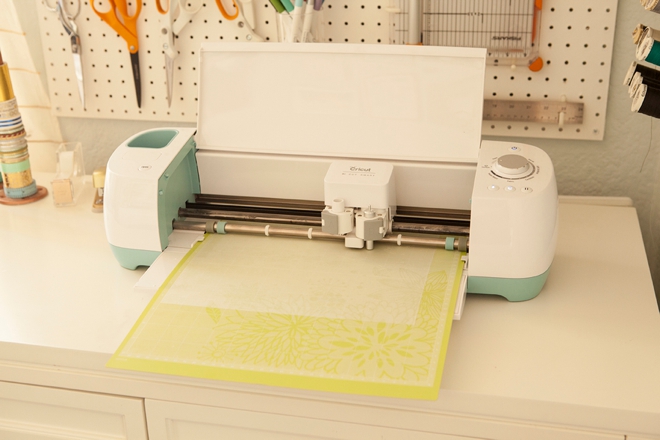
Paper Setting
My advice for this specific project is to use a fresh cutting mat (not one that has seen better days, you know what I mean), a semi-fresh blade and find the custom setting for the exact paper you are going to use. Those 3 elements will ensure a successful cut. Here I chose “vellum”.
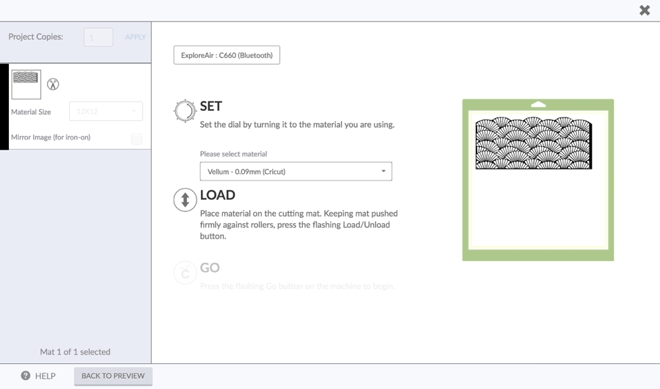
Cut The Designs
Once you’ve got your mat and cut setting dialed in, put the mat in your Cricut, press GO and watch it do it’s magic!
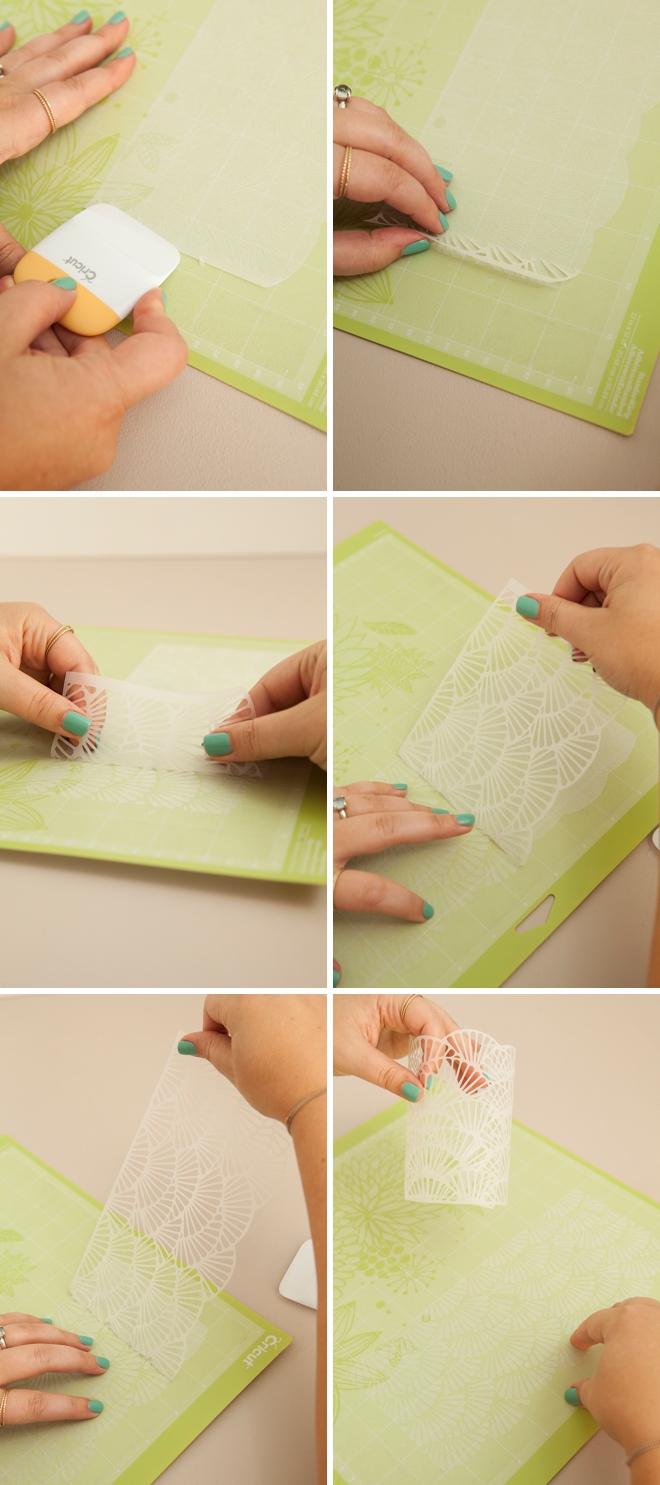
Remove Very Carefully
Cardstock or paper is totally no big deal, but vellum is incredibly delicate. If you use vellum for this project like I did, you’re going to need to remove the cut design from the mat carefully, and with patience. Once removed, use the scrapper tool to carefully remove all the scraps left behind on your mat. There will be so much of it that you could literally turn it into confetti!

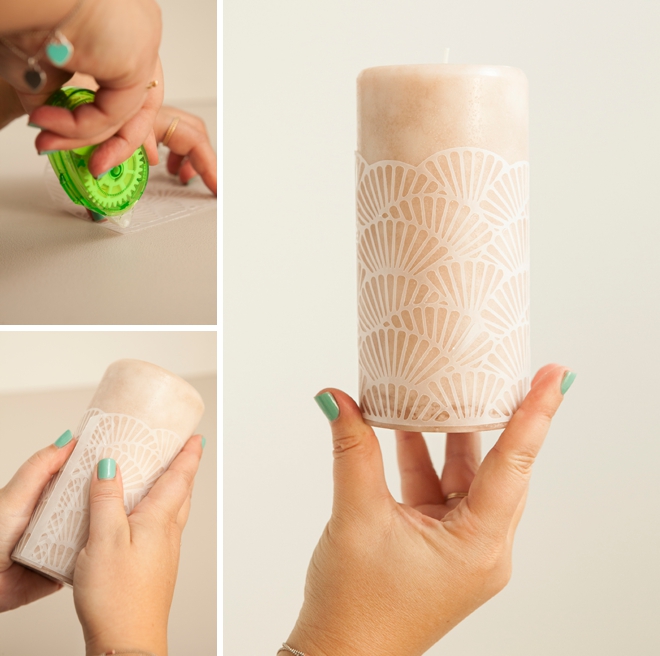
Apply To Your Candle
Apply your favorite adhesive along the edge of the design that has the lip. Wrap around your candle and secure – that’s all there is to it!
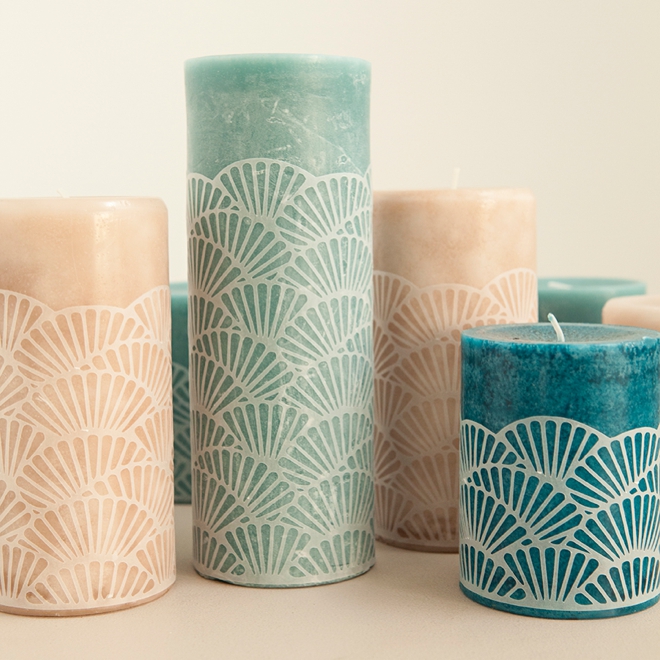
So Many Uses
There are SO many uses for these designs! Decorating candles, glass jars, hurricanes, greeting cards, notebooks, and more. Let your creativity run wild!
Click HERE to find the full styled wedding inspiration shoot that this project is from!


—–> Huge Wedding Giveaway <—–
Throughout the ENTIRE month of September, Cricut has partnered with amazing brands to bring you over $10,000 in prizes for your dream wedding! They have also partnered with amazing wedding and craft bloggers to bring you fabulous DIY wedding tutorials and inspiration! Seriously gals, this month is going to be craft-fabulous! Here’s what you could win:
- Week One (this week): $1500 towards a gorgeous, eco-friendly Celia Grace wedding dress!
- Week Two: $1500 “DIY Dream Wedding Bundle” including a Cricut Explore Air & Canon iP8720 Crafting Printer and SO much more!
- Week Three: $1500 in wholesale wedding flowers from FiftyFlowers.com!
- Week Four: Grand Prize. All the prizes above + a romantic Sandals Honeymoon to your destination of choice!
Click HERE to enter to win! Your friends can also “nominate” you to win!*
As with all our DIY tutorials, if you create one of our projects please send us a picture – We Love Seeing Your Creativity! If you use Instagram or Twitter please use the hashtag #SomethingTurquoiseDIY and it will show up on our Get Social page. Happy Crafting!
DIY Tutorial Credits
Photography + DIY Tutorial: Jen Carreiro of Something Turquoise // Project Created Using The: Cricut Explore Air // Design Files: Julia Ensign // Vellum: Paper Source // All Candles: Pier One // Adhesive: Sticky Thumb // Wholesale Flowers: FiftyFlowers.com // Nail Polish: OPI – Withstands the Test of Thyme
Shop The Supplies:
Find the supplies you’ll need for this project from our affiliate links below:

Comments