
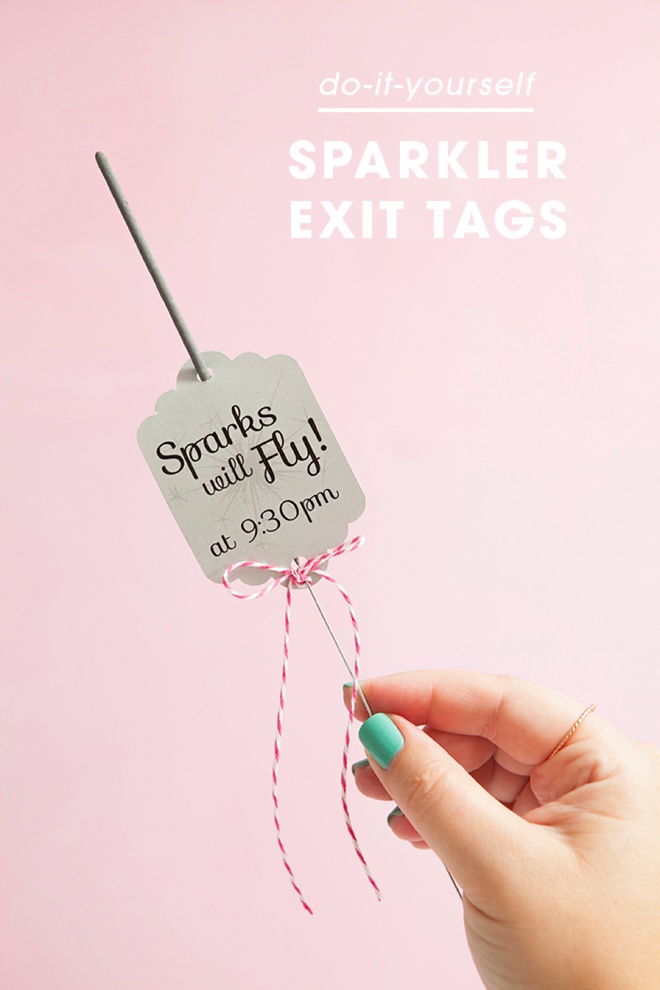
DIY | Wedding Sparkler Exit Tags
-Sponsored Post-
Whoever was the first couple to have sparklers at their wedding for the grand exit are my heroes. This is one of my favorite modern wedding trends for a few reasons… one, it makes the most amazing photographs – two, it gives wonderful closure to you event that encompasses the entire guest list and three, it’s just so romantic! If you haven’t heard, we are right in the middle of an awesome 6-week DIY series of projects inspired by real DIY weddings from our archives, sponsored by Fiskars. Today’s project is how to make the most adorable Wedding Sparkler Exit Tags ever, using my editable tag designs that you can download for free at the end of the post. Give a sparkler to each guest and let the sparks fly!

Real DIY Wedding Inspiration
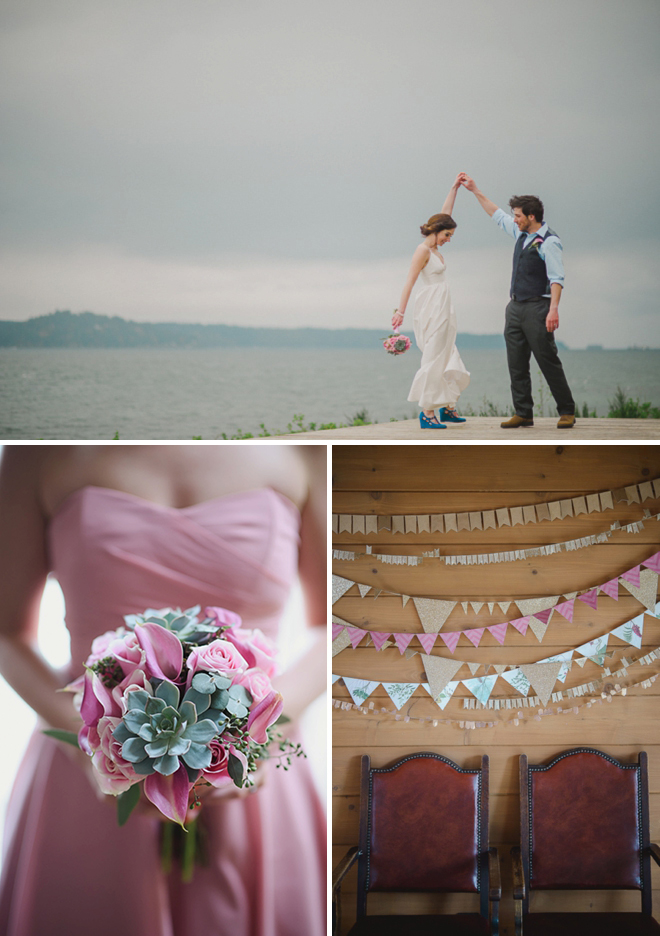
Today’s DIY project was inspired by the details from Ian and Ursula’s gorgeous real wedding, photographed by the talented Erin Wallis Photography. Together with their families, this couple hosted an intimate handmade affair for the books! To see more of their creative wedding day in Vancouver Island, Canada you can visit this post.
Small Sparklers At Each Place Setting
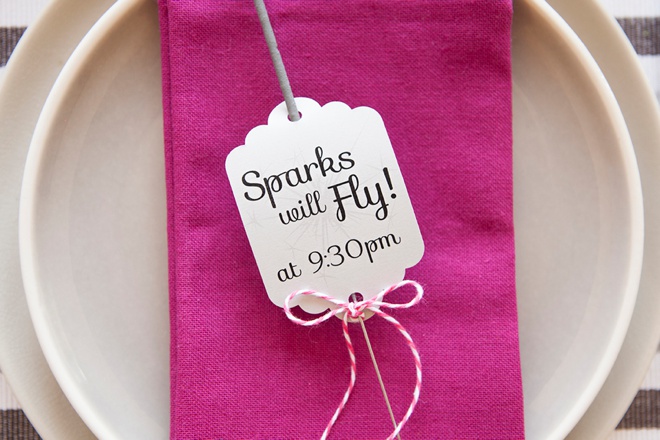
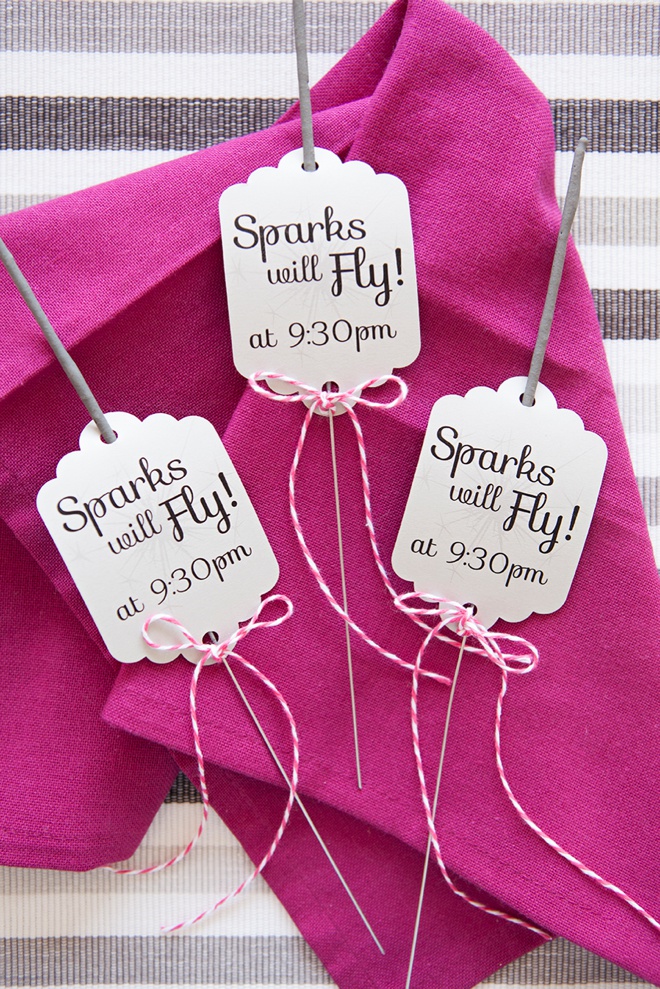
Beyond being absolutely in love with this wedding, one element that I thought was really unique were the small sparklers at each place setting. The trend lately has been to use large 20″ sparklers, displayed in a container near the grand exit location… but here each guest was given their own individual sparklers. They were tied onto adorable love quote cards, that you can actually download for free from Enjoy It. My idea takes this project one step further and let’s each guest know exactly when to let their sparks fly!

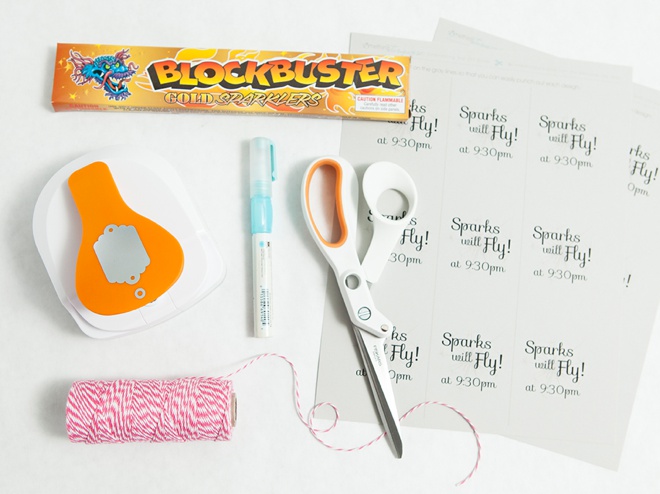
SUPPLIES:
- Fiskars Scallop Tag Maker with Built-in Eyelet Setter
- Fiskars 8″ Amplify® Mixed Media Shears
- 9″ or 10″ Wedding Sparklers
- Glue Pen
- Twine
- My free, editable tag page download!
Download + Edit + Print
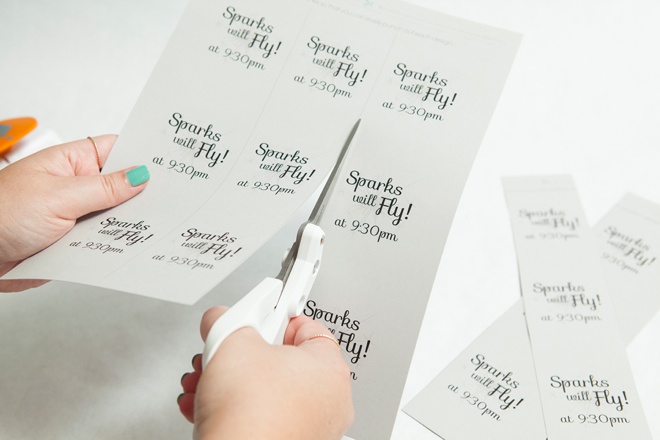
Start by downloading the free font Sofia so that you can properly edit the tags. Next, download my free tag design pdf. at the end of this post. Open the pdf. using Adobe Acrobat or Adobe Reader and double click on the text boxes to edit the sparkler exit time to fit your special event! Then save and print onto your choice of light colored 8.5″ x 11″ cardstock.
Cut the cardstock into 3 strips on the lines provided, this makes the best use of the paper to punch out the tags.
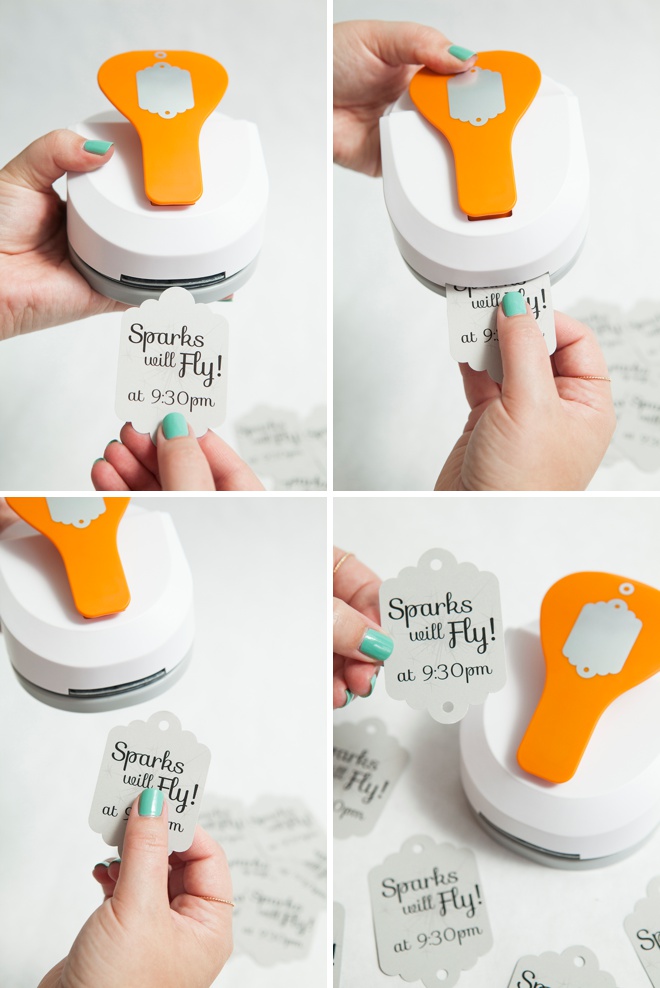
Punch Your Tags
Flip your Fiskars Scallop Tag Maker upside down so you can see the area you are punching, slip the paper into it, center and punch! The tag pdf. printable is designed specifically to work with all four of the Fiskars “tag maker” punches.
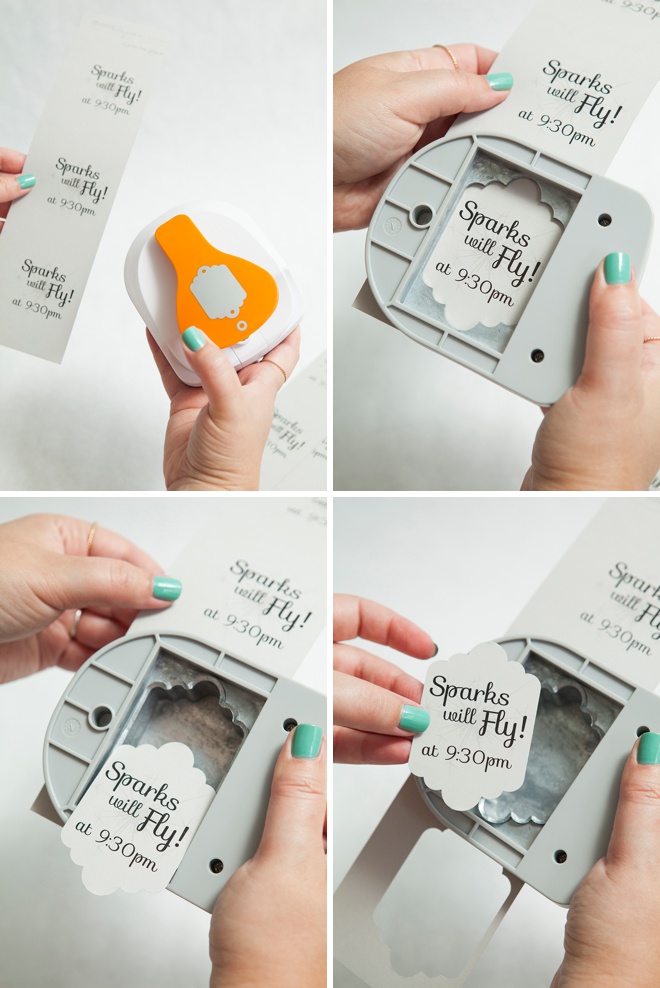
Punch The Holes
I am in love with this punch because it’s truly a multi-tasker! The next step is to punch holes in your tags and guess what? You do it with the same punch – so cool! Insert the tag into the front slot on the punch and press down on the handle, simple as that! Do both ends of the tag.
**My favorite part of this punch is the built in eyelet setter. We don’t need to put eyelets in these tags but you’ll love this feature when you make other tags!
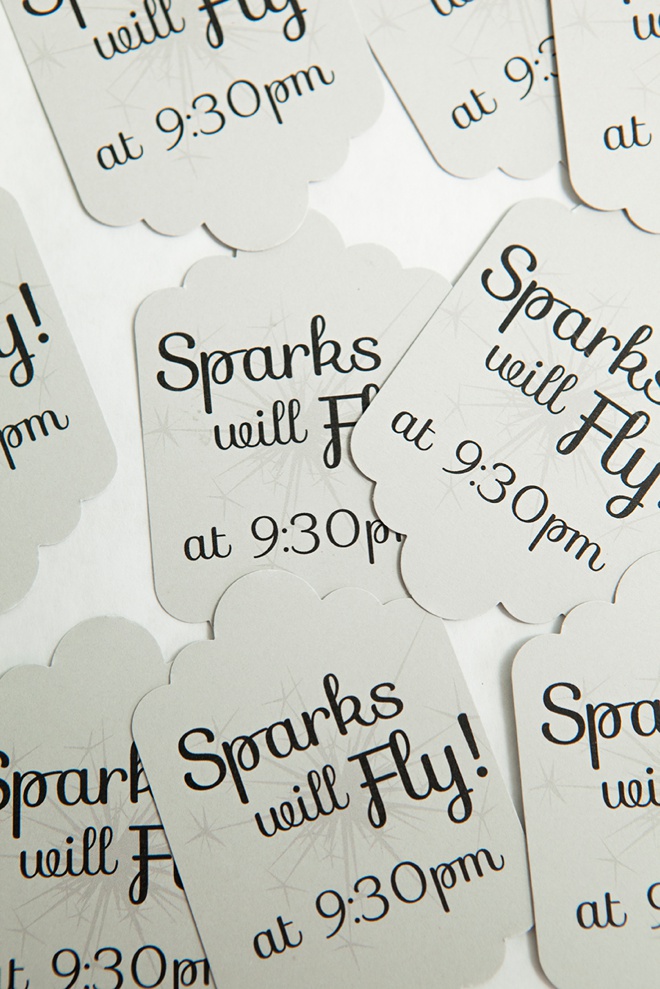
Add Your Tags
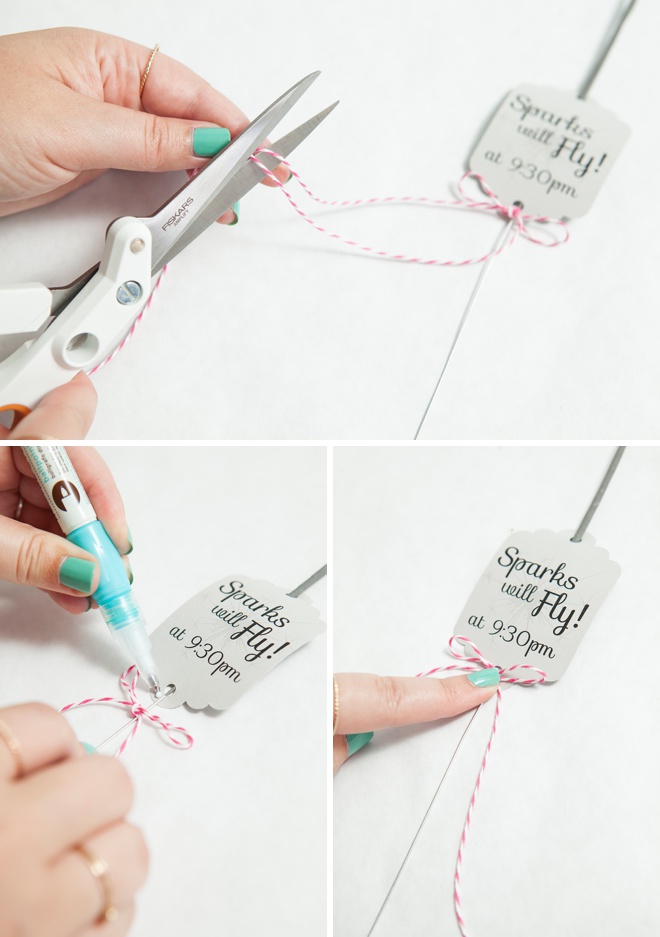
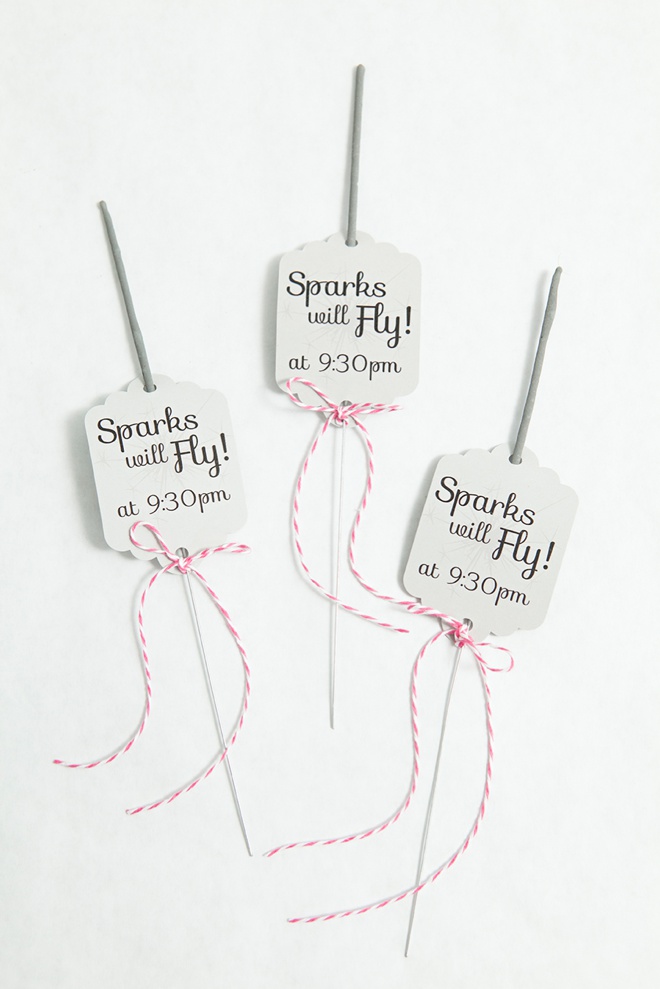
Slip each tag onto its sparkler…

Add A Bow
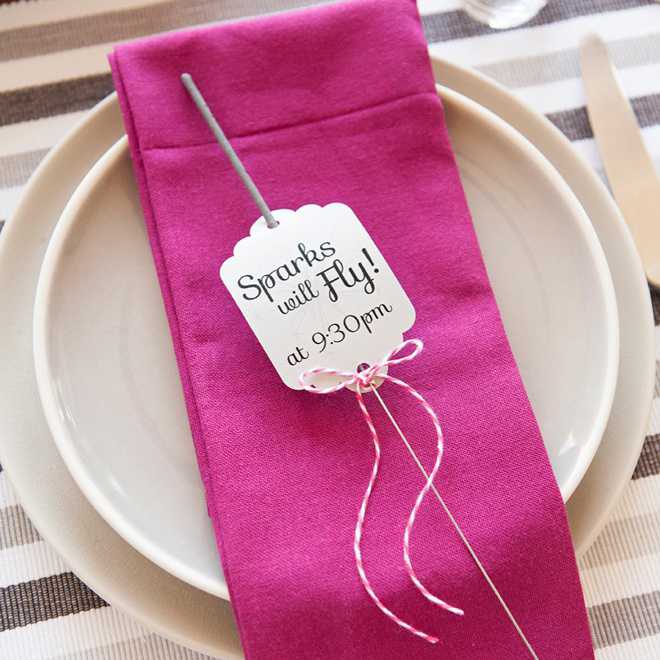
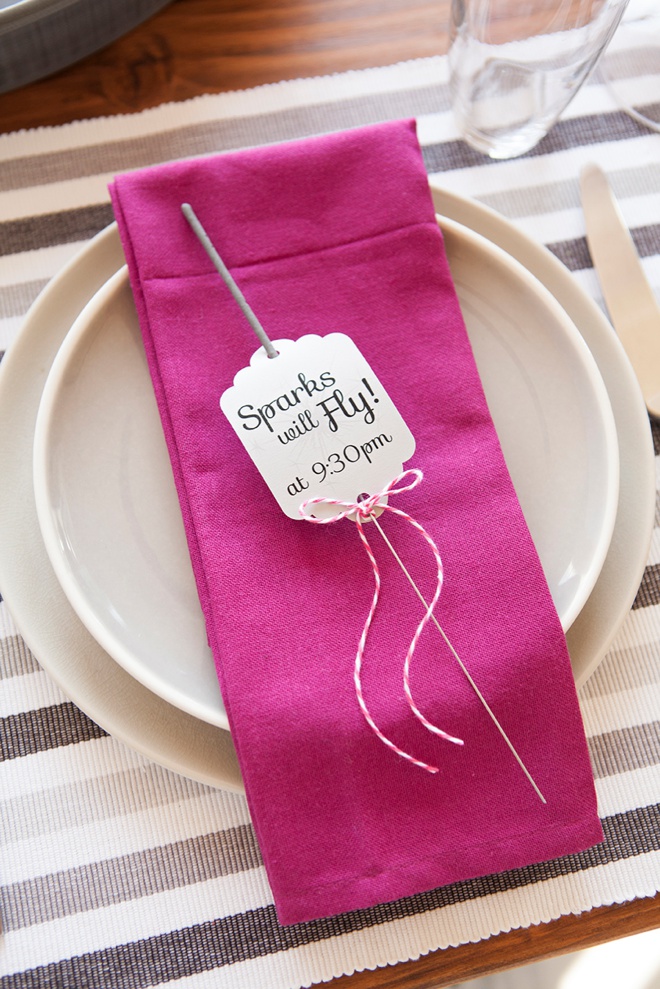
If you’d like, you can add a cute little twine or ribbon bow to your sparkler. The only problem is it will fall off the sparkler if you don’t glue it. Here I used a Martha Stewart Crafts ballpoint-tip glue pen to add a teeny tiny bit of glue to the bottom of the tag. Hold the twine against the glue for about 10 seconds and you’ll be good to go.
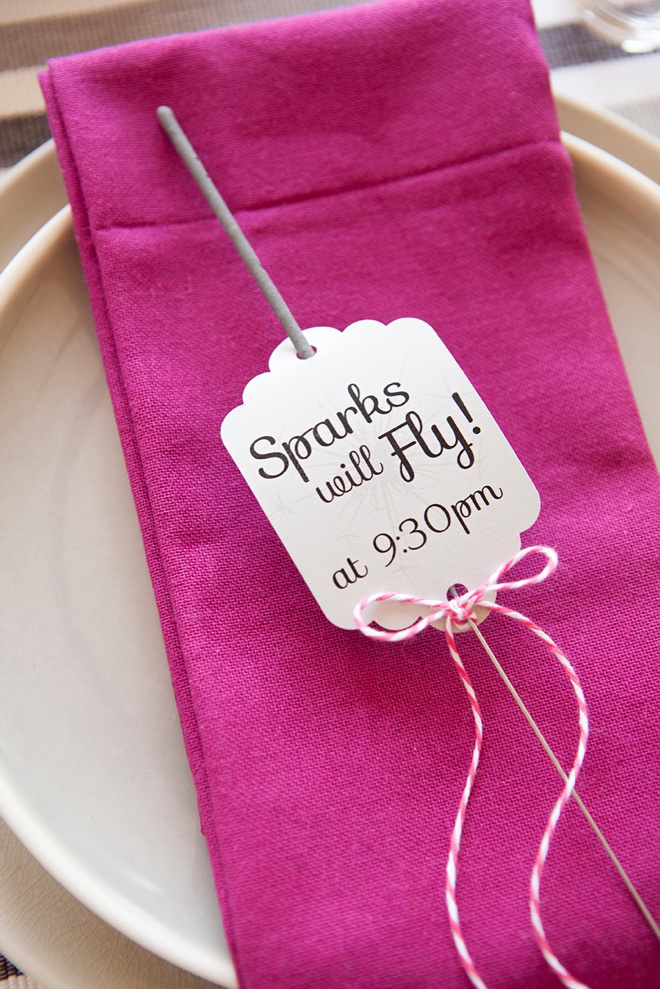
Add To Each Place Setting
Give these little darlings to your wedding planner to display at each place setting during your reception. Easily customize to fit any wedding color scheme by using paper and twine that matches your special event!
DIY Tutorial Sponsored By:

Known for its iconic Orange-Handled Scissors™, Fiskars is a 365-year-old company with a strong heritage of quality and innovation. Fiskars is a leader in the DIY industry with tools spanning the categories of crafting & sewing, gardening & yard care, and kids & school. In addition to providing scissors, punches, trimmers, rotary cutters and many other tools, Fiskars shares inspiring project ideas to help DIY-ers do what they love using tools that make projects easier.

Download the tag design sheet above and open it with Adobe Reader or Adobe Acrobat to edit. Double click on each time slot to edit and add your sparkler exit time. Don’t forget to download the free font Sofia beforehand! Save your edited document and print, making sure to check off “print actual size”.
DIY Tutorial Credits
Photography + DIY Tutorial + Free Download Design: Jen Carreiro of Something Turquoise // 8″ Amplify® Mixed Media Shears and Scallop Tag Maker with Built-in Eyelet Setter: Courtesy of Fiskars // 9″ Wedding Sparklers: Wedding Sparkler Store // Coverweight cardstock paper in Cement: Paper-Source // Martha Stewart Crafts Ballpoint Glue Pen: Amazon // Twine: Amazon // Free Font Used: Sofia // nail polish: OPI – Withstands the Test of Thyme
Shop The Supplies:
Find the supplies you’ll need for this project from our affiliate links below:

Comments