
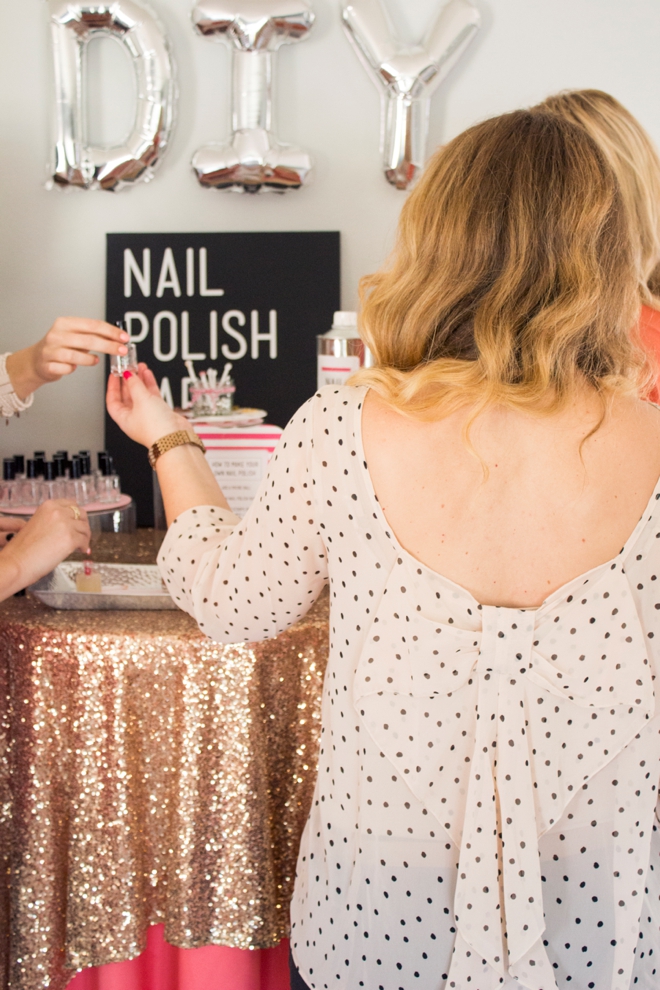
DIY | Nail Polish Bar
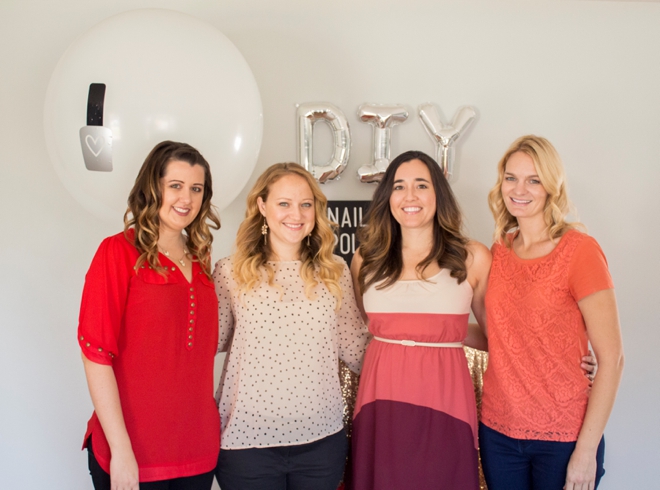
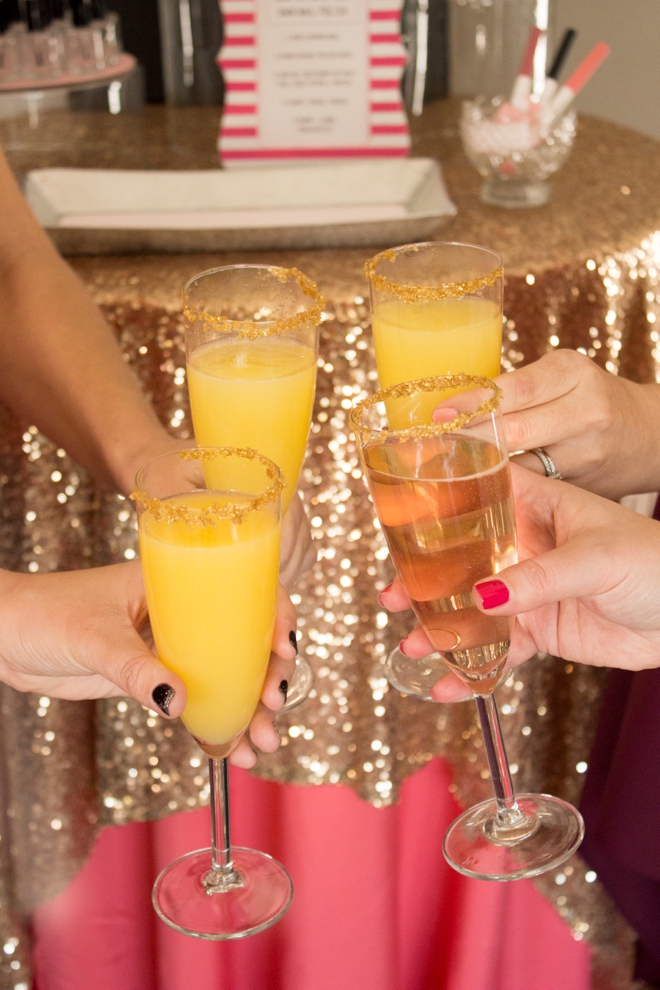
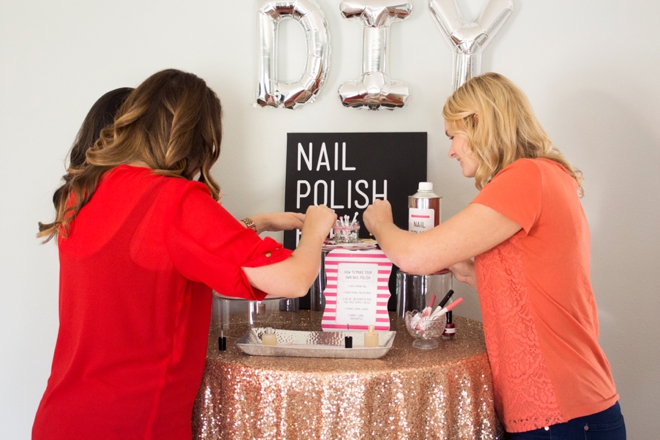
Today I wanted to end 2014’s DIY tutorials with a BANG! Yes, today is the last project of the year and so I made it extra special for you – introducing the DIY Nail Polish Bar! In this tutorial I will not only share exactly how to make your own nail polish, but how you can set up an adorable DIY nail polish bar that would make the perfect addition to any bridal shower or bachelorette party. To make it ultra-fun and give you a glimpse into what it would actually be like to set this up at your event, I invited a few of my friends over to drink champagne and make nail polish with me. We had a blast and everyone agreed they loved how easy it was to create their own special shade of nail polish and that it was a great, interactive activity. Free downloads, detailed instructions and credits of where everything came from can be found below. I hope to see lots of these bars popping up at girly events in 2015!
Special thanks to my bestie Christin for letting us play at her beautiful house.
The Bar
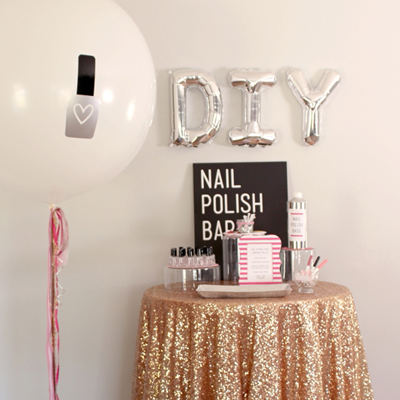
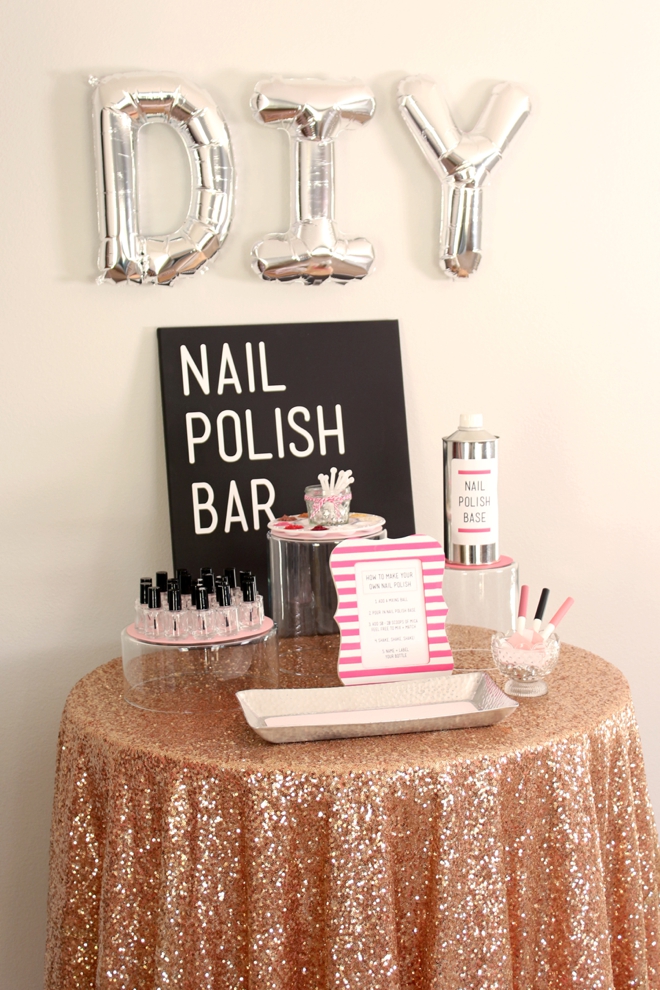
I’ll start by fully describing the bar set up for you and how I made everything that went into this display. Remember, your colors don’t have to be shades of pink, you can make nail polish (and this bar) in any colors you want!
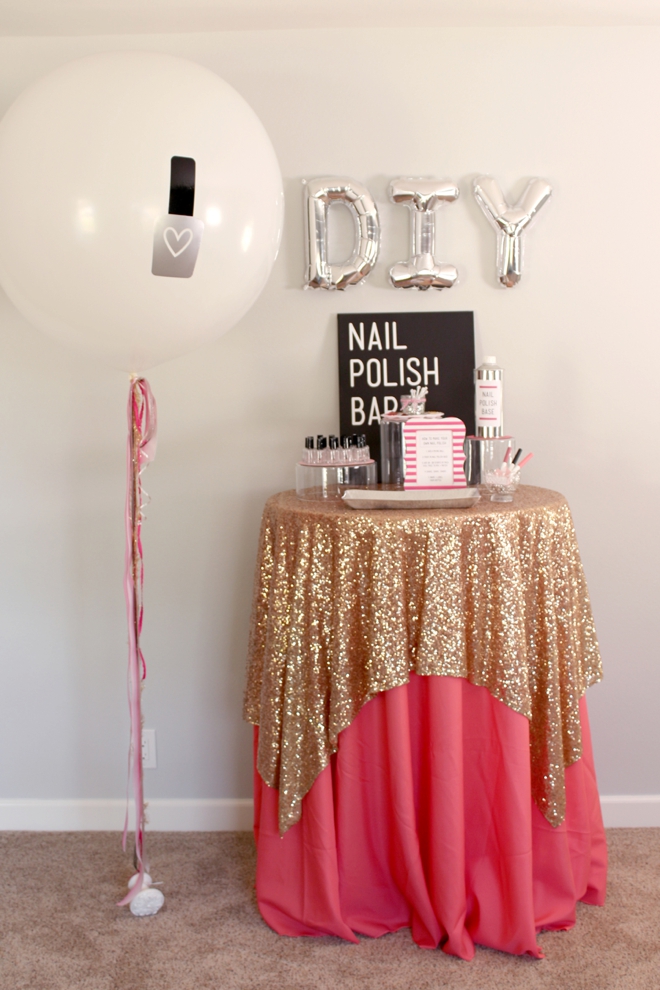
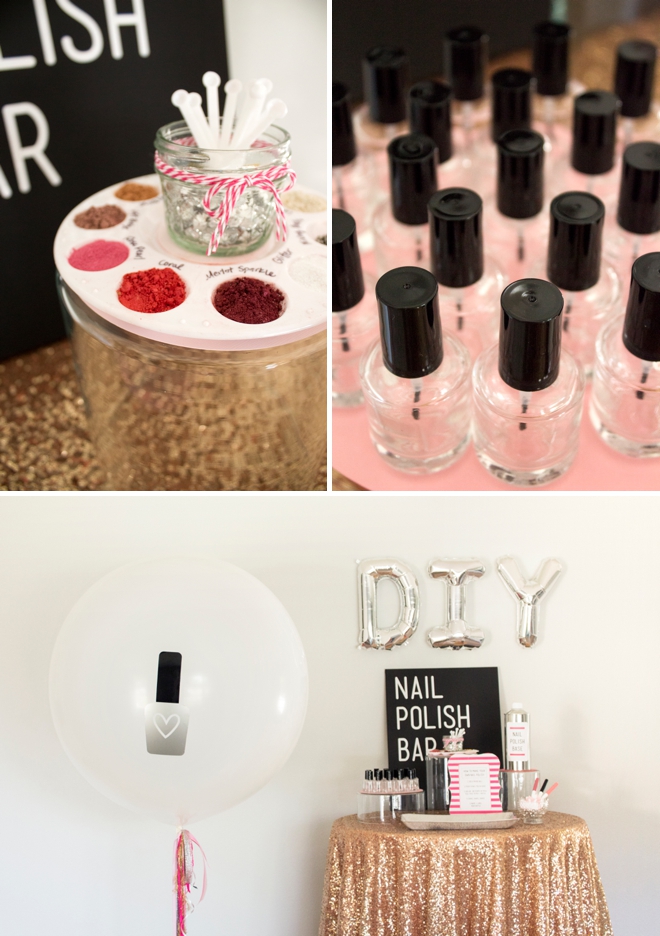
There are 6 key things that you will need to display for this bar:
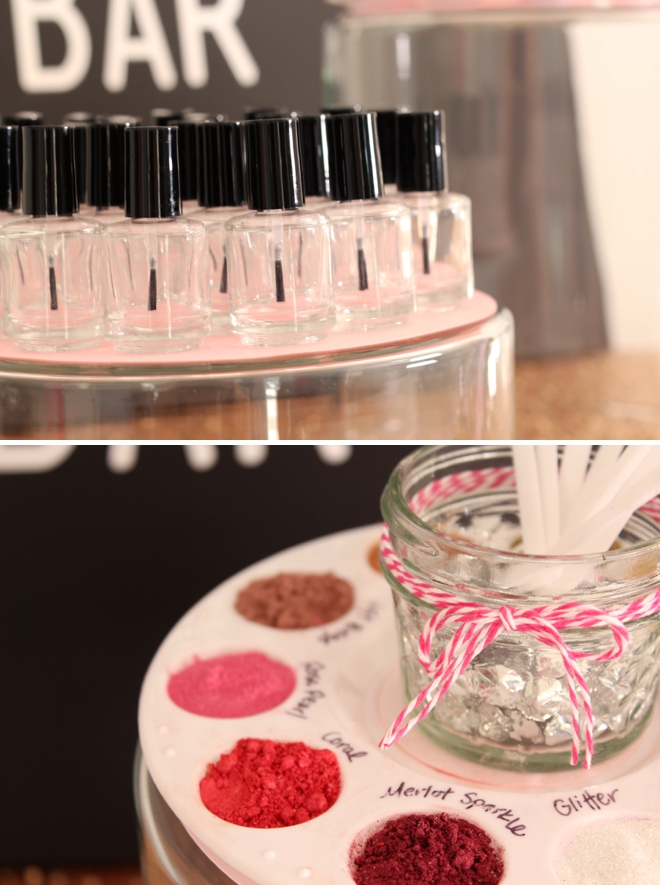
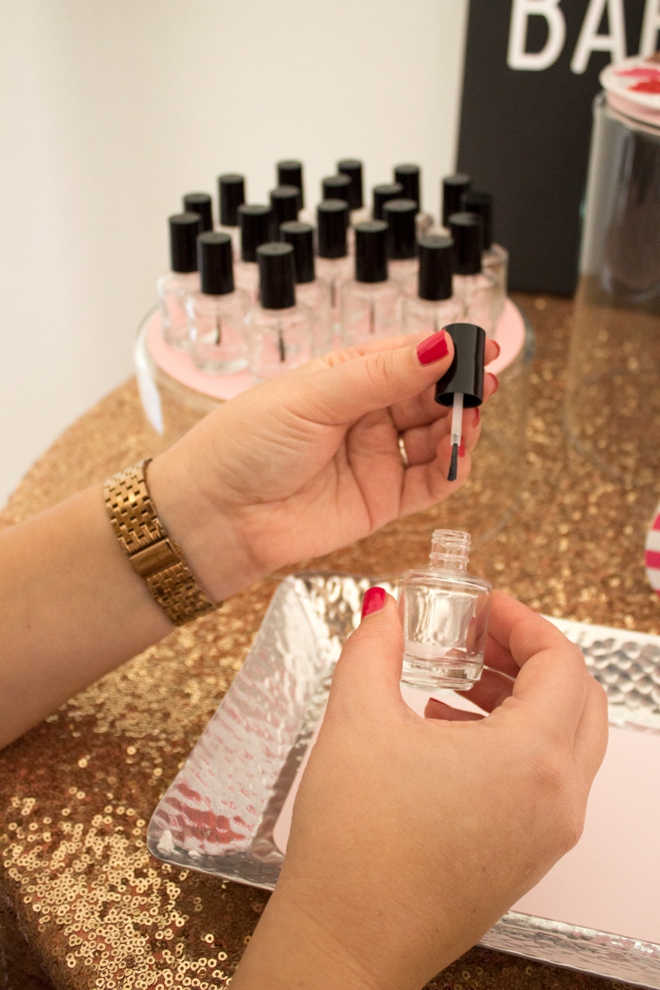
- Empty nail polish bottles
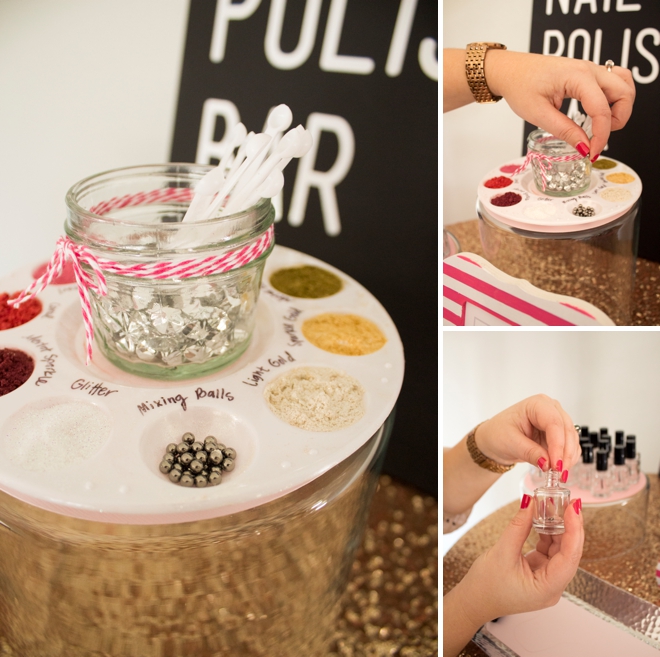
- Mica powders and scoops (more info below)
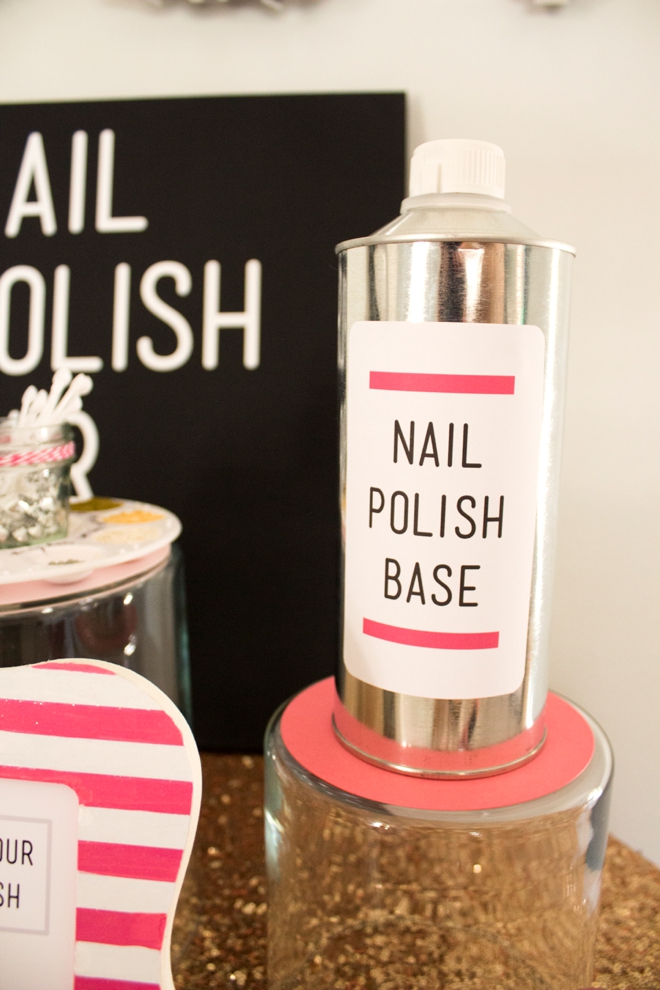
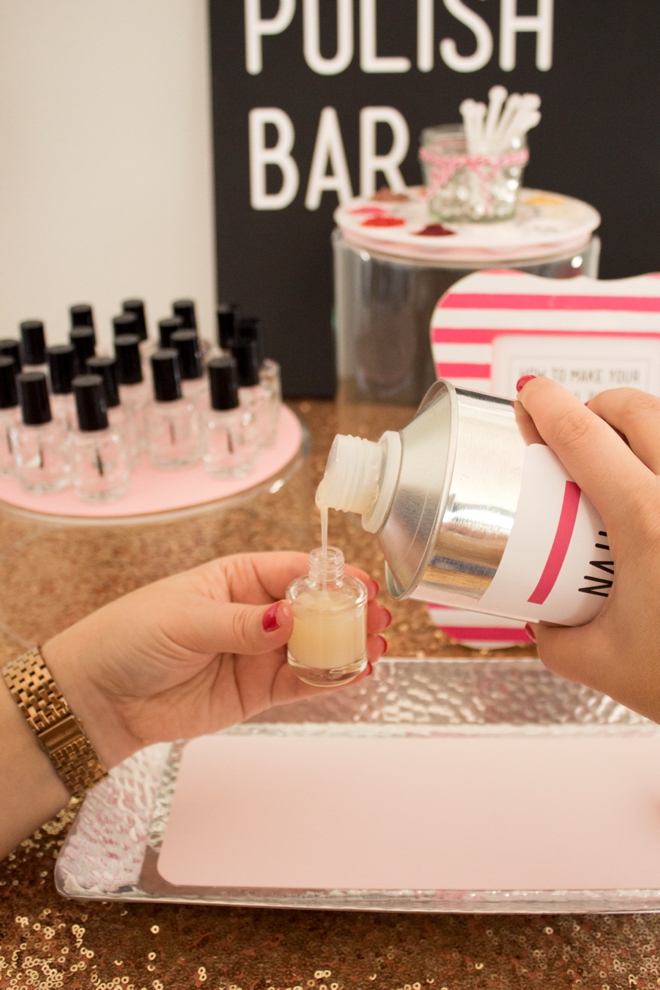
- Nail polish base
- Pens and bottle labels
- The “how-to” sign
- A tray for your guests to pour/mix over (it gets messy!)
The nail polish base comes in this silver container so we slapped a cute sticker on it which you can download below! I used the 32 ounce bottle size.
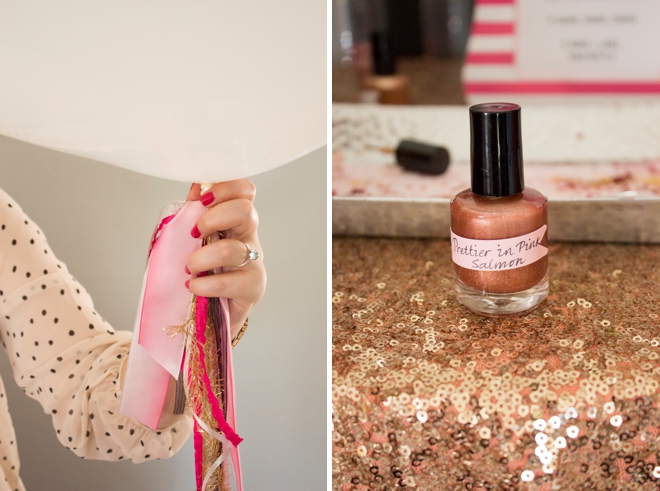
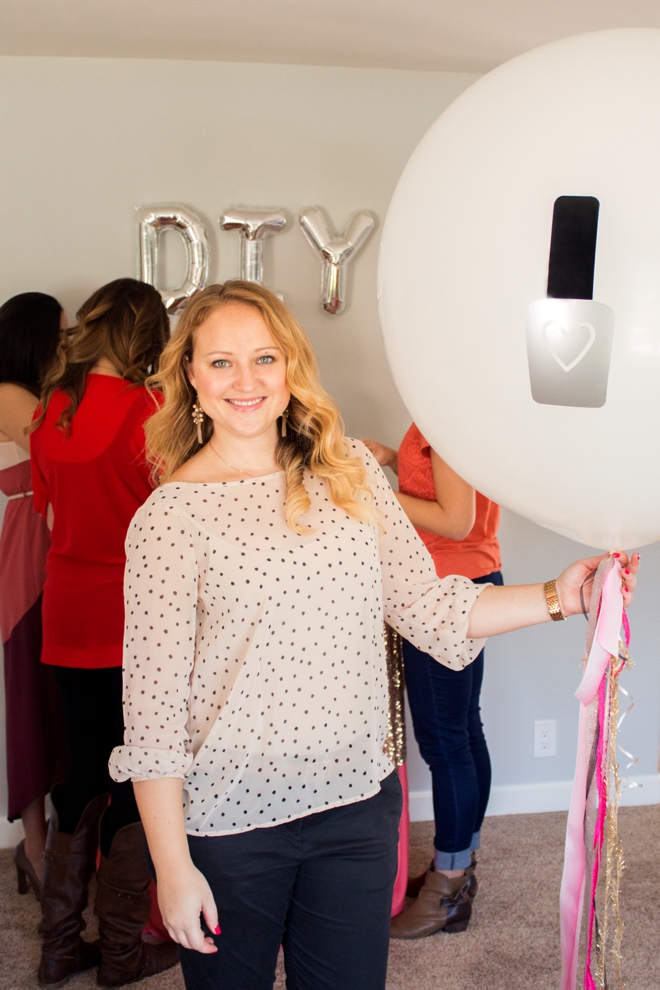
For fun I added a bunch of different colored ribbons to hang from the balloon. I made rectangle flag labels using sticker paper and my Cricut Explore so that each guest could name and label the nail polishes that they made. The tag number on Cricut is #M42D8B.
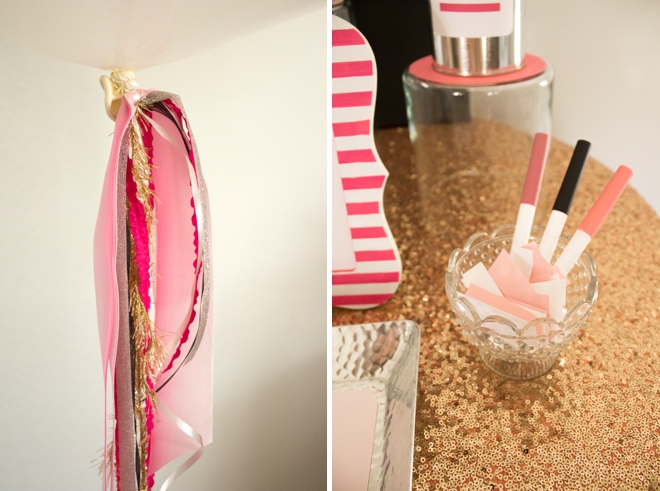
I displayed each item on top of clear glass vases (turned upside down) that I purchased from Ikea, these came in a set of 3 which was perfect. Then I cut different colored “doilies” for the top of each vase.

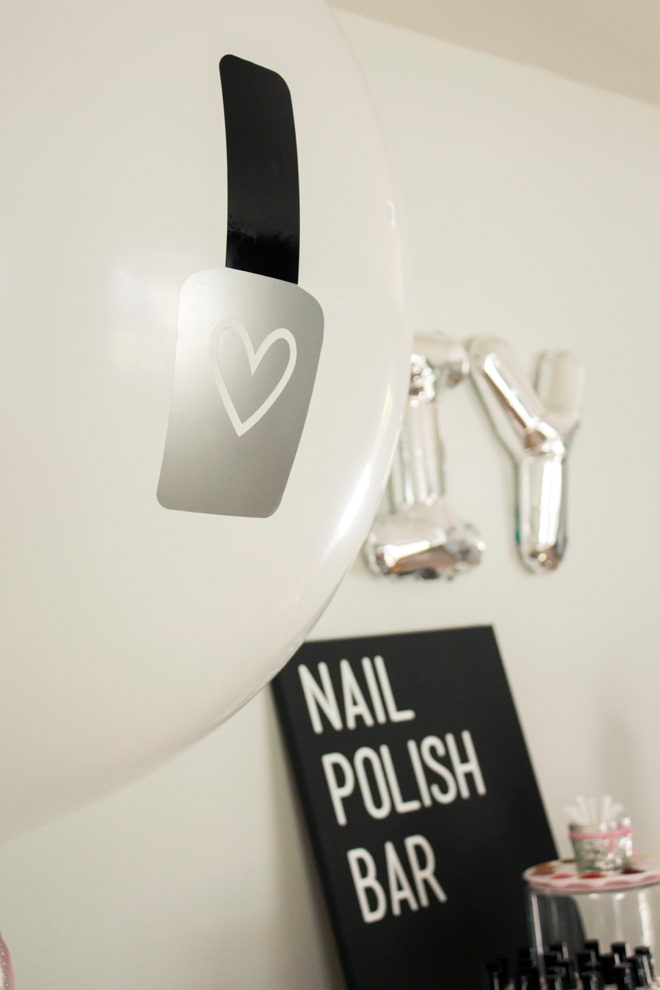
The ballon; my favorite part. To make this vinyl sticker I used my Cricut Explore with silver and black vinyl. I used image #M30201 (the nail polish bottle, but removed the flower) and image #M46DF2 (the heart) and attached them together to be cut out of the same material. Once the balloon was blown up I stuck my custom nail polish sticker onto it.
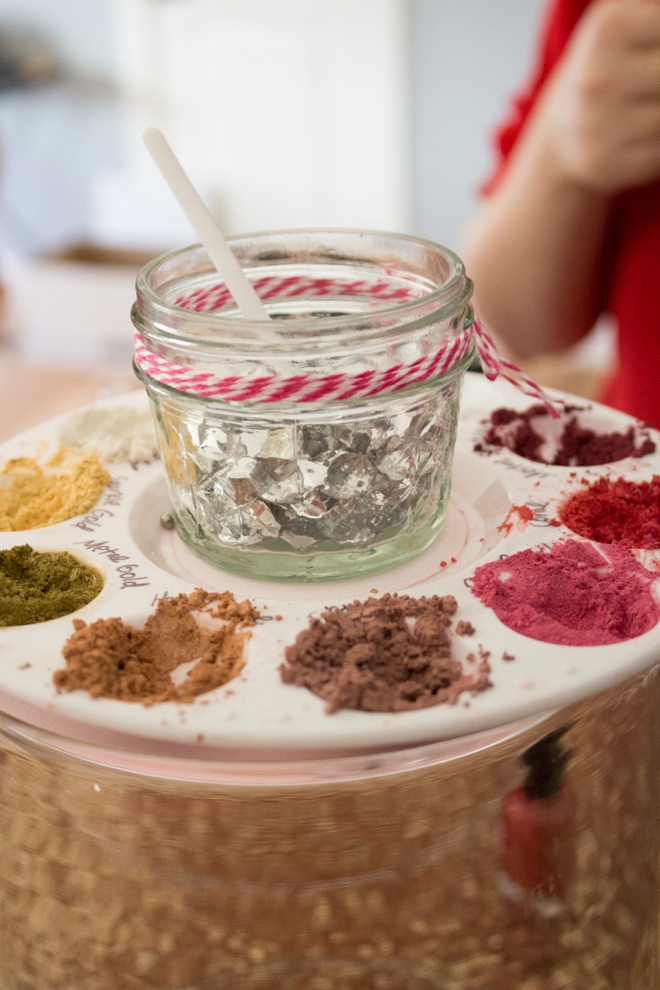
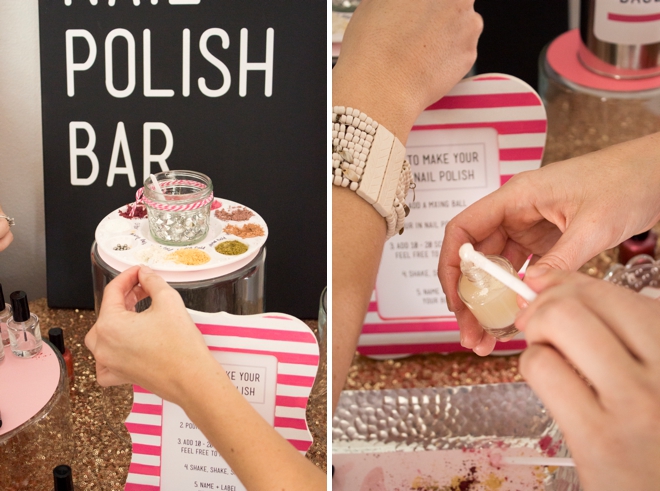
“Mica” is how you are going to add pigment the nail polish. I used an inexpensive plastic paint palette from Michales to display all the different mica colors, glitter and the mixing balls. I used a Sharpie to write each items name on the palette to help my guests decide which one to choose. You will also need these small scoops to add the mica to the nail polish bottles. I put these in a small mason jar with diamond cut accent pieces.

For the sign I used a 16″ x 20″ black canvas that I purchased from Michaels and added the lettering using white vinyl and my Cricut Explore. I used the font Mensch, cut the letters out and added them to the canvas. It took less than 30 minutes and I love how perfect and bold the letters look compared to painting them.

Of course your bar can look however you choose… and be whatever color fits your theme!
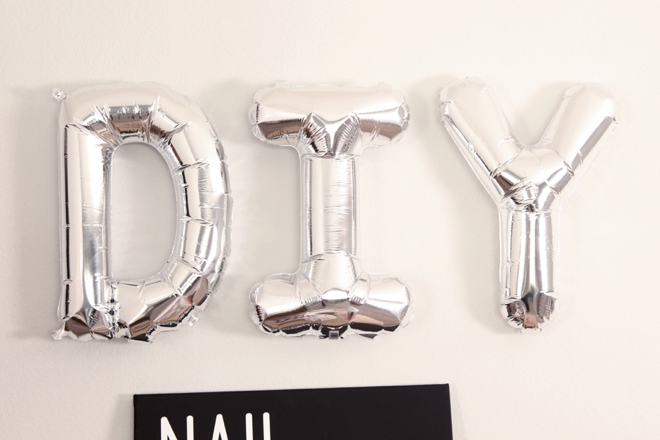
These cute “DIY” balloons are from Oh Shinny! Paper Co. via Etsy.
Now let’s have some bubbly and get to the fun part!
SUPPLIES:
- Empty 15ml nail polish bottles
- Nail polish mixing balls
- 32 oz. Suspending nail polish base
- Your choice of mica colors (powder that adds color to the nail polish, the colors we used are listed below)
- Nail Polish Grade glitter
- .15 cc scoops
- Sticker Labels and pens
- Sign
(All of our nail polish supplies are from BrambleBerry.com)
—> Download our FREE instruction sign and nail polish base sticker here.
To make this frame I painted a cheap wooden craft frame pink and then glued the striped scrapbooking paper to the front of it.
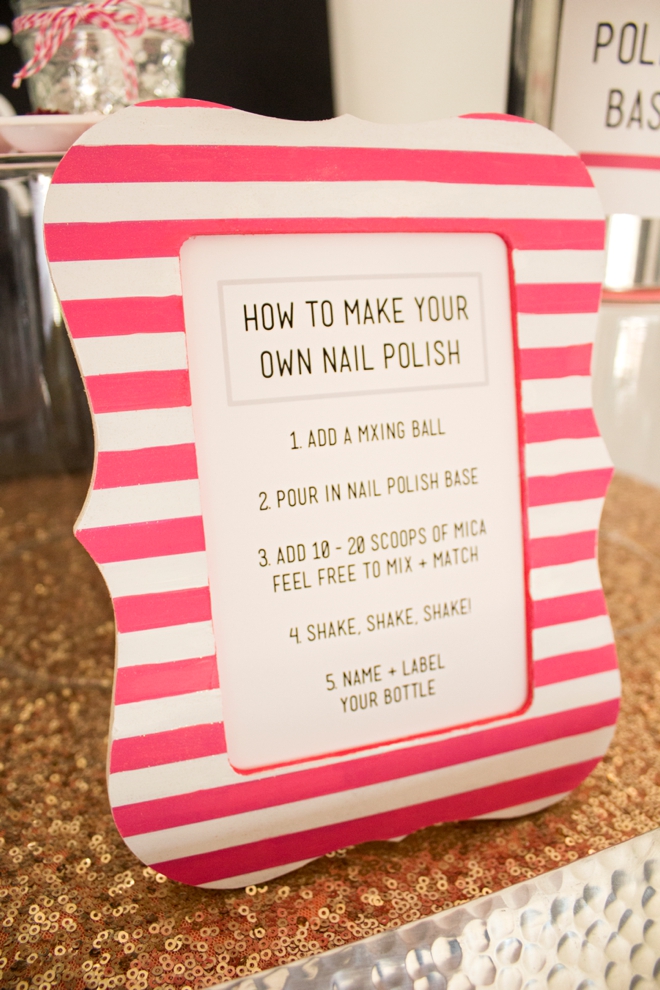
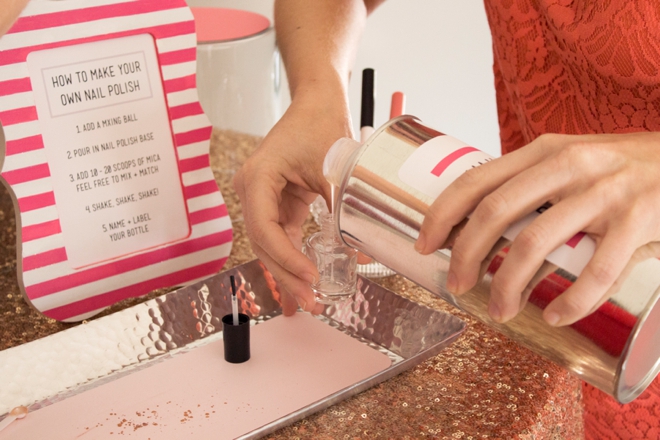
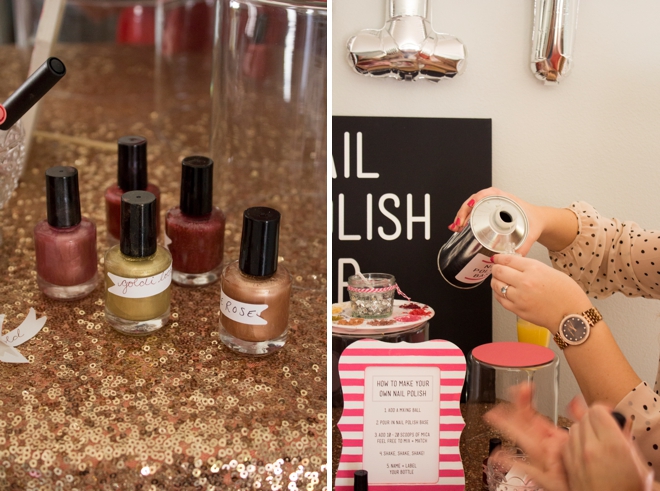
How to Make Your Own Nail Polish
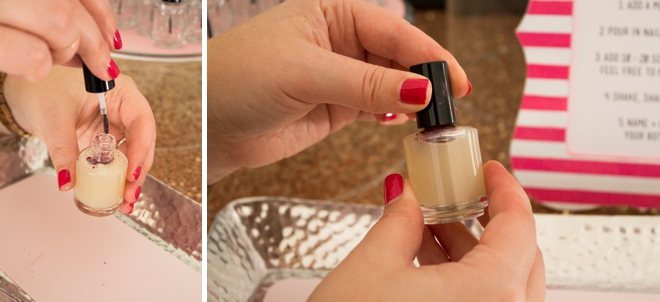
It’s much easier than you might think… we aren’t actually making the nail polish base so it takes like 5 minutes from start to finish! The lid and brushes come “unassembled” but all you have to do to assemble them is put the brush in the jar and screw the lid on until you hear it click. Then the brush is attached to the lid.
Add a mixing ball.
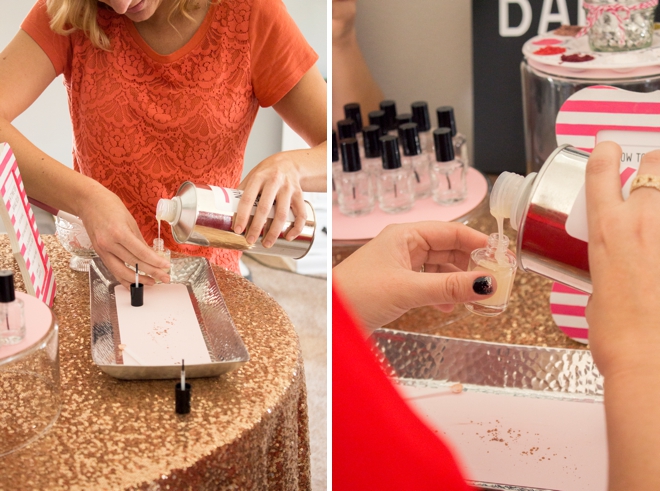
Then carefully pour the suspending nail polish base into your nail polish bottle. Although the base has a slightly yellow tint it dries completely clear and doesn’t effect the color of your polish whatsoever.
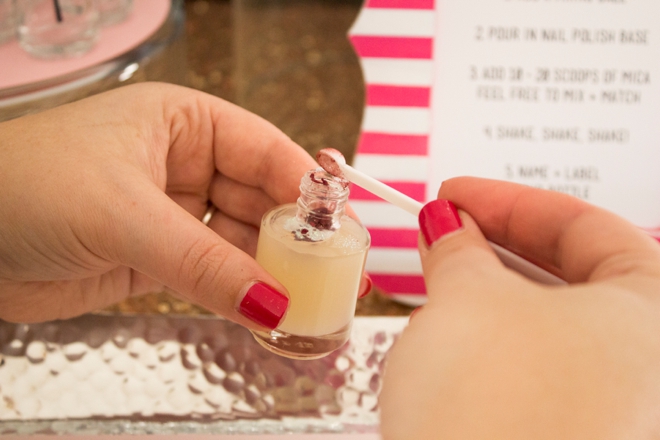
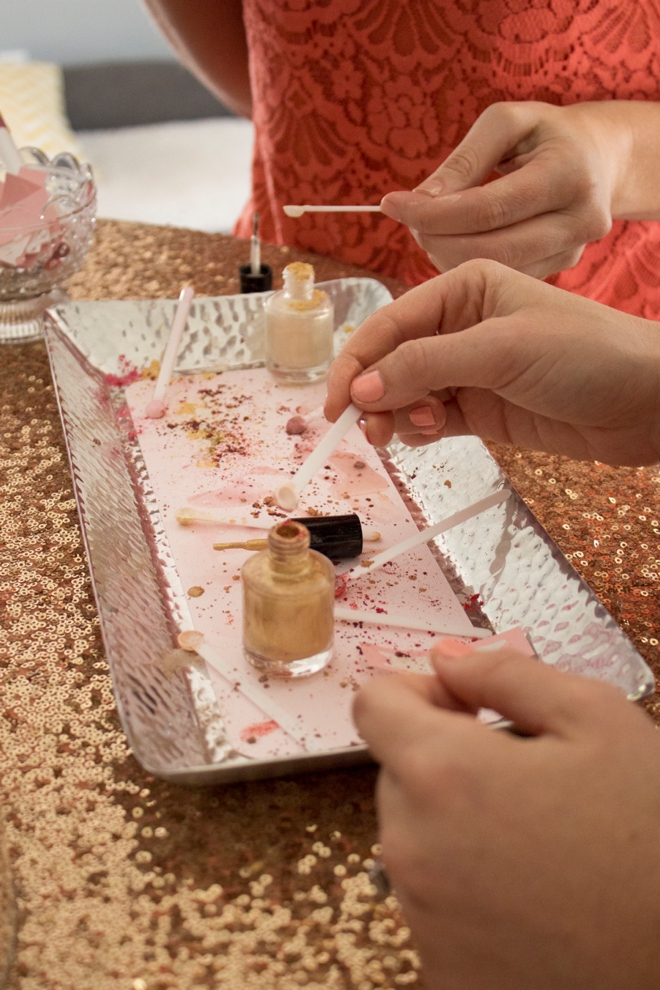
Now the fun part! Add 10-20 scoops of mica and/or glitter into the nail polish bottle. The less mica you add the more sheer the color will be. Test the color on your nails or a piece of paper and add more if you’d like it darker, remember you can always go darker but not lighter.
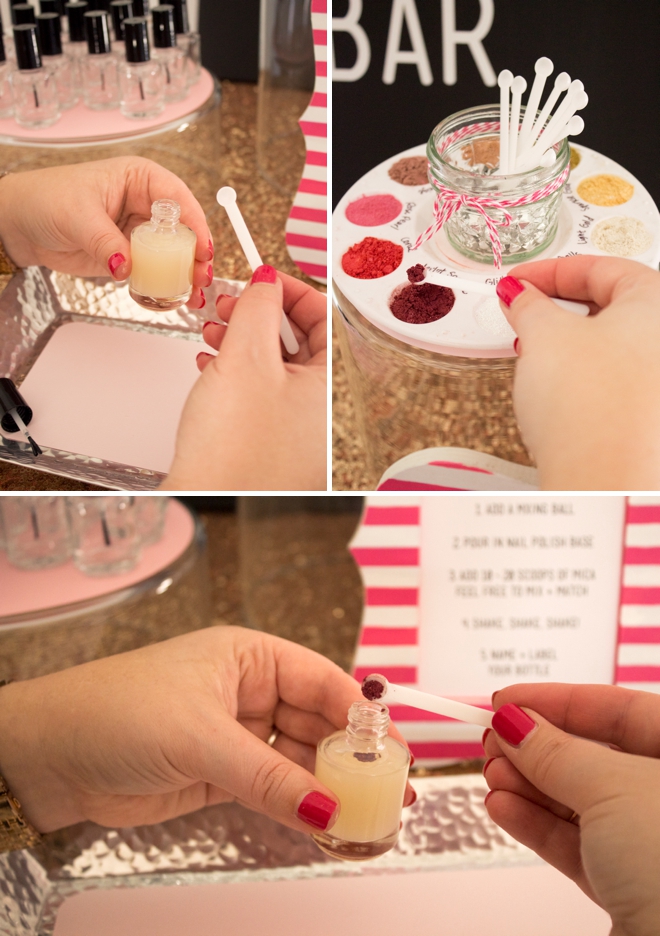
Here I added 10 scoops of Merlot + 5 scoops of glitter + 2 scoops of Coral… to make a warm sparkly red!
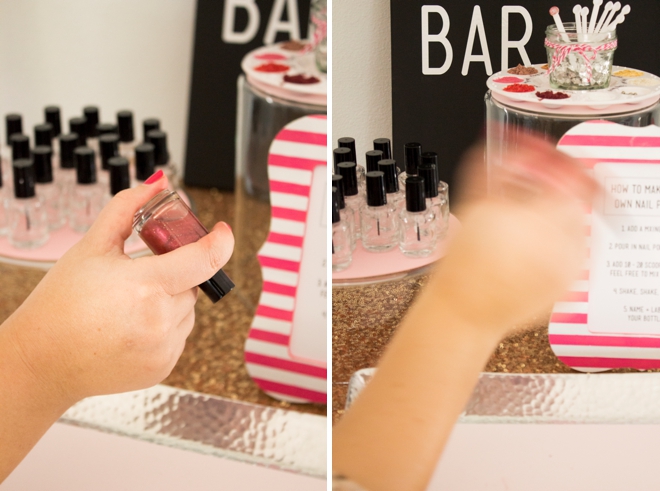
Screw the lid on tight.
..and then really give it a good shake! Continue to shake until you see that the mica and nail polish base are fully combined.
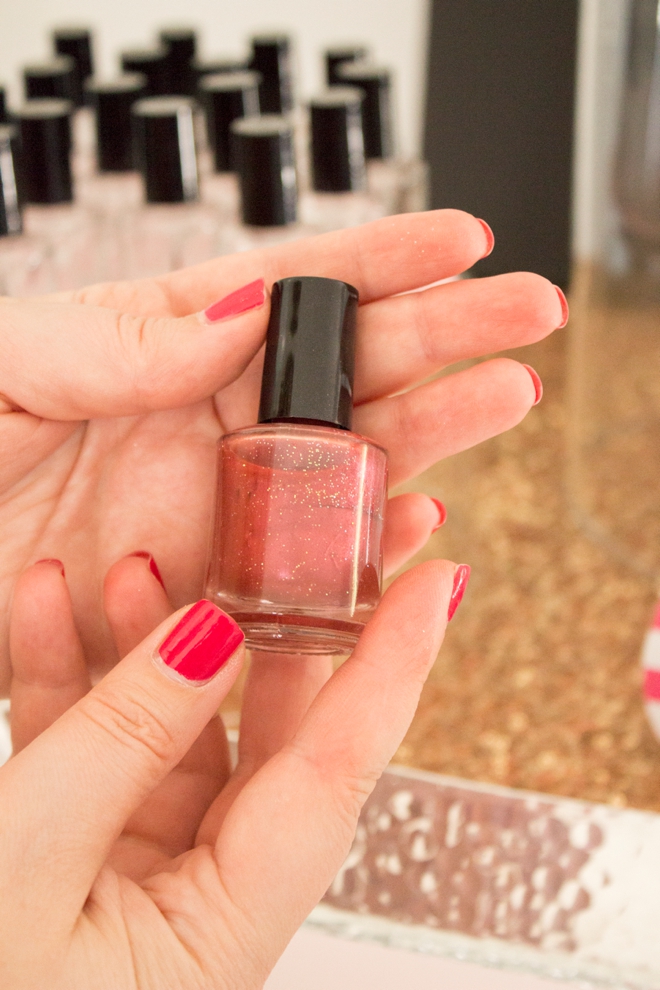
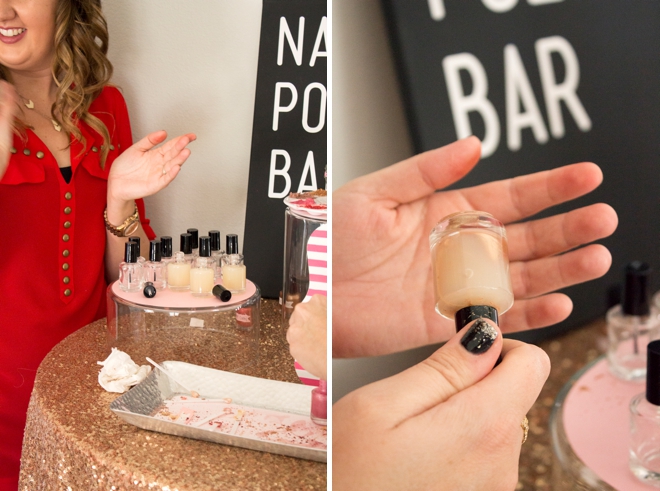
Isn’t it pretty? Are you a tiny bit shocked that it’s just that simple? I was too… and now I have like 15 different custom shades in my nail polish cupboard. I’m slightly obsessed with nail polish and you might have picked up on that from all the fun manicures that you’ve seen me sporting!
Name your new shade of nail polish using a little sticker. Again I made these with my Cricut Explore, see the notes above for more information.
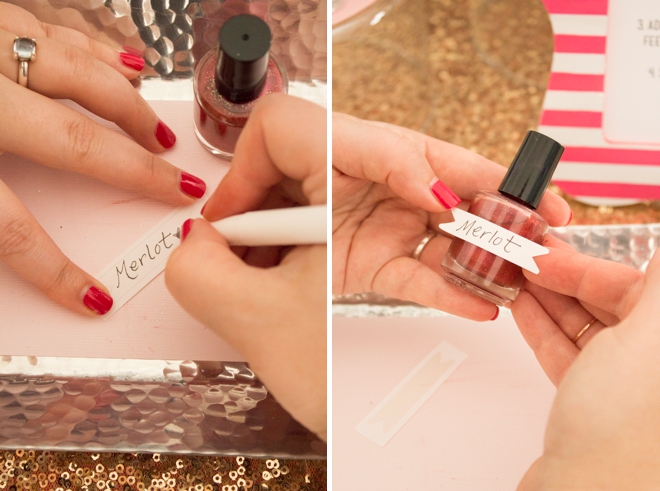
Not the most creative name, but I love it.

…and now for the party!
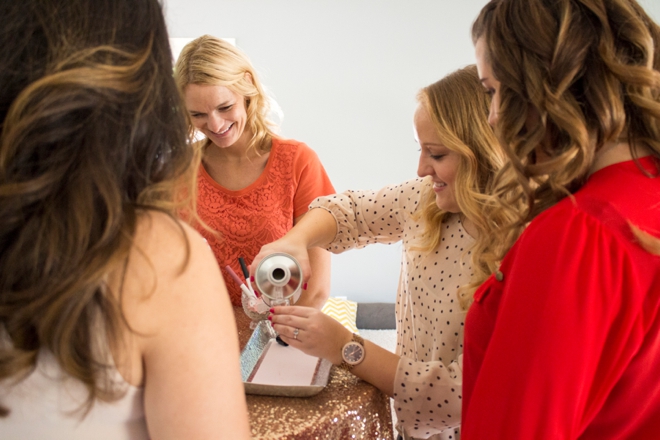
Add mixing ball, nail polish base, your choice of mica, maybe a little glitter and then shake your heart out!
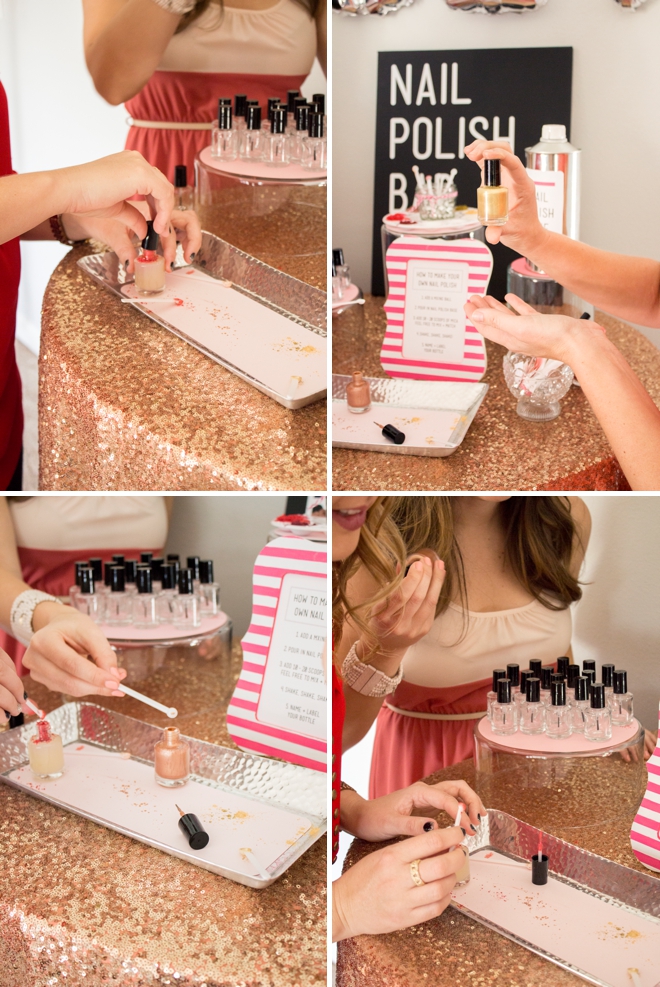
This is a bit of a messy project so setting out a tray where your guests can pour/mix their polishes is a good idea.
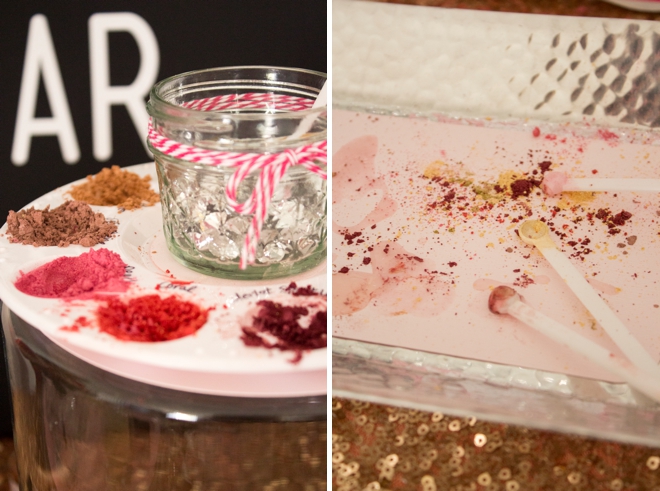
Our Mica Colors
- Light Gold Mica
- Gold Sparkle Mica
- Soft Beige Mica
- Honeyed Beige Mica
- Heavy Metal Gold Mica
- Rose Pearl Mica
- Coral Mica
- Merlot Sparkle Mica
- Iridescent Glitter (not mica, just glitter – not all glitters are created equal so we recommend using nail polish grade glitter, if you don’t the nail polish base will slowly eat away at the specks of glitter and it will be less sparkly)
Honesty all our combinations of these girly colors turned out beautifully. Remember you should add between 10-20 scoops of mica to each bottle, the color and amount are completely up to you – that’s what makes it special. There really are no rules! *The only one that we had a little trouble with was the Heavy Metal Gold mixing with glitter because you couldn’t see the glitter; everything else mixed wonderfully!
A few of our favorite combo’s are:
- 10 Heavy Metal Gold + 4 Honeyed Beige + 2 Rose Pearl = Rose Gold
- 10 Gold Sparkle + 5 Light Gold Sparkle + 5 Glitter = Champagne
- 10 Coral + 6 Soft Beige = Summer Kiss
- 10 Merlot Sparkle + 5 Glitter + 2 Coral = Warm Merlot
It’s a very pretty kind of messy :-)
If you are ever in doubt about the color you have created you can always try it out on your nails or a piece of paper and add more mica if it needs to be darker. Keep in mind you can always go darker, but you can’t go lighter.
You can expect your DIY nail polish to last on your nails just as long as a high-end brand like OPI. Click here for my personal manicure tips and tricks.
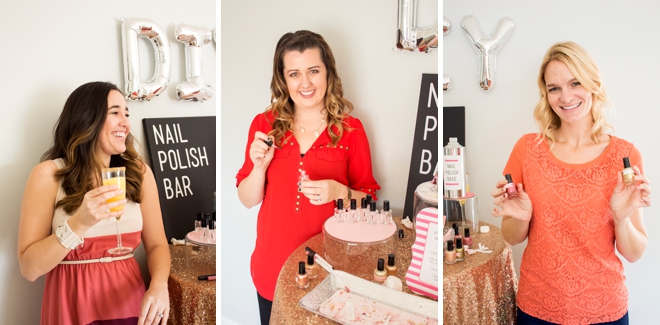
The girls made some truly fabulous colors!

Ok, now a mushy note from me… it has been my extreme pleasure sharing DIY projects with you this year. My goal with these detailed tutorials is to give you the confidence that you can Do-it-Yourself – so I hope that I have inspired you in some way, shape or form to create something special with your own two hands. This year has been epic for me and ST, and it wouldn’t have been possible without all of you! So I need to say thank you for reading, commenting, asking questions, making my projects and of course, sharing them with me — it truly fills my heart with joy. I wish you a very Happy Holidays and a wonderful New Year!
As with all our DIY tutorials, if you create one of our projects please send us a picture – We Love Seeing Your Creativity! If you use Instagram or Twitter please use the hashtag #SomethingTurquoiseDIY and it will show up on our Get Social page. Happy Crafting!
DIY Tutorial Credits
Photography: Shutter Nonsense for SomethingTurquoise.com – huge thanks to my Dad for being our awesome photographer for the day! // DIY tutorial and Nail Polish Bar: Jen | Something Turquoise // all nail polish supplies courtesy of: BrambleBerry.com // 36″ round white balloon: Party City // giant nail polish sticker: DIY by Jen on her Cricut (see above for details) // 72″ gold sequin tablecloth overlay: Koyal Wholesale // coral table cloth: LinenTablecloth.com // DIY balloons: Oh Shiny! Paper Co. via Etsy // 3 glass vase/bowl set: Ikea // sticker paper: Staples // black canvas, paint palette, ribbons, scrapbooking paper, craft frame: Michaels.com // silver hammered serving tray: Target // font used: Mensch // Cricut Explore: Amazon // Big thanks to: Christin, Jessica and Cara for being such great models!

Comments