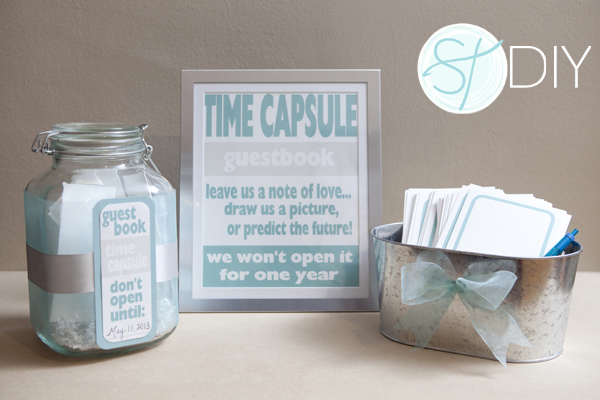
Happy Friday everyone! I have wanted to create something like this ‘time capsule’ guest book for a long time and I’m thrilled to finally share it with you today! Your wedding day is so special and not many people get to relive it – which is why this unique guest book would be a treat for any bride and groom! Making a vow not to open until your first year anniversary, getting to read special notes a year later is sure to bring that day right back to you like nothing else could! The ‘predict the future’ part seams like the most fun to read!
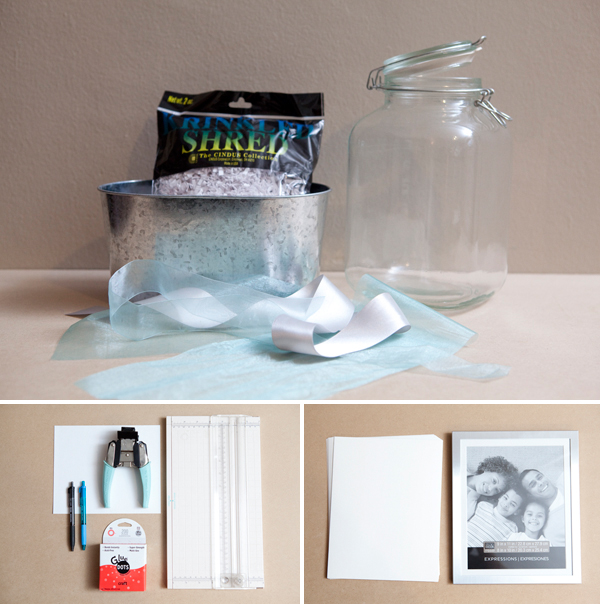
Supplies:
- large glass jar (make sure it is big enough to fit lots of comment cards)
- frame (mine is 9 x 11, matted to 8 x 10)
- cute container to hold your comment cards
- some crinkle shred
- ribbon of choice
- card stock (mine is 65lb from Staples, strong enough for a card, light enough to fold)
- paper trimmer
- sticker paper
- glue dots
- scissors
- corner rounding punch (optional)
- a few pens
- printer
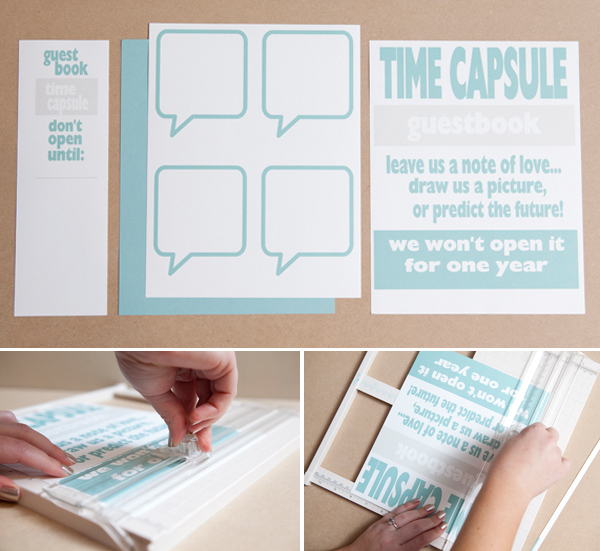
Download the designs below and print them out at home or take them to your local print house. Obviously of the 1st and 3rd designs you only need one, but the amount of guest comment cards will depend on your size of wedding. What?? Your wedding isn’t turquoise! Not to worry, visit my Etsy listing and I will personalize pdf’s like below with your exact wedding colors!
1. Time Capsule Jar Label 2. Speech Bubble Comment Cards 3. 8 x 10 Guest Instruction Print
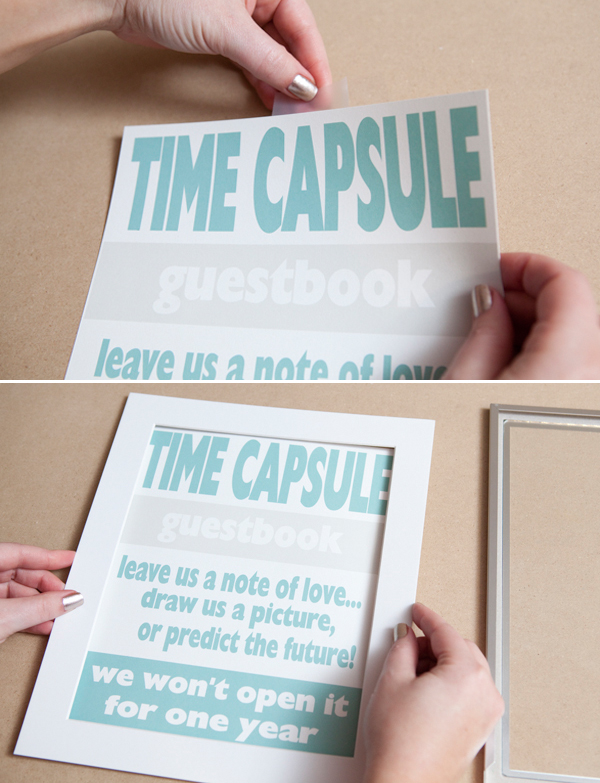
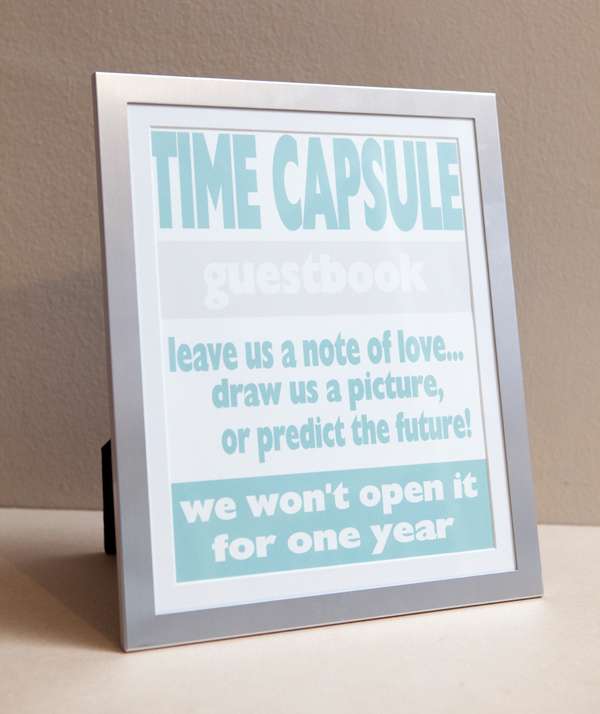
Framed Print for Guest Instruction: Don’t leave your guests in the dark about what they are supposed to do for your guest book! Frame this cute print to show them the way. Cut your framed print a little larger than your matte, for me this was 8.5″ x 10.5″. Put a little tape facing you on the backside of the print so that when you lay the matte on top, your print will stick perfectly – add more tape to the back to secure. Frame your print.
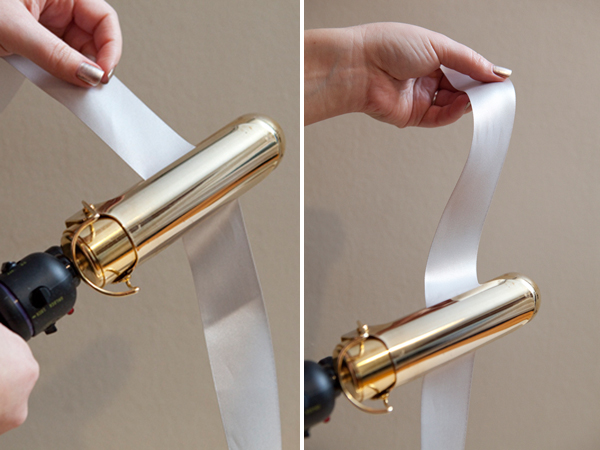
Iron out your Ribbon! This is a fantastic tip that my friend Laura gave me! Is your ribbon wrinkly?? A quick and easy way to smooth it out, is to run it through a large barrel curling iron on medium heat! Make sure your curling iron doesn’t have hair product gunk on it before you do this! Always test an extra piece of ribbon if you are unsure about adding heat to a specific ribbon type.
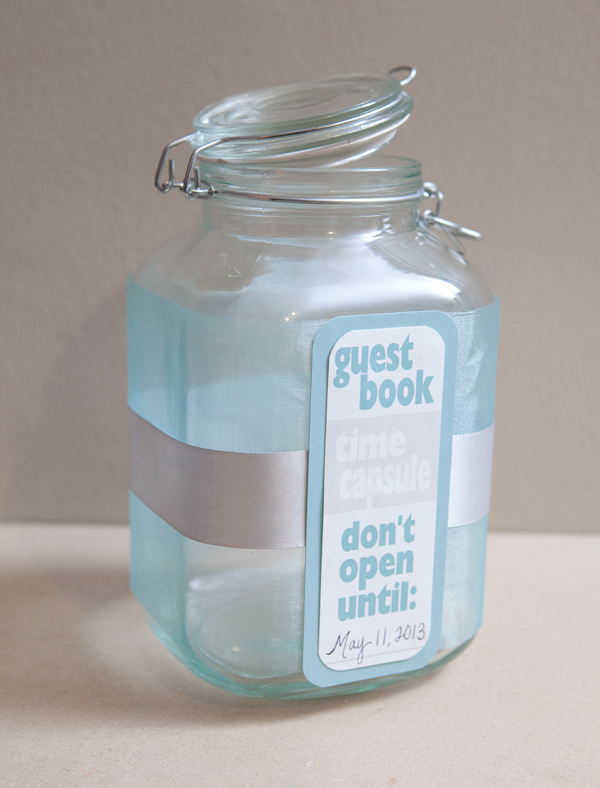
Decorating your ‘time capsule’ jar: This step is completely up to you! Follow my example or dream up your own decoration! The sky is the limit.
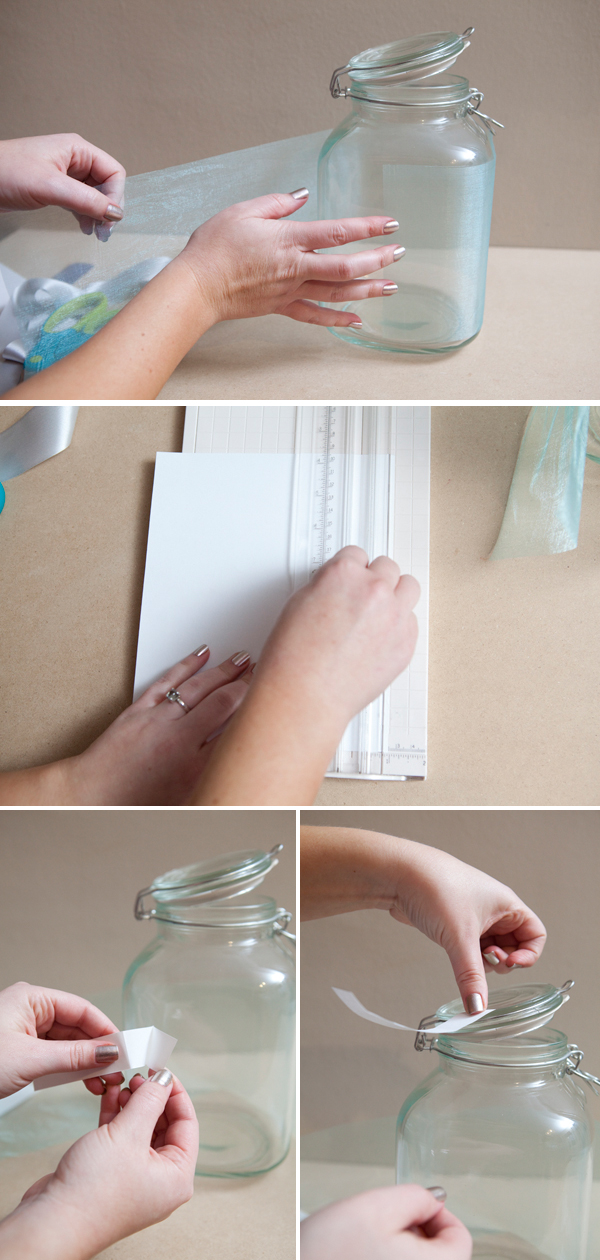
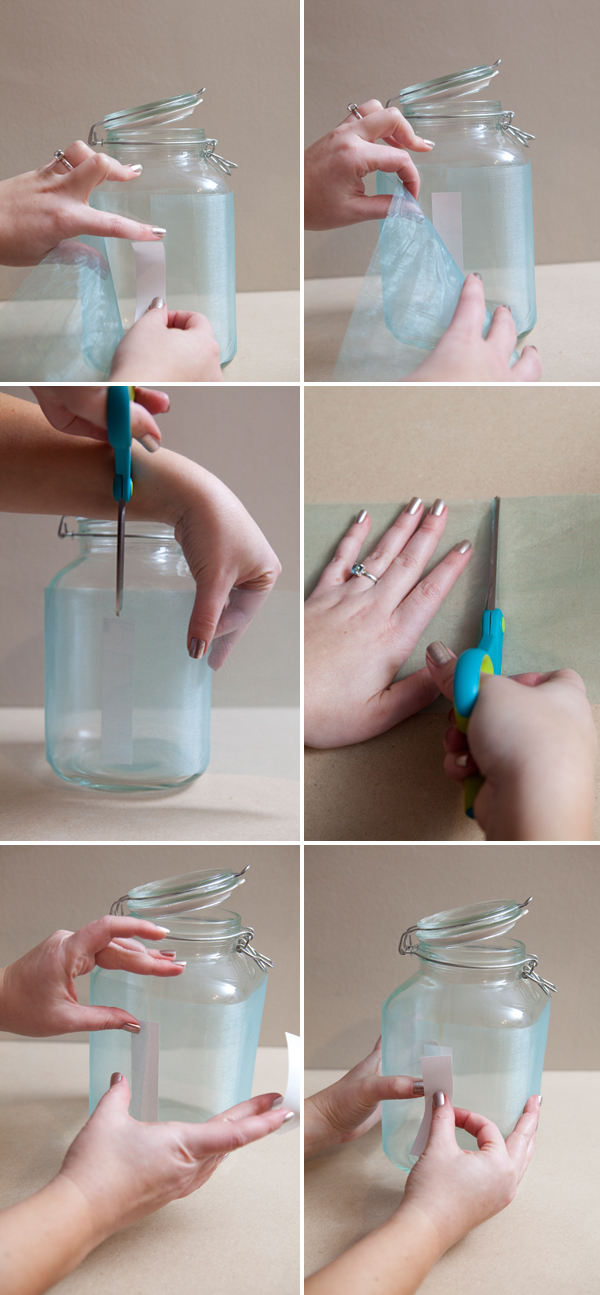
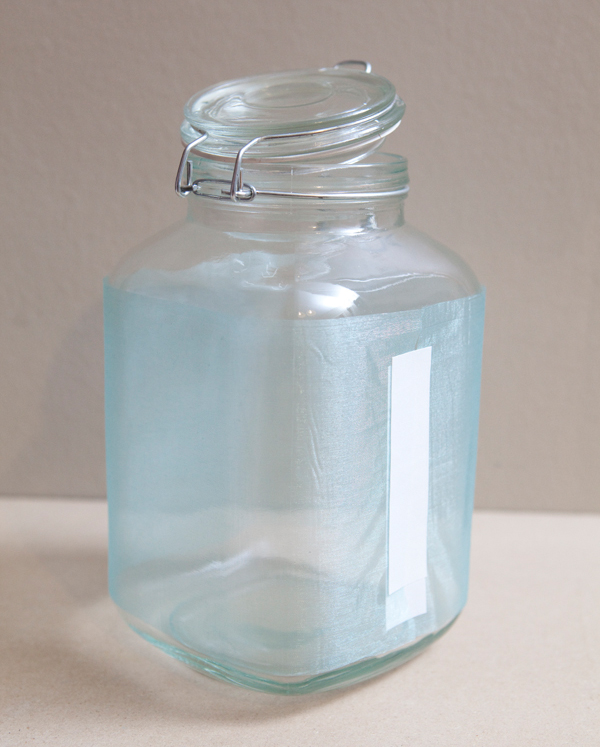
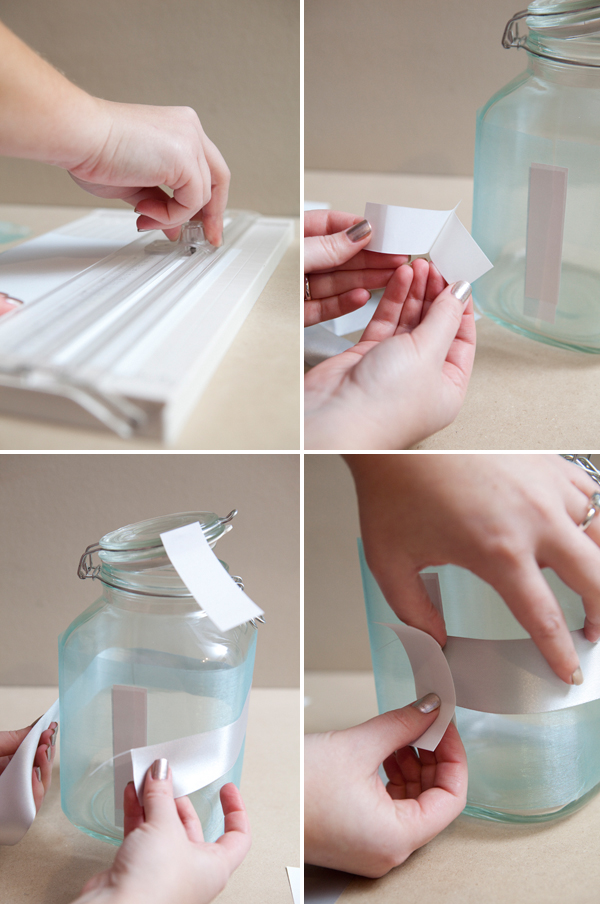
First I covered my jar with a extra wide organza ribbon, using small strips of sticker paper as adhesive.
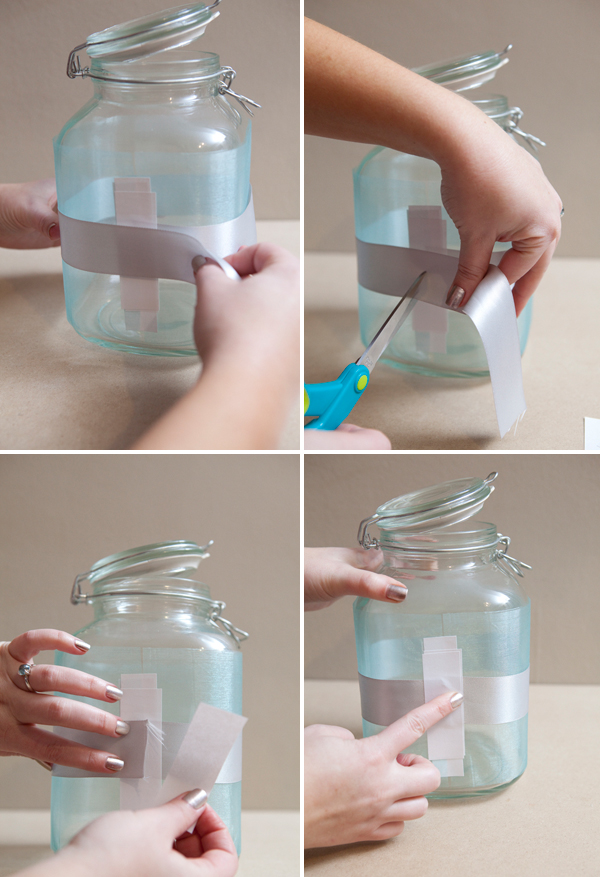
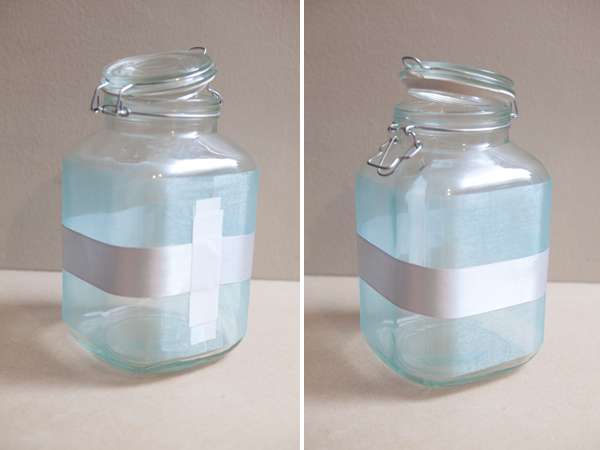
Then I added my second layer of satin ribbon, again using small strips of sticker paper.
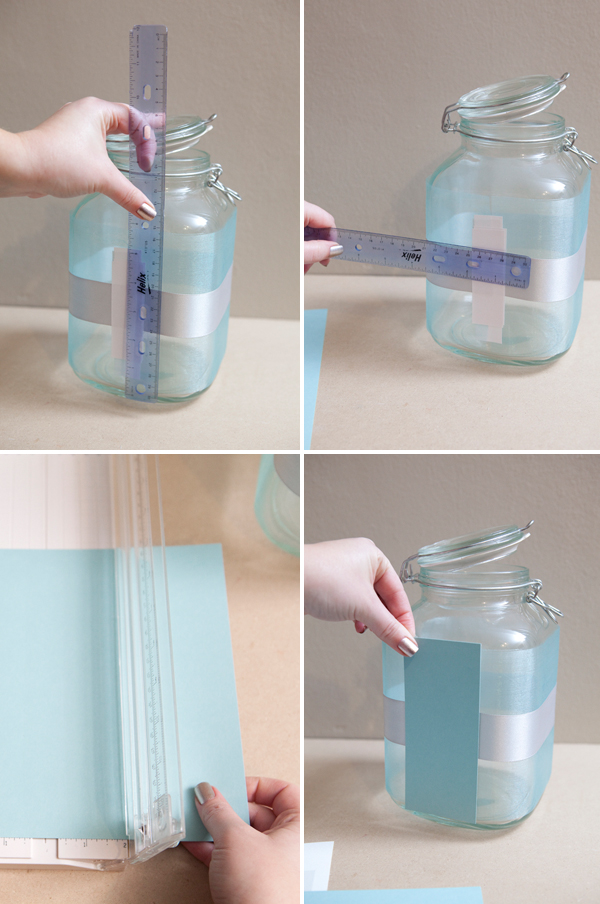
Next I measured the area that I wanted to cover with my cute jar label. It ended up being about 6″ x 2.75″ – so I made my label 6.25″ x 3″ in order to cover the area completely.
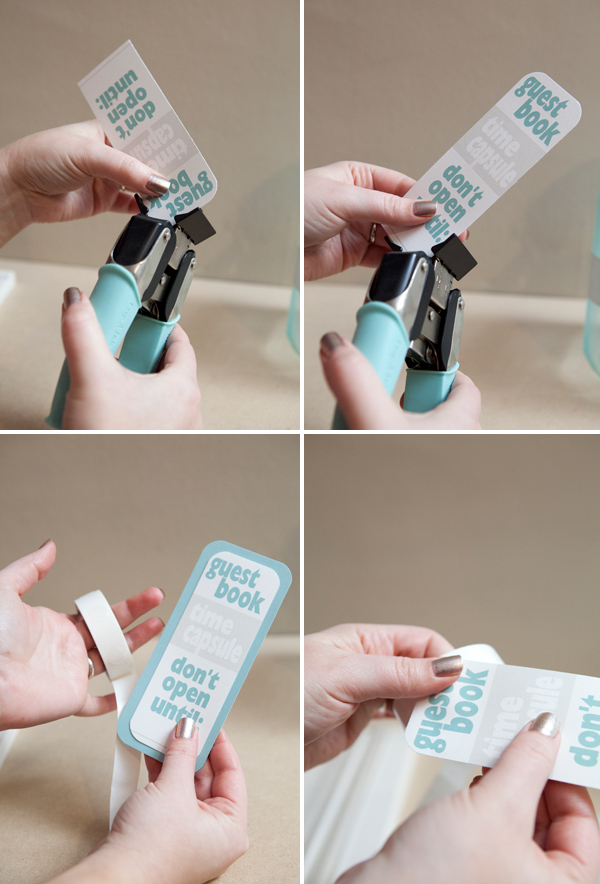
This first piece of paper is 6.25″ x 3″, I cut it out and punched the edges with my corner rounding tool.
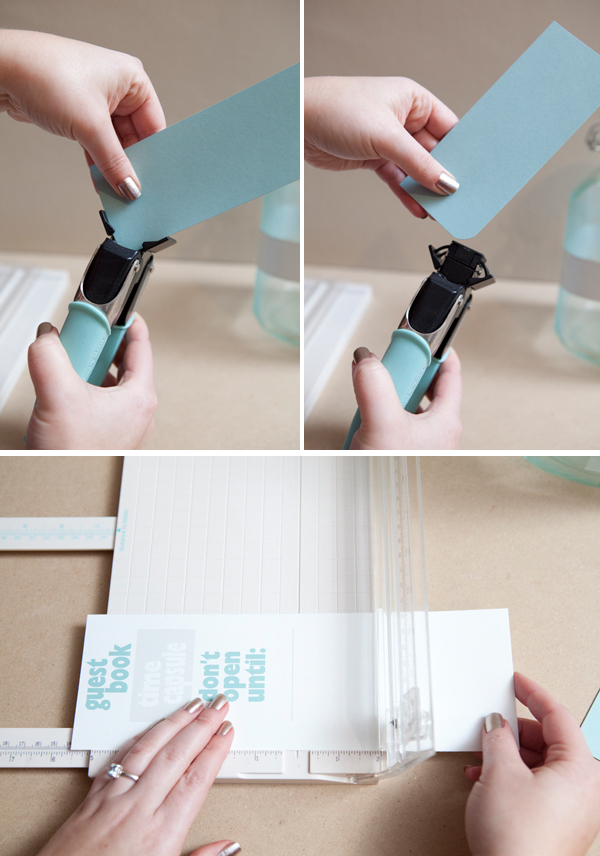
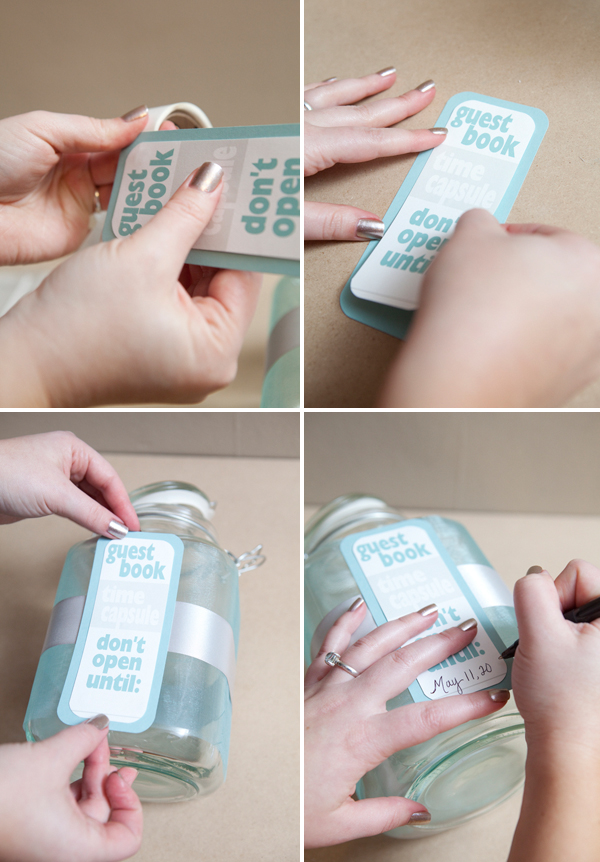
Next I cut out my printed label, 5.75″ x 2.5″ and rounded the corners as well. Then using glue dots I attached the two pieces of paper together.
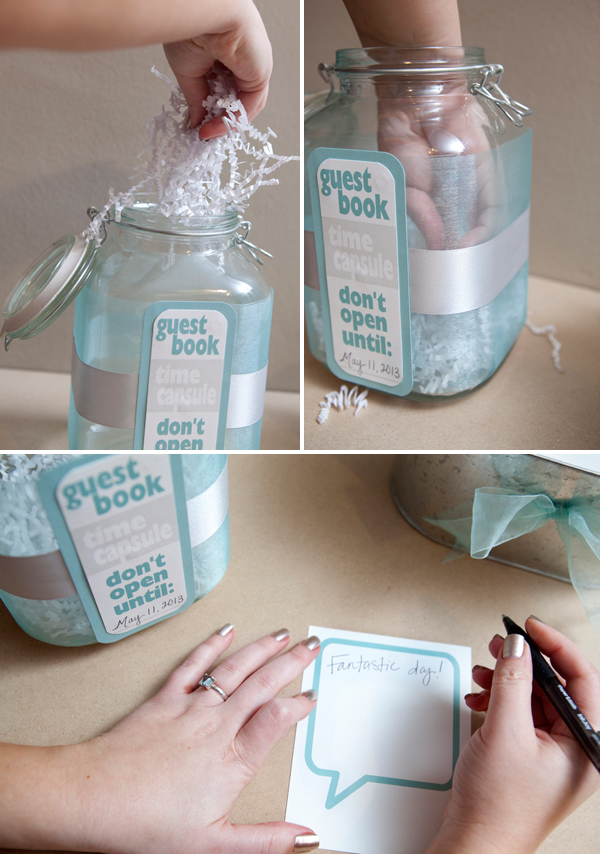
Once complete, again using glue dots – attach the label to the jar and write in your ‘open’ date!
So cute!!!
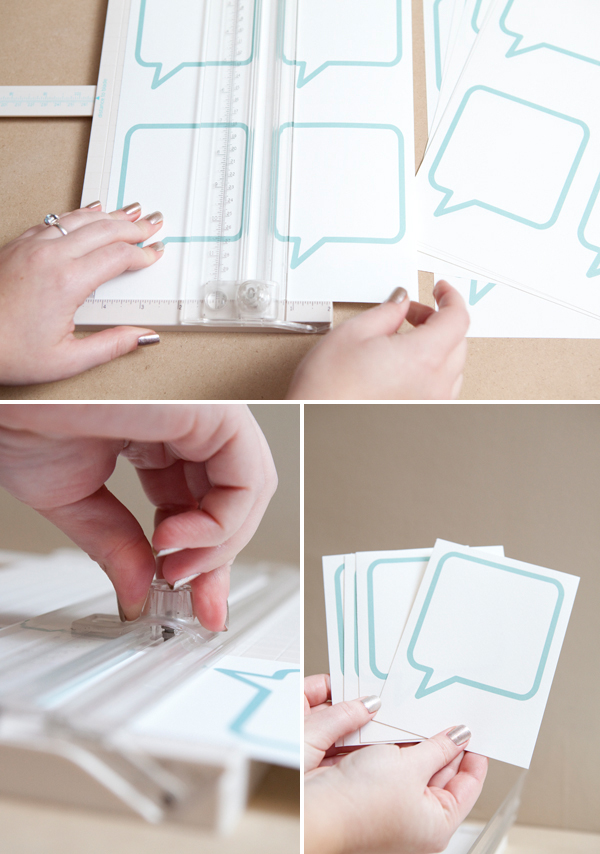
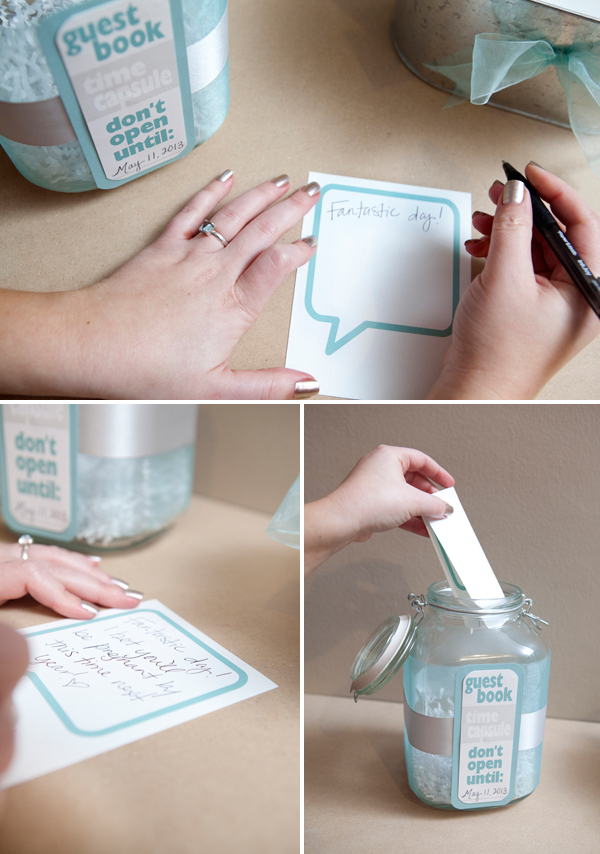
Speech Bubble Comment Cards: how cute are these!!?? The perfect way for your guests to write you a special message! This pdf is designed to cut into perfect quarters from 8.5″ x 11″ sheets of paper – meaning each card will be 4.25″ x 5.5″ – four to a sheet. Print and cut as many as you need for your amount of guests. I usually advise 70% of your guest list – if you invited 100 people, you probably only need 70 cards. Women are the ones who mostly write in the guest books and rarely does every guest write something.
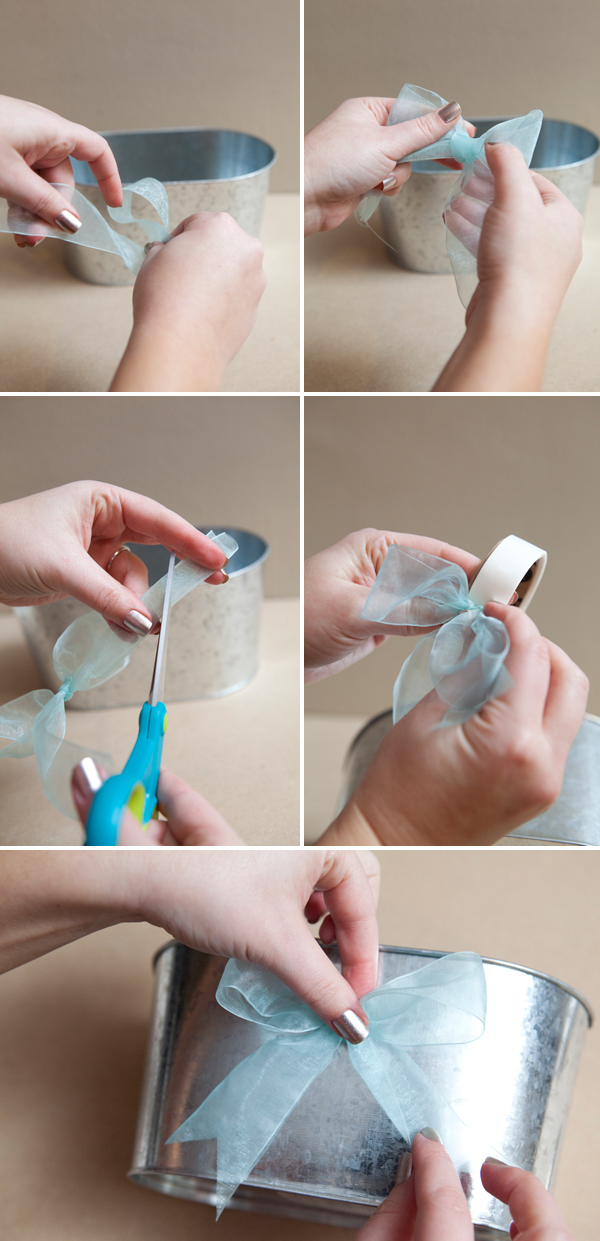
I added a simple bow to this cute container I found at Michaels in the ‘garden-ish’ section, this is actually a planter. Using glue dots I stuck the bow onto the container – I would advise doing this step at your reception location to ensure that your bow doesn’t fall off in transit.
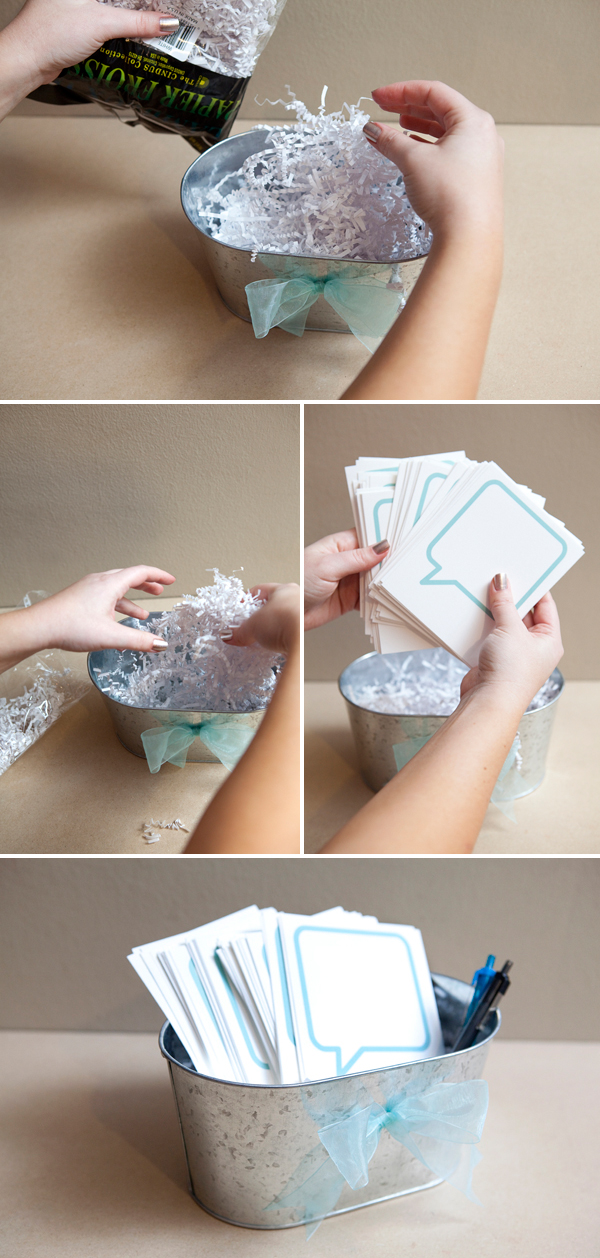
Add some crinkle shred, your comment cards, and a couple pens!
Add some crinkle to your time capsule jar as well… what else can you put in there? A personalized napkin or program from your day? A left over favor or possibly you could each write a special note to each other!
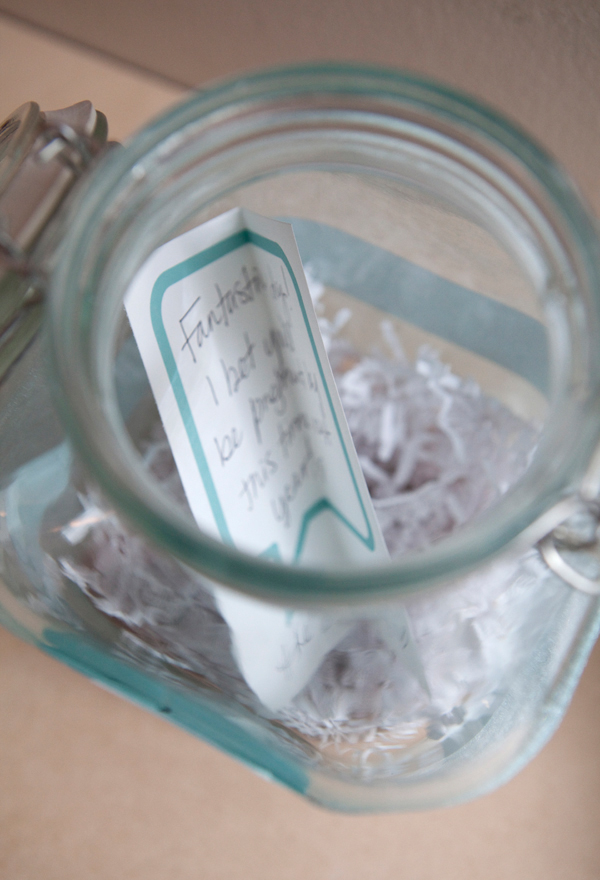
Your guests will write you a sweet note, draw you a silly picture… or predict the future!
Such a fun and unique guest book that will give you an added reason to look forward to your anniversary! NO PEAKING through the jar! If you think you might be tempted, use a wide satin ribbon so you can’t see in at all!
As with all our DIY tutorials, if you create one of our projects please send us a picture or a trackback – We Love Seeing Your Creativity! If you use Instagram or Twitter please use the hashtag #SomethingTurquoiseDIY. Happy Crafting!
Photography: Studio 11 // Diy: Jen | Something Turquoise // glass jar, ribbon, frame, corner rounder, glue dots, Martha Stewart paper trimmer, crinkle shred, scissors, and comment card container: Michaels // ‘Pool’ colored paper: Paper-Source // card stock, Ink Joy pens and sticker paper: Staples // nail polish: same



Comments