
Custom Bridal Party Gifts With Cricut Infusible Ink
-Sponsored Post-
If you’re already a Cricut fan, you know about the brand new Infusible Ink and I’m sure you’ve been dying to play with it. If you haven’t heard about it yet, I’m super excited to share it with you today! Cricut has once again pushed the boundaries of creativity by inventing something that has never been seen before – high heat ink transfers. The results are incredibly vibrant, seamless, permanent, and stunning. The designs look as if the fabric or coaster was manufactured, definitely not crafted. You know how you can typically feel the slightly raised edge of vinyl or iron-on? There is NO edge, the ink embeds into the fabric or surface with heat, it’s amazing. So, what’s a DIY bride to do with all these fabulous new things, make bridal party gifts of course!
Bridal Party Gifts
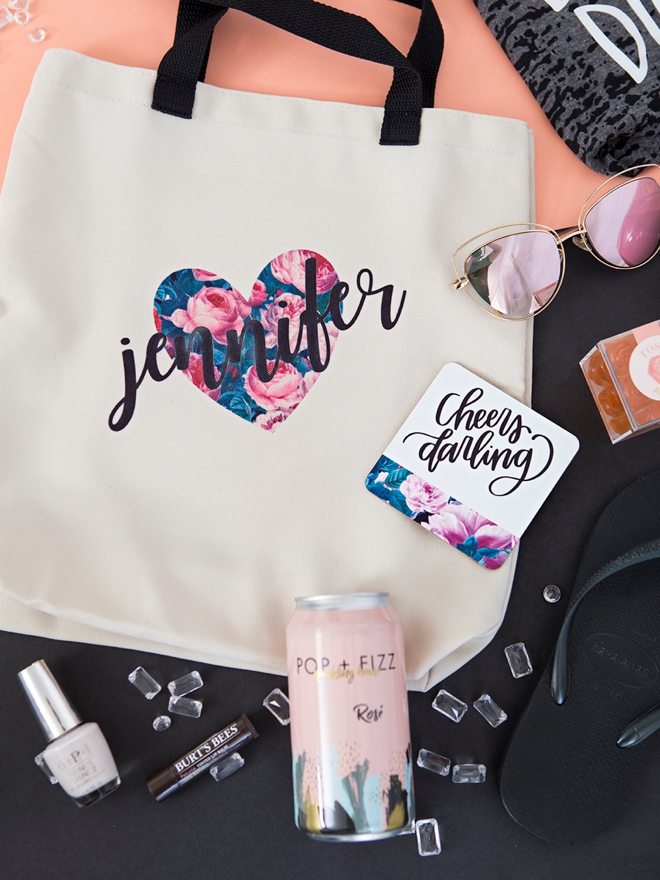
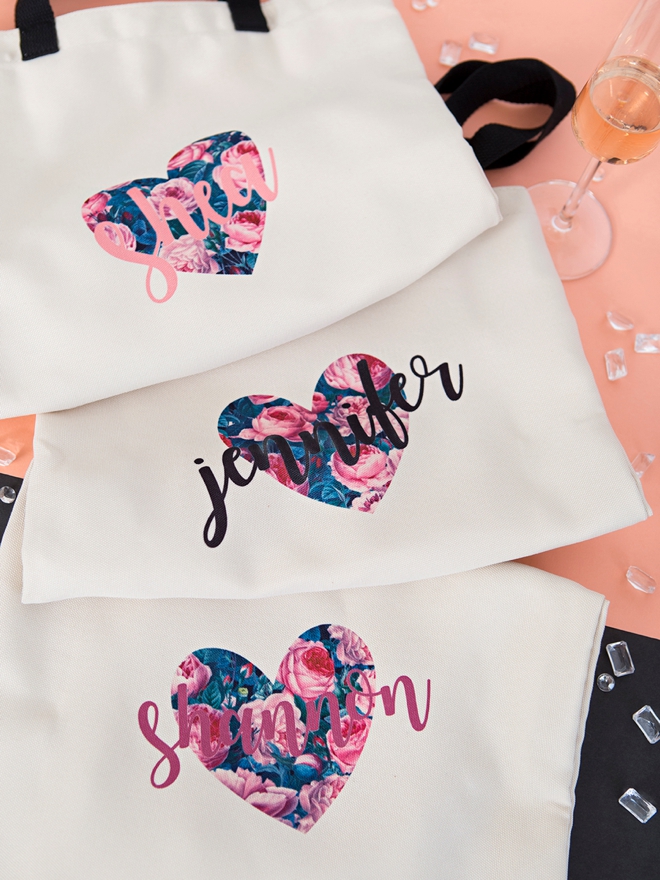
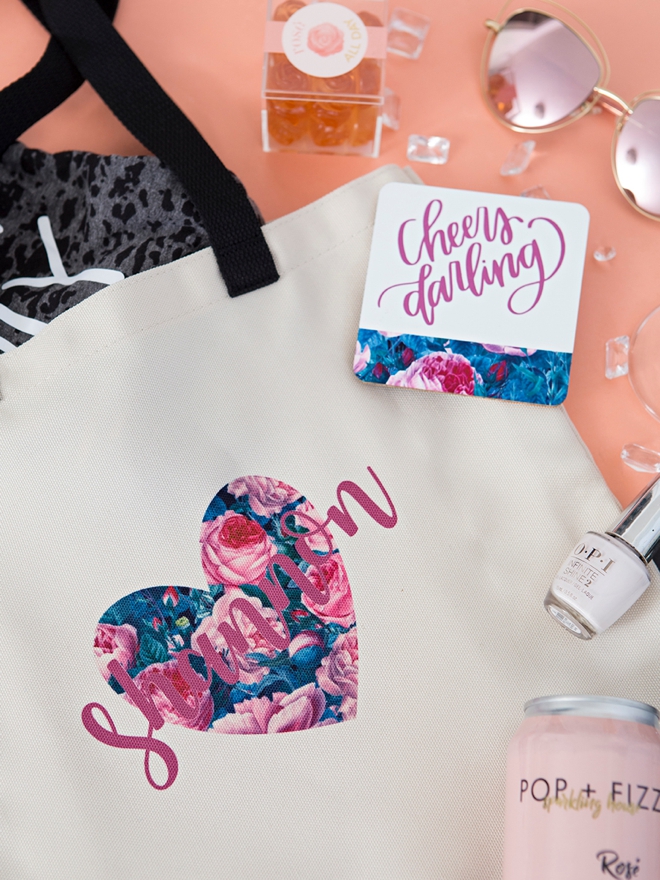
With this new Infusible Ink process, you can achieve professional quality results, with the same custom and creative process you can expect from Cricut. Which means personalizing special things for yourself and your bridal party has never been easier! Easily create fabulous tote bags for them to fill with fun things for your bridal shower, bachelorette party, or the morning of your wedding. They’re sure to love that you went the extra mile and made them yourself!
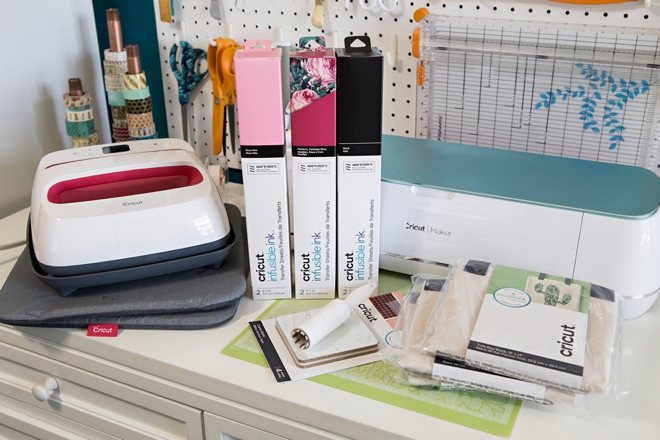
SUPPLIES:
- Cricut Maker or Cricut Explore, either one works!
- Cricut® Infusible Ink™ Transfer Sheets: Rose Pink, Cabbage Rose, and Black
- Butcher Paper, which comes inside each transfer roll
- Cricut® Infusible Ink™ Square Coaster Blanks
- Cricut® Infusible Ink™ Medium Tote Bags
- Cricut EasyPress 2
- Cricut EasyPress Mat
- Cricut Regular Grip Cutting Mat
- 12″ x 12″ White Cardstock
- Lint Free Cloth (for coasters)
- Lint Roller
- Scissors
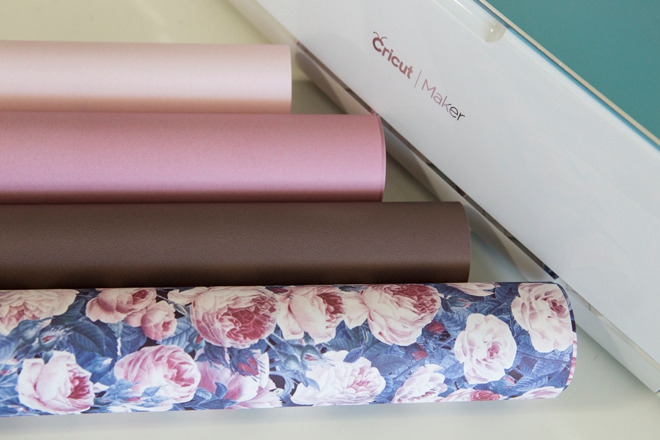
Saturation
This is what the Infusible Ink transfer sheets look like before heat. They’re definitely in the pastel category but don’t let that fool you because they are as vibrant as the sun on a hot day once they’ve been applied!
Create In Design Space
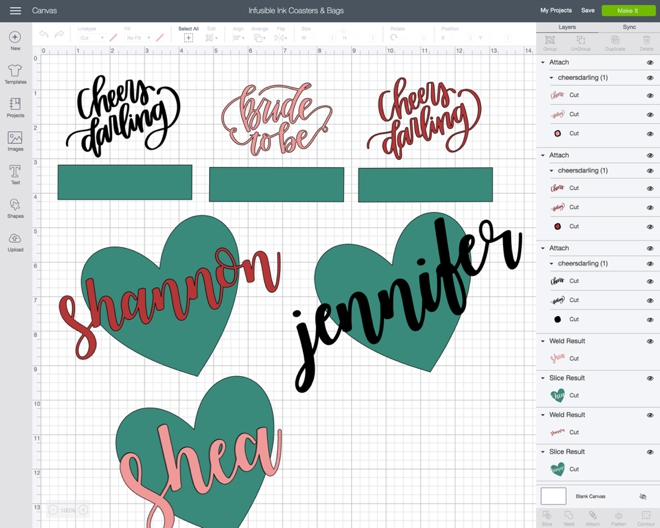
The first step is to login to Design Space and start designing your tote bags and coasters! Click on this link to visit my exact canvas and use some of my pre-designed cut files. The “cheers darling” and “bride to be” are our exclusive cut files available for a few dollars in our shop. Names font used: Watermelon Script, my fav!
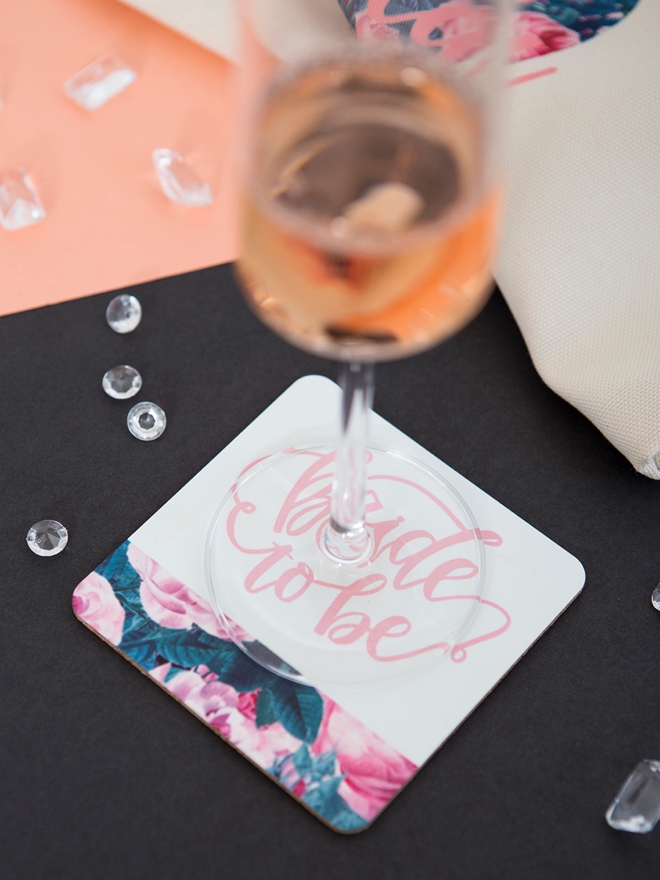
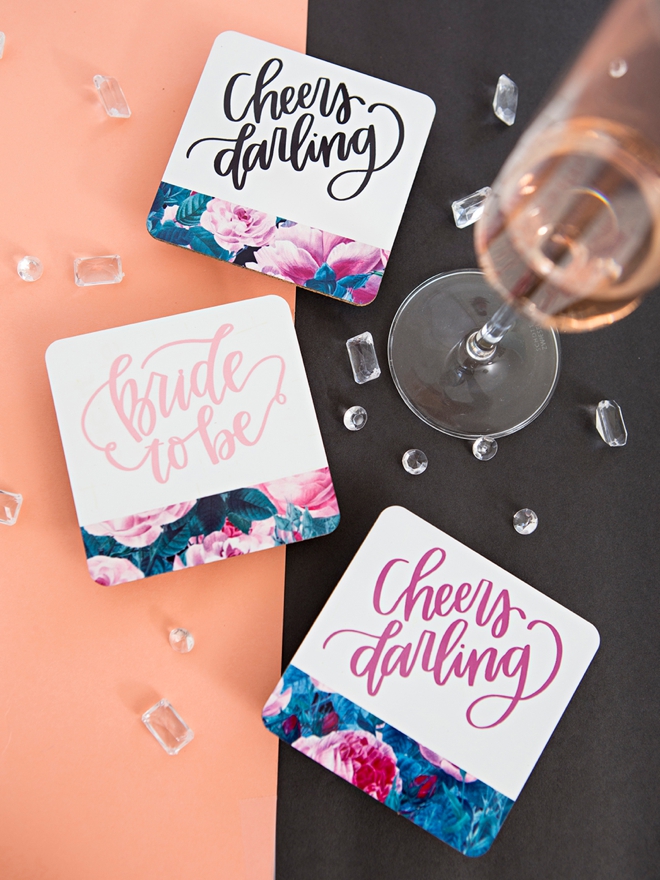
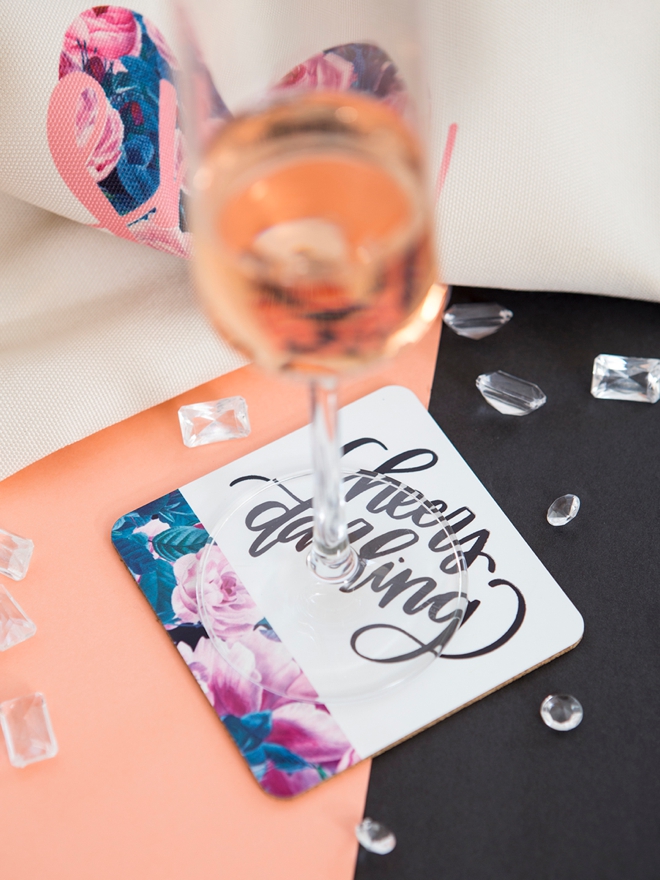
Coasters: The coaster designs were super simple to create. I added 1/8″ to the size of the coasters to make sure that the cabbage rose pattern would overlap the edges. I sized the sayings to fit inside the square shape and that’s it.
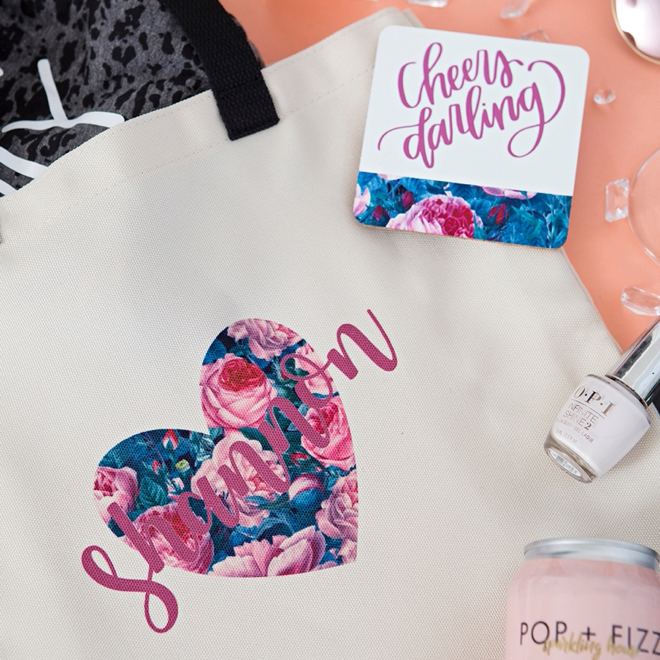
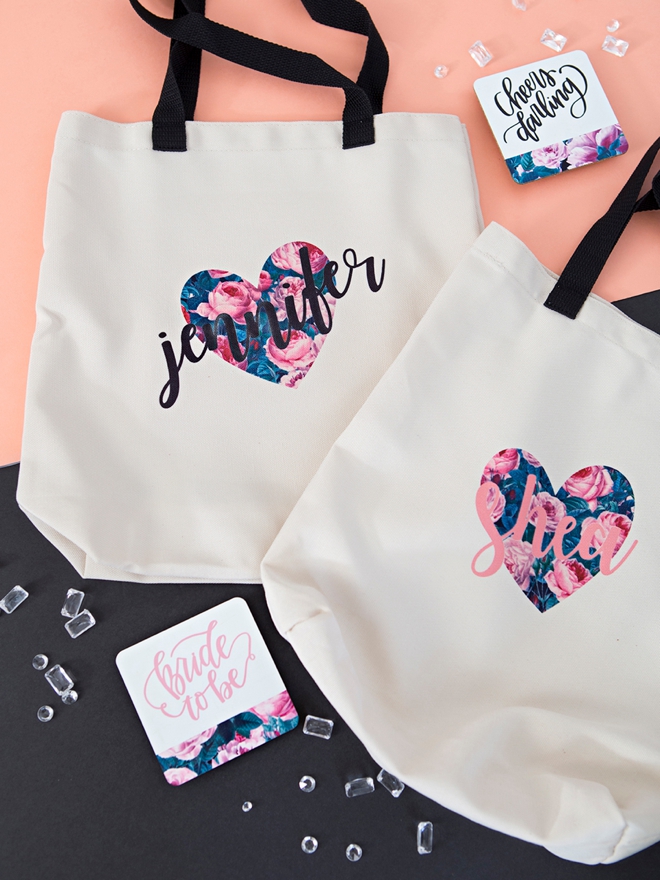
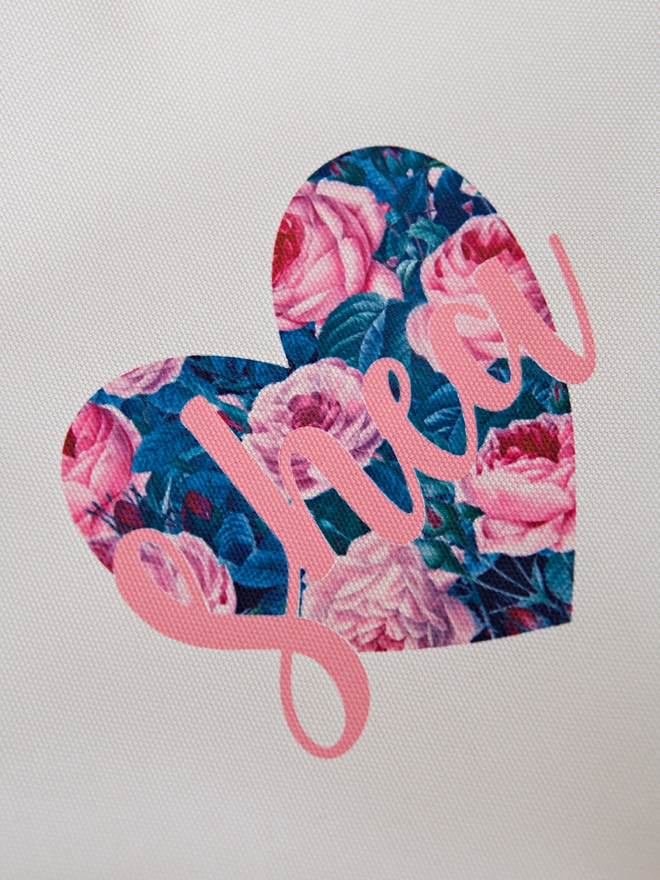
Tote Bags: For the tote bags, I upped the ante by creating a layered design. First, I sliced the lettering out of the hearts, then welded the letters back together, and deleted the area that was sliced out of the heart shape. This left me with a heart that has the overlapped lettering removed from the shape, which will make it super easy to line up during the transfer, you’ll see. If you need to brush up on your slicing and welding skills, this video of mine might help!
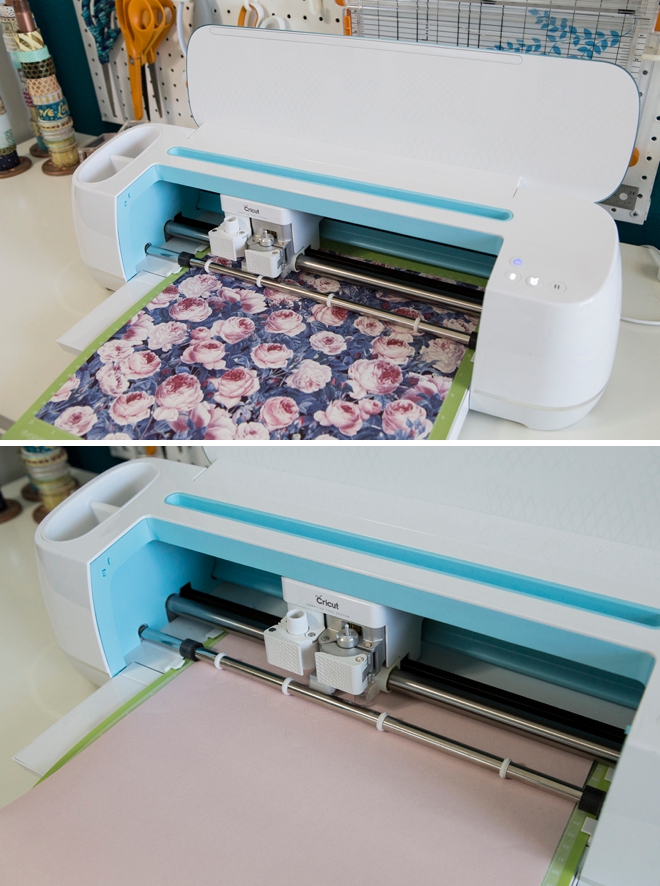
Let Your Cricut Work It’s Magic
All Infusible Ink designs must be mirrored or else they’ll turn out backwards. Click the “mirror-image” button on the cut screen canvas before cutting, and make sure your Infusible Ink transfer sheets are always placed ink side up on the cutting mat.
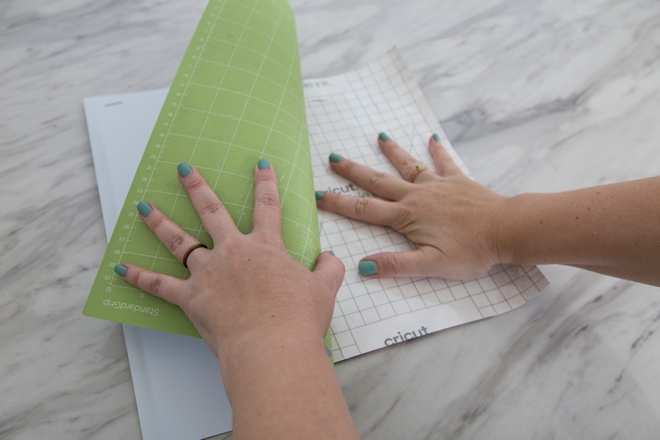
Remove From The Mat
Remove your transfer sheets from the mat as if you’re removing the mat from your transfer sheets. Turn it upside down and carefully peel the mat from the sheet.
Weed The Designs
Weed, (aka. remove) all the excess transfer material that isn’t a part of your design. I’d like to compare wedding the transfer sheets to weeding cardstock, that’s what it feels like. It’s easiest to bend and pop the unwanted areas out of the design and using the tweezers, rather than using the normal weeding piercing tool. Then trim each design down to size for individual transferring. For the rectangles, make sure to leave a little extra of the transfer backing behind to use it to secure to the coasters.
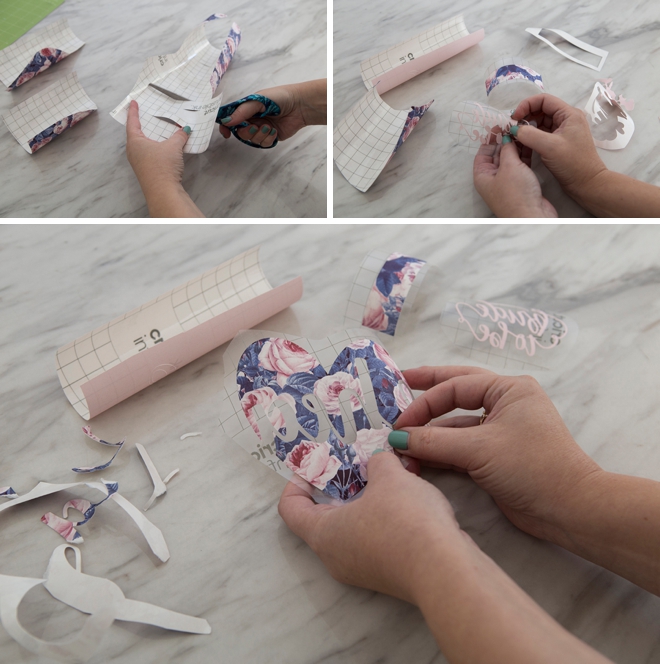
Layered Weeding
Very carefully peel out the names from the back of the transfer sheet. When you do this you’ll see how thick the ink transfer paper really is, it’s amazing. Try not to rip it but don’t worry if you do a little, it won’t transfer.
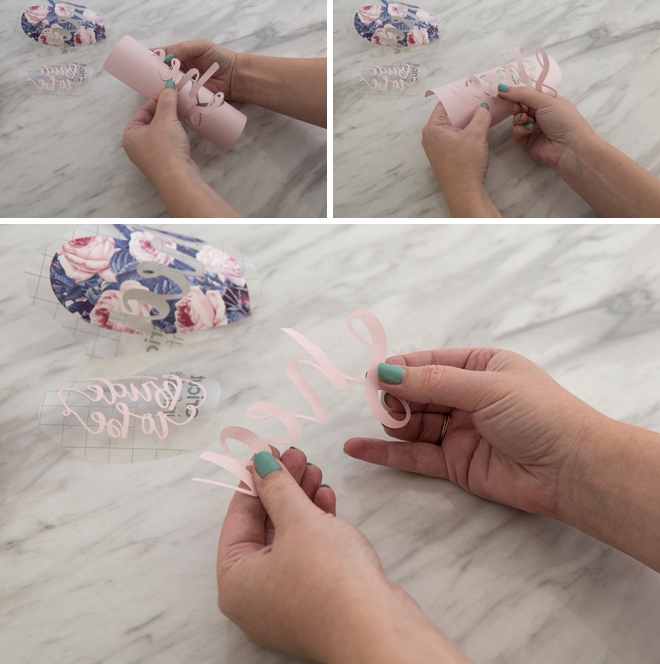
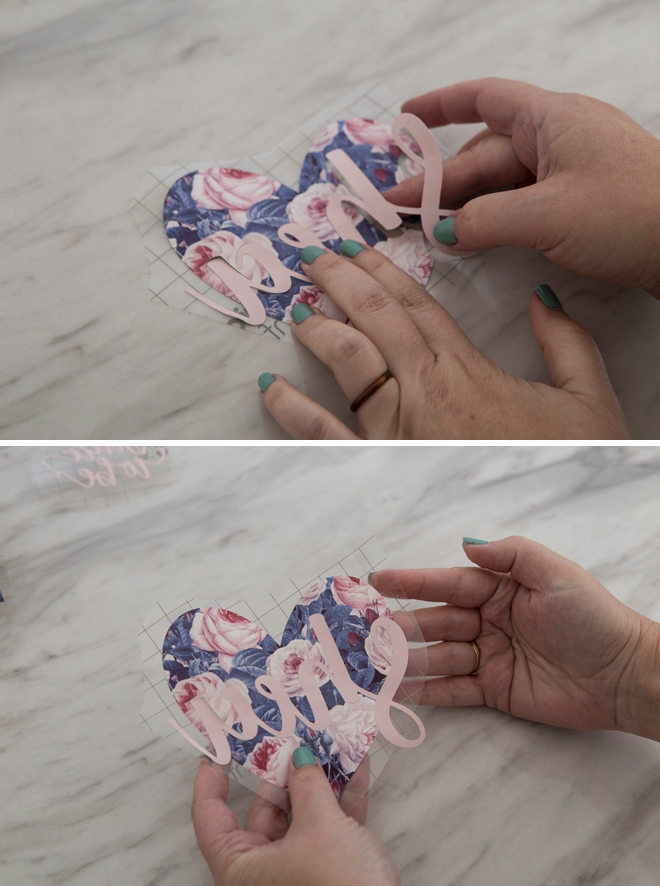
…then carefully place the script name inside of the heart! Follow the cut line already in place to perfectly line up the two layers. Such a simple way to do a “layered” design!
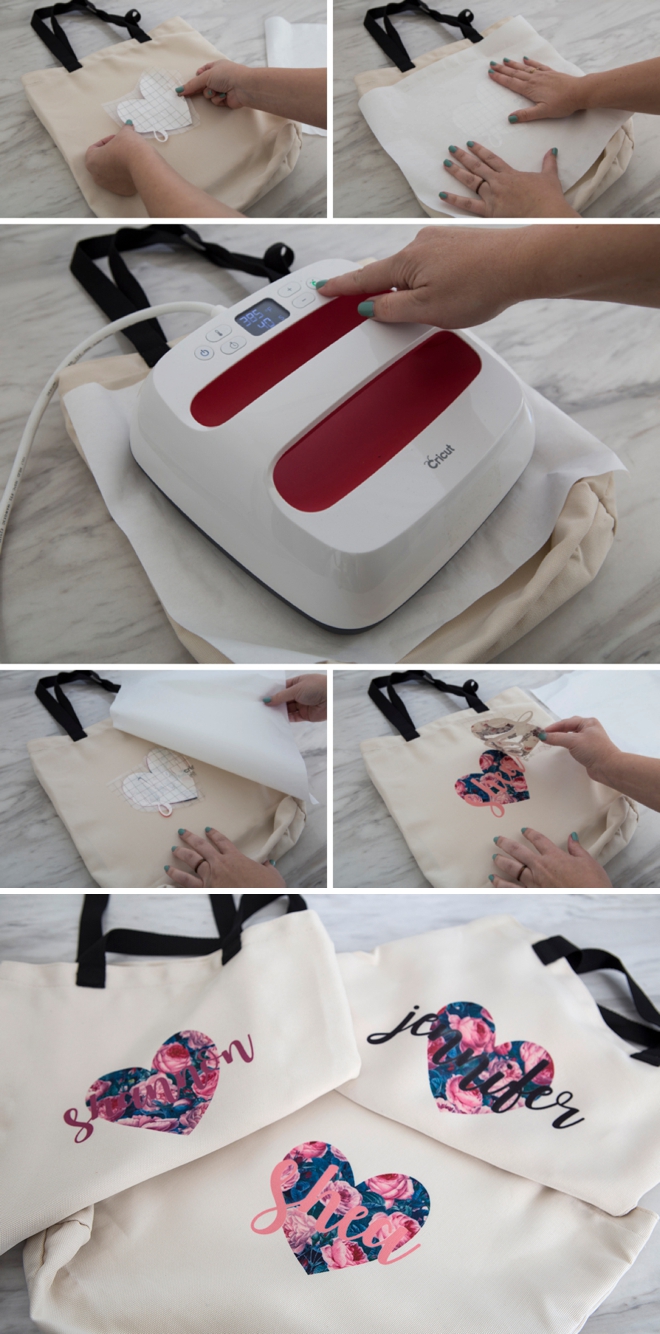
Prepare Your Tote Bag
Before you can infuse the ink onto your tote bag there are a few things you need to do:
- Place a white sheet of 12″ x 12″ cardstock on top of your EasyPress mat and slip both inside the tote bag. The carstock protects the mat from any ink bleeds and the mat perfectly absorbs the high heat of the EasyPress 2.
- Use a lint roller across the area of the tote you will be infusing. Even a stray piece of string or lint can throw off your vibrant ink transfer.
- Place a piece of butcher paper (each roll of Infusible Ink comes with some inside, yay!) on top of your tote bag and pre-heat to remove any wrinkles or excess moisture.

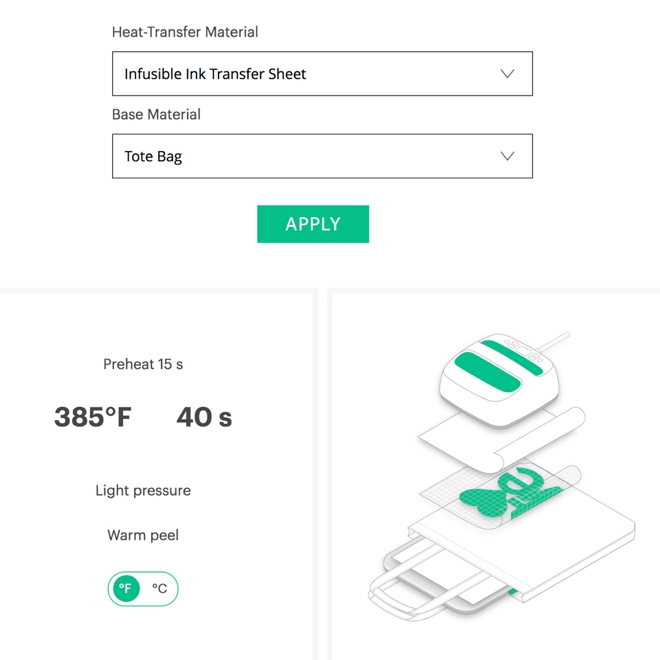
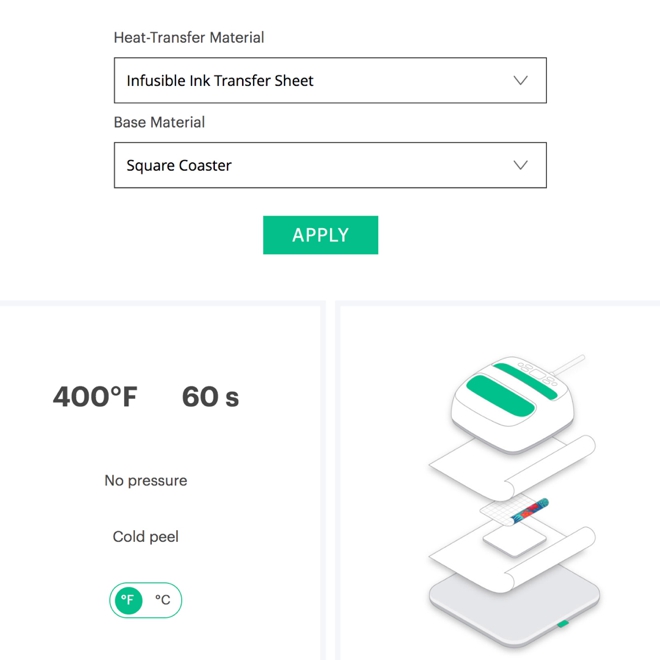
Cricut Easy Press Heat Transfer Guide
Cricut has created an amazing interactive heat transfer guide to take all the guess work out of heat transfers. Pick your project supplies and it tells you the exact heat and timing required. Then plug that into your EasyPress 2 and you’re ready to go.
Apply The Transfer
Add the design to your tote bag ink side down then place a piece of butcher paper on top. Heat according to the guidelines using your EasyPress 2. For this exact project it was 385º for 40 seconds with firm pressure and a warm peel. Carefully remove the transfer sheet to reveal your amazing new tote bag design!
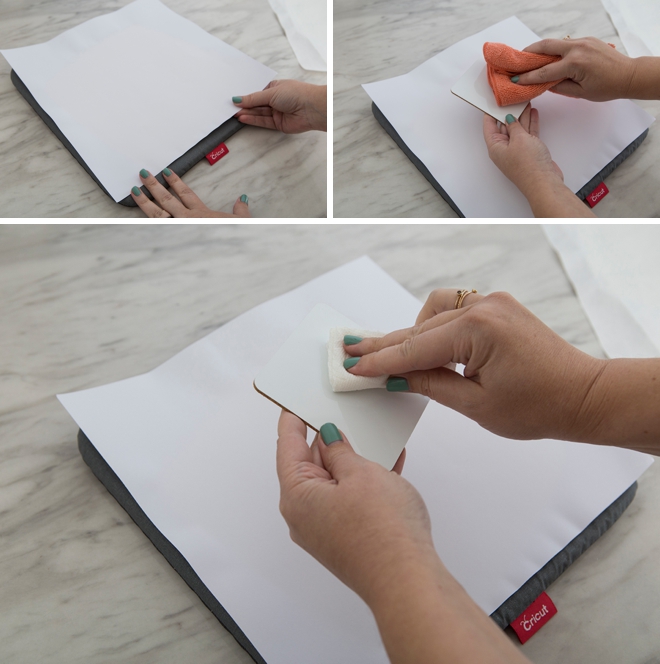
Prepare Your Coaster
Before you can infuse the ink onto your coasters there are a few things you need to do:
- Place a white sheet of 12″ x 12″ cardstock on top of your EasyPress mat. The carstock protects the mat from any ink bleeds and the mat perfectly absorbs the high heat of the EasyPress 2.
- Wipe the coasters clean with a microfiber cloth. Even a bit of dust can create an imperfection in your transfer.
- If you feel like your coaster needs a deeper clean, wipe with an alcohol wipe or alcohol on a paper towel and dry with the microfiber cloth.
Cricut Easy Press Heat Transfer Guide
As you can see the heat and timing are different for the coasters than they are the tote bags. Make sure to always double check your heat and time settings for every project, just to be safe.
Apply The Transfer
For the square cork coasters you add the designs to the top, ink side down and place them right side up on top of the cardstock, which is on top of the EasyPress mat. Then put a piece of butcher paper on top and heat using your EasyPress 2! The coasters will be very hot so allow them to cool down completely before touching or removing the transfer sheets. For this exact project it was 400º for 60 seconds with no pressure and a cool peel. The coaster result is phenomenal. The application and the sheen are simply stunning and look professionally manufactured!
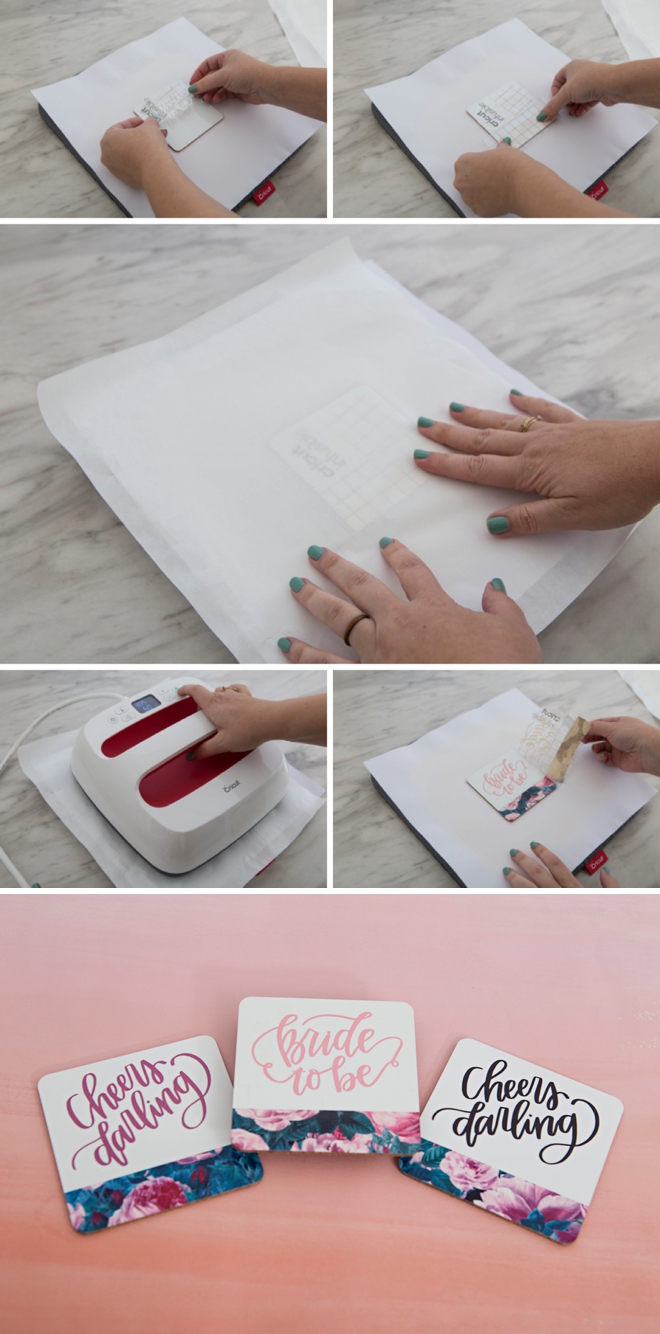
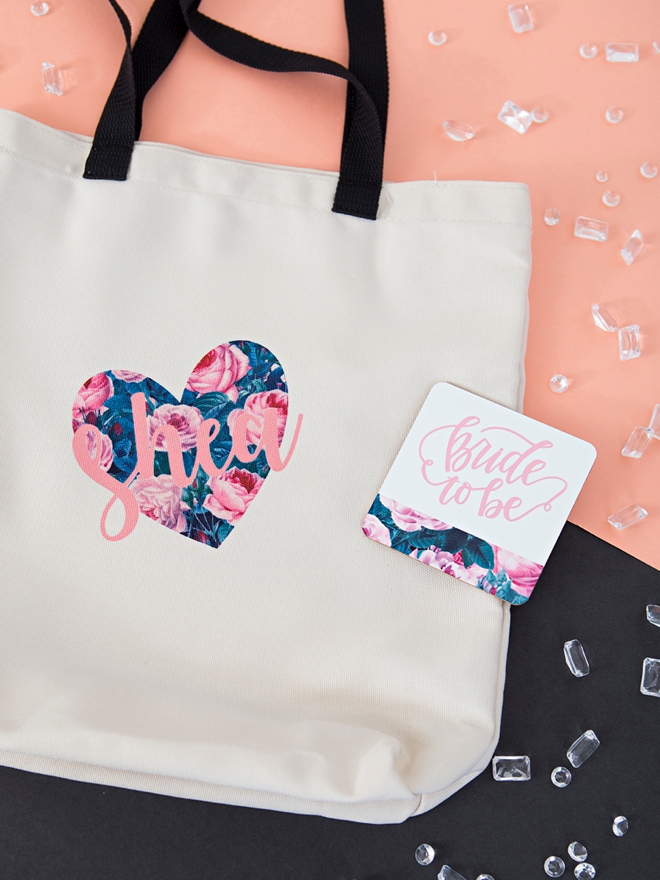
So What Will You Make?
DIY TUTORIAL SPONSORED BY:

Cricut is a world-class leader in personal electronic cutting machines that has enabled people to achieve their creative best for over 50 years. Today, millions of people use Cricut products to create unique projects, and they focus on enhancing lives with this power of creativity. Let Cricut help you take your wedding personalization and project creativity to the next level!
As with all our DIY tutorials, if you create one of our projects please send us a picture – We Love Seeing Your Creativity! If you use Instagram or Twitter please use the hashtag #SomethingTurquoiseDIY and it will show up on our Get Social page. Happy Crafting!
DIY Tutorial Credits
Photography + DIY Tutorial: Jen Causey of Something Turquoise // Cricut Maker, Cricut EasyPress2, Infusible Ink Supplies: courtesy of Cricut // Nail Polish: OPI – Withstands the Test of Thyme
Shop The Supplies:
Find the supplies you’ll need for this project from our affiliate links below:

Comments