
Personalized Wedding Chargers & Napkins With Cricut & Martha Stewart
-Sponsored Post-
This is now our third custom wedding project using the new wedding-specific Cricut & Martha Stewart supplies from Michaels and if you look hard, you might see a trend. Month by month we will be creating a gorgeous handmade head table, packed full of ways that you can use your Martha Stewart Edition Cricut to create the ultimate custom wedding decor. I’m absolutely in love with today’s ideas, the chargers being my favorite. Now I’m actually thinking about making a special charger for each family member for Thanksgiving. As a bride who truly wants a unique wedding, having a Cricut is an absolute must!
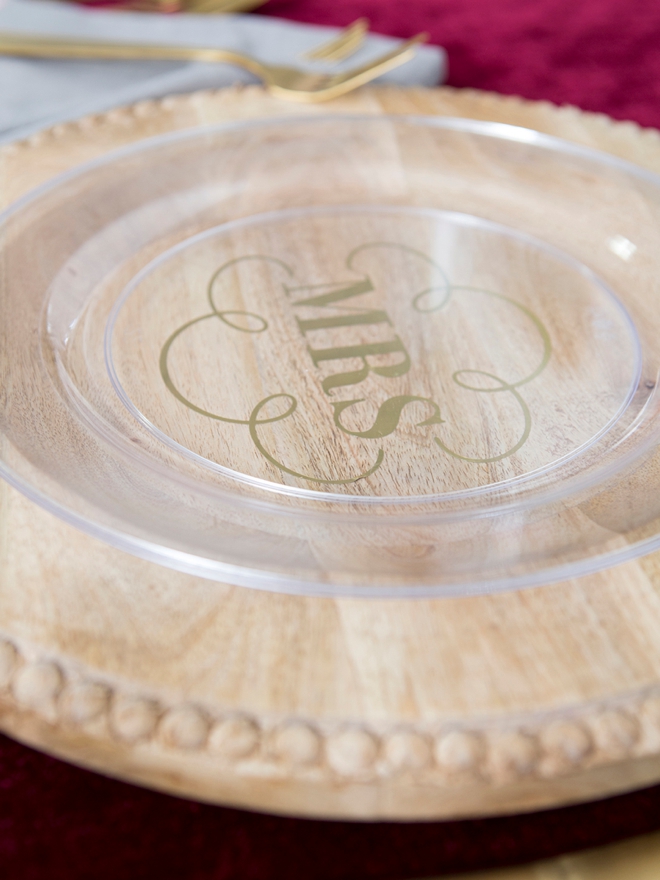
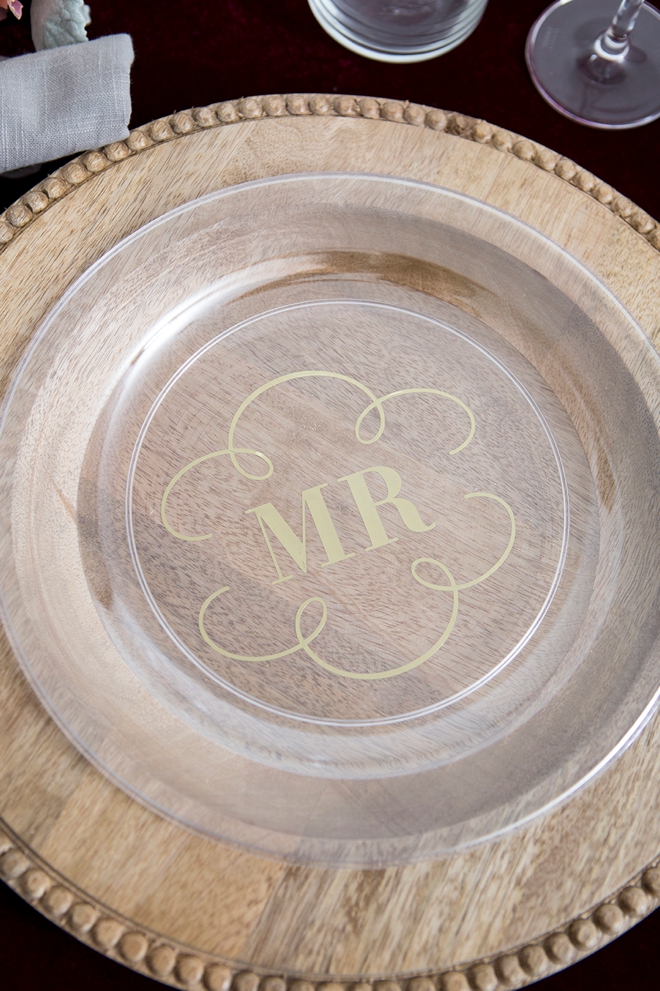
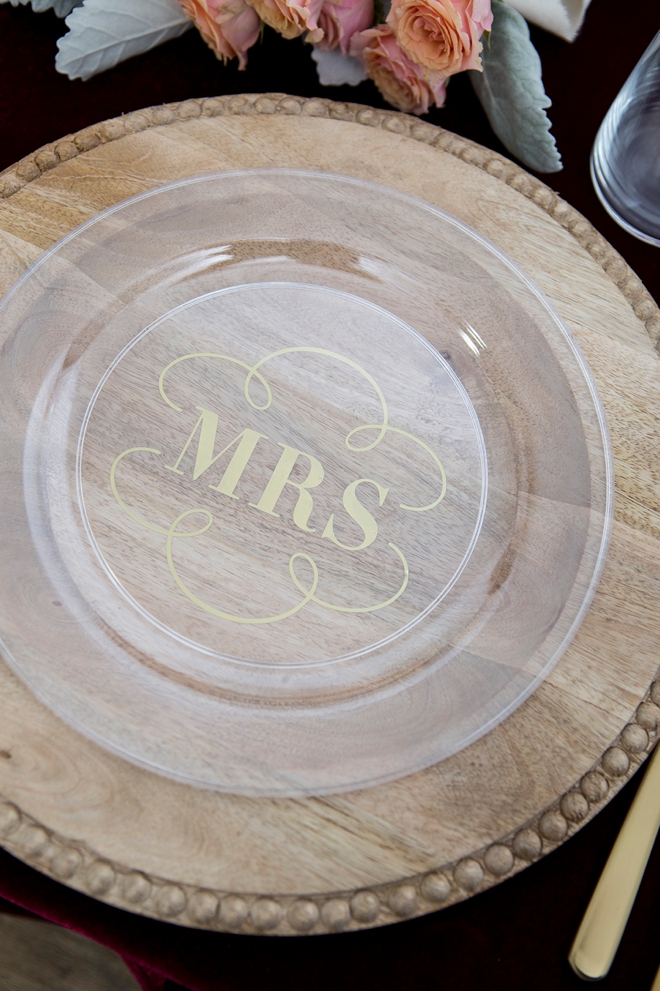
Wood + Glass
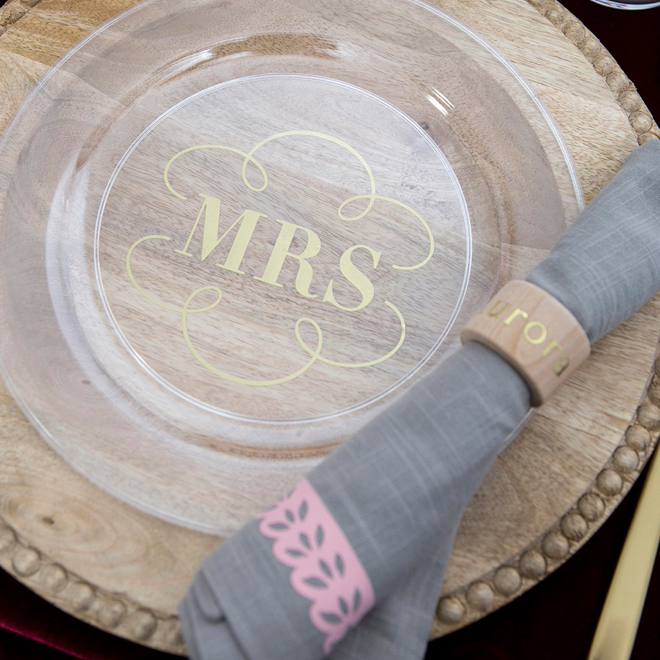
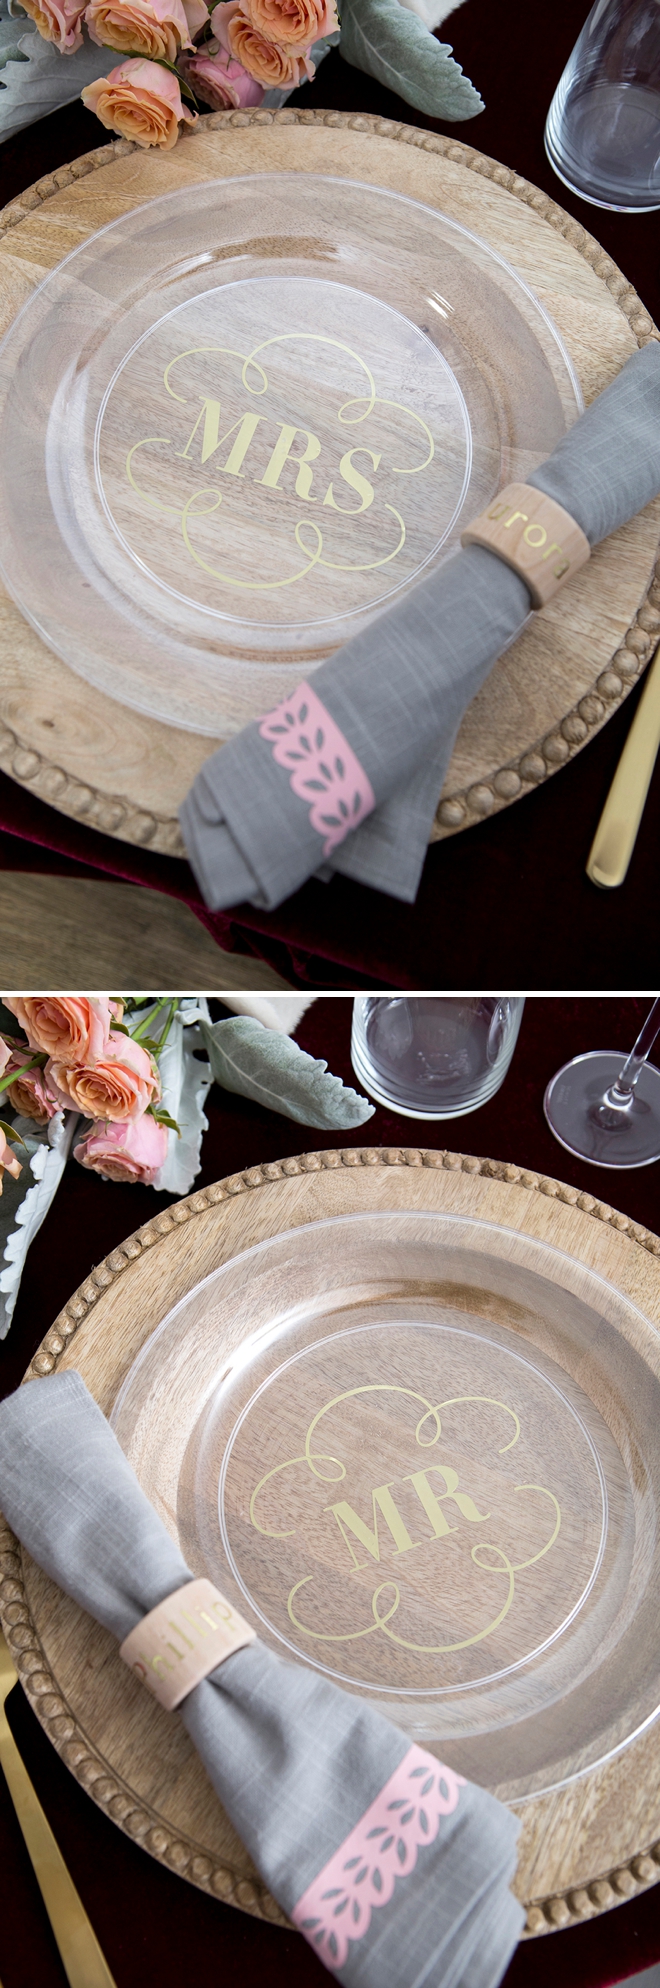
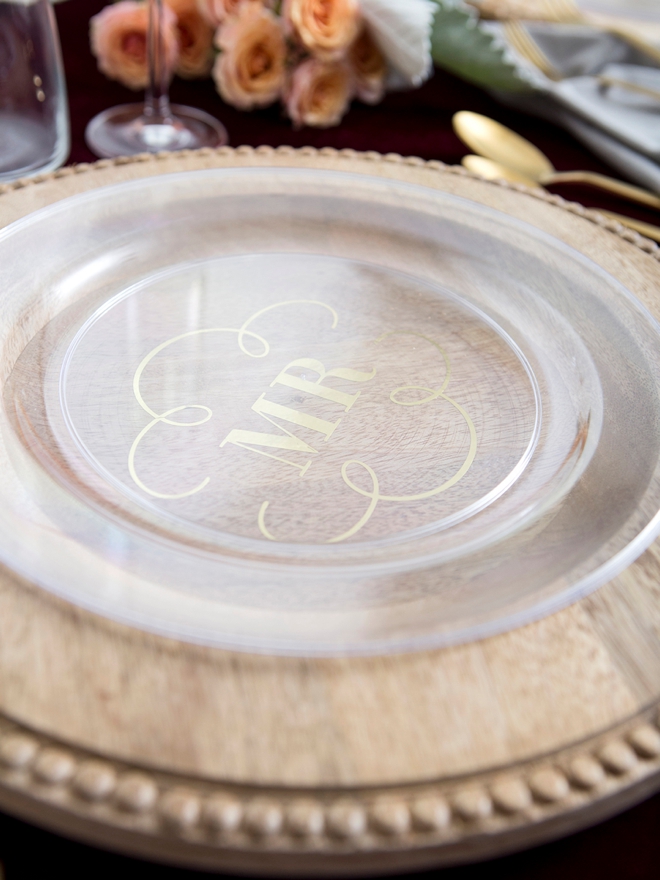
I’m absolutely in love with how these chargers turned out! The beautiful wood grain plus the gold Cricut design looks terrific underneath simple glass plates. Making a custom charger for all of your guests might be too large of a task, but creating something ultra-special for just your head table is 100% doable!
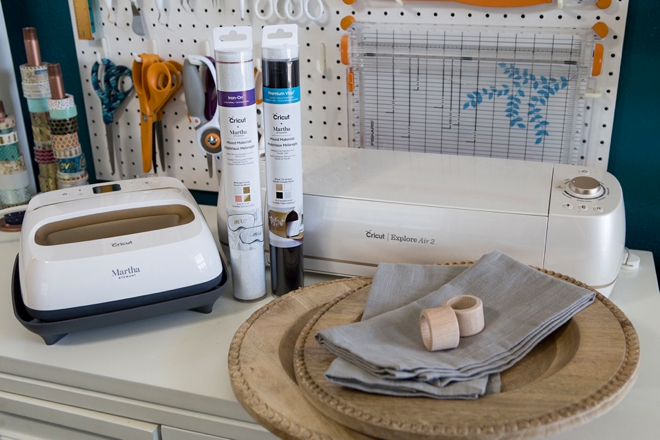
SUPPLIES:
- Cricut® Explore Air™ 2 Special Edition, Martha Stewart Machine Bundle
- Cricut® Martha Stewart Mixed Materials Vinyl Wedding Collection, Black Tie Soirée
- Cricut® Martha Stewart Mixed Materials Iron-on Wedding Collection, Midnight Coral Mixed
- Cricut® EasyPress™ 2 Martha Stewart Edition Vanilla, 9″ x 9″
- Wooden Chargers
- Wooden Napkin Rings
- Cotton Napkins
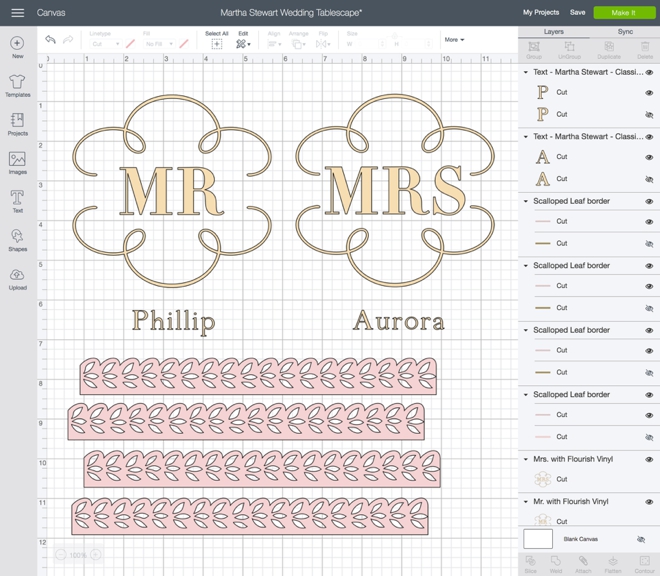
Create In Design Space
The first step is to create your designs in Design Space. Measure your chargers (taking into consideration the clear plate on top), your napkin rings, and napkins, and create your design according to their size. Color your designs to the vinyl and iron-on you’ll be using to keep your cutting mats organized. Login first and then click here to access my exact canvas within Design Space. When you purchase the new Cricut® Explore Air™ 2 Special Edition, Martha Stewart Machine, it comes with an entire set of gorgeous wedding design files including the ones I’ve used here. The exact design files I used were:
- Martha Stewart Mr with Flourish #M92D6209
- Martha Stewart Mrs with Flourish #M92D620F
- Martha Stewart Scalloped Leaf Border #M306C7
- Font for names: Martha Stewart Classic Old
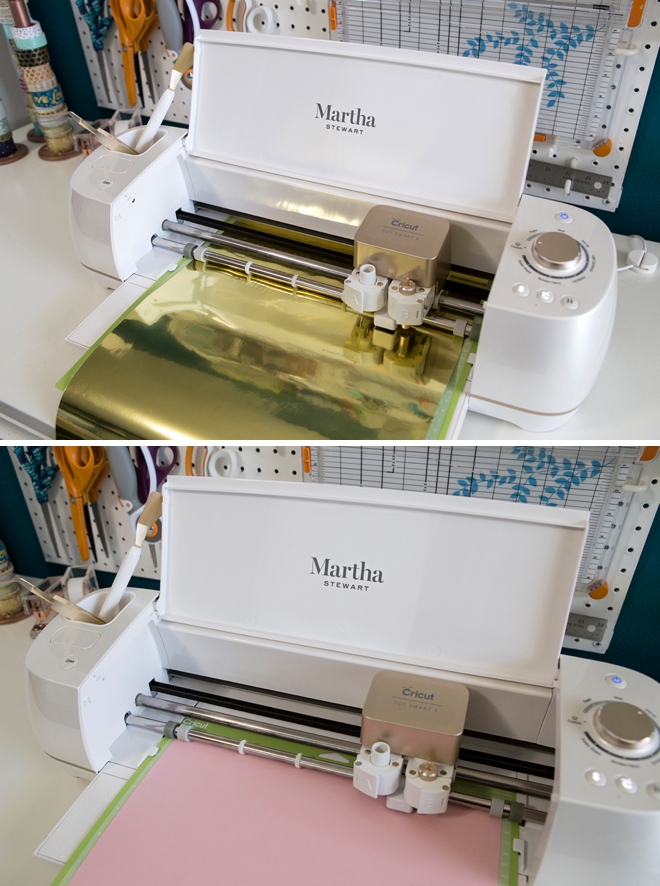
Let Your Cricut Work It’s Magic
Don’t forget for iron-on designs the backside of the iron-on should be face up and you’ll need to click the “mirror-image” button on the cut screen canvas before cutting, otherwise, your iron-on will be backward!
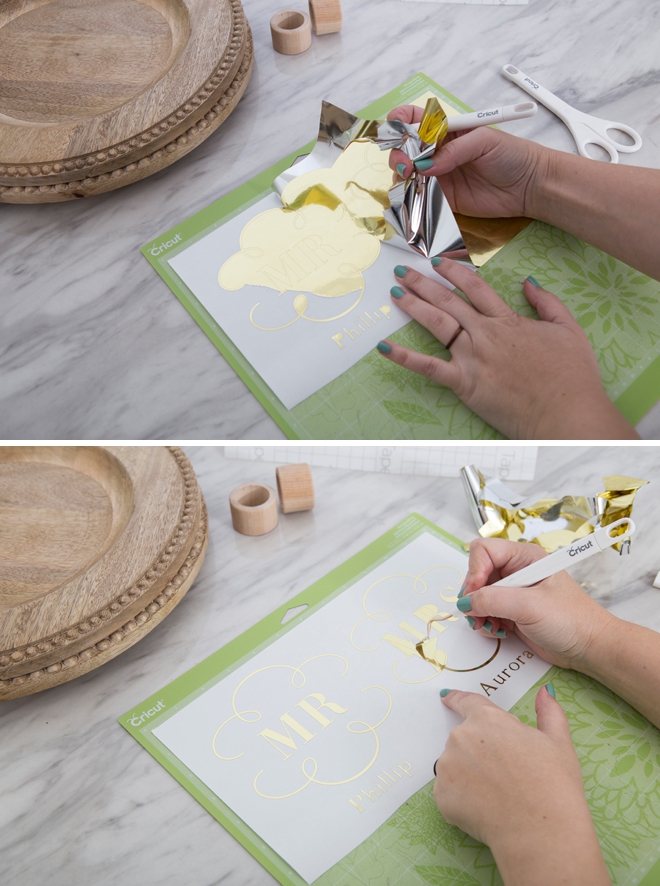
Weed The Designs
Weed, (aka. remove) all the excess iron-on material that isn’t a part of your design. Using the Cricut weeding tools makes the removal of intricate pieces super easy.
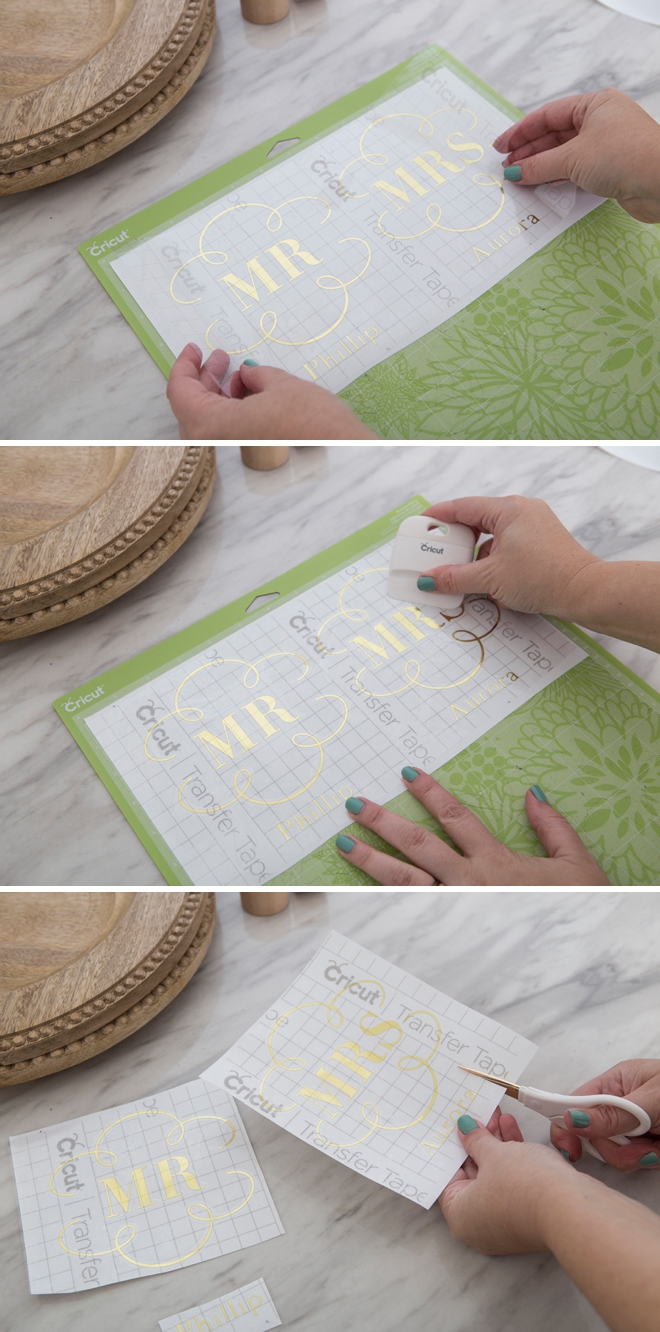
Transfer Tape
Transfer tape is the BEST and if you’ve never used it, you must try it. Basically you transfer your new vinyl stickers from their base to a clear film so you can properly position them on their final resting place. Cut a piece of transfer tape just larger than your designs, peel and evenly smooth on top of the vinyl. Then cut your designs apart.
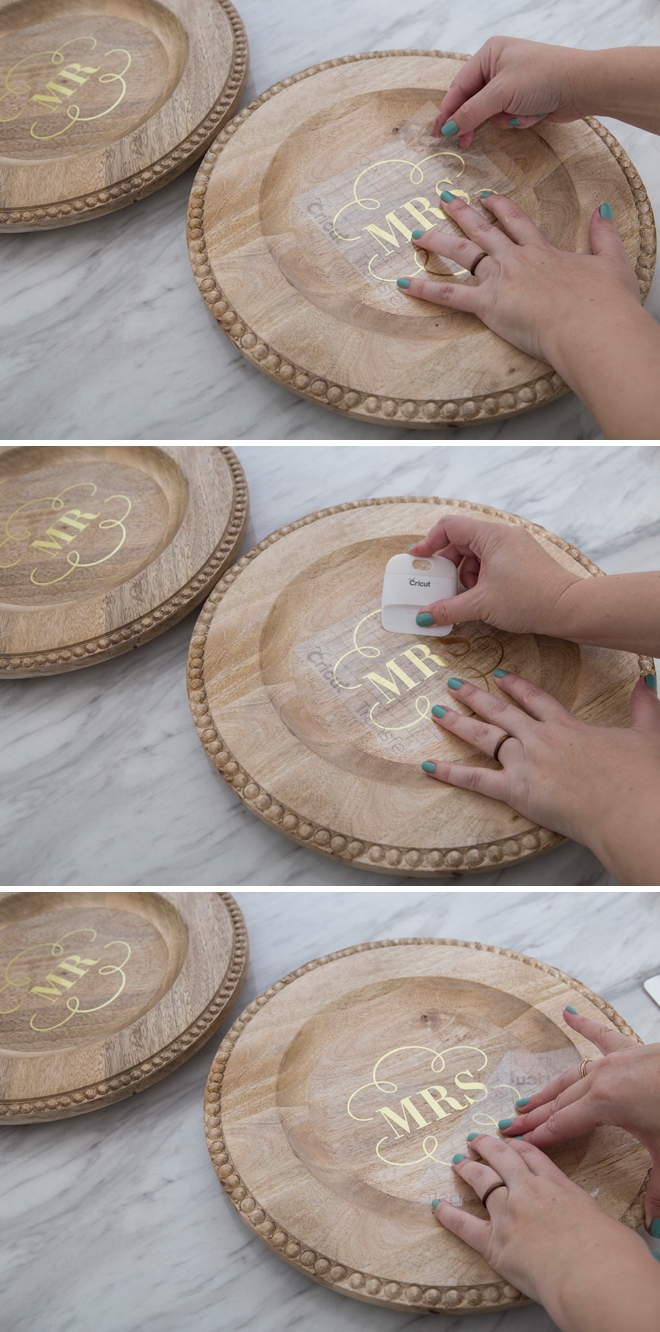
Adhere The Designs
Finally, the fun part. Remove the white vinyl backer sheet leaving just the clear transfer tape and your design. Then place on top of your item and gently burnish with the scraping tool. Next, pull away the transfer tape to reveal your beautiful chargers!
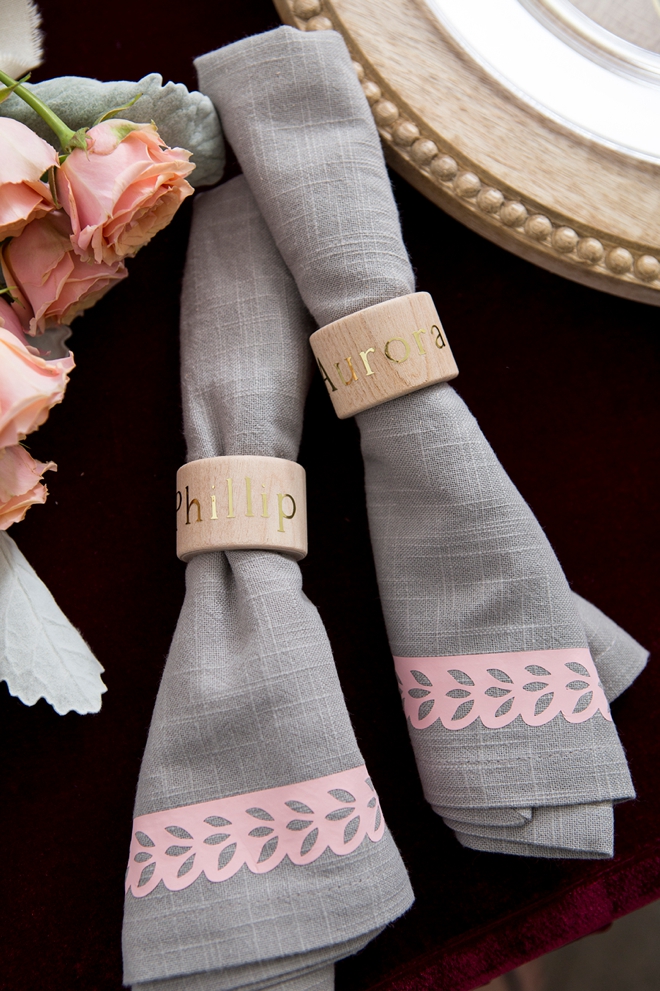
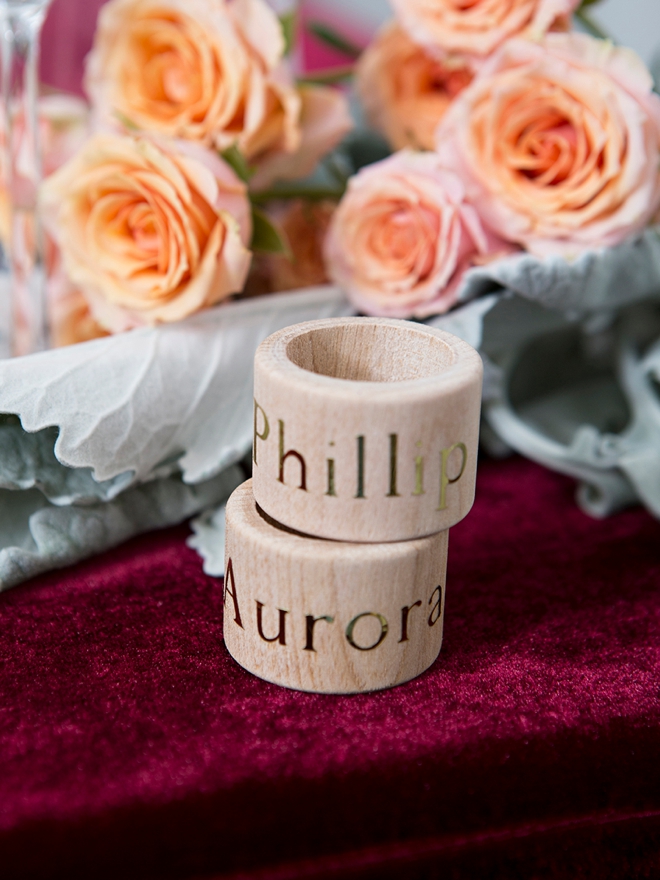
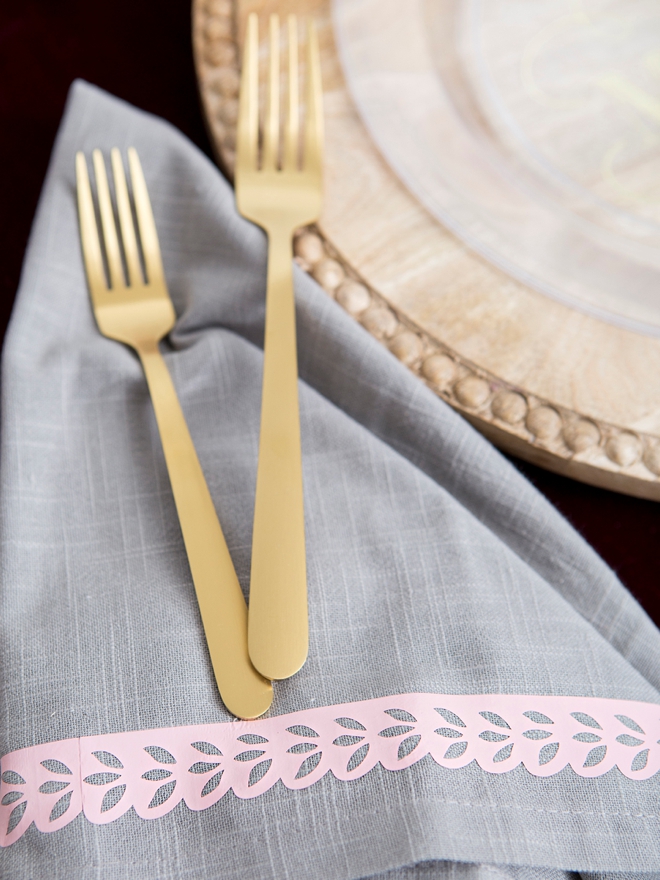
Do The Same For The Napkin Rings

Weed The Designs
Again, weed your designs. Weeding iron-on feels a lot different than weeding vinyl. Remove all the leaves and excess iron-on that isn’t part of your design. Then cut the designs apart.

Easy Press Heat + Time Settings
One of my favorite aspects of using the EasyPress 2 is that Cricut has already created a spreadsheet of heat times and heat temperatures for all fabrics and types of iron-on. So if you’re using everyday iron-on on 100% cotton like we are here, there is an exact setting for that, which happens to be 315º for 30 seconds, front and back. That’s what I mean by no guesswork. You don’t have to hope that your iron is hot enough or that you’ve held it on the fabric for long enough. Follow this link to find the interactive chart, simply plug in your items to find the correct temperature and time for your unique project!
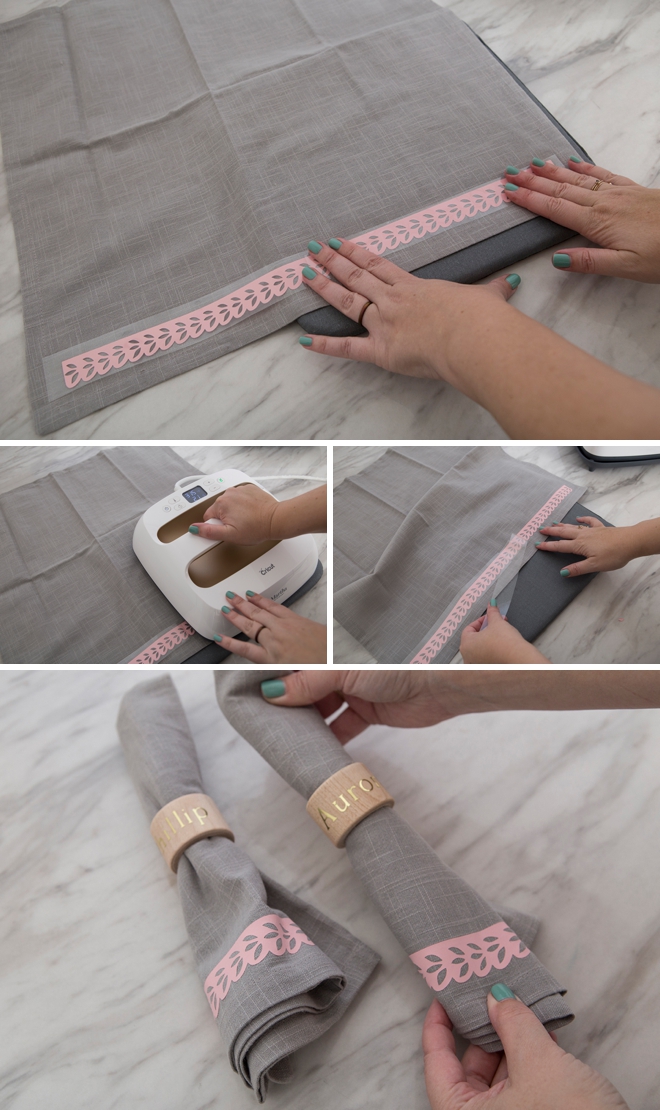
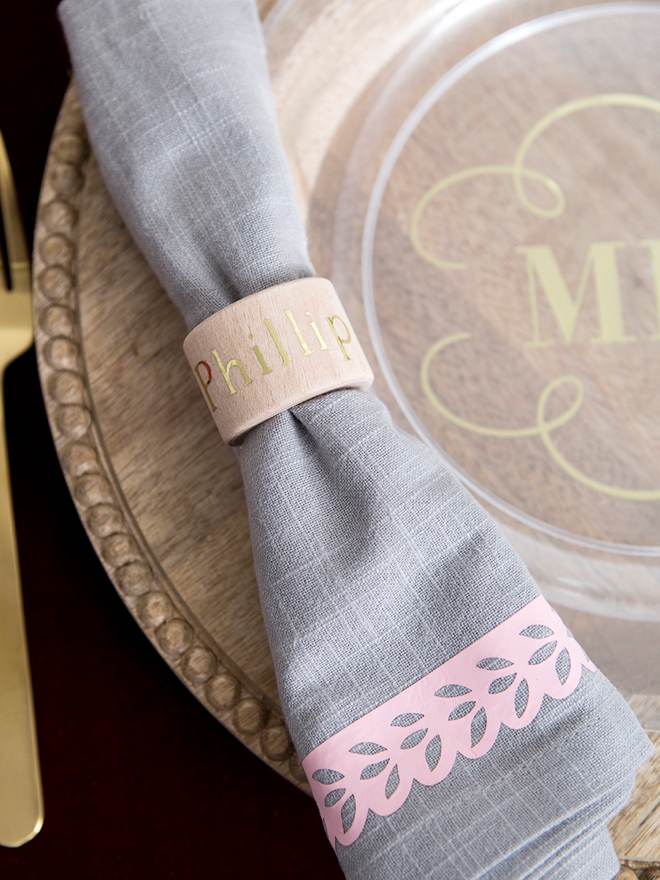
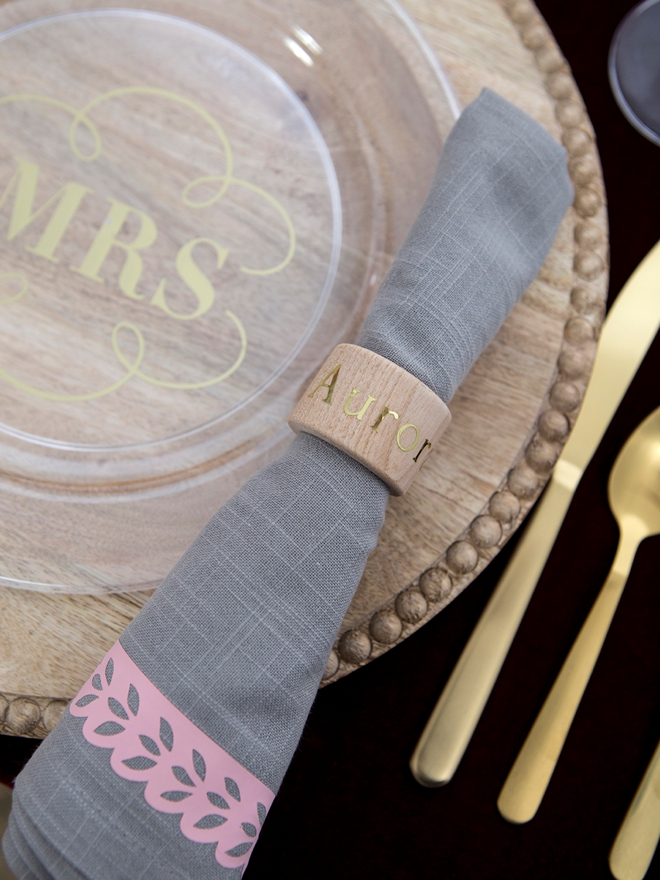
This small addition to the napkins will really tie them into the rest of the table design!
Endless Personalization Options
If you’ve been on the fence about getting a Cricut, or you need a gentle nudge to finally pull the trigger – our projects are it! Seriously, the sky is the limit when it comes to what you can make for your wedding with the Cricut Explore or the Cricut Maker. From amazing custom table ideas like these to an entire wedding bouquet made from felt and everything in between. It will be your number one wedding crafting tool and after your wedding, you will find loads of ways to personalize your new home, make fabulous gifts and so much more!
DIY Tutorial Sponsored By:
Cricut is a world-class leader in personal electronic cutting machines that has enabled people to achieve their creative best for over 50 years. Today, millions of people use Cricut products to create unique projects, and they focus on enhancing lives with this power of creativity. Let Cricut help you take your wedding personalization and project creativity to the next level!
As with all our DIY tutorials, if you create one of our projects please send us a picture – We Love Seeing Your Creativity! If you use Instagram or Twitter please use the hashtag #SomethingTurquoiseDIY and it will show up on our Get Social page. Happy Crafting!
DIY Tutorial Credits
Photography + DIY Tutorial: Jen Causey of Something Turquoise // Cricut® Explore Air™ 2 Special Edition, Martha Stewart Machine Bundle and Cricut Supplies: courtesy of Cricut // Wooden Chargers: Pier One // Wooden Napkin Rings: Etsy // Gray Napkins: Pier One // Gold Flatware: Target // Nail Polish: OPI – Withstands the Test of Thyme
Shop The Supplies:
Find the supplies you’ll need for this project from our affiliate links below:

Comments