
DIY Photo Tie Patches For Father’s Day With Canon
-Sponsored Post-
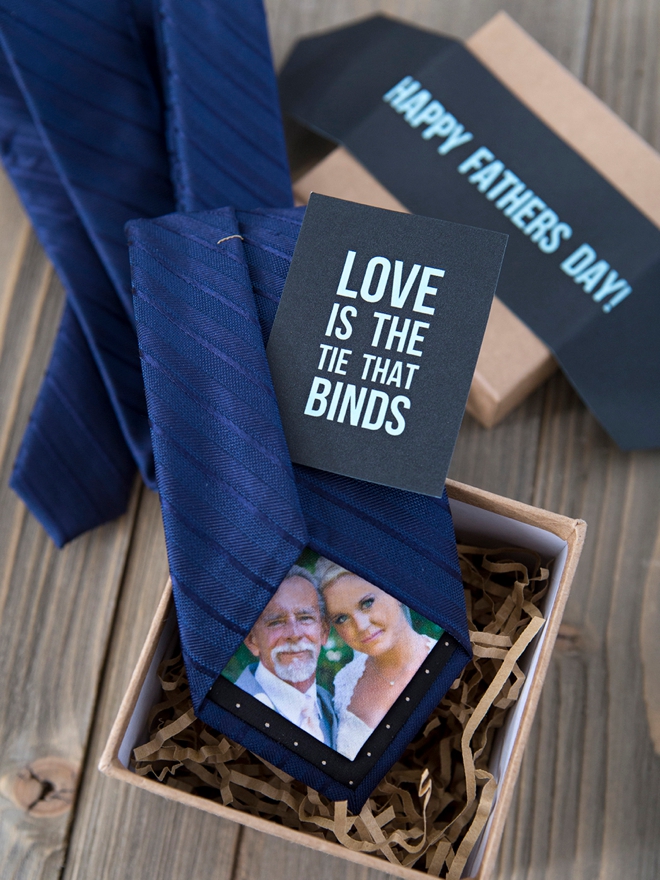
Since Father’s Day is literally right around the corner, I wanted to share a heartfelt (but super quick) DIY gift idea for all the Dad’s out there! Stop by his favorite store and pick out a tie, swing by your local craft store to grab some iron-on transfer and within 30 minutes you’ll be able to create a gift that might make him cry. My work-horse crafting printer, the Canon PIXMA TS9521C is the star of the show today, making the iron-on prints look professional. Even if you aren’t normally a “crafter” this is an ultra-easy project that will make you look like the hero at your Father’s Day event, even though we know Dad’s the real hero. Using your favorite wedding photo of you and Dad would be a terrific idea and a wonderful way to use your wedding photos!

Father’s Day or Your Wedding Day
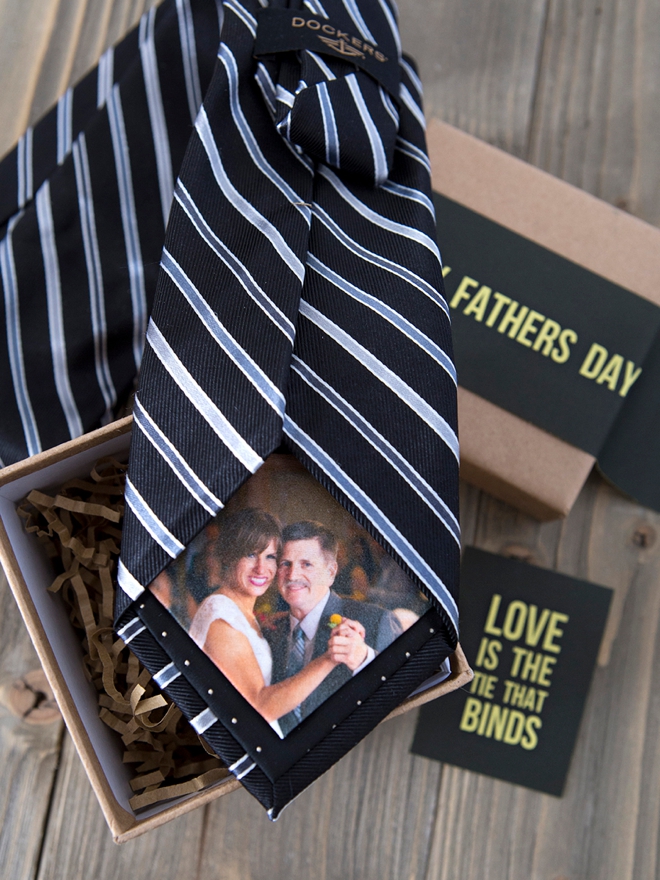
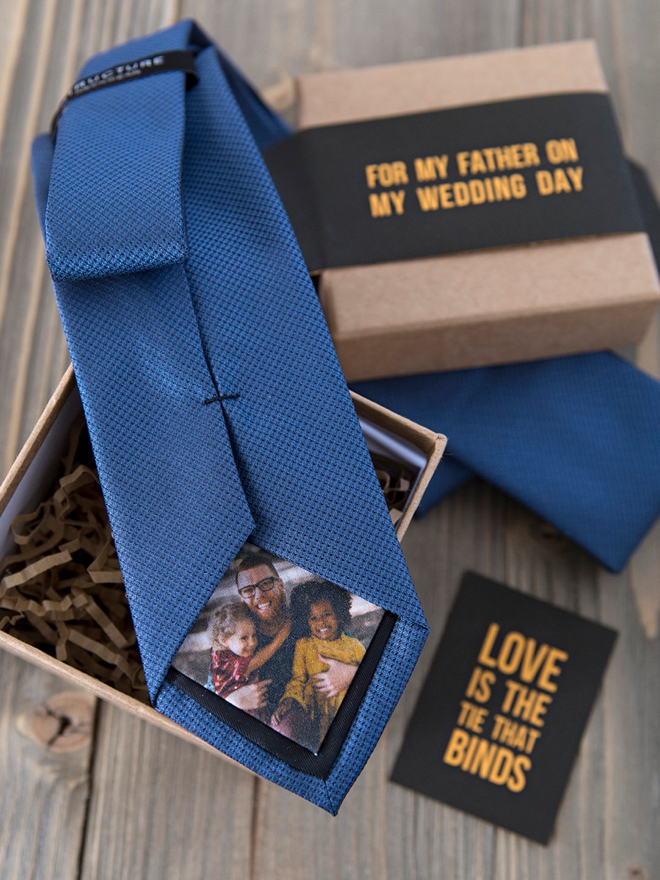
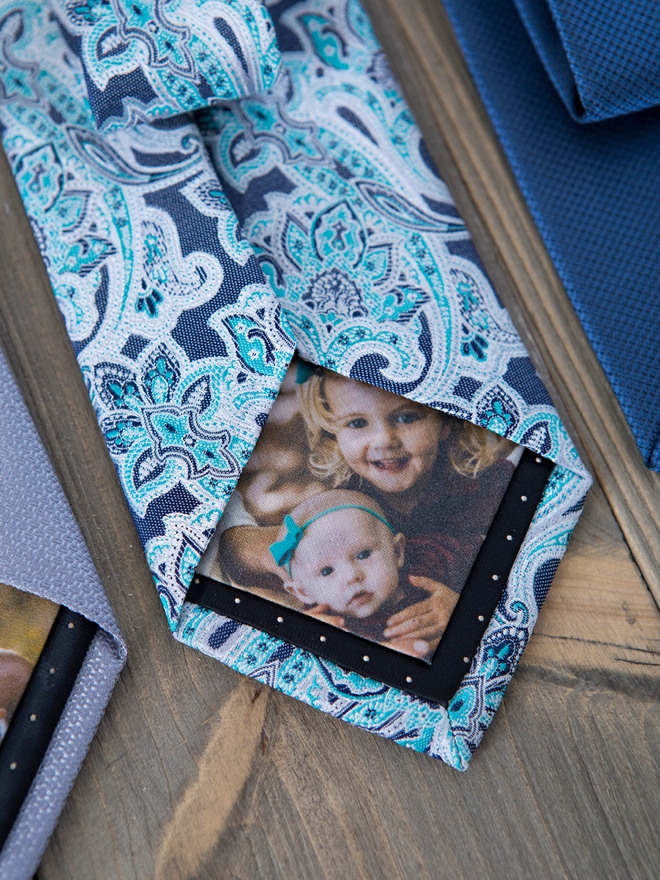
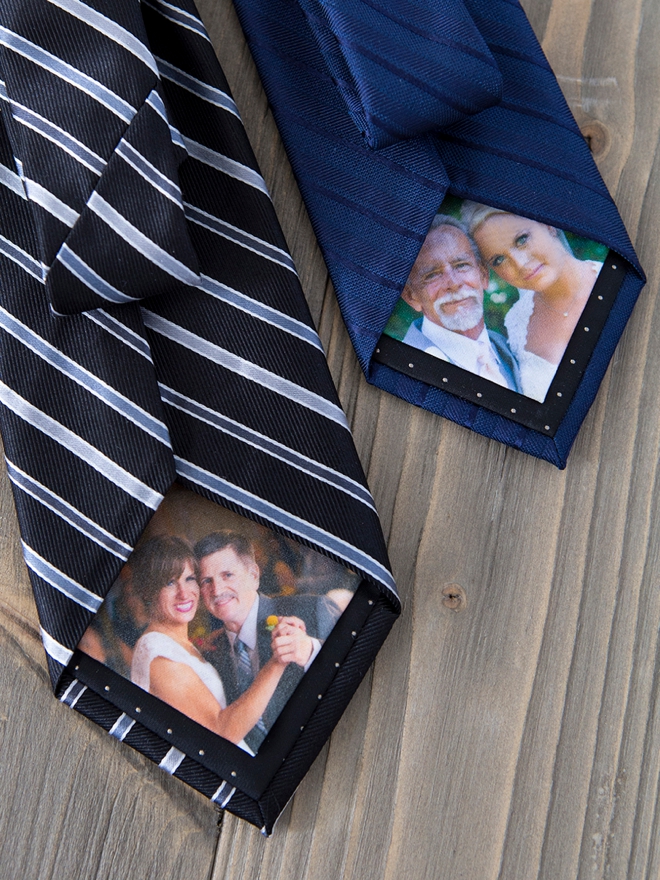
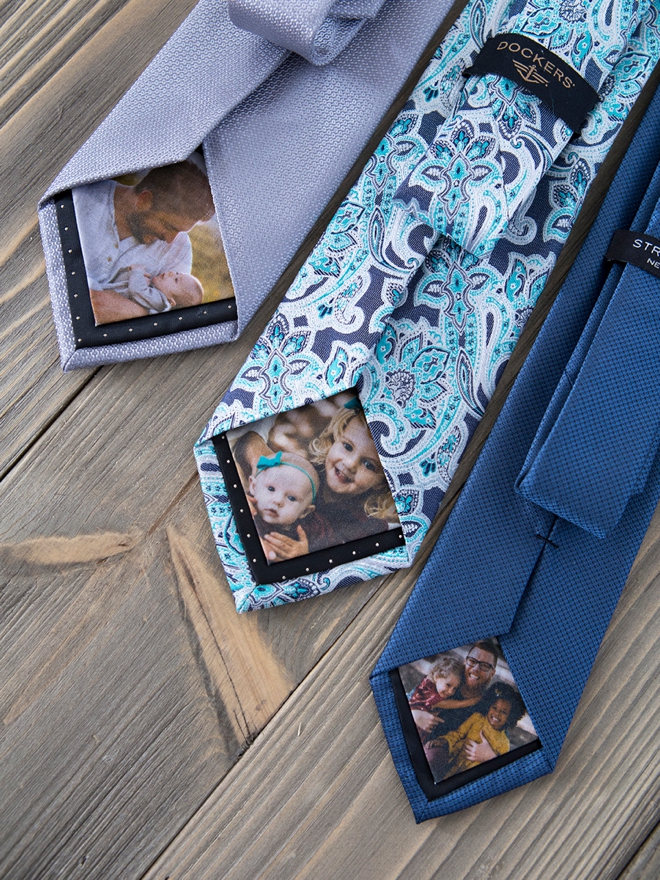
This is a terrific Father’s Day gift. Use Dad or Grandpas favorite photo of his babies or use a photo of you and him from your wedding day! Also a supremely perfect Father of the Bride gift for the morning of your wedding. We’re sharing super sweet printables to accompany your tie gift too, just scroll to the end of the post to grab them. Anytime you need to fancy up a tie, this would be a terrific way to do it!
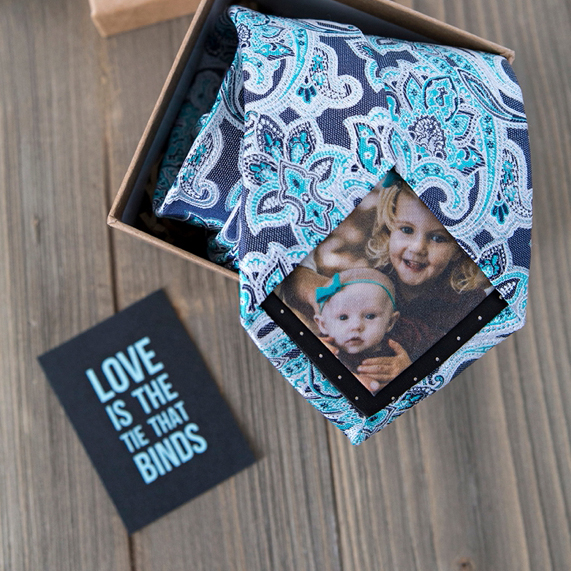
A Little Turquoise
I have mentioned it here and there that we’ll be launching a baby/kids blog soon and it’s right around the corner! In a few short weeks you can look forward to lots and lots of different type of mom-ish content from kid projects to DIY room decorating ideas, advice, and so much more. This is just a little preview of what’s to come!
ps. Yes, those two (the ones with the turquoise headbands) are my adorable babies!
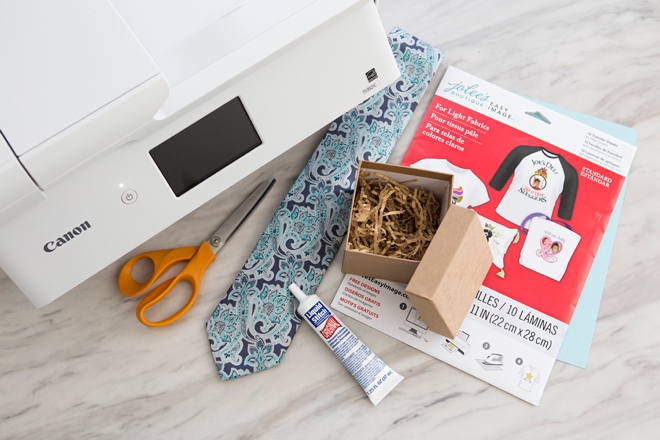
SUPPLIES:
- Canon PIXMA TS9521C All-in-One Crafting Printer
- The Perfect Tie For Dad
- Iron-on Transfer Paper
- Small Piece of White Fabric
- Iron (or EasyPress)
- Liquid Stitch Fabric Glue
- 4″ Square Gift Box
- Colored Cardstock
- Glue Dots
- Scissors
- Our FREE printable labels at the end of the post!
Fabric Tip: Since you need such a little bit of fabric, if you don’t have a piece of white cotton laying around, just purchase what is called a “quilting square”. Usually they are 18″ square and only like $1.99.
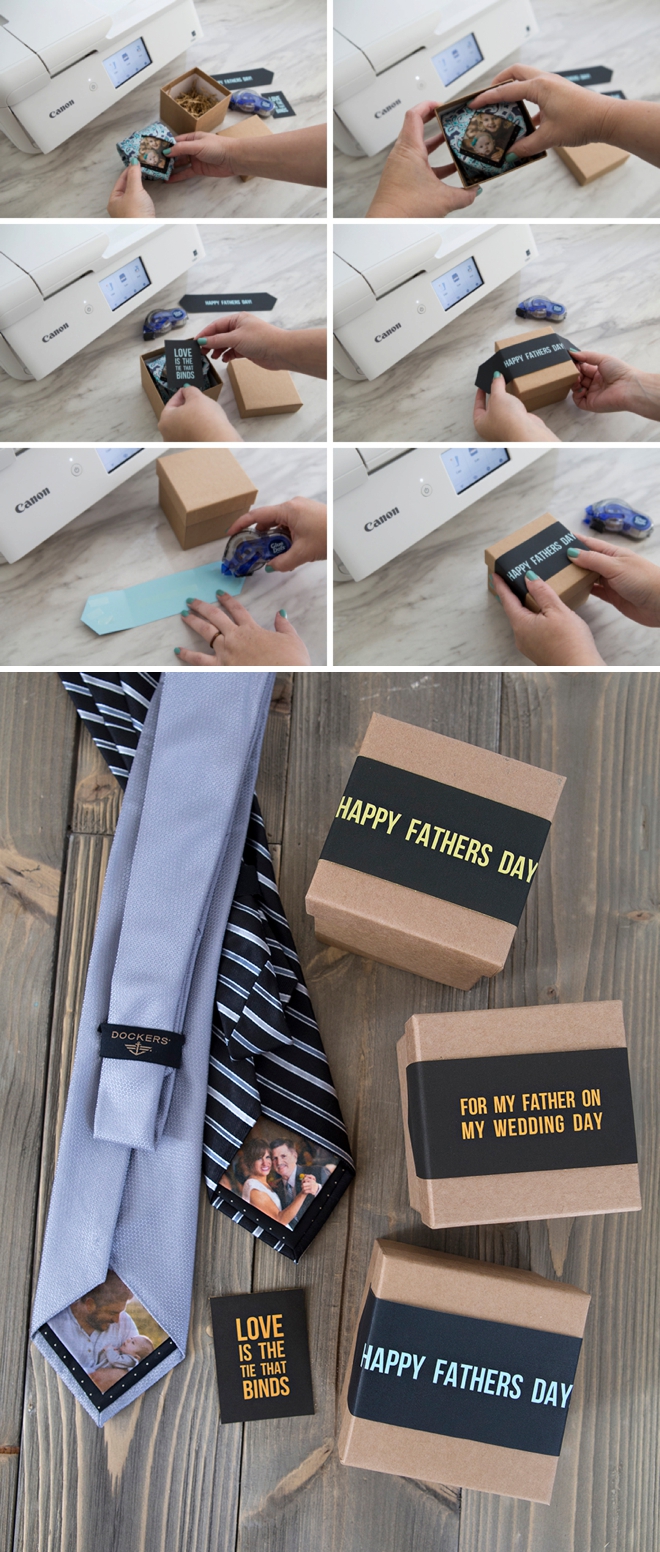
Measure
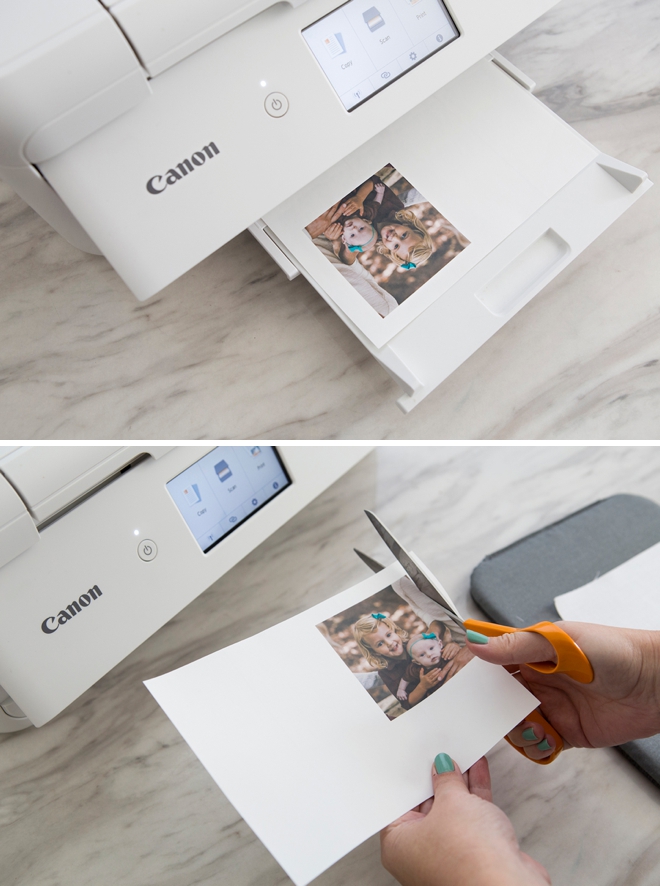
Start by measuring the backside edge of the tie, the inside part that is showing under the flap. Add 1″ to the measurement and size your photo that size. This tie measured 2″, so I sized my photo to 3″ square.
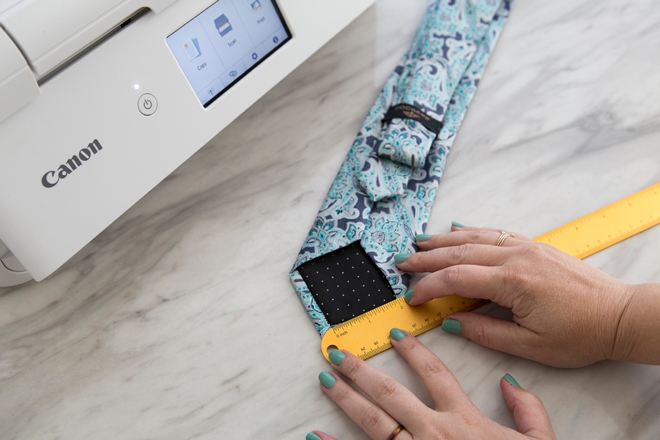
I’m printing my iron-on photos using my fabulous Canon PIXMA TS9521C Crafting Printer because the print quality is stunning and I never have to worry about unique materials running through my printer. Trim down to size.
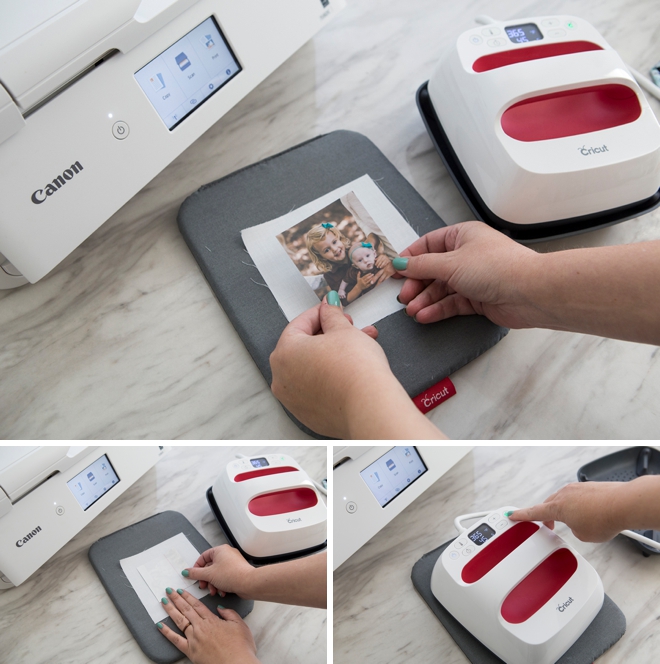
Make Your Patch
Iron your photo onto a piece of white fabric following the directions on your iron-on transfer package. Since I no longer own an iron because the EasyPress is the best thing ever, I’m using my mini for this project – but feel free to still use your iron. The EasyPress settings are 365˚ for 45 seconds.
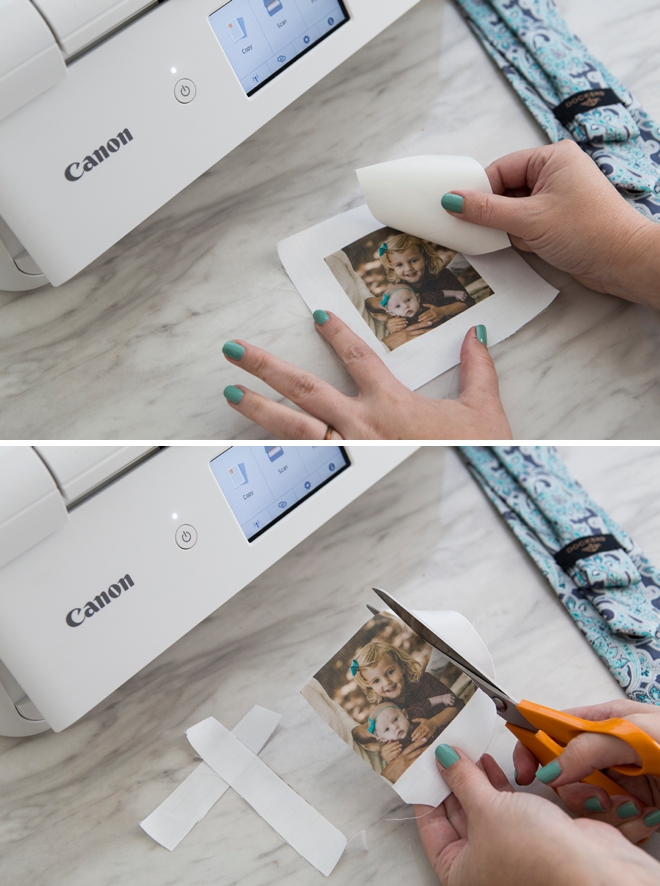
Peel + Trim
This is a cold-peel project, meaning you need to wait until the fabric is completely cool before peeling the backing paper off. Then trim right along the edge of the image, cutting off a tiny sliver of the print. The iron-on actually creates a non-fray edge which is awesome.
Photo Tip: Iron-on projects are always reversed when ironed, so if you don’t want a backwards photo (or wording) you must mirror the image before printing!
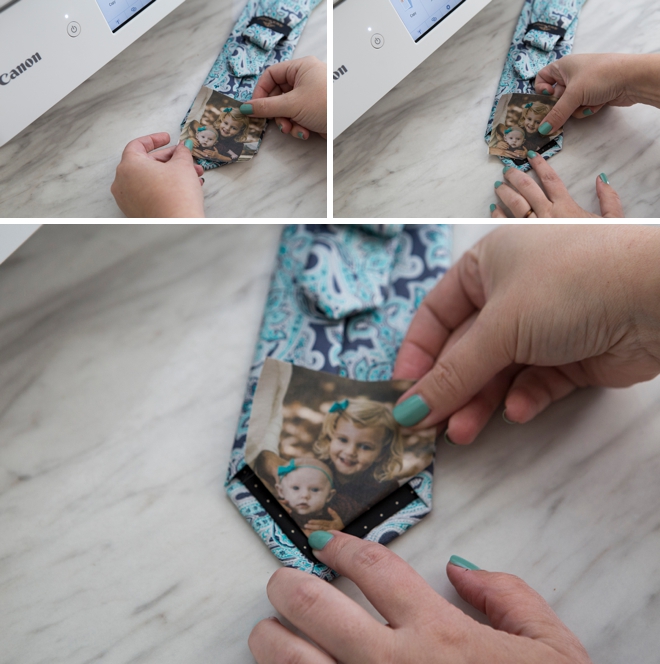
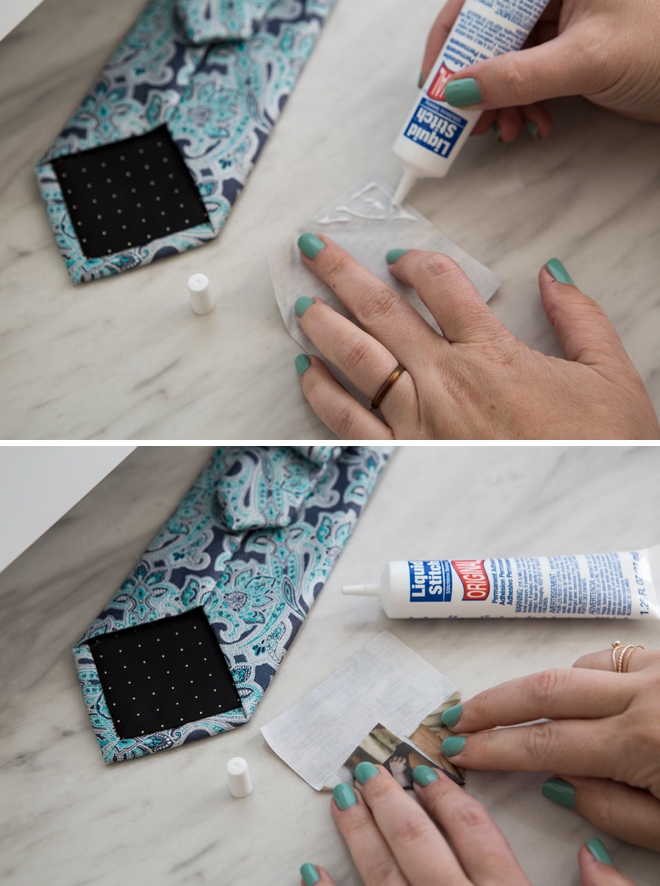
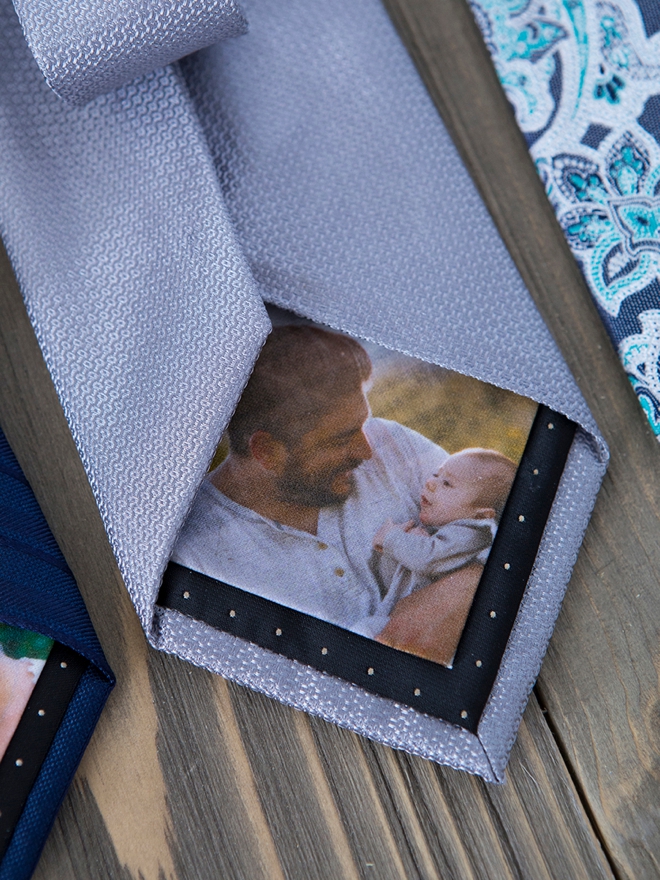
Fold To Fit
Now simply fold the bottom two edges of your photo patch to fit your unique tie. All ties will be different, so fold based on the tie you are working on.
Glue The Flaps
Glue the two folded flaps first using Liquid Stitch. Hold until dry, a few minutes.
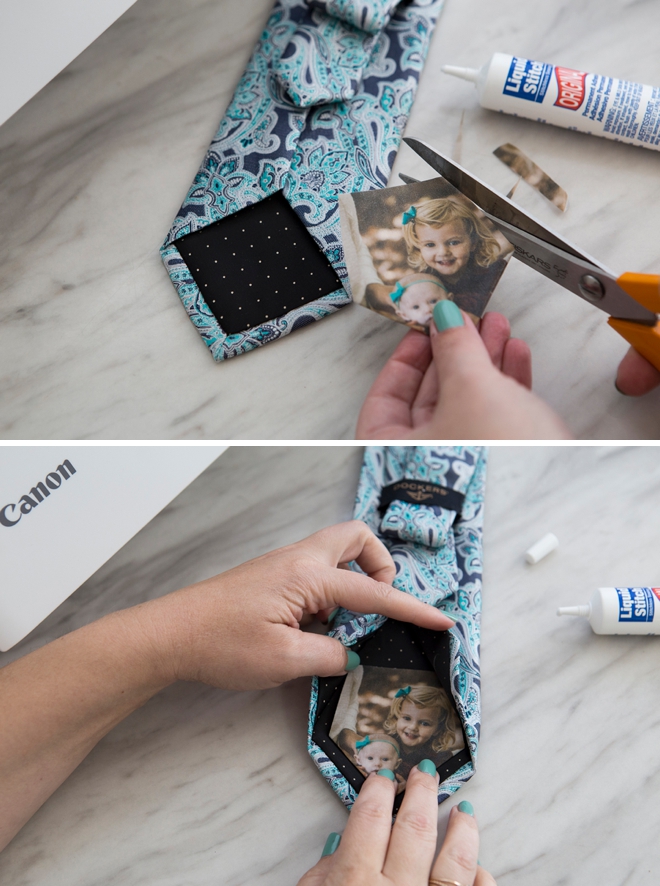
Trim To Fit
Trim the rest of your photo down to fit nicely inside the tie flap.
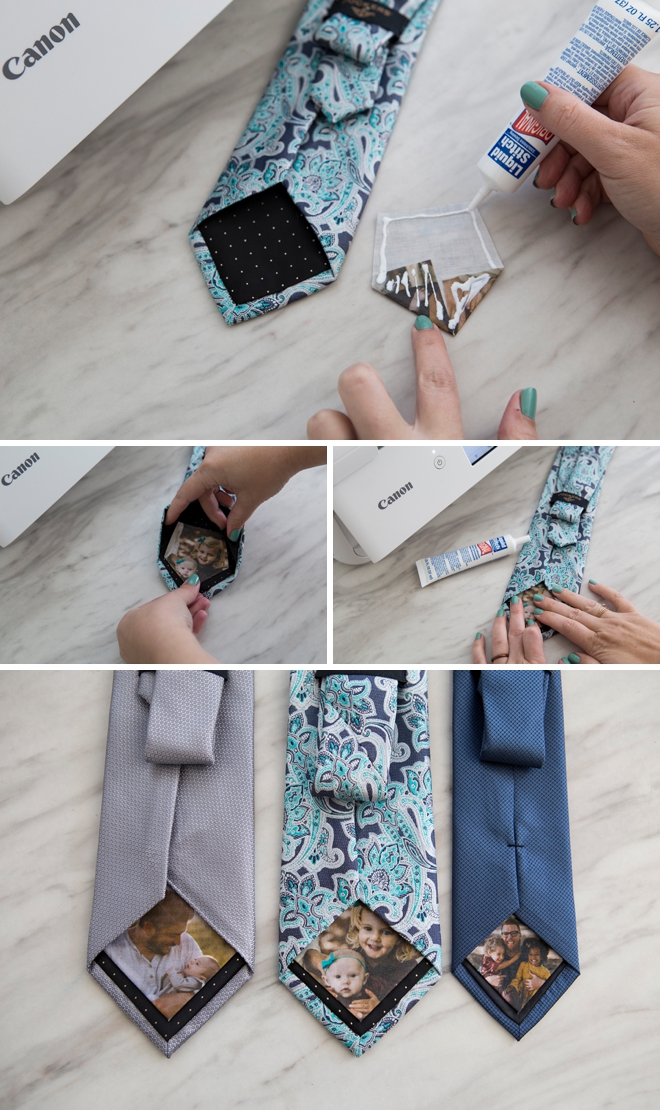
Glue
Add a line of glue along the edge of the patch, plus all over both folded corners to secure inside the flap of the tie… and it’s complete! WAY easier than it looks right!?
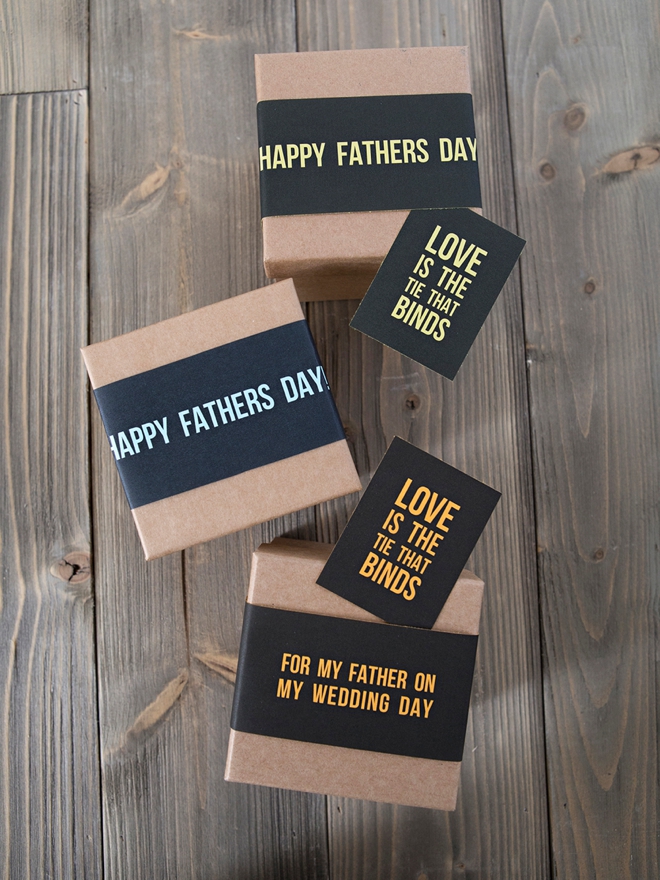
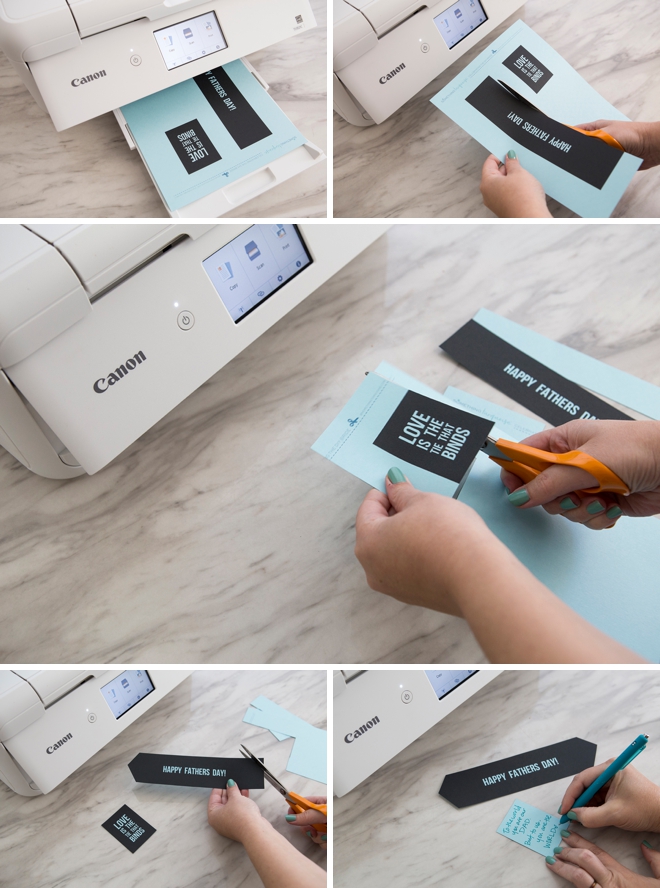
Create Your Gift Box
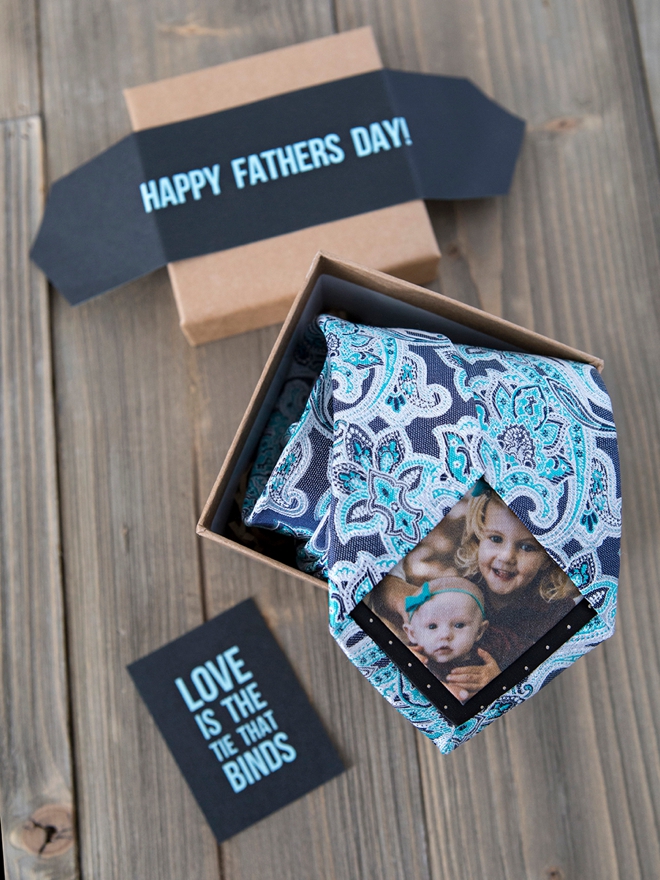
We have two super sweet printable labels for you. A silly “dad joke” type little card for inside your tie box and a Happy Fathers Day wrap for the outside of it! Print the all black design on ANY color paper, the color of the paper will show through the black print as the text color! Trim down and write a little note on the back of the small card if you like.
Wrap
Roll your tie up leaving the photo flap showing, then place inside a 4″ x 4″ gift box. Place the card on top of the tie and add the lid. Then adhere the label around the top of the box to finish your gift!

Huge Thanks
To my friends who lent me their lovely photos to use… Shannon, Lauren, Steve, and Shea! Photographers: Steve Cowell Photography, Lizzie Photo, Chelsea Maras Photography and Iron & Fern.
DIY TUTORIAL SPONSORED BY:
Canon U.S.A., Inc. prides itself on allowing consumers to create and preserve beautiful imagery, from capture to print. With wireless technology and seamless printing capabilities, you can print your photos and printables with precision and ease.


As with all our DIY tutorials, if you create one of our projects please send us a picture – We Love Seeing Your Creativity! If you use Instagram or Twitter please use the hashtag #SomethingTurquoiseDIY and it will show up on our Get Social page. Happy Crafting!
DIY Tutorial Credits
Photography + DIY Tutorial: Jen Causey of Something Turquoise // Canon PIXMA TS9521C All-in-One Crafting Printer: courtesy of Canon // Iron-on Transfer Paper: Amazon // 6″x7″ EasyPress 2: Amazon // Liquid Stitch: Amazon // 4″ Square Kraft Box: Michaels // Colored Cardstock: Personal Stash // Cotton Fabric: JoAnn // Ties: Sears // Scissors: Fiskars // Nail Polish: OPI – Withstands the Test of Thyme
Shop The Supplies:
Find the supplies you’ll need for this project from our affiliate links below:

Comments