
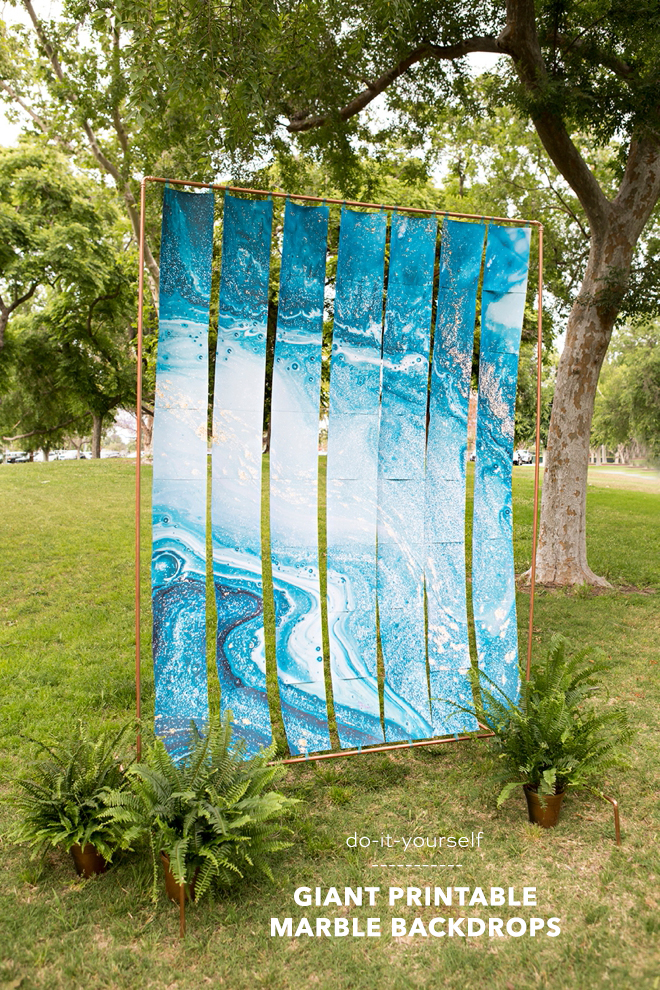
DIY Giant Printable Marble Backdrops With Canon
-Sponsored Post-
Woza!!! I’ve been working on this one for a while now. I’ve long been dreaming of being able to print something this amazing, at home, but ink capacity was my only worry. Enter the new Canon PIXMA G4210 Wireless MegaTank All-In-One Printer, with enough ink to print up to 6,000 vivid colored pages! Yaassss! No joke, I printed both of these gorgeous backdrops and it doesn’t even look like there is any less ink, I’m super excited to see how long I can go before refilling one of the tanks. Today I’ve turned two gorgeous marble backdrops into a mosaic of sorts, that you can print from the comfort of your own home and assemble to fit whatever you are working on, no special supplies needed. I seriously cannot wait to see how you lovely makers use these designs!
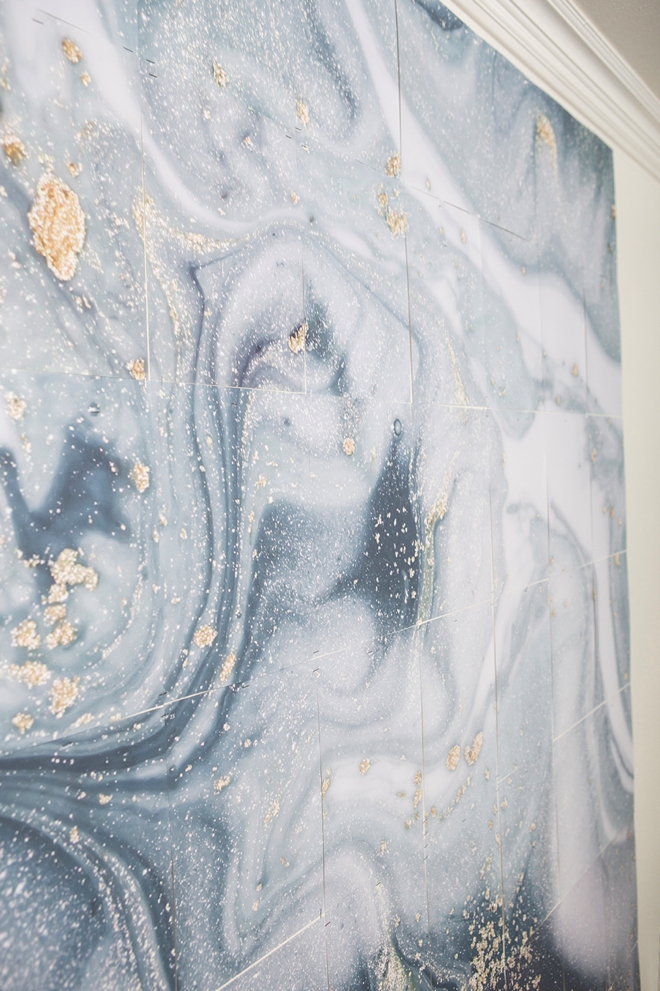
Teal + Gray
Today we’re sharing two stunning colorways for this free printable backdrop, a teal and gold version and a gray and gold version. Obviously the teal is my favorite but there is something special about the gray as well!
SUPPLIES:
- Canon PIXMA G4210 Wireless MegaTank All-In-One Printer
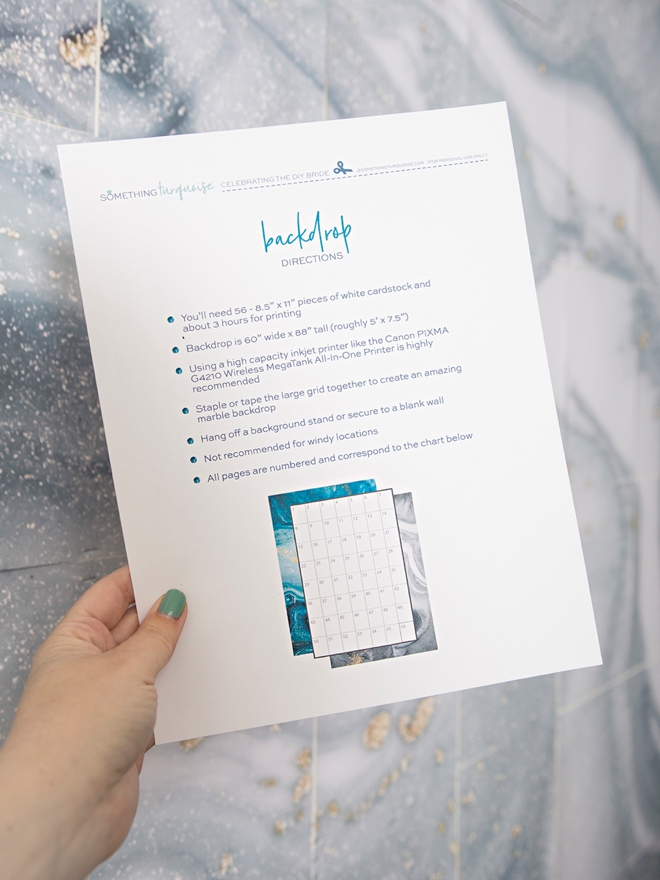
- 56 Sheets of 8.5″ x 11″ white cardstock or photo paper
- A way to display or hang the backdrop
- Our FREE printable files at the end of the post!
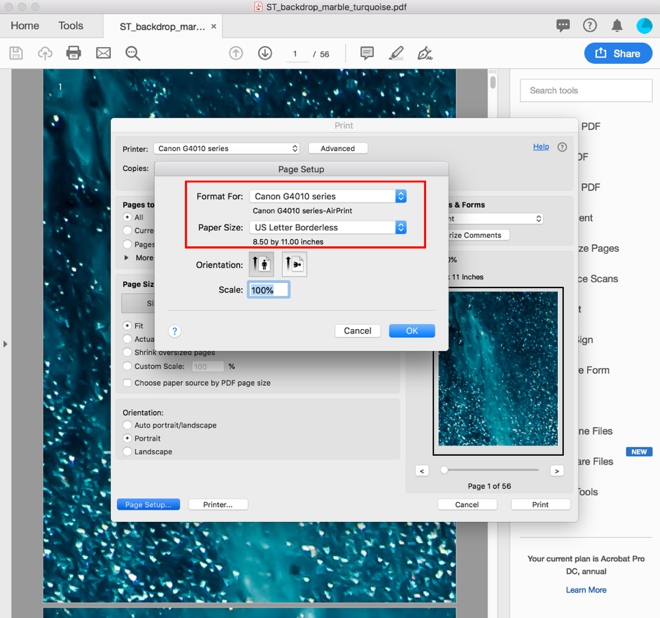
Print Settings
Choosing custom print settings on the Canon PIXMA G4210 is super easy. Open the print queue and make sure to select “borderless” and “photo-best” for the quality, that’s all there is to it.
Crafters Tip: Some computers have a sleep mode where they won’t continue to print if the computer falls asleep. Turn yours off to avoid printer interruptions as printing all 56 sheets could take up to 3 hours.
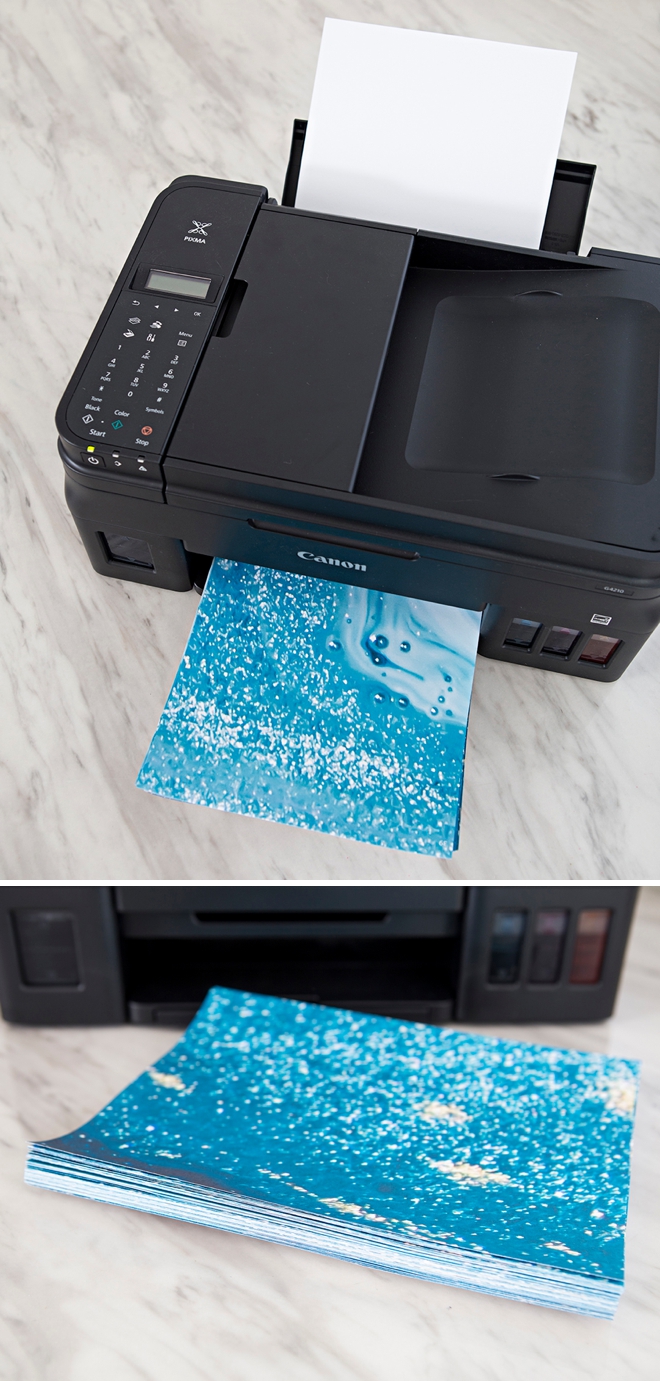
Download your choice of backdrop color and get ready to print! Printing something of this size and magnitude will take a significant amount of ink, possibly multiple cartridges on a regular inkjet, so we highly recommend using the Canon PIXMA G4210 MegaTank printer because it could probably print 50 of these backdrops before needing more ink! This oversized print will require 56 sheets of 8.5″ x 11″ white cardstock or photo paper.
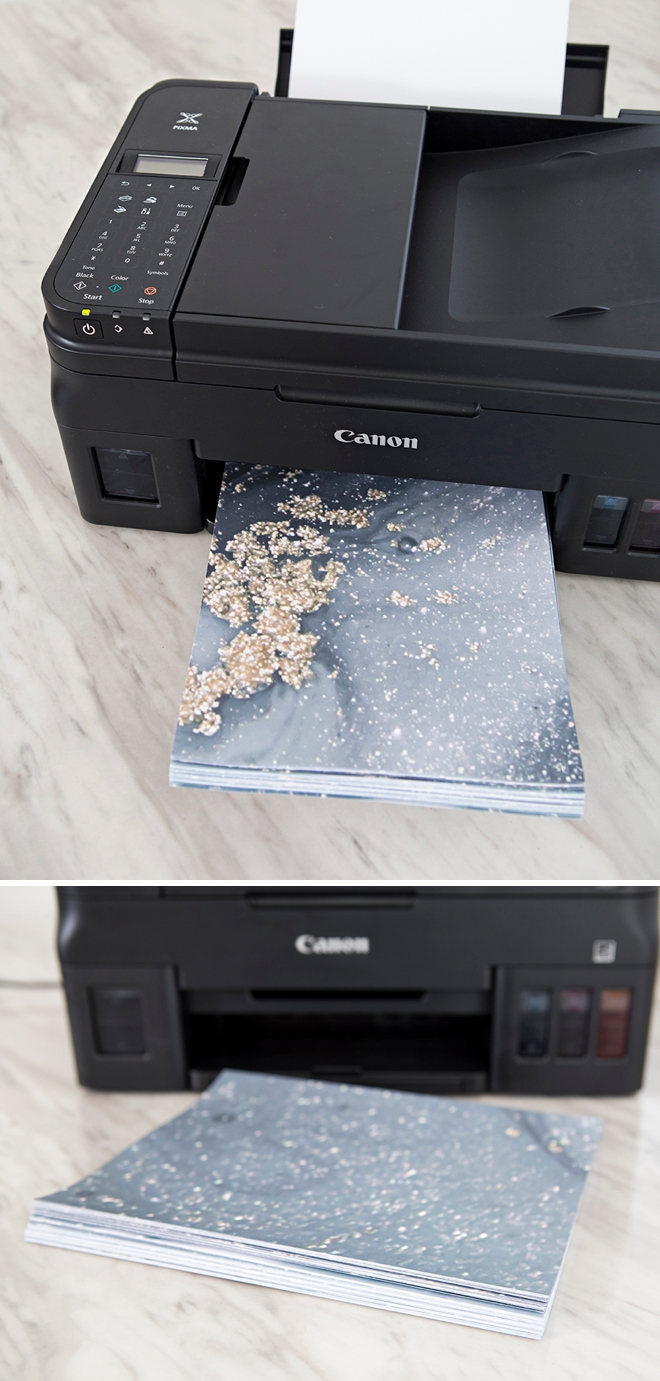
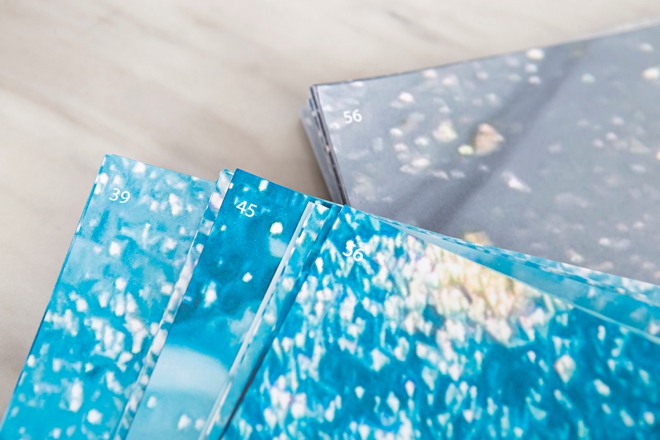
Tiny Numbers
In the upper left hand corner of every print there is a tiny white number that corresponds to the grid on the instruction sheet. Don’t worry, once hung you won’t be able to see them. If your printer does stop midway through the print for some reason, you’ll know right where to pick up because of the numbers too!
Instructions
Follow the grid on the instruction sheet to assemble your mosaic-type backdrop. There are many different ways to use these designs and I’m sharing two ideas here today.
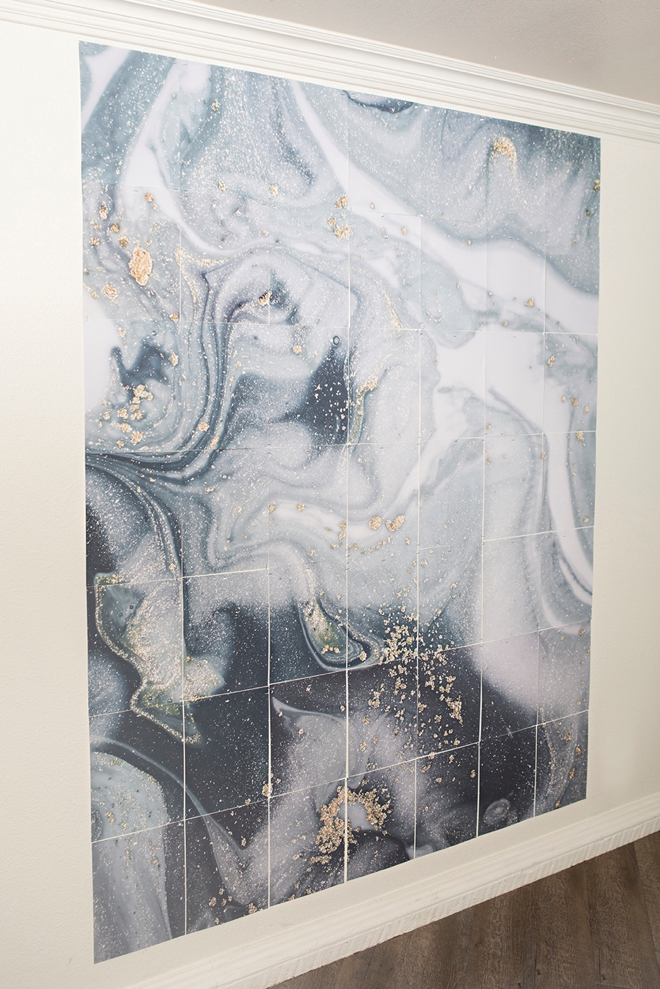
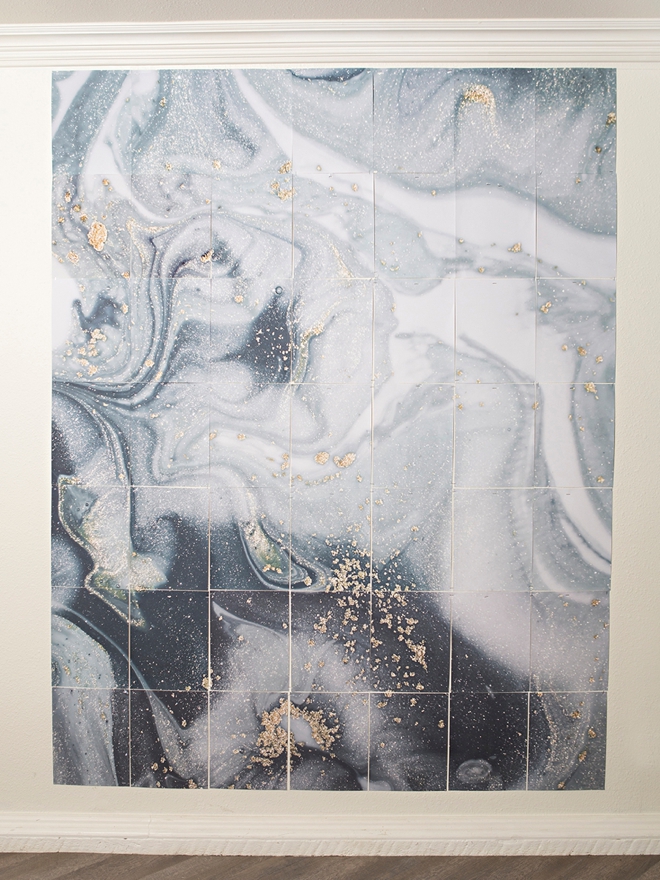
The backdrops are 60″ wide by 88″ tall, or 7 pages wide by 8 pages tall. Use all 56 sheets or leave some off if you don’t need it to be that large. Example, I left the bottom row off the gray display because my walls weren’t tall enough!
Affix To A Wall
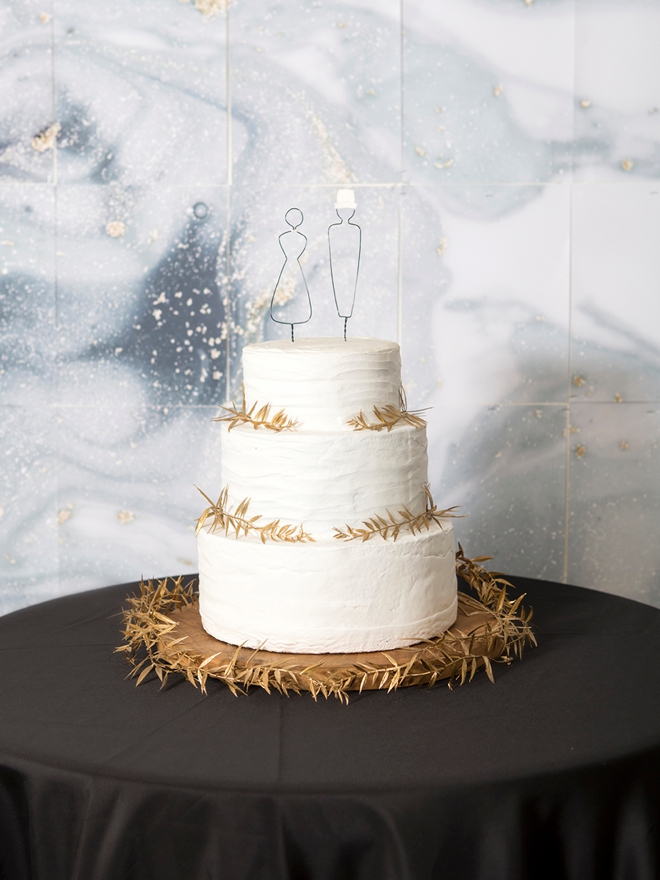
If you have a large blank wall at your home or venue, simply tape it to the wall! This wall in my 1920’s home isn’t exactly flat nor is the ceiling perfectly level so forgive the odd lines. I ended up stapling the sheets to the wall and it worked wonderfully. This would be a terrific backdrop for:
- a cake display
- a gift table
- a sweetheart table
- or even a photo booth!
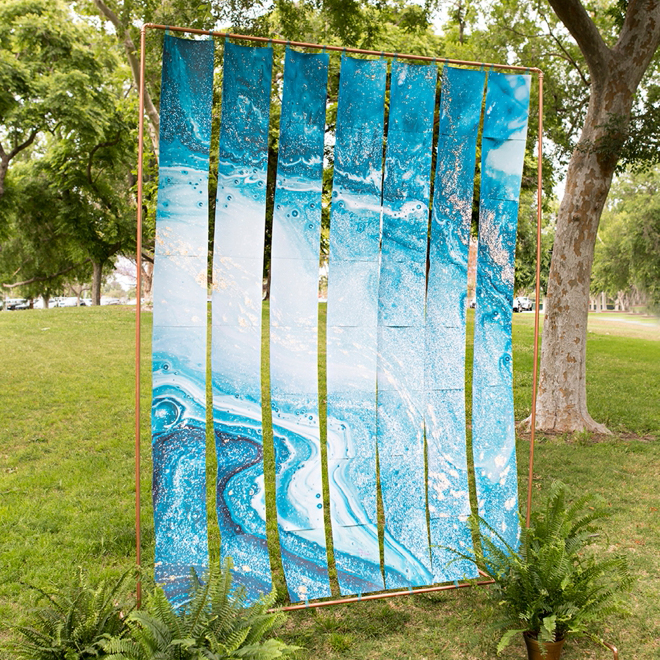
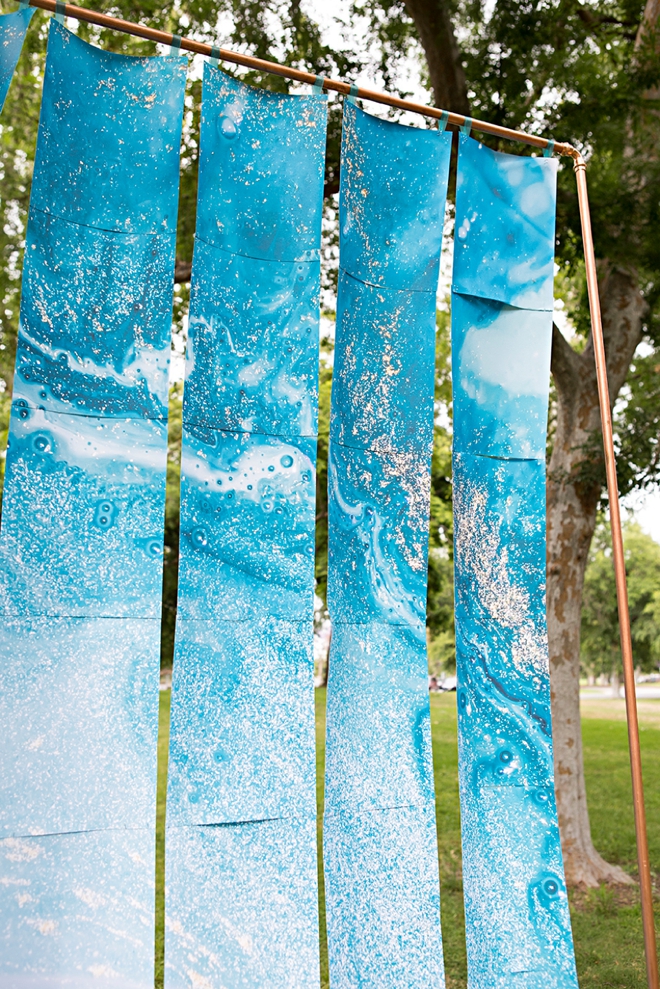
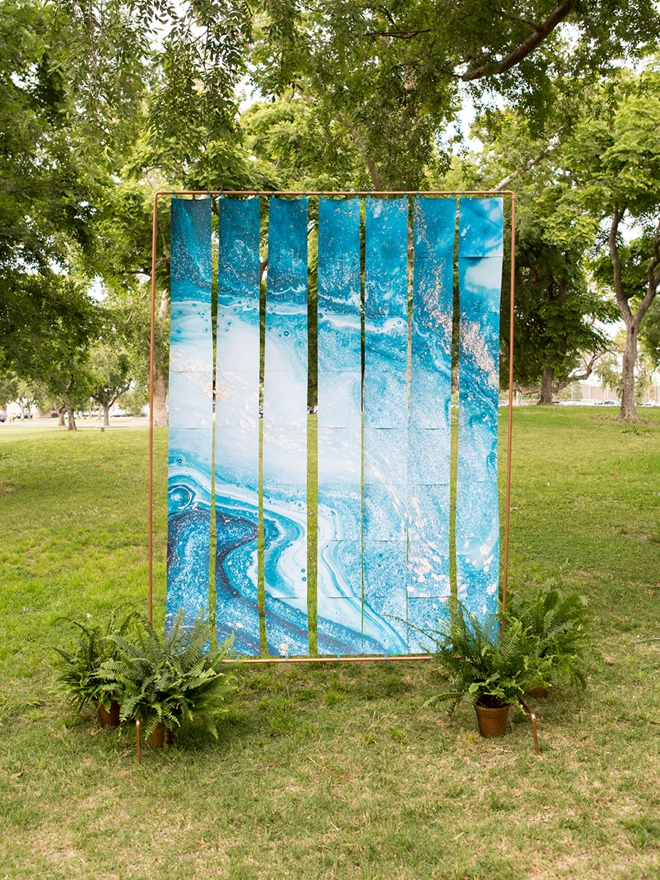
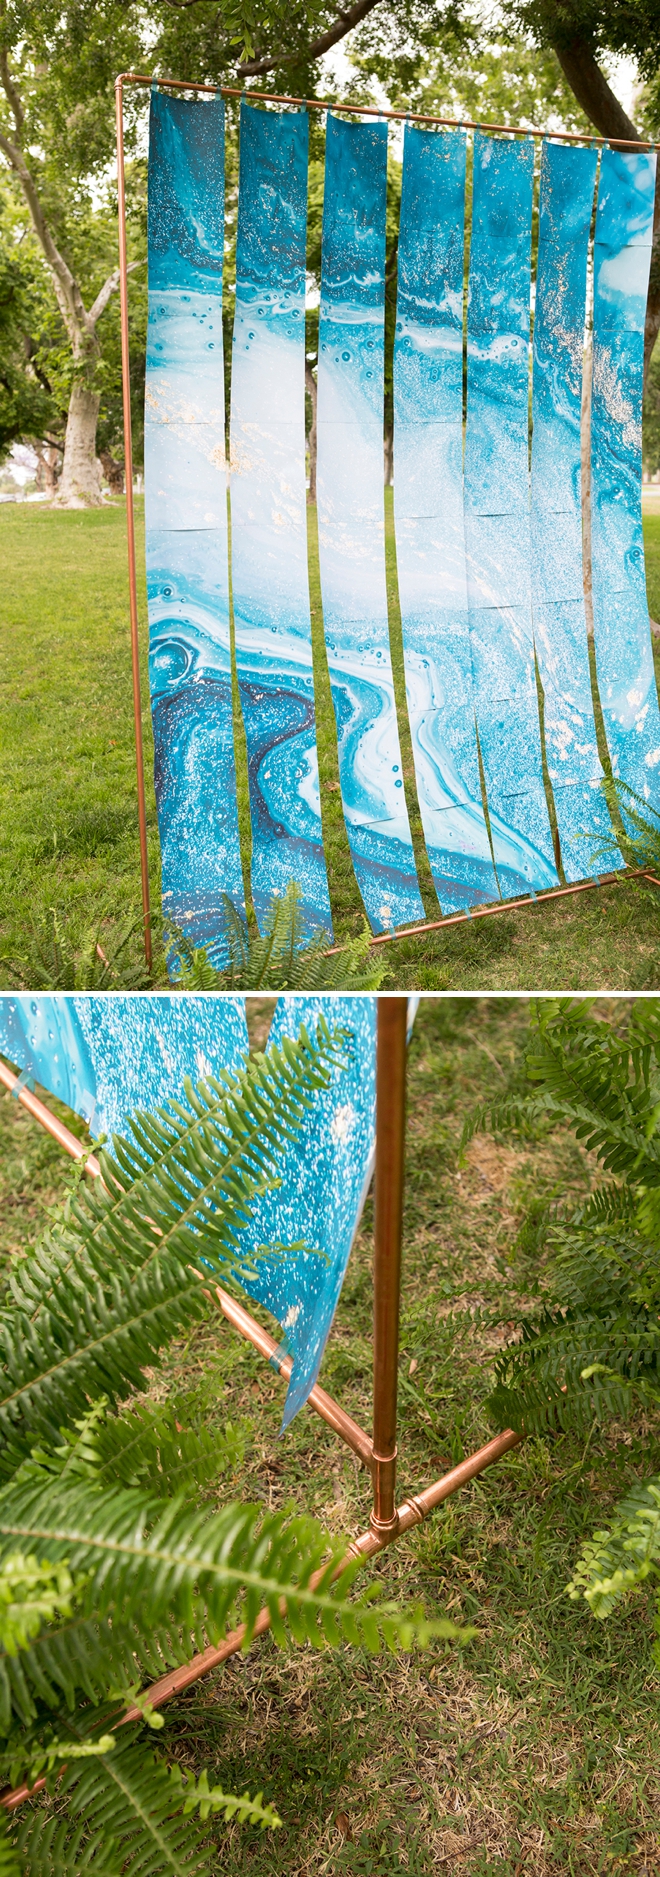
Hang Off Copper Pipes
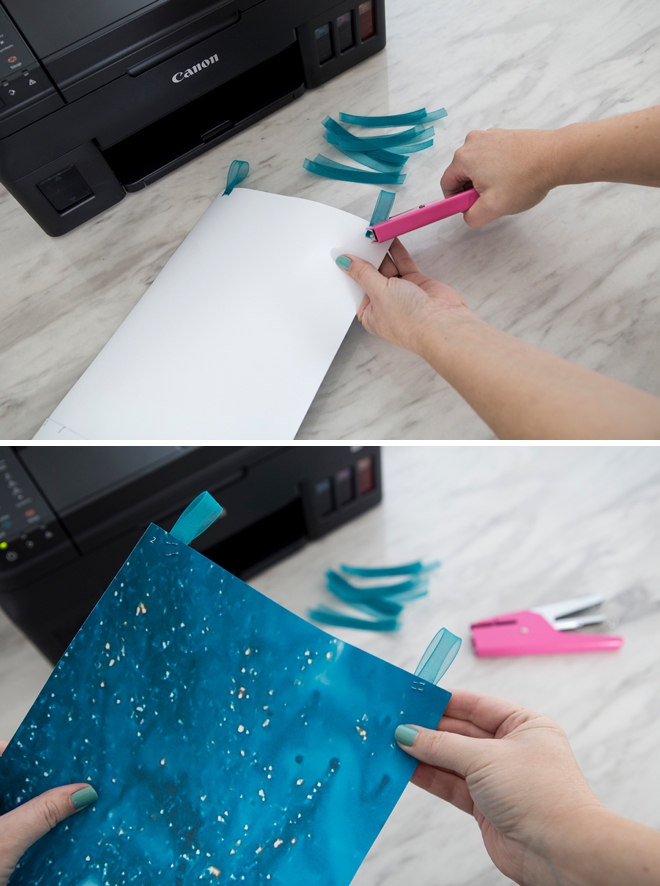
This next idea is to hang the design off a copper pipe backdrop stand. Instead of making one giant sheet of paper and connecting them all, I stapled the sheets together in long strips knowing that wind could be an issue. This way the wind can gently pass through the separations in the strips. Line up each sheet and add a few mini staples to secure.
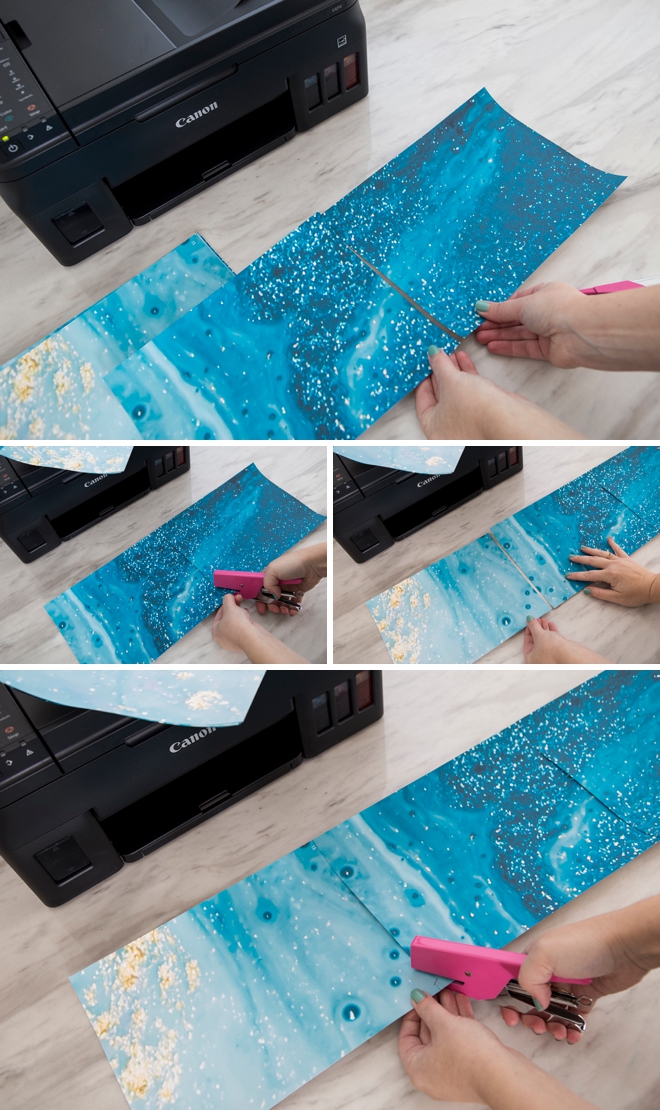
Ribbon Loops
Staple 4″ ribbon loops to the top and bottom of each strip to hang off the pipe display. Originally I only added one loop to the bottom of the strips but during setup I realized that two loops would have been better, so that is what I’m recommending.
A Stunning Display
This copper pipe display would be a gorgeous backdrop for saying your I Do’s! Add some greenery like we did with the simple ferns or some large decor lanterns or vases and you’ll be good to go. The design is the star and no one will believe that you printed it at home!
Pipe Stand Construction
Similar to this pipe stand we made a few months back, this display was just made a bit larger. We used 1/2″ pipe and had all the pieces cut at the hardware store. The bottom pieces of the stand were 1.5′ on each side with 6″ feet that we hammered into the dirt, which worked wonderfully for stability.
Overall Size: 5.5′ Wide by 8′ Tall
DIY TUTORIAL SPONSORED BY:
Canon U.S.A., Inc. prides itself on allowing consumers to create and preserve beautiful imagery, from capture to print. With wireless technology and seamless printing capabilities, you can print your photos and printables with precision and ease.


As with all our DIY tutorials, if you create one of our projects please send us a picture – We Love Seeing Your Creativity! If you use Instagram or Twitter please use the hashtag #SomethingTurquoiseDIY and it will show up on our Get Social page. Happy Crafting!
DIY Tutorial Credits
Photography + DIY Tutorial: Jen Causey of Something Turquoise // Canon PIXMA G4210 Wireless MegaTank All-In-One Printer: courtesy of Canon // 8.5″ x 11″ White Cardstock: Amazon // Copper Pipe Backdrop Holder: DIY, simple instructions in the tutorial // Mini Stapler: Amazon // Nail Polish: OPI – Withstands the Test of Thyme
Shop The Supplies:
Find the supplies you’ll need for this project from our affiliate links below:

Comments