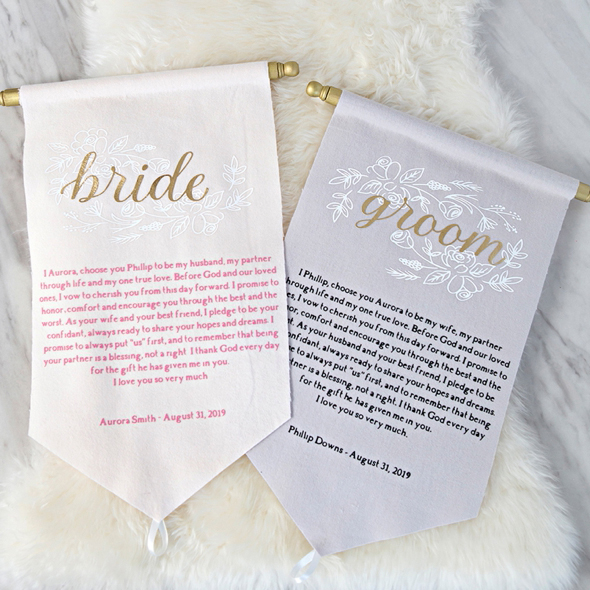

DIY Wedding Vow Scrolls With Cricut & Martha Stewart
-Sponsored Post-
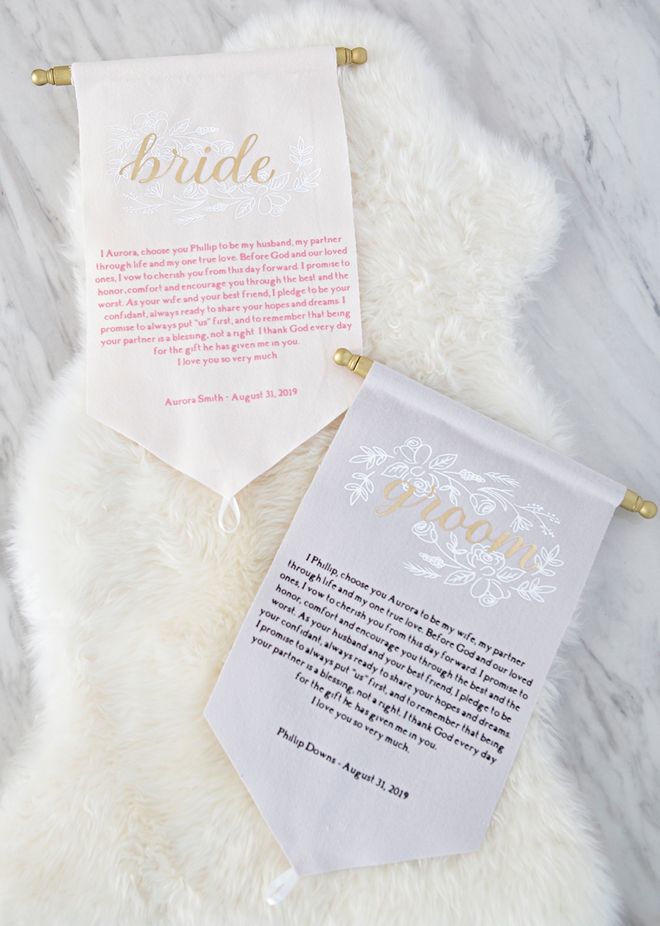
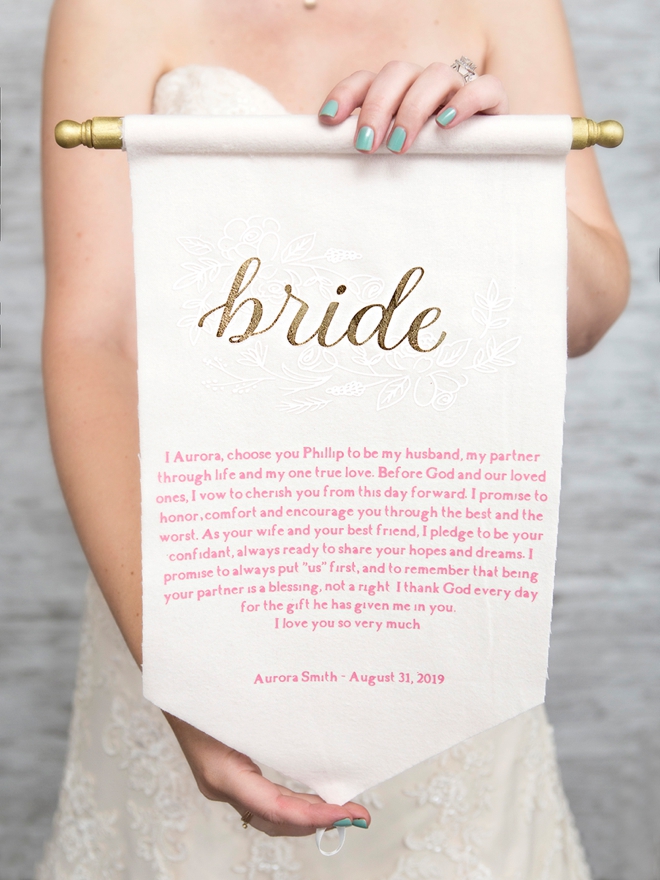
It’s not every day that I can get this jazzed about new craft products! I’m honored to share that Martha Stewart has just released a brand new line of wedding-specific Cricut materials at Michaels!!! Including new wedding Cricut projects in Design Space! Yaaassss! One of the most exciting elements is that the packages, be it iron-on, vinyl, or cardstock – are all mixed materials! Which is exactly what we need for weddings! A little of this and a little of that making creating all your wedding projects super easy… and it wouldn’t be Martha without gorgeous color schemes! Today I’m using the mixed materials iron-on package called Gala Rose to create these fabulous wedding vow scrolls! The package includes gold foil, black, white, and pink iron-on all in one tube, meaning you don’t have to buy 4-5 rolls and have lots of leftover materials after one simple project. For this design, we’re “layering” iron-on so make sure to bank this technique for future personalization projects!

Martha Stewart EasyPress 2
These vow scrolls are made with iron-on and I’m super excited because I’ll be sharing how to layer iron-on today! I’m of course using my Martha Stewart EasyPress 2 for this project because I wouldn’t use an iron again for an iron-on project unless my life depended on it. The advanced heat plate design with it’s ceramic-coated surface gives you professional iron-on results in 60 seconds or less. The entire plate heats up to the exact temperature you set it to, unlike an iron that is the hottest in the center. The precise temperature control lets you set the exact heat and time for your different projects. Follow this link to find the interactive heat setting guide to find the exact heat setting for your project materials!

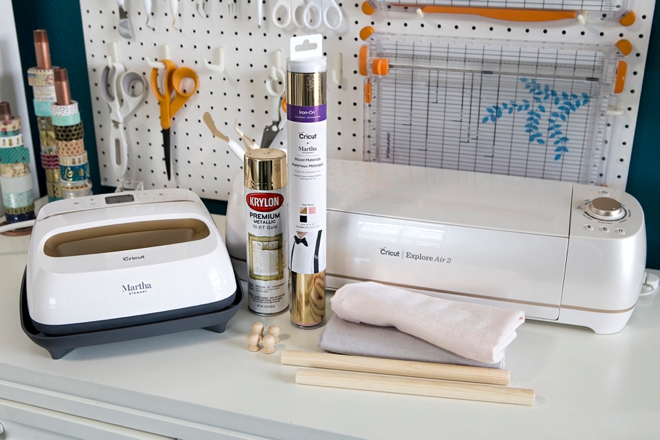
SUPPLIES:
- Cricut® Explore Air™ 2 Special Edition, Martha Stewart Machine Bundle
- Cricut® EasyPress™ 2 Martha Stewart Edition Vanilla, 9″ x 9″
- Cricut® Martha Stewart Mixed Materials Iron-on Wedding Collection, Gala Rose
- Cricut BrightPad
- Pretty Flannel Fabric
- 5/8” x 10” Wooden Dowels
- 1/2” Wooden Dowel Caps
- Spray Paint
- Hot Glue Gun
- Ribbon
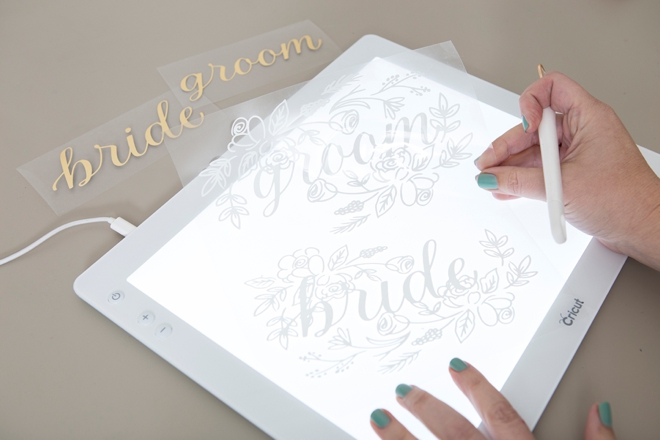
Create In Design Space
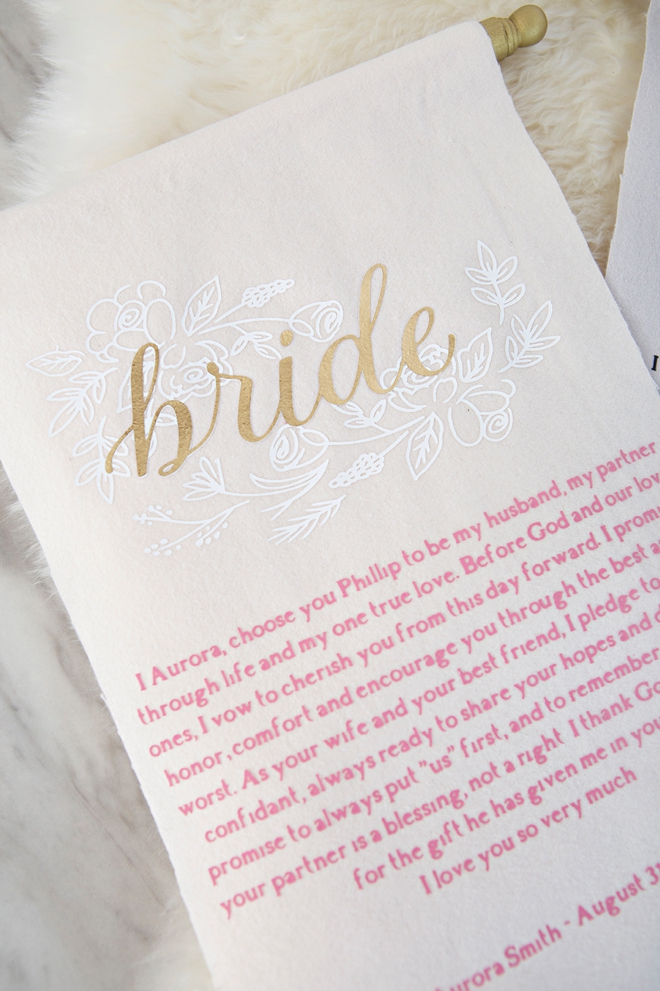
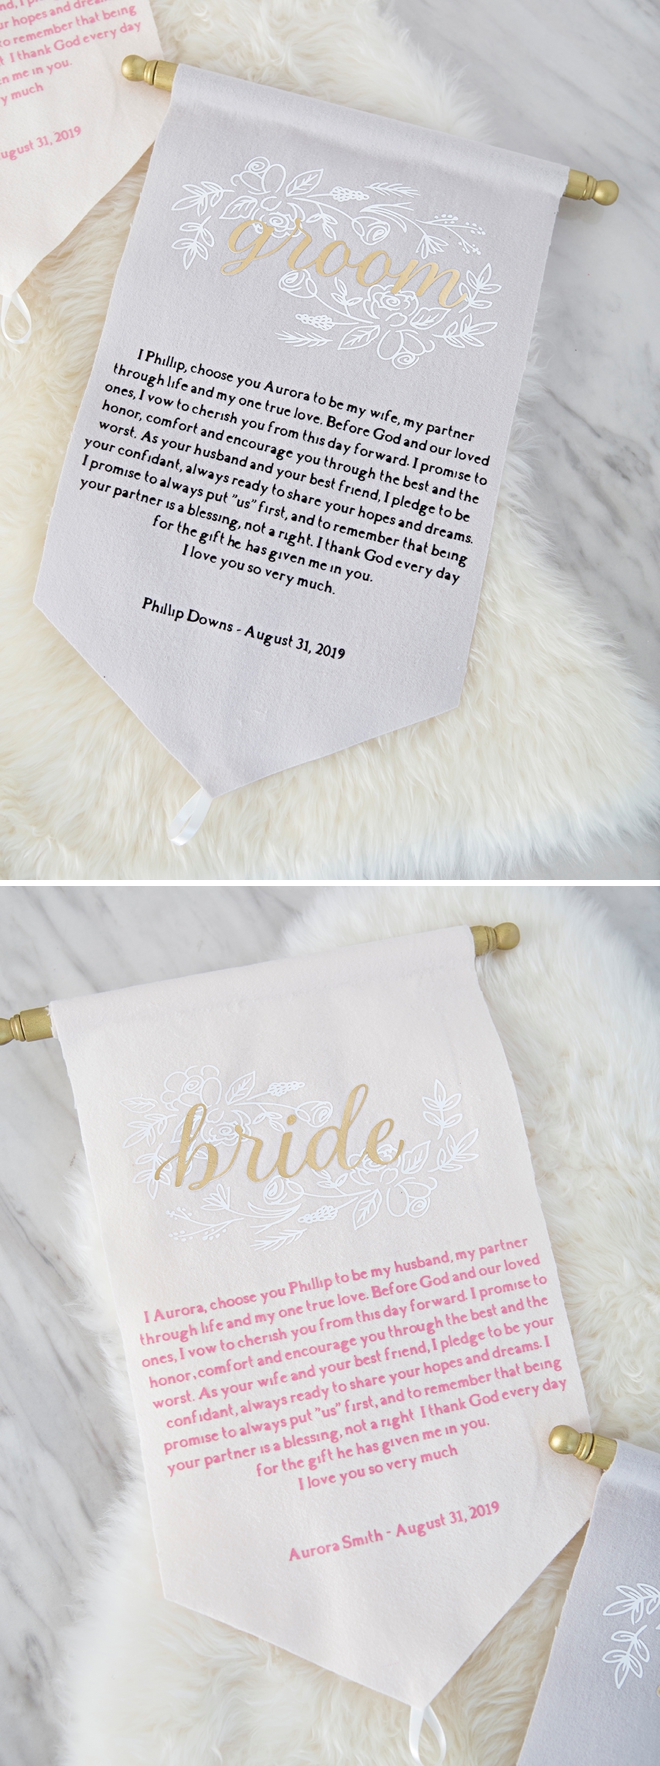
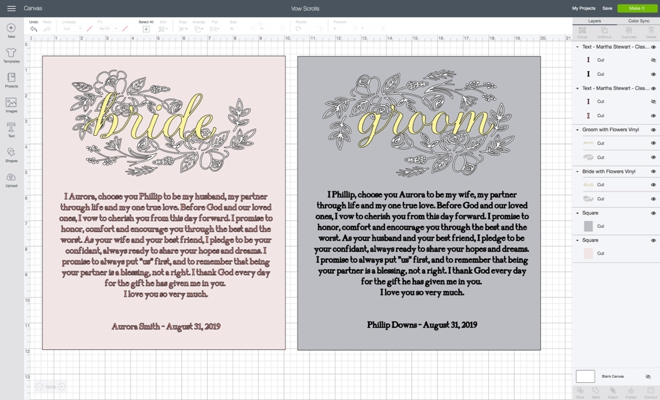
The first step is to login into Design Space and start designing your vow scrolls. I started by adding rectangles the size of the scrolls and made them same color as the fabric. I’m not going to cut these squares, they are just holding the place of the fabric while I create the design. I fell in love with the floral bride and groom designs from Martha Stewarts new wedding collection and was excited to use them for this project.
- Bride: Martha Stewart Wedding File #M92D5FFE
- Groom: Martha Stewart Wedding File #M92D6116
For the vows I added a text box, clicked the “center” text option and started typing. Every time a line reached the edge of the fabric square I hit enter to start a new line. This large amount of text will sometimes bog down Design Space, so just take it slow.
Let Your Cricut Work It’s Magic
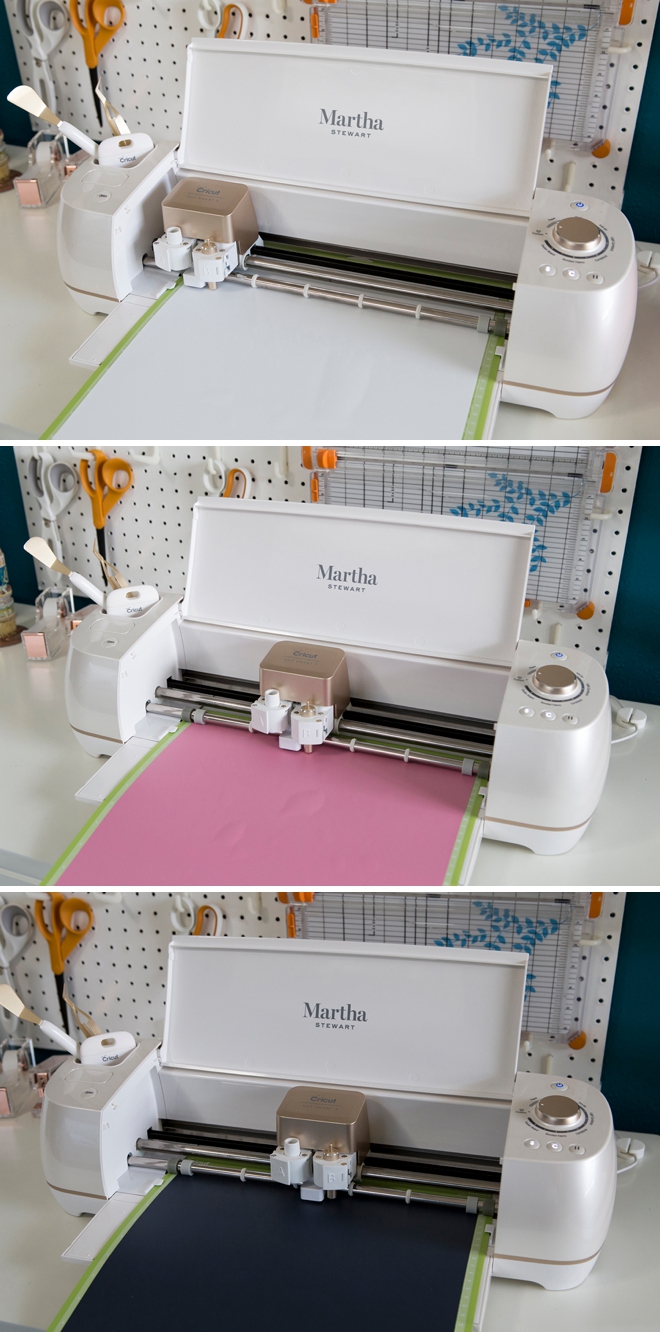
Cut out all the elements for your vow scrolls. You ALWAYS need to click the “mirror-image” button for iron-on projects, otherwise your lettering will be backwards.
This step will take a while, especially the vow part. Total cut time for me was about an hour and fifteen minutes.
Create The Scroll
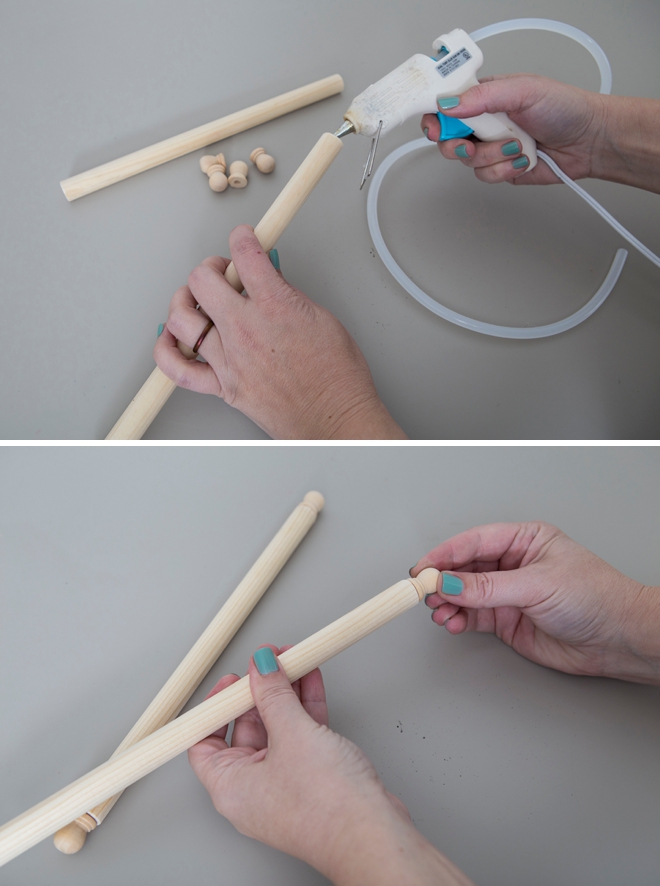
While your Cricut is cutting, you can create the scrolls. I cut a 5/8″ wooden dowel down to 10″ long and hot glued cute 1/2″ dowel caps on each end as a little decoration.
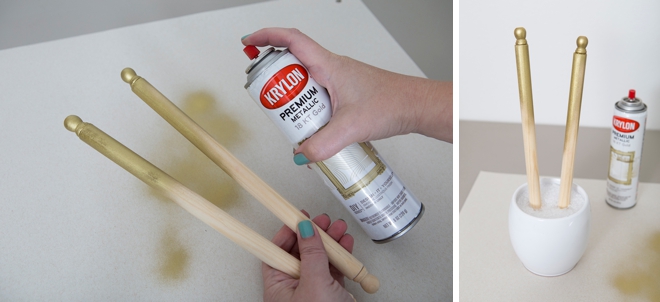
Then paint the scrolls. I spray painted half and then placed them in a cup of rice to hold them while they dried, then painted the other half.
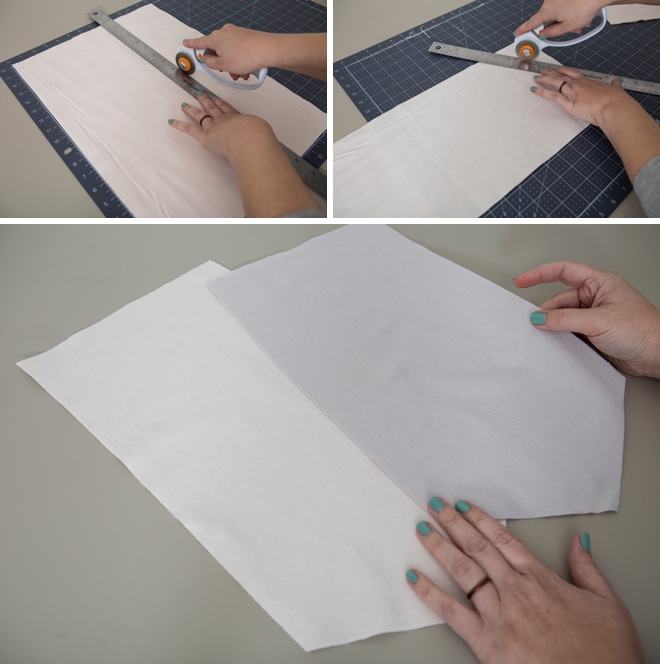
Cut The Fabric
For the scroll fabric I used flannel because it’s soft, thick, and comes in loads of pretty pastel colors. It also accepts iron-on beautifully. I used a rotary cutter on my large Cricut cutting mat to cut the scroll fabric to 9″ x 18″.
Fabric Size: 9″ x 18″
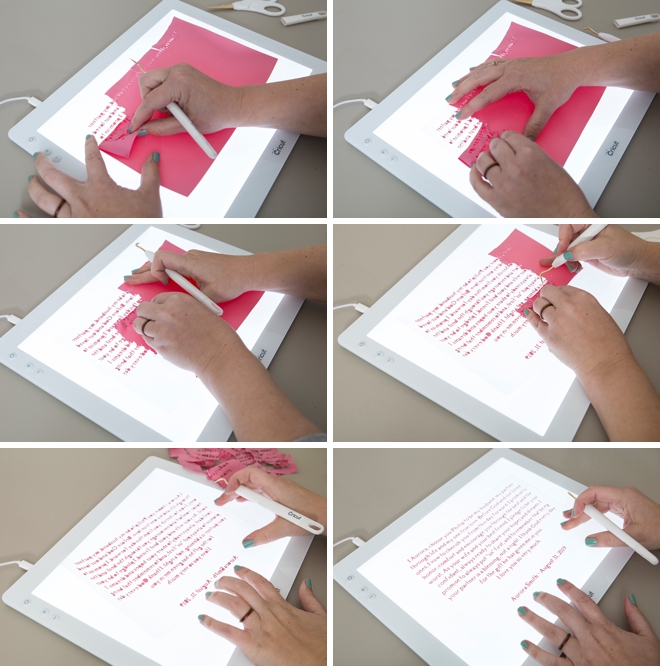
Weed, Weed, Weed
Weed, (aka. remove) all the excess iron-on material that isn’t a part of your design. Using the Cricut weeding tools makes the removal of intricate pieces super easy. For this project, the weeding will take the longest, it took me about 2 hours to weed all the layers, so just take your time and enjoy.
Cricut BrightPad
Because this is such an intricate weeding project, I’m using my Cricut BrightPad to help me out. The light from underneath the cut file makes it way easier to see what you need to remove and what you don’t.
For the vow portion especially, it’s important to take your time. Go slow and work in sections so that you don’t loose a letter or a punctuation!
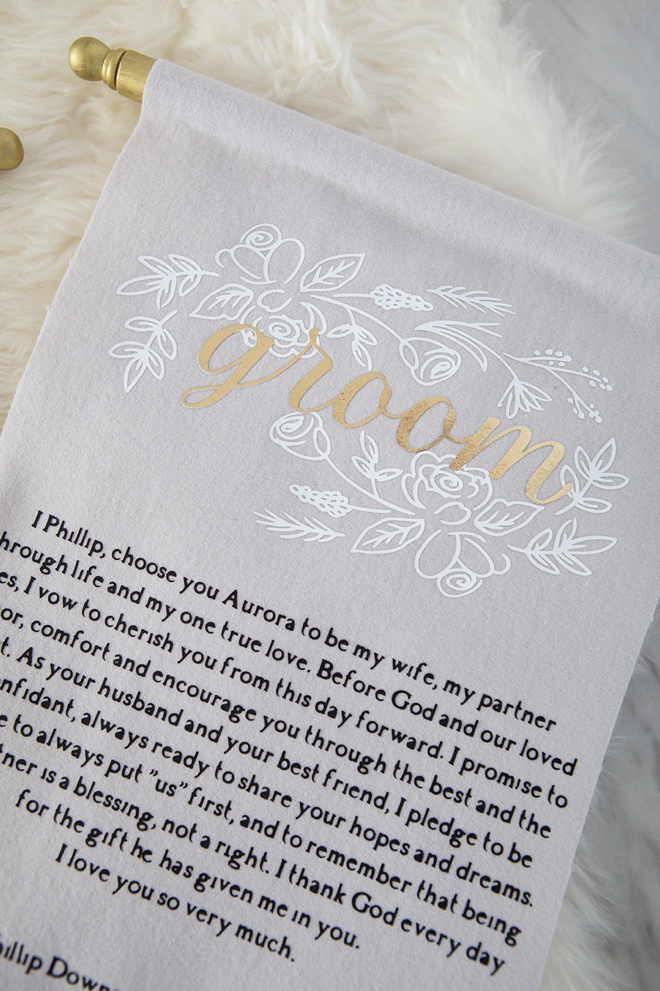
How To Layer Iron-on
The bride and groom design file is the perfect file to learn how to layer iron-on with! The floral design actually also cuts the bride and groom lettering so you know EXACTLY where the additional cut-out is supposed to go! Here are the steps:
- Layout your full design on the fabric, adjust until you’re happy with the placement.
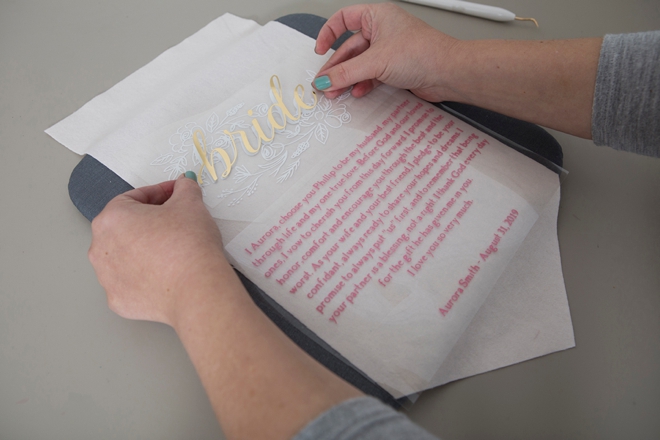
- Iron the floral design first, remove the clear backing and save.

- Add the bride/groom cut-out on top of the first design, lined up with the lettering. Then place the clear backing from the floral design on top to cover not only the wording but all of the floral design as well. That’s the most important part, the clear backing will protect the first iron-on design.
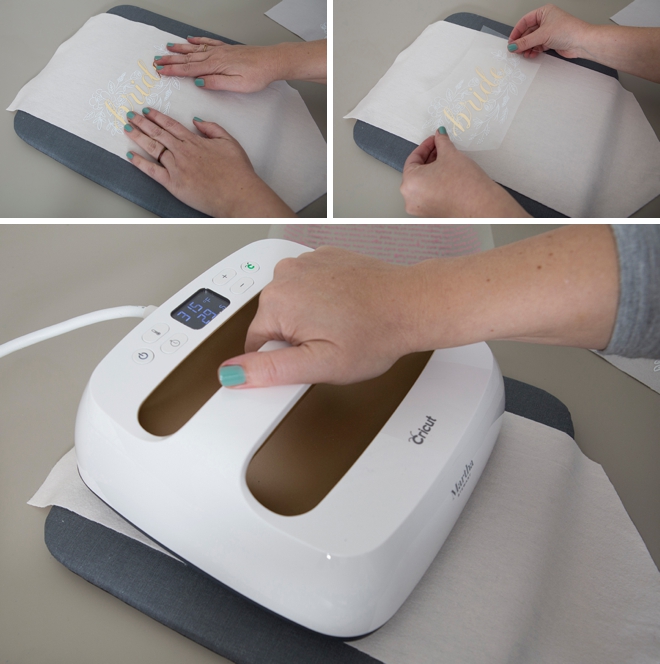
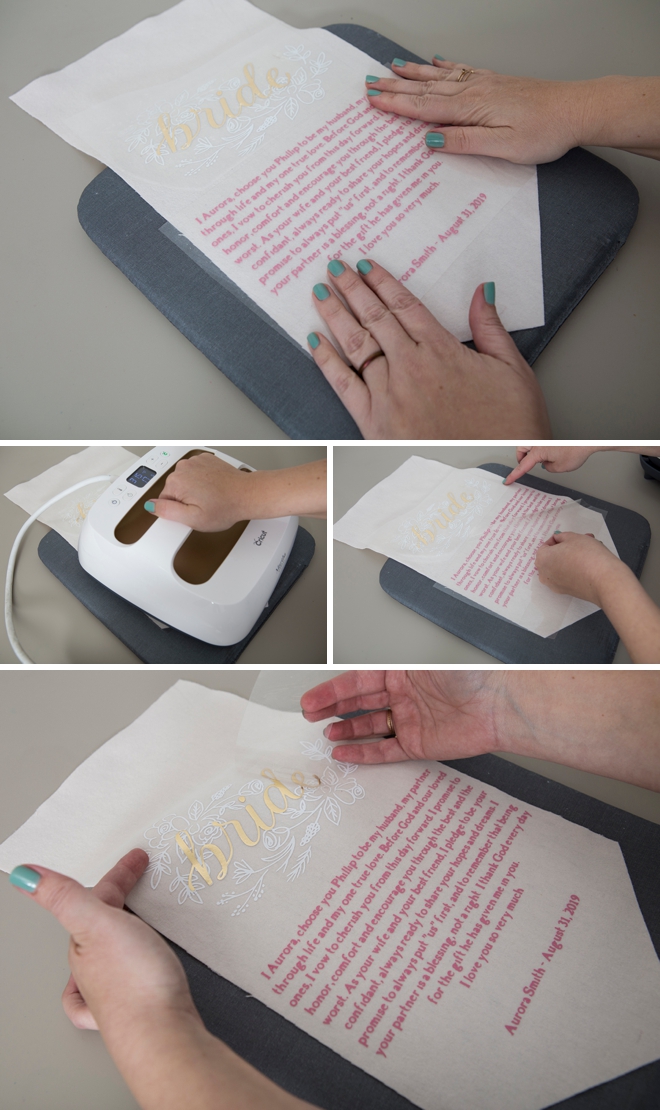
- Since the wording is foil, and foil is a “cold-peel” I left the clear backing on the design while I ironed the vow wording too, just to be safe in case the EasyPress touched the other design.
- Remove all clear backing layers to reveal your gorgeous, custom vow scrolls!
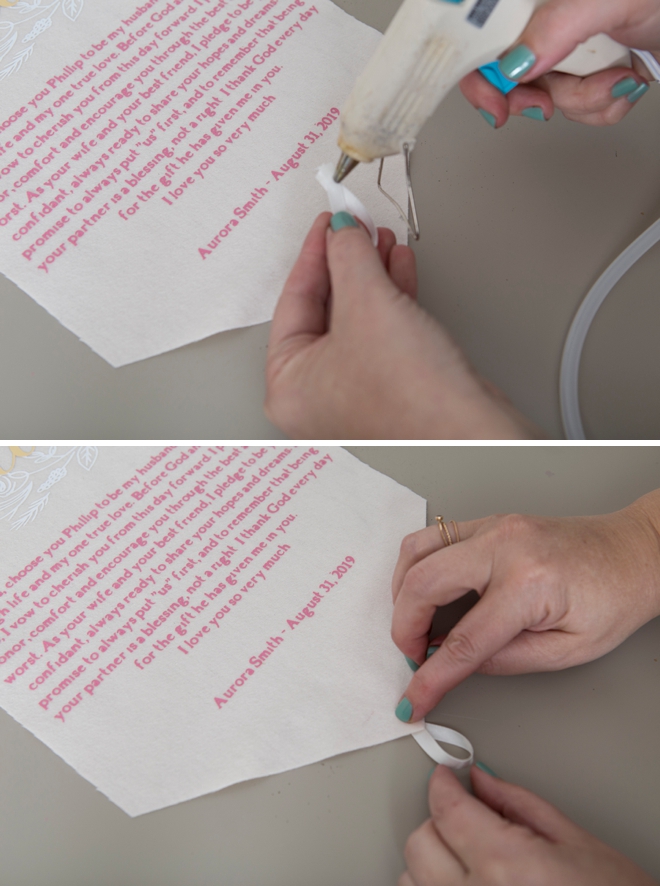
Add A Little Loop
Fold a 3″ piece of ribbon in half and hot glue to add a little loop you can hold at the end of the scroll.
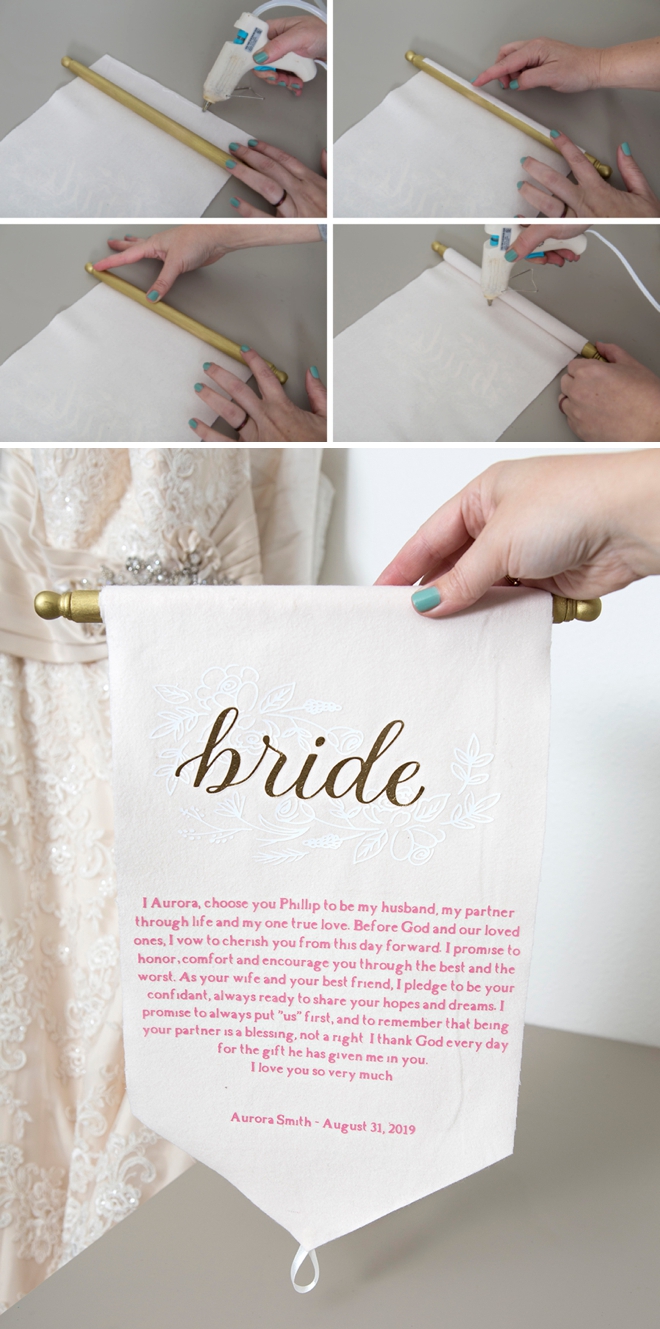
Add The Scroll
Now that the spray painted scroll has dried, we’ll glue it to the fabric. Position the scroll in the center of the fabric at the top on the backside. Add a line of hot glue to the top edge of the fabric and roll the scroll into it, hold until cool. Then roll it up and add another line of glue along the fabric and roll the scroll into that too. Keep rolling and gluing until the scroll lands about 1.5″ from the floral design.
Endless Personalization Options
If you’ve been on the fence about getting a Cricut, or you need a gentle nudge to finally pull the trigger – our projects are it! Seriously, the sky is the limit when it comes to what you can make for your wedding with the Cricut Explore or the Cricut Maker. From amazing vow scrolls like these to an entire wedding bouquet made from felt and everything in between. It will be your number one wedding crafting tool and after your wedding, you will find loads of ways to personalize your new home, make fabulous gifts and so much more!
DIY Tutorial Sponsored By:

Cricut is a world-class leader in personal electronic cutting machines that has enabled people to achieve their creative best for over 50 years. Today, millions of people use Cricut products to create unique projects, and they focus on enhancing lives with this power of creativity. Let Cricut help you take your wedding personalization and project creativity to the next level!
As with all our DIY tutorials, if you create one of our projects please send us a picture – We Love Seeing Your Creativity! If you use Instagram or Twitter please use the hashtag #SomethingTurquoiseDIY and it will show up on our Get Social page. Happy Crafting!
DIY Tutorial Credits
Photography + DIY Tutorial: Jen Causey of Something Turquoise // Cricut® Explore Air™ 2 Special Edition, Martha Stewart Machine Bundle + Supplies: courtesy of Cricut // 5/8″ Dowels: Amazon // 1/2″ Dowel Caps: Amazon // 18K Gold Spray Paint: Amazon // Flannel: JoAnn // Nail Polish: OPI – Withstands the Test of Thyme
Shop The Supplies:
Find the supplies you’ll need for this project from our affiliate links below:

Comments