
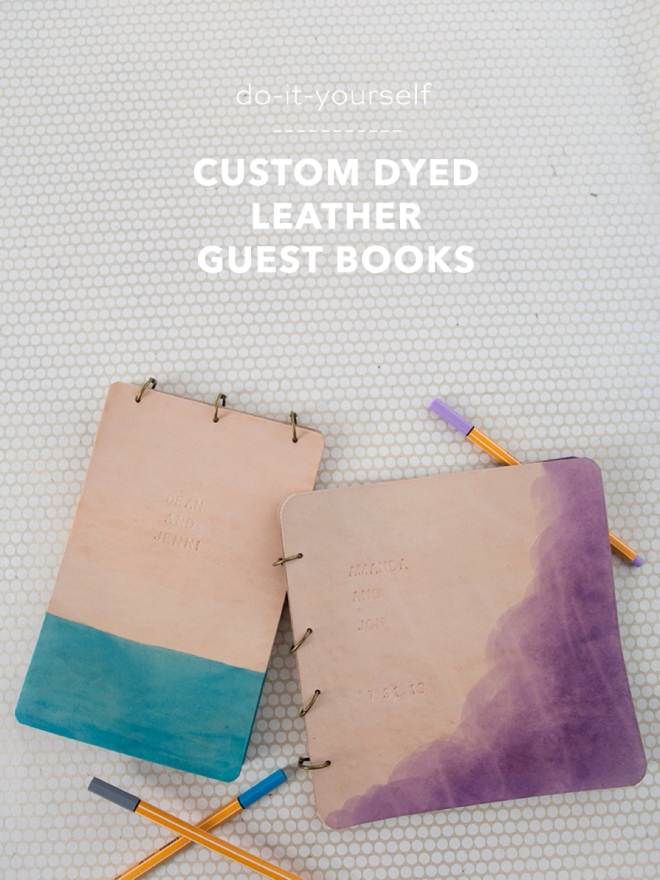
How To Make Leather Guest Books With Rit Dye
-Sponsored Post-
Every time I use Rit Dye to color something I thoroughly enjoy myself. Traditionally I always go for paint but Rit is creeping in on that feeling because it’s incredibly easy to use and just so darn versatile. Today I’m sharing how to create your very own leather guest book, hand-dyed using three different techniques: a dip, a wipe, and a splash. We’re also dying the paper inside for an overall bohemian feel that will impress your guests and be a very special keepsake to read along the years ahead.
Create Something Truly Custom
Many of our creative brides struggle to find something that is 100% “them”. They don’t want a store-bought thing that will work, they want something special and unique. Something truly custom, which is what we’re creating today with these leather guest books. Rit Dye offers you endless color options within their Color Formula Library. Almost any color under the sun can be created with just a teaspoon of that color and a tablespoon of this one…
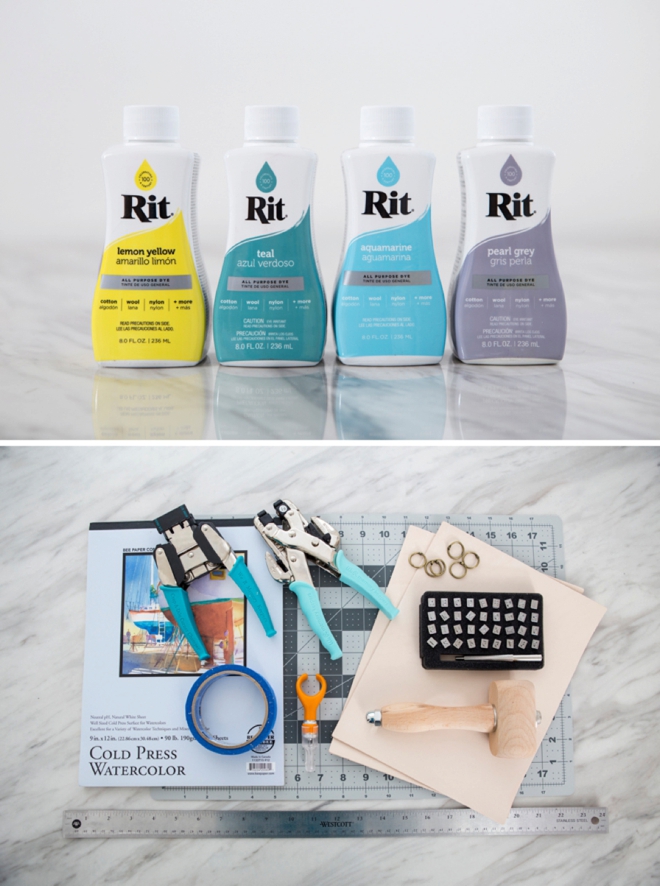
SUPPLIES:
- Rit All-Purpose Dye, in your choice of colors!
- 3-4oz Tooling Leather
- Heavy Duty Hole Punch
- Heavy Duty Corner Rounder
- Watercolor Paper
- 3/4″ Binder Rings
- Alphabet Leather Stamps
- Wooden Mallet
- Resolene
- Paint Brush
- Cutting Mat
- Craft Knife
- Gloves
- Iron
Make Your Own Guest Book
Here we’re opting to make our own guest book from scratch, but you don’t have to! You can easily find a special leather notebook or guest book to dye yourself. Etsy is a great place to look for something like that!
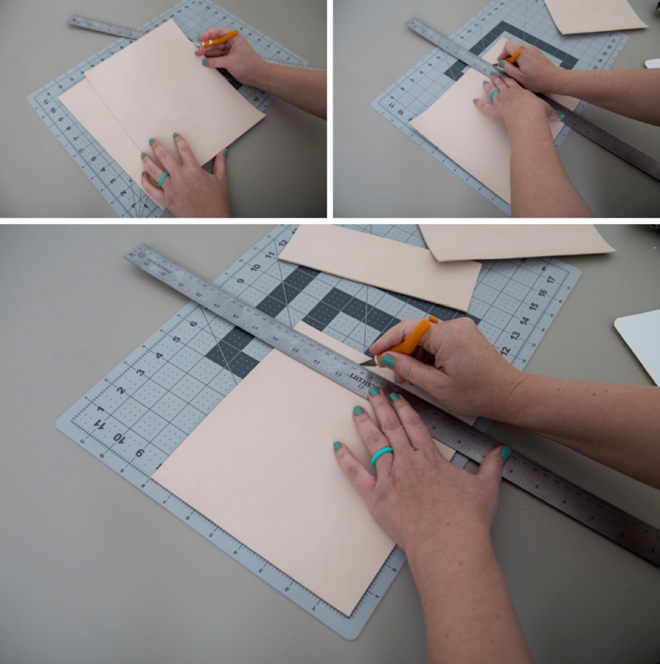
Cut The Leather
Using a craft knife and cutting mat, cut your leather guest book cover. I created three different shapes and sizes. Pick a size and shape that gets you excited!
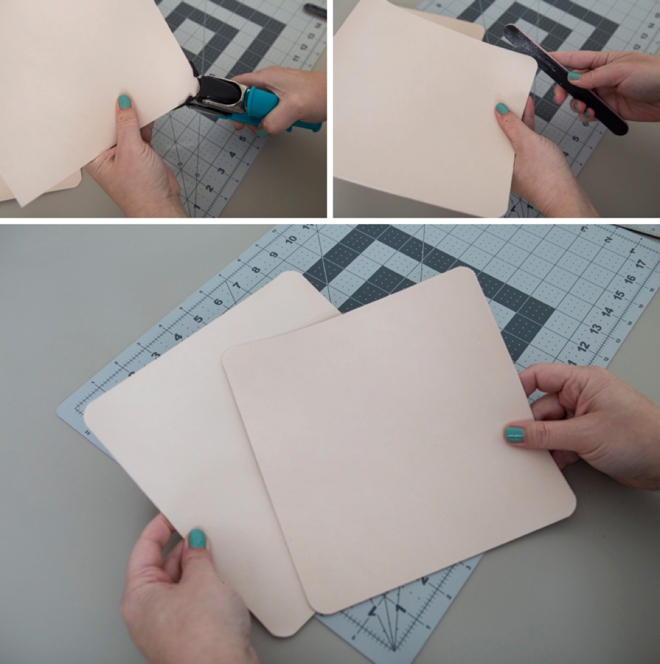
Round + Smooth
If you’d like, use a heavy duty corner rounder punch like this Corner Chomper to round the edges of the leather. If there are rough edges, you can sand them with a nail file.
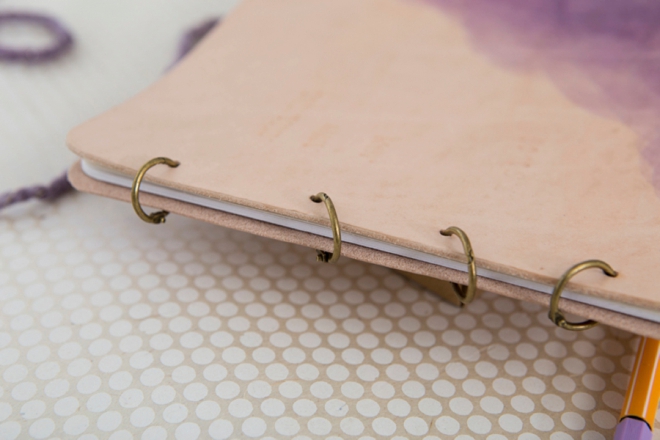
Add Holes
Where you add holes and how many are totally up to you. Mark them using the ruler on your cutting mat and the craft knife. Then punch using a heavy duty punch like the Crop a Dile. You can see all three sizes I did here.
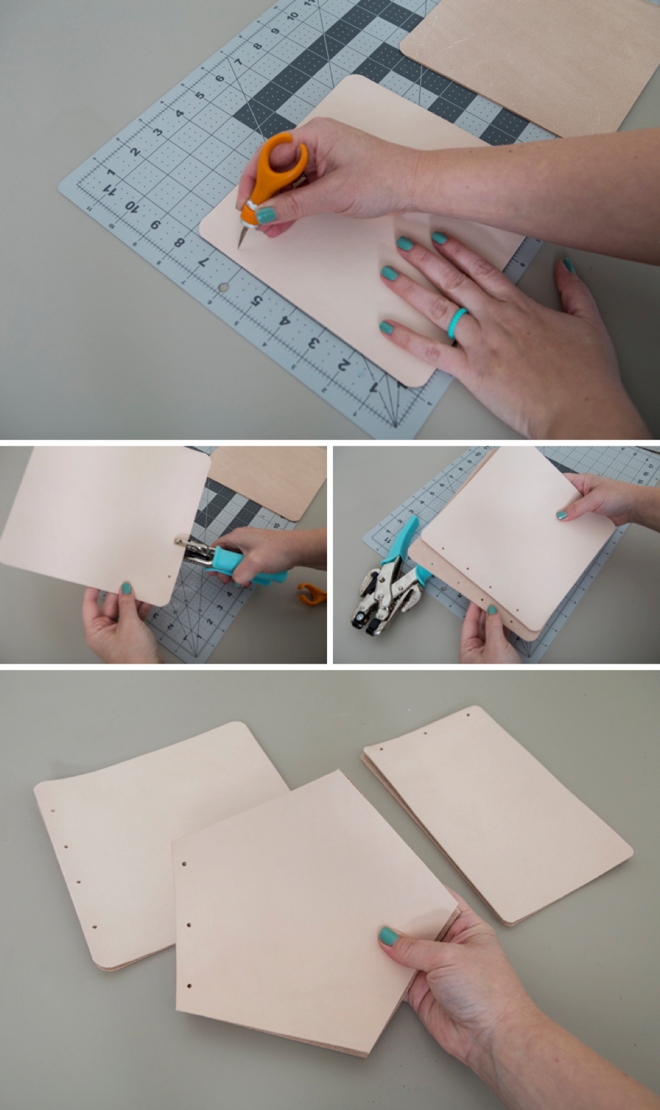
Cut The Paper
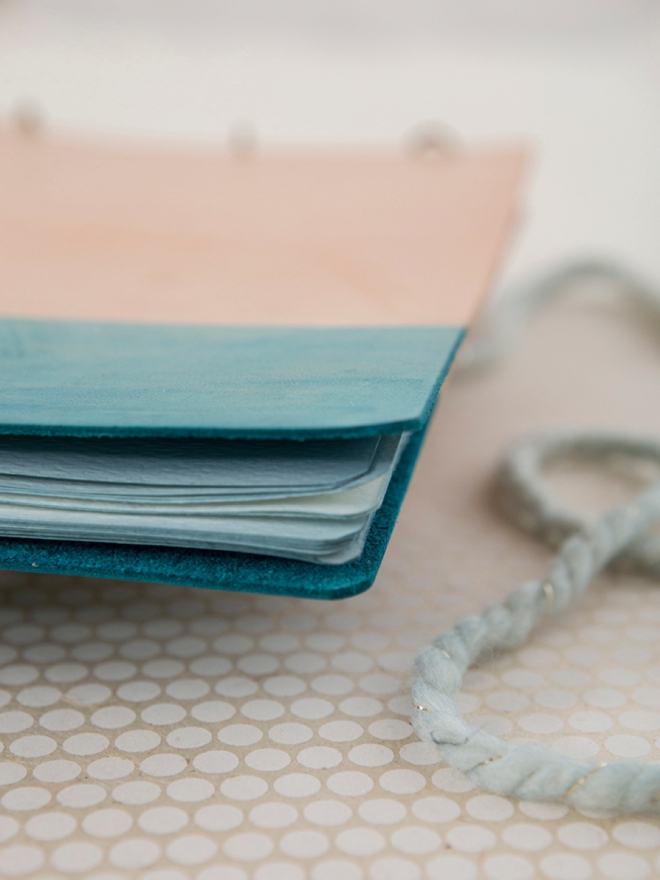
You’ll want to add about 20 sheets of paper to your guest book. Maybe less if you’re having a small wedding and maybe more if your wedding is going to be huge. Cut your pages using the craft knife and cutting mat, roughly 1/4″ smaller than the leather. Punch holes to match.
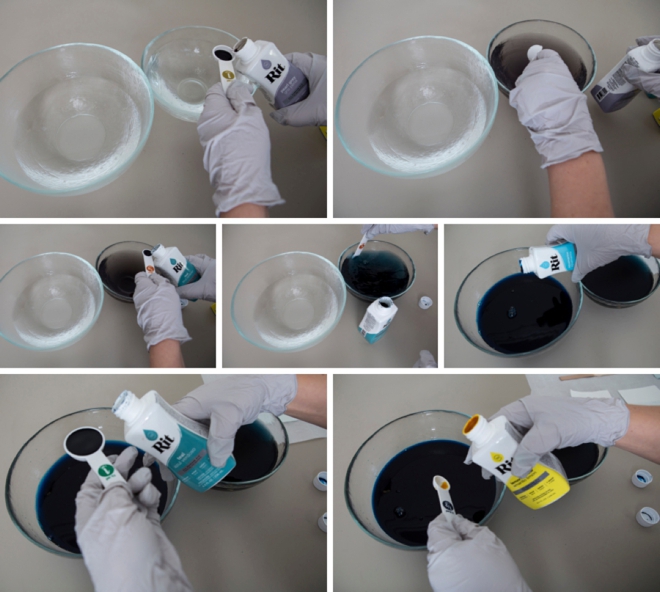
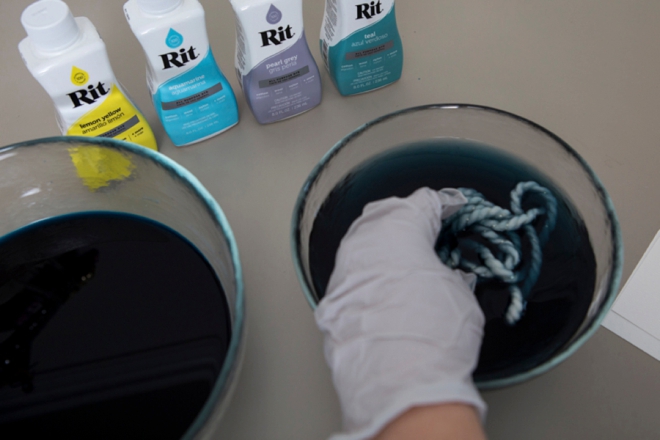
Dye Bath
To dye the leather and paper I created 4 different dye baths in total using the hottest water from my tap, large glass bowls, and 4 cups of water for each.
Rit Dye Color Formulas
- Icy Morn, pale turquoise. Mixed in 4 cups hot water.
- Jade Green, vibrant teal. Mixed half the batch in 4 cups hot water.
- Cosmic Sky, pale lavender. Mixed in 4 cups of hot water.
- Persian Violet, vibrant purple. Mixed a double batch in 4 cups of hot water.
Test Swatches
Make sure to do test strips of both fabric and leather. Test different times so that you can find your desired color. Remember, you can always add more dye to the water if the color is too light and if the color is too dark – just add more water!

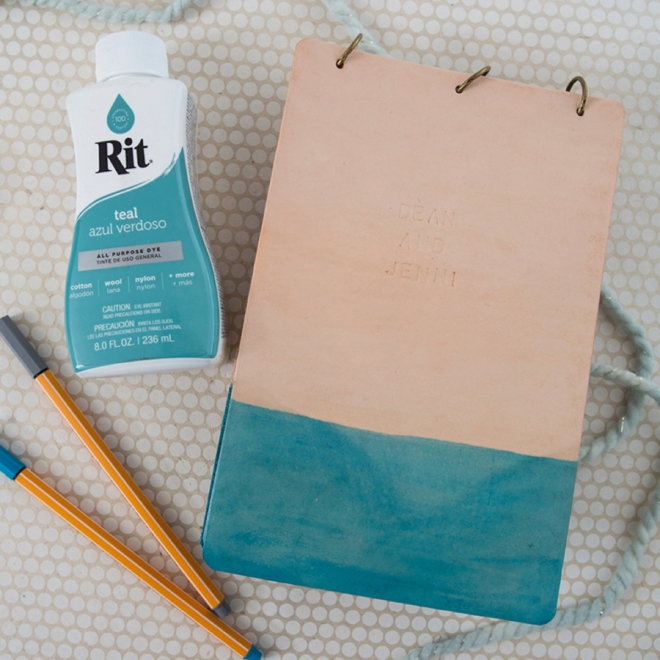
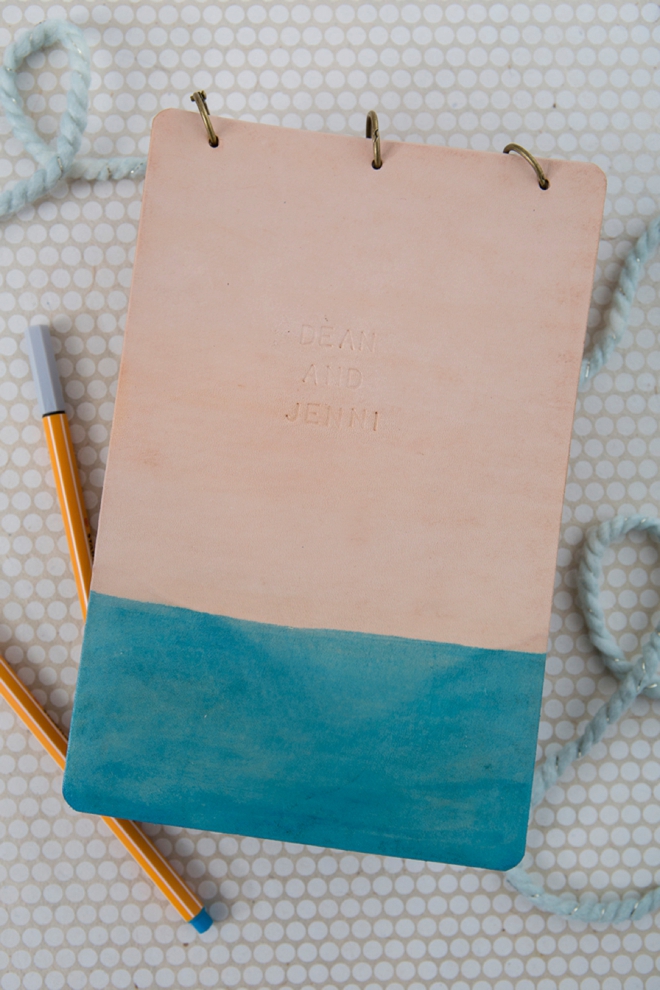
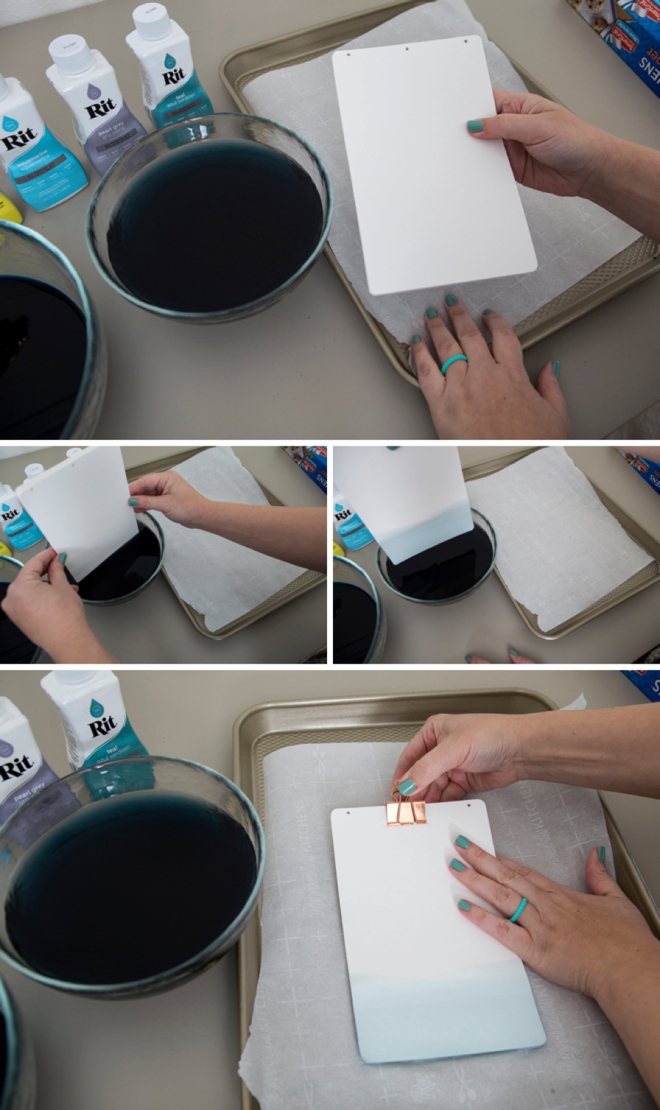
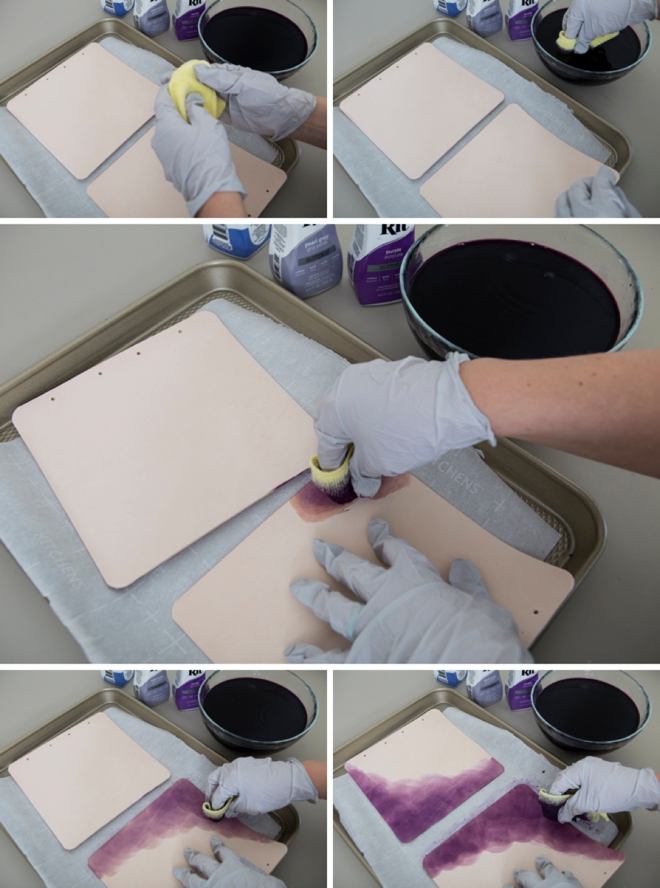
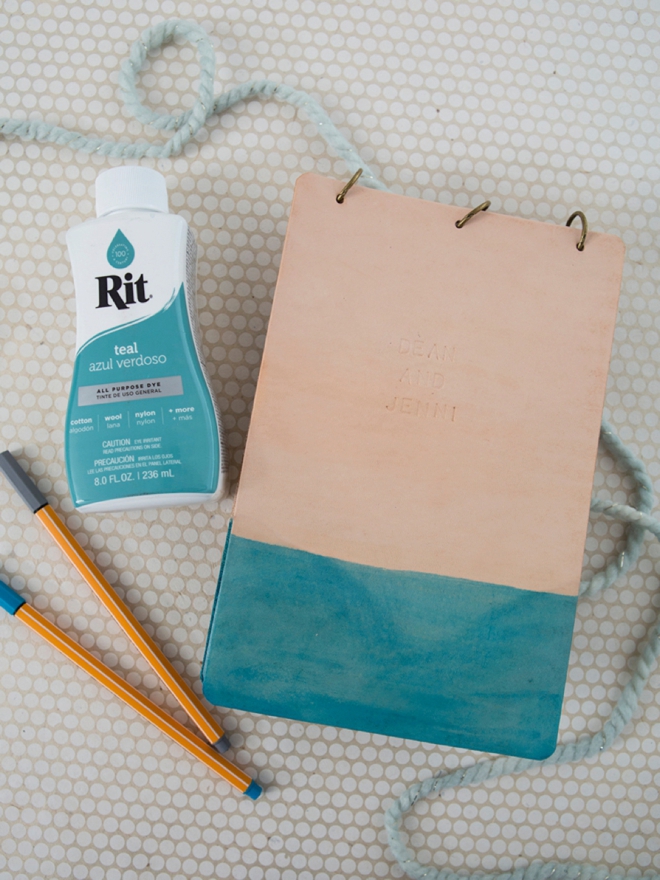
Dip It
For the dip method I submerged the leather for 30 seconds in the Jade Green, holding both pieces together to get the same dip height on front and back. Then I let them dry on parchment paper.

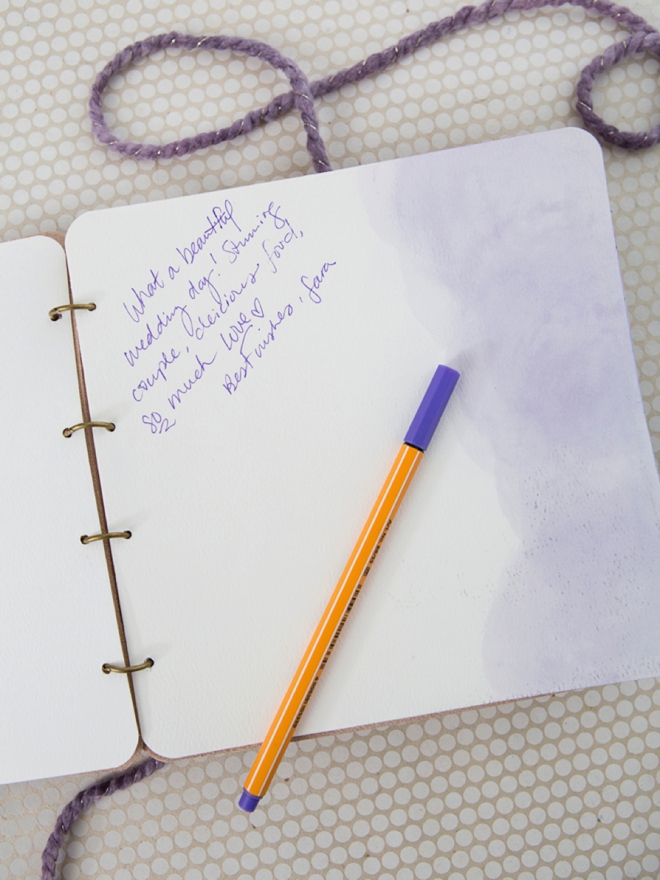
I dipped the watercolor paper into the Icy Morn for 45 seconds and held all 20 sheets at the same time. Making sure to move the paper around a bit and swirl it in the water. I clipped them together and hung them outside to drip dry. If you use regular paper or cardstock and not watercolor paper, you won’t be able to submerge it as long and if you do it might warp or fall apart.
I also dyed a little bit of cream colored yarn in the Icy Morn and Cosmic Sky for fun!
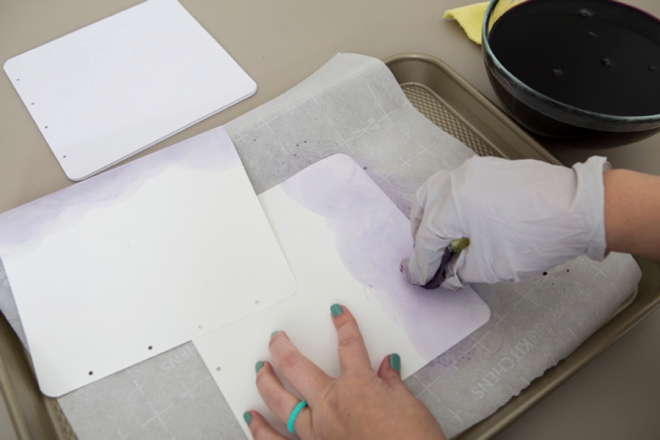
Wipe It
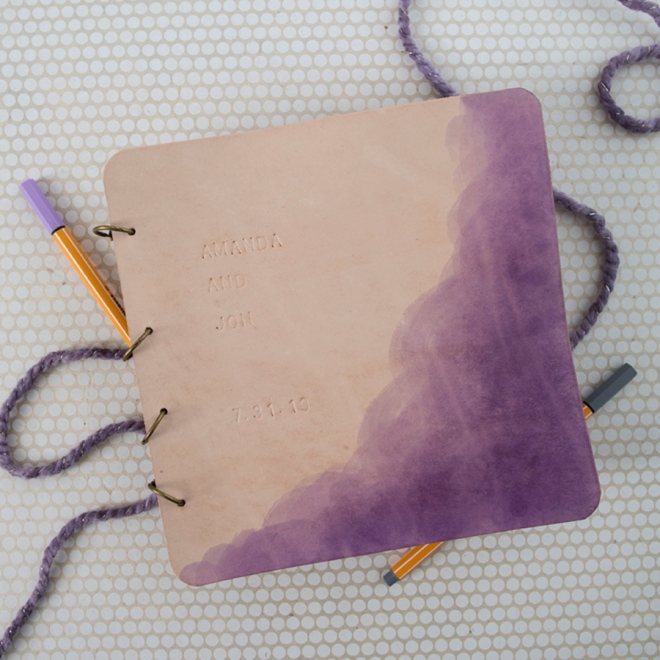
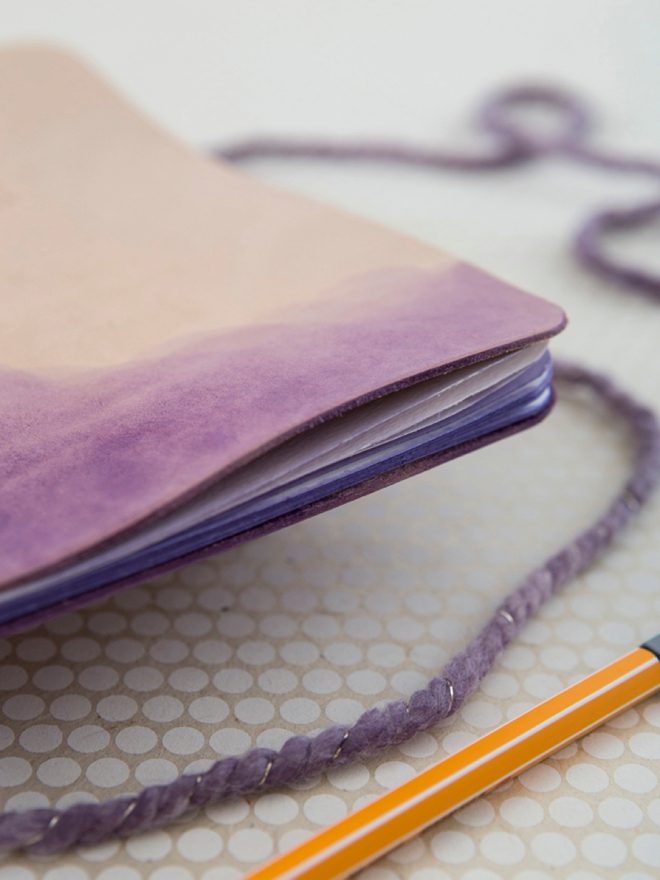
For the wipe method I used a small piece of microfiber cloth, dipped it into the Persian Violet and wiped it repeatedly across the edges of the leather.
I wiped the paper the same way using the Cosmic Sky blend.
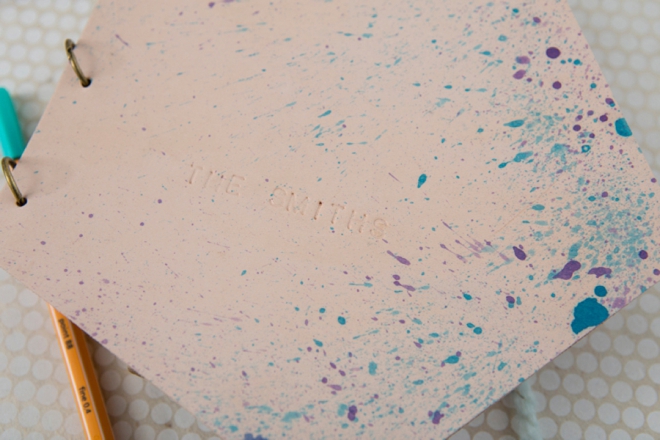
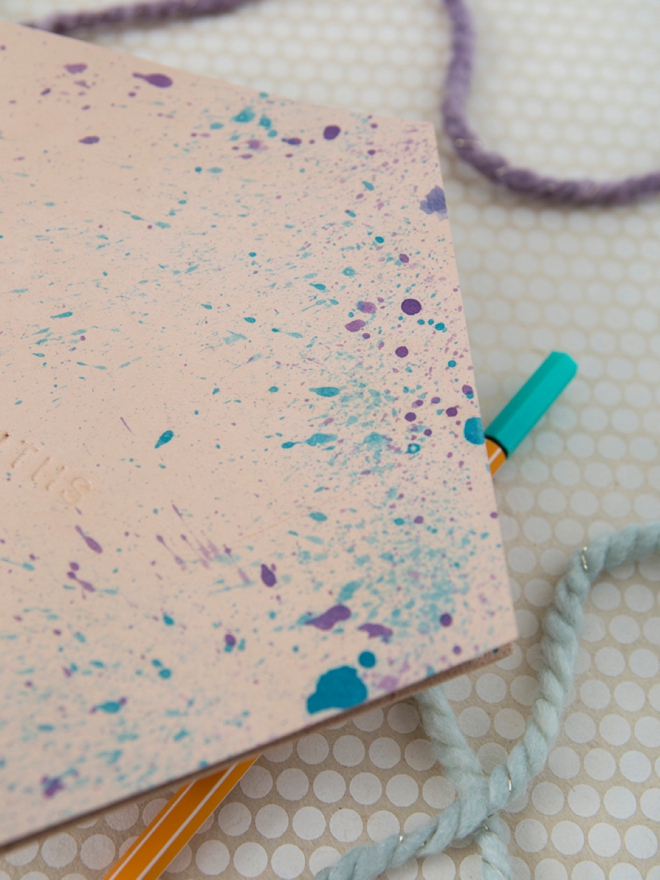
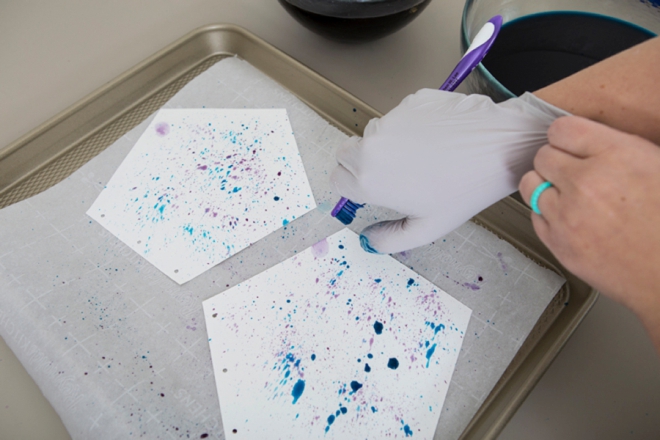
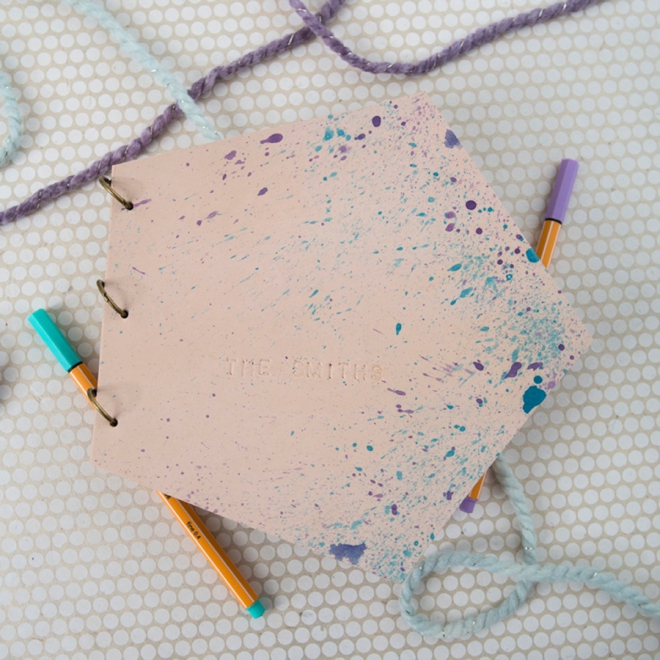
Splash It
Just like we did in elementary school, I splatter painted the leather using a toothbrush and both the Jade Green and the Persian Violet.
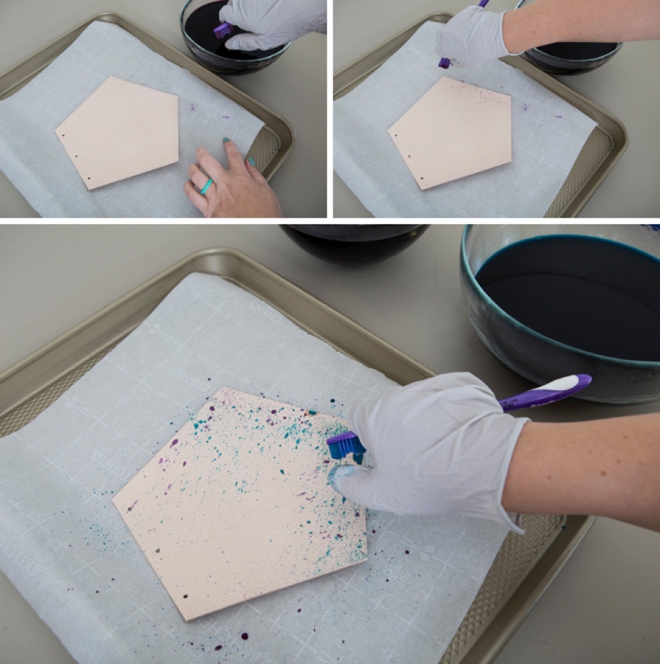
I did the same to the front and back cover paper page, not the actual signing papers!
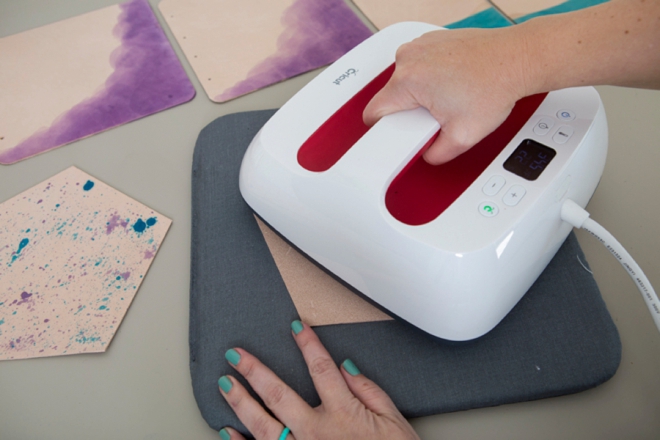
Iron
If your leather starts curling from the liquid you can iron it flat again. I had the best results ironing the rough side and letting it stay that way until it cooled. I’m using my Cricut EasyPress instead of an iron because it’s better than any iron! You can also try to put your leather under really heavy books overnight to flatten it out, but I didn’t have luck with that method. I’m thinking different types of leather, possibly thinner leather might work with the books but I had success with the iron.
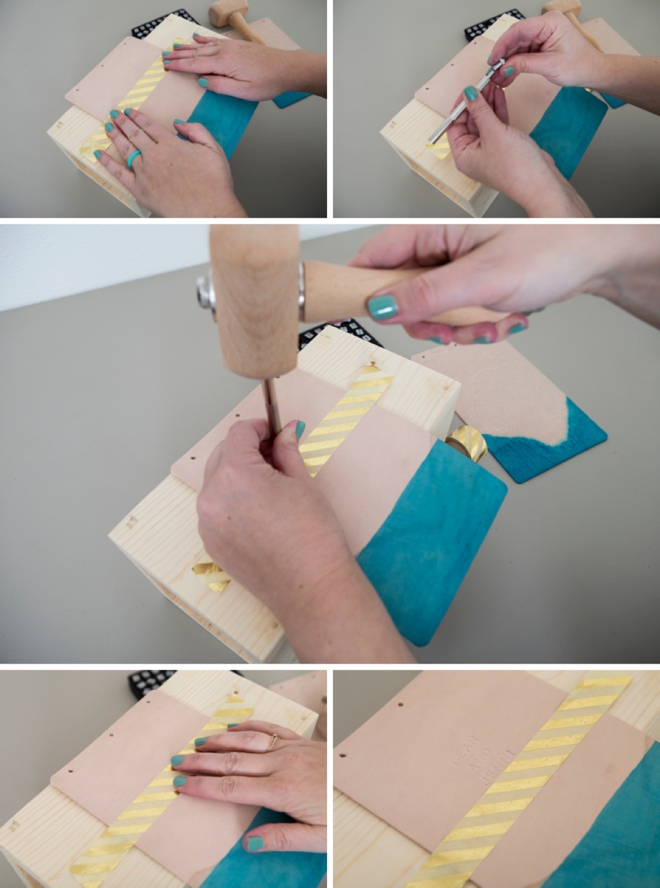
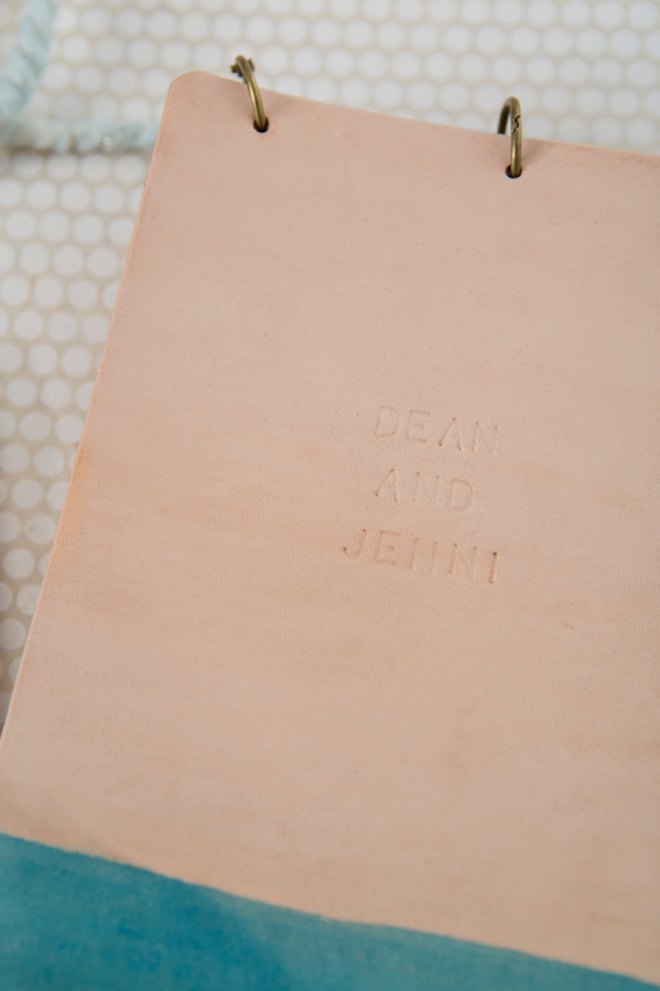
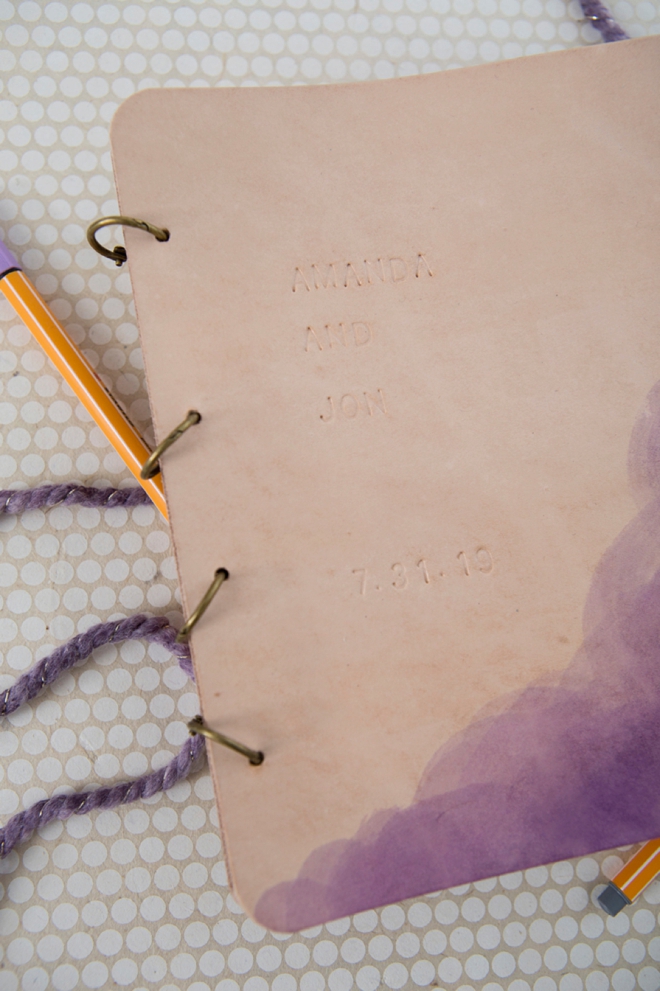
Personalize
I used leather stamping alphabets to create the personalization in the leather. This needs to be done on top of a piece of wood. I taped off the leather with washi tape to keep my stamping in a straight line.
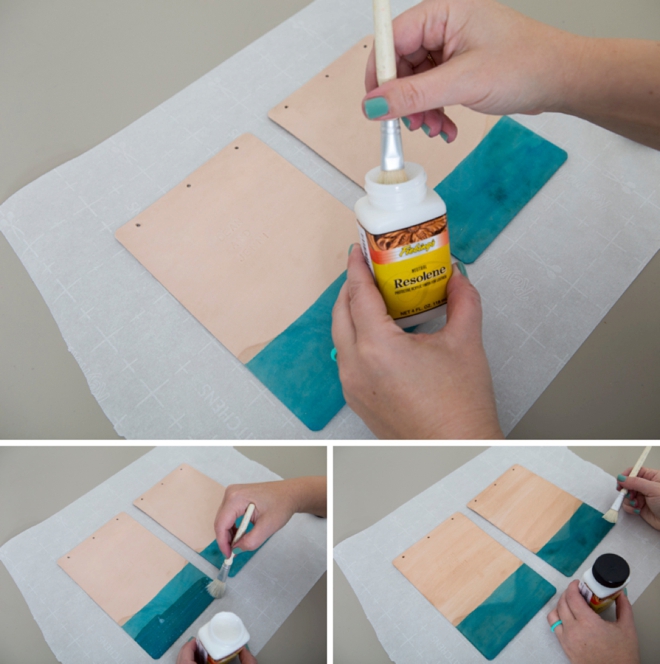
Seal
Add a thin coat of Resolene to the front and back of the leather to seal the dye. Otherwise it could rub off on clothing or tabletops.
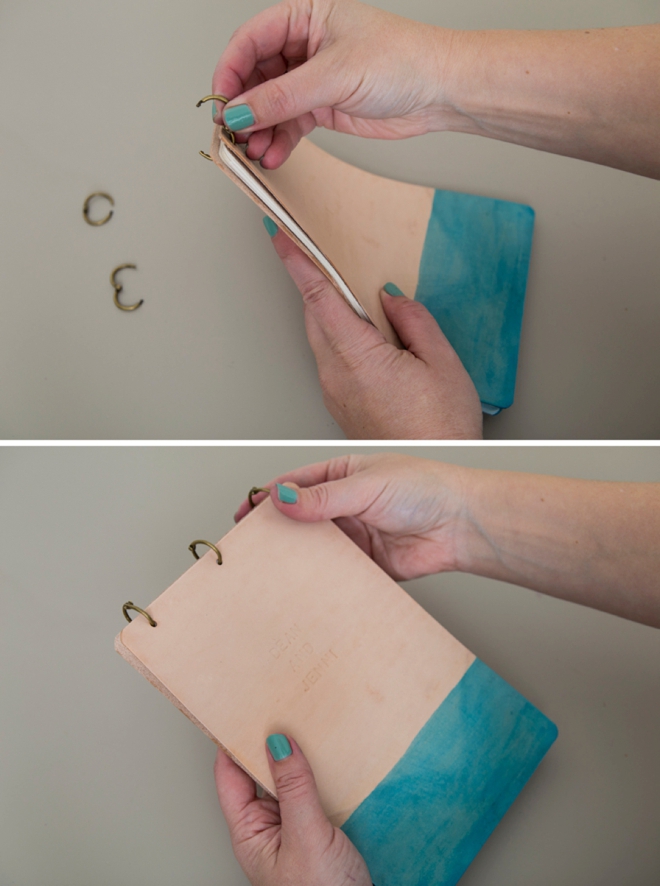
Bind
The last step is to join your leather and paper with the binder clips… it’s now a book, yayay!
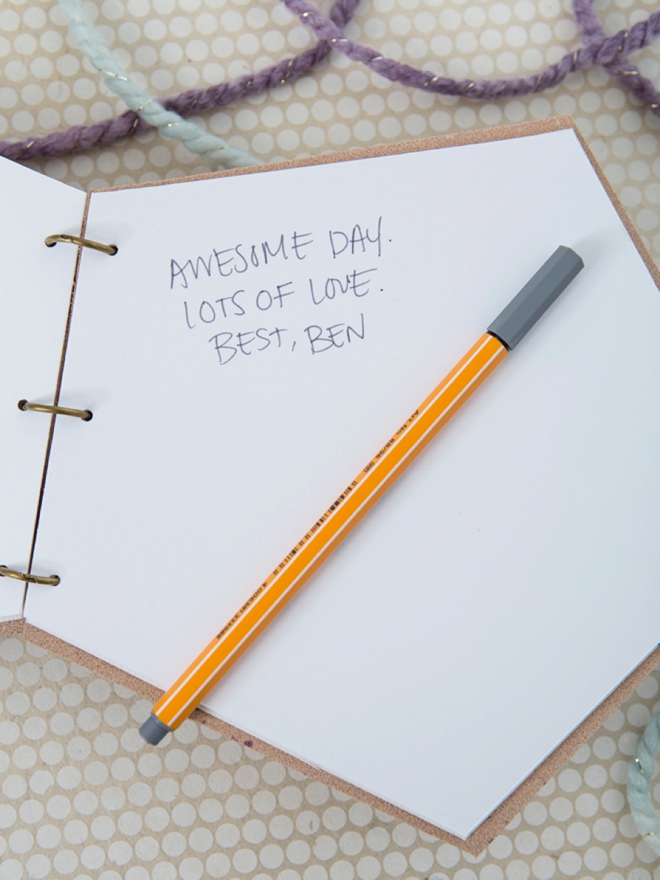
Special Messages
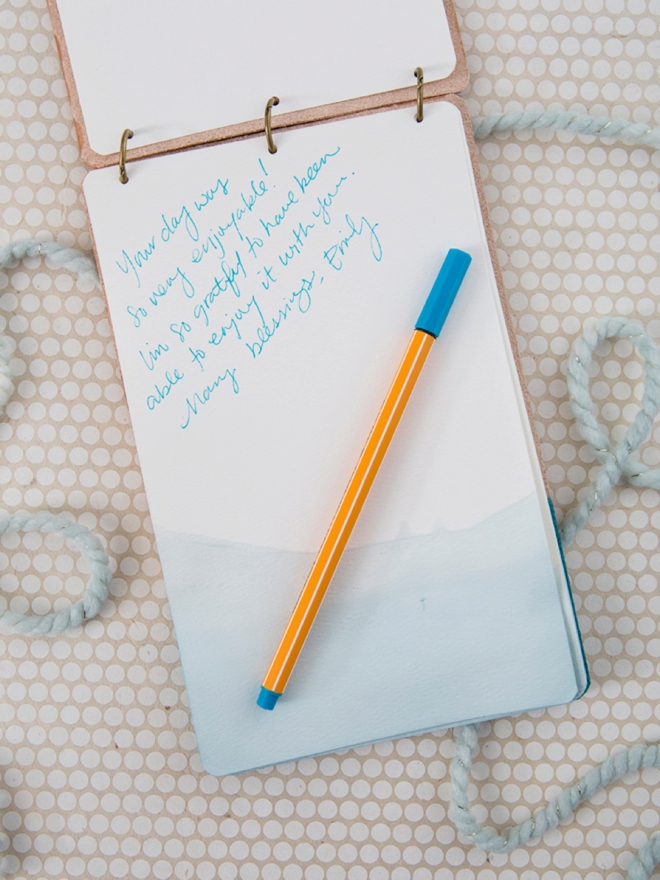
The best thing about a guest book is being able to read it year after year. Those special messages have a way of transporting you back to that special day. Unfortunately for many, the messages live on after our loved ones and that is also a very special gift. Do yourself a favor and create an ultra special place to hold those special messages, just like this!
DIY Tutorial Sponsored By:

This is a sponsored post written by Something Turquoise on behalf of Rit Dye. The opinions and text belong to the author. Rit Dye make dyes to customize your world. Non-toxic DIY color for your wardrobe, home décor, crafts and more!
As with all our DIY tutorials, if you create one of our projects please send us a picture – We Love Seeing Your Creativity! If you use Instagram or Twitter please use the hashtag #SomethingTurquoiseDIY and it will show up on our Get Social page. Happy Crafting!
DIY Tutorial Credits
Photography + DIY Tutorial: Jen Causey of Something Turquoise // Rit Dye: courtesy of Rit Dye // 8.5″ x 11″ Tooling Leather, 3-4oz: Amazon // Leather Stamps: Amazon // 3/4″ Brass Binder Rings: Amazon // Wood Leathercraft Mallet: Amazon // Cutting Mat: Amazon // Fiskars Fingertip Craft Knife: Amazon // Crop-a-Dile Hole Punch: Amazon // Corner Chomper: Amazon // 90lb Watercolor Paper: Amazon // Nail Polish: OPI – Withstands the Test of Thyme
Shop The Supplies:
Find the supplies you’ll need for this project from our affiliate links below:

Comments