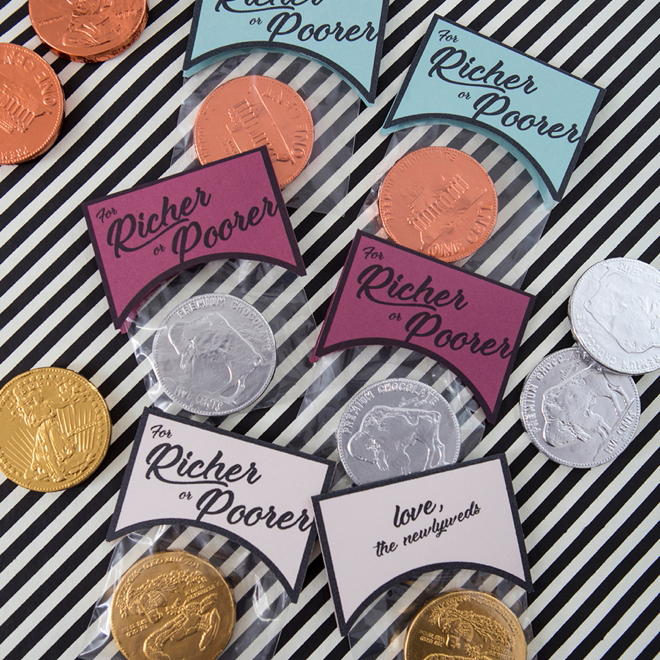

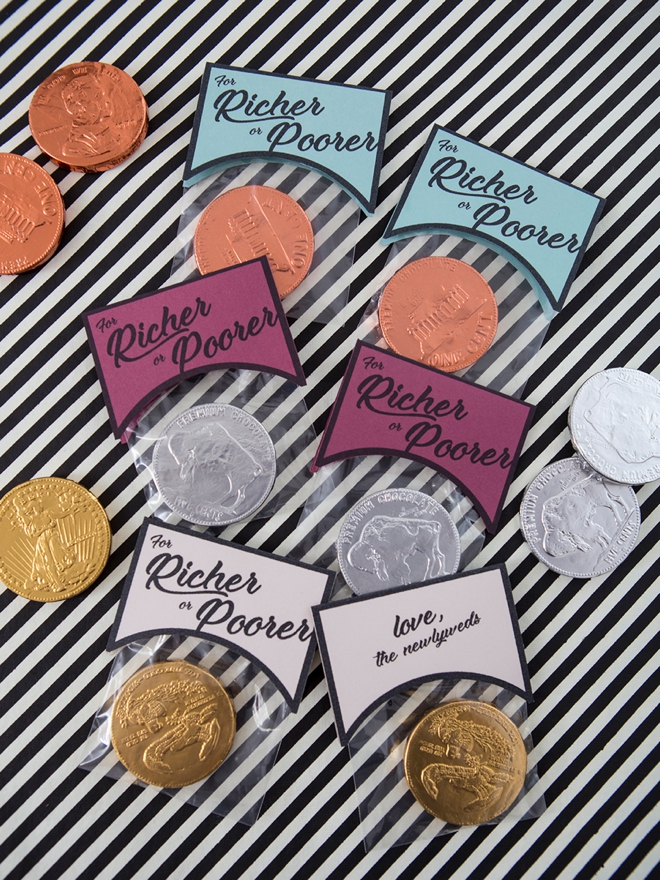
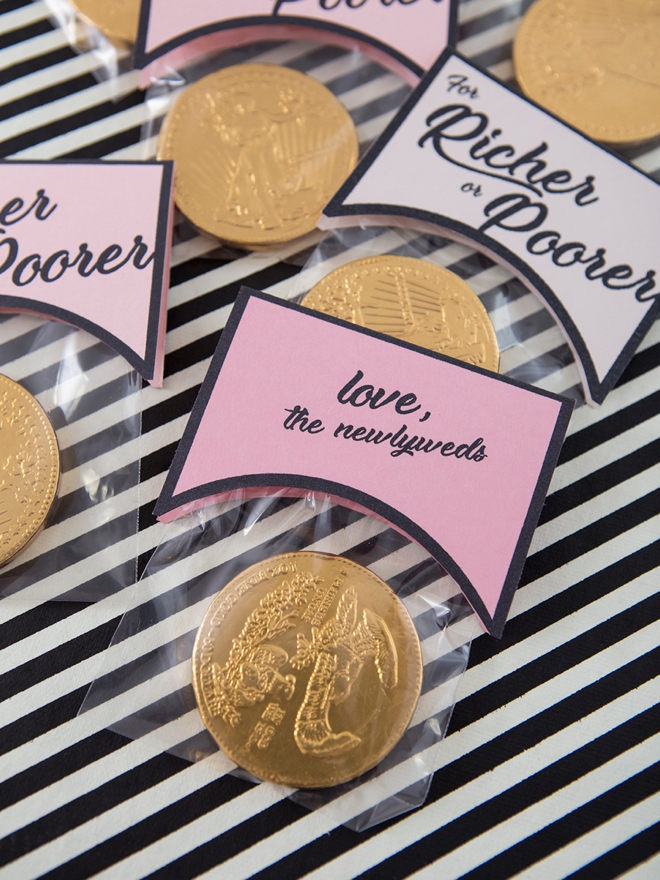
DIY For Richer or Poorer Chocolate Favors
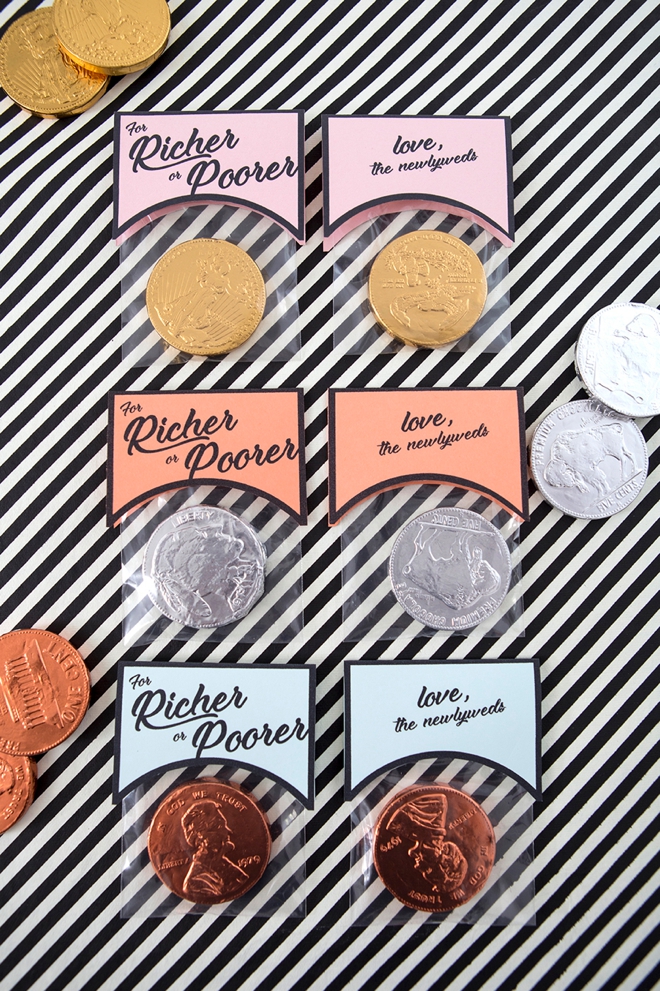
Everyone loves chocolate, so embrace your vows with this super sweet, DIY wedding favor idea. Easy to customize using any color of cardstock you’d like, along with our adorable printable design file for sale in our shop for only $1.99! Two tags come with your purchase, one that says “love the newlyweds” on the back and one that has a blank back side so you can personalize it yourself. These budget-friendly favors will definitely bring a smile and maybe even a chuckle to your guests’ faces!

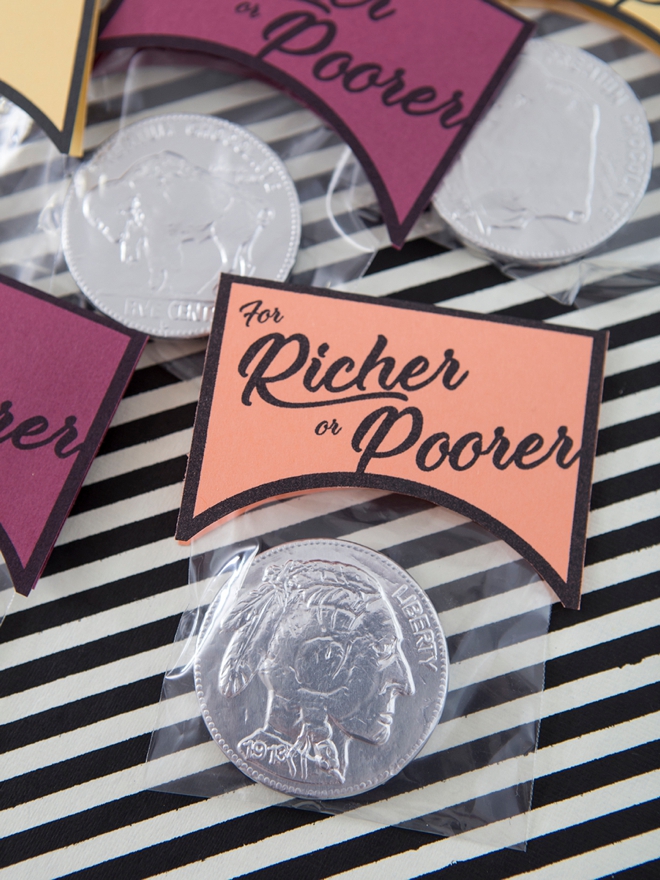
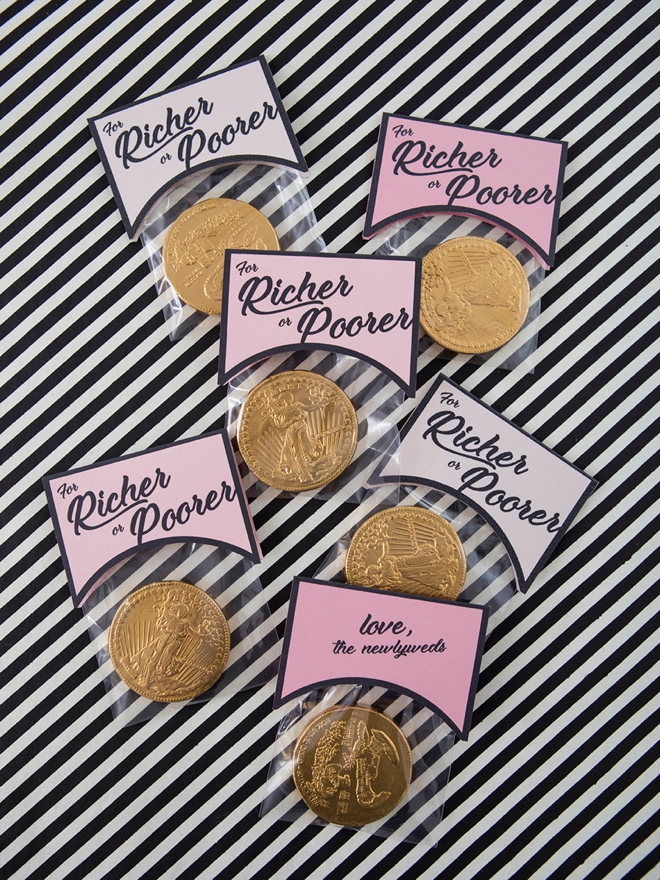
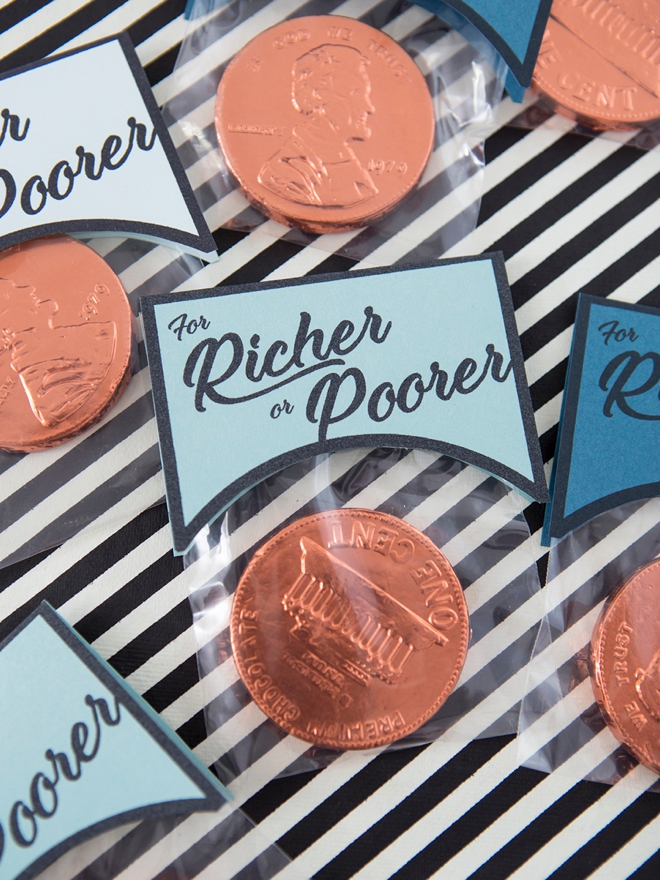
Extra Large Coins
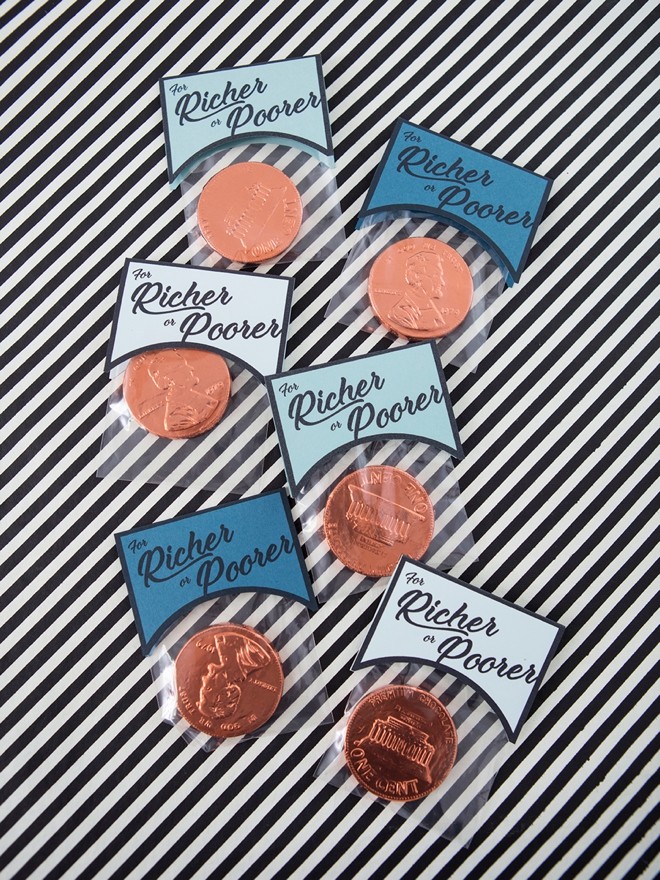
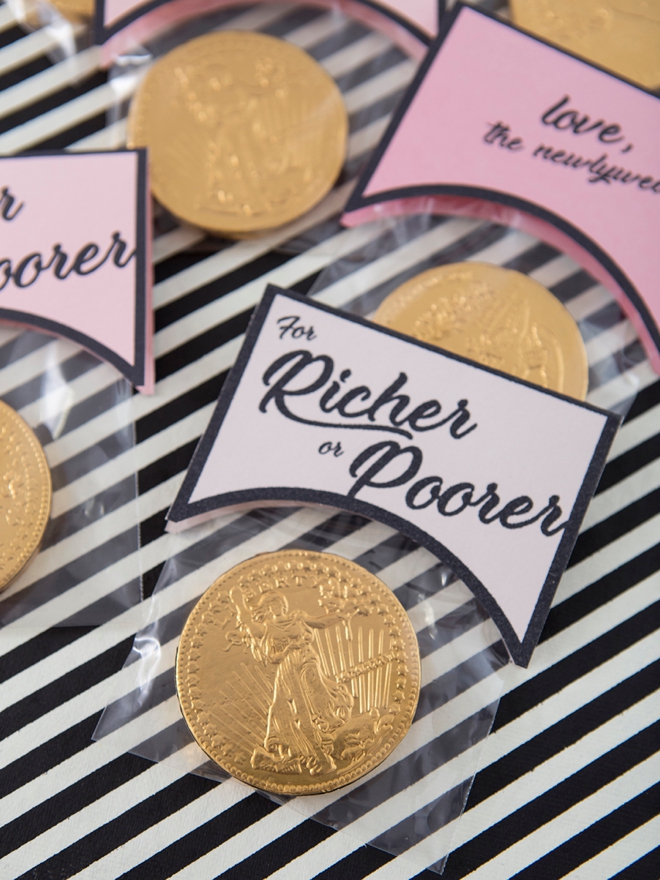
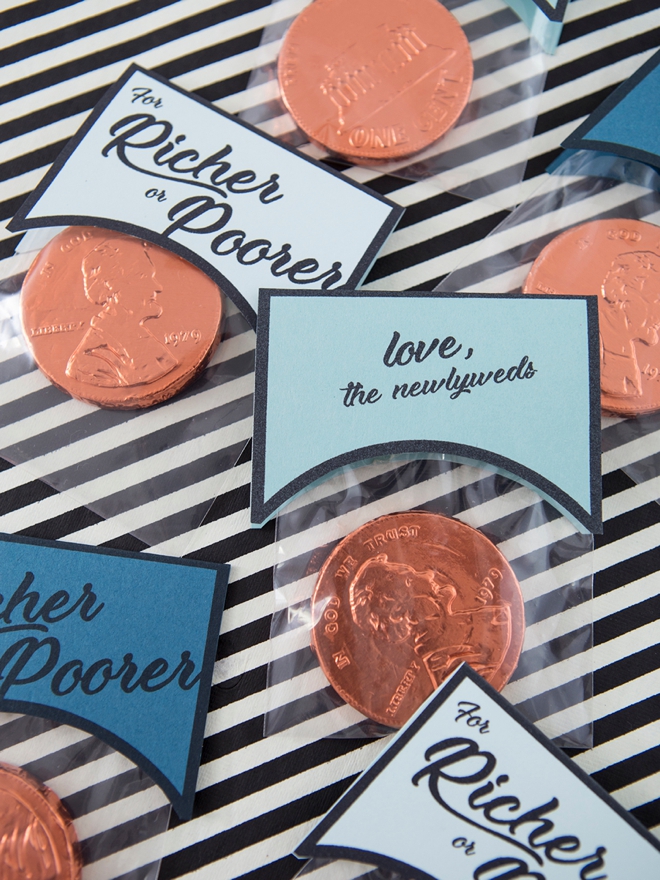
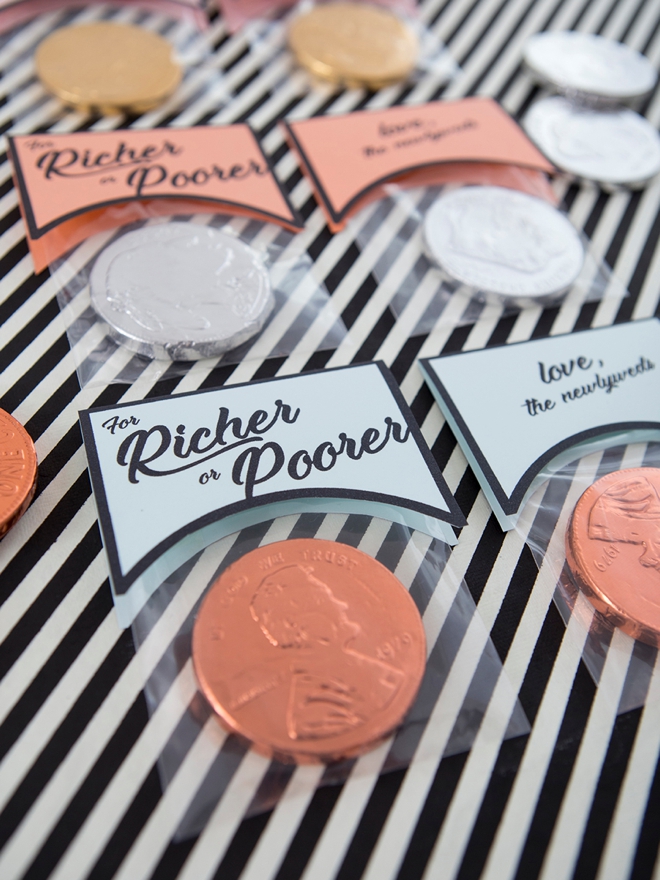
Aren’t these giant chocolate coins adorable?! I love that they come in all three metallic colors, the chocolate is actually really good too. A cute and tasty treat for your guests to get them in the mood for making promises!
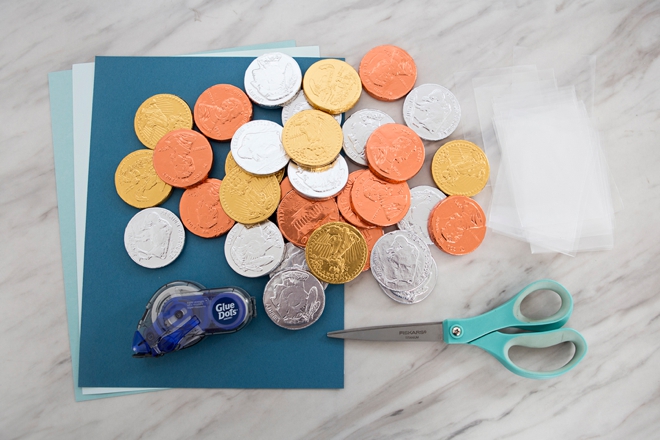
SUPPLIES:
- Home Printer
- 8.5″ x 11″ Colored Cardstock
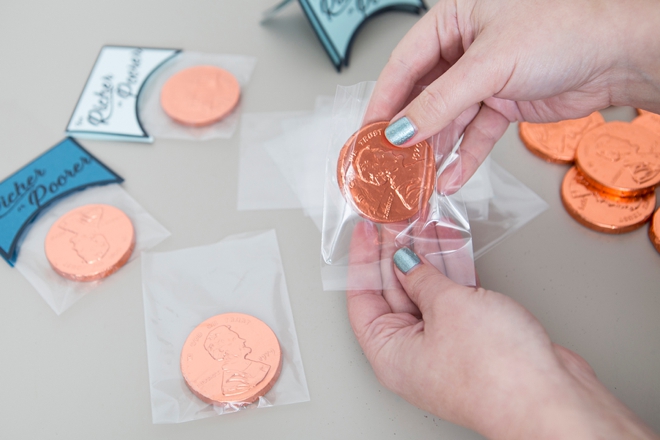
- Extra Large 2″ Chocolate Coins
- 3″ x 4″ Clear Treat Bags
- Craft Adhesive
- Scissors
- Our exclusive “For Richer or Poorer” favor labels for sale in our shop for only $1.99!
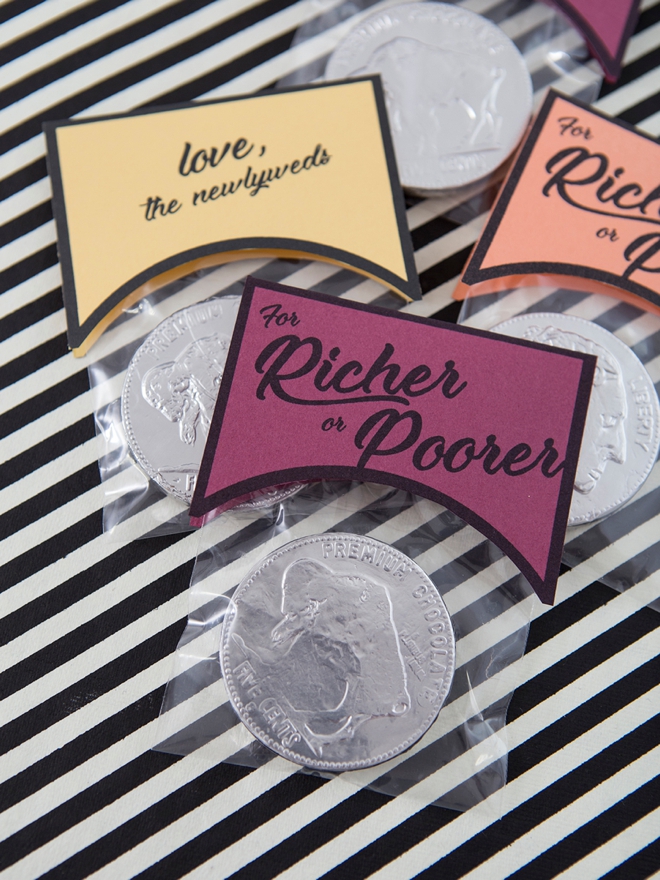
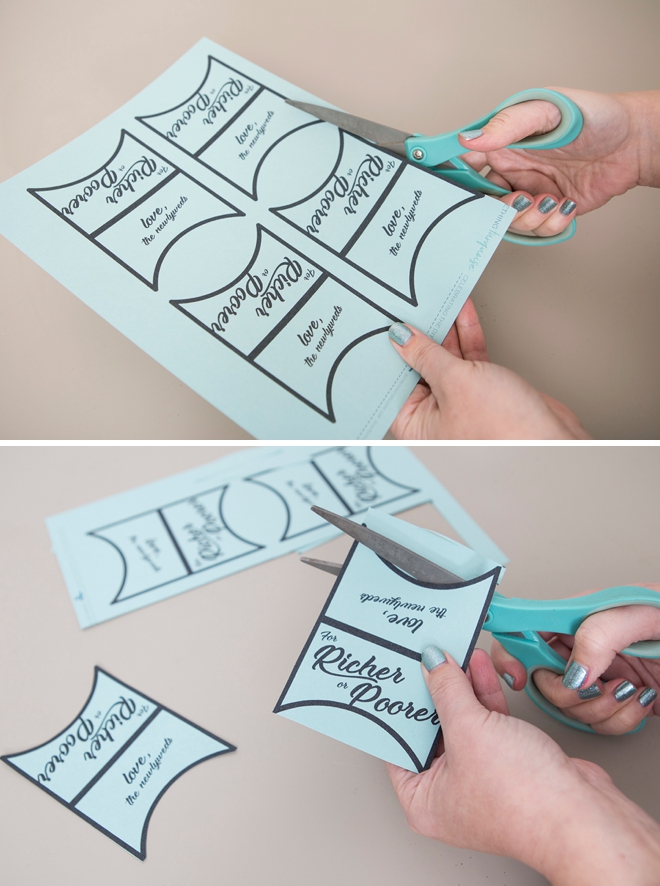
Print our label design onto 8.5″ x 11″ colored cardstock. The file itself has no color, it’s only black so you choose the color and styling by your choice of paper color! I made them in 9 different shades here so that you could see just how different they could look.
If you’re computer savvy, we’re including a label that has a blank backside so that you can personalize it yourself using your favorite editing software. We used the free font Moonlights on the Beach for this project.
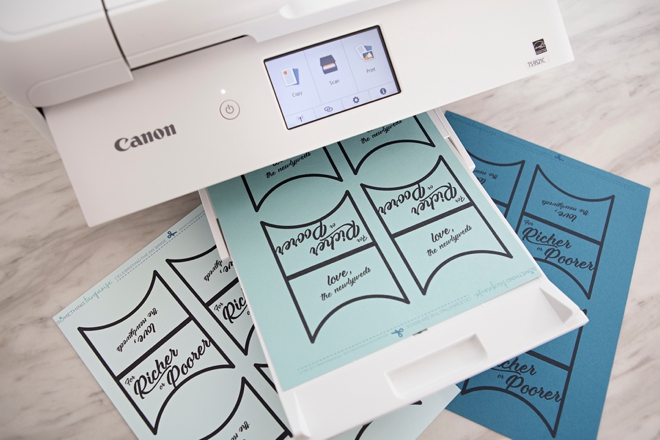
Trim
Cut each label out from the sheet, there are 4 per page.
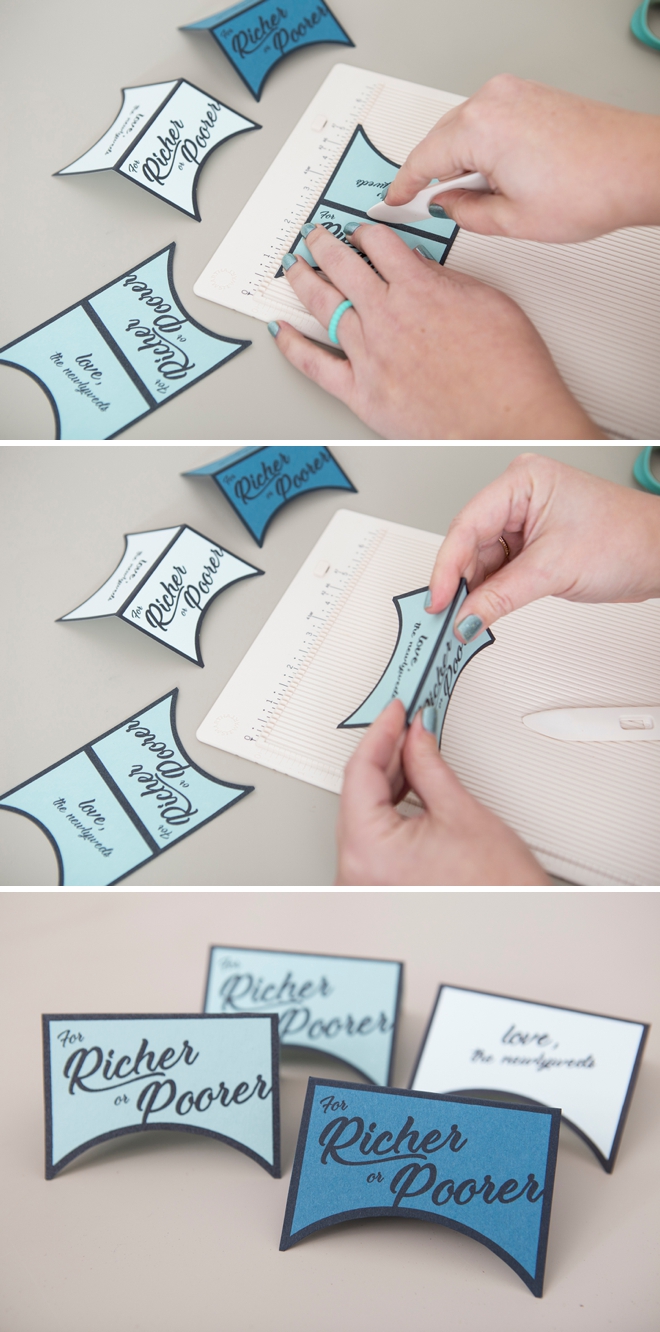
Score + Fold
If you’d like, score each label across the middle line on a scoring board. This always makes the fold extra crisp and professional looking. However it’s totally optional and you can just as easily fold the labels in half.
Fill
Add one (or two!) extra large chocolate coins to each 3″ x 4″ treat bag.
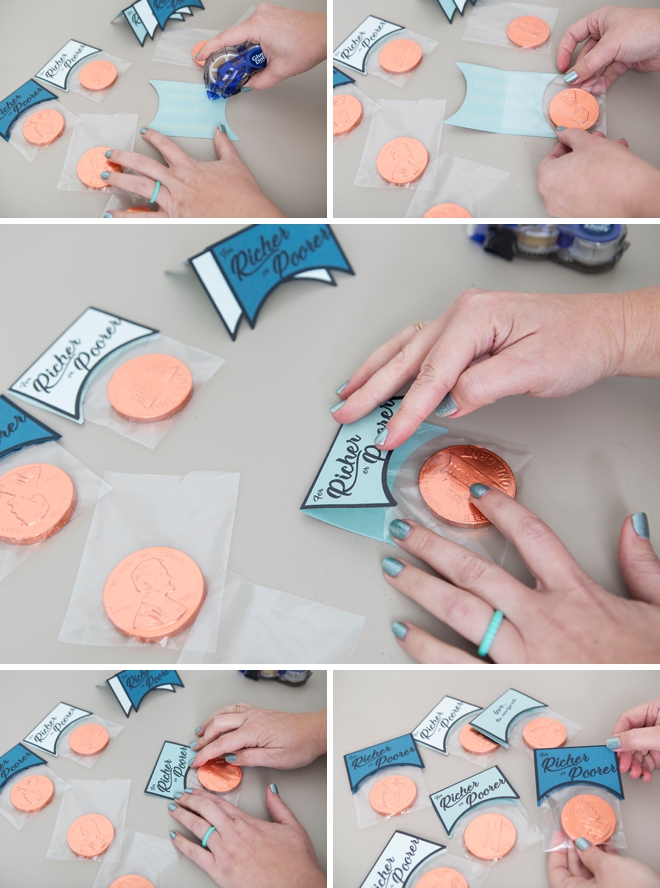
Adhere
Add a few rows of your favorite craft adhesive to the inside flaps of the labels, I love these Glue Dot Glue Tape Dispensers. Then place the treat bag inside the label fold and press together to secure. Adding glue/tape to both sides will securely hold the labels in place while making sure the coins don’t fall out of the bags! ….and that’s it! Short and super sweet.
Colored Cardstock
I love how the different colors of cardstock and coins can make each little treat look so different! The blues look a bit nautical, the pinks look romantic and the maroon and peach look bright and fun! What colors will fit your unique event?
As with all our DIY tutorials, if you create one of our projects please send us a picture – We Love Seeing Your Creativity! If you use Instagram or Twitter please use the hashtag #SomethingTurquoiseDIY and it will show up on our Get Social page. Happy Crafting!
DIY Tutorial Credits
Photography + DIY Tutorial: Jen Causey of Something Turquoise // For Richer or Pourer Printable Tags: Shop Something Turquoise, only $1.99! // Canon TS9521C Crafting Printer: courtesy of Canon // Extra Large Chocolate Coins: Amazon // 3″ x 4″ Clear Treat Bags: Amazon // 8.5″ x 11″ Colored Cardstock: Paper Source // Paper Scoring Board: Amazon // Glue Dot Glue Tape Dispenser: Amazon // Nail Polish: OPI – Withstands the Test of Thyme
Shop The Supplies:
Find the supplies you’ll need for this project from our affiliate links below:

Comments