
How To Make A Guest Book Quilt With Cricut
-Sponsored Post-
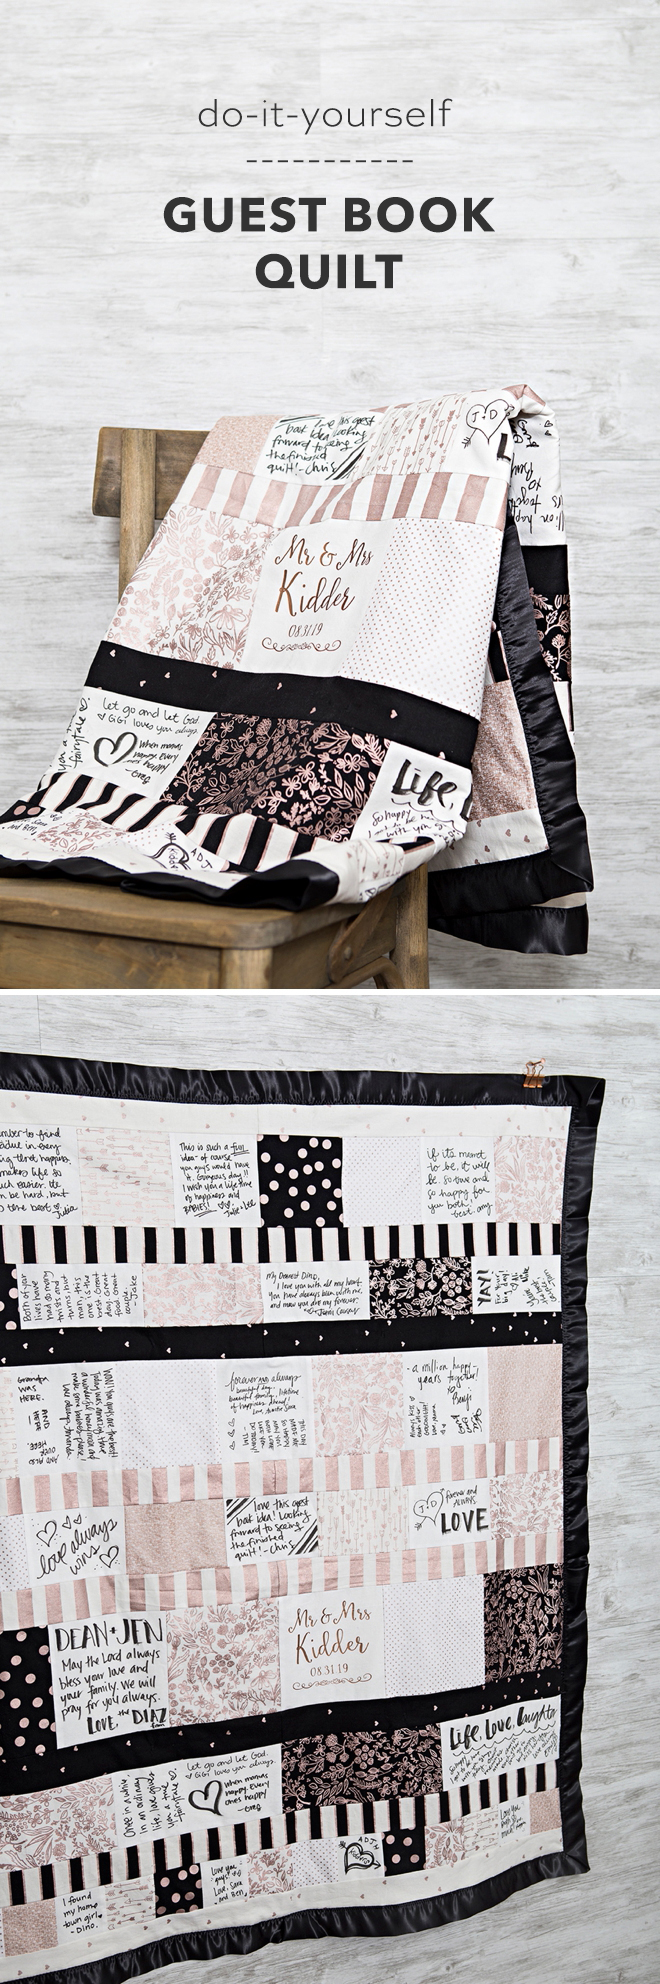
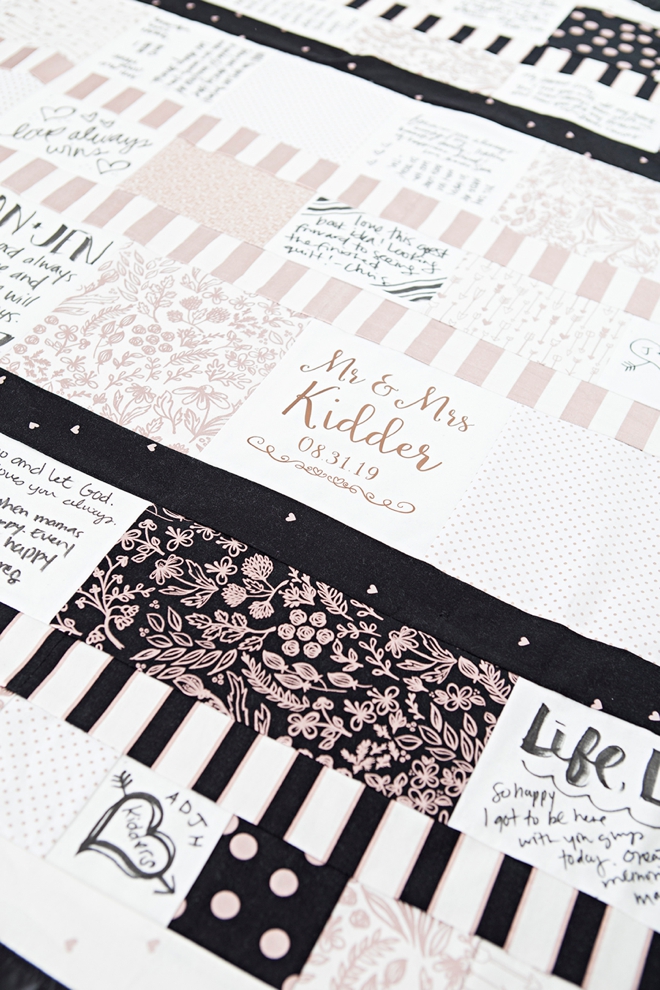
This is the ultimate keepsake. Let me start by saying this project is absolutely amazing, but it’s also intense. While there’s lots of effort and planning involved, this guest book quilt was made so much easier because I used my Cricut Maker to cut ALL the squares! This was my first real quilting experience and I picked the easiest pattern, both for myself and for you. The Riley Blake quilt directions for this design called Pave the Way, were super easy to follow and incredibly perfect for this project. Replace patterned quilt squares with blank pieces of fabric that your guests’ sign with permanent fabric markers, before you sew the quilt. Create a fabric signing table for your reception and then look forward to having a terrific project to work on after you return from your honeymoon!
The Pros and Cons Discussed
Quilt guest books have been a thing for a while. I’ve heard many a bride discuss the pros and cons of this project so I decided to address the later in the creation and steps I’ve shared here.
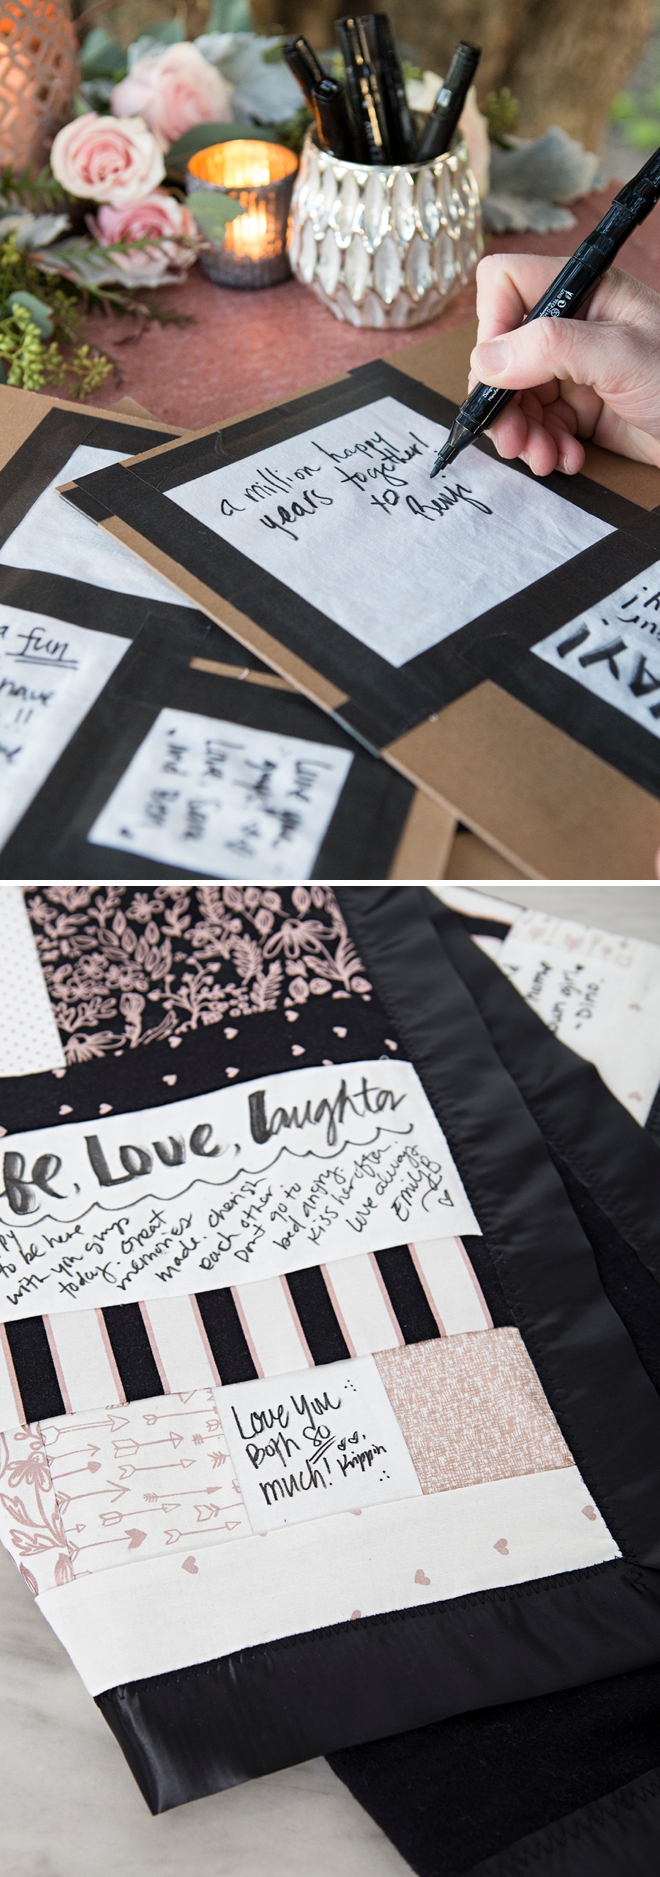
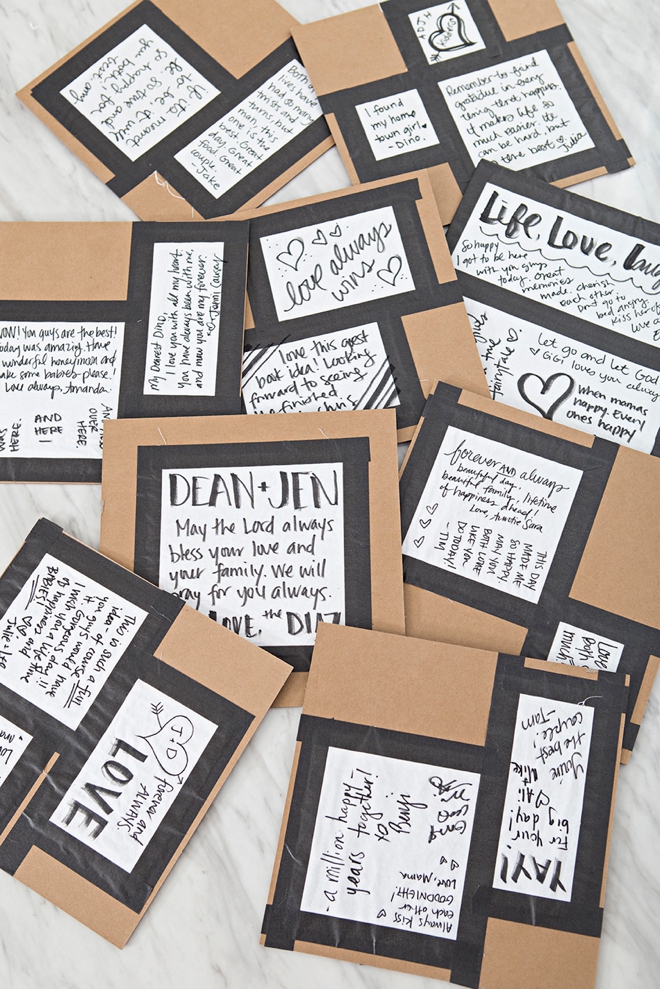
If you have your guests sign a finished quilt, some guests might leave messages you don’t want on your quilt forever. The main reason I didn’t sew the quilt first. If you come across a quilt square that is ugly or a weird message – just don’t include it in your quilt!
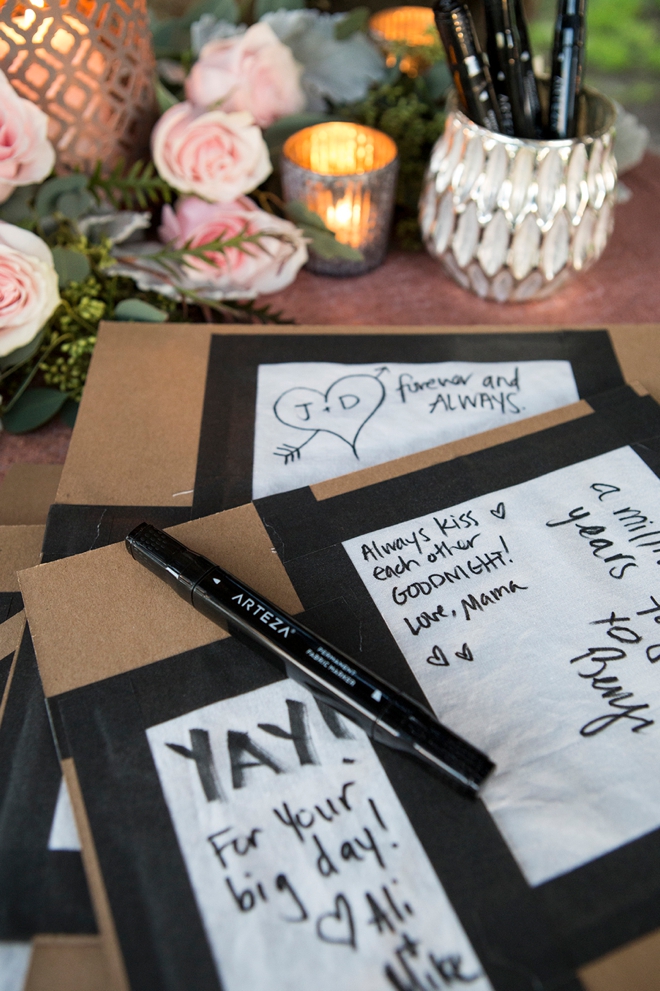
Writing on fabric is hard. Yes it can be unless it’s held down properly. Which is why we’ve taped the squares down fully to the chipboards.
Some guests messages were written into the seam allowances. You don’t want to sew over a message so this is another reason we’ve taped every side of the squares. The tape should cover your 1/4″ seam allowance!
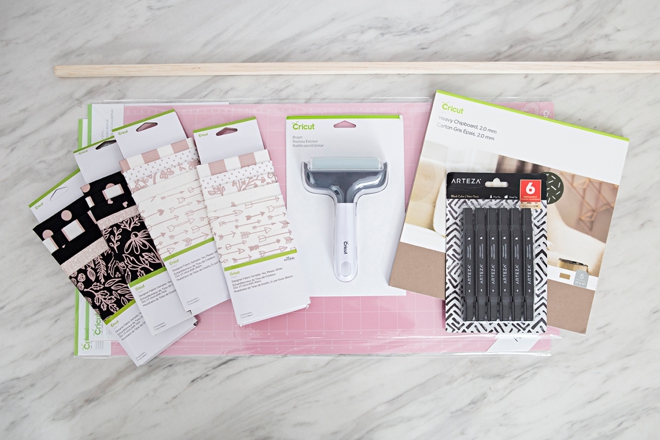
SUPPLIES:
- Cricut Maker
- Cricut Pave The Way Quilt Pattern
- 4 Riley Blake Cricut Fabric Sampler Packs
- 2 – 12″ x 24″ FabricGrip Cutting Mats
- Cricut Fabric Brayer
- Cricut Chipboard
- Cricut EasyPress
- Masking Tape
- Permanent Fabric Markers
- Sewing Machine
- Quilt Batting
- Blanket Binding
- Pretty Table Decor
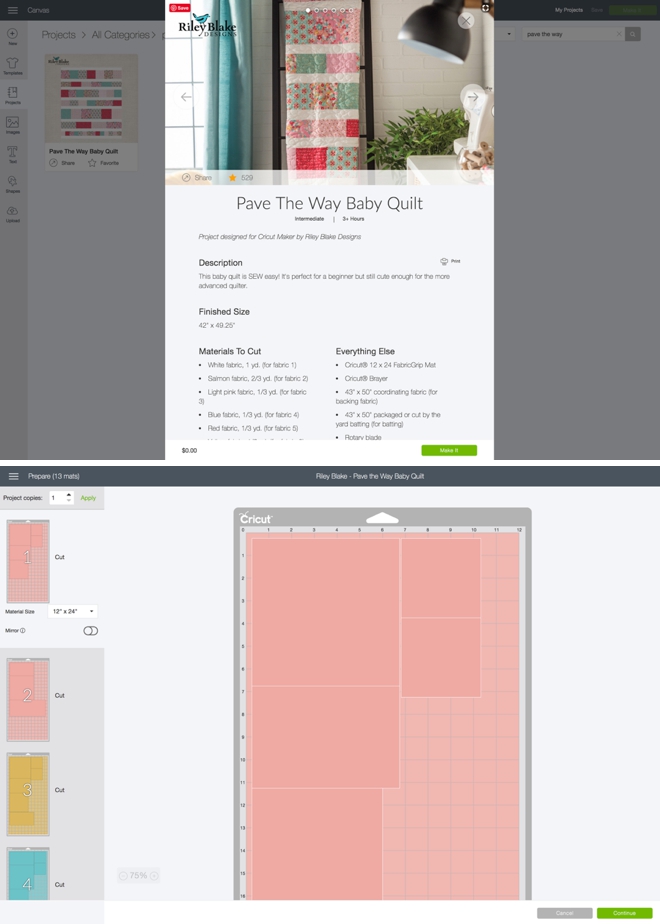
Quilt Plan
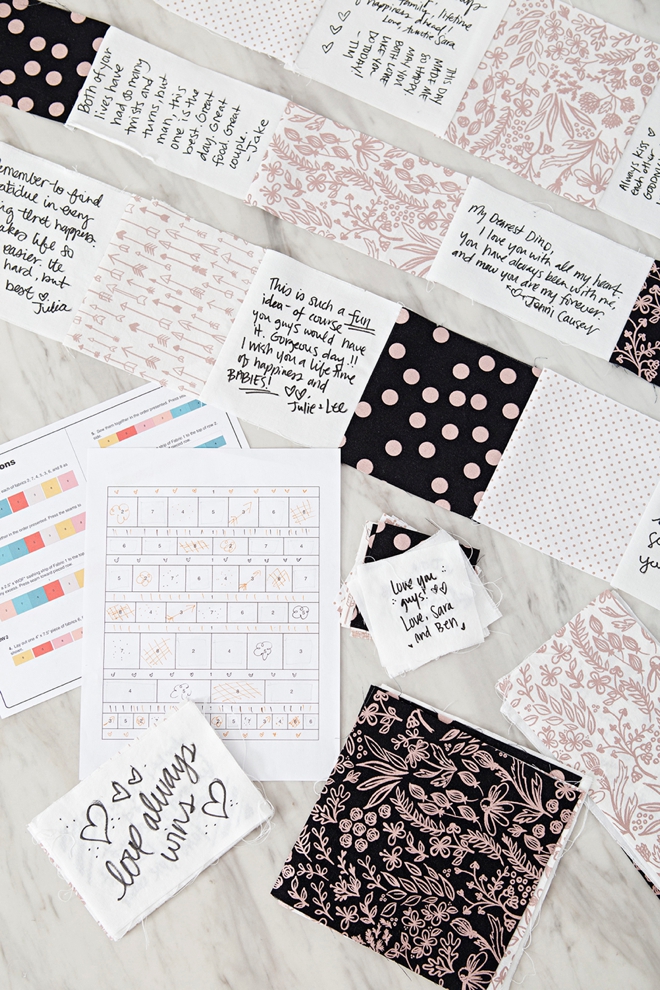
This step took me the longest. First I printed out the Pave the Way Riley Blake Quilt Pattern from Cricut’s website and used it to create my quilt plan. At the end of the pattern is a blank quilt template that you can fill in for yourself.
Unlike following the pattern like you normally would, I had to select squares and cutting mats that would cut the blank white fabric for the guest signatures. I moved back and forth between the cutting mat screen and the printed pattern to figure out exactly what squares would be what.
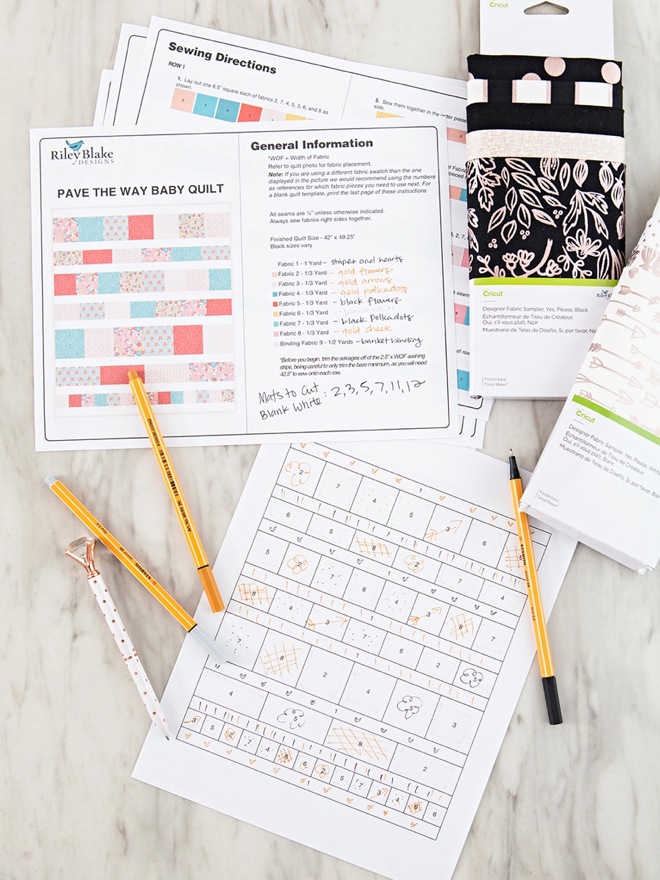
It turned out that I made cutting mats 2, 3, 5, 7, 11, and 12 all the blank white fabric. It took me about 45 minutes just to make the fabric plan.
Unlike a regular Cricut project, you won’t have a canvas – you just go straight to cutting. Find the project here (must be logged in to see it).
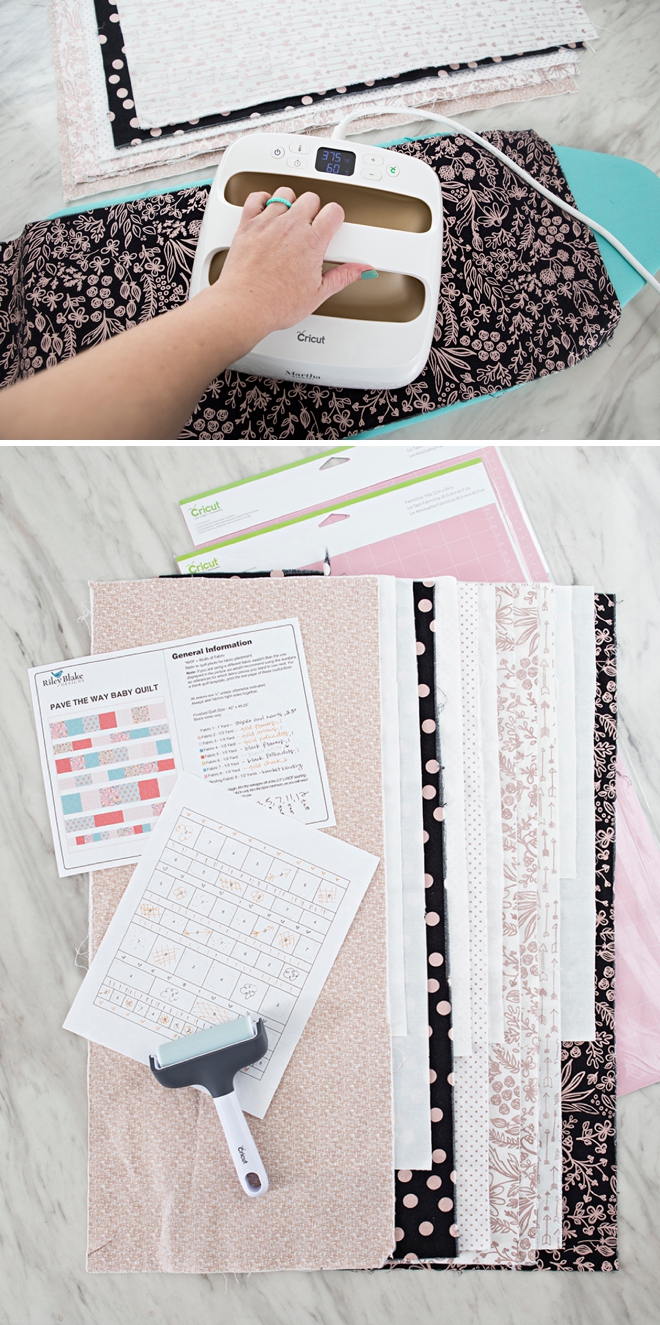
Wash + Iron
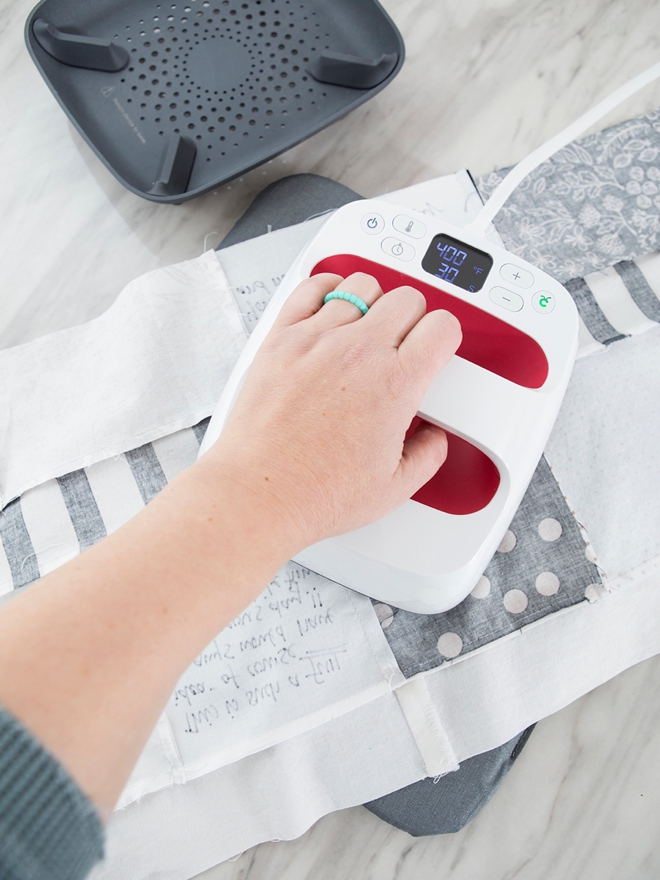
The next step is to wash and iron all your fabric. The Riley Blake fabric sets I used, Pretty Please in Black and White are already pre-cut to 12″ x 24″ which is the size of the fabric cutting mat. HUGE time saver. I used my EasyPress 2 to iron all the fabric because it’s way better than a regular iron!
Going back to my fabric plan and the cutting mats, I organized the pieces of fabric by mat so that I could just keep loading mat after mat with the correct piece of fabric.
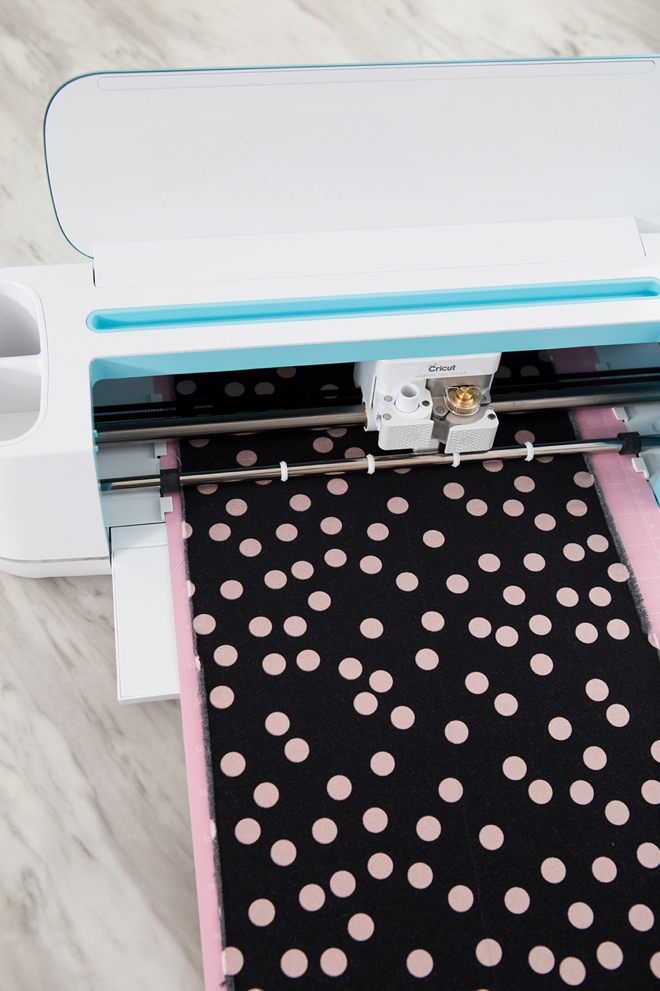
Let Your Cricut Work It’s Magic
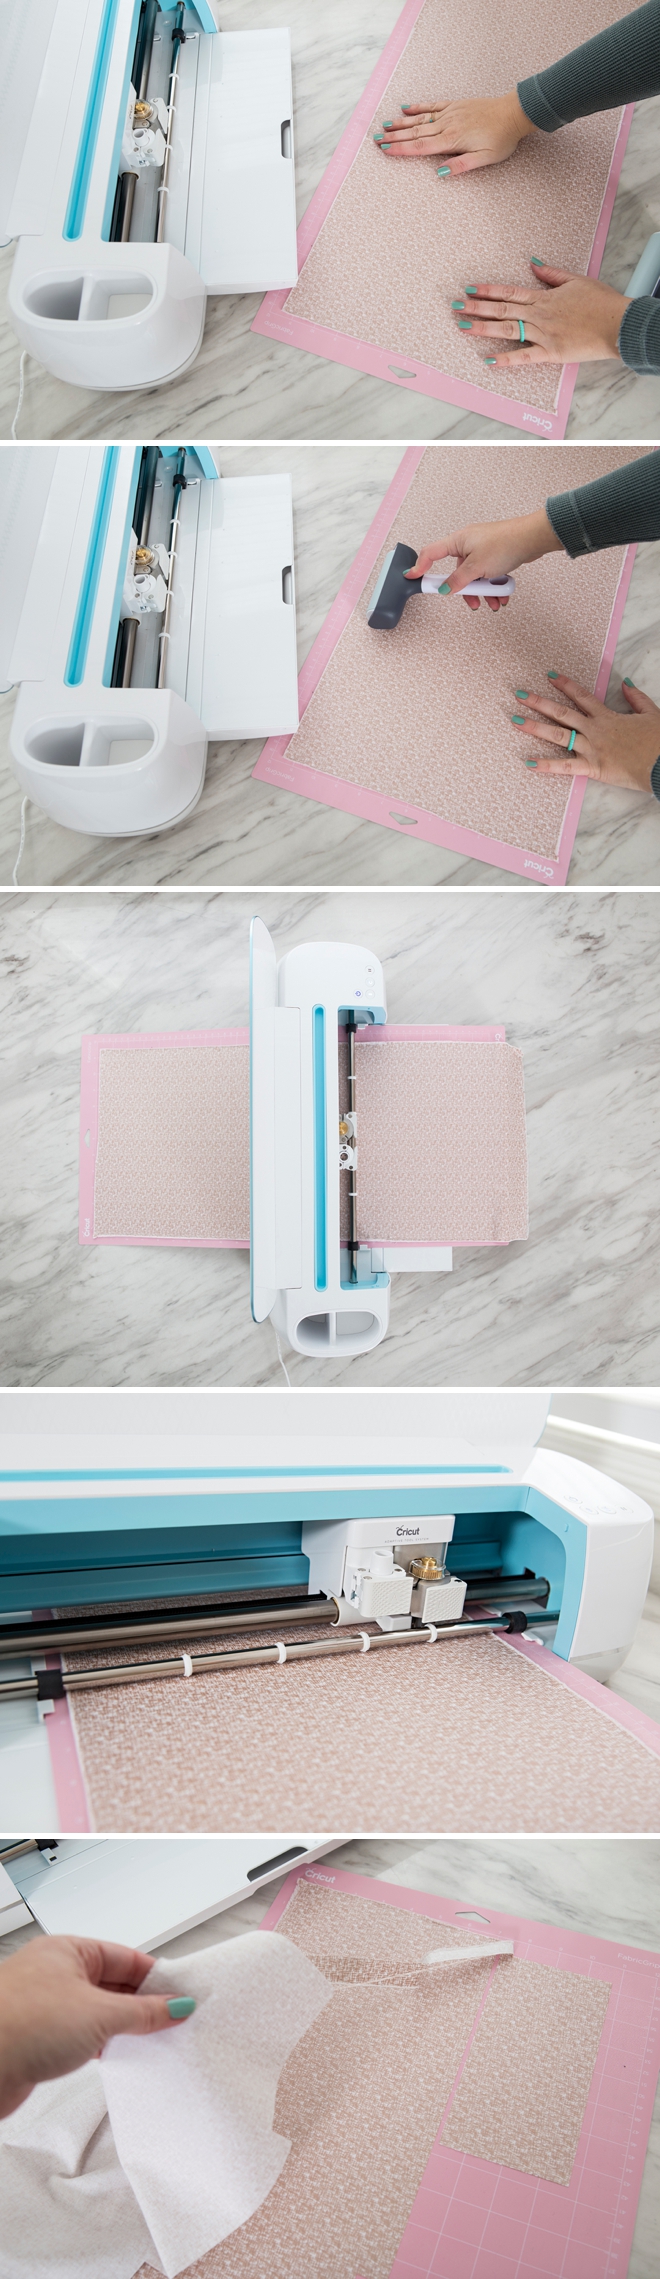
I used two fabric mats to keep the cutting process rolling; while one was cutting, the other was being cleaned and prepped for the next cut. First smooth the fabric onto the mat with your hands, then use the brayer to get perfect adhesion. Insert and cut! Peel away the excess fabric and carefully remove each quilt square. Don’t worry about left over strings on the mat, the rotary blade will slice right through them.
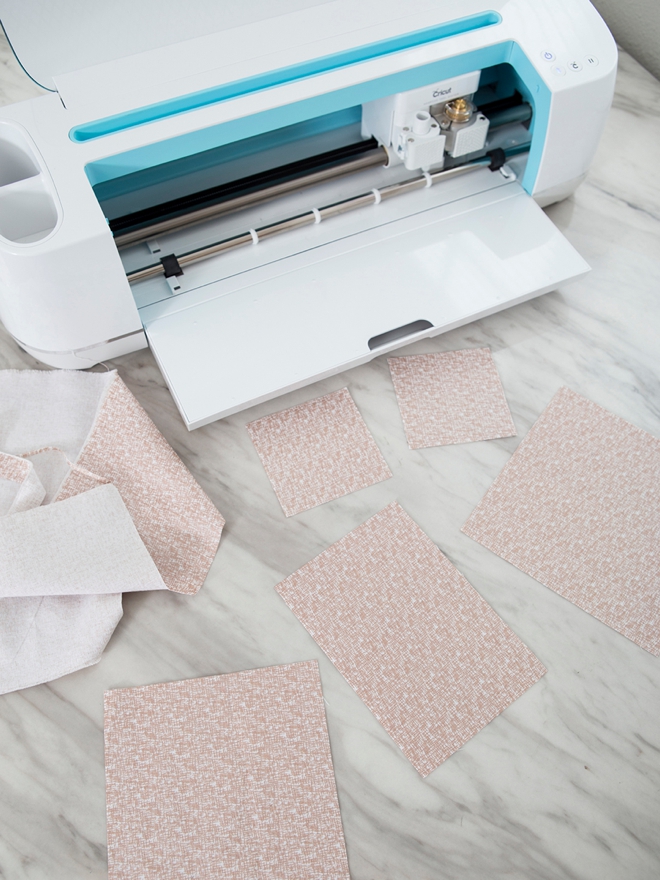
Square Organization
This quilt pattern is SUPER easy, each row has it’s own square sizes so you can’t get them mixed up! Create piles to store your squares by size. At this point, you won’t need the patterned squares until after your wedding when you’re ready to sew the quilt.
Cut All 13 Mats
Making The Fabric Boards
Just like I mentioned in the beginning of the post, there are two big reasons we are taping the fabric squares to chipboard. The first is so that it makes it SUPER easy for your guests to write on. The second is to cover at least 1/4″ of each square side so that your guests don’t write into your seam allowance! I used masking tape and Cricut’s chipboard to do this step.
After the wedding you can craft with the boards!
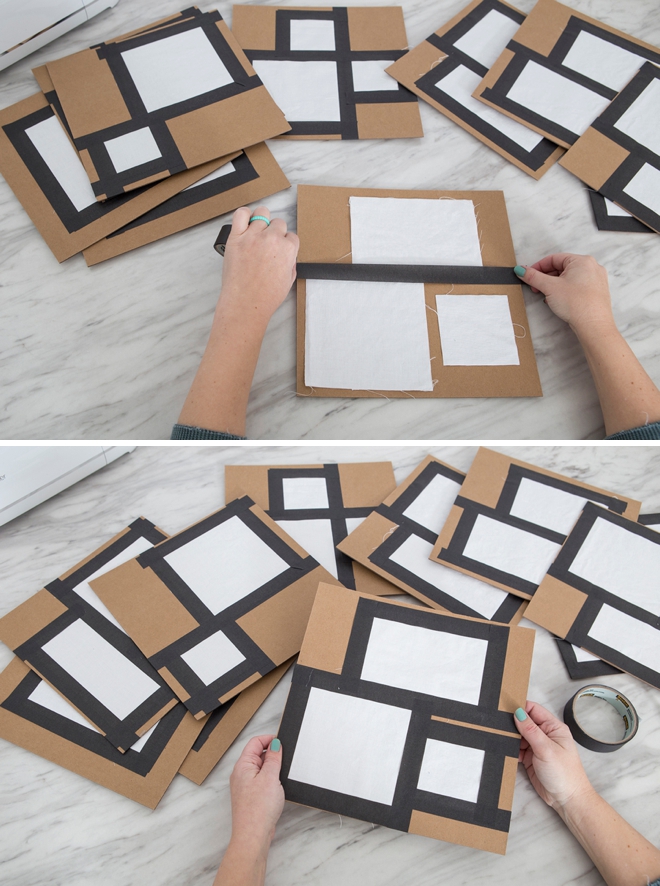
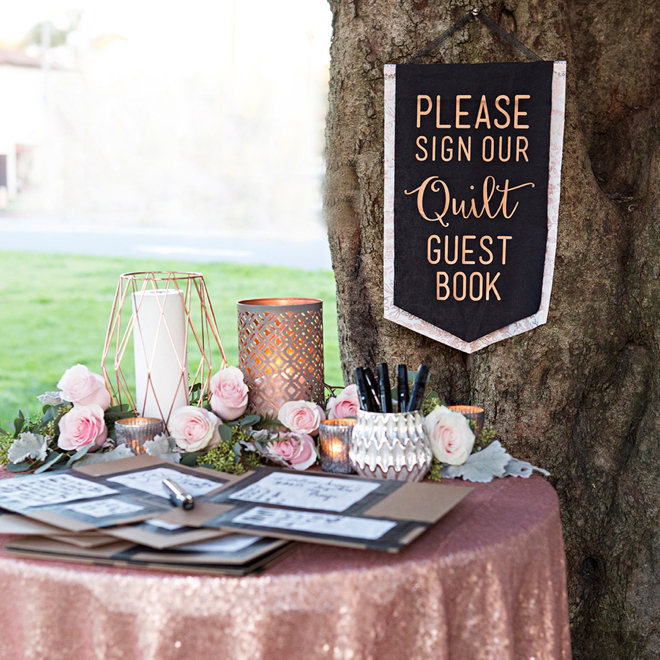
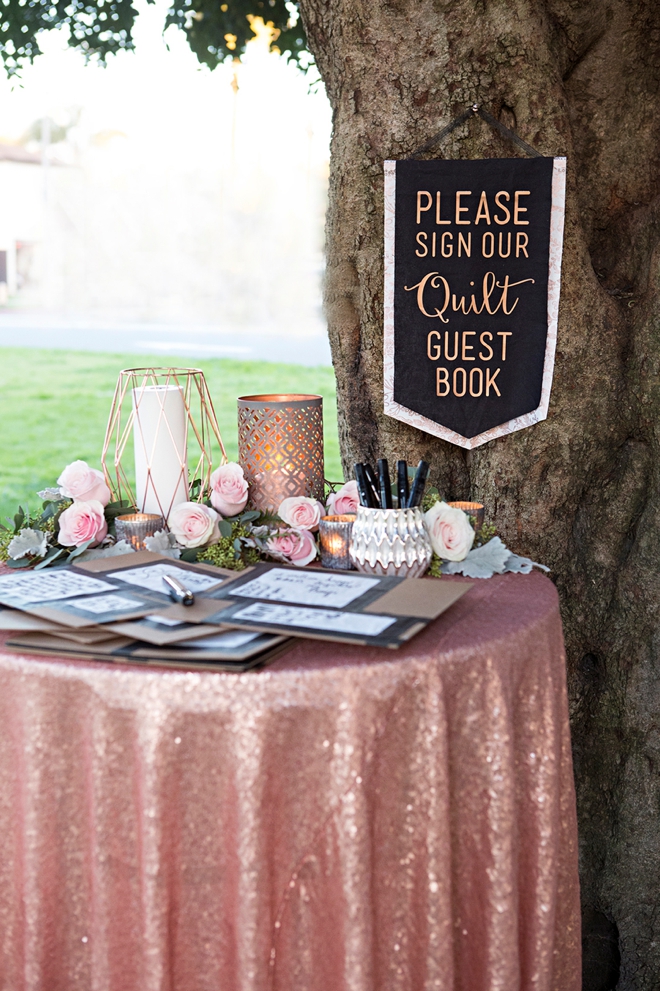
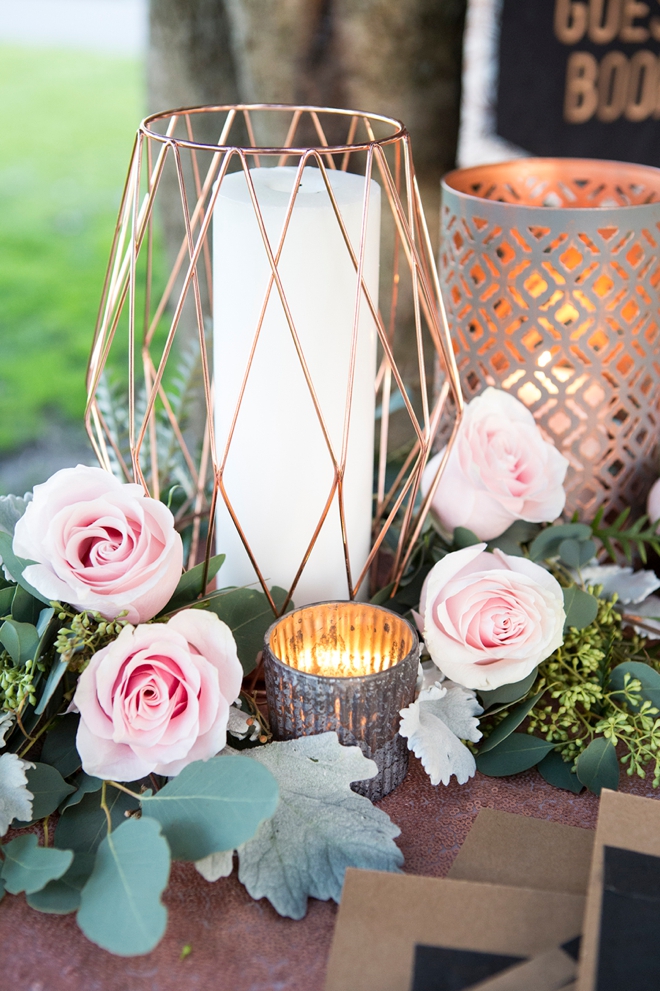
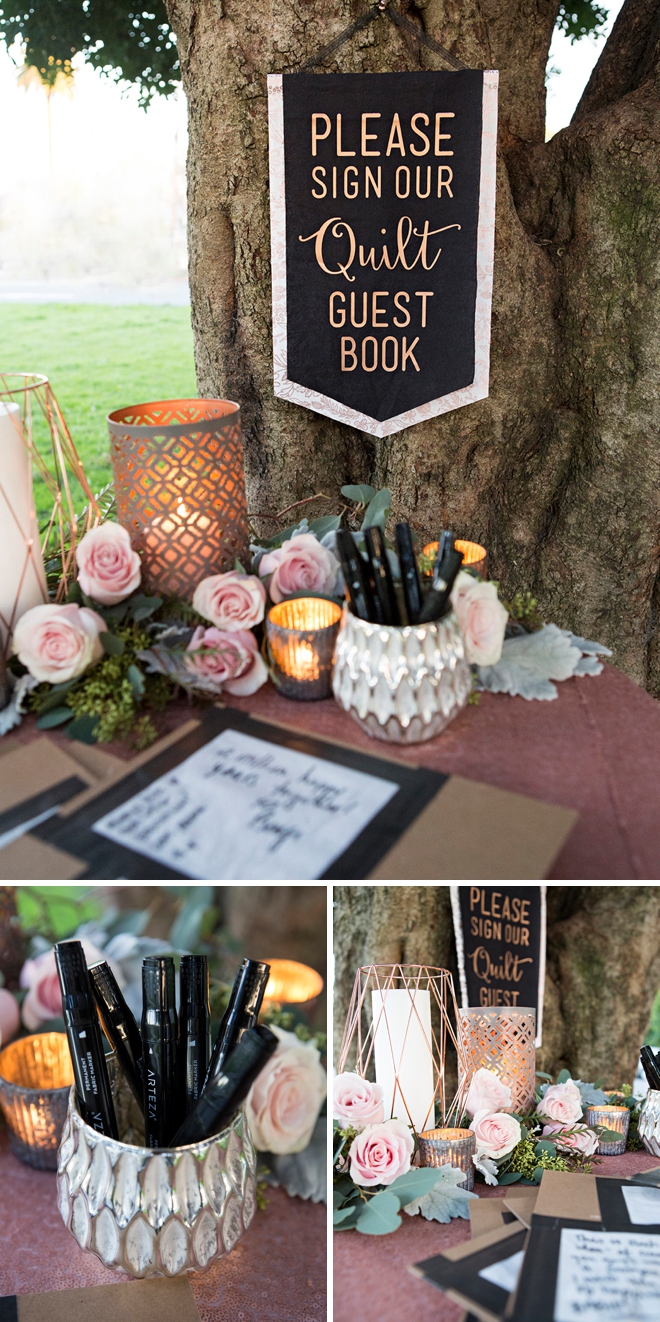
Table For Your Reception
Create a special table set up for your reception to gather all your special signatures!
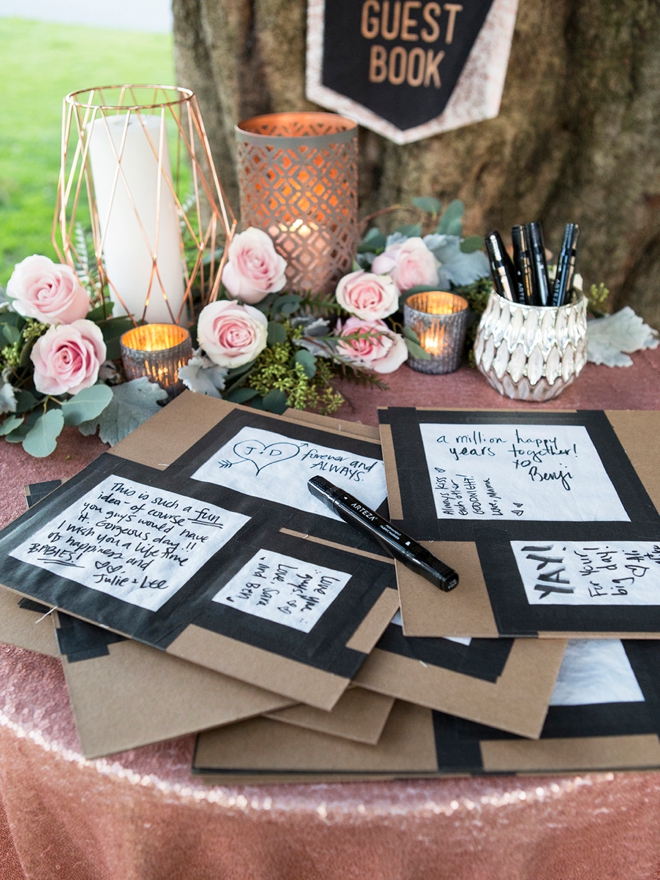
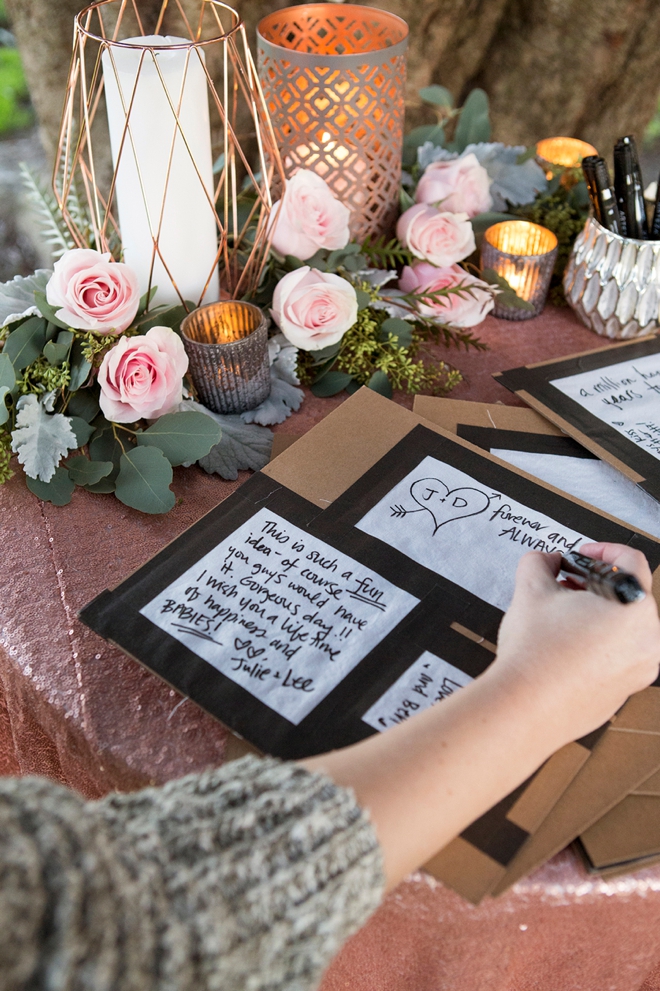
All Filled Out
Get excited to read all your special messages! Each square isn’t intended for one signature, there can be multiples on one. If there are blank squares or spaces, fill them in with notes to each other!
Assemble
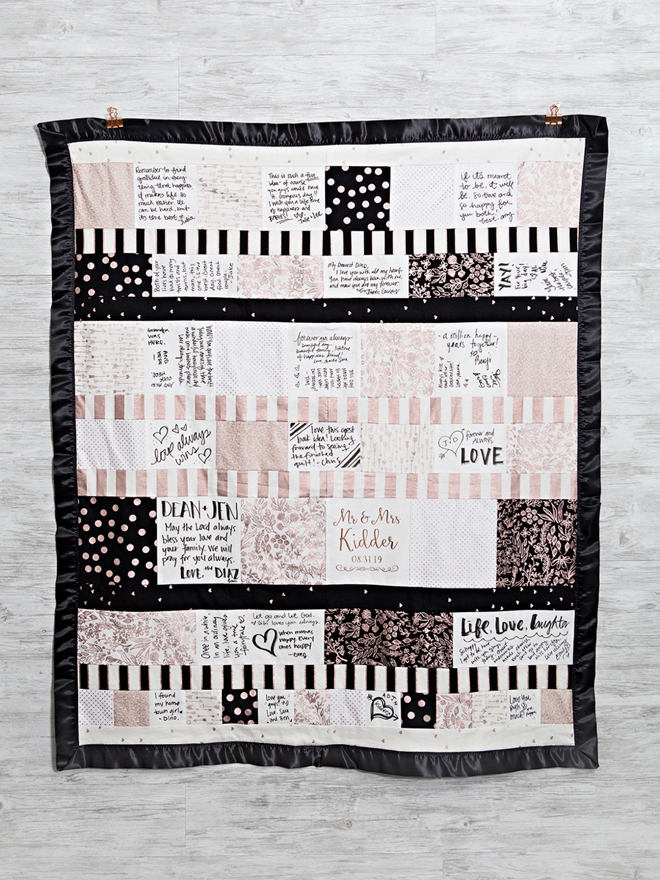
Follow your plan and the Cricut pattern to assemble your gorgeous, keepsake quilt!
Iron As You Go
A big part of quilting is pressing. Each time you finish a row, iron it smooth. Making crisp lines ensures the best seams. I used my mini EasyPress 2 for this step.
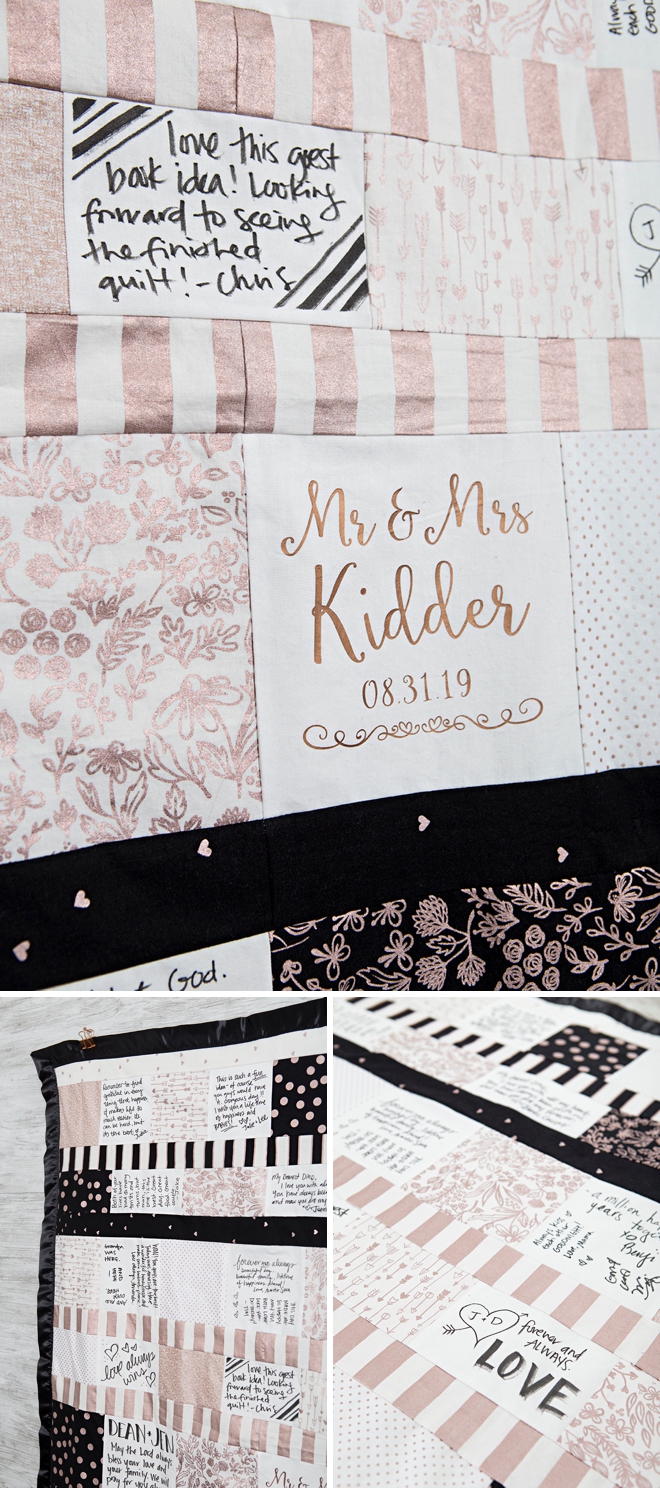
The Finished Quilt
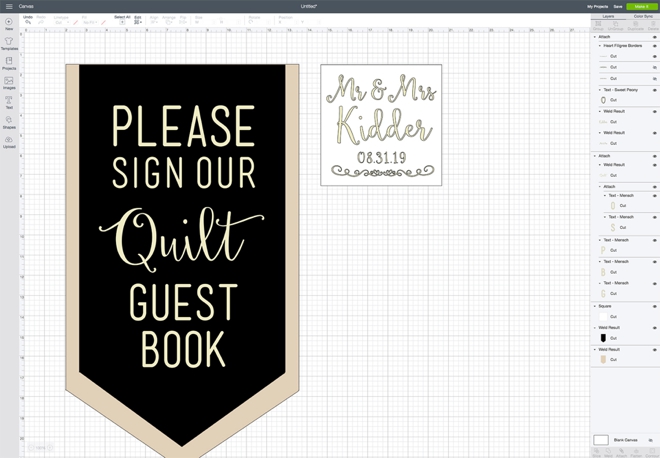
Quilt Guest Book Sign
I created the guest book sign and the personalized Mr & Mrs quilt square in Cricut too using foil iron-on! Login to Design Space and then click on this link to use my design for free!
DIY TUTORIAL SPONSORED BY:

Cricut is a world-class leader in personal electronic cutting machines that has enabled people to achieve their creative best for over 50 years. Today, millions of people use Cricut products to create unique projects, and they focus on enhancing lives with this power of creativity. Let Cricut help you take your wedding personalization and project creativity to the next level!
As with all our DIY tutorials, if you create one of our projects please send us a picture – We Love Seeing Your Creativity! If you use Instagram or Twitter please use the hashtag #SomethingTurquoiseDIY and it will show up on our Get Social page. Happy Crafting!
DIY Tutorial Credits
Photography + DIY Tutorial: Jen Causey of Something Turquoise // Cricut Maker, Fabric Mats, Riley Blake Fabric, Chipboard, Easy Press 2 and Iron-on Supplies: courtesy of Cricut // Permanent Fabric Markers: Amazon // Quilt Batting: Amazon // Black Satin Blanket Binding: JoAnn // Black Masking Tape: Amazon // 120″ Round Sequin Table Cloth, Rose Gold: Amazon // Nail Polish: OPI – Withstands the Test of Thyme
Shop The Supplies:
Find the supplies you’ll need for this project from our affiliate links below:

Comments