
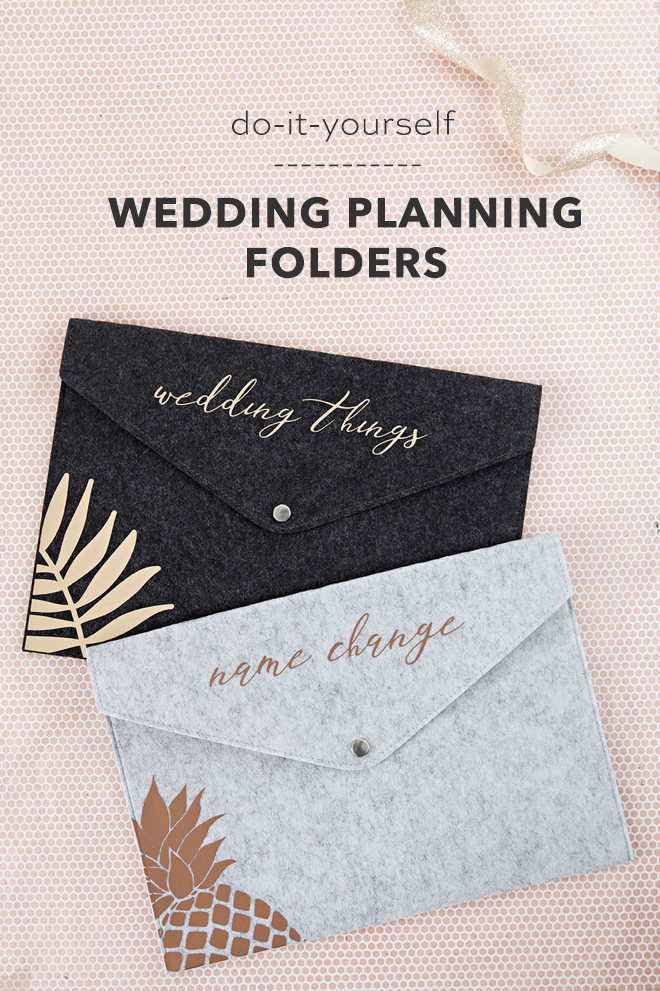
DIY Wedding Planning Folders With Cricut
-Sponsored Post-
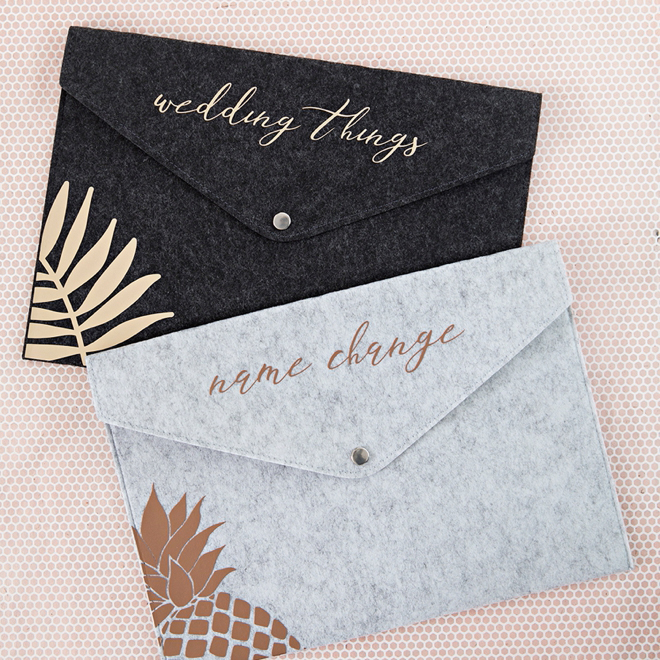
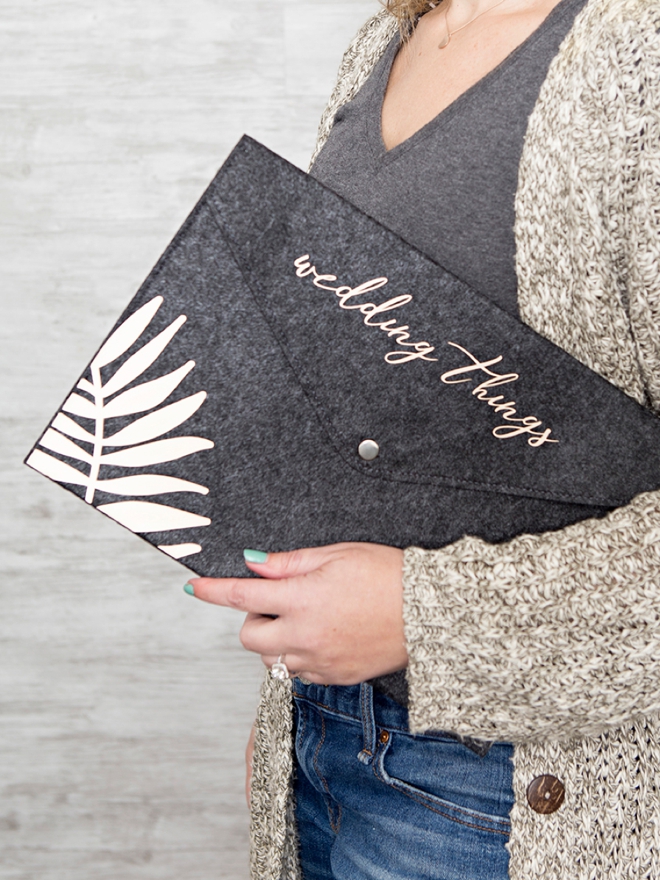
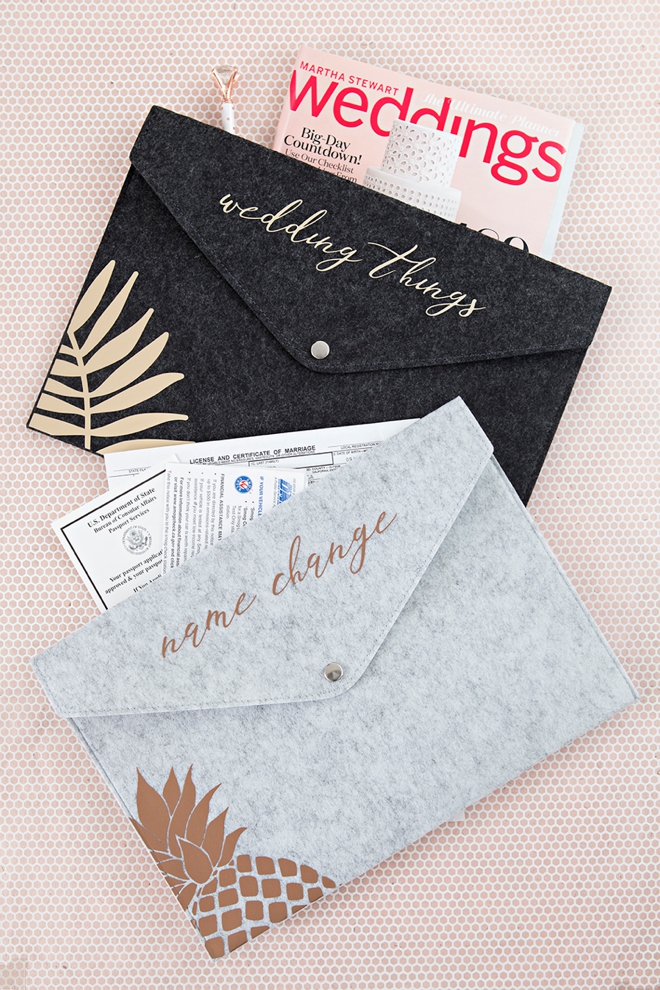
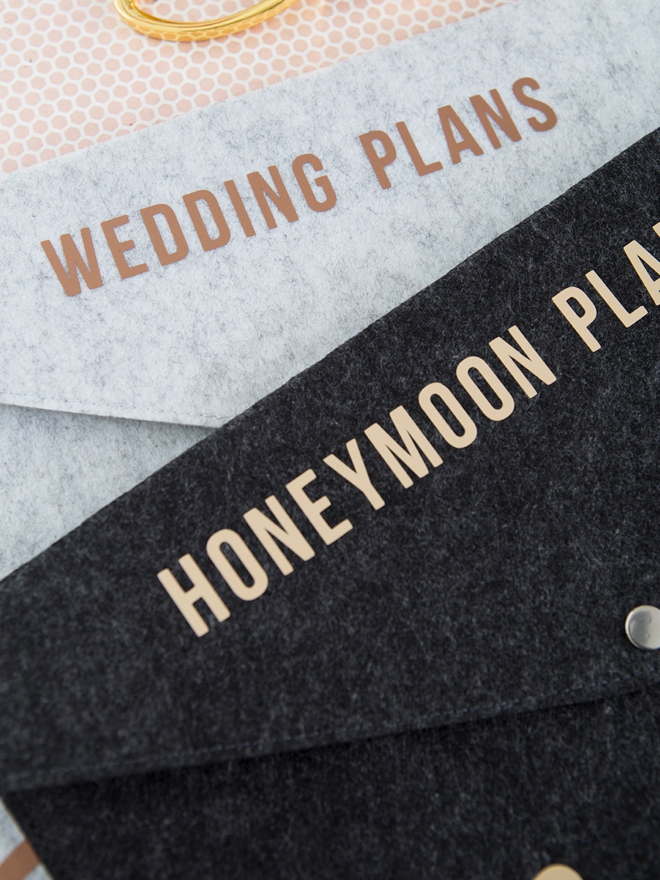
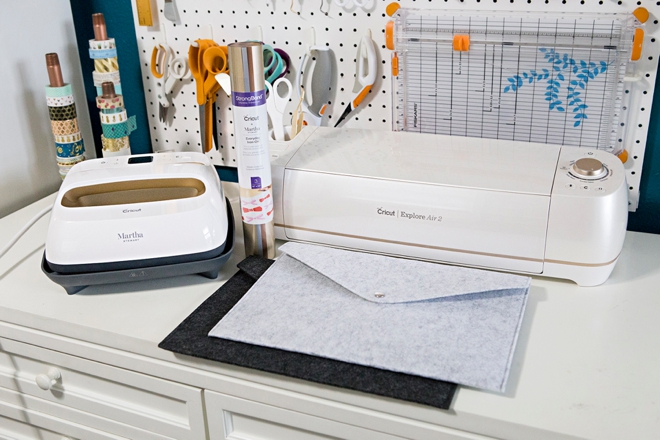
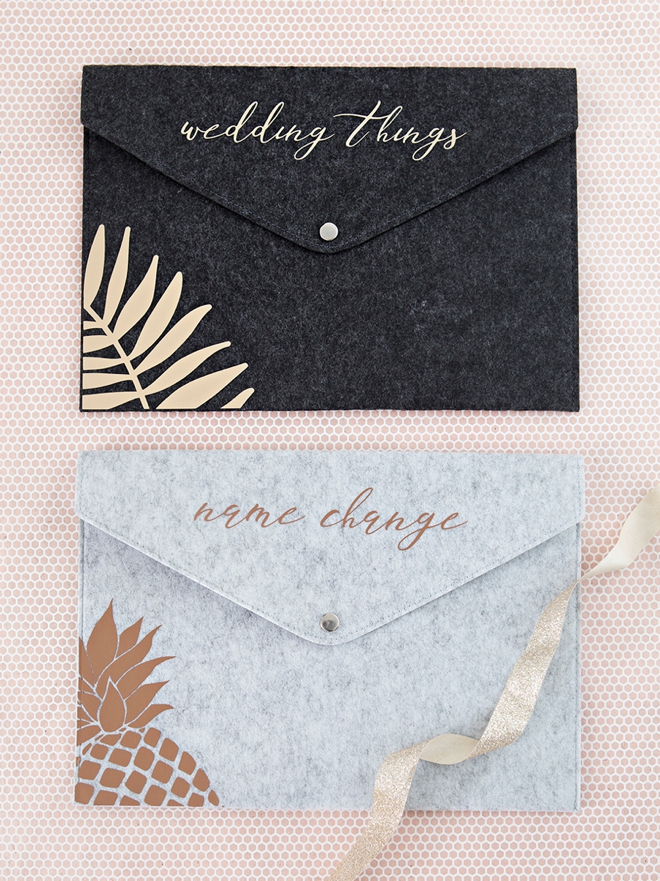
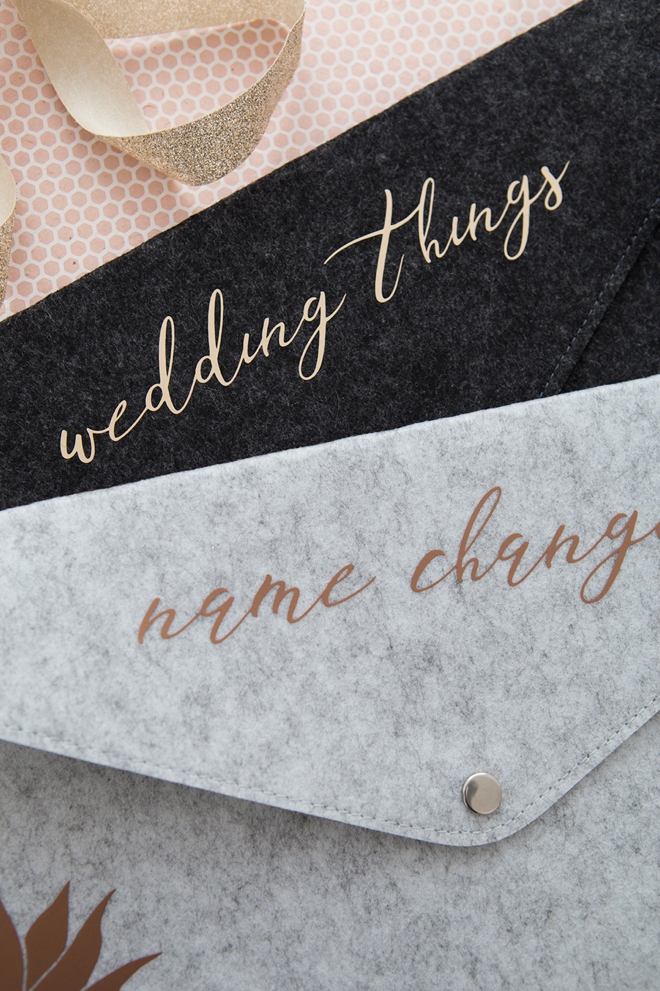
Many of you lovely ladies have just been proposed to (Congrats!!! We’re super excited that you’re here!!) and are now really digging into wedding planning. So I figured you’d need a pretty place to hold all the things you’re working on, enter these gorgeous personalized felt file folders! I’m using my beautiful machine and my matching Martha Stewart EasyPress 2 for this project. I love how Martha always makes sure that her tools are beautiful so you can feel beautiful while crafting! Whether you’re trying to stay organized for your bridal shower, your wedding day, your honeymoon, or your name change, you can design a custom oversized file folder to hold whatever you’d like!

Obsessed With These Felt File Folders
I found these felt file folders on Amazon and wondered if they could be as pretty in person as they claimed to be in the listing, and they are! They are perfectly oversized to fit all kinds of things, even a clipboard could fit inside. Making it super easy to store all your important wedding contracts, honeymoon plans, name change documents and so much more!
SUPPLIES:
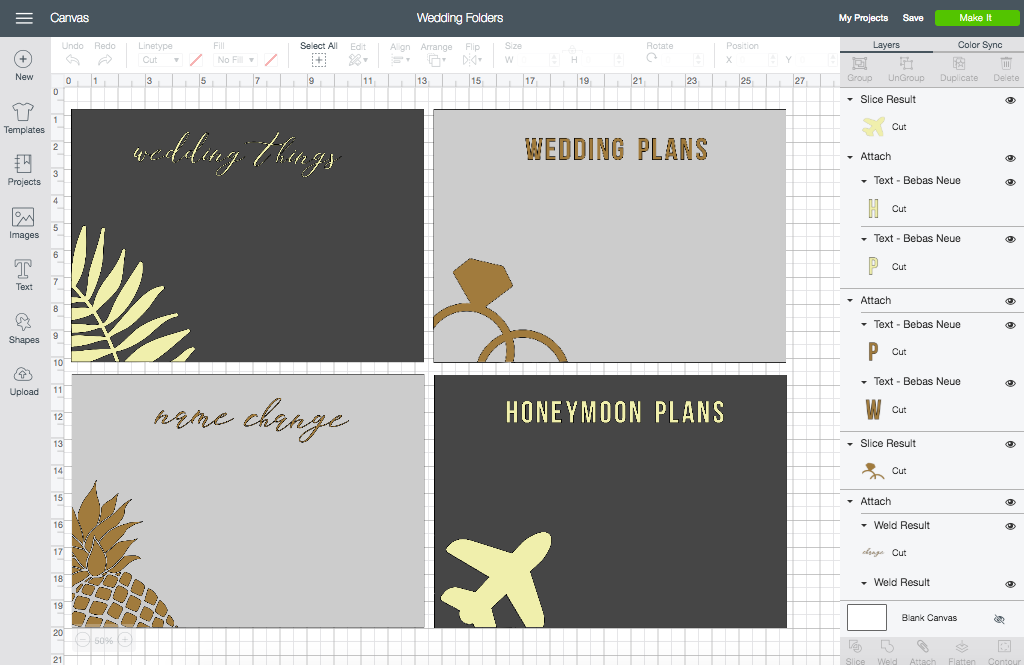
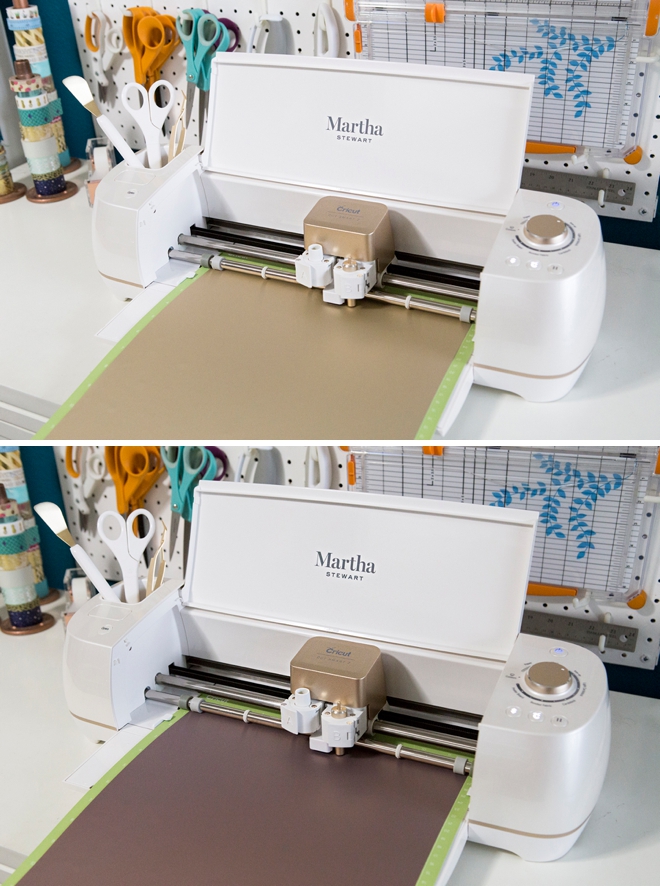
Create In Design Space
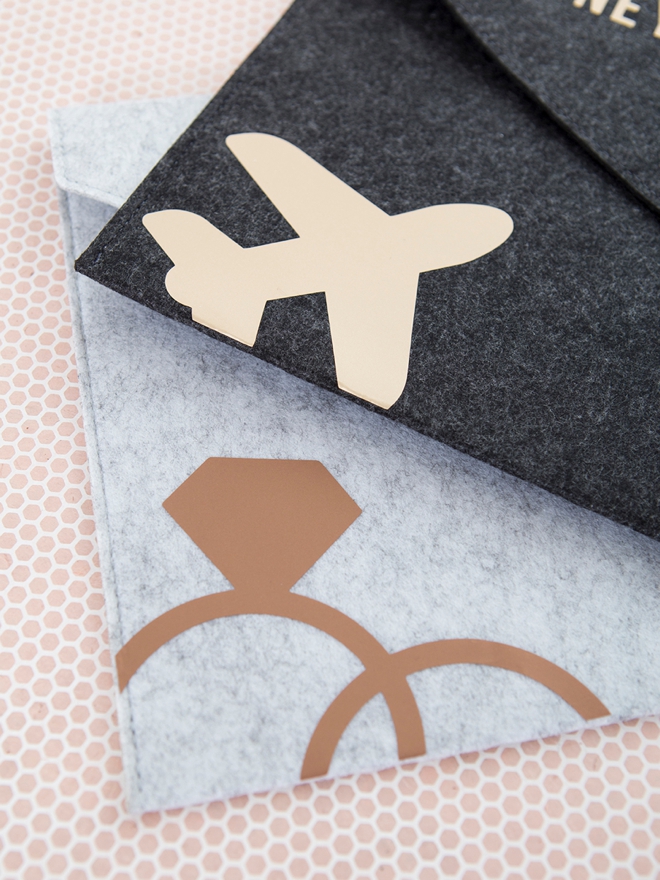
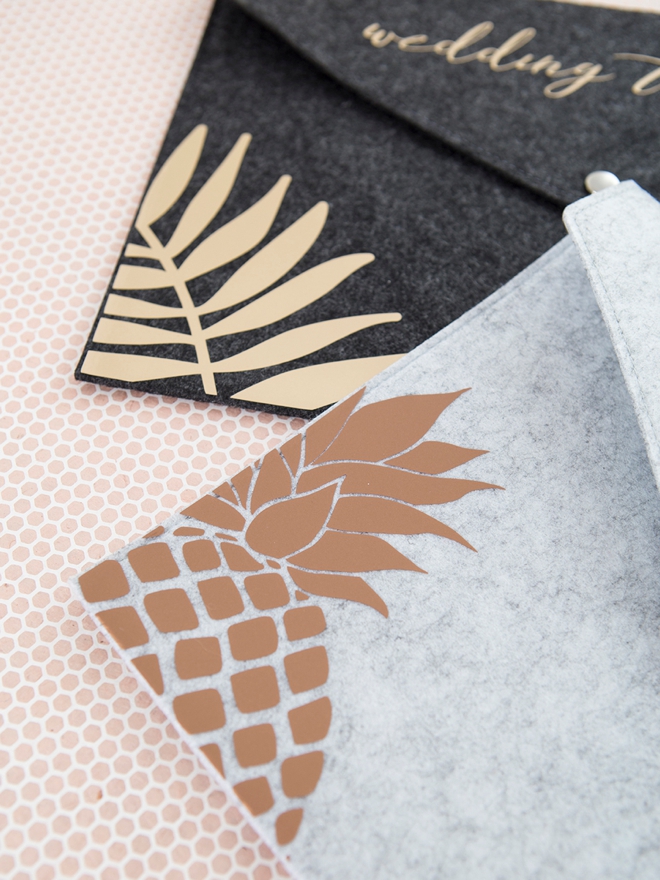
I like to start by creating the shape of what my designs will go on. In this case, colored rectangles that represent the felt file folders at their exact size. Then I design from there, knowing the elements will fit perfectly once I go to iron them on. I used Melinda Script and Bebas Neue for the fonts. The palm leaves (M570EE81) and pineapple (M54C516D) are Martha Stewart’s designs and the wedding rings (MA94164E) and airplane (MA39E3B4) were found in Design Space. Search the numbers to locate each one to use them on your own. Or simply click to use my canvas and all the files and fonts pre-designed! You need to login to Design Space to be able to see and use the canvas.
Let Your Cricut Work It’s Magic
You ALWAYS need to click the “mirror-image” button for iron-on projects, otherwise your lettering will be backwards. Iron-on material always goes face down on the cutting mat.
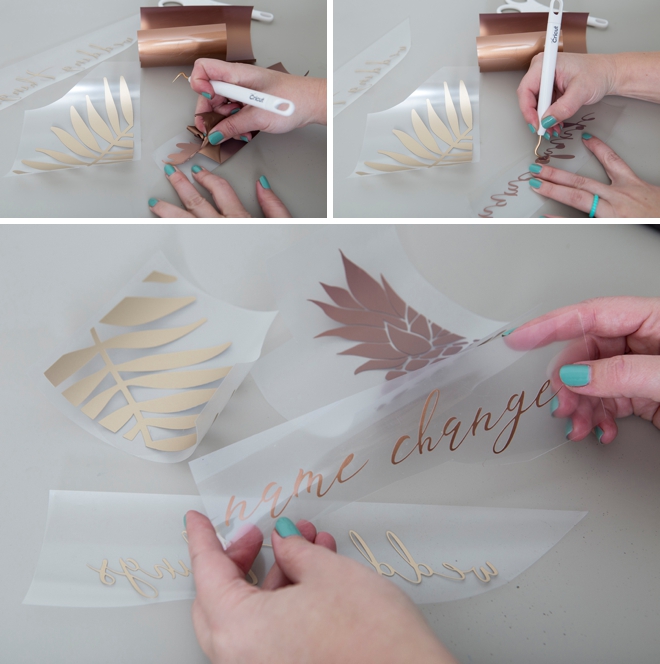
Weed The Designs
Weed, (aka. remove) all the excess iron-on material that isn’t a part of your design. Using the Cricut weeding tools makes the removal of intricate pieces super easy. Then trim each design down to size if needed.
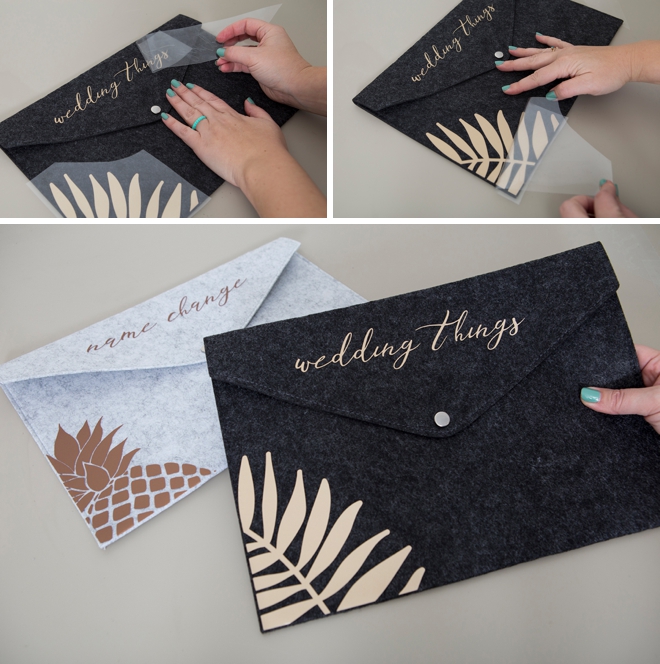
Adhere The Designs
These file folders are made of a gorgeous, sturdy wool felt. I’m using my Martha Stewart EasyPress 2 for this step, which I love because all you do is plugin the heat and time settings and that’s it, no guess work! You can easily find the EasyPress settings for any project by visiting this link on Cricut’s website and entering your materials. I found the best EasyPress settings for this project are:
- Everyday Iron-on: 290˚ for 60 seconds, cool peel.
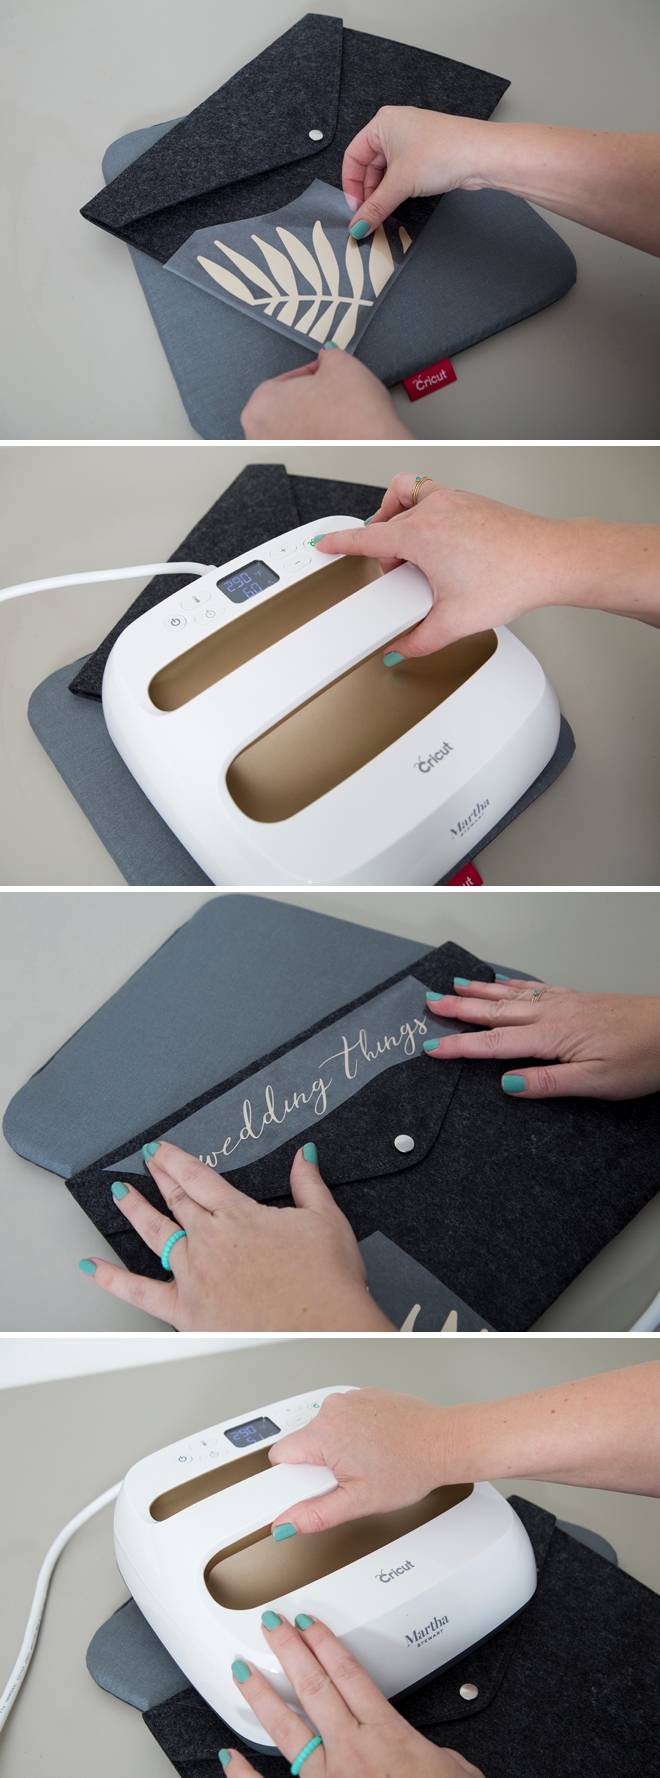
Cool Peel means to peel off the clear iron-on transfer sheet once the project has cooled down. Most metallic iron-on colors do best with a cool peel.
Personalization Made Easy
If you’re on the fence about getting a Cricut, or you need a gentle nudge to make the decision to buy one – our projects are it! Seriously, the sky is the limit when it comes to what you can make for your wedding with the Cricut. From simple personalized felt file folders like these to a felt flower wedding bouquet and everything in between. It will be your number one wedding crafting tool and after your wedding, you can use it to personalize your home, make fabulous gifts and more!

DIY Tutorial Sponsored By:

Cricut is a world-class leader in personal electronic cutting machines that has enabled people to achieve their creative best for over 50 years. Today, millions of people use Cricut products to create unique projects, and they focus on enhancing lives with this power of creativity. Let Cricut help you take your wedding personalization and project creativity to the next level!
As with all our DIY tutorials, if you create one of our projects please send us a picture – We Love Seeing Your Creativity! If you use Instagram or Twitter please use the hashtag #SomethingTurquoiseDIY and it will show up on our Get Social page. Happy Crafting!
DIY Tutorial Credits
Photography + DIY Tutorial: Jen Causey of Something Turquoise // Cricut® Explore Air™ 2 Special Edition, Martha Stewart Machine Bundle, Cricut® EasyPress™ 2 Martha Stewart Edition Vanilla, 9″ x 9″, and Martha Stewart Metallics Iron-on: courtesy of Cricut // Felt File Folders: Amazon // Nail Polish: OPI – Withstands the Test of Thyme
Shop The Supplies:
Find the supplies you’ll need for this project from our affiliate links below:

Comments