
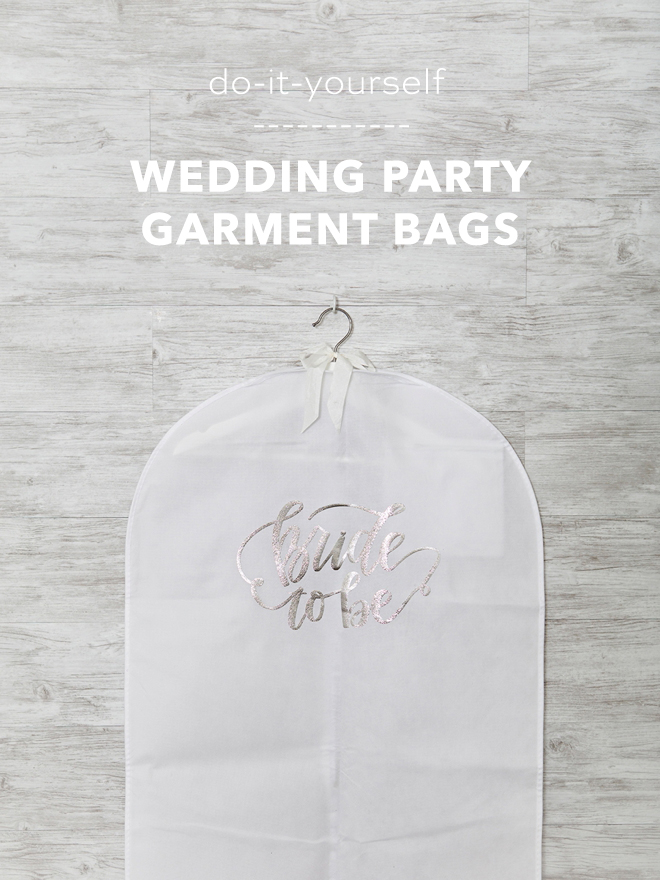
DIY Wedding Party Garment Bags
If you’re an extra type of Bride, you need all the personalized things and gurl, we are here for you! These wedding party garment bags need to be added to your list of fabulous things to DIY. They are quick and easy, they protect your special clothing and will make awesome photo props while you’re getting ready. You can also store your clothing in them after your wedding and maybe even use them to travel with on your honeymoon. First up, visiting our shop to find your favorite hand-lettered .SVG cut file to use with your Cricut!
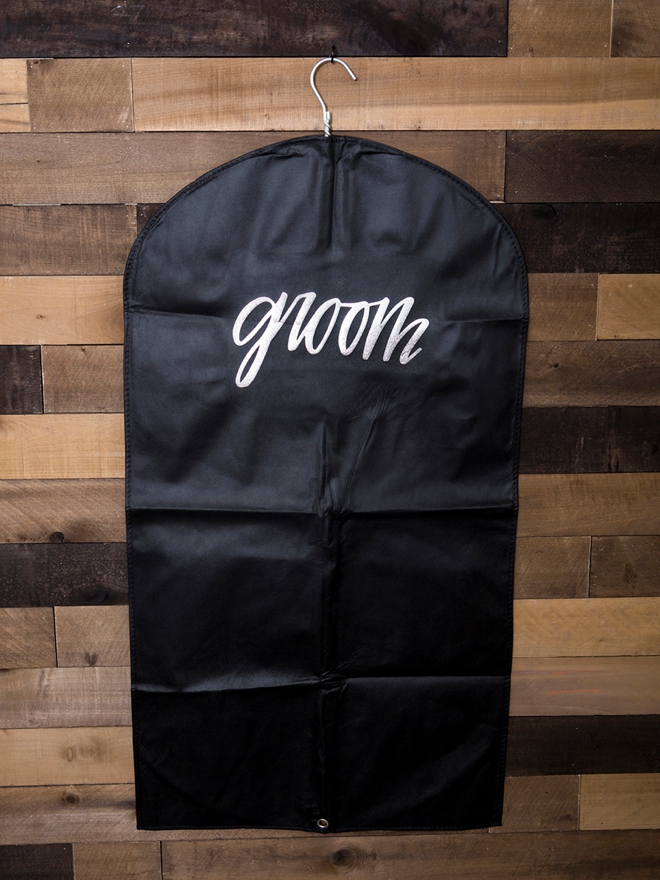
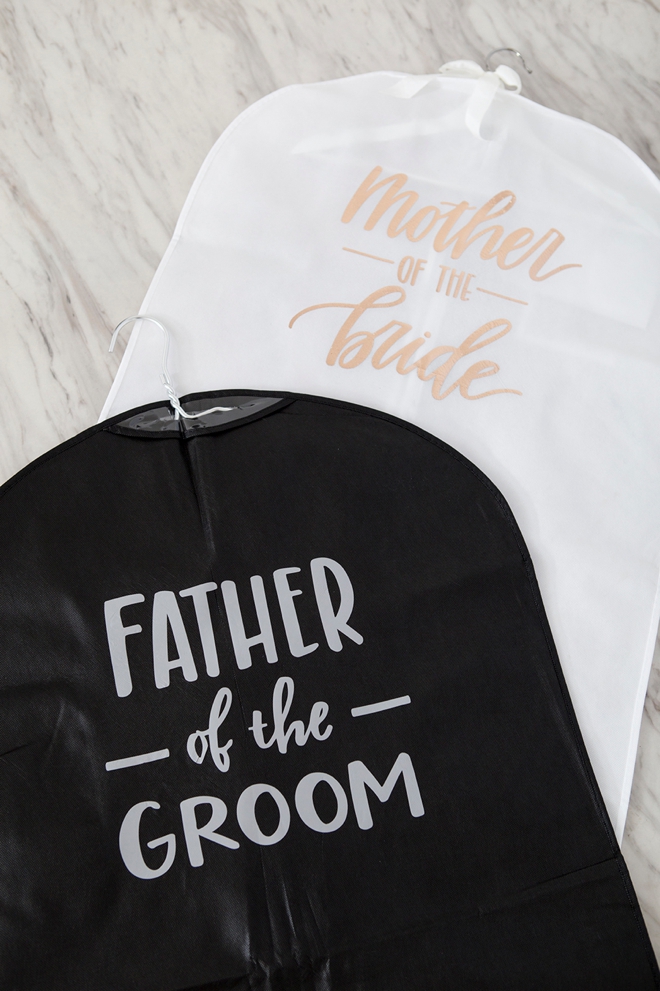
Quick & Cute
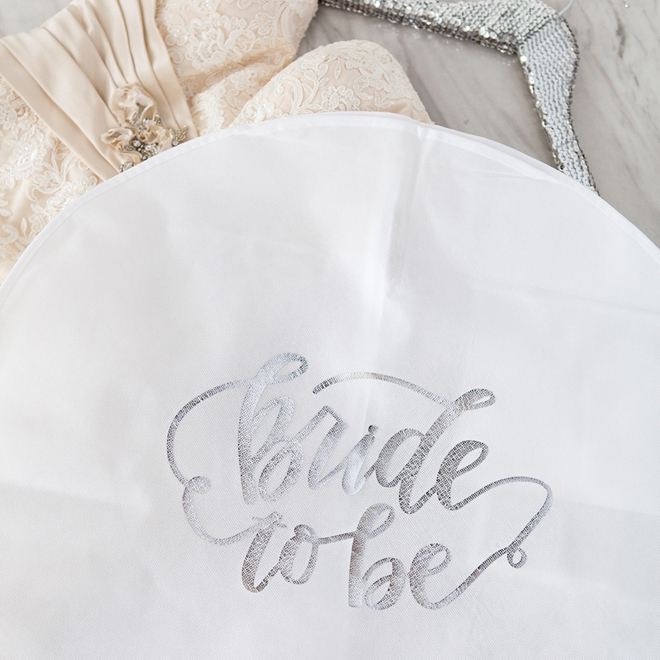
This is a small detail that will make for terrific getting ready photographs! You and your entire bridal party will feel extra special with your clothing in these gorgeous personalized bags and the best part is that if any clothing is lost, it won’t be for long!
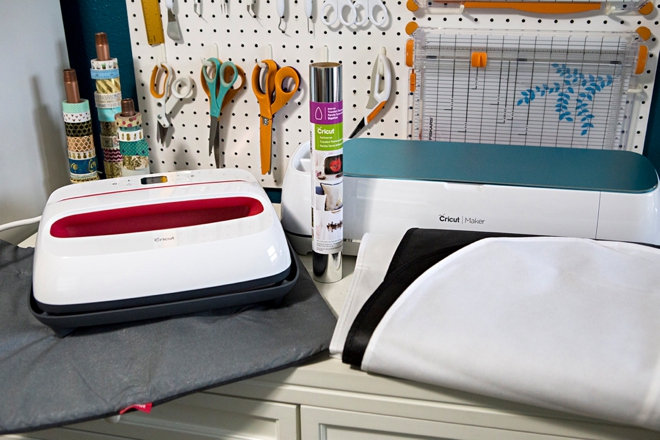
SUPPLIES:
- Cricut Explore or Cricut Maker
- Cricut EasyPress 2 – 12″ x 10″
- Cricut EasyPress Mat
- Cricut Iron-on
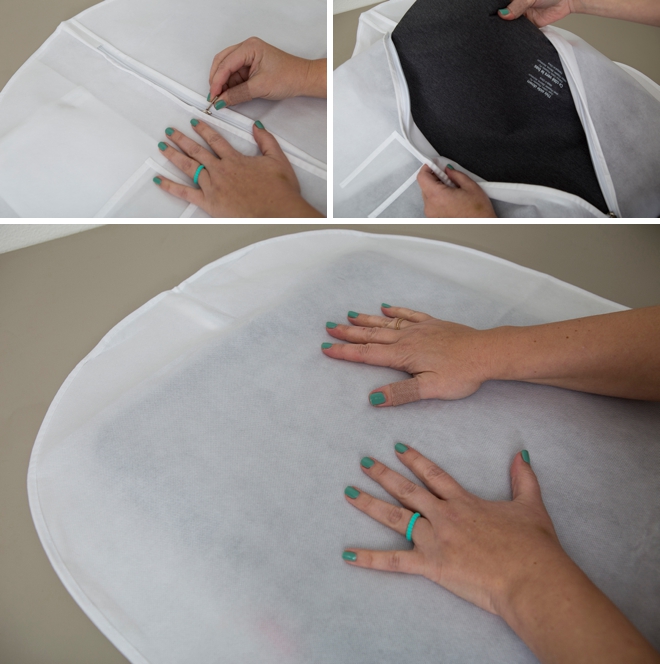
- Fabric Garment Bags (not the PEVA kind, that is plastic and will melt!)
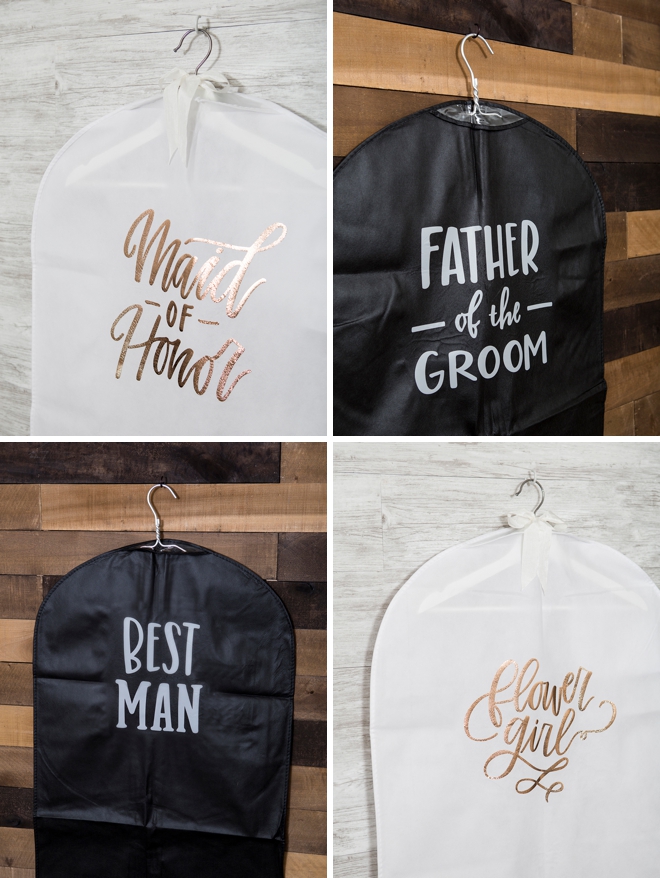
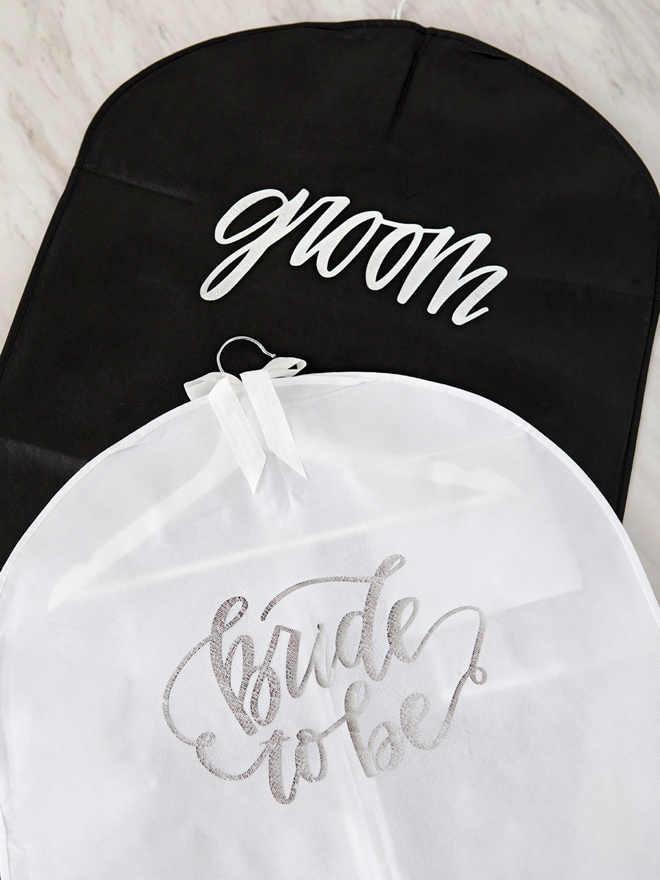
- Our exclusive, hand-lettered .SVG Bridal Party cut files!
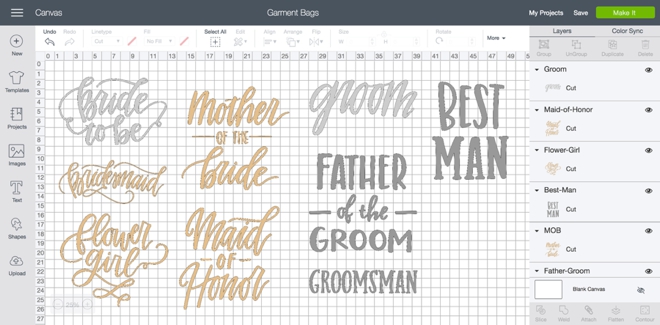
How To Upload Custom Cut Files
There are MANY different places to get custom cut files like these for your Cricut, our shop is one of them. Etsy is another terrific place to look and some websites offer them for free.
- Login to Design Space and open a new project canvas
- From the tool bar on the left hand side, click “Upload”
- Locate your .SVG cut file from your computer and click to upload
- Then click to add that file to your canvas
- Yes, it’s that simple!
Then drag each file to the correct size for your project and color code it to match the iron-on you are using.
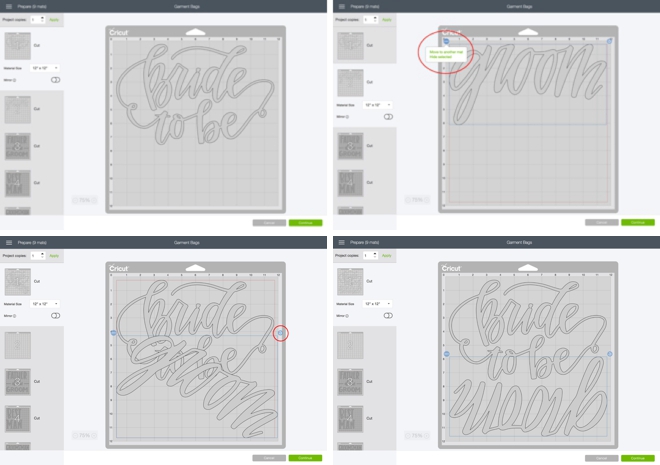
Make The Most Of Your Material
Design Space usually does a terrific job of saving space on your cutting mats but sometimes it can use some help. In this case, the “bride to be” and the “groom” could easily fit on one mat, the groom just had to be rotated to do so. You do that by clicking the three little dots in the corner on cut file you want to move, select “move to a different mat”, then select the mat you want to move it to, then use the arrow to rotate it to fit! Easy and awesome.
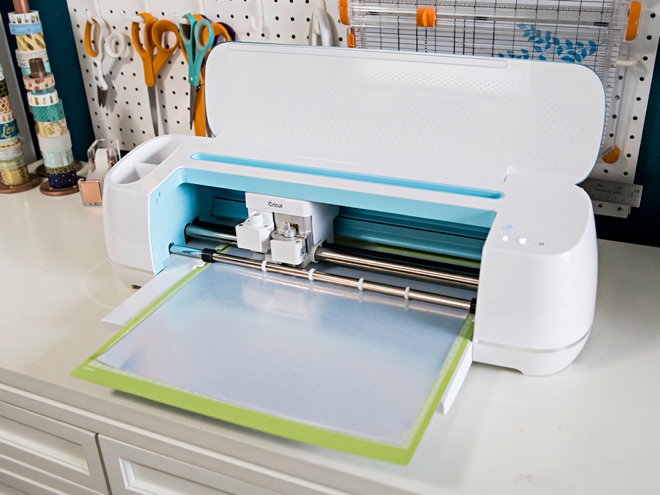
Let Your Cricut Work It’s Magic
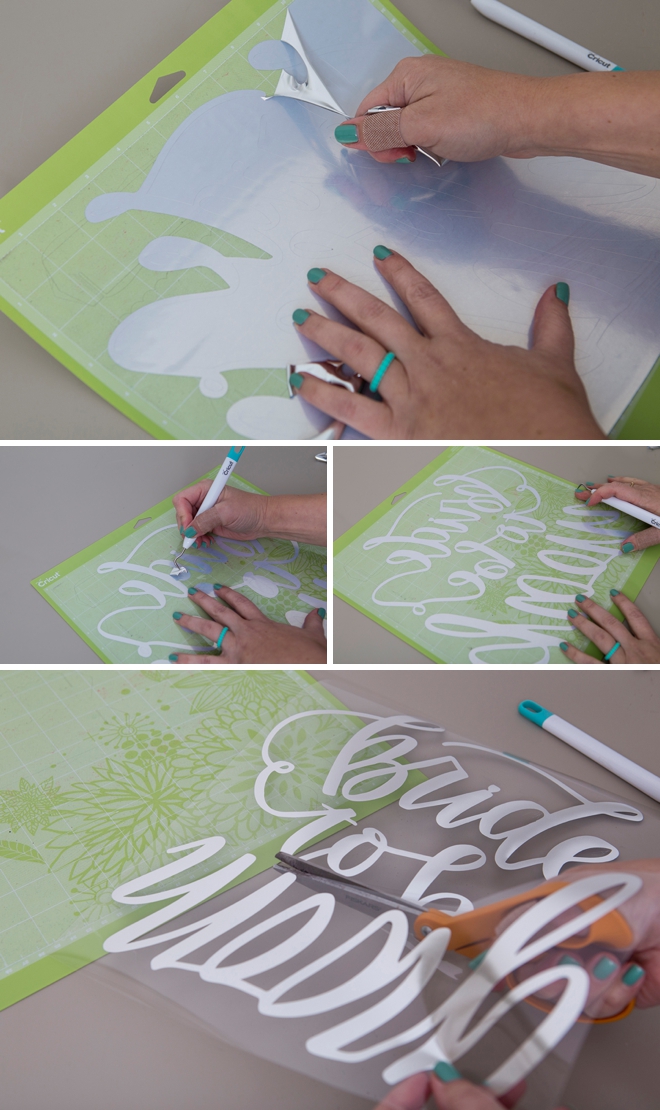
You ALWAYS need to click the “mirror-image” button for iron-on projects, otherwise your lettering will be backwards.
Weed The Designs
Weed, (aka. remove) all the excess iron-on material that isn’t a part of your design. Using the Cricut weeding tools makes the removal of intricate pieces super easy. Then trim each design down to size if needed.
Easy Press Mat
Place the EasyPress mat inside the garment bag to give yourself the perfect surface for adhesion. Kind of like how we used to put a piece of cardboard in our shirts to do puffy paint designs, LOL.
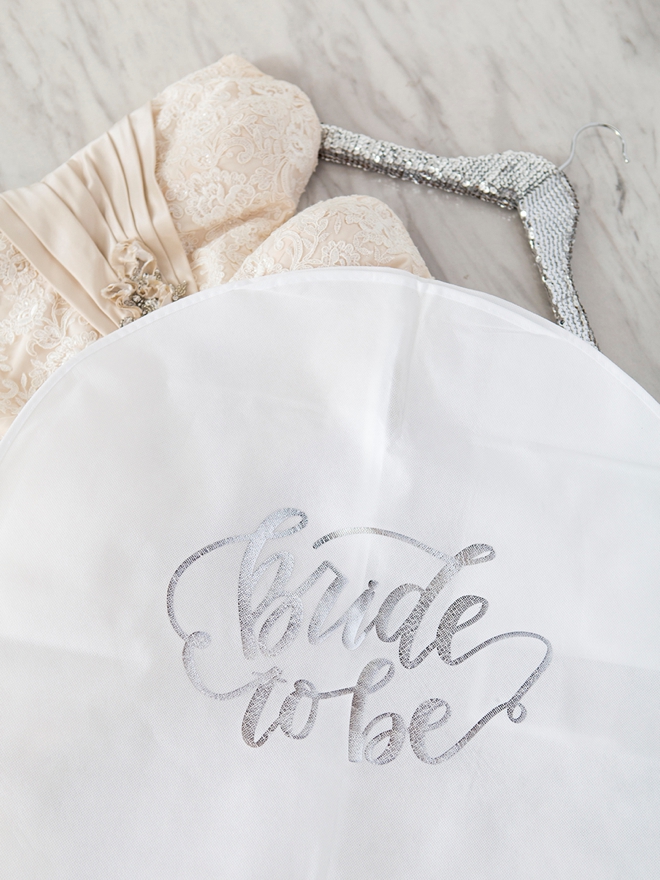
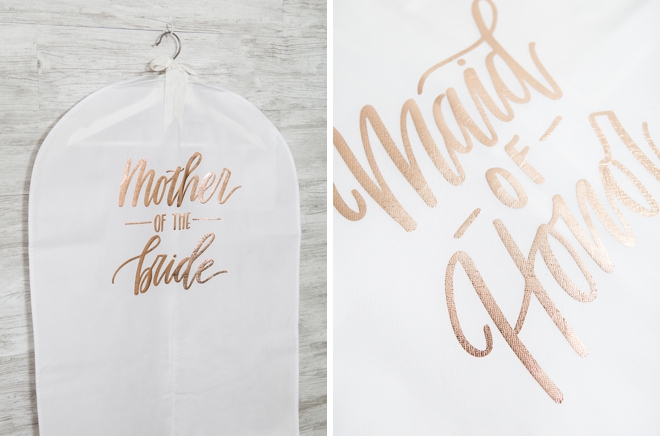
Adhere The Designs
These garment bags are made of an interesting mesh type cloth. I searched and searched and could not find what exact type of material it was so I did some testing and turns out the perfect EasyPress settings for this project are:
- Everyday Iron-on: 275˚ for 30 seconds, slow and careful warm peel
- Foil Iron-on: 275˚ for 45 seconds, slow and careful warm peel

Not Getting Married?
You can still make one of these for yourself if you’re not getting married! You might need to store keepsake clothing or maybe you travel a lot with nice clothes, both great reasons to personalize a garment bag or two for yourself!
As with all our DIY tutorials, if you create one of our projects please send us a picture – We Love Seeing Your Creativity! If you use Instagram or Twitter please use the hashtag #SomethingTurquoiseDIY and it will show up on our Get Social page. Happy Crafting!
DIY Tutorial Credits
Photography + DIY Tutorial: Jen Causey of Something Turquoise // Exclusive Hand-lettered .SVG Cut Files: Shop Something Turquoise // All Cricut Supplies: courtesy of Cricut // Cloth Garment Bags: Amazon // Nail Polish: OPI – Withstands the Test of Thyme
Shop The Supplies:
Find the supplies you’ll need for this project from our affiliate links below:

Comments