

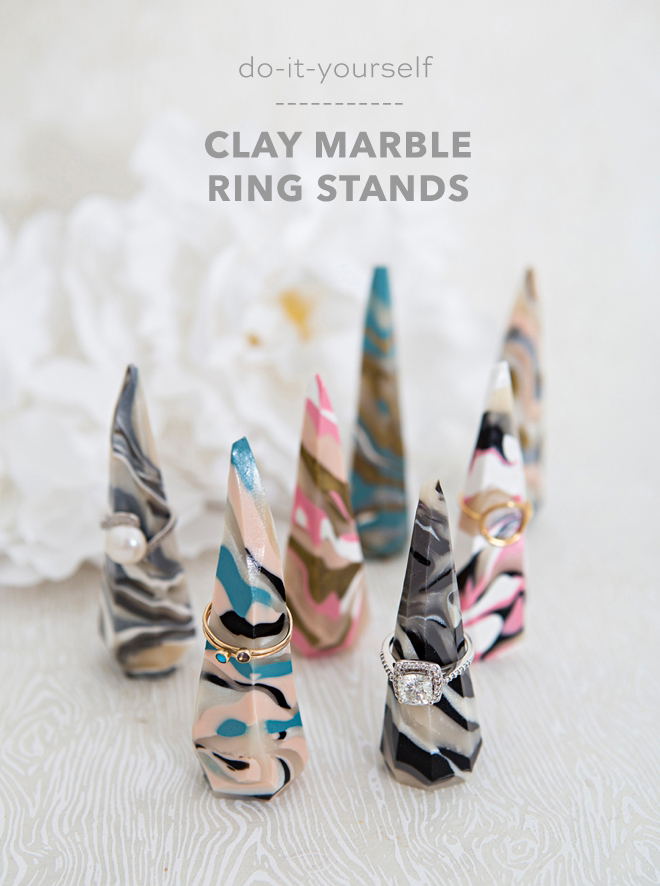
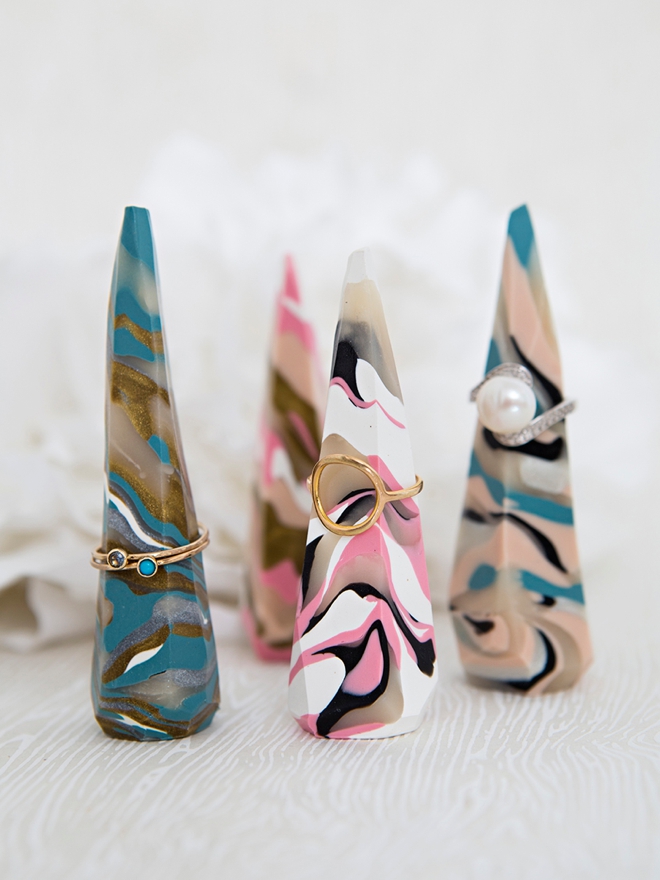
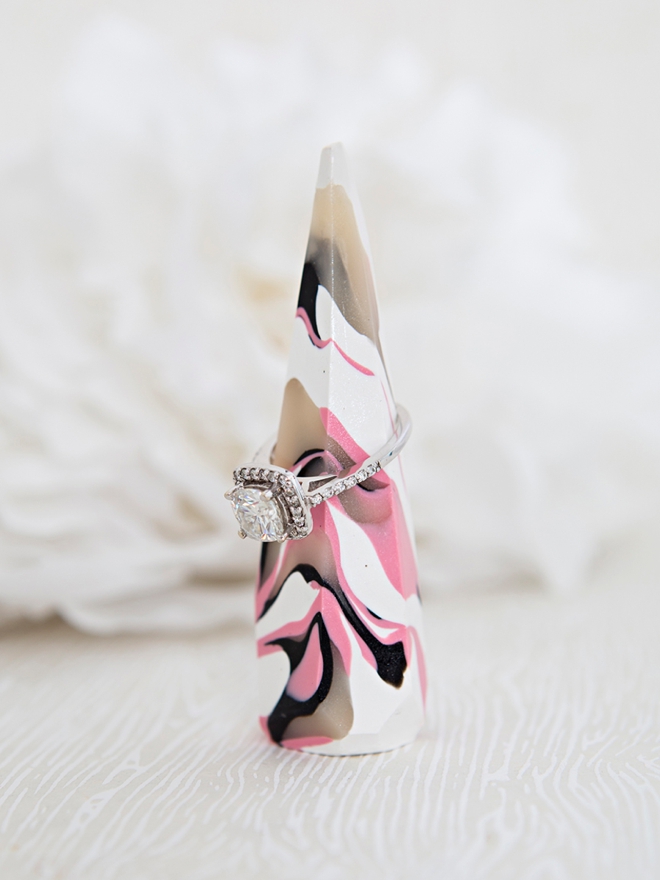
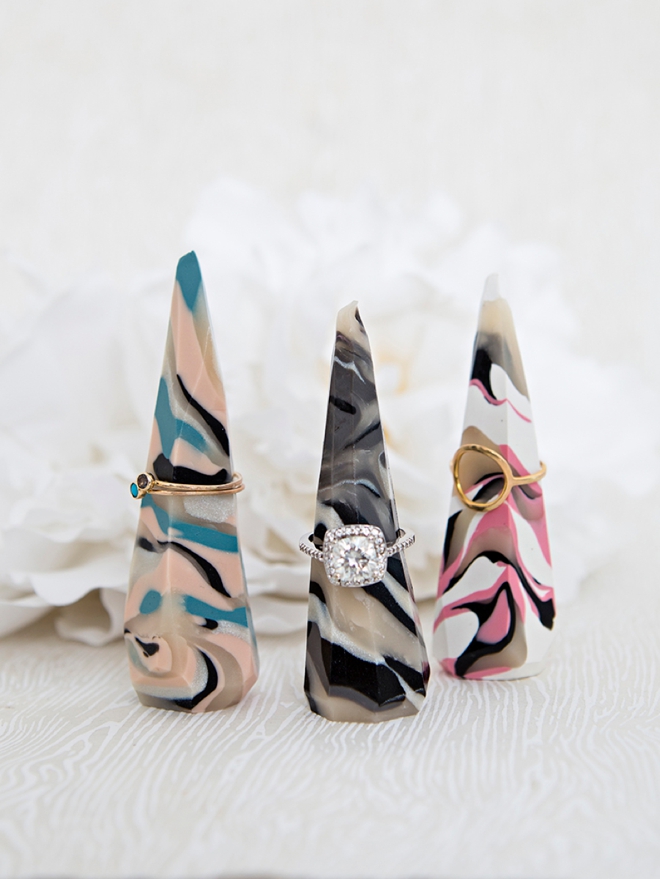
DIY Marble Clay Ring Stands
I love playing with clay. I love choosing different colors, mixing them together, slicing it up and seeing what I can create. Today I’m mixing up some trending neutral tones to create unique little ring stands. The perfect place for your wedding ring to rest each night, or while you’re in the shower, or washing your hands, and they double as ultra-pretty room decor. They would be terrific for taking pictures of your wedding rings on your wedding day as well. If you love these ring stands you’ll also love my personalized cake forks and these gemstone wine stoppers, you could even make them all match!
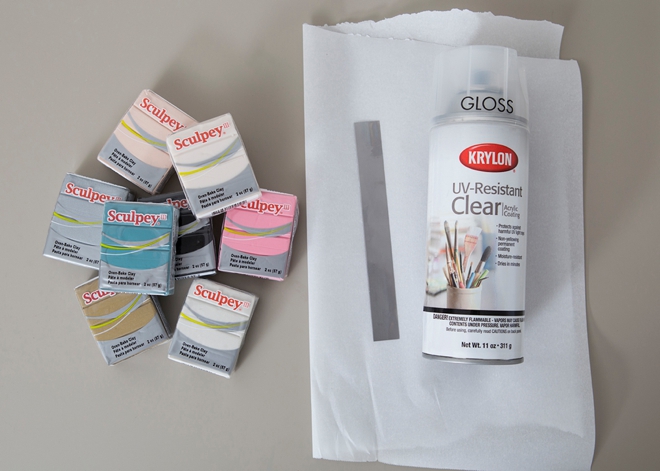
SUPPLIES:
- Oven Bake Clay
- Flexible Clay Knife
- Parchment Paper
- Clear Sealer Spray, optional
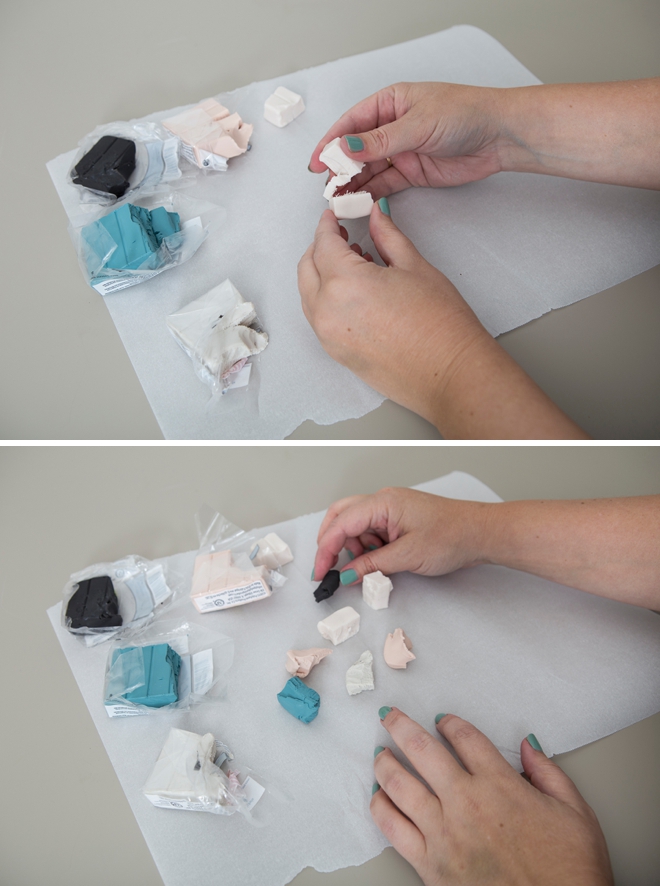
Choose Clay Colors
Choose your colors of clay, 4-5 different shades make the best marble look. I’ve also included “transparent” clay in all the designs, once baked it adds unique dimension. Break off about 5-7 pieces of clay that are each about 1/2″ square. Be careful when adding black, a little goes a long way!
Roll + Squish
Roll each color into a worm shape, LOL, very technical stuff here. Then press them together, twist, twist, twist and roll a bit. Don’t over twist and roll as that could blend the colors.
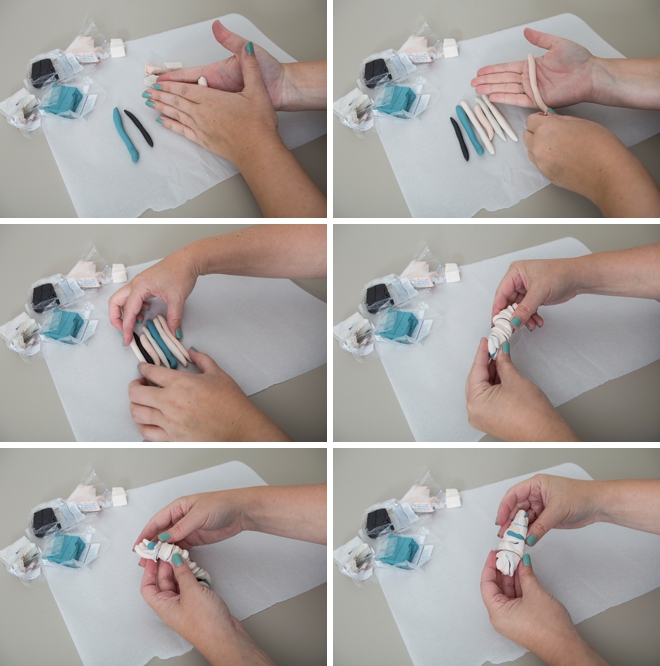
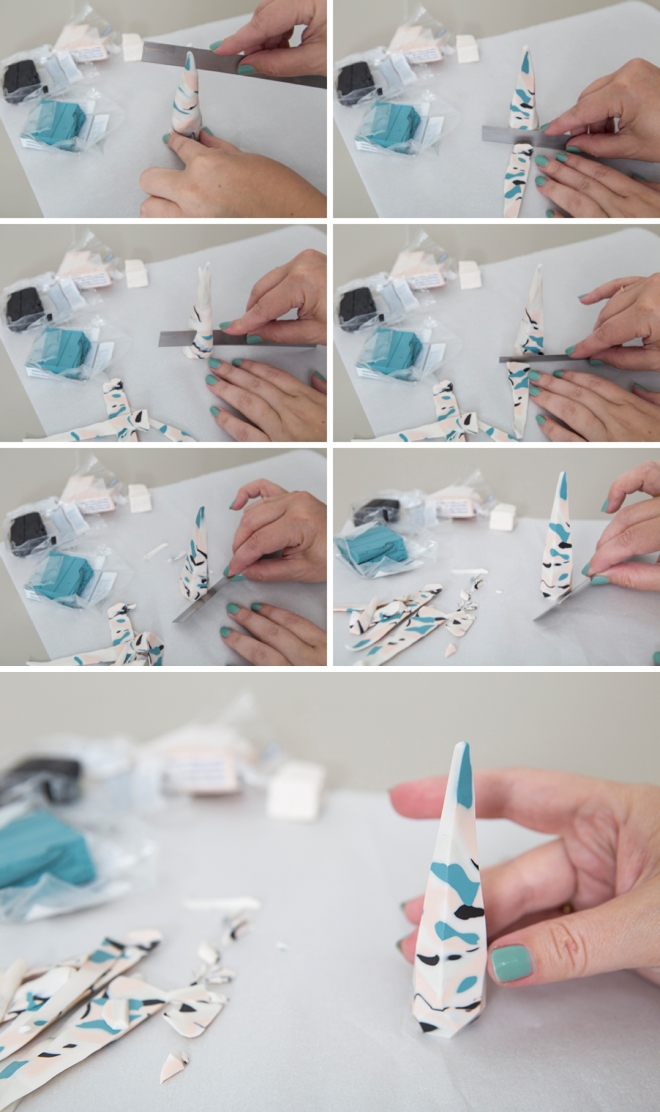
Cone Shape
Then roll into a cone shape with a large and small end.
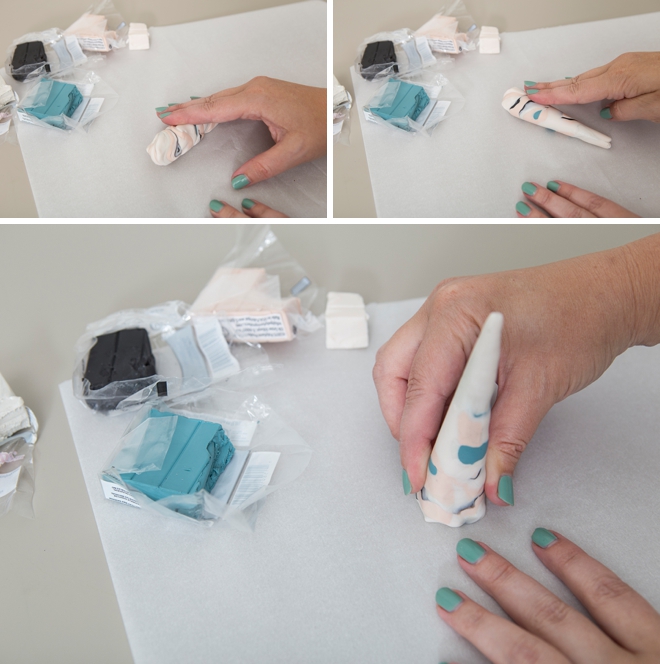
Slice Facets
To add the cool facet edges, slice the clay cone using a flexible clay knife or something sharp and thin. Cut and add random sharp edges all the way around and do the same to the bottom, under-cutting the cone to give the look of a gemstone.
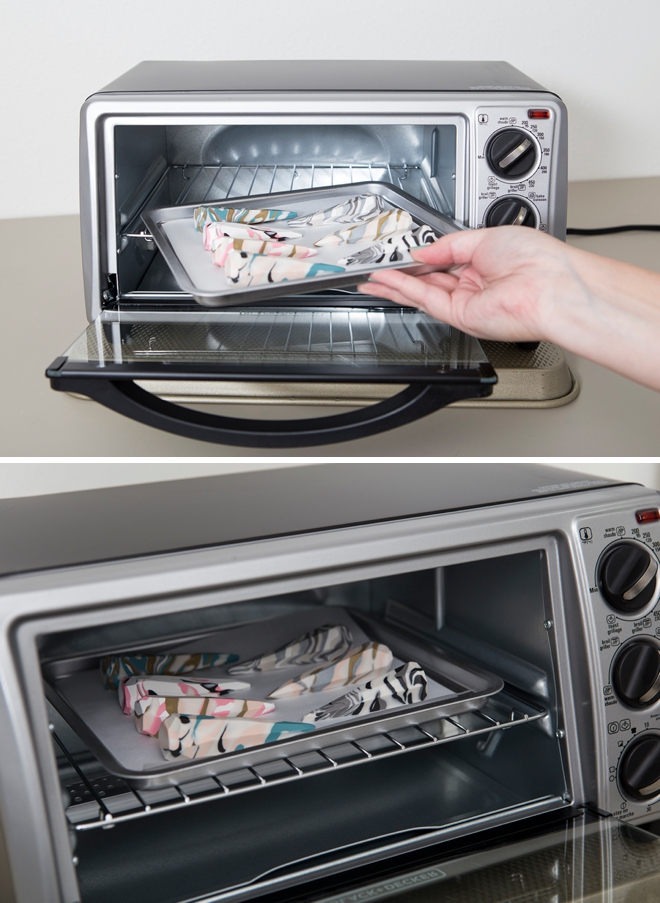
Bake
Bake your ring stands per the instructions on your specific clay. Mine was 275º for 15 minutes per every 1/4″ of clay, so I ended up baking them for 45 minutes. I did so in my toaster oven in my studio, set on top of a cookie sheet to protect my work table. Worked perfectly, first time using it!
Glossy Coat
To add a glossy finish I did two coats of clear spray sealer. This step is totally optional but super shiny!

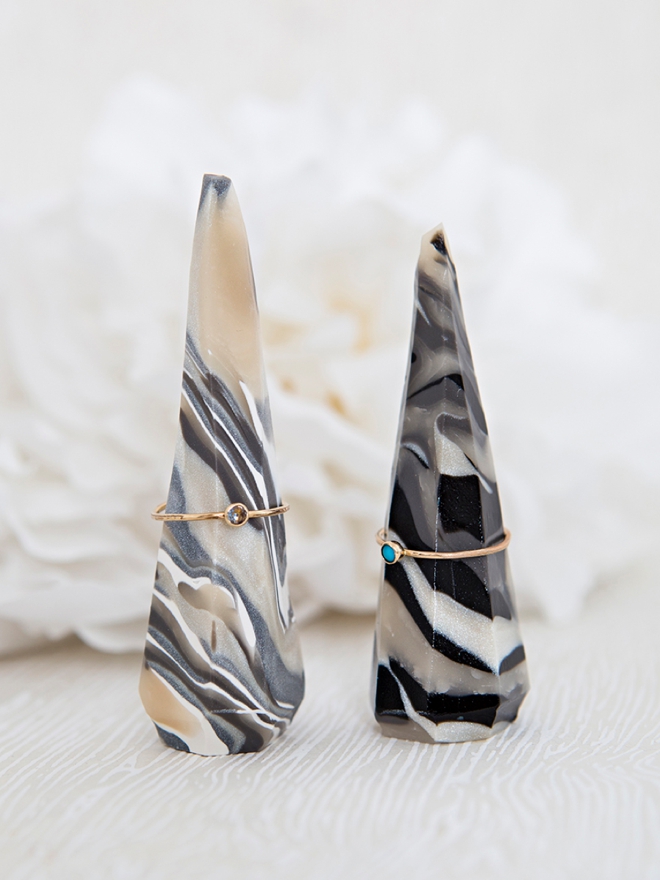
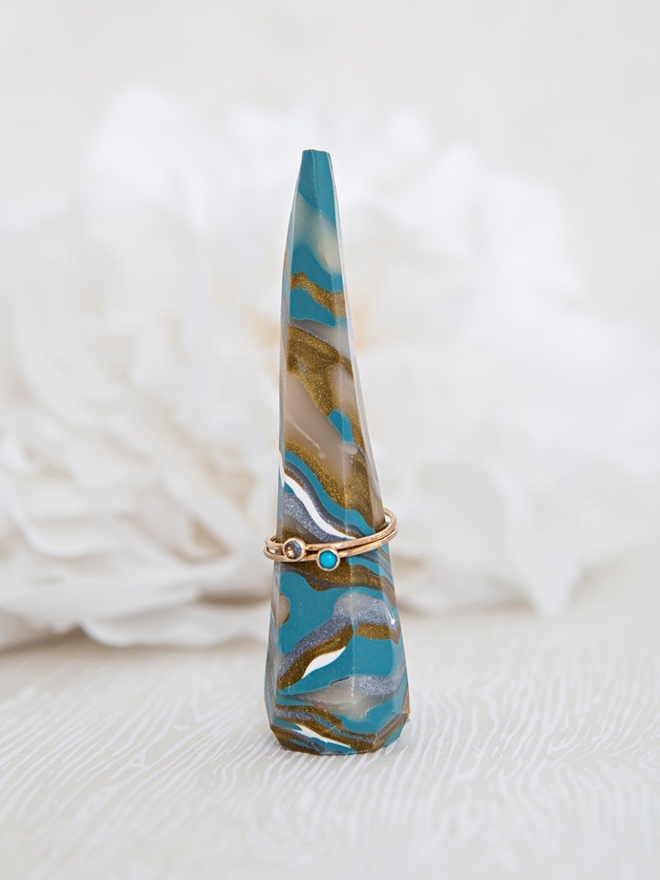
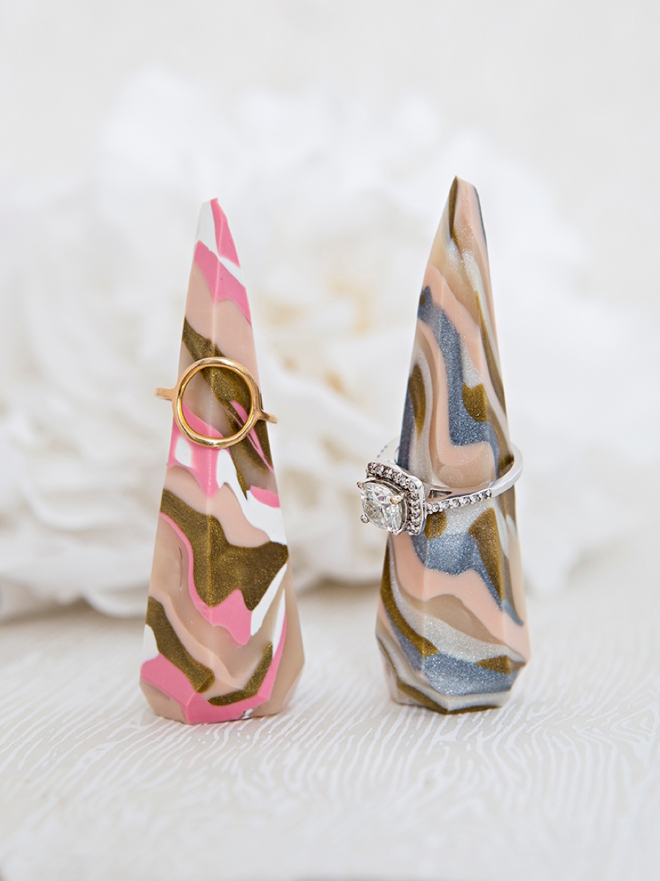
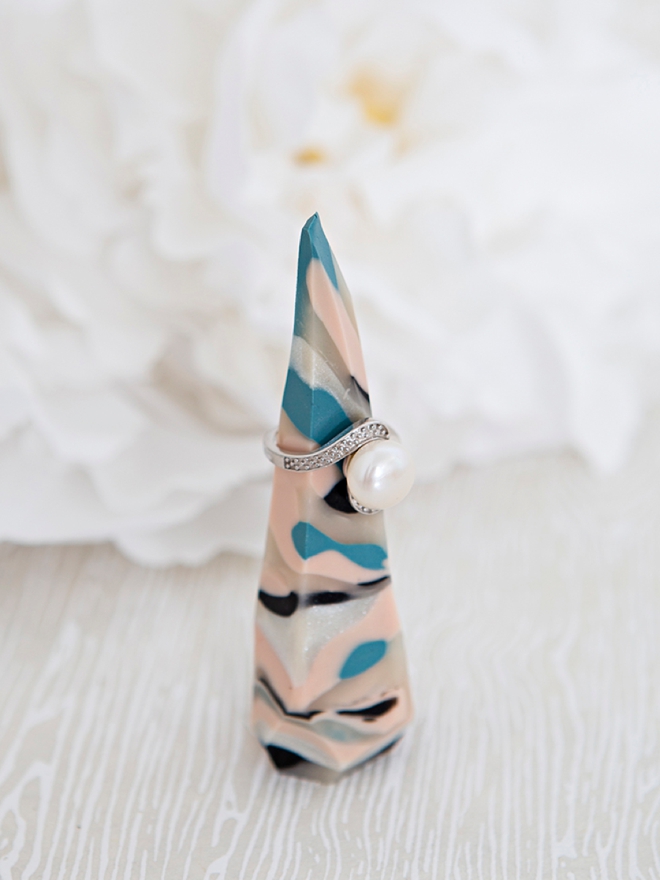
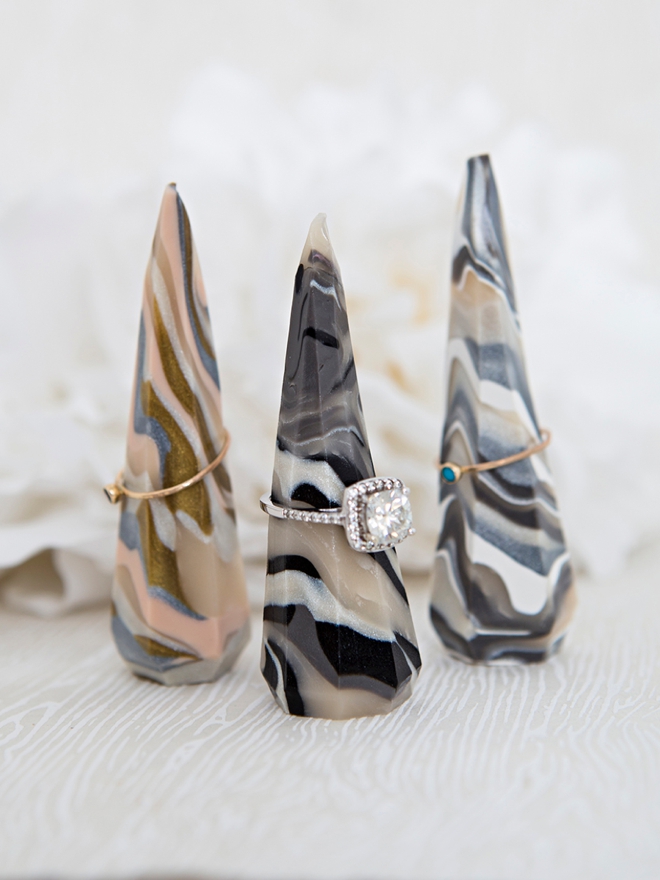
Clay Colors
They make this clay in almost every color imaginable, so what colors would you choose? The combo of transparent, white, turquoise, black and beige turned out to be my favorite. Although the pink, white, black, beige and transparent one below is a close second!
As with all our DIY tutorials, if you create one of our projects please send us a picture – We Love Seeing Your Creativity! If you use Instagram or Twitter please use the hashtag #SomethingTurquoiseDIY and it will show up on our Get Social page. Happy Crafting!
DIY Tutorial Credits
Photography + DIY Tutorial: Jen Causey of Something Turquoise // Sculpey Souffle Clay in Silver, Gold, Black, Dusty Rose, Transparent, Pearl, White and Tranquility: Michaels // Flexible Clay Knife: Amazon // Krylon Clear Sealer Spray: Amazon // Parchment Paper: Amazon // Nail Polish: OPI – Withstands the Test of Thyme
Shop The Supplies:
Find the supplies you’ll need for this project from our affiliate links below:

Comments