

DIY Chipboard Cake Toppers With Cricut Maker
-Sponsored Post-
Have you heard!?! Cricut just released their AMAZING new KNIFE BLADE and we’re dying over the crafty possibilities!!! From balsa wood to leather and to the chipboard we’re cutting today, this blade is designed to cut through it all and is a must-have for all Cricut Maker owners! Watching it cut can be mesmerizing, and after you create your first project you will realize that it’s potential is staggering. Today’s custom wedding cake topper project is just one of many we have planned for this fabulous new tool!

Cake Topper Heaven
The combination of Cricut’s new knife blade and their new chipboard is pretty much Cake Topper Heaven! You can easily create any of our designs here, using the Design Space links in the “supplies” section – or you can design your own!

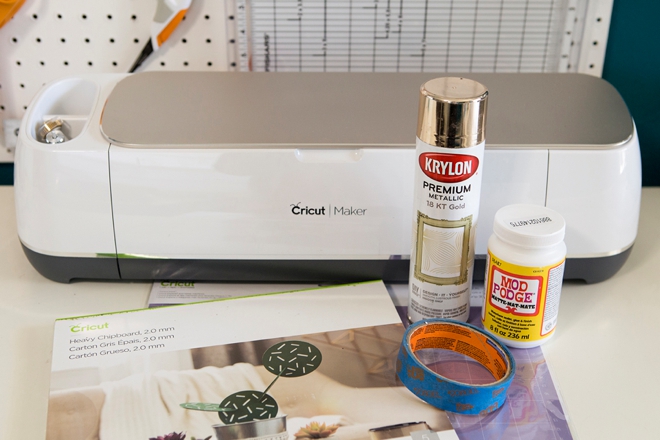
SUPPLIES:
- Cricut Maker (having the Maker is a MUST for this project)
- Cricut Knife Blade (the knife blade is also a must!)
- Cricut Chipboard
- Cricut Strong Grip Mat
- Painters Tape
- Mod Podge
- Spray Paint
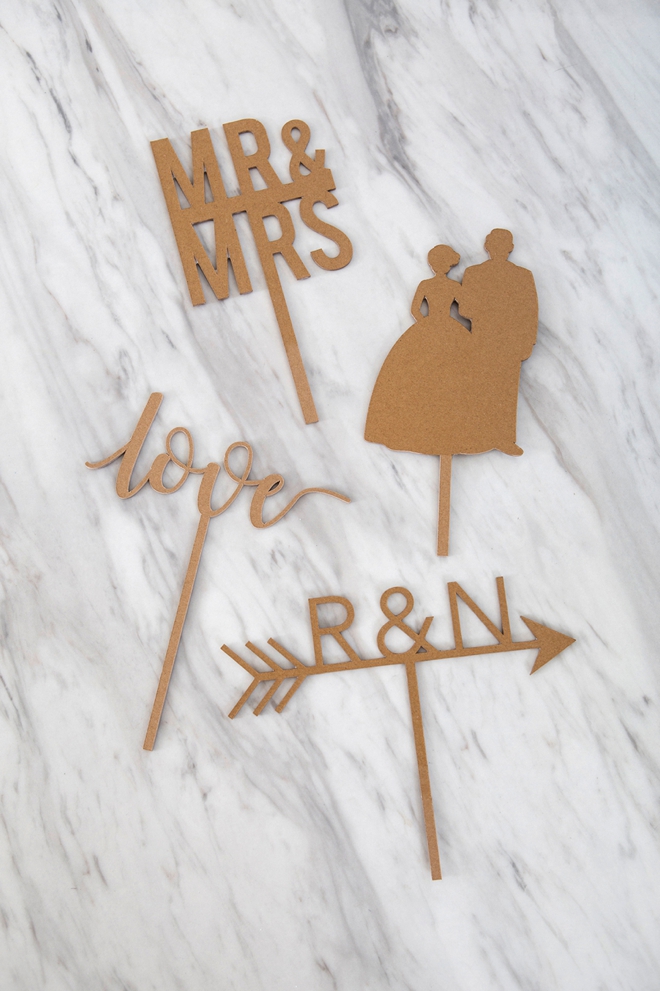
Cake Toppers: follow the links below to be taken straight to Design Space to edit and cut our cake topper designs featured here!
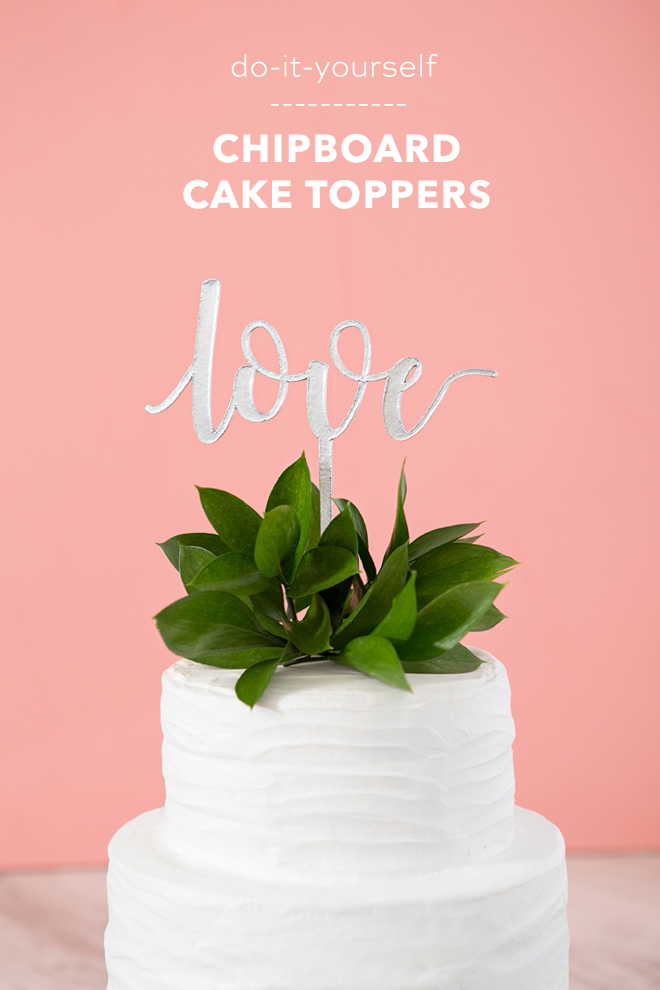
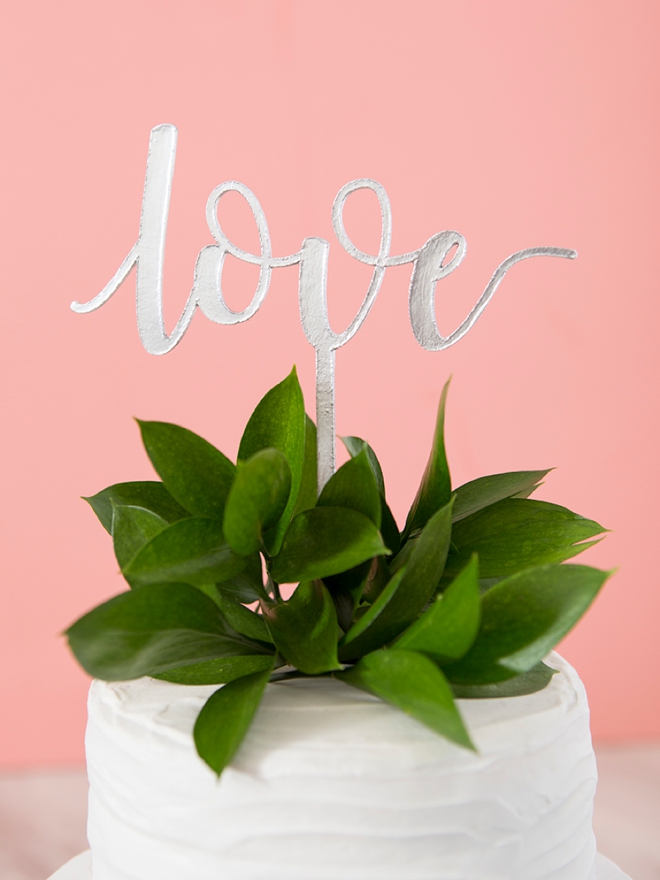
- “love” Cake Topper
- “MR & MRS” Cake Topper
- “Couple Silhouette” Cake Topper
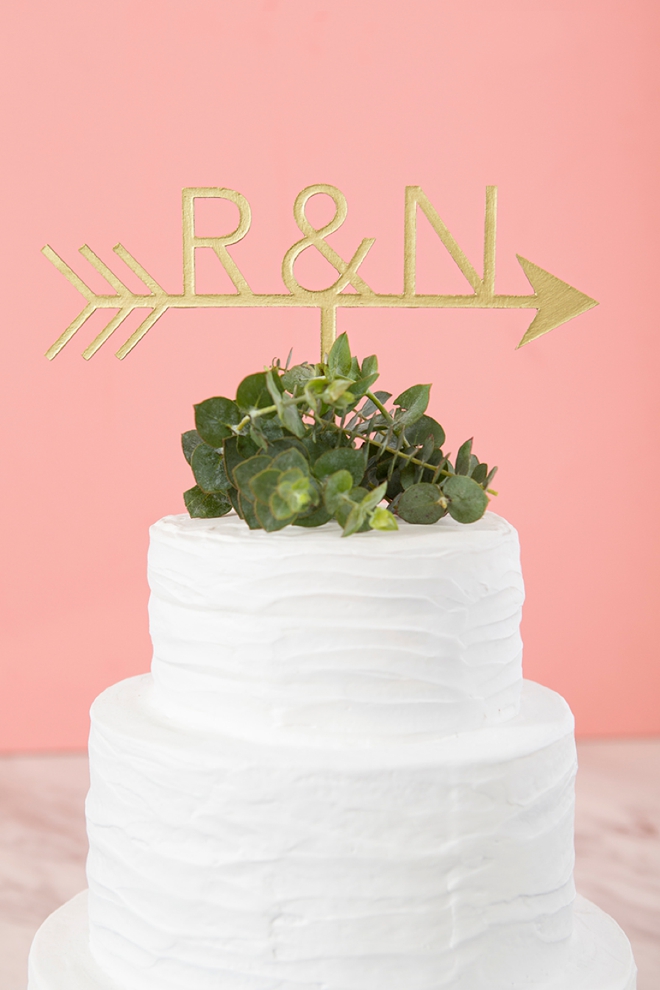
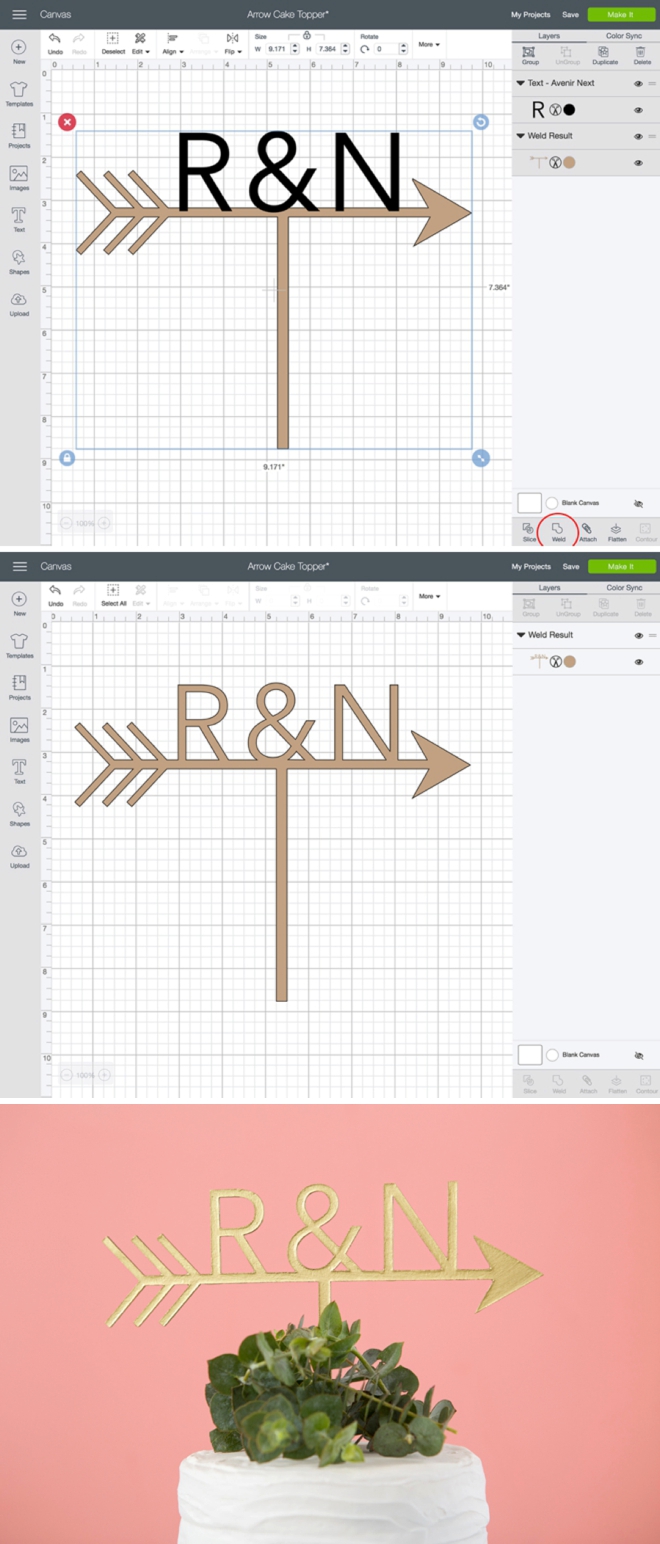
- “Initials + Arrow” Cake Topper, you can personalize this one!
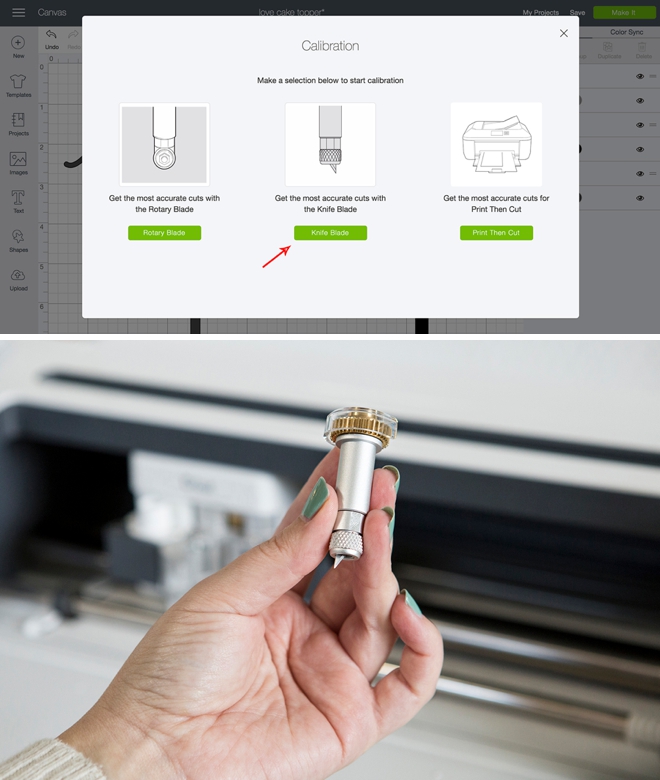
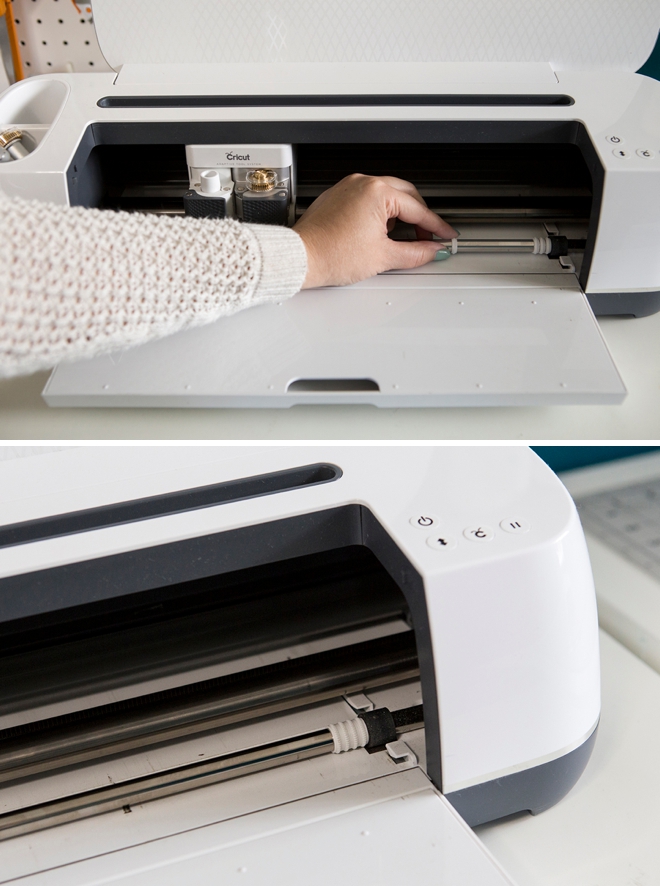
Calibrate Your Knife Blade
If this is your FIRST knife blade project, you’ll need to calibrate it with your machine before you start. Click the hamburger menu in the upper left hand corner of Design Space to reveal a dropdown menu and select “Calibration”. Then click on the knife blade and follow the on screen prompts. This ensures your machine is properly registered to use the exact blade you purchased.
Other Knife Blade Musts:
- You can only work from Design Space using your desktop or laptop computer. Knife blade projects aren’t compatible with the Cricut app yet.
- Tape your thick material to the cutting mat using a low-tack tape to ensure it doesn’t move around during cutting. The knife blade is so strong that this can happen!
- Move the 4, white start wheels to the right side of your machine, otherwise they will make indents in your chipboard or other materials.
- Avoid small cuts. The knife blade is not your intricate cutting blade. Lines should be kept to about 1/4″ while inner cuts should be no less than 3/4″. If your file isn’t sized properly you run the risk of the item having cutting issues or you could break your blade.
- Knife blade projects take time! Thicker materials require more cuts, so give yourself time to make projects. After the blade does it’s first pass, DS will tell you how many more passes it is going to make and the time estimated.
- Use a dedicated cutting window online. You can have other windows open, just open them separately and don’t use a new tab.
- Turn the sleep function off or increase the time on your computer. Some computers are set to sleep at 15 minutes or less and if your project is still cutting, it will stop!
For more tips on using the knife blade, check out this YouTube video from Cricut.
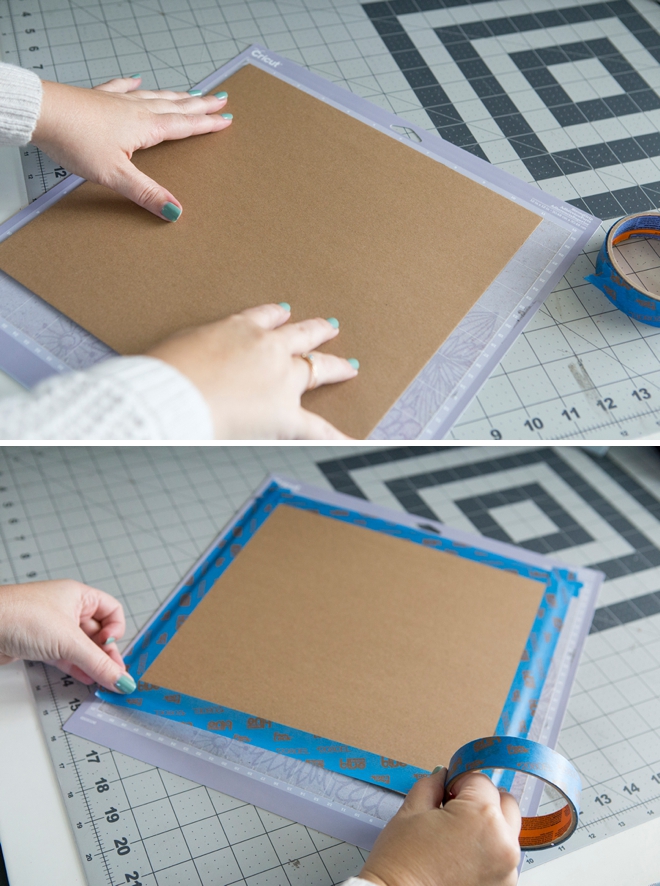
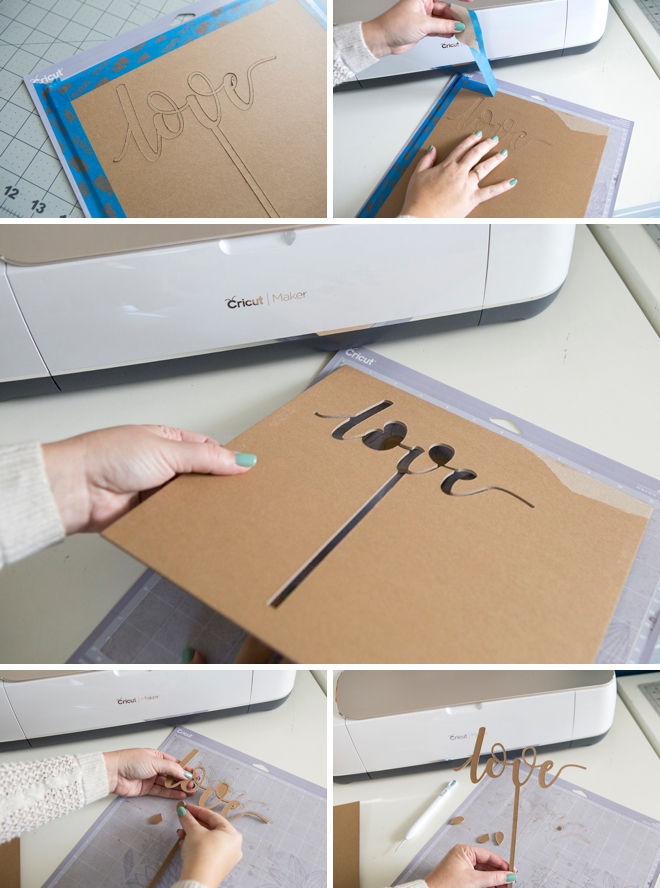
Tape Down Your Chipboard
I am highly recommending that you only use the Cricut Chipboard for this project. It was designed to cut perfectly with the knife blade and not lift or tear. It’s super heavy at 2mm thick and is perfect for this project and many others. Tape all four sides down to your strong grip mat using painters tape or other low-tack tape.
Prepare Your Project
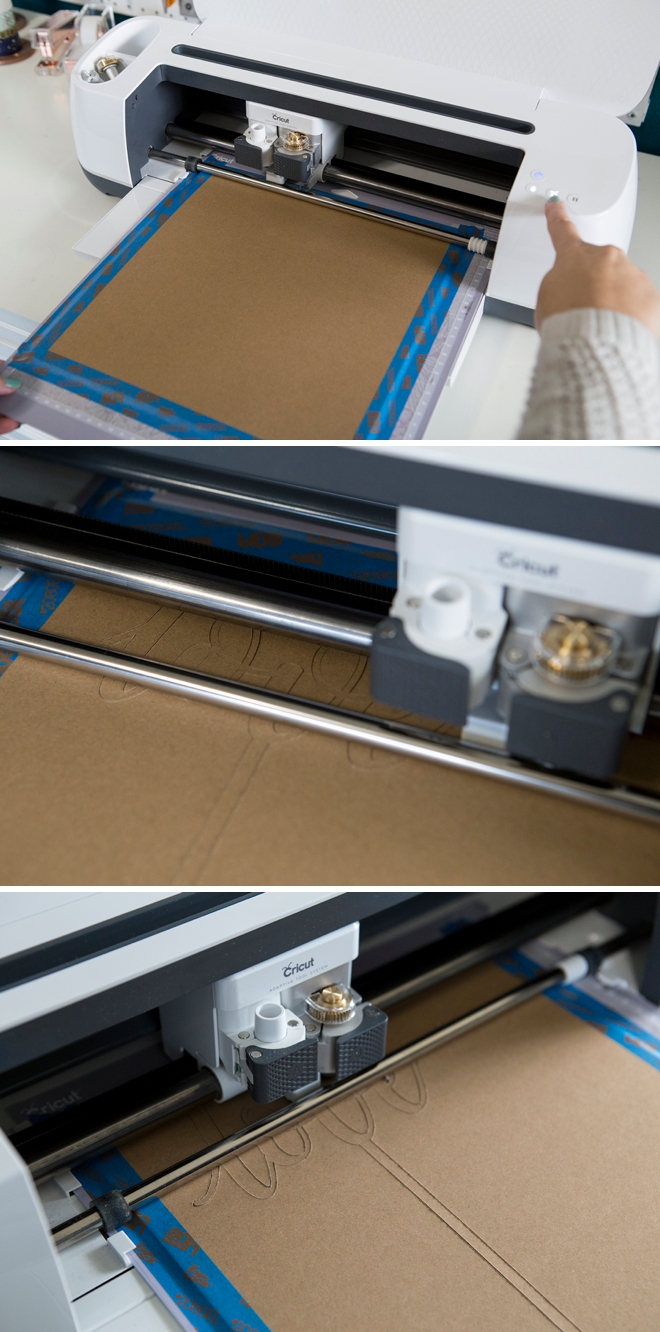
Using the links we shared above, click into Design Space to personalize your cake topper! Make sure to select that you are cutting the Cricut chipboard and click GO! After the first cut, DS will tell you how many more cut passes the machine needs to make and how much time is remaining.
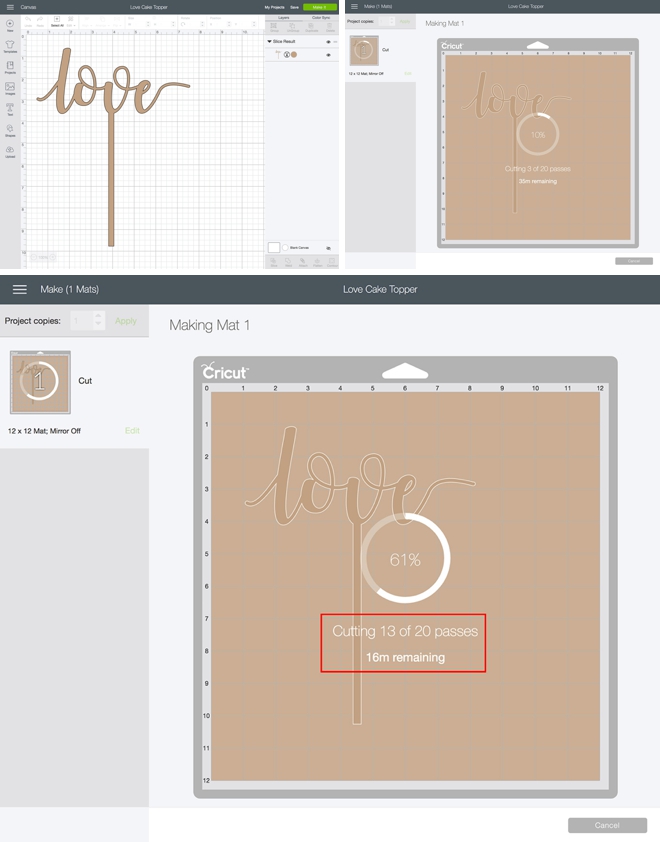
Crafters Tip: I found that the machine wanted to always make 20 cut passes, but that all 5 of our cake toppers were fully cut out at only 13 passes. So I kept an eye on the pass number and stopped the machine at 13.
Remove Your Cake Topper
Carefully peel the tape and chipboard off your mat to reveal your gorgeous new cake topper!
Seal With Mod Podge
If you plan on painting your cake topper, you’ll first need to seal the chipboard with Mod Podge or the like. Think of the chipboard as a porous cardboard that will soak up and warp if straight paint is applied to it. I tested this out and some spray paints even left a white residue behind before it was sealed, so take it from me – seal your chipboard.
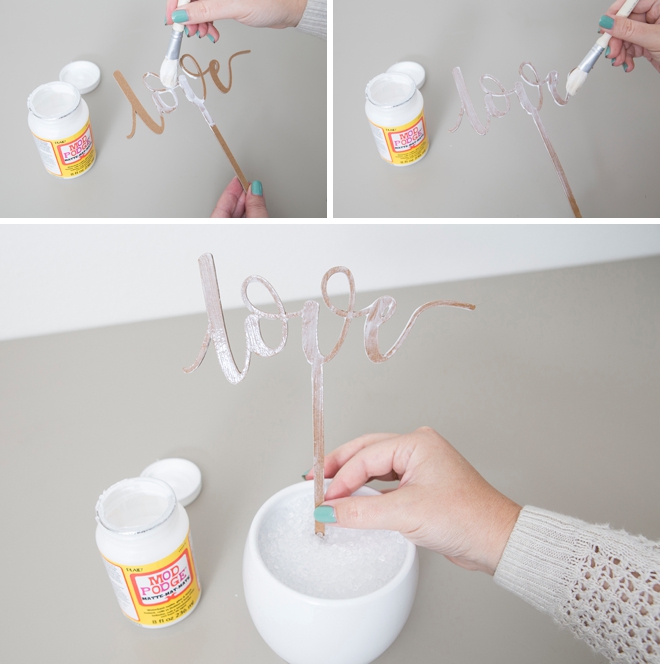
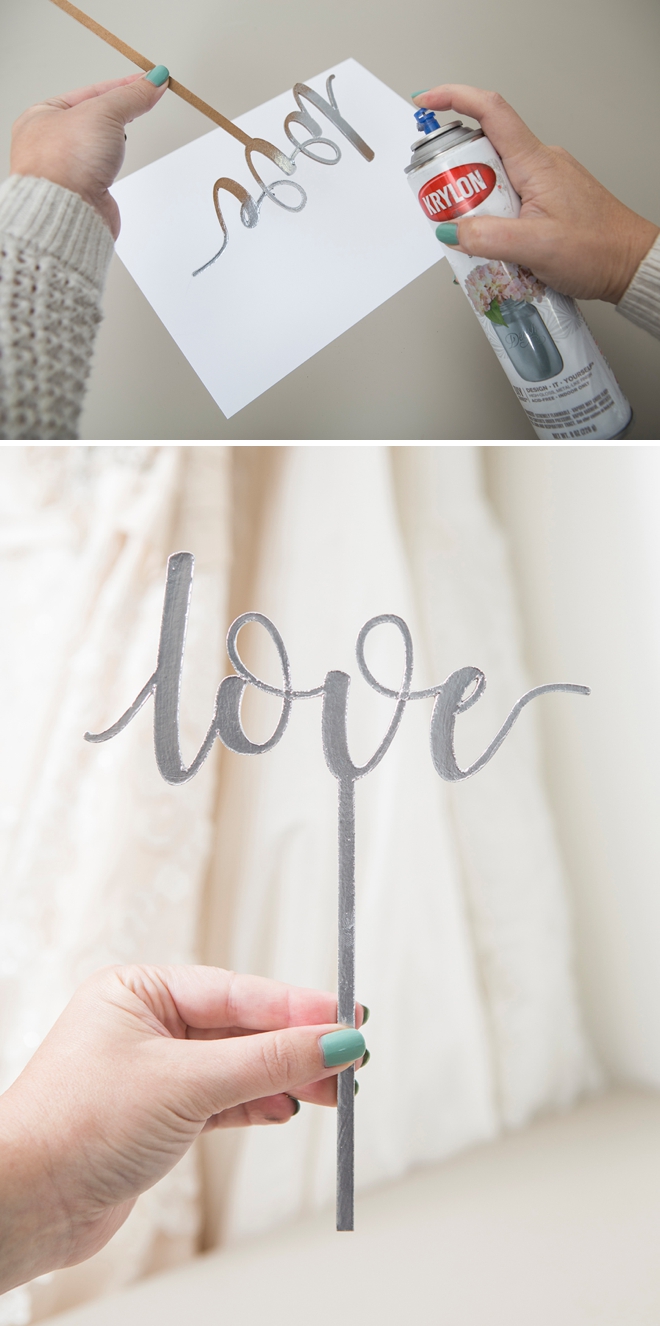
Spray Paint
Once your entire cake topper is sealed and fully dry, paint your new cake topper with spray paint or whatever paint you’d like to use. You could even glitter-glue the entire thing!
Food Safe: no this spray paint is not food safe, but it is non-toxic. I personally don’t feel that the amount of time this topper will be in the cake, combined with the amount of cake it’s actually going to touch, is a big deal but that’s your call!

How To Add Initials:
If you’d like to personalize our Initials + Arrow cake topper, follow this link to find the design in Design Space. You will see the arrow layer and the initials layer. Click to edit the initials and add your own, resize if needed. Then make sure that the initials and the top of the arrow are touching significantly, select both layers, then click “weld”. This will make the two layers one, and turn it into one solid cut design! That’s all there is to it!

Bride To Be
For this cake topper design, I used the shape tools in Design Space to create a pentagon base and cut it out of the Cricut chipboard. Then I used our exclusive “Bride To Be” hand-lettered .SVG file and cut it using white glitter vinyl. I sealed and spray painted the pentagon and then added the vinyl design on top!
Creating a shape as a base for an intricate design is a fantastic option for these cake toppers!


DIY TUTORIAL PARTNER:

Cricut is a world-class leader in personal electronic cutting machines that has enabled people to achieve their creative best for over 50 years. Today, millions of people use Cricut products to create unique projects, and they focus on enhancing lives with this power of creativity. Let Cricut help you take your wedding personalization and project creativity to the next level!
As with all our DIY tutorials, if you create one of our projects please send us a picture – We Love Seeing Your Creativity! If you use Instagram or Twitter please use the hashtag #SomethingTurquoiseDIY and it will show up on our Get Social page. Happy Crafting!
DIY Tutorial Credits
Photography + DIY Tutorial: Jen Causey of Something Turquoise // Cricut Maker, Knife Blade, Strong Grip Mat, Chipboard, and Vinyl: courtesy of Cricut // Bride to Be .SVG: Something Turquoise Shop // Mod Podge: Amazon // Metallic Spray Paints: Amazon // Nail Polish: OPI – Withstands the Test of Thyme
Shop The Supplies:
Find the supplies you’ll need for this project from our affiliate links below:

Comments