
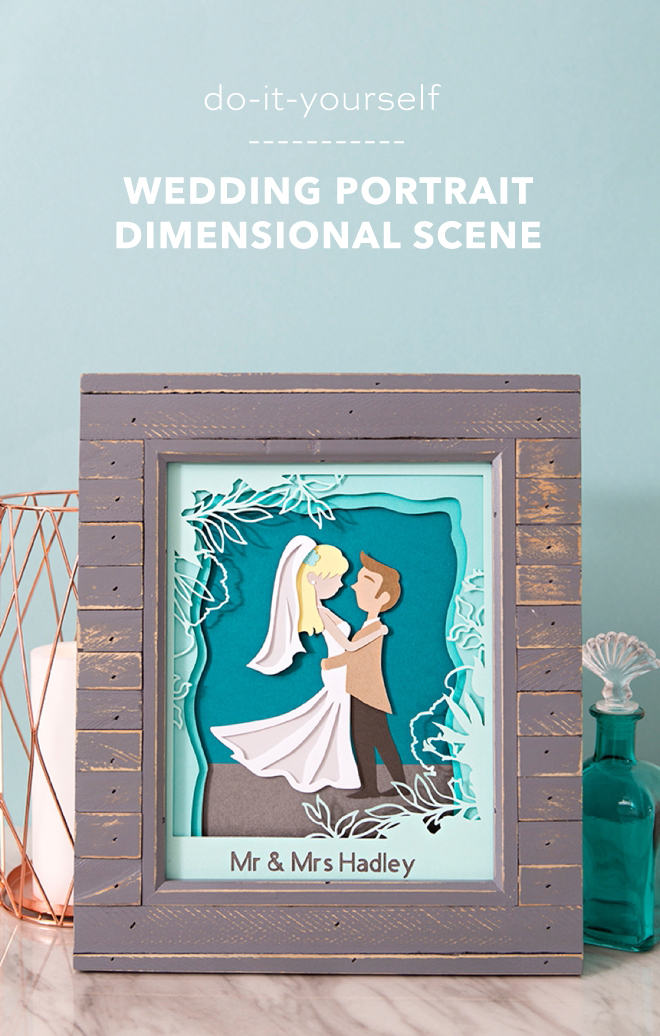
DIY 3D Wedding Portrait Scene With Cricut Maker
-Sponsored Post-
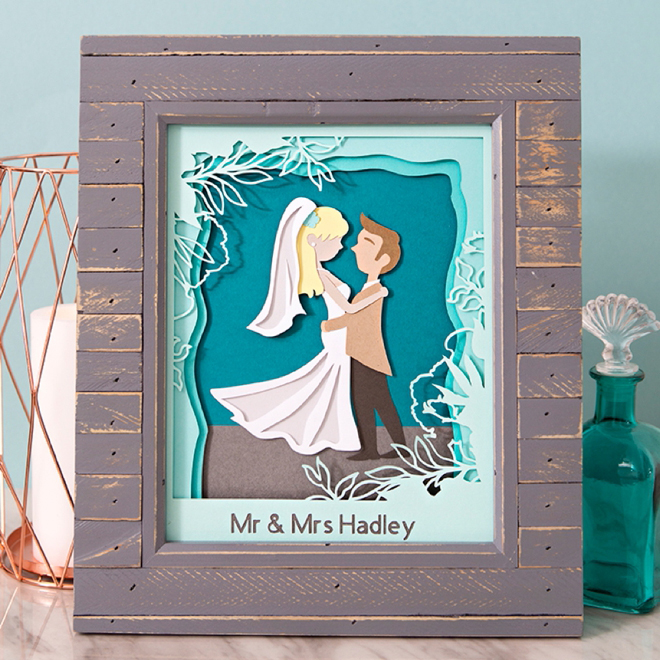
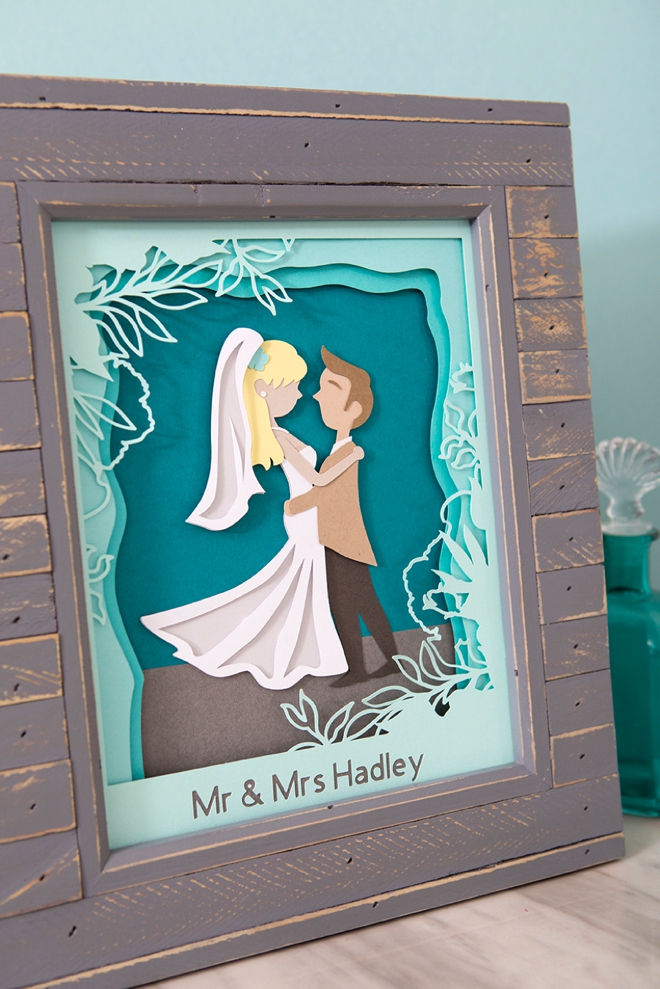
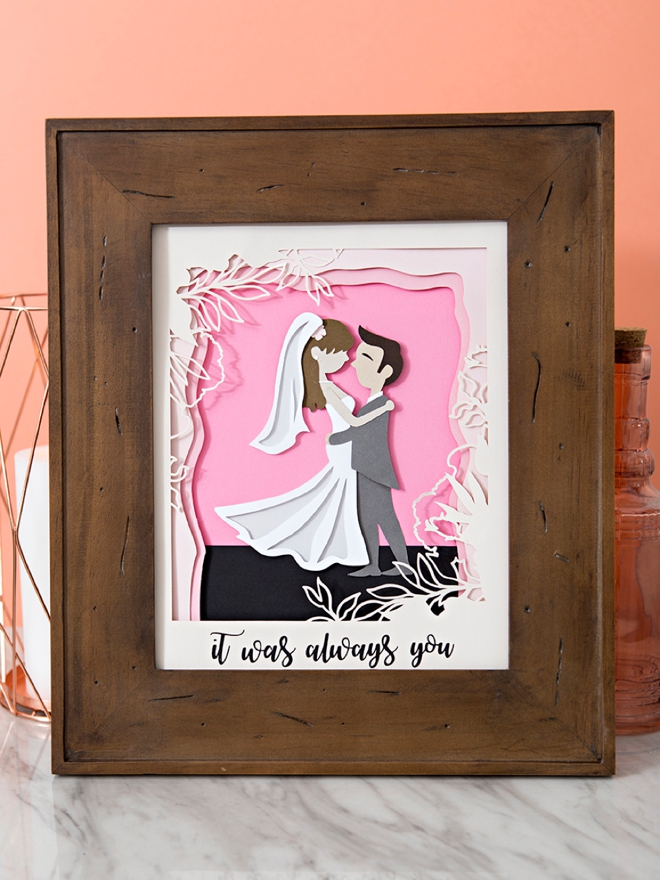
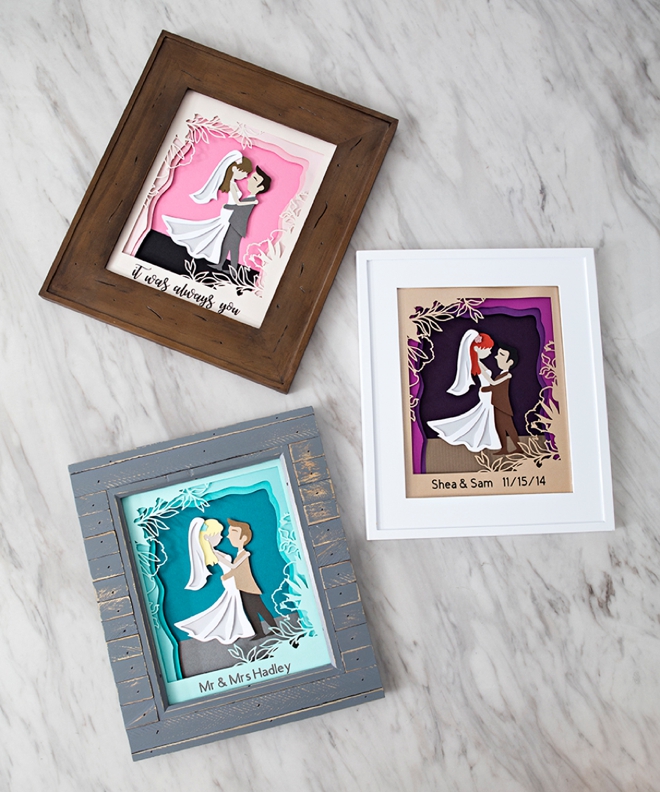
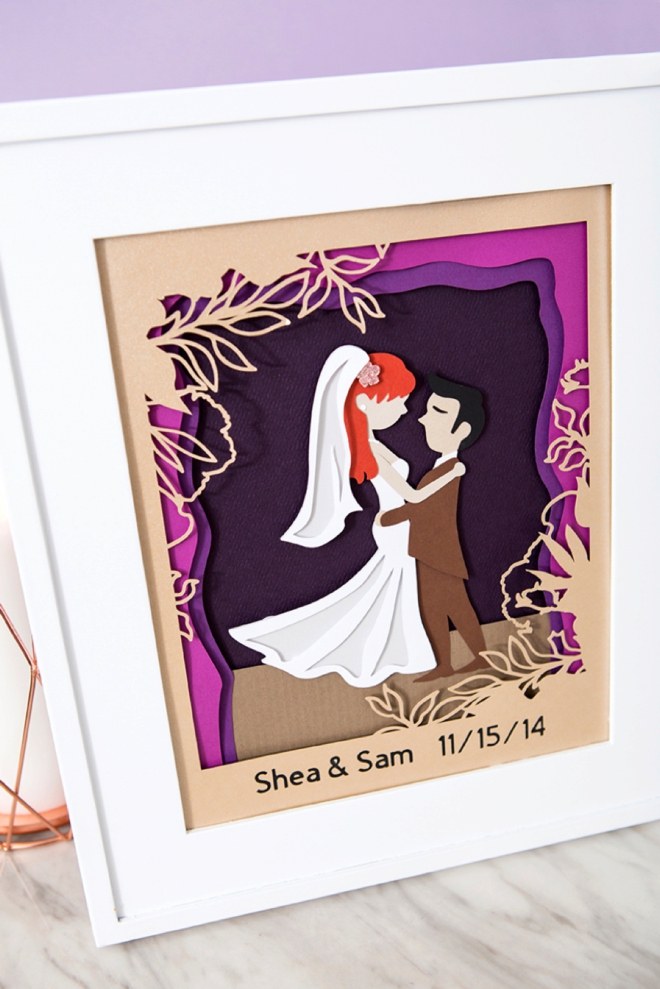
Ok, is this like the cutest thing you’ve ever seen? I’ve come across quite a few adorable dimensional, 3D scenes that people have created with their Cricut, like this mermaid, this Valentine, or this fairy, and I wanted in. I was looking to create a universal Bride & Groom design that anyone would be able to personalize and add their names, date, and unique flair to. So me and my graphic designer Julia got to work and I’m beyond thrilled with what we designed! This little custom scene would be a terrific bridal shower or wedding gift for the bride in your life. It would even be a fun project for any current Mrs. to make to commemorate their past special day!
8 x 10
Our custom SVG file is already perfectly sized to use with an 8 x 10 frame, just import and edit! If you resize, be mindful that the new ratio might not fit certain frames!
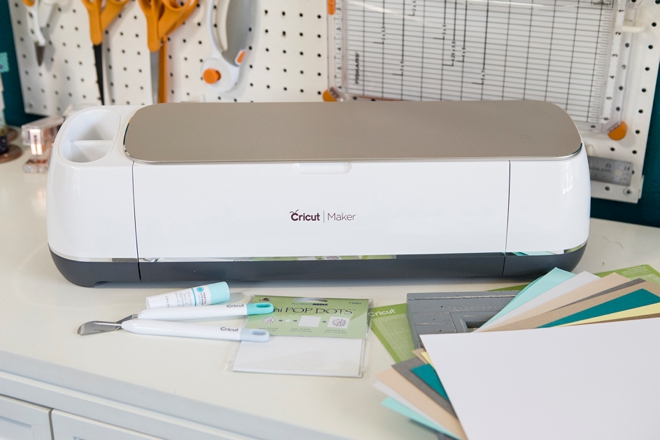
SUPPLIES:
- Cricut Maker or Cricut Explore
- Lots of Colored Cardstock
- 8 x 10 Frame
- Pop Dots
- Glue Stick
- Cricut Tools
- Our free SVG. file at the end of the post!
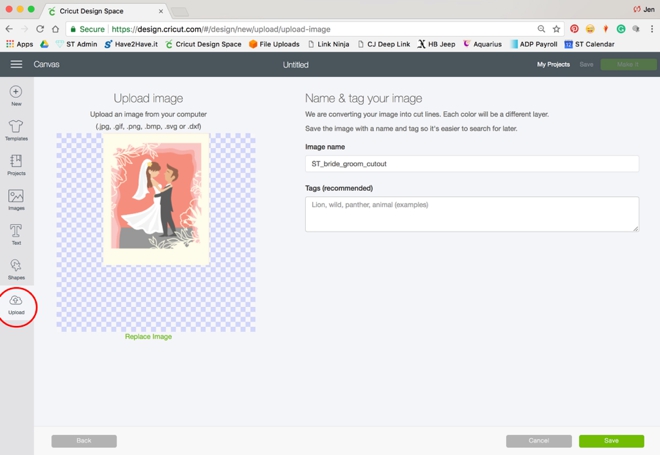
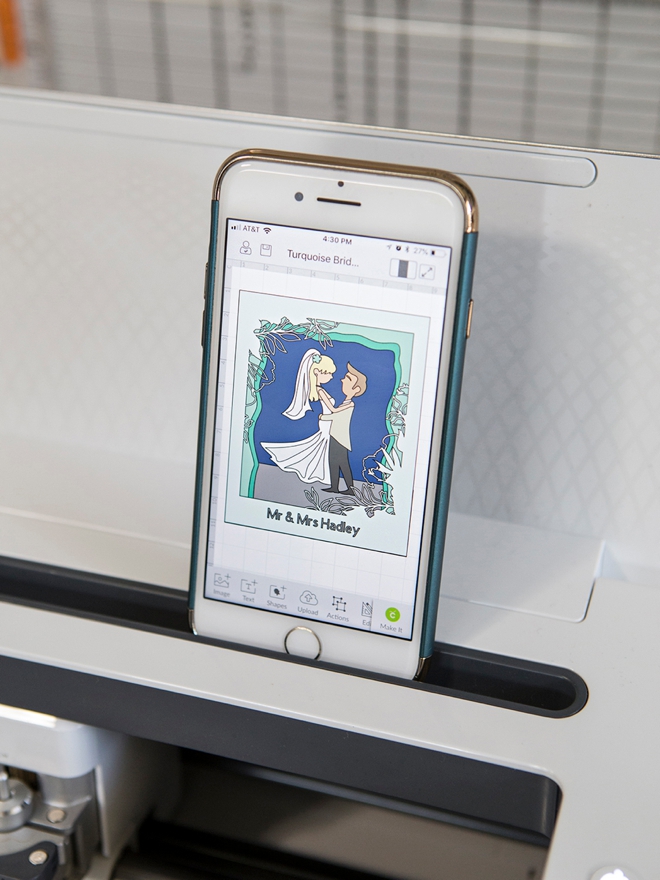
Upload
Download our free SVG. file at the end of the post and upload into Cricut Design Space.
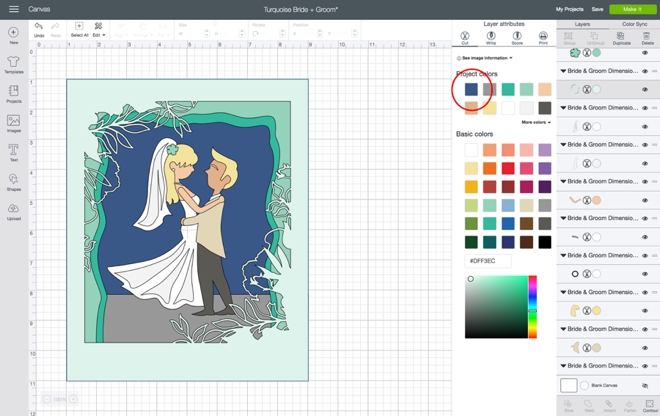
Pick Your Colors
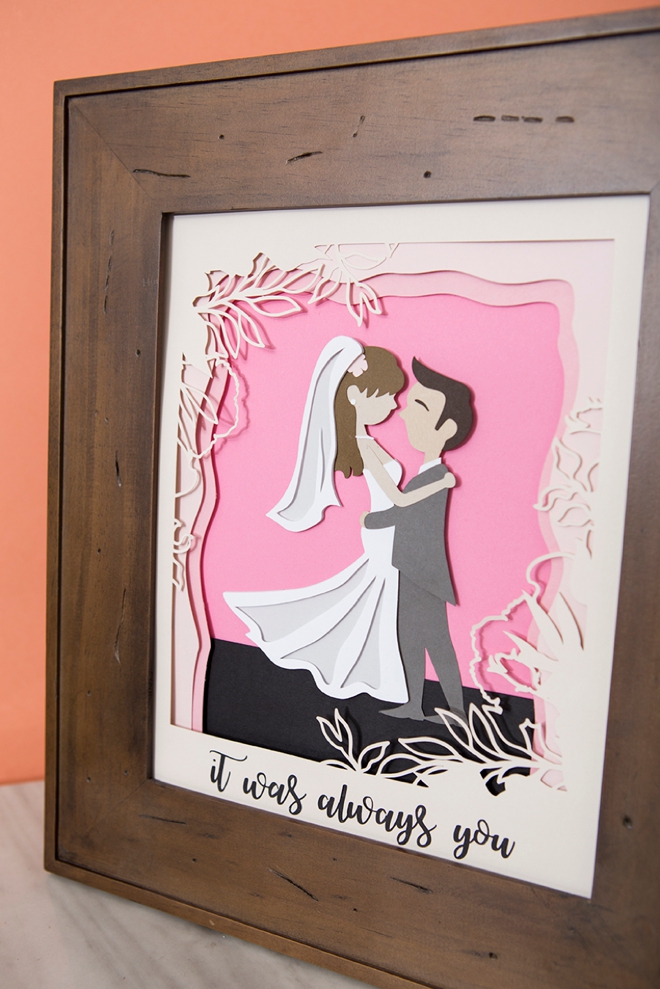
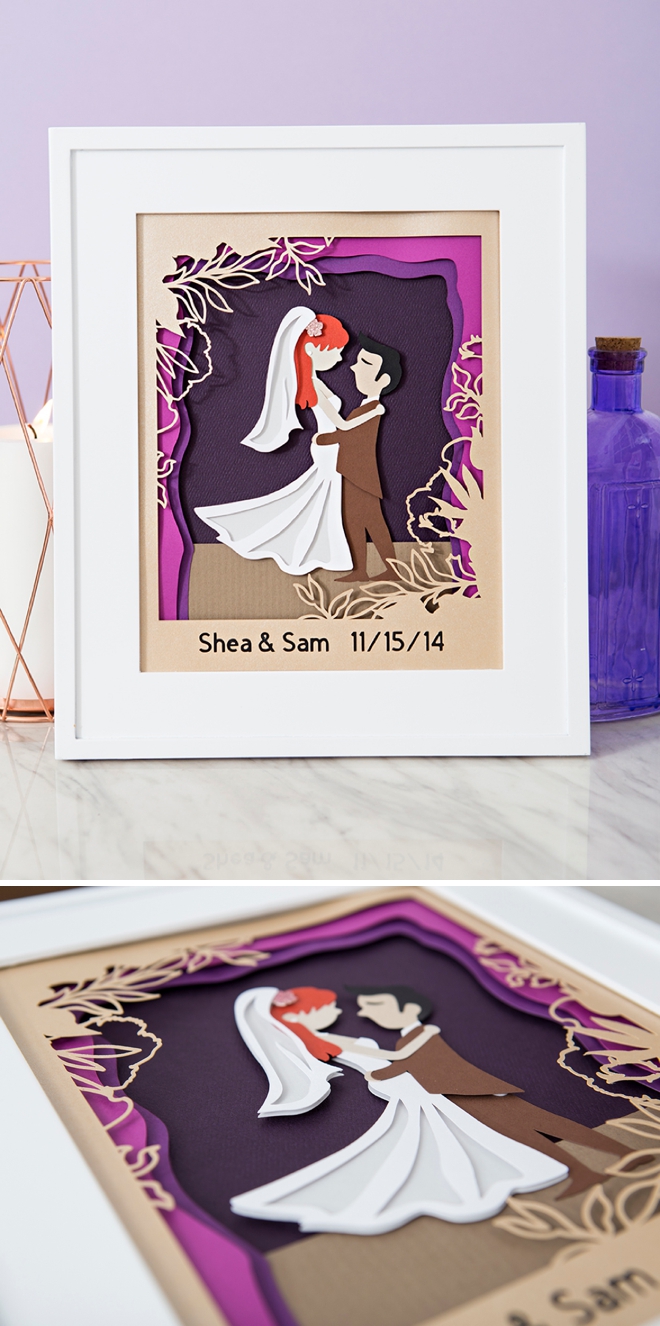
There are SO many options when it comes to colors for this portrait scene – your only constraint is paper color! Click each layer and pick it’s color to customize your portrait.
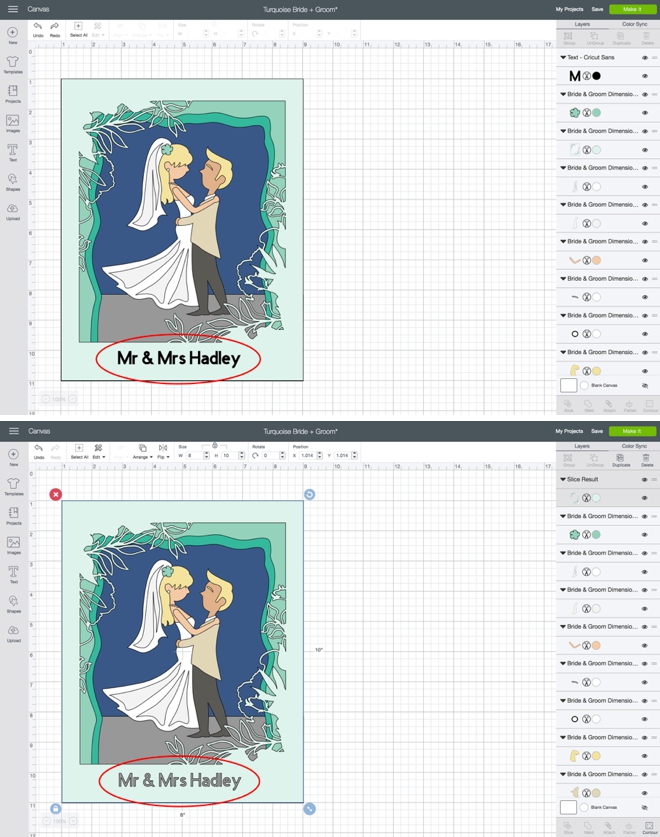
Add Text
We’ve left a blank area at the bottom of the design to add any text you’d like, from your names to a special saying. You can either cut letters out of paper and glue them on top of the last design layer or you can “slice” them out of the last design layer in Design Space, which is what I did for all three:
To Slice: Ungroup the file. Add text and size to fit the blank area. Select both the text and the top design layer, then hit “slice”. Delete the two text layers and you’ll be left with a custom top design layer that your text will be cut out of!
Working From The App
Since there are 14 cut mats for this design and my Cricut is a few paces away from my computer, I found it easier to work/cut off the app instead. Your choice!
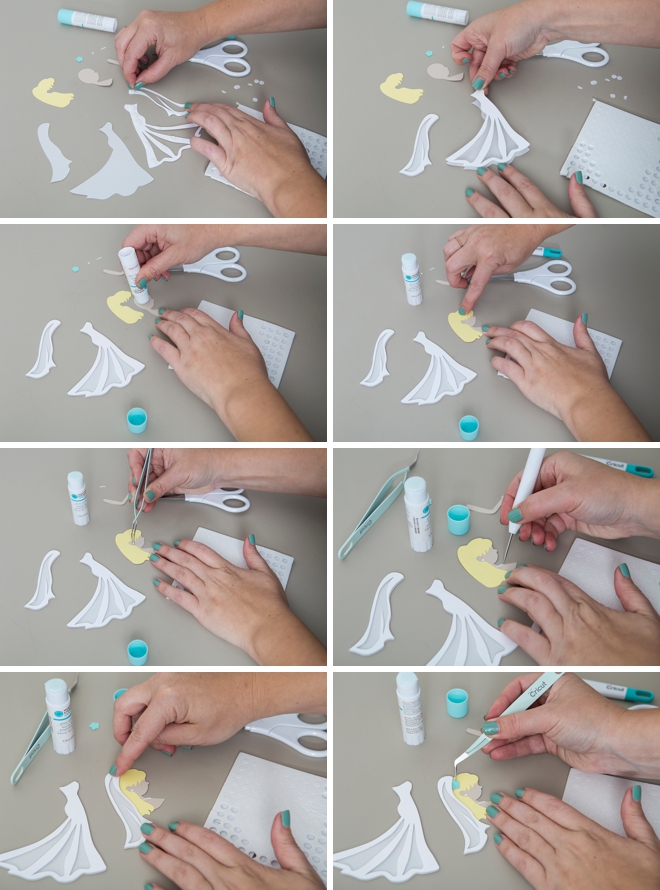
Let The Cricut Work It’s Magic
Aside from picking your colors of paper, cutting is the step that takes the longest. Have your paper colors ready to go and keep all the tiny cut pieces together.
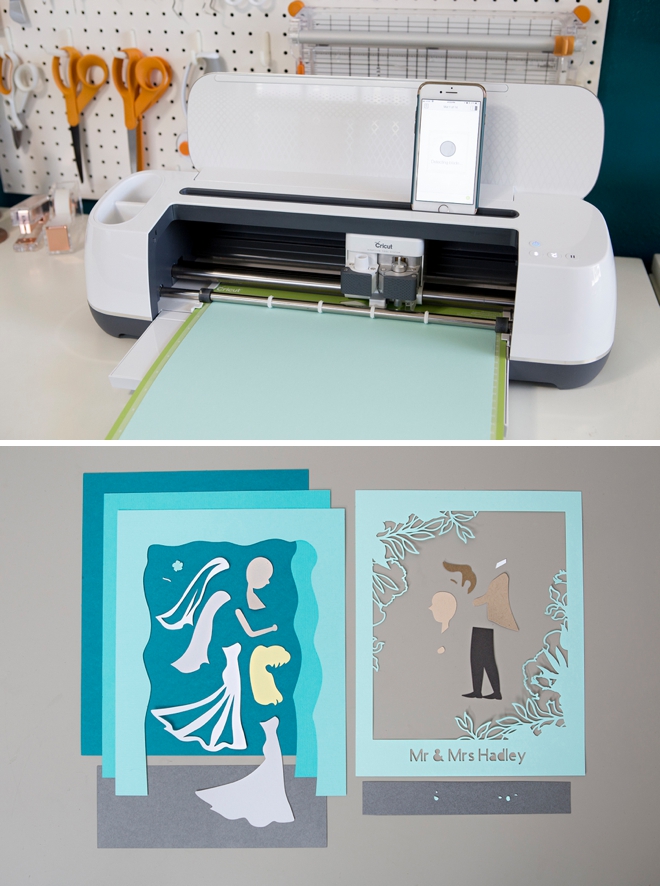
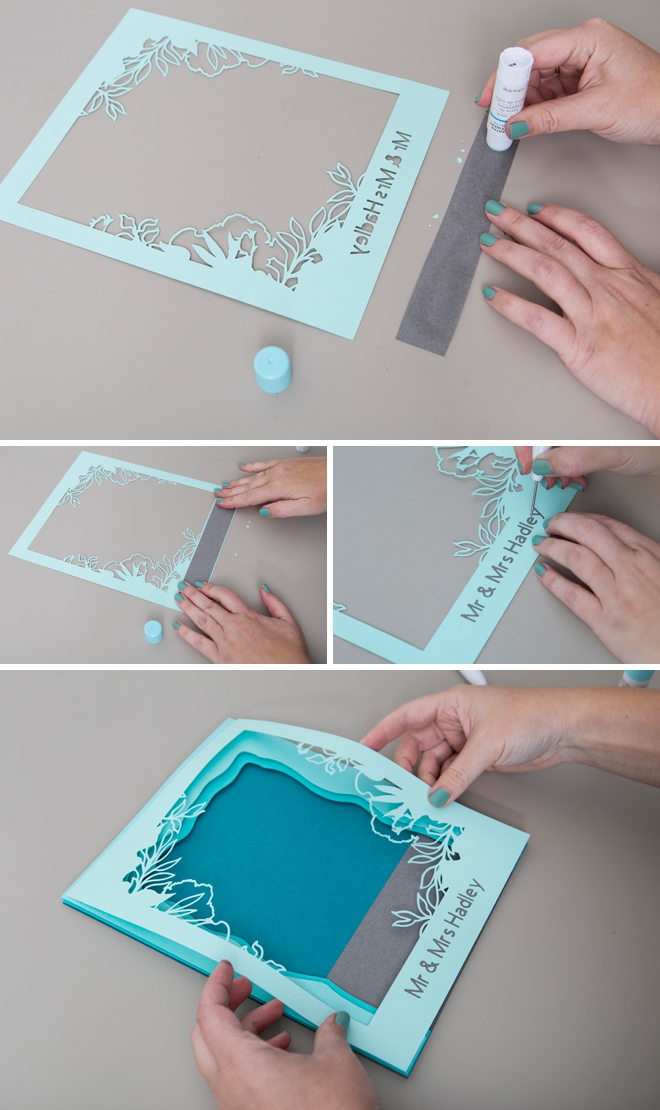
Assemble Your 3D Portrait
This part is SO much fun! I had a blast doing it! Start by assembling the background, use Pop Dots to add the 3D dimension to the design.
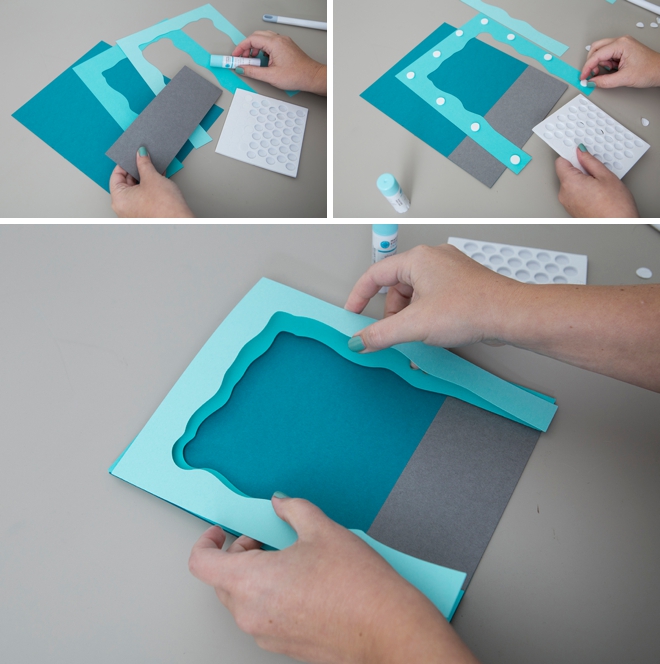
Carefully glue the inside of letters and numbers back into place after cutting; ie. d, e, f, &, a, etc. Then adhere to the finished background.
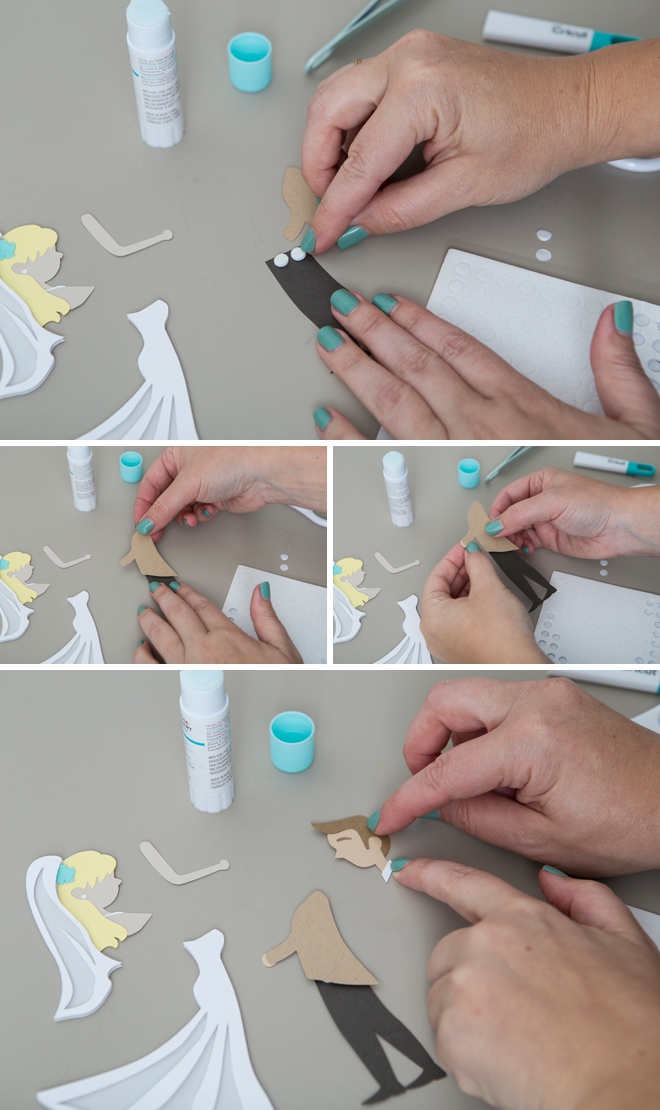
Assemble The Bride & Groom
Carefully assemble both the bride and groom. Using Pop Dots to give them dimension, on smaller areas you can totally cut the Pop Dots down to fit.
Assembling both the bride and groom, I found it easiest to leave their heads free until the end so that I could position them perfectly together.
After you have them together, add them into their special background! So cute right!?
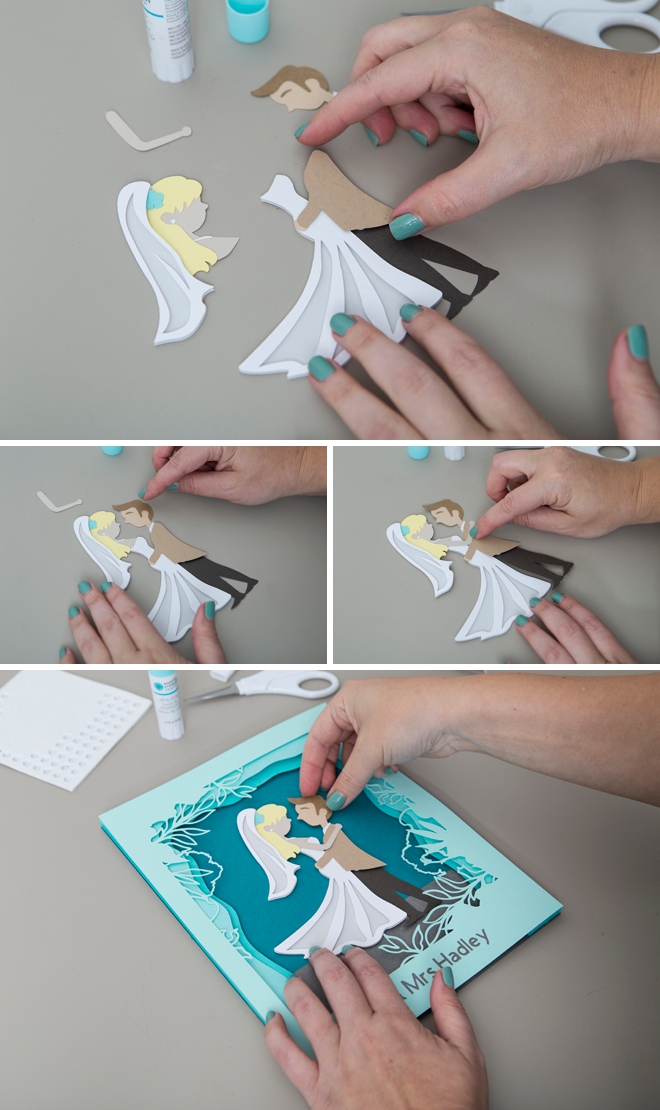
It’s All Paper
This entire mini-scene is all paper, which means that you get to pick out each and every color. From turquoise to pink, to lavender and every color in between – I can’t wait to see your rendition! Add your names, wedding date, special saying or nothing at all. The entire scene is all about you!
DIY TUTORIAL PARTNER:

Cricut is a world-class leader in personal electronic cutting machines that has enabled people to achieve their creative best for over 50 years. Today, millions of people use Cricut products to create unique projects, and they focus on enhancing lives with this power of creativity. Let Cricut help you take your wedding personalization and project creativity to the next level!

Love This Project?
If you’re in love with this Cricut wedding project, you’ll be happy to hear that we now sell exclusive .SVG cut files for your Cricut in our shop! Most files are only $1.99 and they download instantly… so you can be crafting in minutes!
As with all our DIY tutorials, if you create one of our projects please send us a picture – We Love Seeing Your Creativity! If you use Instagram or Twitter please use the hashtag #SomethingTurquoiseDIY and it will show up on our Get Social page. Happy Crafting!
DIY Tutorial Credits
Photography + DIY Tutorial: Jen Causey of Something Turquoise // Cricut Maker + Supplies: courtesy of Cricut // SVG Design: Julia Ensign // Cardstock Papers: personal stash // Frames: Michaels // Pop Dots: Amazon // Nail Polish: OPI – Withstands the Test of Thyme
Shop The Supplies:
Find the supplies you’ll need for this project from our affiliate links below:

Comments