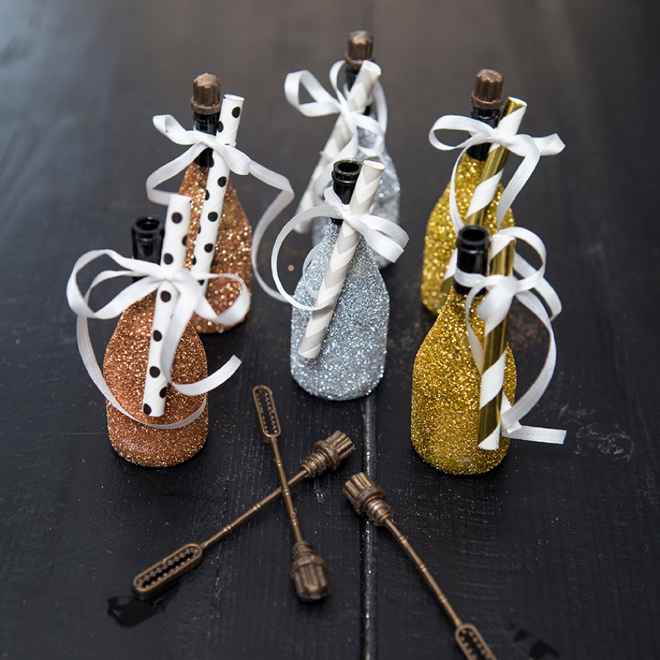

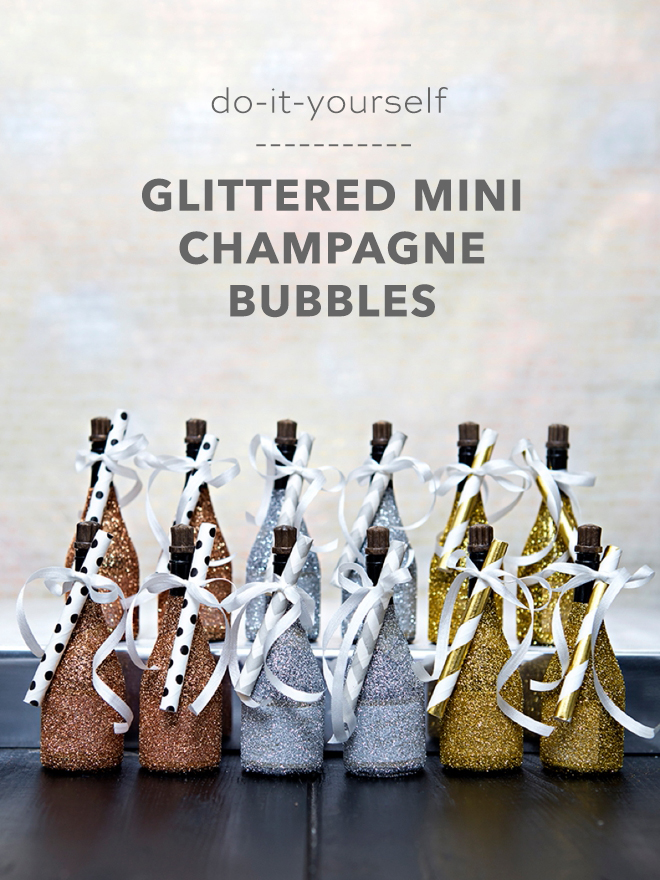
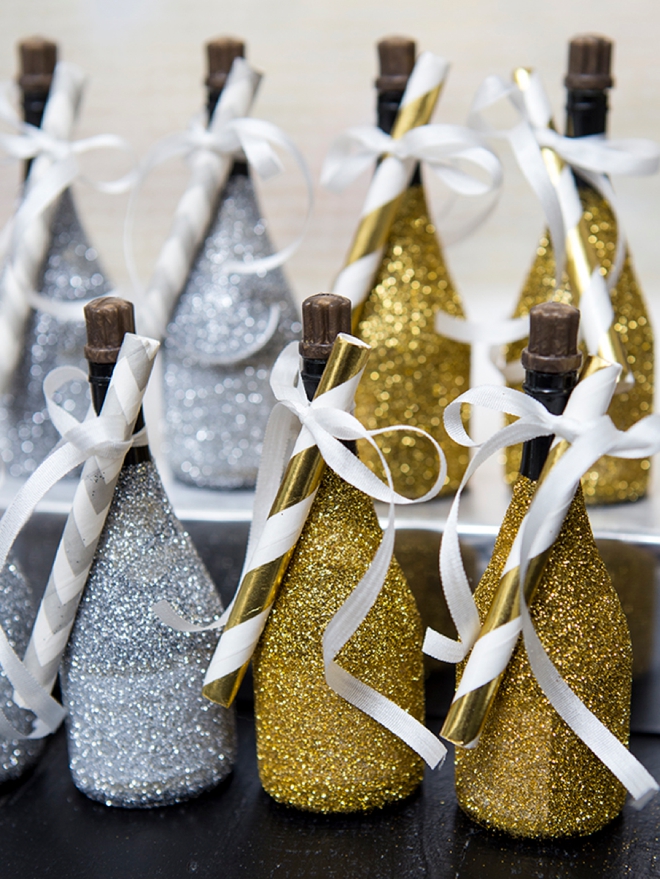
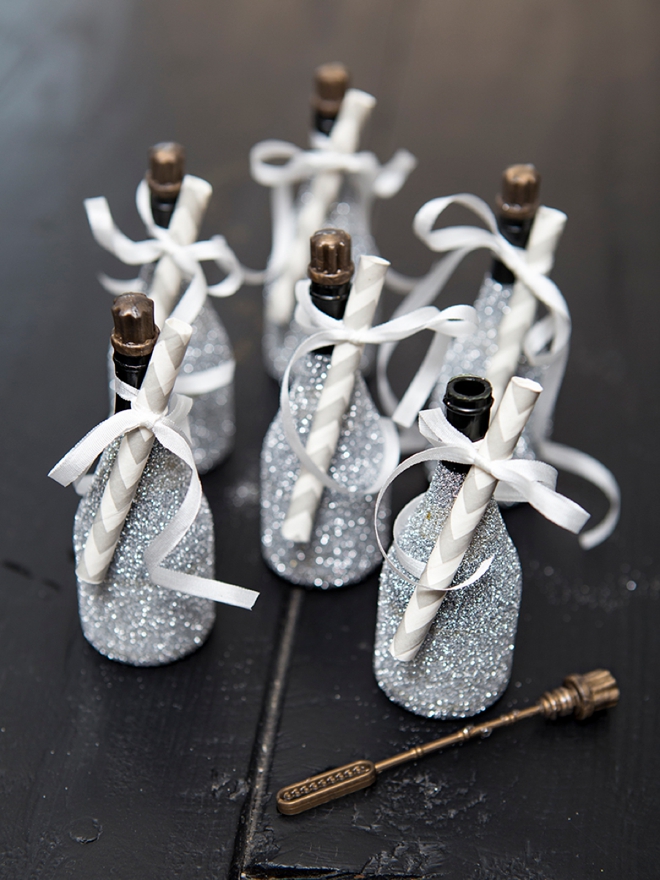
DIY Glittered Mini-Champagne Bubbles
Thinking about a bubble exit? Or possibly being forced into it because your venue doesn’t allow sparklers, rose petals, or birdseed? Why not glam up some adorable mini champagne bottle bubbles, make them match your event colors, and cover up their existing ugly labels? Well, that’s what we’re doing today and hopefully, if you weren’t already jazzed on bubbles, you might be now!
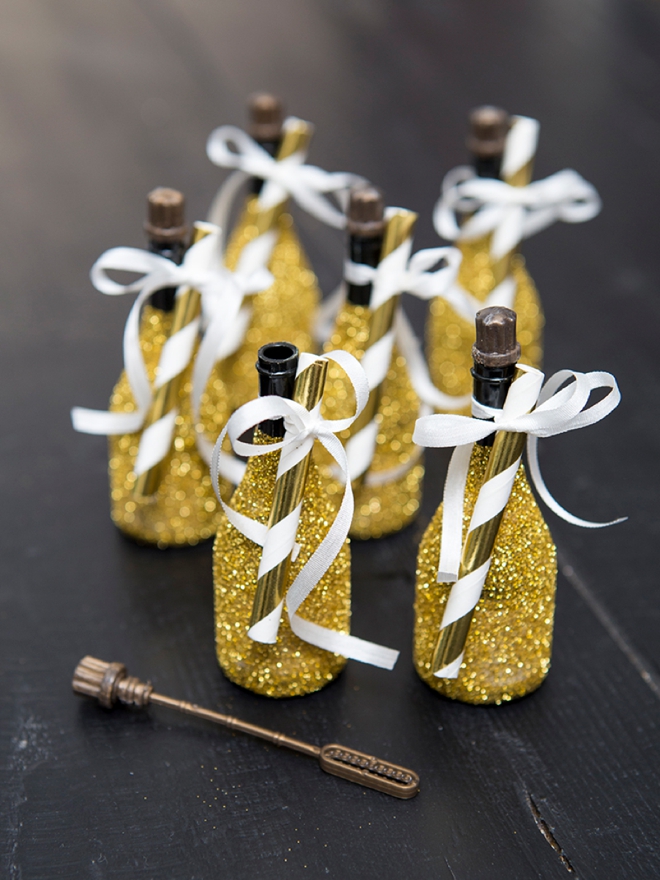
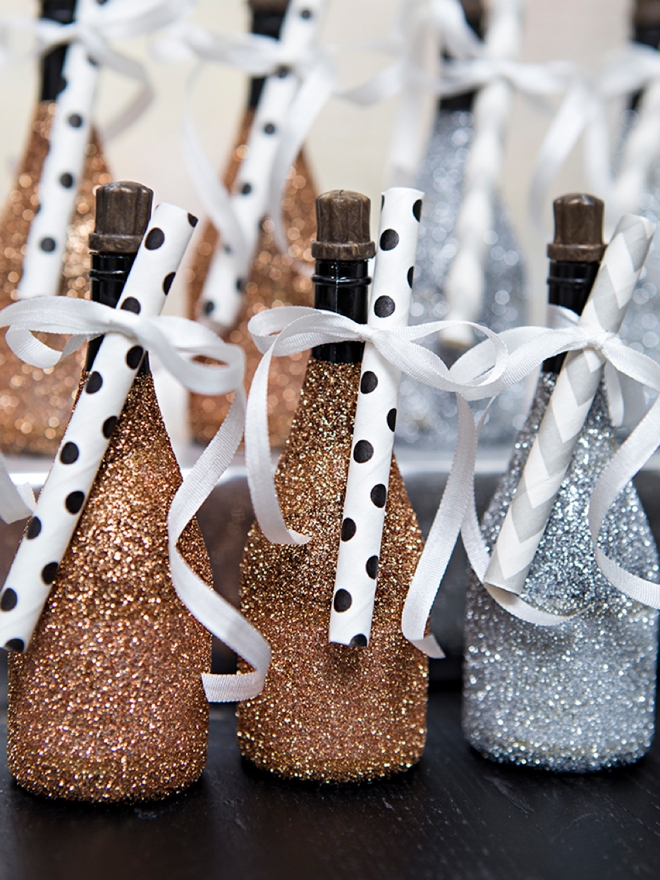
Darker Glitter Is Best
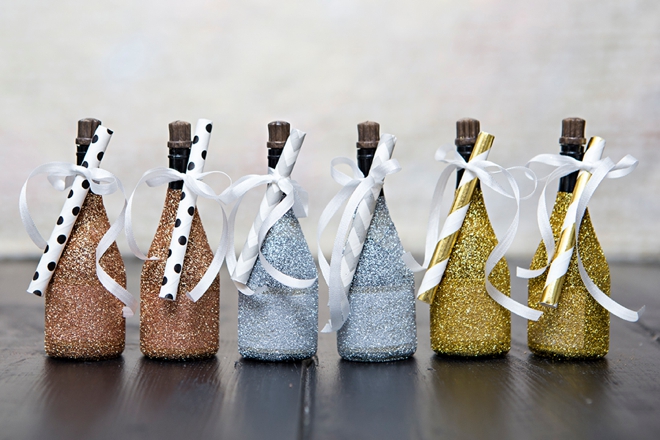
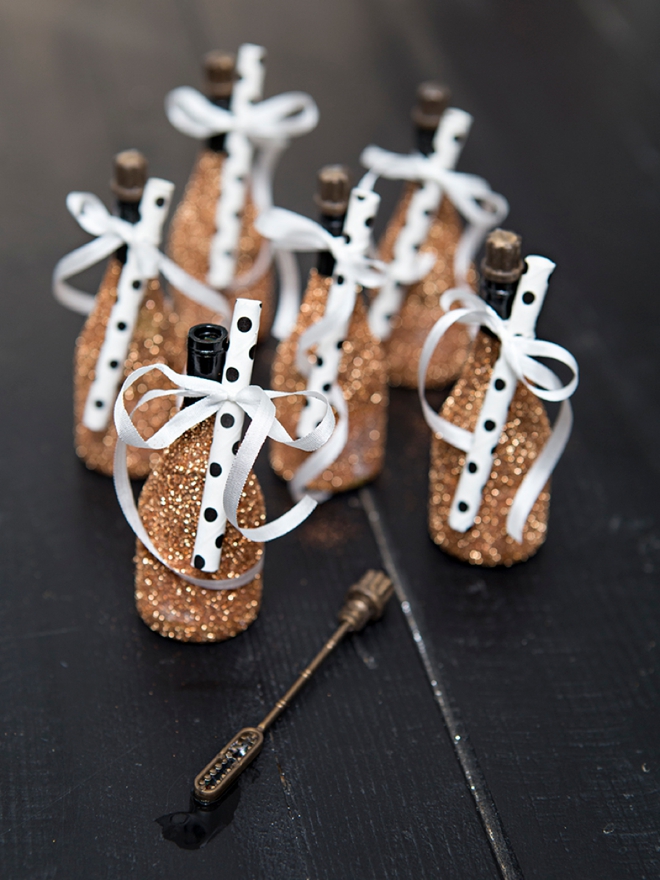
Not all glitter colors are created equal! If you’ve ever tried to glitter a real bottle of champagne, you’ll know that it’s true for that project as well. The “lighter” shades of glitter, pale yellow, pale pink, pale turquoise, etc. won’t cover the labels in one coat like gold, copper, navy blue, or red will. Through the silver glitter I used here, you can see a faint outline of the label, just keep that in mind when choosing your glitter color. If you’re set on a lighter color, you can always do two coats of it!
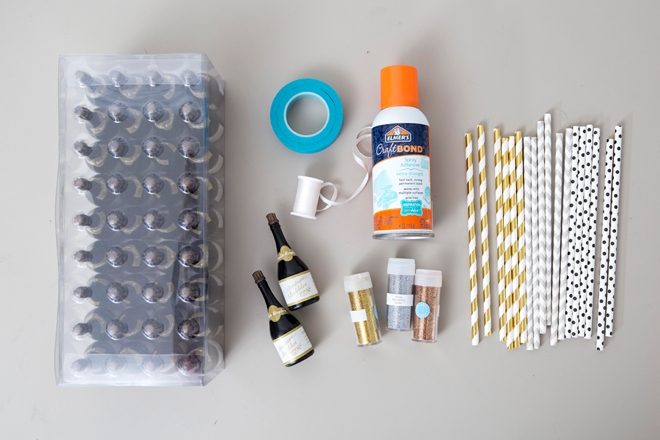
SUPPLIES:
- Champagne Bubbles
- Paper Straws
- Pretty Glitter
- Spray Glue
- Ribbon
- Stencil Tape
Manicure Warning: spray glue is horrible on your manicure, so make sure you don’t have a fresh coat before you make this project!
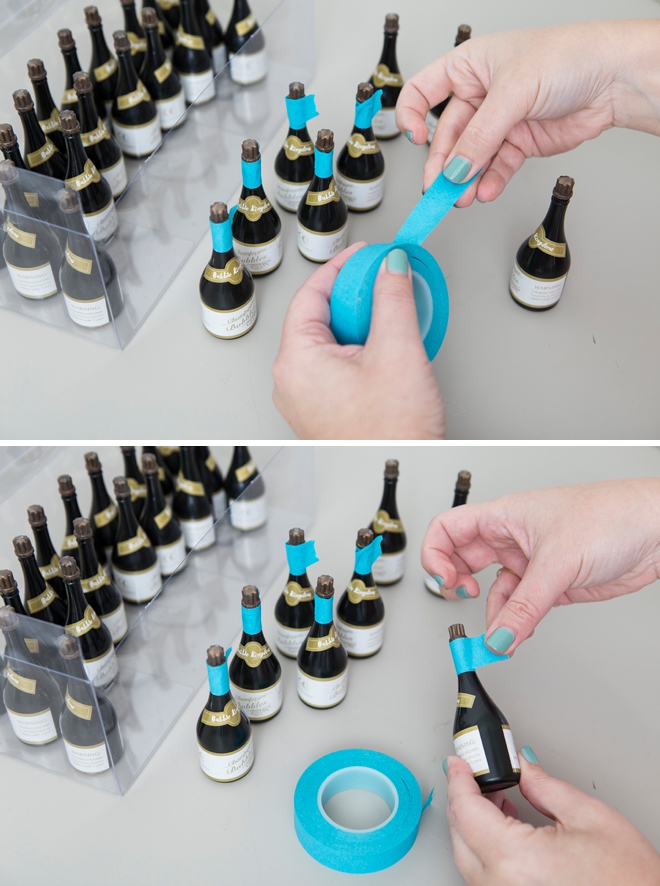
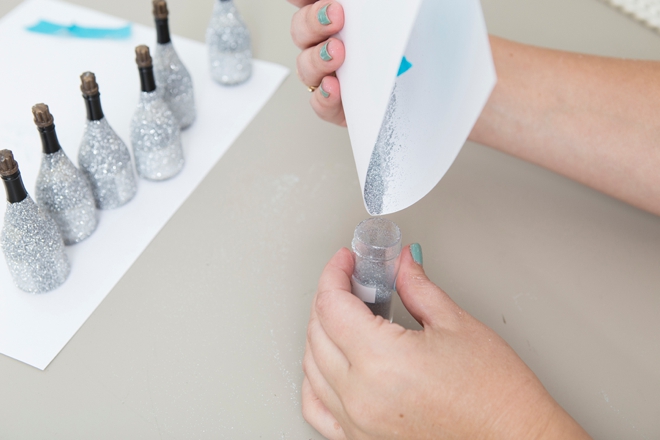
Tape Off
Tape off the top of each bubble bottle with painters tape or stencil tape. Leave a little tab hanging/free so it’s easy to pull off.
Spray + Glitter
Hold the bottle from the taped off area and cover the rest in spray glue. Then cover with glitter! As soon as the bottle is covered, remove the tape right away so the glue doesn’t dry to the tape. Set aside and let fully dry.
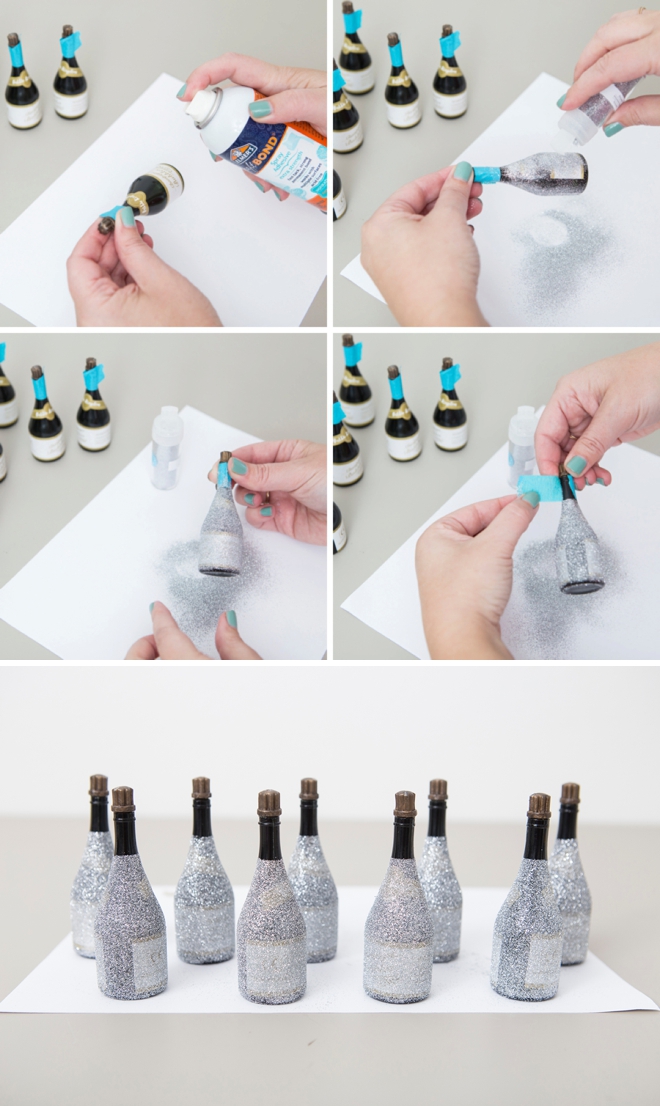
Save Your Excess Glitter!
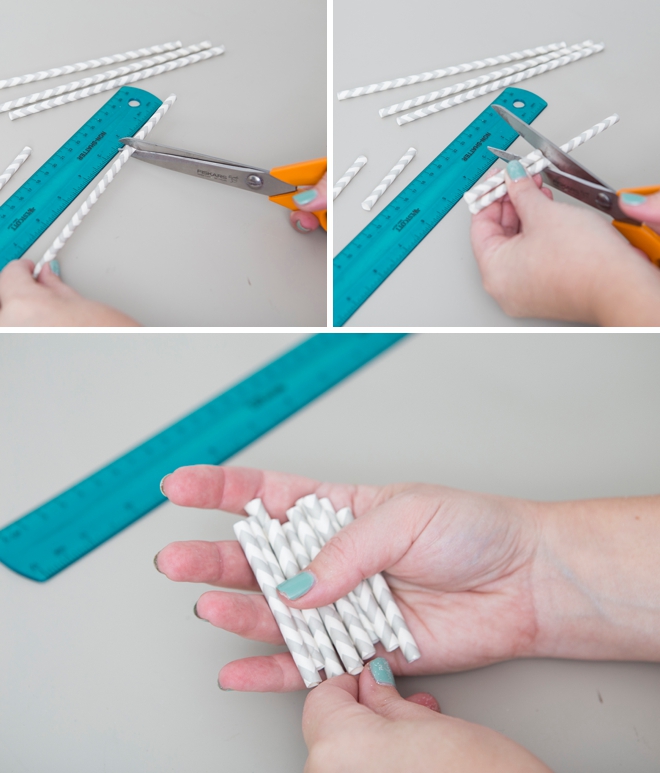
Cut Straws
These are just for looks. No, you’re guests will not be drinking the bubbles! You can get 3 mini straws out of one paper straw.
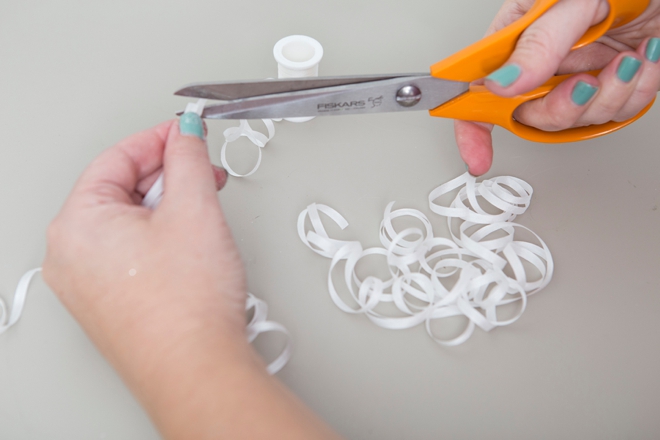
Cut Ribbon
Cut 12″ of ribbon or twine for each bottle. Here I’m using 1/8″ silk ribbon.
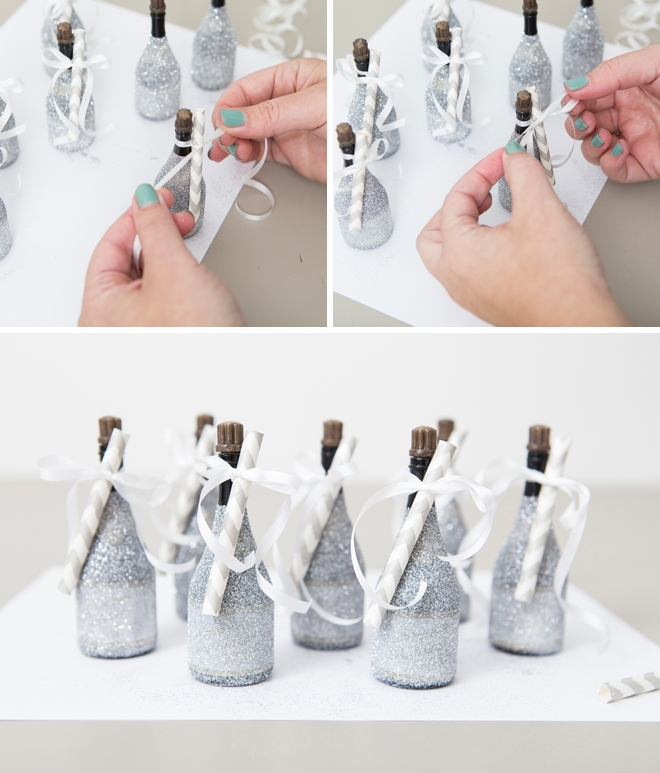
Tie
Tie the straws onto the bottles! It’s easiest to knot the ribbon on the bottle first, then start to make another knot and right before you pull it tight, insert the straw. Then tie a bow!
As with all our DIY tutorials, if you create one of our projects please send us a picture – We Love Seeing Your Creativity! If you use Instagram or Twitter please use the hashtag #SomethingTurquoiseDIY and it will show up on our Get Social page. Happy Crafting!
DIY Tutorial Credits
Photography + DIY Tutorial: Jen Causey of Something Turquoise // Champagne Bubbles: Amazon // Gitter: Amazon // Spray Glue: Elmers // Paper Straws: All Over, Personal Collection // Ribbon: Amazon // Stencil Tape: Martha Stewart // Nail Polish: OPI – Withstands the Test of Thyme
Shop The Supplies:
Find the supplies you’ll need for this project from our affiliate links below:

Comments