
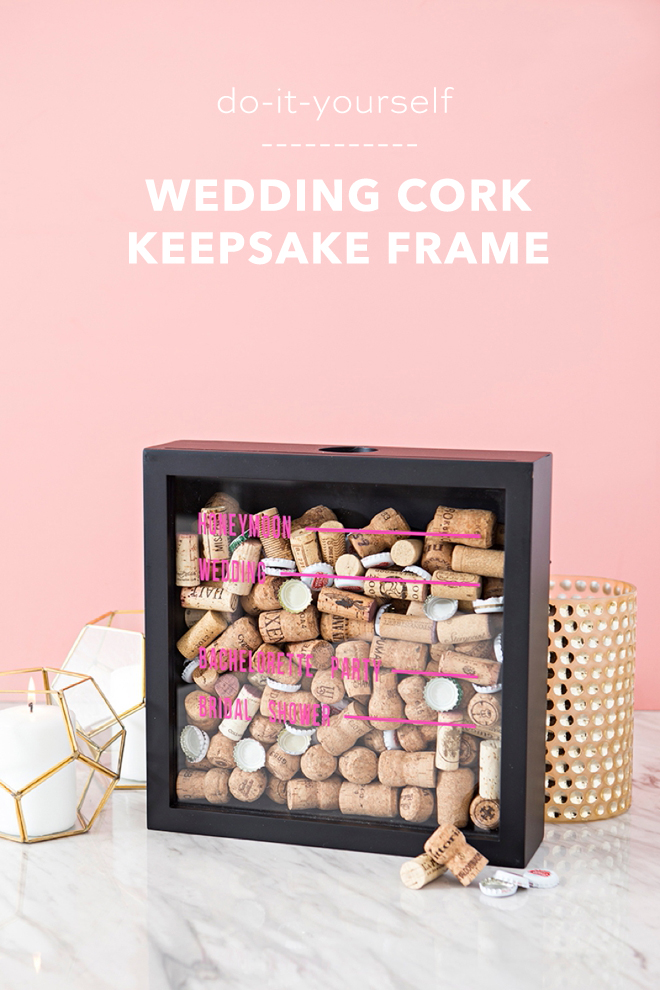
DIY Wedding Cork Keepsake Frame With Cricut Maker
-Sponsored Post-
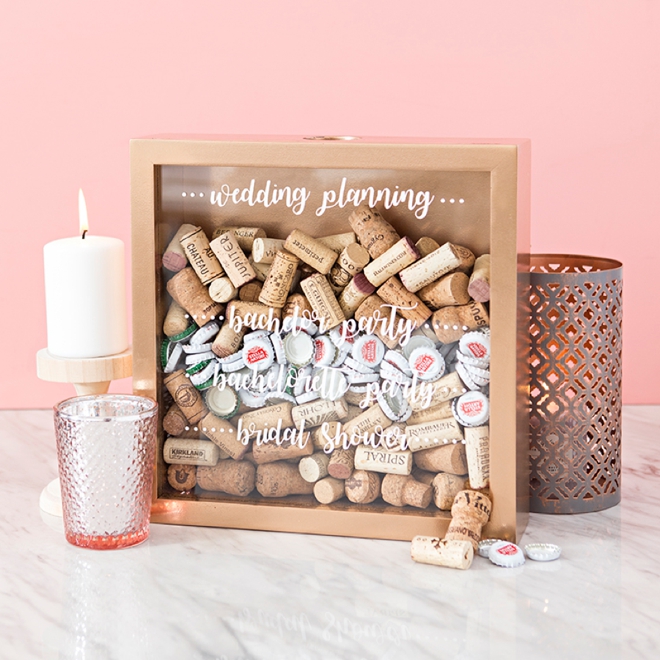
I’m a sentimental type gal. I love saving corks, concert tickets, special receipts and all the rest. So when I saw these darling cork shadow box frames on Amazon, I was immediately inspired to embellish them with my Cricut Maker! But the corks we are saving are extra special because they’re from your wedding events! From your engagement party to your bridal shower or from good ol’ wedding planning drinking to honeymoon drinking! That’s right, save the corks and bottle tops from any of your wedding events, put them in the frame, add your custom label marker to mark the event and keep on saving! You can use my designs for free in Design Space right now, but you can also create your own. I can’t wait to see how creative you fabulous Cricut-ers get with this project, cheers!
Use Any Markers You Want
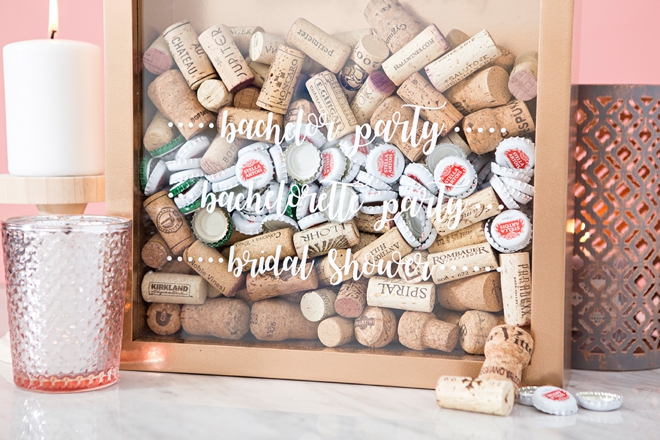
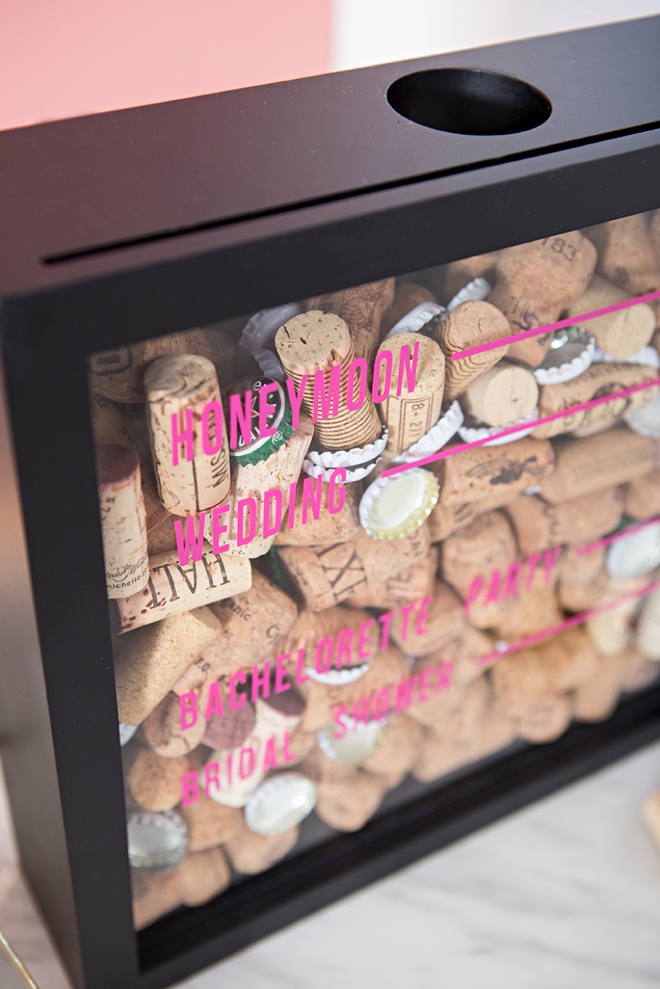
Whether you’re saving corks from your engagement party, bridal shower, bachelorette party, wedding, honeymoon… or maybe even each year, you get to pick the “markers”, special events or dates to mark your collection of corks and bottle caps!
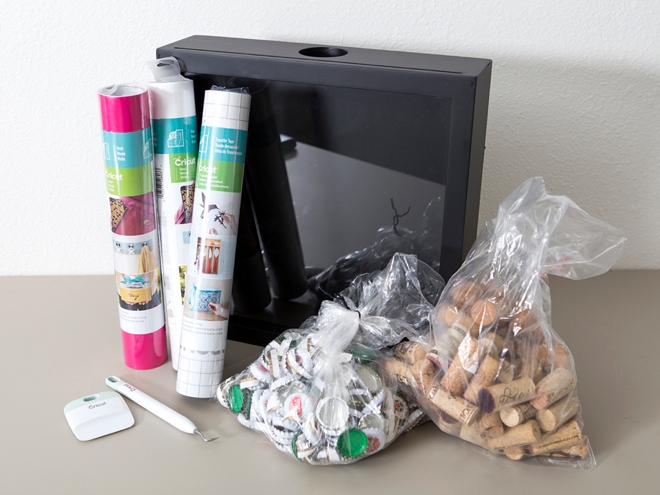
SUPPLIES:
- Cricut Maker or Cricut Explore
- Cricut Vinyl (I used Flamingo and Linen)
- Cricut Transfer Tape
- Cricut Weeding Tools
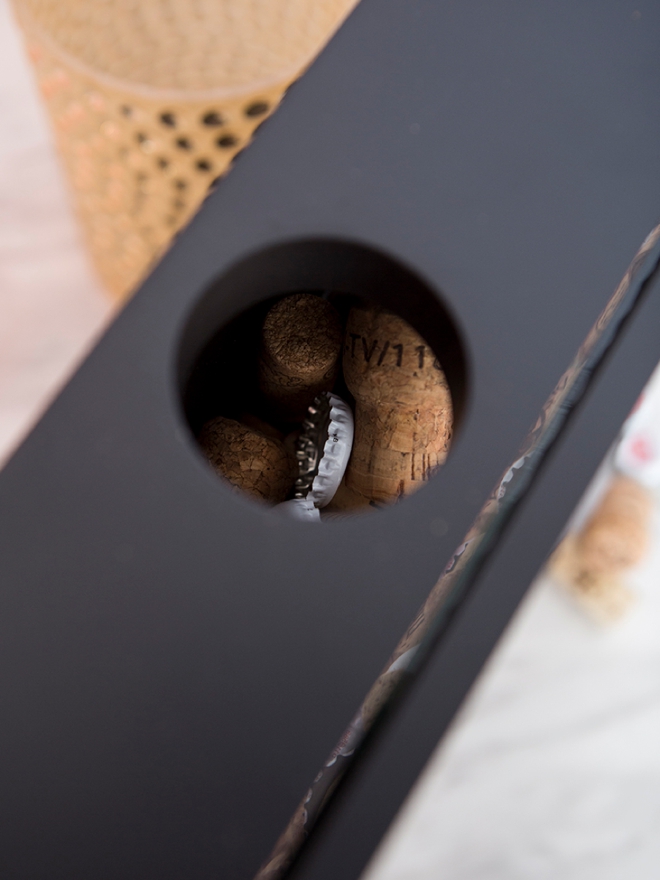
- Cork Shadowbox Frame (mine is from Amazon)
- All your special corks and bottle caps!
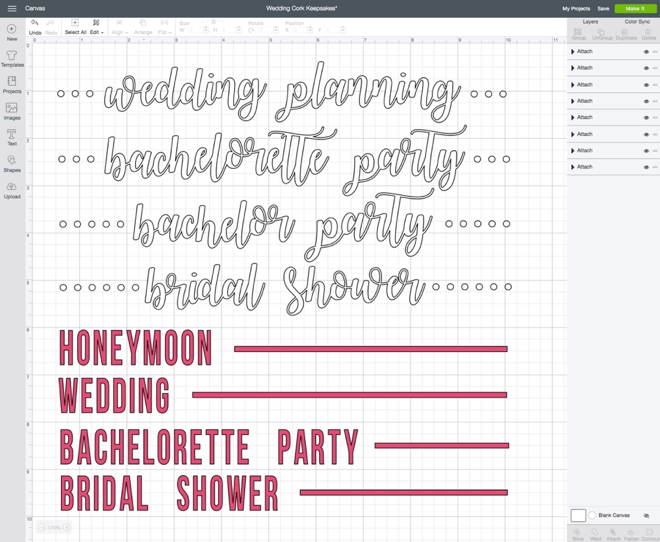
Create Your Design In Design Space
You can use this link to click and cut both of my exact designs in Design Space now or you can login and design your own! I used Watermelon Script and Bebas Neue for the fonts. Pick and create your own cork “markers”.
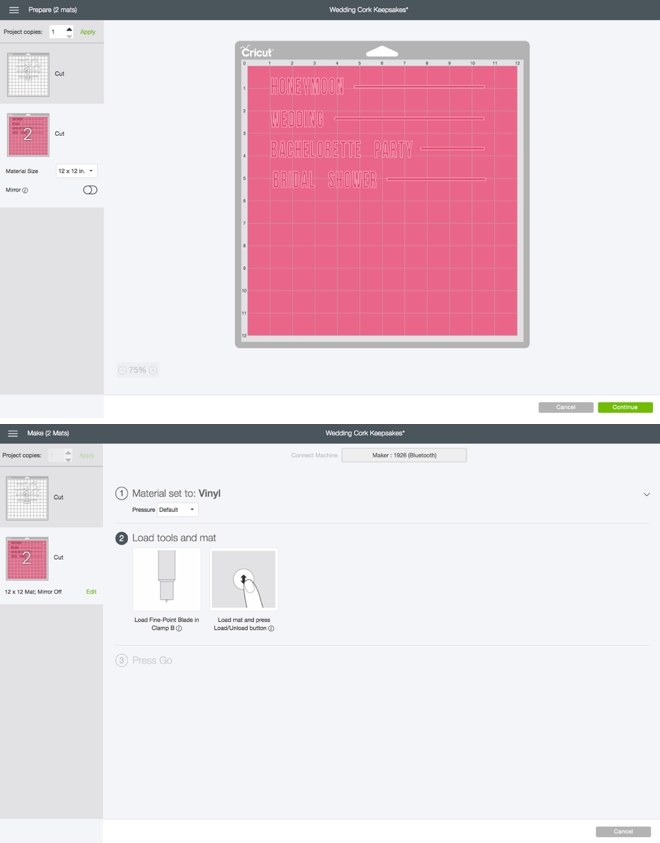
Prep The Cut
Pick your color of vinyl, choose the vinyl your using so the Cricut knows exactly what it’s cutting, connect your machine, load the mat…
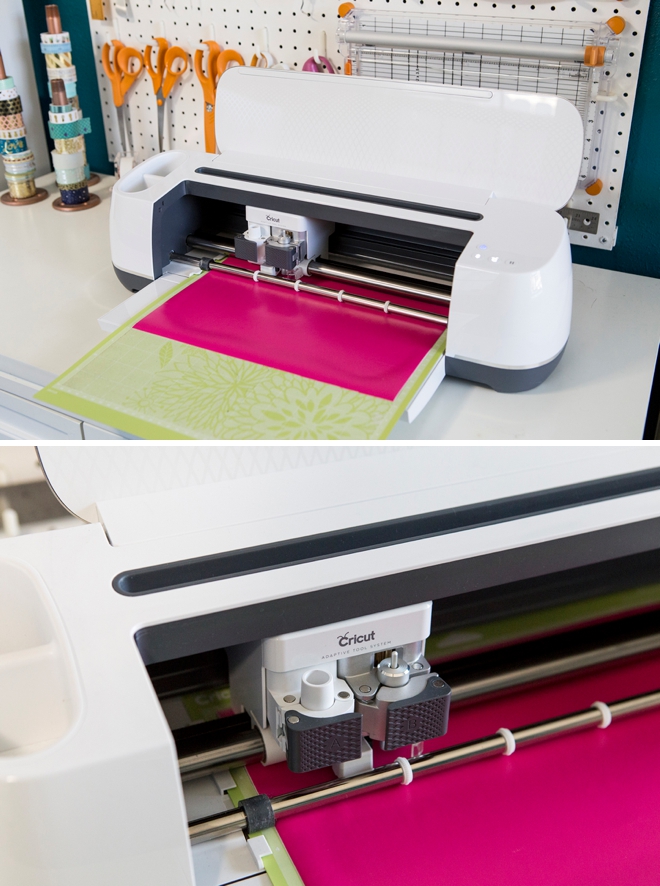
And Let The Cricut Work It’s Magic
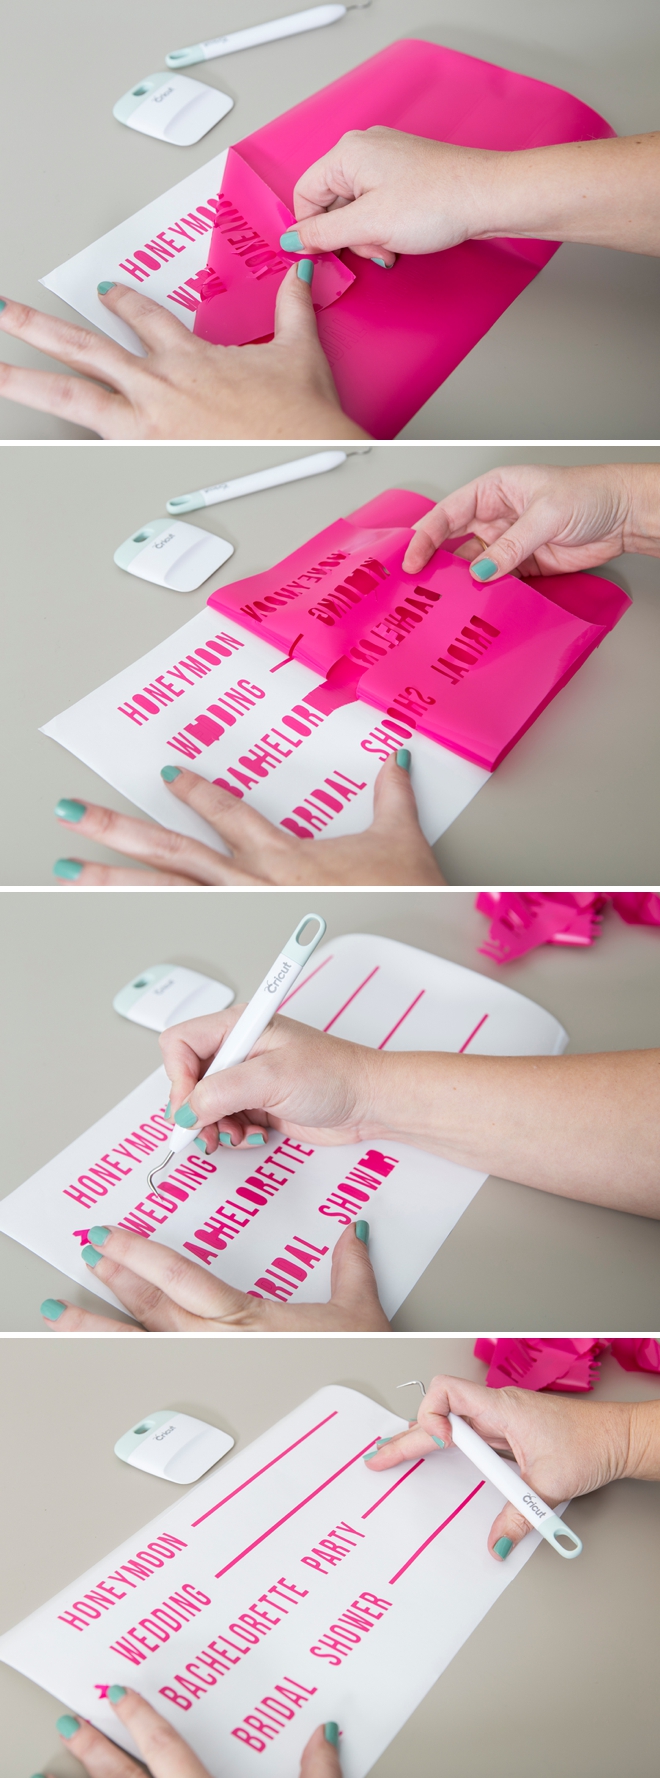
Weed
Using Cricut’s wedding tools, carefully peel off/remove all the excess areas of vinyl that aren’t part of your design, this is called “weeding”.
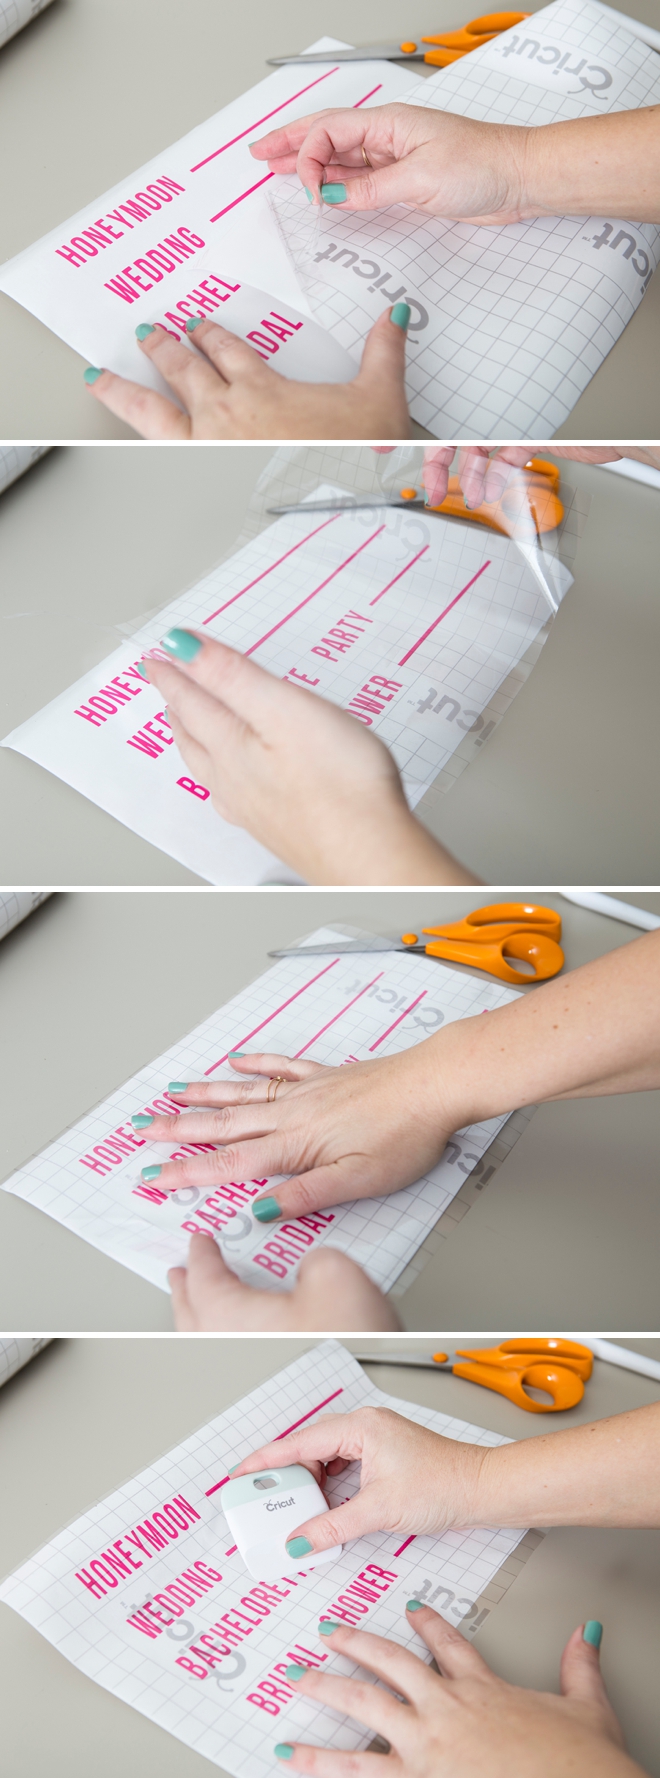
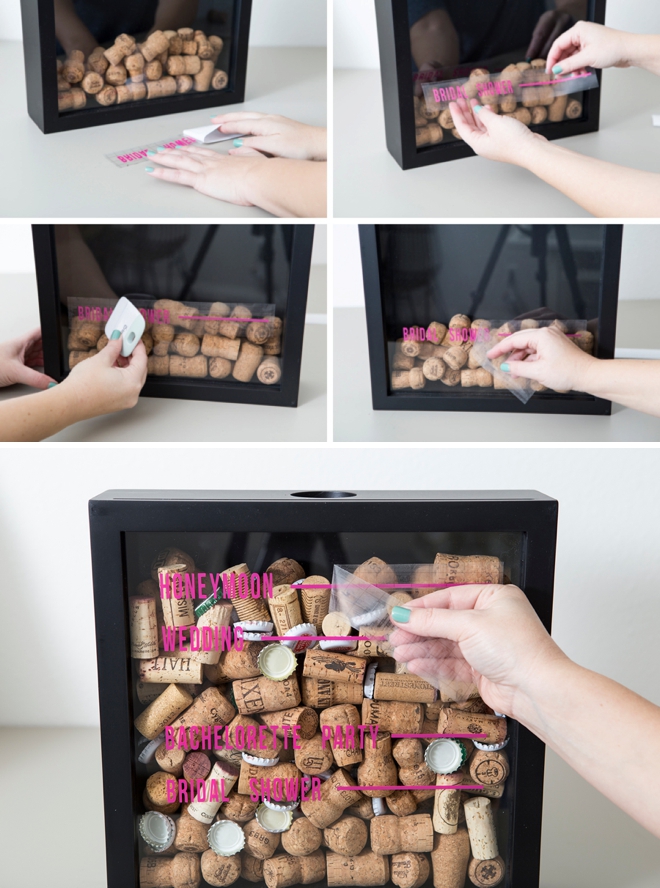
Apply Transfer Tape
Many new Cricut-ers aren’t aware of the fabulousness that is transfer tape. Sure, we could hand-place each individual sticker that we just cut but who has time for that!? Not just time, but the spacing would be way off because no one is that good. Simply cut a piece of transfer tape the same size as your design. Peel the backing off and place it on top of your design, then burnish/press/smooth the tape onto the vinyl design using the scraper tool. Then you’ll peel the transfer tape from the vinyl backing, taking the sticker with it, to apply it to the shadowbox frame glass.
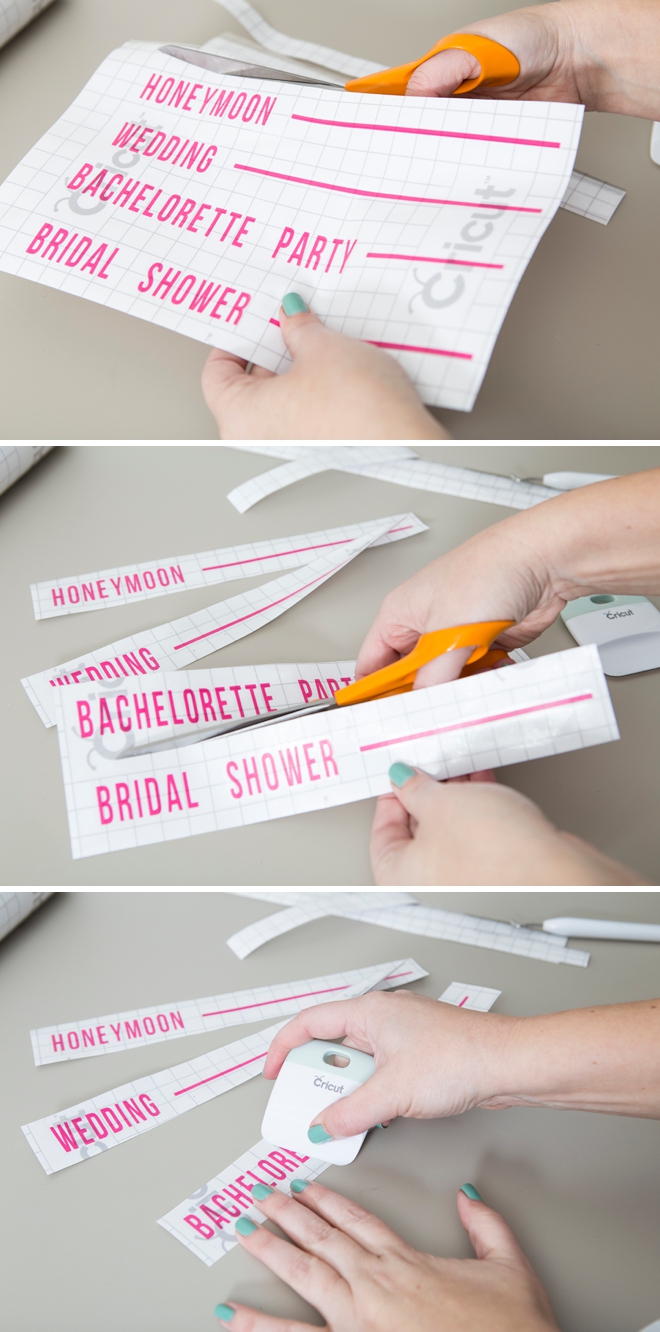
Cut Individual Markers
Since you’ll be adding these cork “markers” at different times, you’ll want to cut out each one individually and keep them near the frame for adding to it once each event is complete.
Collect Your Corks
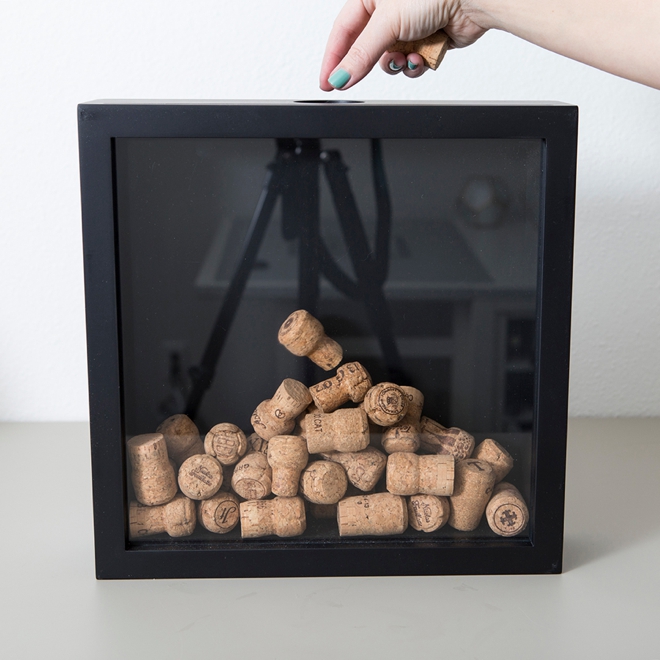
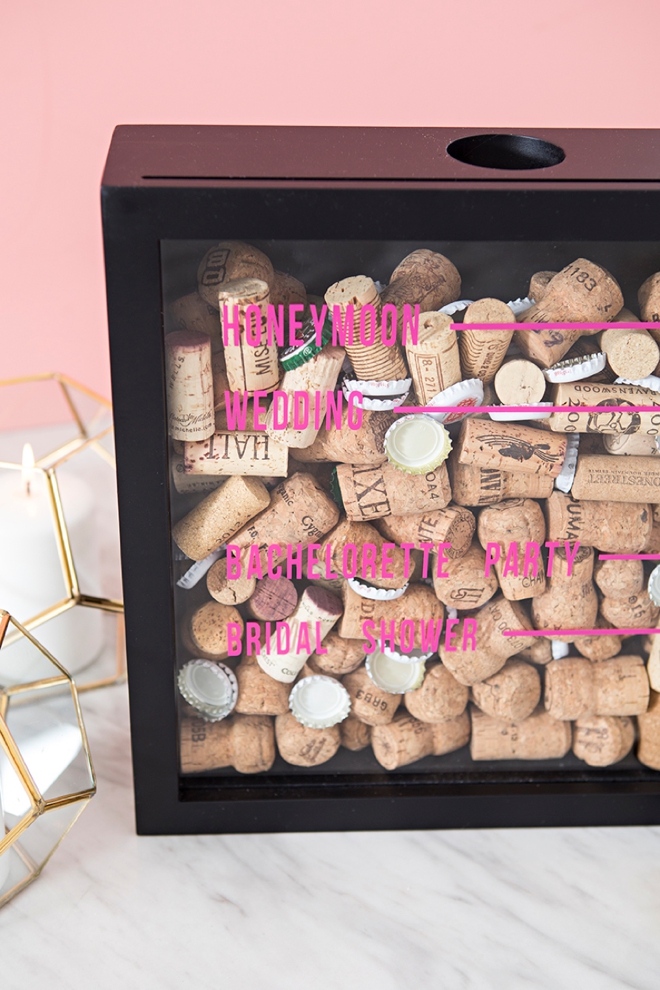
Fill + Mark
So the thought here is that you’ll collect all the corks from a special event, fill the frame up with them and then mark the level of where they ended up. Fill at the end of each special event and then add the marker label you created! Peel the transfer tape from the vinyl backing, peeling the custom cut sticker with it, then press/burnish/smooth onto the glass using the scraper tool. Remove the transfer tape and admire your darling keepsake!
Black… or Spray Paint
I bought both of these frames in the black finish and simply spray painted one rose gold. Don’t feel “stuck” with the color that a frame comes in… spray paint is an awesome tool for every DIY gal! Just two even coats with 72 hours of dry time before crafting will do your frame good!
DIY TUTORIAL PARTNER:

Cricut is a world-class leader in personal electronic cutting machines that has enabled people to achieve their creative best for over 50 years. Today, millions of people use Cricut products to create unique projects, and they focus on enhancing lives with this power of creativity. Let Cricut help you take your wedding personalization and project creativity to the next level!

As with all our DIY tutorials, if you create one of our projects please send us a picture – We Love Seeing Your Creativity! If you use Instagram or Twitter please use the hashtag #SomethingTurquoiseDIY and it will show up on our Get Social page. Happy Crafting!
DIY Tutorial Credits
Photography + DIY Tutorial: Jen Causey of Something Turquoise // Cricut Maker + Supplies: courtesy of Cricut // Top Loading Shadow Box Frame: Amazon // Nail Polish: OPI – Withstands the Test of Thyme
Shop The Supplies:
Find the supplies you’ll need for this project from our affiliate links below:

Comments