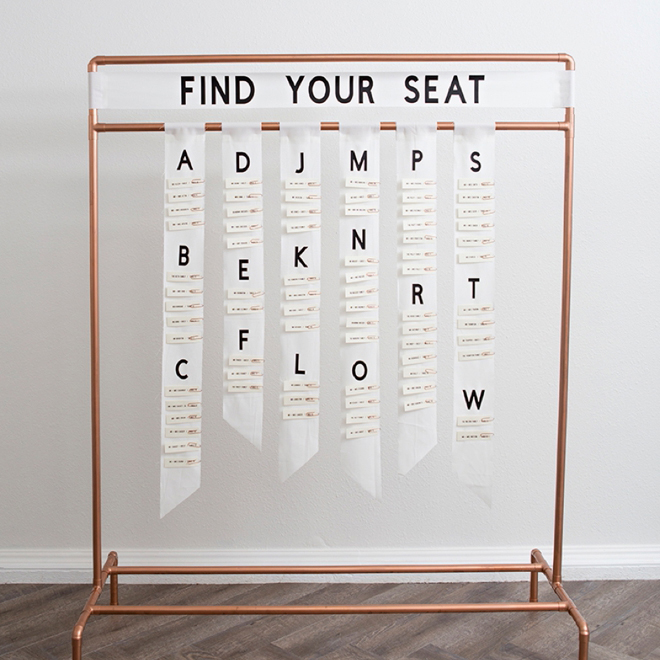

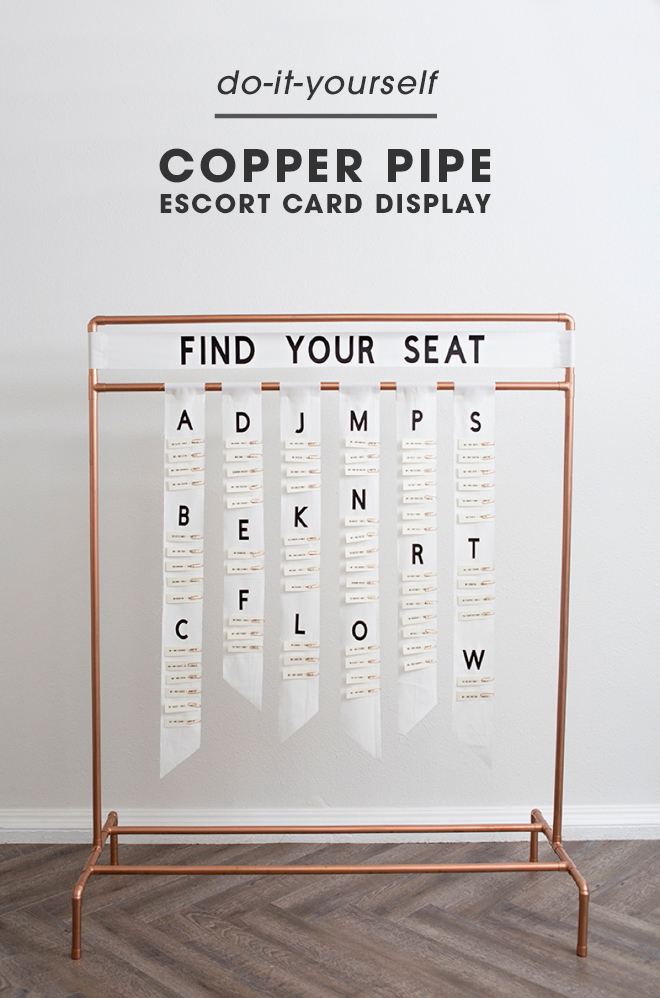
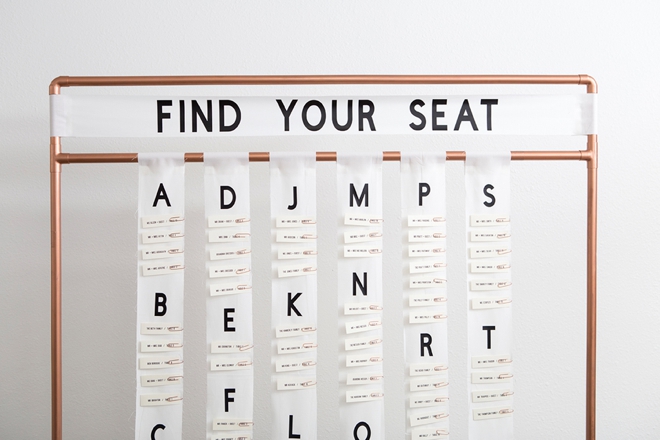
DIY – Copper Pipe Escort Card Display
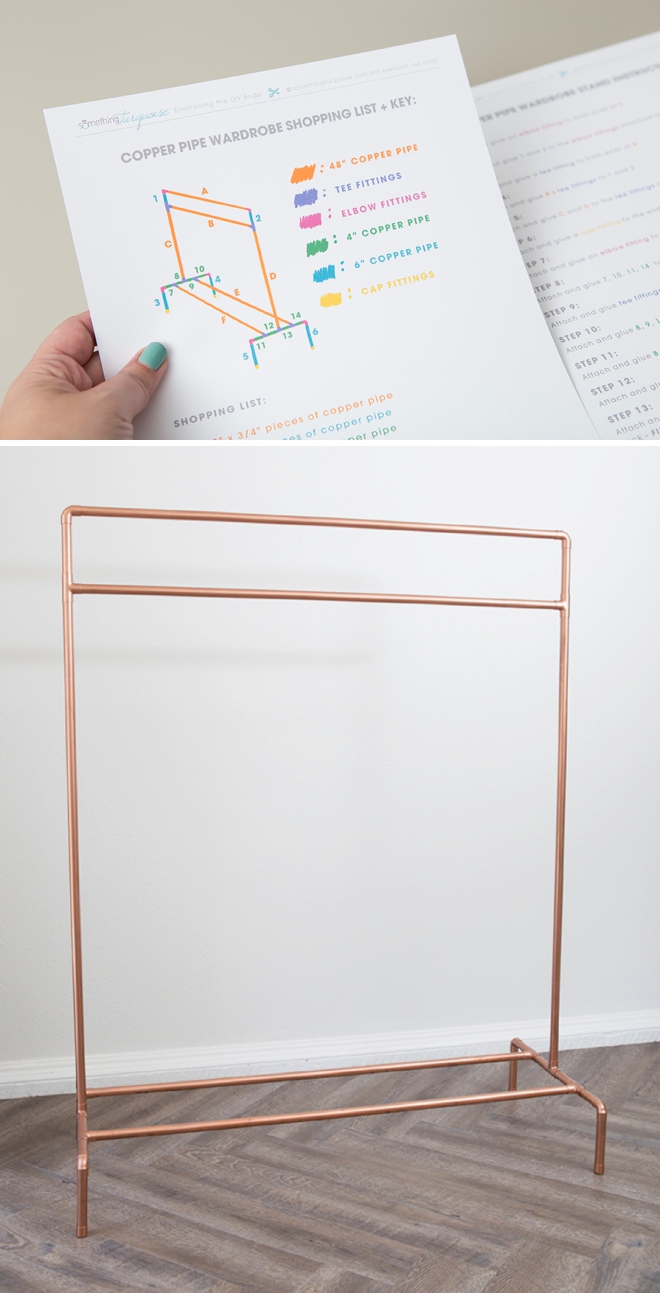
Last weeks DIY Copper Pipe Wardrobe Stand has been magically turned into a modern DIY Copper Pipe Escort Card Display! I will start by saying that yes, this project is a bit involved and has a lot of moving parts, however it’s fabulous. Today I’m playing with some BRAND SPANKING NEW Cricut tools that you’re going to be drooling over, and good news – they will be available for purchase this Sunday the 20th! Build, cut, cut, cut some more and before you know it you’ll have the most custom, eye catching display for your escort cards… the work is worth the end result!
Guest Interaction
Escort card displays are such a fun DIY detail and something to definitely think about because every single one of your guests will interact with it!
Get The How-To:
Last week I shared how to make this amazing copper pipe wardrobe stand… you might have seen it. And this week I’ve turned it into this fabulous escort card holder. Visit this post to learn how to first build the copper pipe stand!
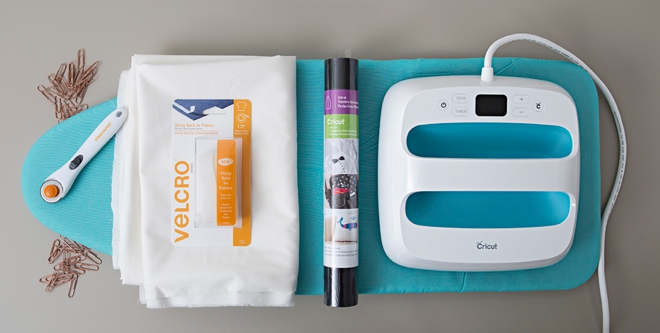
SUPPLIES:
- Cricut Maker (releasing August 20th!) or Cricut Explore
- Cricut EasyPress (releasing August 20th!) or Iron
- Cricut Iron-on Light, Black
- 2 Yards Cotton Muslin Material
- Fabric Velcro
- Cardstock
- Cute Copper Paper Clips
- Scissors or Rotary Cutter and Cutting Mat
- Your final seating chart!
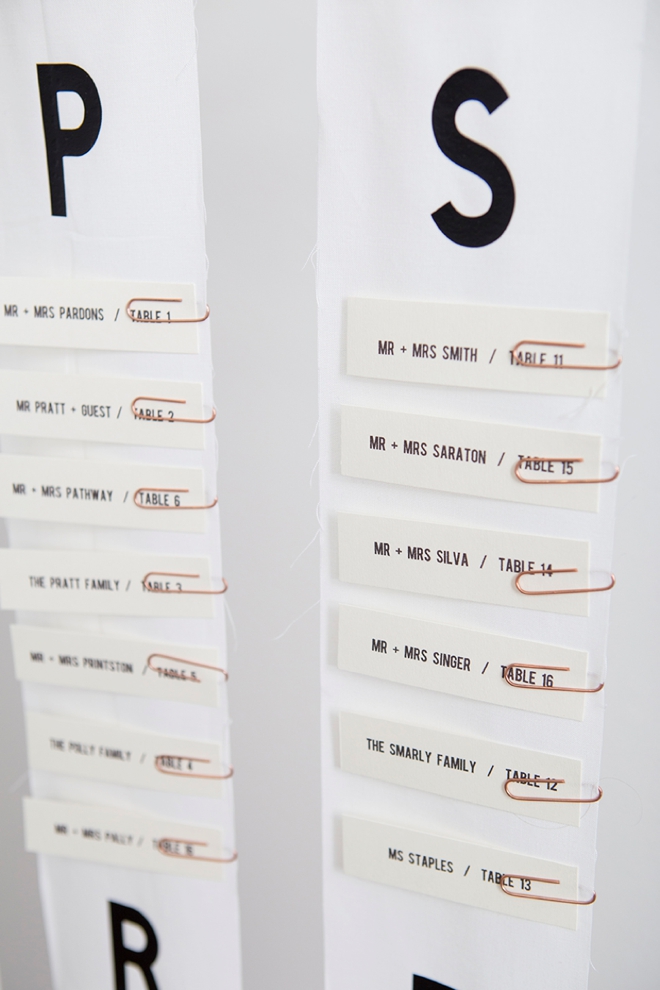
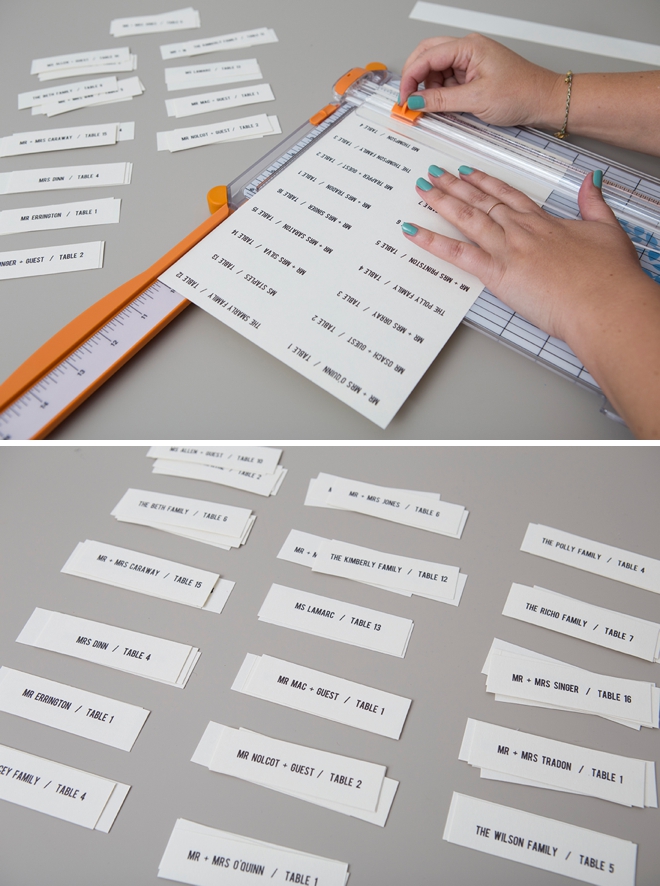
Design + Print Your Escort Cards
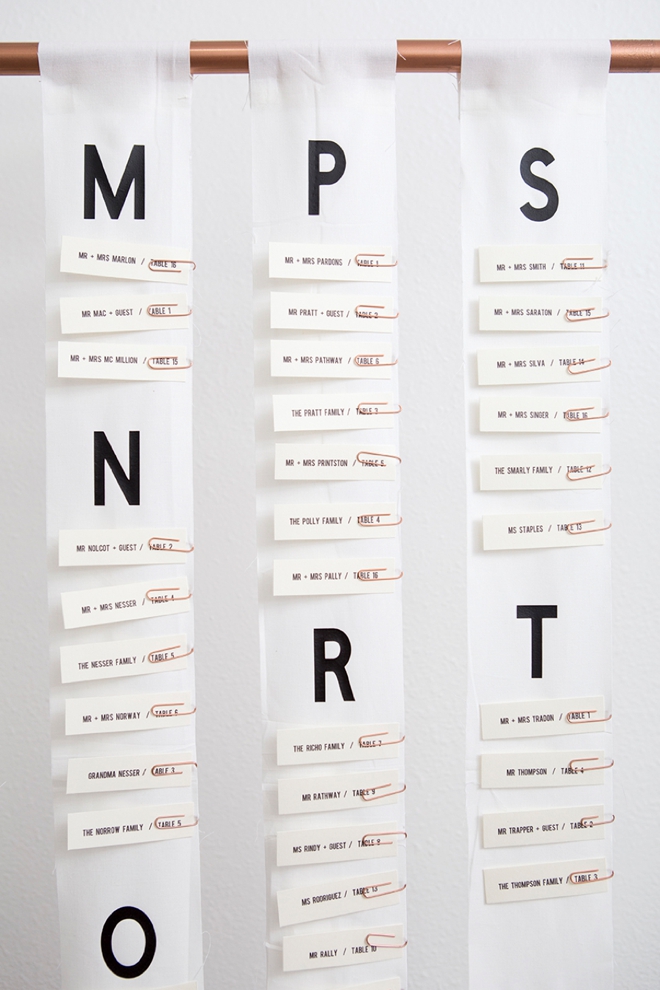
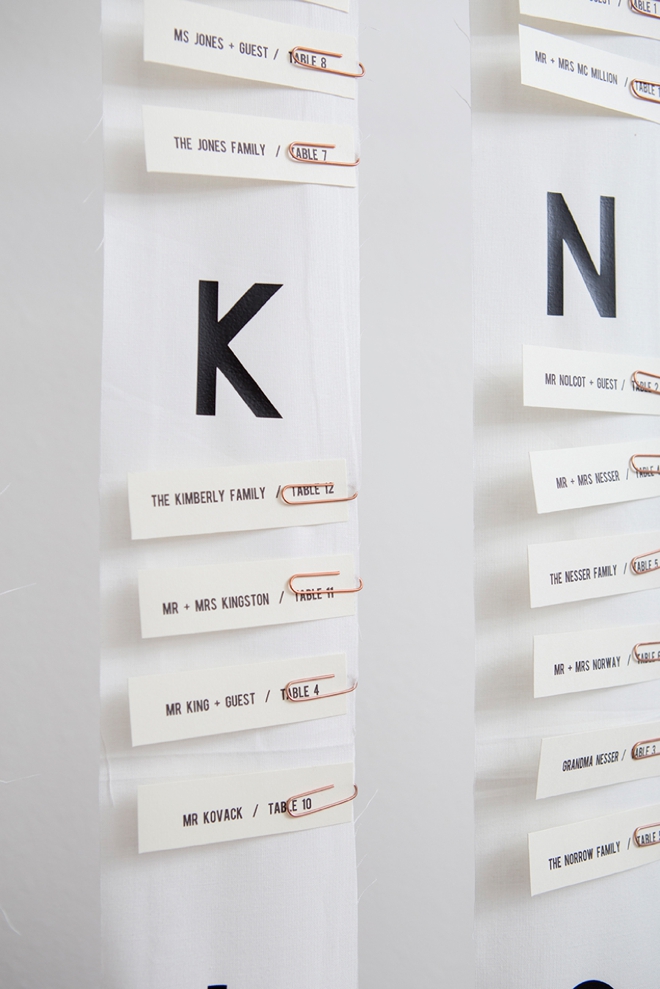
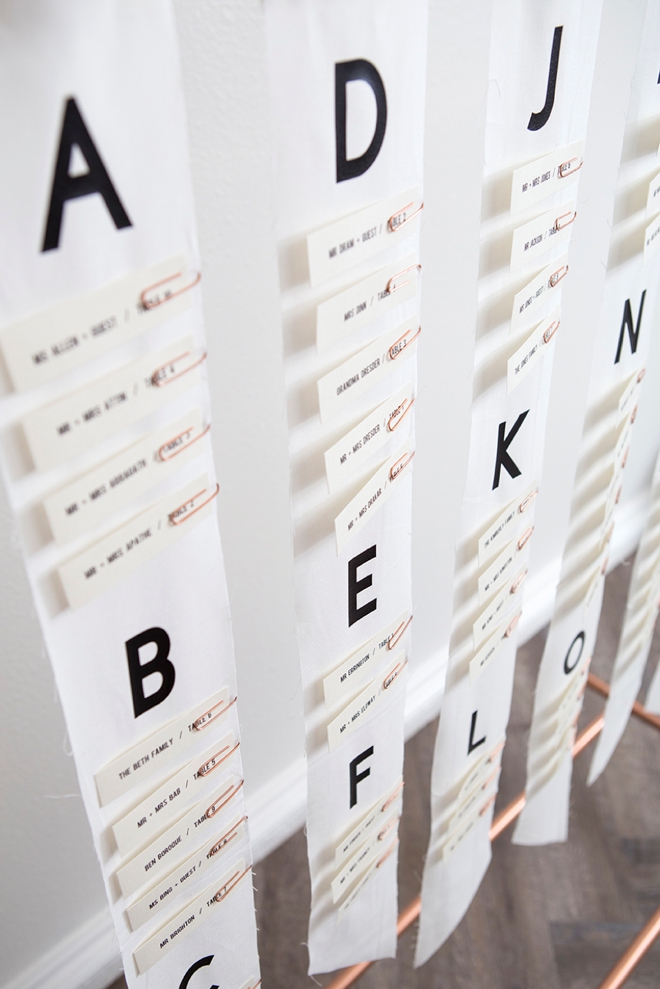
Using your favorite design software, design simple strips of paper that have the guests names and table on them. These are 1″ x 3.5″ and I used Bebas Font. Print on cardstock and cut them out.
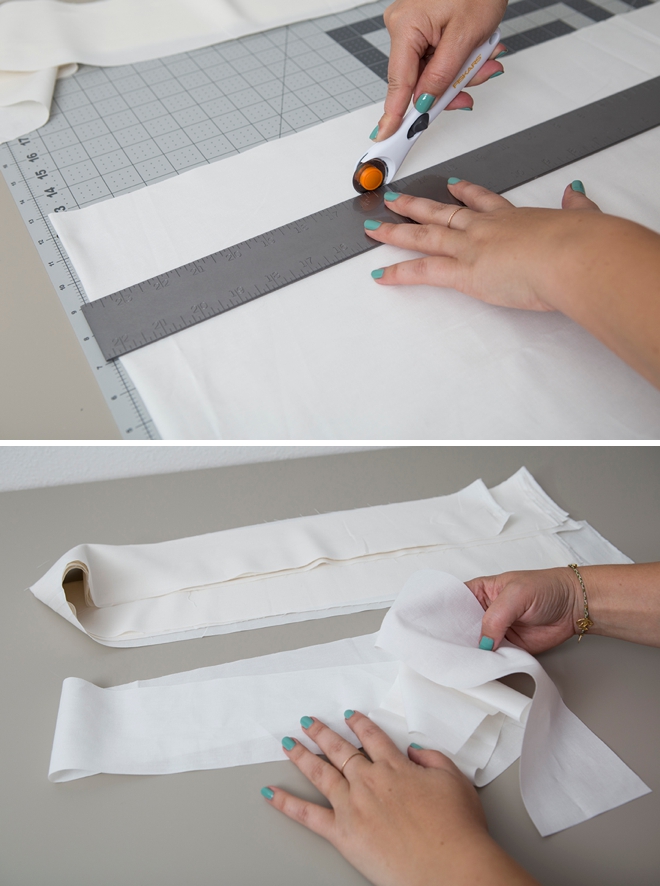
Cut Your Fabric
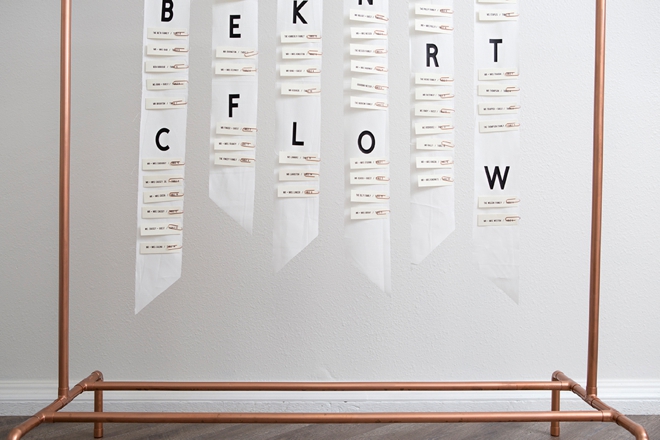
For this display you’ll need to cut at least 7 strips of muslin fabric. Cutting with a rotary cutter and cutting mat is easiest but you can do this with scissors too.
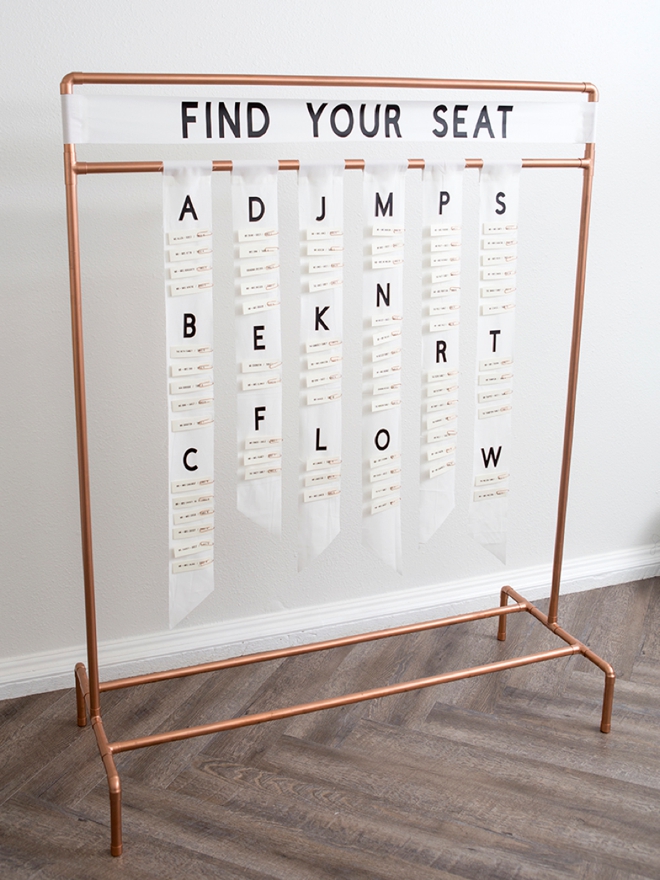
- 1 @ 3 3/4″ x 56″ strip for the top
- 5-7 @ 4″ x 46″ strips for the seating cards
The amount of seating card strips you’ll need will depend on your guest list.
Sticky Velcro Is Your Friend
Add a strip of self adhesive, fabric velcro to the end of your long strip of fabric. Remove the backing from the velcro and take it over to the stand to wrap around the pipe and secure in the proper spot. Do this on both sides, nice and tight.
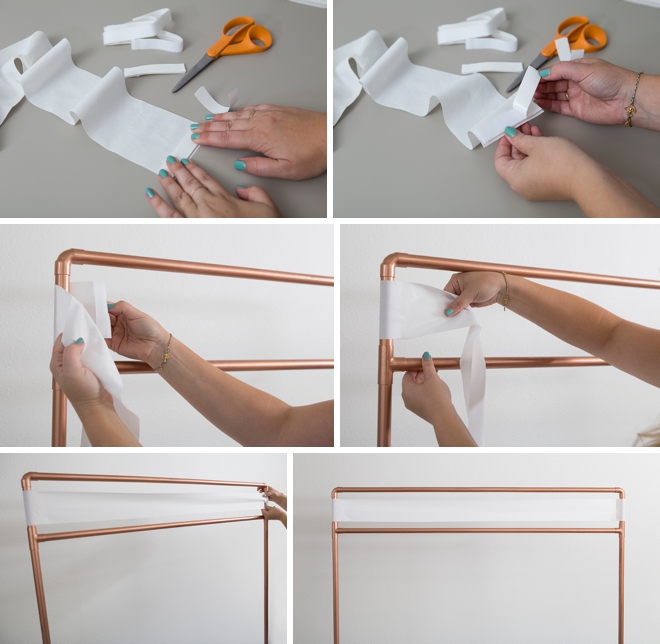
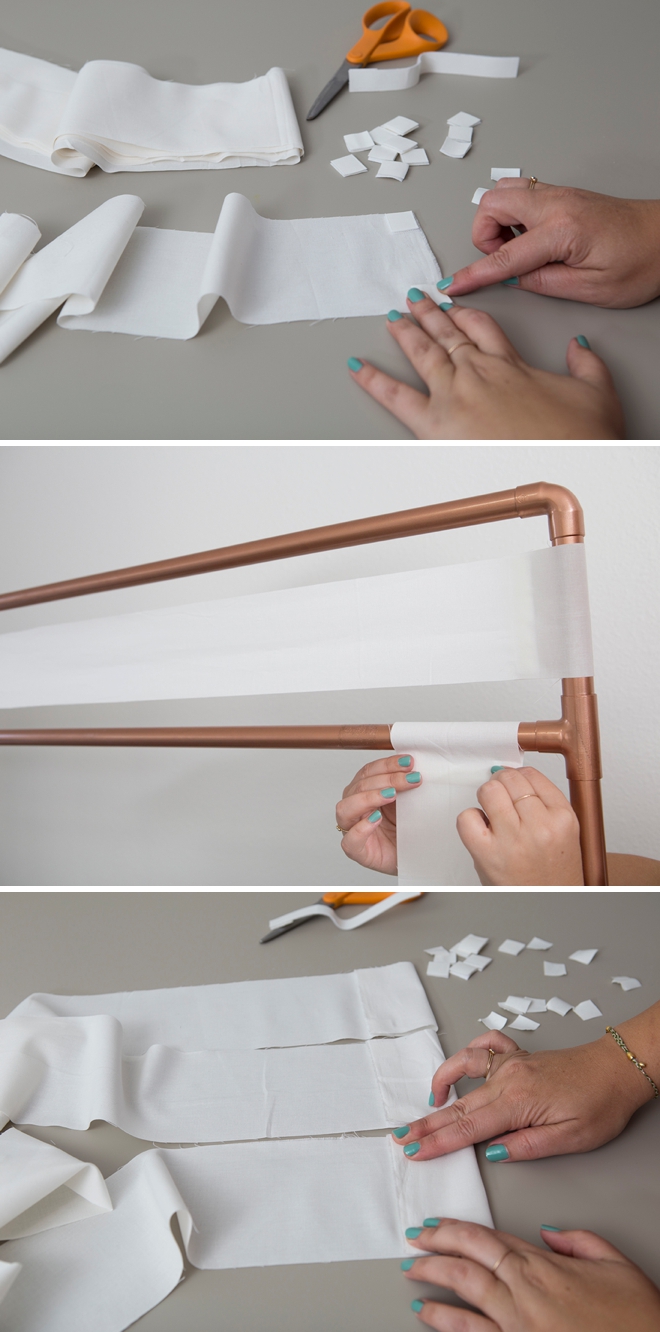
Now For The Escort Card Fabric
Do the same thing as the previous step, but only on one side. Add two small pieces of velcro, take to the pipe to get the spacing and wrap around to secure. Then remove this strip, take it back to your table and copy the spacing for the rest of your fabric pieces.
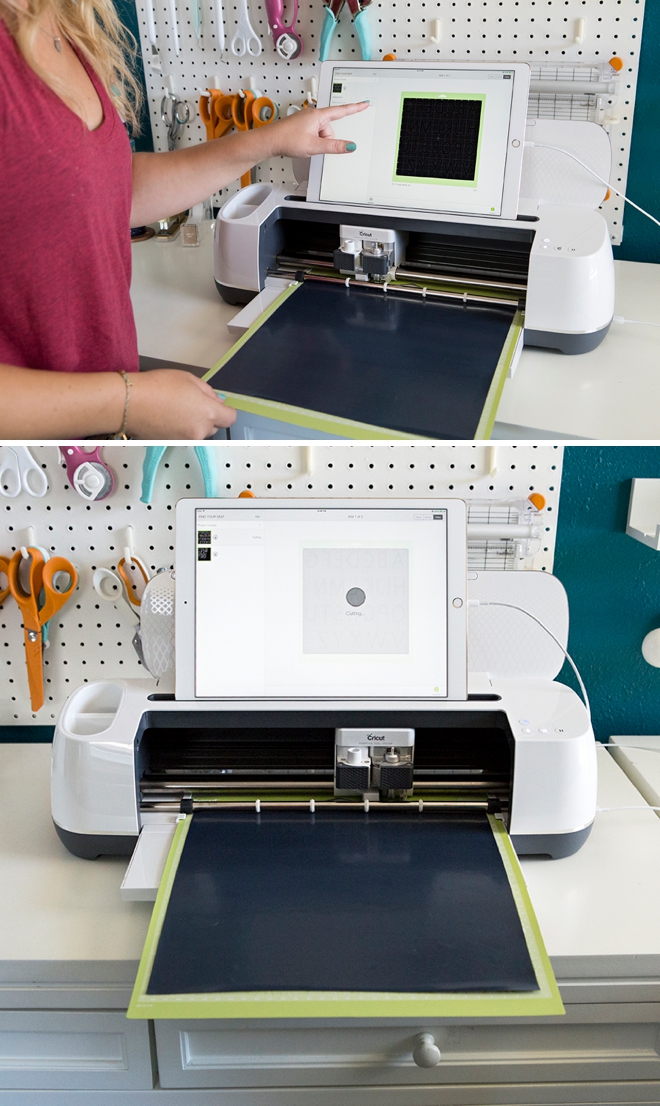
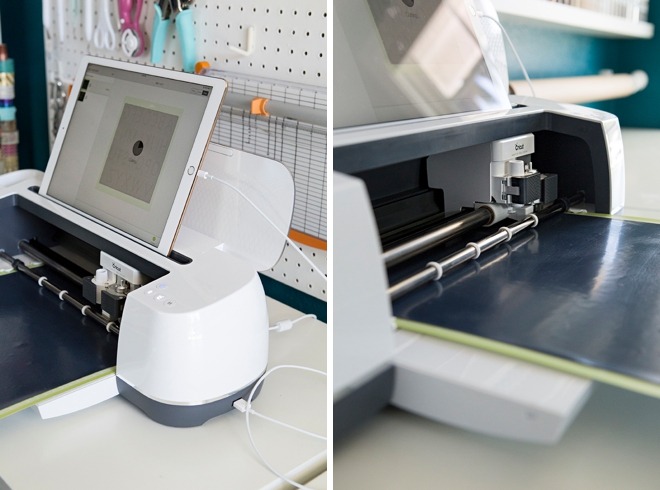
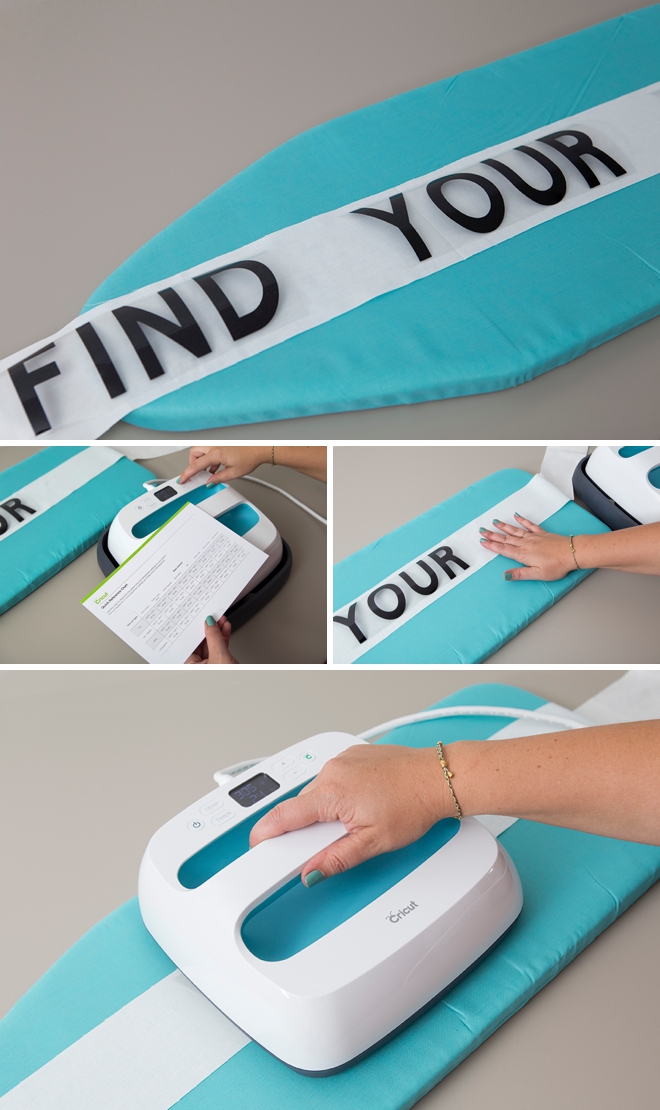
OMG, The Cricut Maker
You can use the AMAZING new Cricut Maker for this project or you can use your Cricut Explore. I’m not going to dive deep into the fabulous new features of this new machine in todays post, that’s for next week, but just know that this cutting machine right here is going to change the crafting industry!
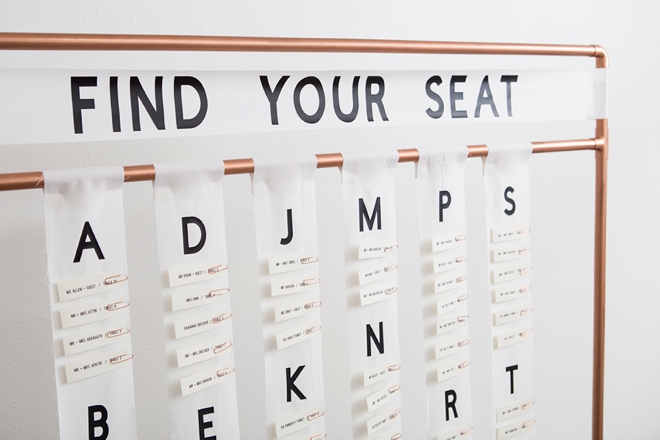
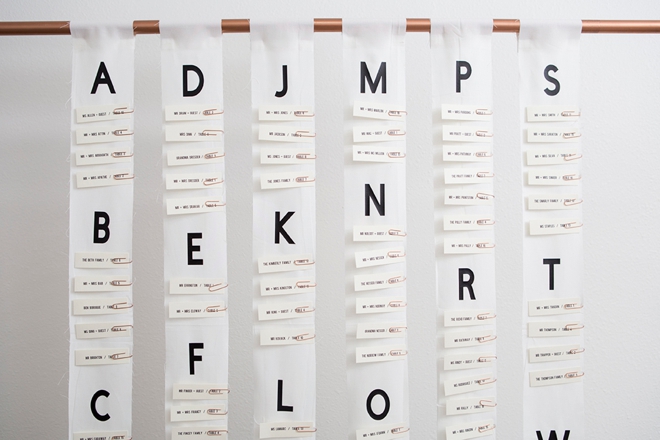
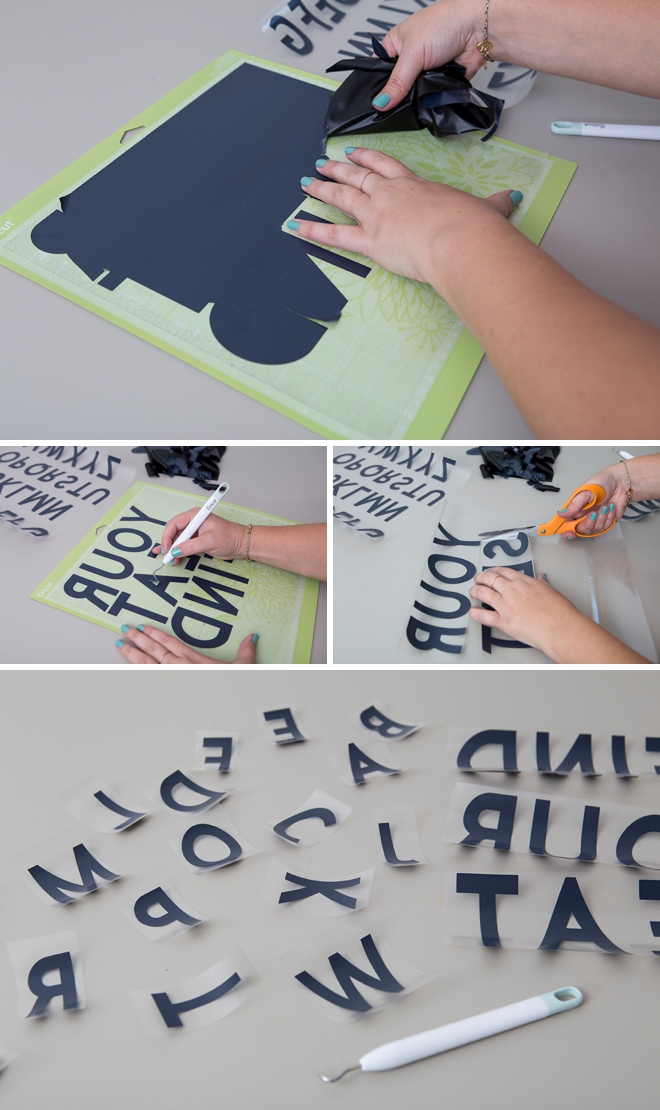
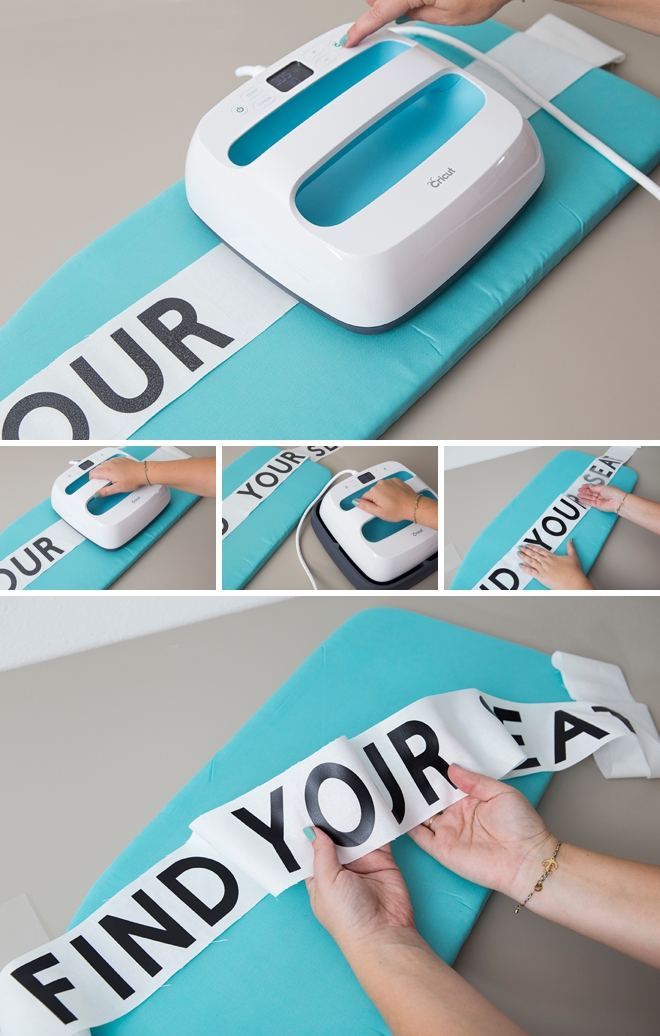
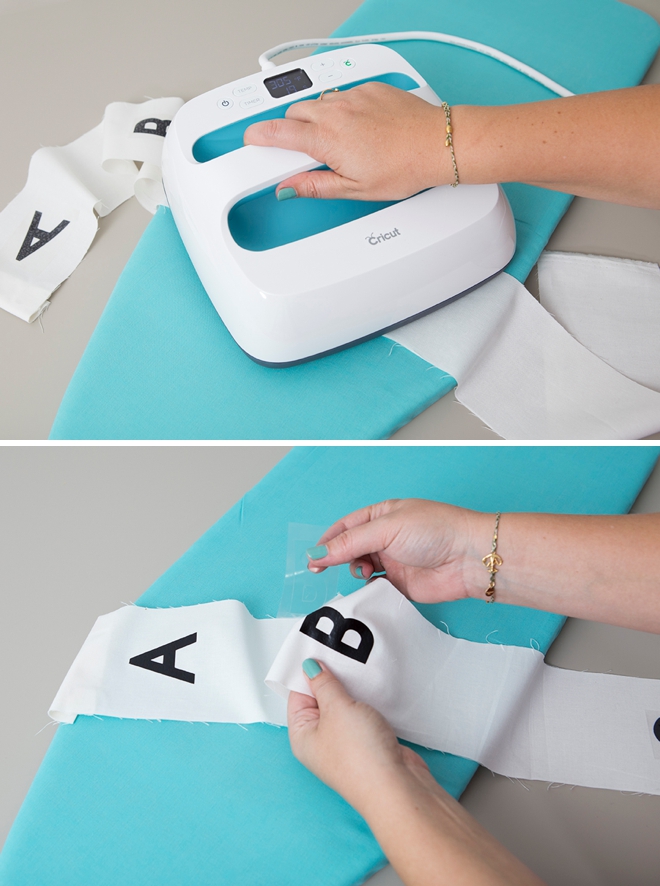
Design and cut “find your seat” and all the letters of the alphabet using your choice of Cricut and Iron-on Light in Black. Follow this link to my Design Space canvas where you can use my exact design!
The Device Slot + USB
One of my FAVORITE new features of the Cricut Maker is the handy little slot that they created to fit your iOS device! So my new iPad pro fits perfectly and the machine also has a USB charger plug on the side. Which means I can design my project on my desktop, but cut from my iPad – that’s right at my machine!
Weed
Weed (remove) all the extra bits of your cut letters and cut them up accordingly.
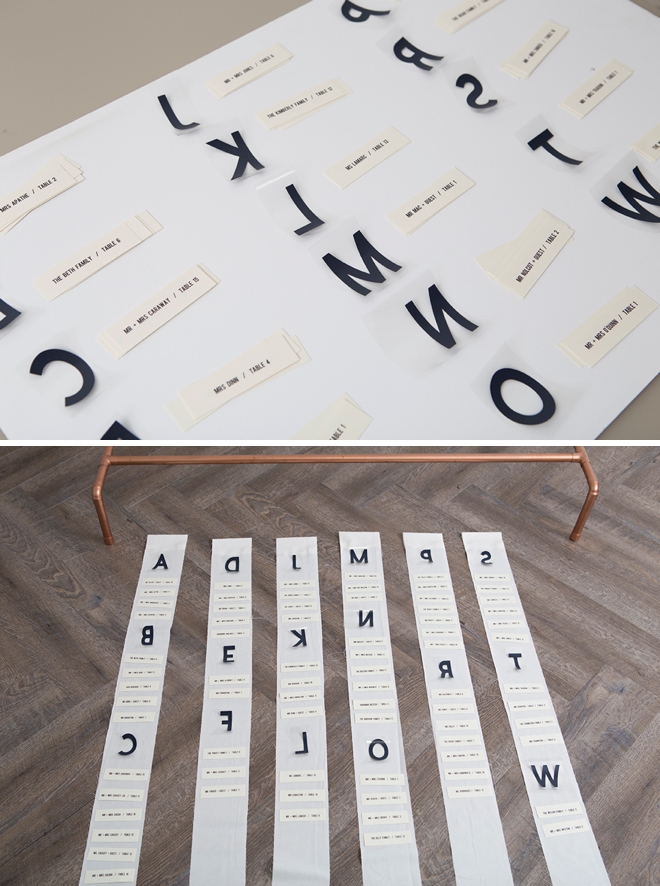
Layout
To figure out exactly where your alphabets need to go, I recommend doing a full mock layout of your escort cards first. Depending on your guest list, you might not even need some letters. Lay everything out and tack the iron on letters down with tape to hold them in place until you iron.
Easy Press
This is one of Cricut’s brand new tools… let me introduce you to the EasyPress. The ultimate combination of a heat press and iron, plus a little Cricut magic.
Refer to the heat guide per your fabric and iron-on material to find the perfect heat setting and timing for your project. Press the Cricut button and let the EasyPress heat your iron on PERFECTLY. Iron the “Find Your Seat” and all of your alphabet letters!
In between ironing, always return the EasyPress to it’s base.
Velcro Around The Pipes
Add your fabulously ironed fabric pieces to the pipe stand and adhere with their velcro pieces!
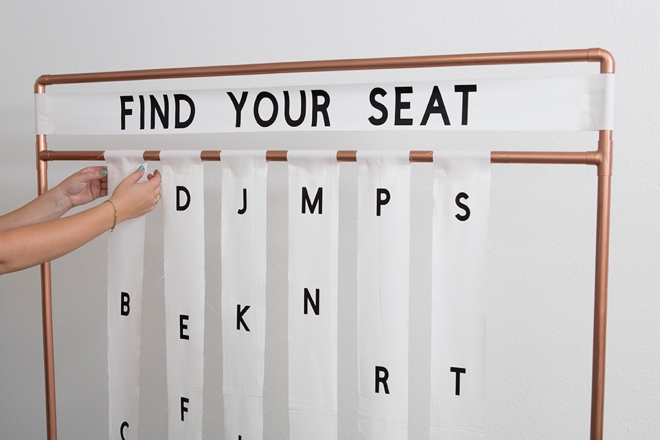
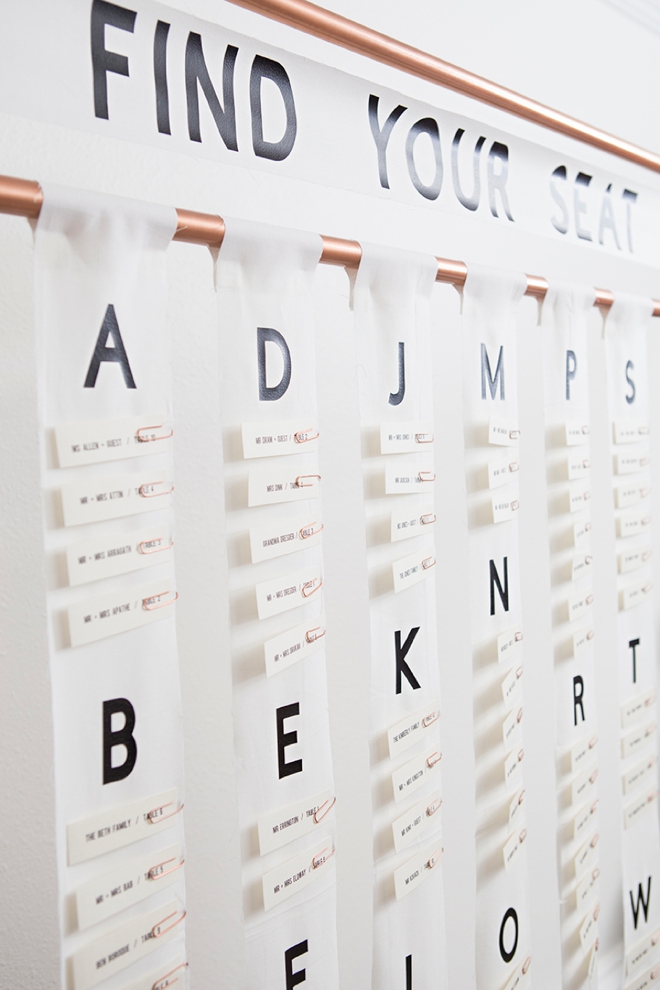
Paper Clip +Escort Card
Add each escort card under it’s proper letter using a pretty copper paper clip. Obsessed!

Packed For Perfection
To make things easier on your wedding planner, you can totally create this set up before hand and carefully fold up each piece of fabric. Pack them up and then all they have to do is unpack and velcro!
As with all our DIY tutorials, if you create one of our projects please send us a picture – We Love Seeing Your Creativity! If you use Instagram or Twitter please use the hashtag #SomethingTurquoiseDIY and it will show up on our Get Social page. Happy Crafting!
DIY Tutorial Credits
Photography + DIY Tutorial: Jen Carreiro of Something Turquoise // Cricut Maker, Cricut EasyPress, and Black Iron-on Light: courtesy of Cricut // DIY Copper Pipe Stand: Something Turquoise // Fabric Velcro: Amazon // Muslin Fabric: Amazon // Copper Paper Clips: Amazon // Rotary Cutter + Mat: Fiskars // Nail Polish: OPI – Withstands the Test of Thyme
Shop The Supplies:
Find the supplies you’ll need for this project from our affiliate links below:

Comments