
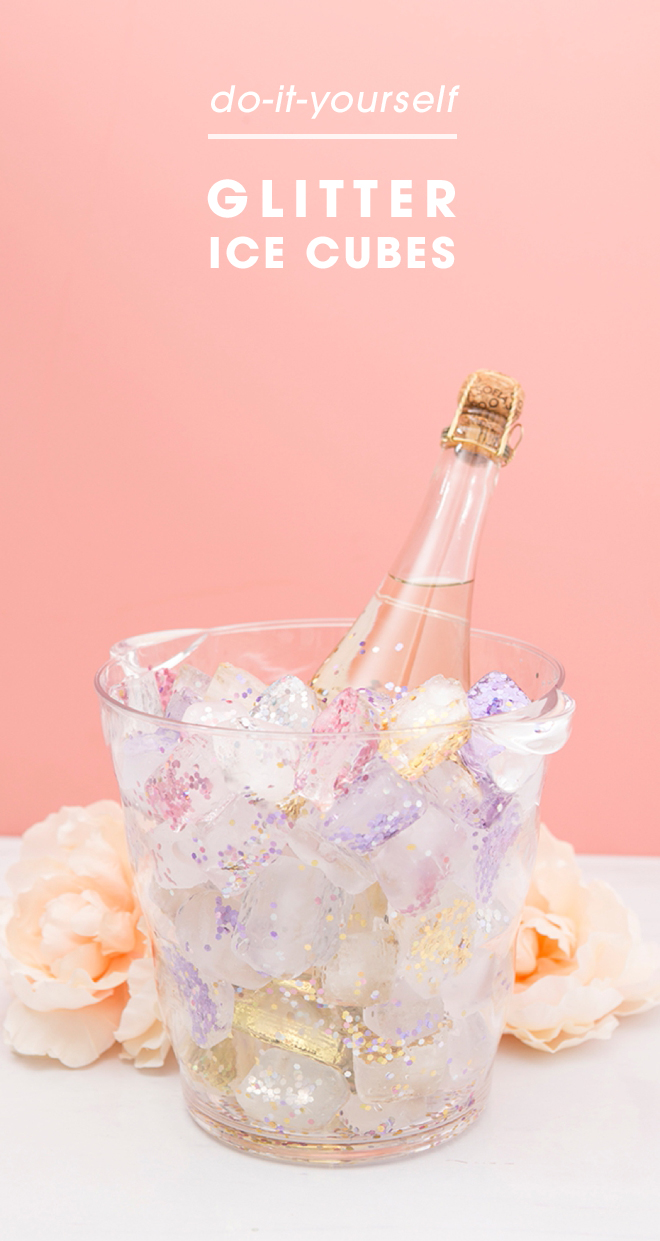
Simple DIY | Glitter Ice Cubes
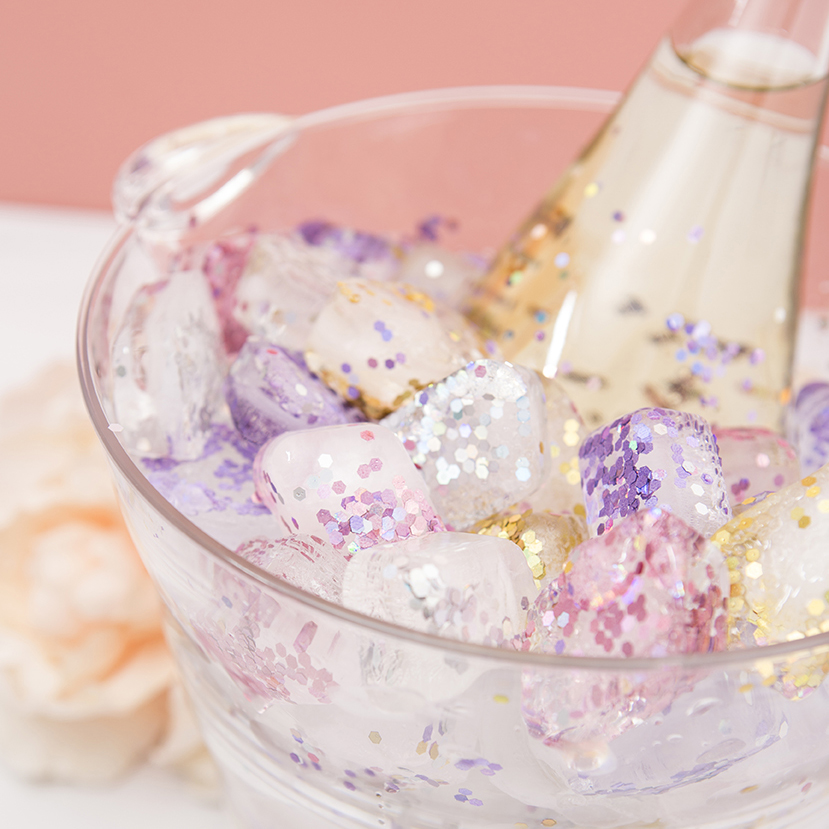
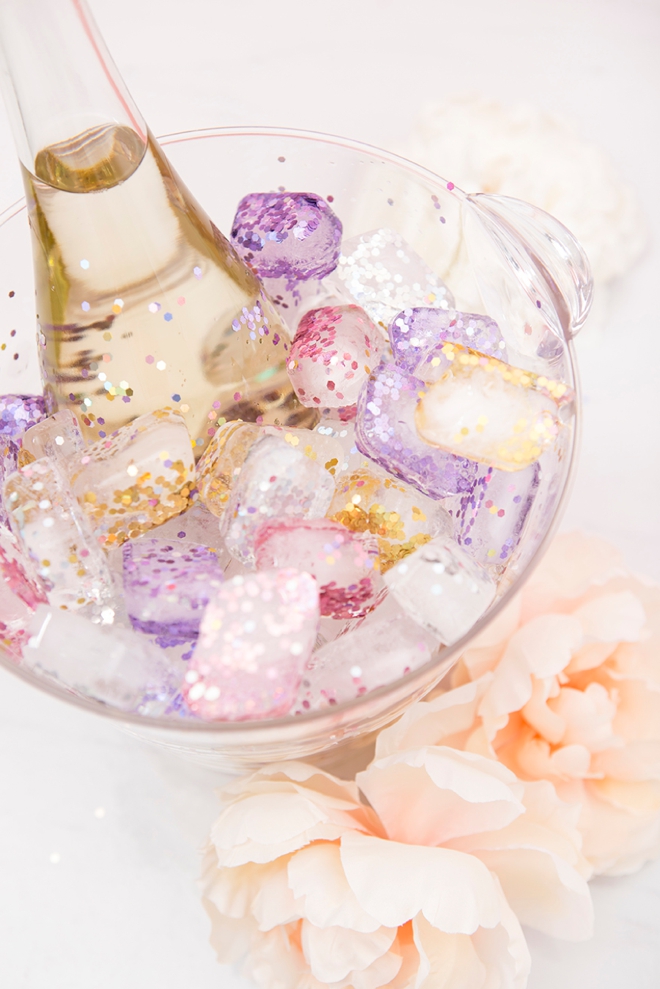
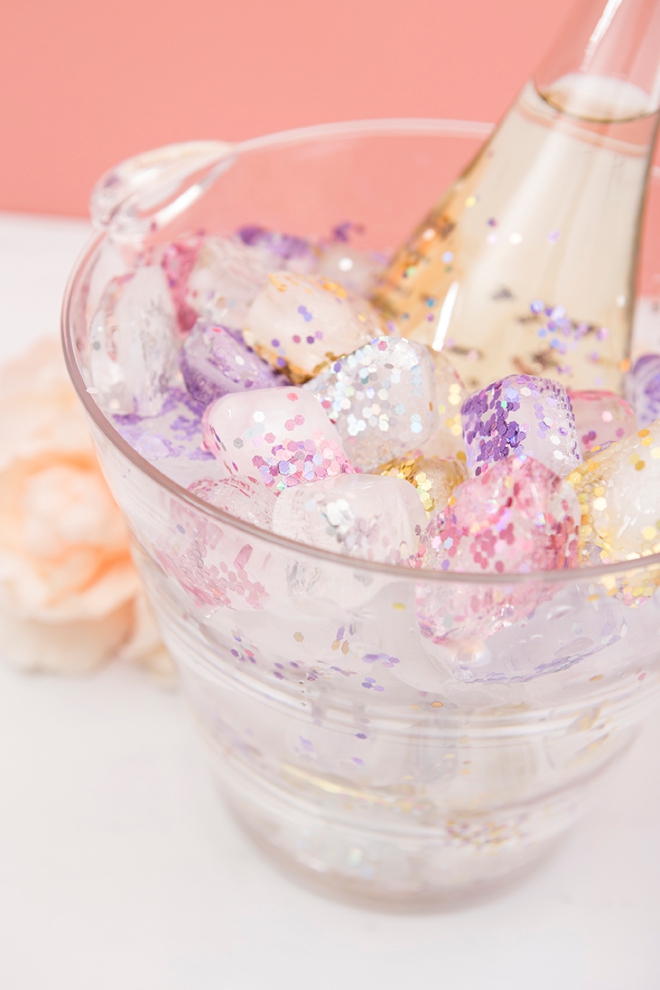
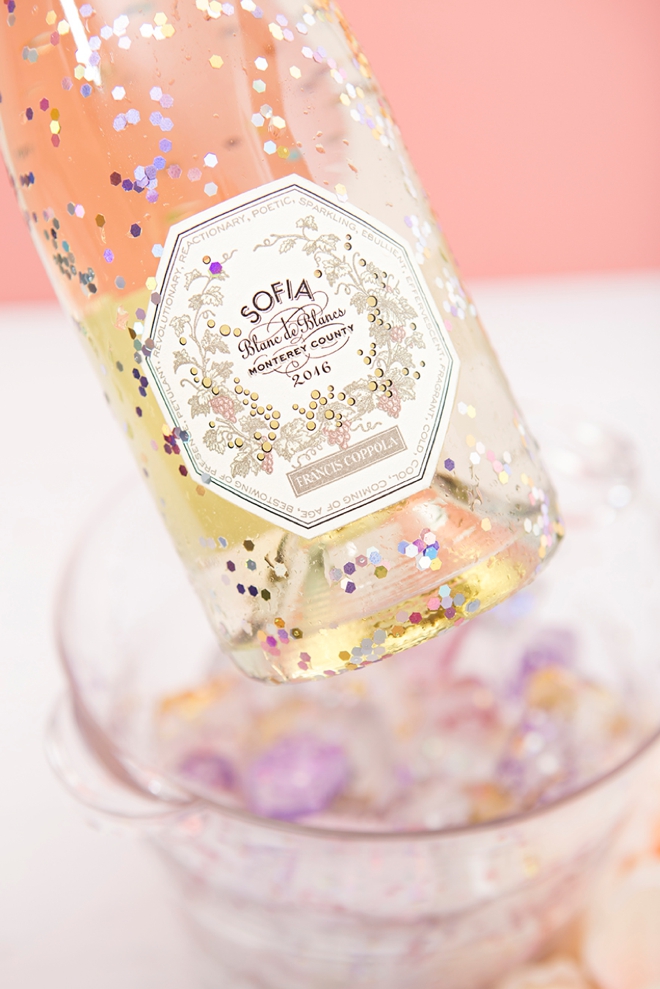
For all our glitter loving gals out there – this sparkly idea is just for you. The next time you need to chill some wine, you’ll absolutely have to make these glitter ice cubes for the ice bucket! Not edible and an absolute mess, but for those who love glitter like I do, it’s all so worth it. Wine is always a good idea, but wine chilled with glitter ice cubes is for the most extra of hostesses. Perfect for bridal showers or bachelorette parties!
These Are NOT Edible
This glitter is not edible – so neither are these ice cubes. This idea is ONLY for using in an ice bucket or the like. Glitter is better when it’s not in your drink, lol.
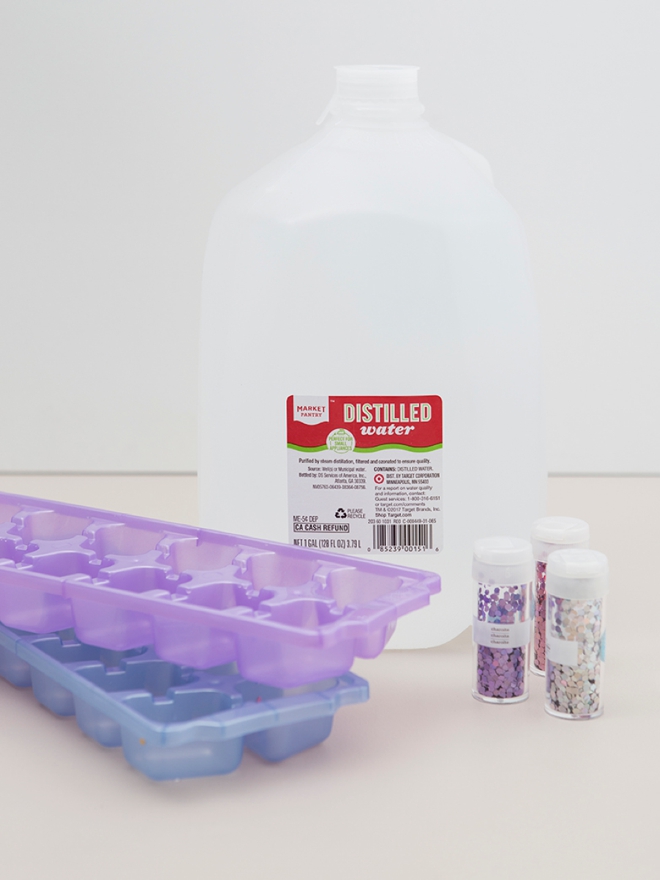
SUPPLIES:
- Clear Ice Bucket
- Distilled Water
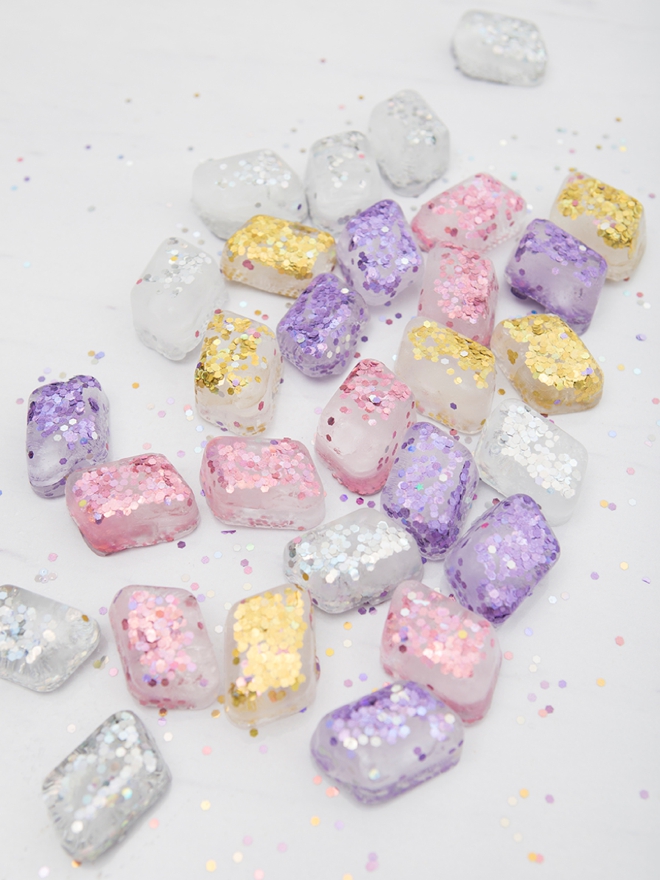
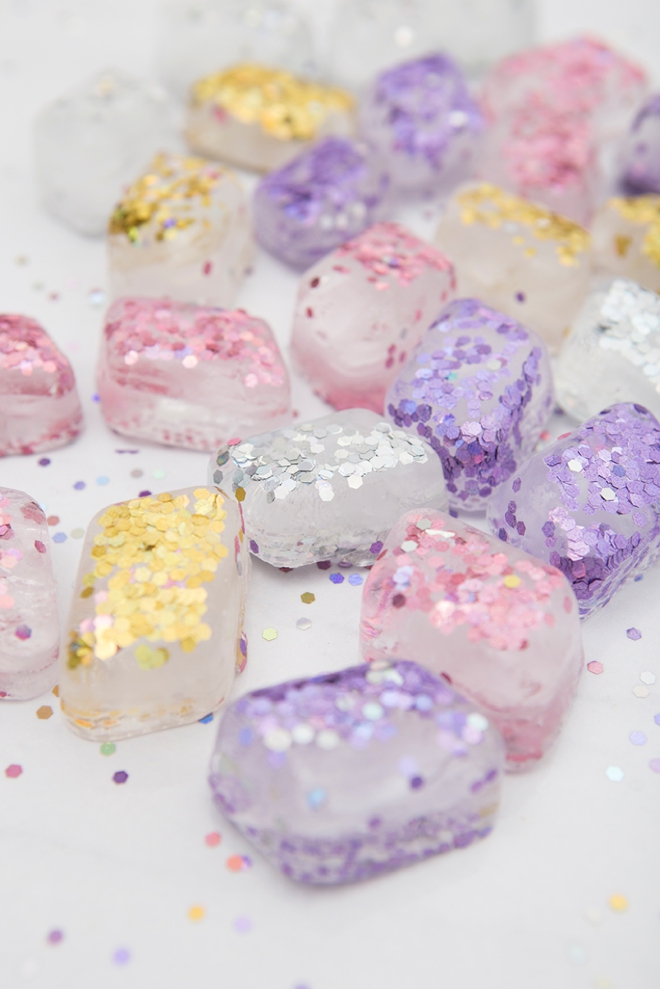
- Chunky Glitter (don’t use fine!)
- Ice Cube Trays
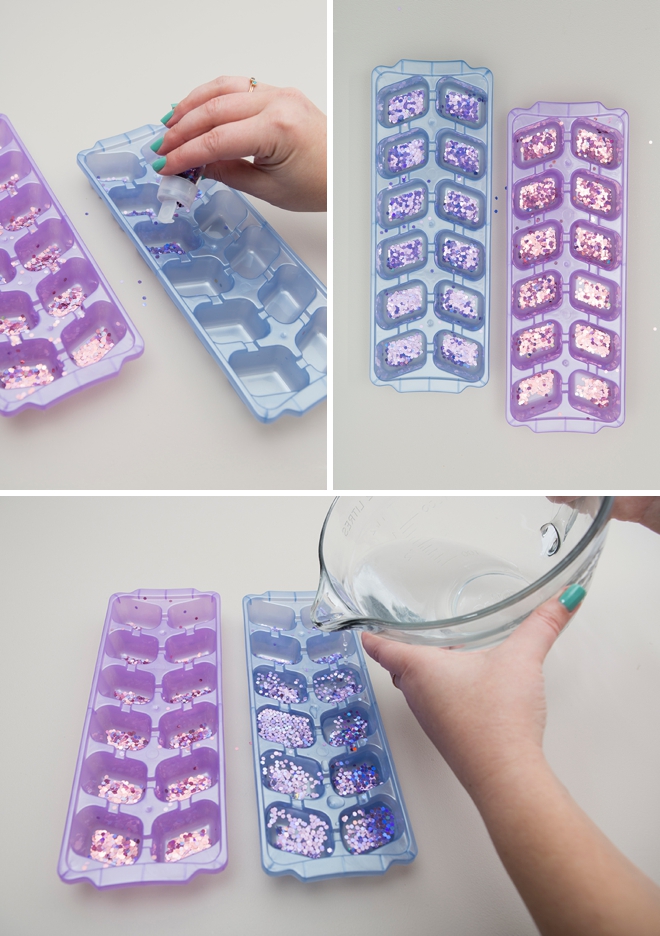
Glitter + Water
Add your choice of chunky glitter into each ice cube tray, then fill with water about 1/4″ below the top. When water freezes it expands, so don’t overfill!
CRAFTERS TIP: Using distilled water will help you get an ice cube that is much more clear than water from the tap!
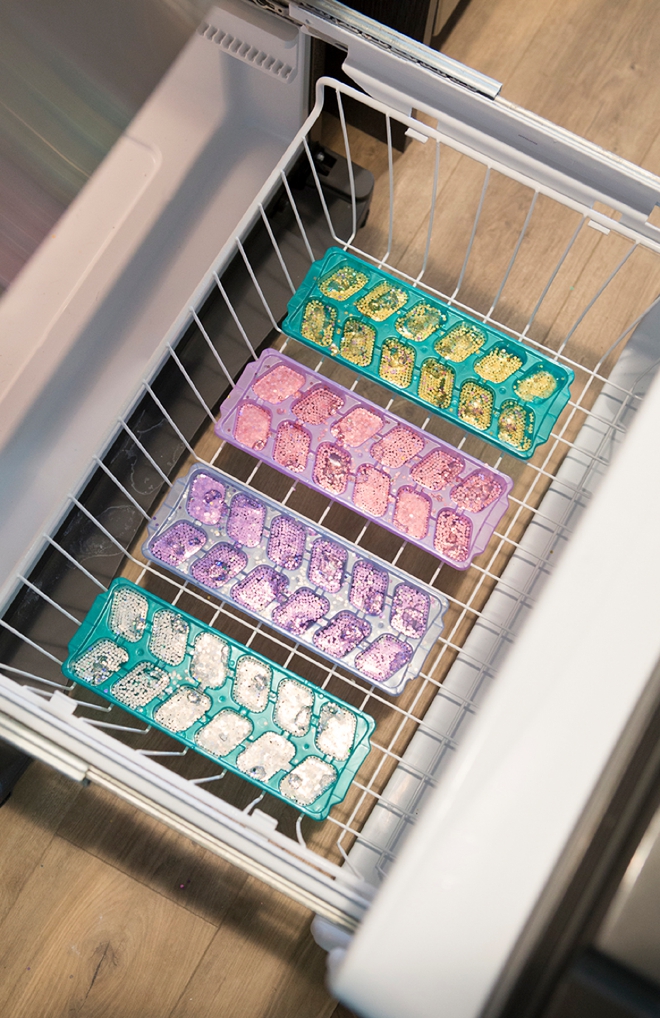
Freeze
Let the cubes freeze! I have a bottom loading freezer so I cleared the bottom rack and you can see that four trays fit. You can stack the trays if you need to.
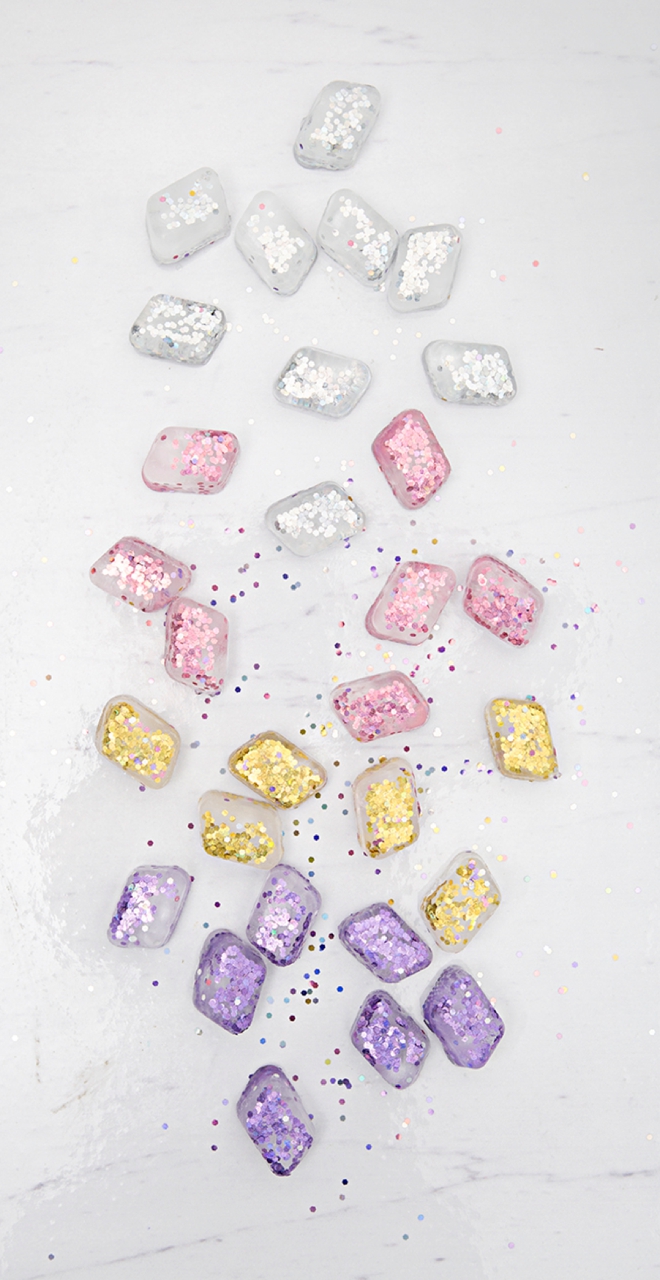
Gorgeous + Sparkly
Storage
These are a mess. A gorgeous, glittery mess. So crack them out of the ice cube trays and store them in freezer bags until your event!
As with all our DIY tutorials, if you create one of our projects please send us a picture – We Love Seeing Your Creativity! If you use Instagram or Twitter please use the hashtag #SomethingTurquoiseDIY and it will show up on our Get Social page. Happy Crafting!
DIY Tutorial Credits
Photography + DIY Tutorial: Jen Carreiro of Something Turquoise // Blanc de Blanc: courtesy of Coppola Winery // Hexagon Chunky Glitter: Martha Stewart Crafts // Clear Ice Bucket: Amazon // Ice Cube Trays: Amazon // Nail Polish: OPI – Withstands the Test of Thyme
Shop The Supplies:
Find the supplies you’ll need for this project from our affiliate links below:

Comments