
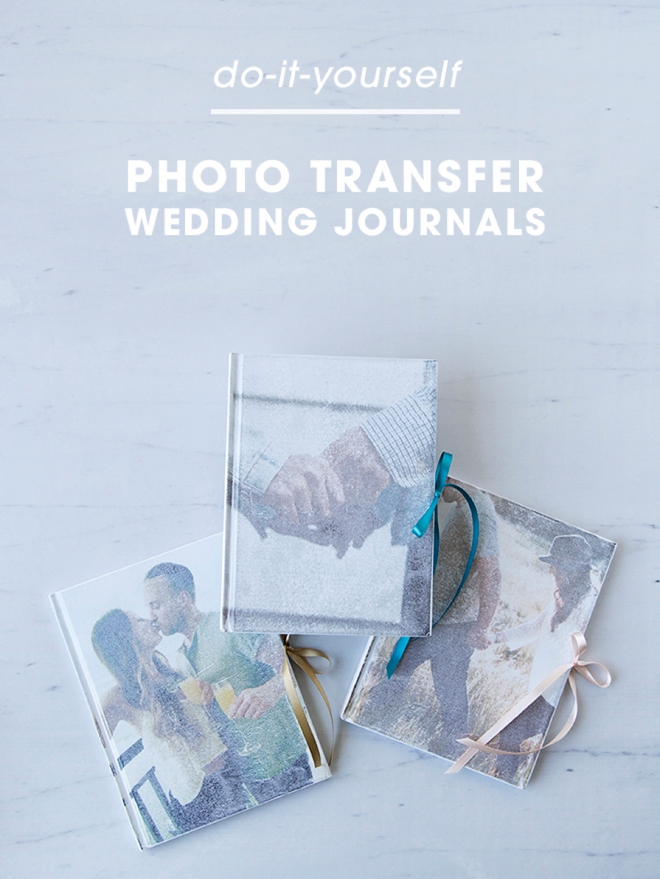
Simple DIY | Photo Transfer Wedding Journals
-Sponsored Post-
Journaling is my favorite way to remember a moment. So many times we forget what life was like, but a simple sentence or drawing can bring us right back to that unique moment time. Capture some of your favorite wedding planning moments in this adorable DIY Photo Transfer Wedding Journal project! In no more than 20 minutes you’ll be able to create a dreamy place to hold all your thoughts during this incredibly special time in your life. Your Canon PIXMA iP8720 Crafting Printer will rock the photo print and make this project a breeze. Think about how precious this keepsake will be for years to come!

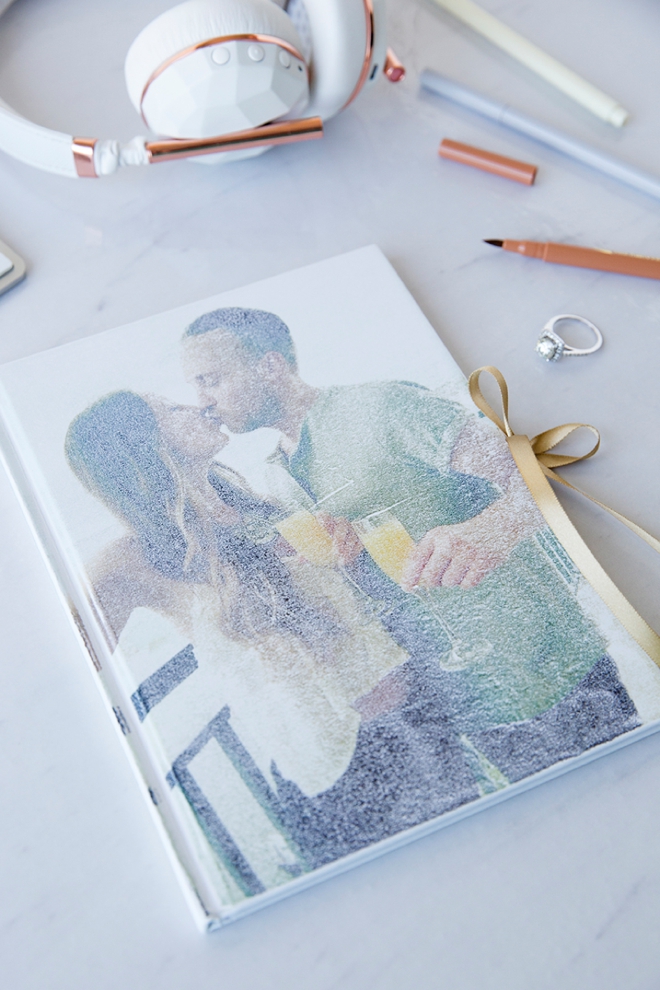
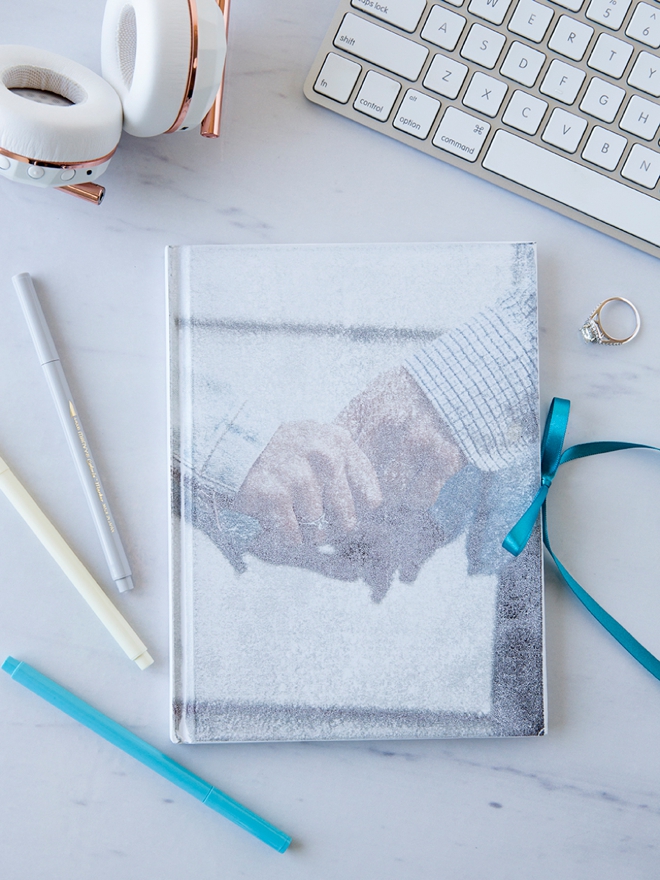
Any Photo, Any Reason
Create a special keepsake for yourself, for any reason, using any photo! Perfect for your wedding planning journey but wonderful for any reason at all!

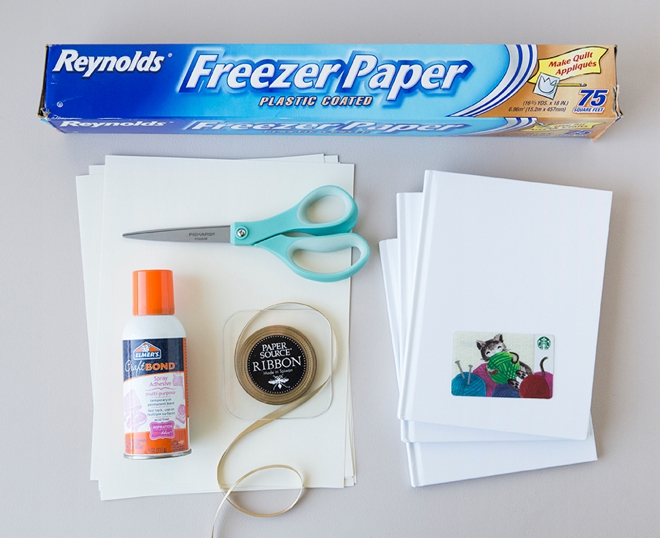
SUPPLIES:
- Canon PIXMA iP8720 Crafting Printer
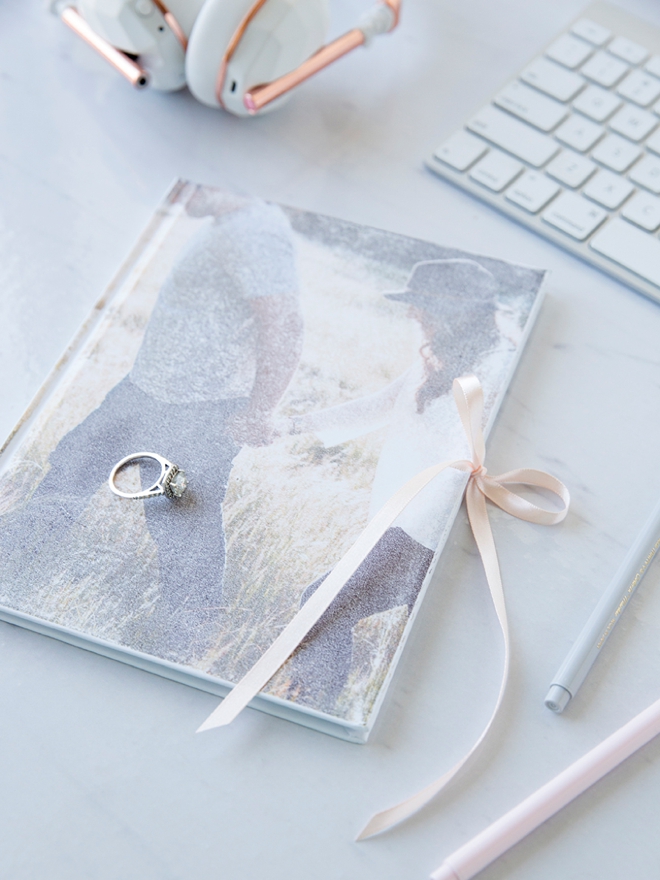
- 6″ x 8″ White Blank Journal With Paper Cover (mine are from Amazon)
- Freezer Paper
- Spray Glue
- Cardstock
- Old Gift Card
- 1/4″ Ribbon
- Hot Glue Gun
- Scissors
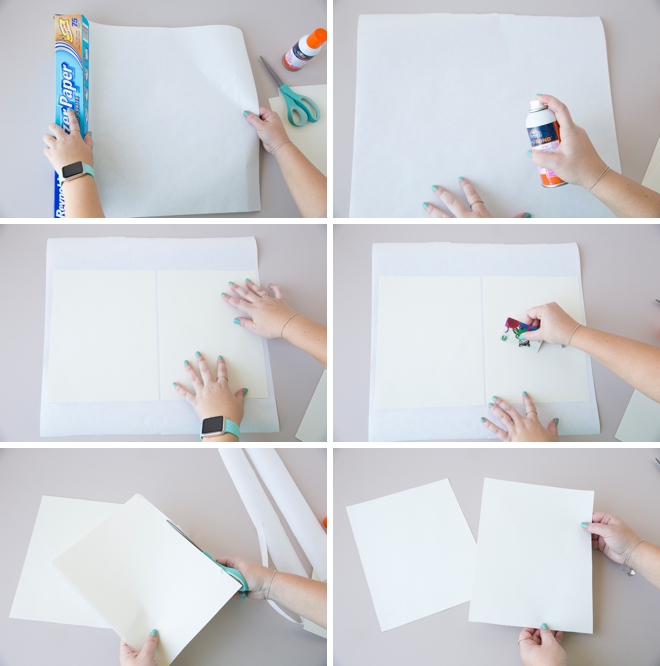
Prepare The Freezer Paper
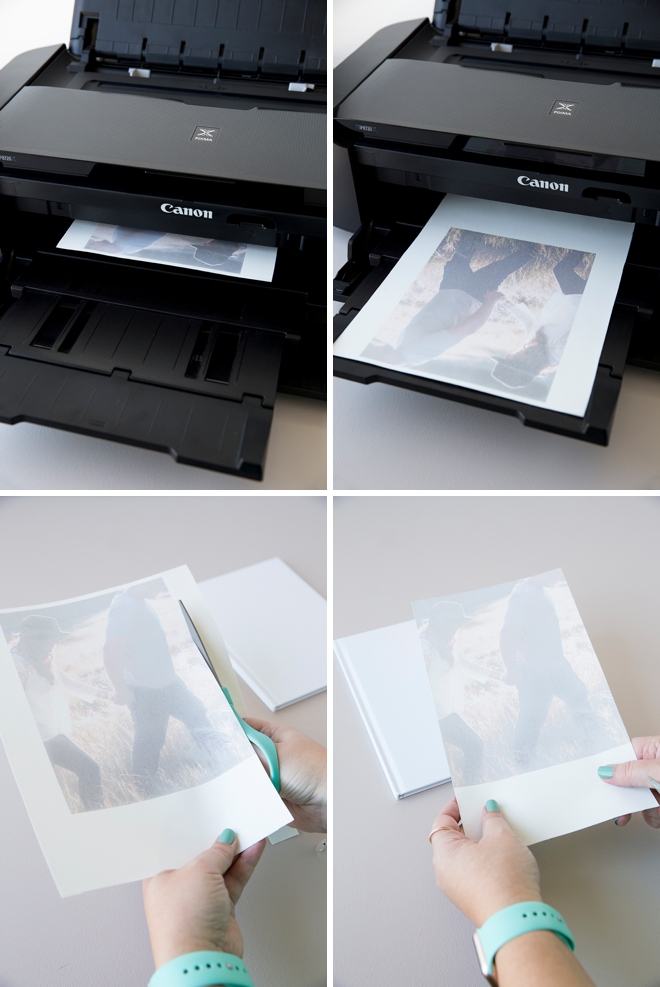
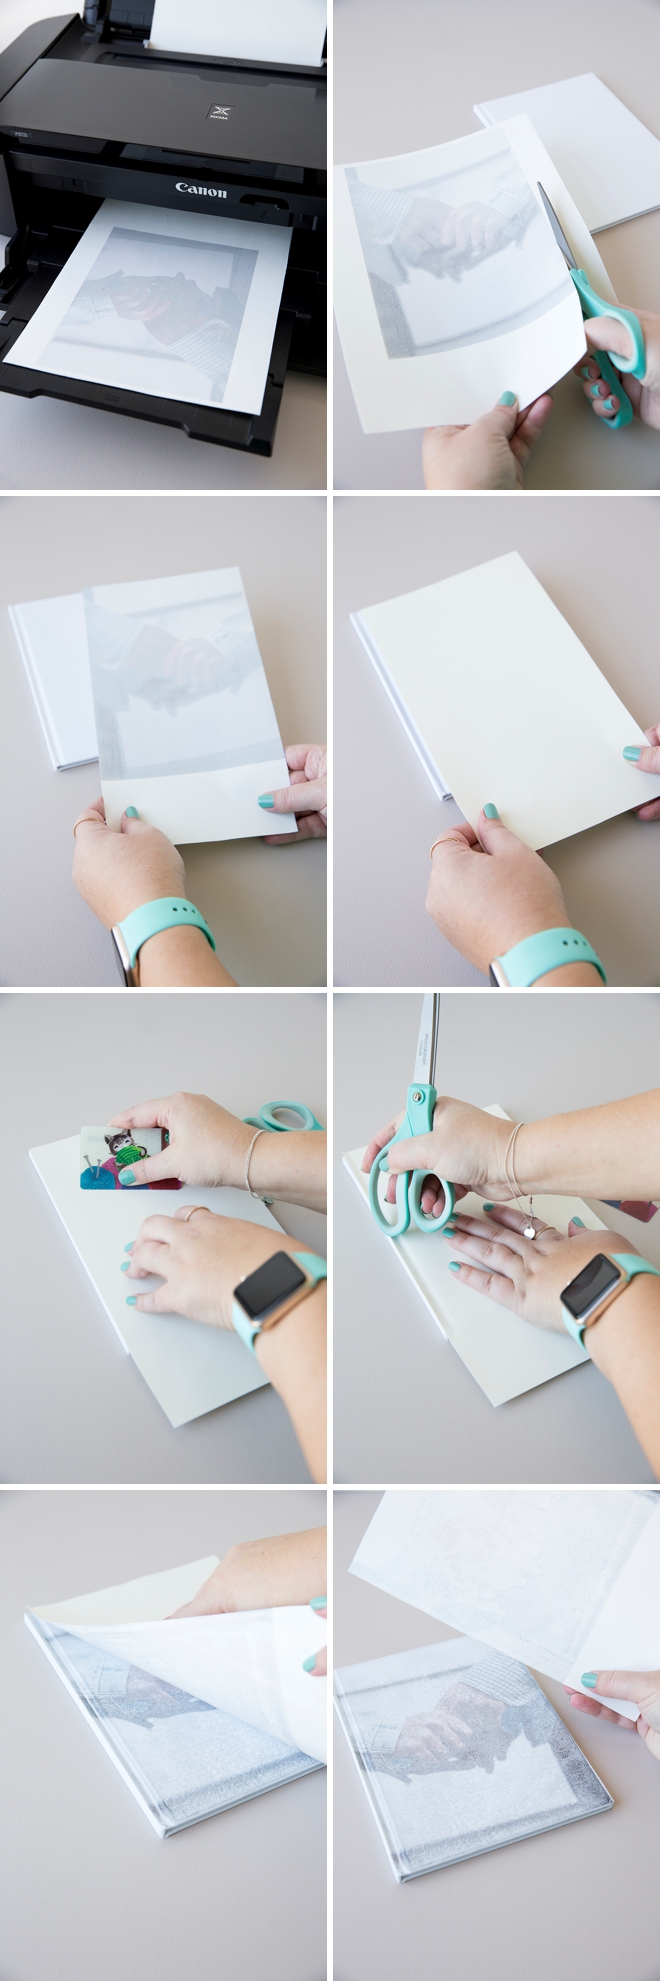
The first step is to glue the freezer paper to 8.5″ x 11″ cardstock so it will actually feed through your printer properly. Start by adding spray glue to the freezer paper then press the cardstock to it. Smooth out all the bubbles using an old gift card and then trim the freezer paper down to the original cardstock size. Ensuring that the waxy side faces up!
Print Your Photo
Here I’m using my favorite printer, the Canon PIXMA iP8720 Crafting Printer. It’s my favorite for two reasons; first that it can print up to 13″ x 19″, which includes 12 x 12 scrapbooking paper (can you say dream come true!) and second that it’s back-loading, meaning it can handle thicker materials than a normal printer. Just like this freezer paper/cardstock combo!
Insert the paper into the printer, freezer side up and print using the “photo” setting. Be careful. The ink doesn’t sink into the paper it just sits on top – so it can smear! Remember, this will mirror your image so it will be backwards.
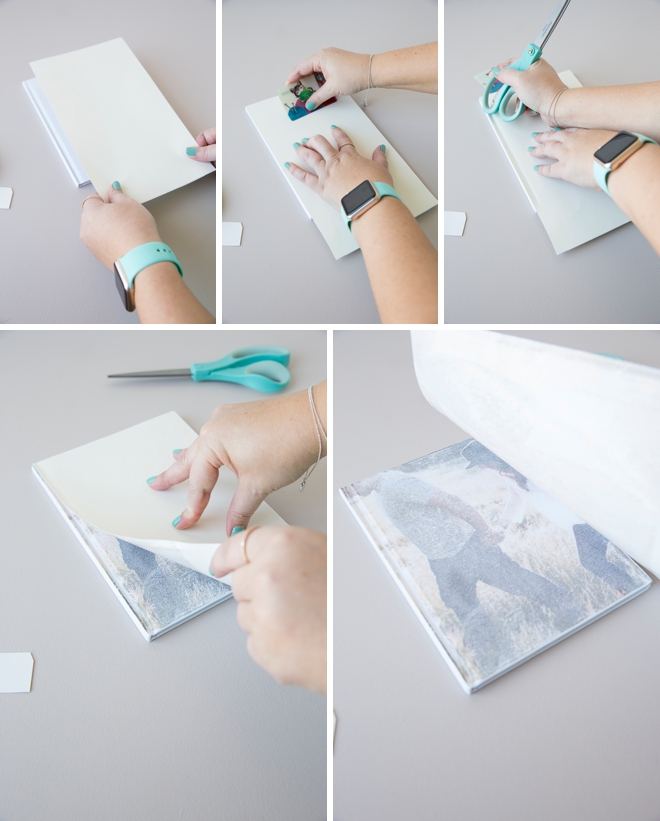
Then cut three sides off the photo, leaving one that you can hold onto.
Cut + Transfer
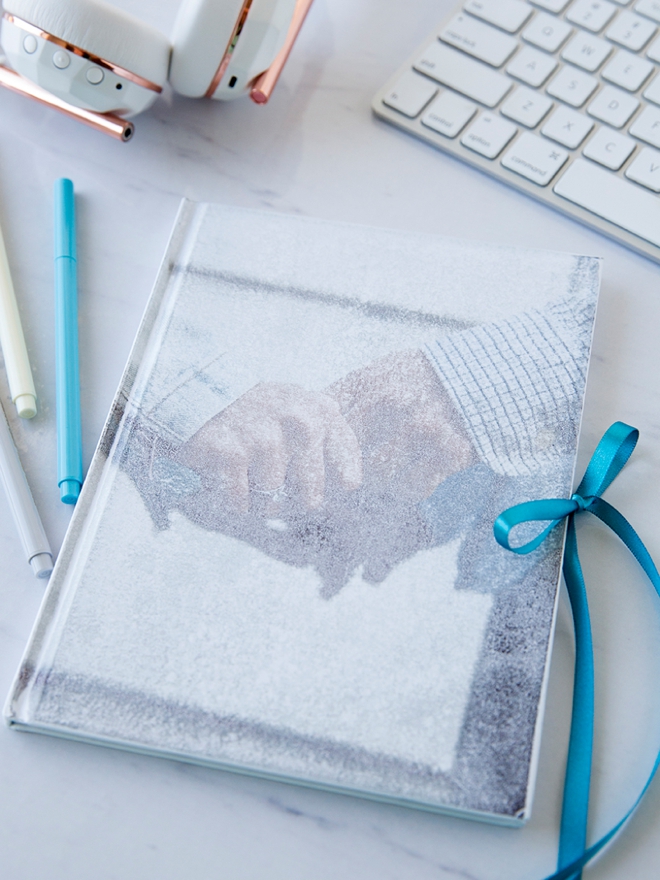
Carefully lay the print onto the top of your notebook – press and smooth every area of the print onto the notebook using an old gift card. You can use the edges of your scissors to press the photo into the ridge of the notebook binding. In this step you’re actually pressing/transfering the ink from the freezer paper onto the notebook. Be very careful not to move or bump the design or it can smear. Once you’ve smoothed across every bit of the freezer paper, remove the design for an impressive reveal!
These specific notebooks are PERFECT for this project. The cover is paper, which is exactly why it works… and the pages inside are so thick that you can even use Sharpies on them!
Print + Cut + Transfer
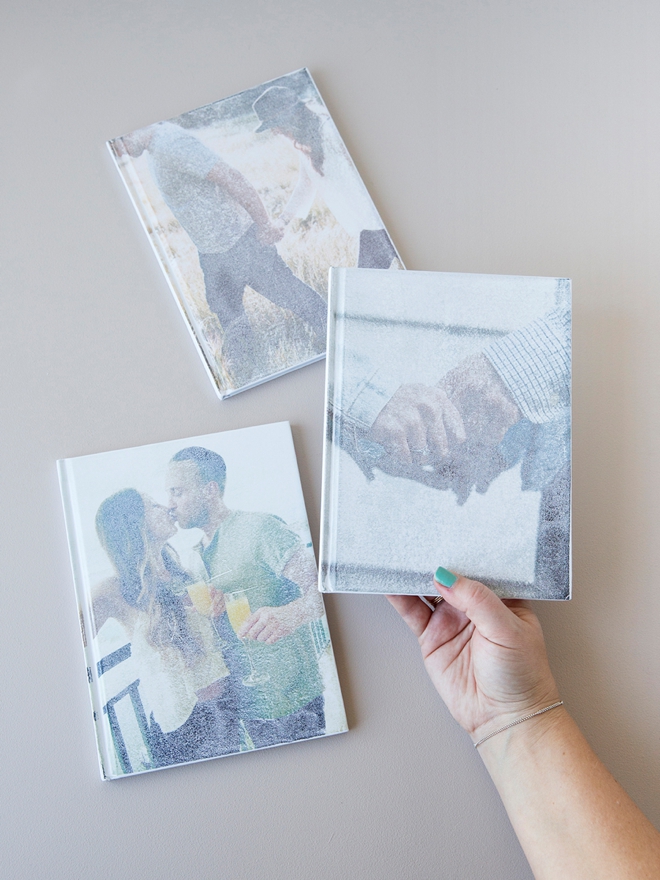
In only a few quick steps you’ll have the most dreamy, personalized notebook ever!
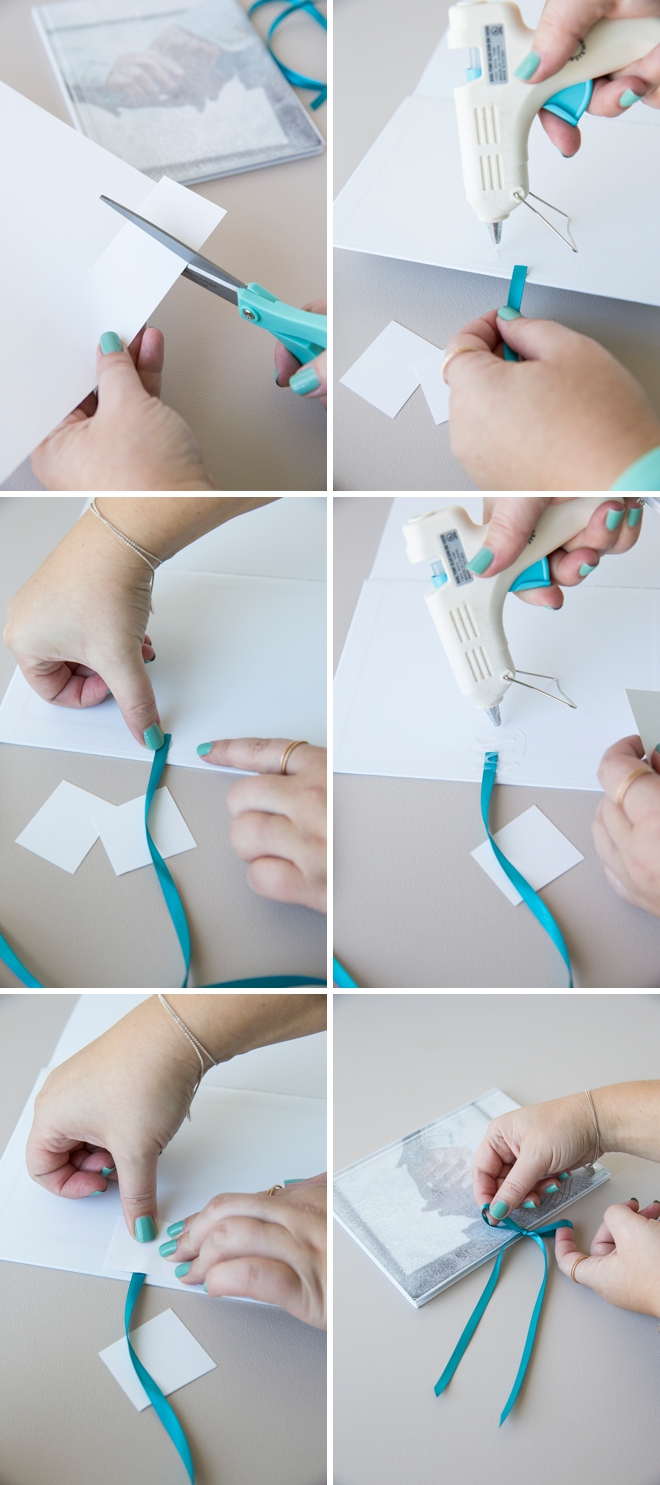
Ribbon Closure
Just for fun, add a little ribbon closure to your notebook! Cut a piece of cardstock into a 1″ square. Then add some hot glue and a piece of ribbon and cover with the piece of cardstock. Do both the front and back covers and tie in a bow.
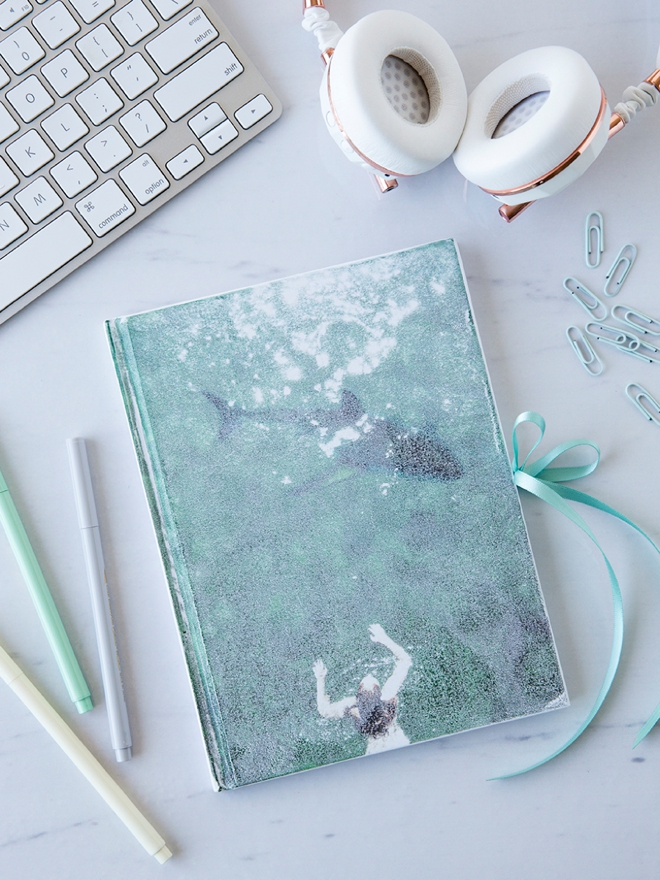
One For Me
If you aren’t aware, I’m slightly obsessed with sharks. And no, this isn’t a real picture. It is a real picture of me swimming in Italy, but I photoshopped the shark in, good job right? LOL. I just had to make one of these journals for myself!
DIY TUTORIAL SPONSORED BY:
Canon U.S.A., Inc. prides itself on allowing consumers to create and preserve beautiful imagery, from capture to print. With wireless technology and seamless printing capabilities, you can print your photos and printables with precision and ease.
Huge thanks to Shea, Kendra, and Shea for letting me use their gorgeous images!
As with all our DIY tutorials, if you create one of our projects please send us a picture – We Love Seeing Your Creativity! If you use Instagram or Twitter please use the hashtag #SomethingTurquoiseDIY and it will show up on our Get Social page. Happy Crafting!
DIY Tutorial Credits
Photography + DIY Tutorial: Jen Carreiro of Something Turquoise // Canon PIXMA iP8720 Crafting Printer: courtesy of Canon // 6″ x 8″ White Blank Journals: Amazon // 1/4″ Ribbon in Gold, Pool, Peacock and Blush: Paper Source // Spray Glue: Amazon // Headphones: Amazon // Nail Polish: OPI – Withstands the Test of Thyme
Shop The Supplies:
Find the supplies you’ll need for this project from our affiliate links below:

Comments