
Simple DIY | Growler Table Numbers
-Sponsored Post-
Well, hello there lovelies! It feels marvelous to be back from my little break and boy do I have a wonderful week of posts lined up for you! Starting with a very special DIY project that I created for a very special couple. Kendra, our bridal blogger planned her own gorgeously creative wedding and allowed me to make a few things for her – one being these very growler table numbers! She and her guests loved them so much that we figured we should share them with you. Stay tuned because tomorrow she’s going deep with a list of all her fabulous projects and then on Wednesday we’re sharing her entire wedding, yay! As always, I trusted my Canon PIXMA MG7720 Wireless Photo All-in-One Printer to create the exquisitely printed design of these unique table numbers. Download the free printable numbers 1-20, plus a fun design for a head table at the end of the post!
Special thanks to Norma Ibarra of La Piro Photography for sharing these beautiful images of Kendra + Aaron’s wedding with us!
SUPPLIES:
- Canon PIXMA MG7720 Wireless Photo All-in-One Printer
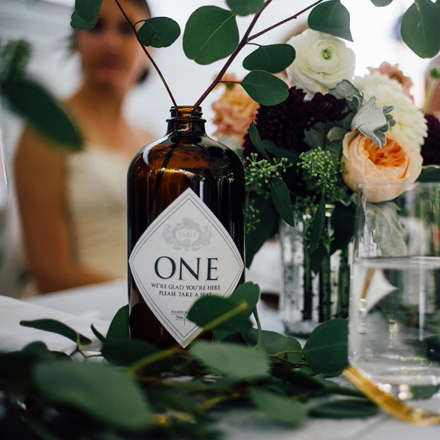
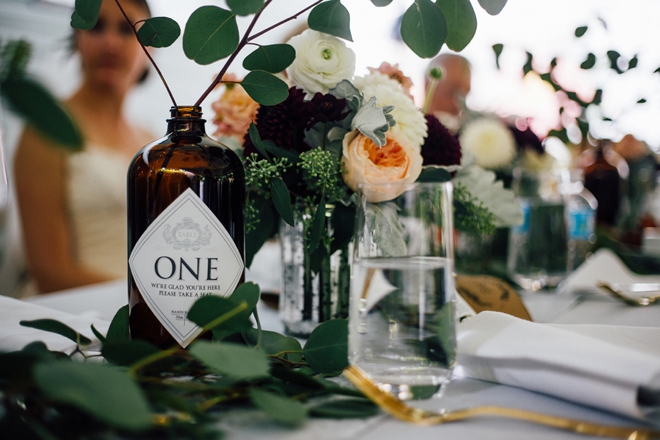
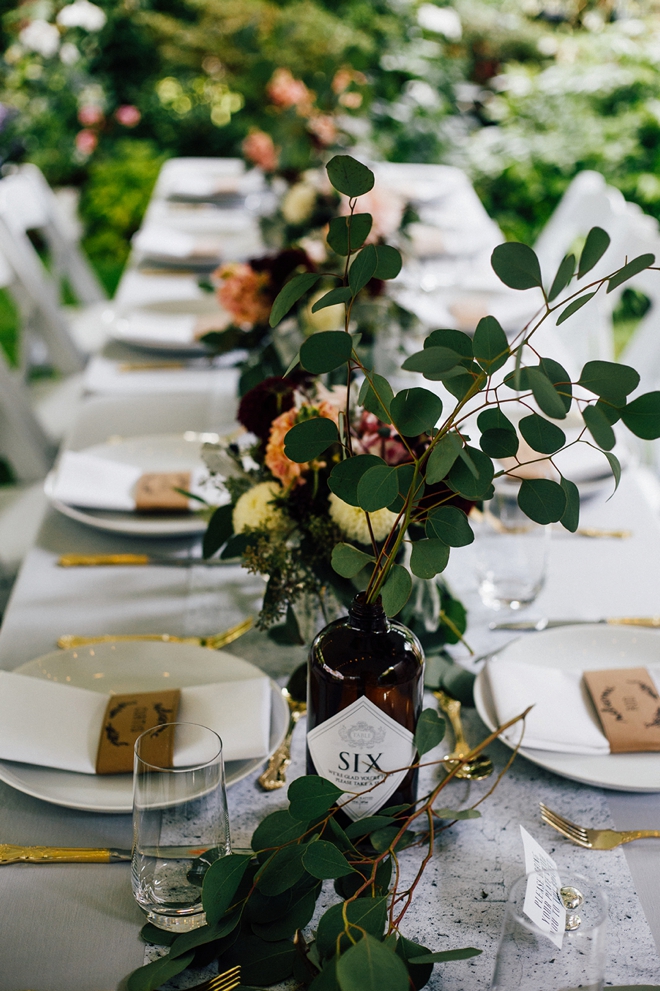
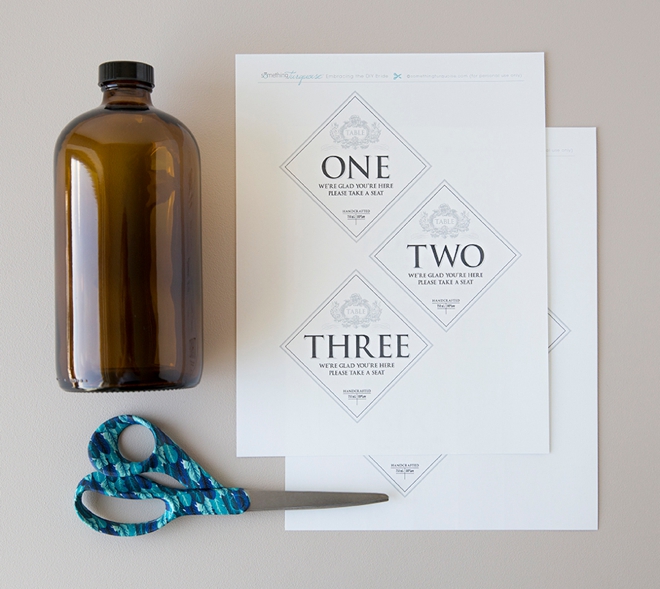
- 32oz Amber Growlers
- 8.5″ x 11″ White Sticker Paper
- Scissors or paper trimmer
- Our free printable table number designs at the end of the post!
Print + Cut
I used my gorgeous, gold Canon PIXMA MG7720 to print these table numbers onto 8.5″ x 11″ sticker paper. If you’ve never heard of sticker paper… it’s my favorite, because the ENTIRE sheet of paper is one giant sticker. Meaning you don’t have to worry about getting the alignment just right on a label sheet! There are 3 numbers per sheet that measure 3.25″ square. Print the ones you need and then simply trim using scissors or a paper trimmer.
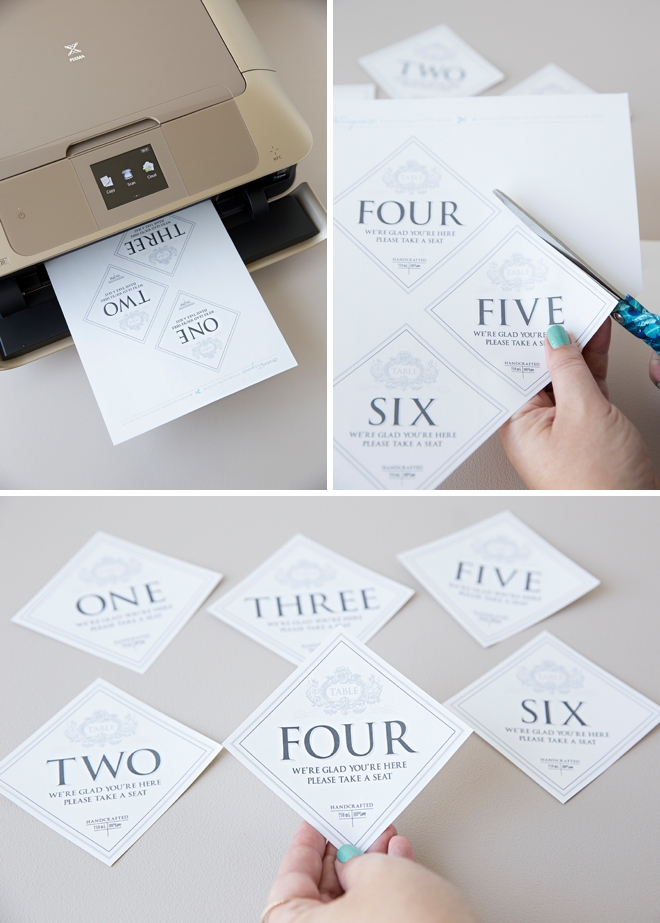
Peel + Stick
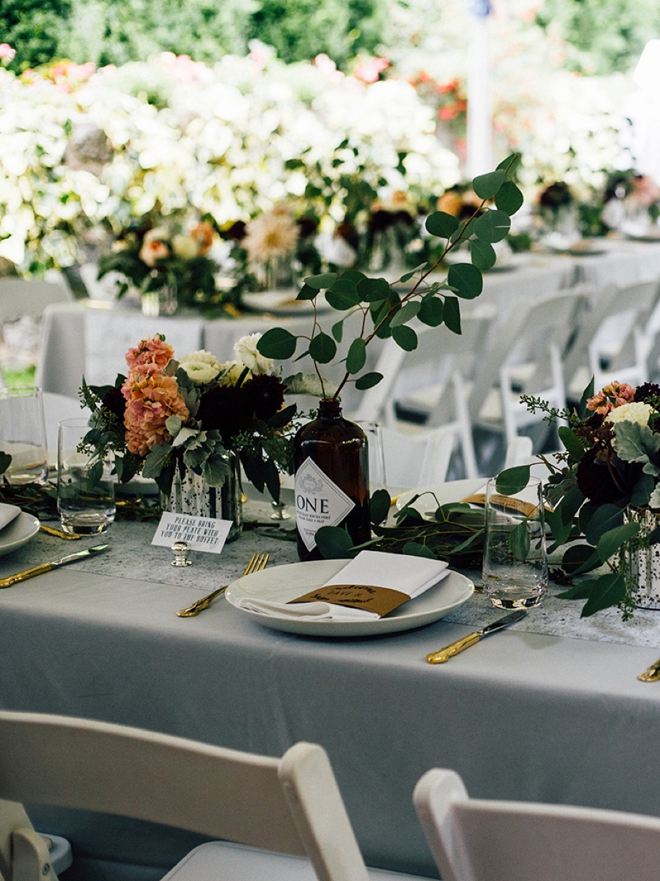
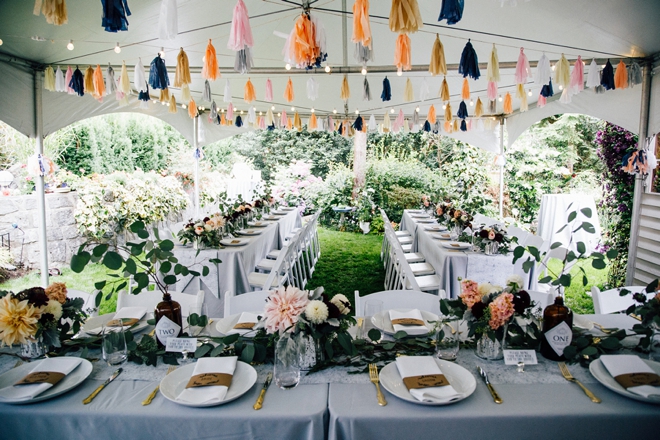
Peel the backing off each table number sticker and carefully apply them to each growler… at your reception add a few flower stems, a single rose or just eucalyptus like Kendra did!
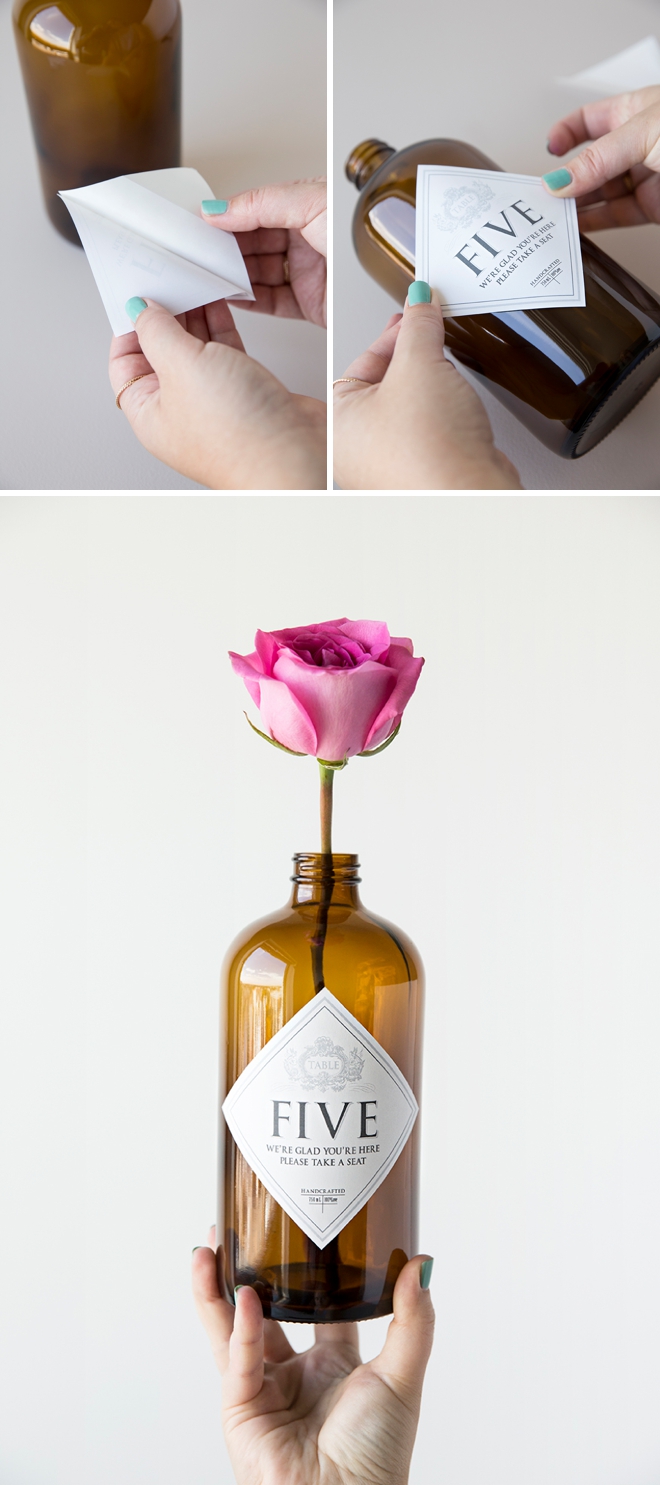
If you aren’t into the growler look, you can easily add these stickers to any type of vase that you fancy!
DIY TUTORIAL SPONSORED BY:
Canon U.S.A., Inc. prides itself on allowing consumers to create and preserve beautiful imagery, from capture to print. With wireless technology and seamless printing capabilities, you can print your photos and printables with precision and ease.

As with all our DIY tutorials, if you create one of our projects please send us a picture – We Love Seeing Your Creativity! If you use Instagram or Twitter please use the hashtag #SomethingTurquoiseDIY and it will show up on our Get Social page. Happy Crafting!
DIY Tutorial Credits
Step-by-Step Photography + DIY Tutorial: Jen Carreiro of Something Turquoise // Event Photography: La Piro // Canon PIXMA MG7720 Wireless Photo All-in-One Printer: courtesy of Canon // Table Number Design: Julia Ensign // 32oz Amber Growlers: Amazon // Sticker Paper: Amazon // Scissors: Fiskars // Nail Polish: OPI – Withstands the Test of Thyme
Shop The Supplies:
Find the supplies you’ll need for this project from our affiliate links below:

Comments