
DIY | Custom Mermaid + Man Wedding Cake Topper
-Sponsored Post-
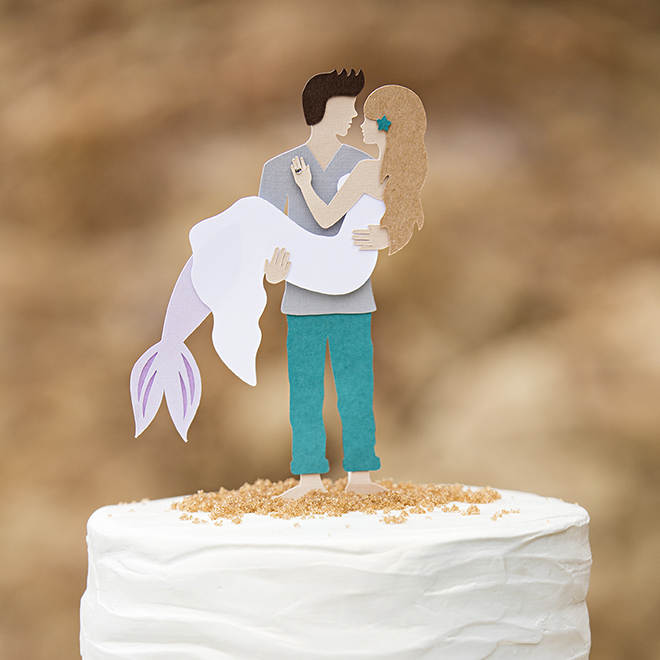
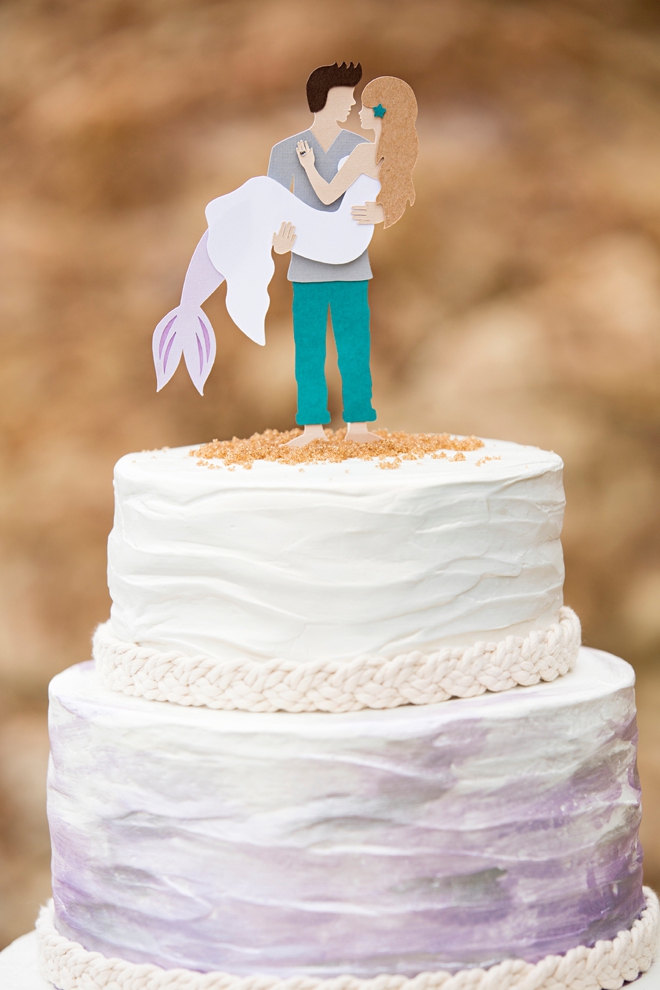
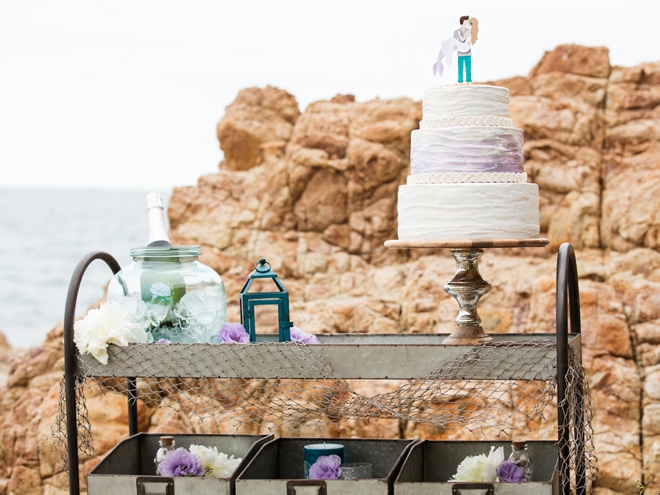
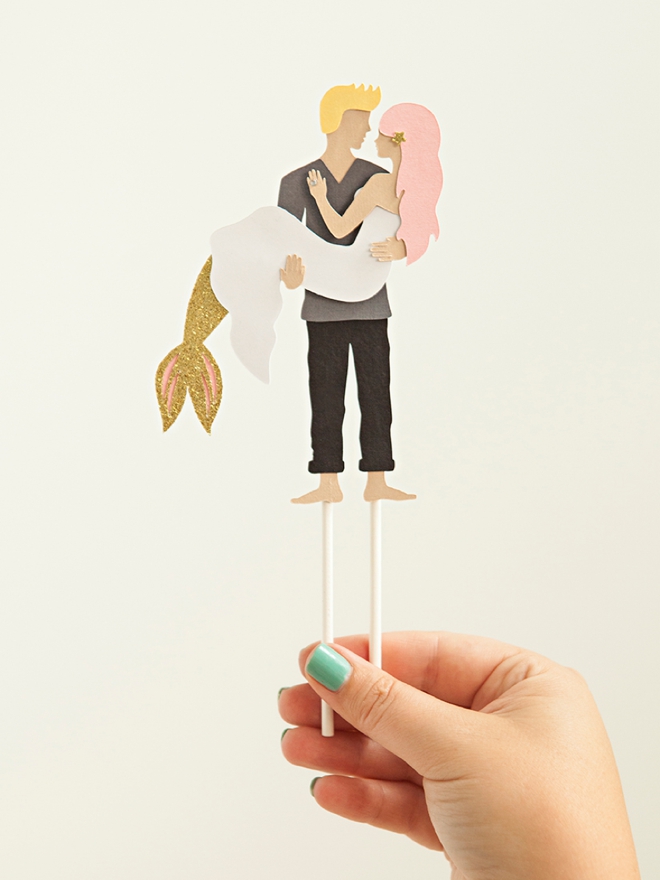
Hey all, I’ve saved the very best for last… my absolute favorite project from the entire shoot! Seriously dying. This DIY Mermaid + Man Wedding Cake Topper is easily in my top five favorite projects of all time. When I told my graphic designer what I wanted to create, she looked at me a little cross-eyed but then we put our two creative brains together to figure it out and I’m so very pleased with the result. Use our custom designed (and totally free) SVG file and your Cricut Explore Air to make your mermaid wedding dreams come true! Each element of this design is made from paper; paper that you get to pick… be it patterned or plain, glitter or textured. I cannot wait to see these beauties popping up on wedding cakes across beaches everywhere!
Click HERE to find the full styled wedding inspiration shoot that this project is from!
Your Colors For Your Unique Event
The BEST part about this design is that YOU get to pick the paper for each element!
SUPPLIES:
- Cricut Explore Air
- 10 Colors Of Cardstock, to match each item
- Hot Glue Gun
- 6″ Lollipop Sticks
- Tiny Craft Rhinestone (optional)
Import Into Design Space
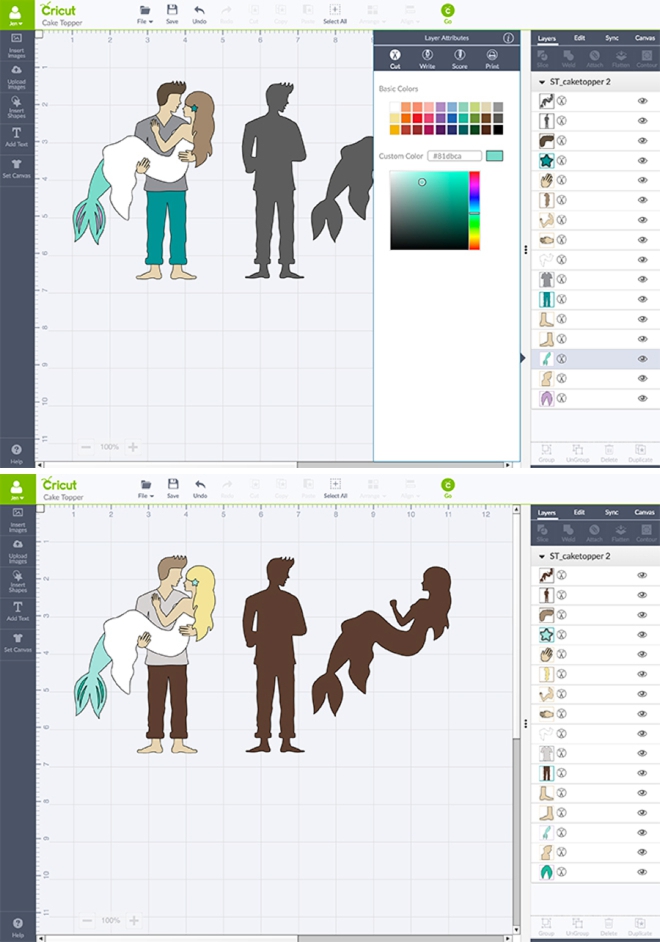
Download our free SVG cut file at the end of the post and upload it into Cricut Design Space. Each layer already has a color to it, but you can click on each layer to change the color to match the paper that you’ll be using. Doing this step really helps give you an example of what the overall design will look like and then really helps you stay organized while cutting.
Cut Each Layer
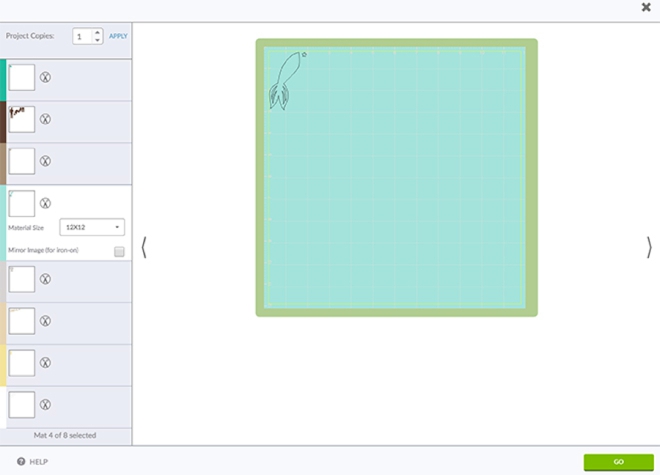
Design Space will prompt you to add + cut each different color and layer. It will tell you to put the “turquoise” paper in the machine, you’ll do it and then it will cut whatever you “colored” turquoise in the last screen. This is what I mean about matching the layer colors to the paper you’re going to cut, it just makes it easier. Below you can see all the individual cut pieces plus to backer pieces.

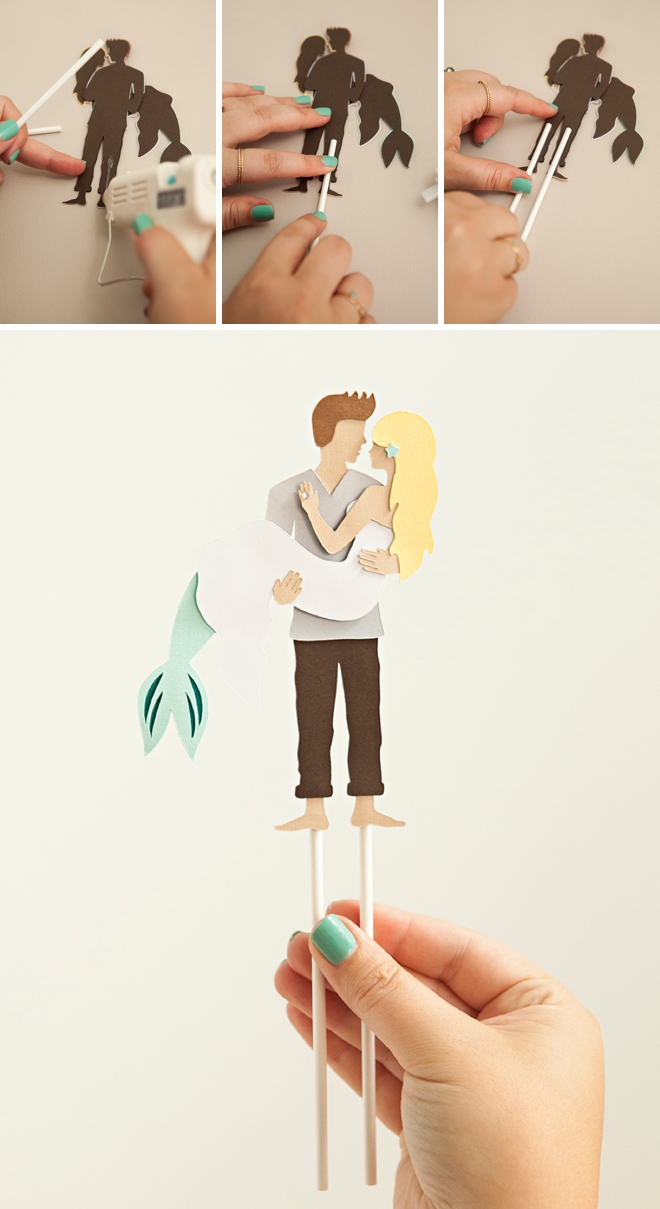
Assemble The Man
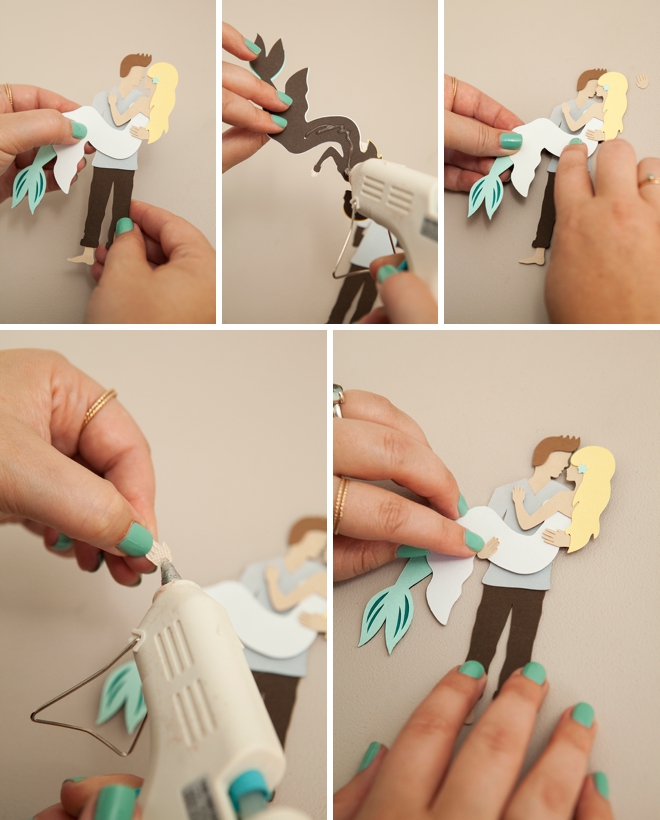
Using a hot glue gun on low heat, assemble the man onto the backer piece! Start with his feet, then head, then hair, then pants, then shirt. Easy right….

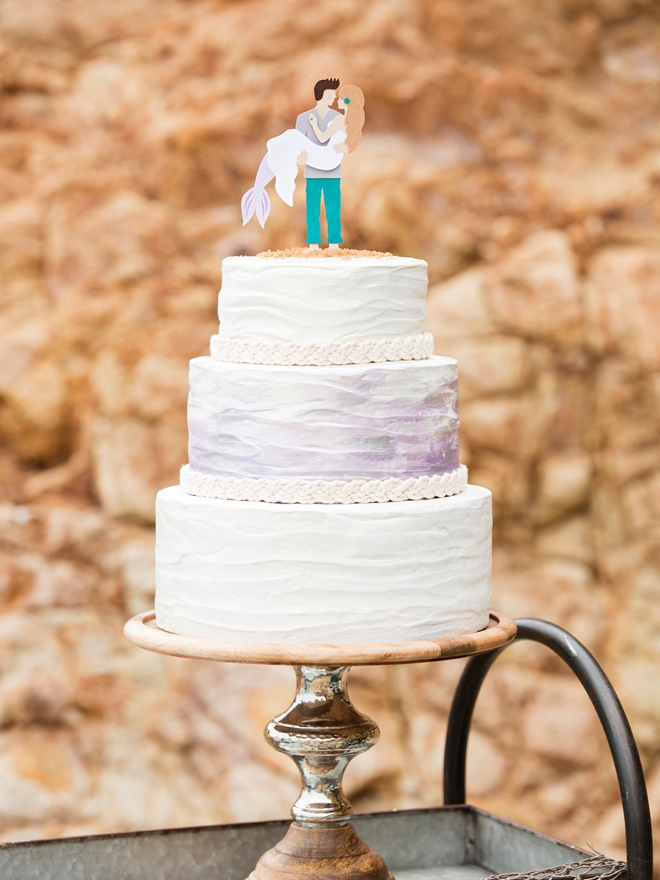
Assemble The Mermaid
In the same fashion, assemble the mermaid! First add her peek-through tail color, then her tail, then her dress, then her face/arm, the one of his hands, then her hair, lastly add the star.

Glue Them Together
Following the backing guide, glue the man + mermaid together and finish by adding his other hand on top of her dress!
Give Her Some Bling
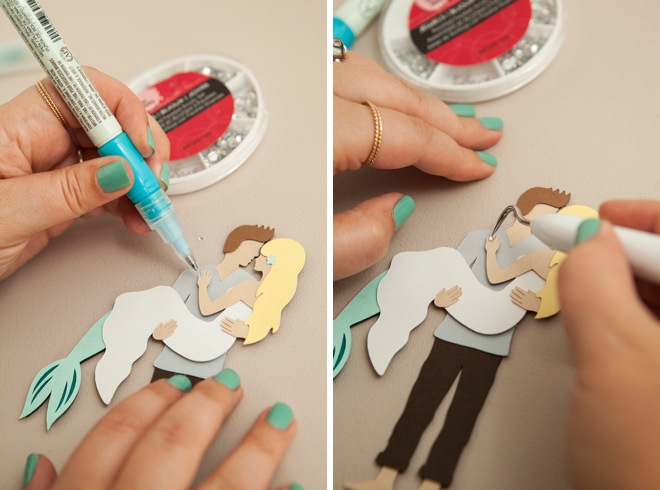
Every mermaid bride needs a ring! Use craft glue and a mini-rhinestone to seal the deal.
Cake Legs
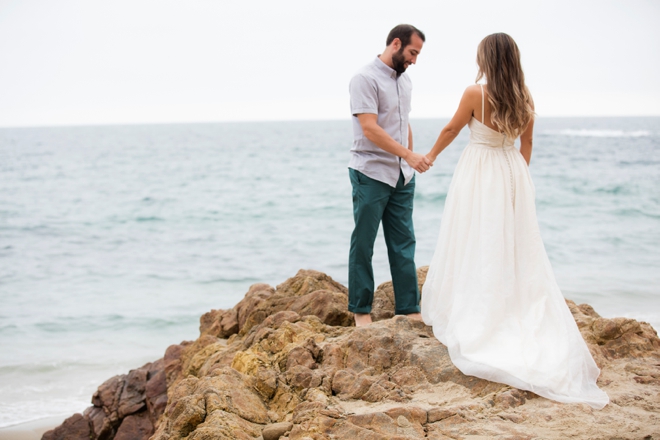
To ensure that this darling cake topper stands up properly on your cake, glue a lollipop stick to each of the mans legs. They will slip right into the cake and hold the couple upright all night! Add a few spoonfuls of brown sugar to fully embrace the beach theme!
Click HERE to find the full styled wedding inspiration shoot that this project is from!

—–> Huge Wedding Giveaway <—–
Throughout the ENTIRE month of September, Cricut has partnered with amazing brands to bring you over $10,000 in prizes for your dream wedding! They have also partnered with amazing wedding and craft bloggers to bring you fabulous DIY wedding tutorials and inspiration! Seriously gals, this month is going to be craft-fabulous! Here’s what you could win:
- Week One (this week): $1500 towards a gorgeous, eco-friendly Celia Grace wedding dress!
- Week Two: $1500 “DIY Dream Wedding Bundle” including a Cricut Explore Air & Canon iP8720 Crafting Printer and SO much more!
- Week Three: $1500 in wholesale wedding flowers from FiftyFlowers.com!
- Week Four: Grand Prize. All the prizes above + a romantic Sandals Honeymoon to your destination of choice!
Click HERE to enter to win! Your friends can also “nominate” you to win!*
As with all our DIY tutorials, if you create one of our projects please send us a picture – We Love Seeing Your Creativity! If you use Instagram or Twitter please use the hashtag #SomethingTurquoiseDIY and it will show up on our Get Social page. Happy Crafting!
DIY Tutorial Credits
Photography + DIY Tutorial + Cake: Jen Carreiro of Something Turquoise // Project Created Using The: Cricut Explore Air // Design Files: Julia Ensign // Cardstock: Personal Stash // Glue Gun: Amazon // Lollipop Sticks: Amazon // Nail Polish: OPI – Withstands the Test of Thyme
Shop The Supplies:
Find the supplies you’ll need for this project from our affiliate links below:

Comments