
DIY Felt Flower Bouquet + Boutonnières #2
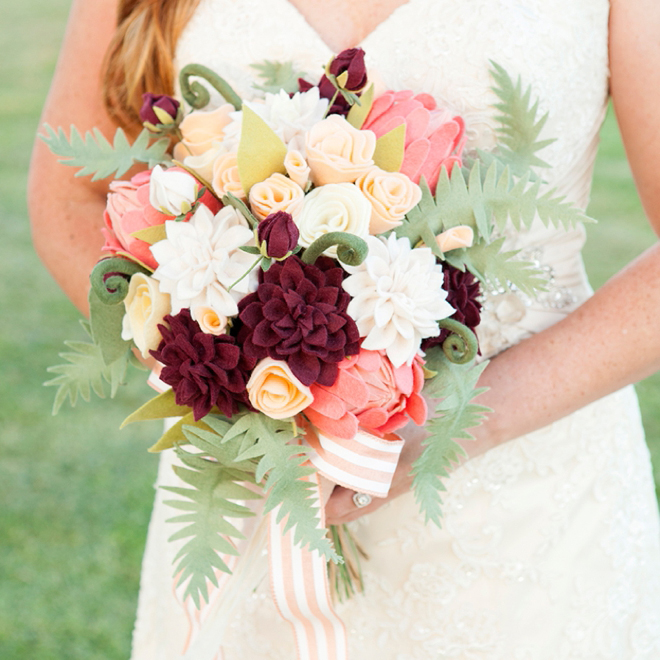
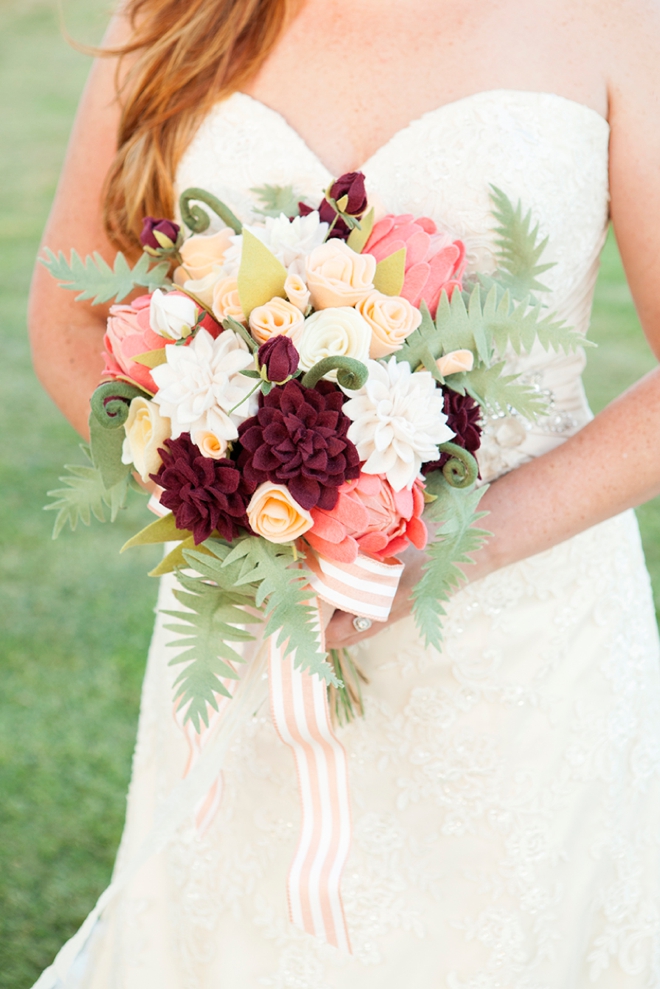
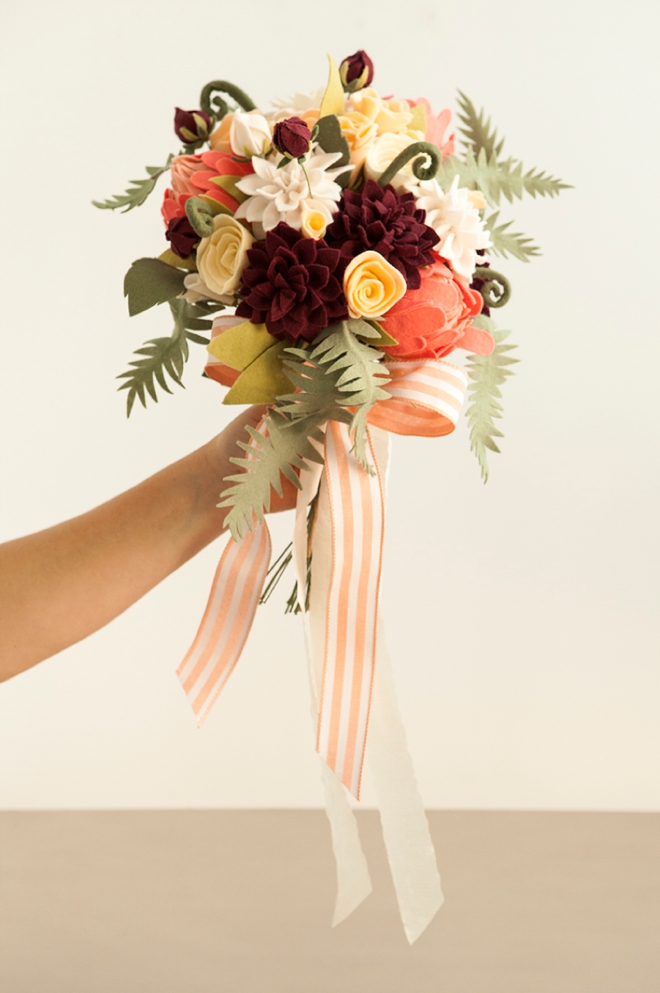
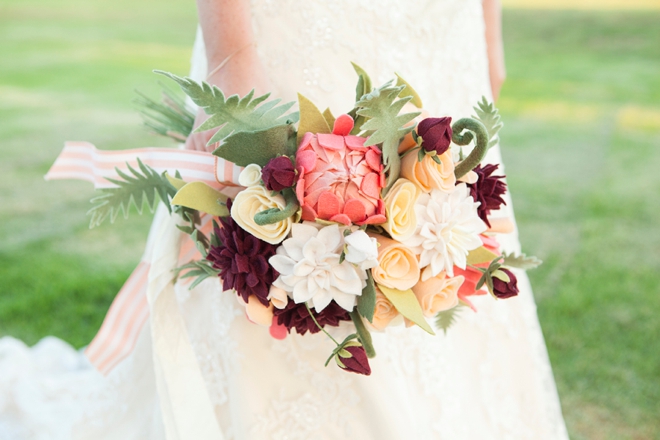
It’s finally Friday and so that means that I finally get to share this amazing DIY felt flower wedding bouquet with you! I’ve been working on the petal patterns for months, swooned over different felt colors and had to gently persuade my assistant Shea to be today’s model bride and it was all worth it because I’m obsessed, to say the very least. The last felt wedding bouquet I shared was cute, but I think that this one might even hold a candle to actual flowers. While we were shooting in the park a few ladies actually thought they were real! Making all these flowers isn’t an “easy” task and it will take you hours to create enough blooms (probably took me 20ish total) – but it’s an absolutely perfect project for the creative, eclectic bride that wants something unique. This bouquet will last forever meaning it will make a wonderful wedding keepsake! I’ve been so genuinely touched by our fabulous DIY brides who made my old felt flower bouquet and shared pictures of them on social… and I can’t wait to see more!
UPDATE: May 21st, 2018: You no longer have to cut all these felt flowers by hand! We have the Cricut .SVG cut files for this entire bouquet (and many other designs) available in our shop now!
In talking about handmade flowers – we are singing the praises of felt. Unlike paper, felt flowers are thick, sturdy and can withstand all that your wedding day could possibly throw at them. Paper can rip and crumple in a flash – but not felt! There is something so old-school crafty about felt… and I just love it. So without further ado, here is this weeks absolutely beautiful – felt flower wedding bouquet.


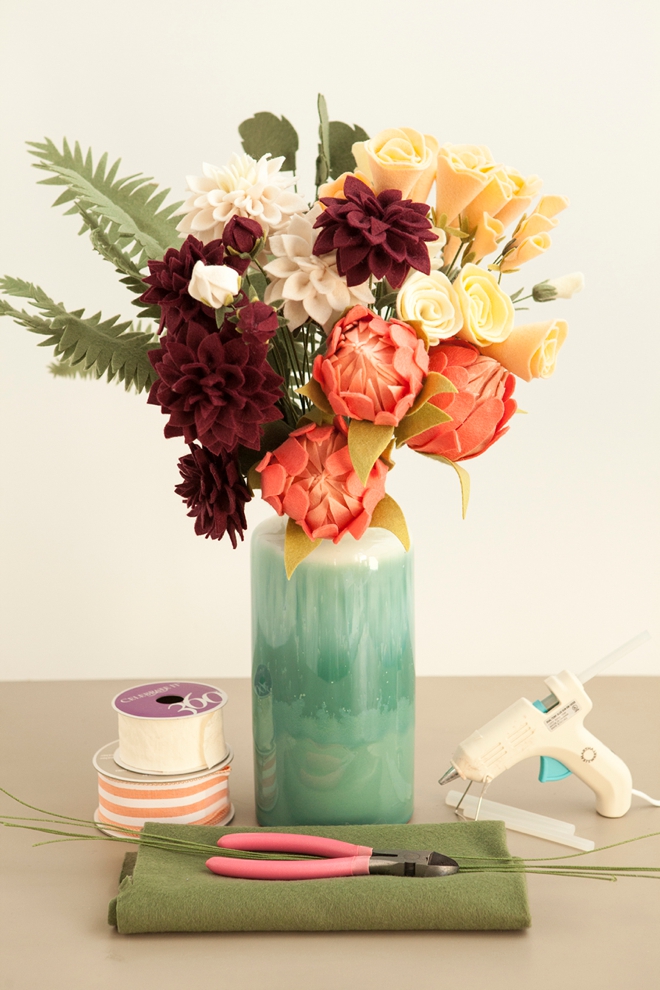
SUPPLIES:
- Wool Felt (shown here in olive)
- Floral Wire (20-22 gauge)
- Wire Cutters
- Ribbon
- Hot Glue Gun (that does low heat)
- Lots of pretty felt flowers! (find ALL the patterns here)
This bouquet has 24 large flowers, 12 flower buds, 28 leaves including 5 fiddleheads.
UPDATE: May 21st, 2018: You no longer have to cut all these petals and leaves for the felt flowers by hand! We have the Cricut .SVG cut files for this entire bouquet (and many other designs) available in our shop now! Cutting these shapes with the Cricut is a HUGE time saver!

Add One Flower At A Time
I started this bouquet holding the 3 large protea and then added the other flowers from there. Once you get to a place where you are happy with the way things look – wrap with a piece of floral wire to secure and keep moving.
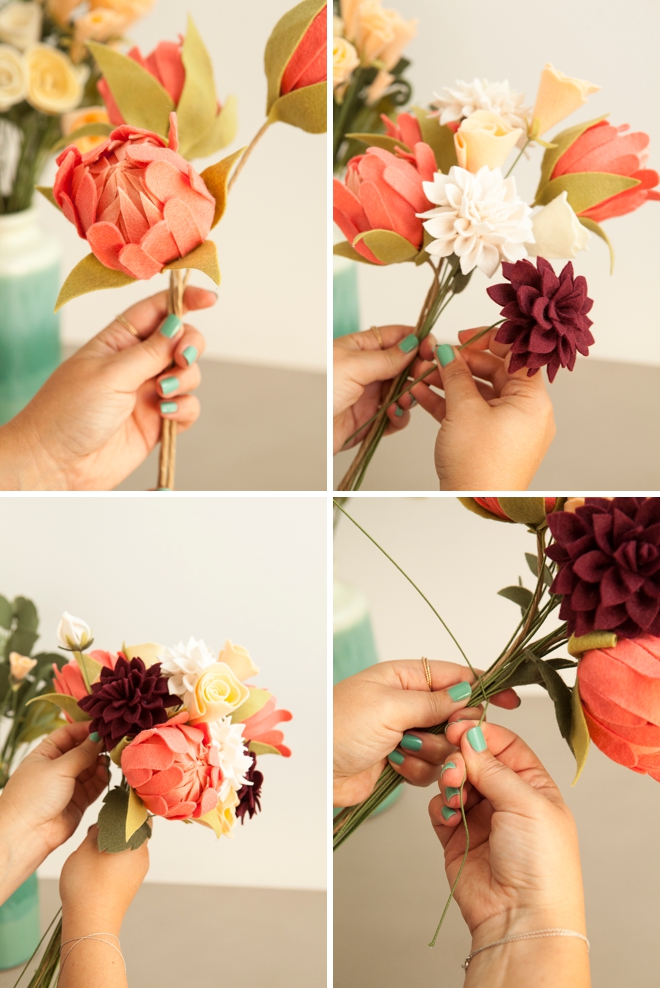
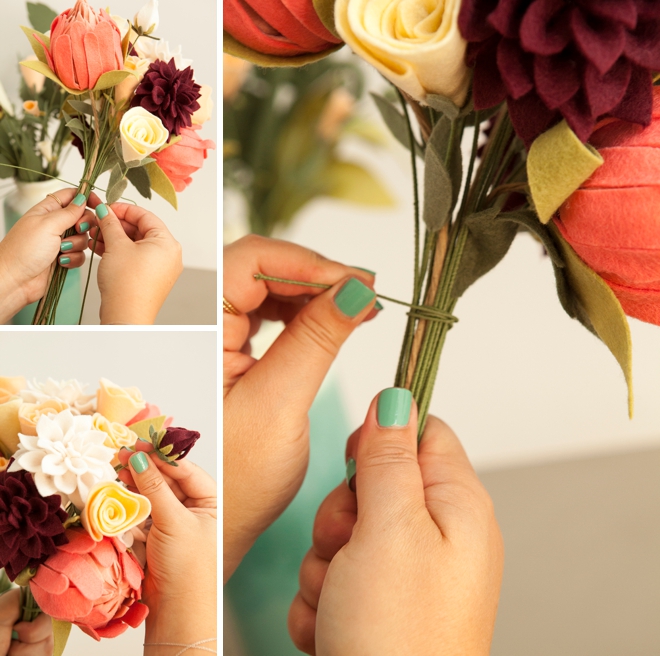
Keep Building
Keep adding more flowers, wrapping with wire and arranging your pretty felt blooms until you’re happy.
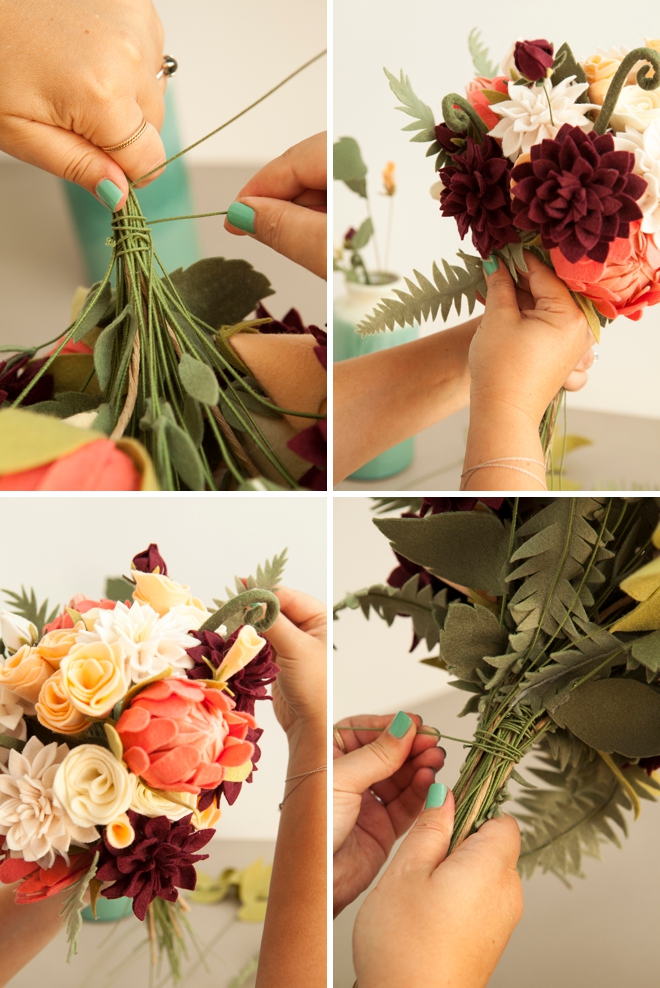
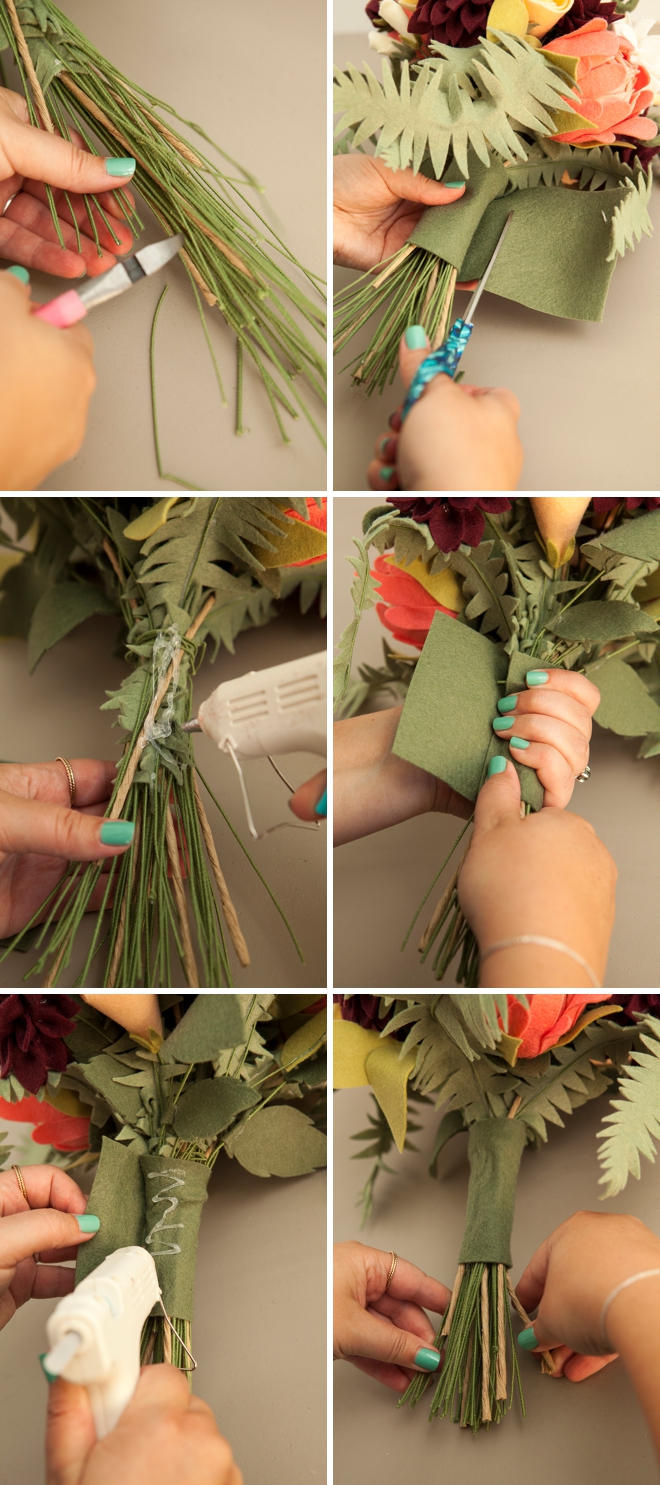
Finish The Stems
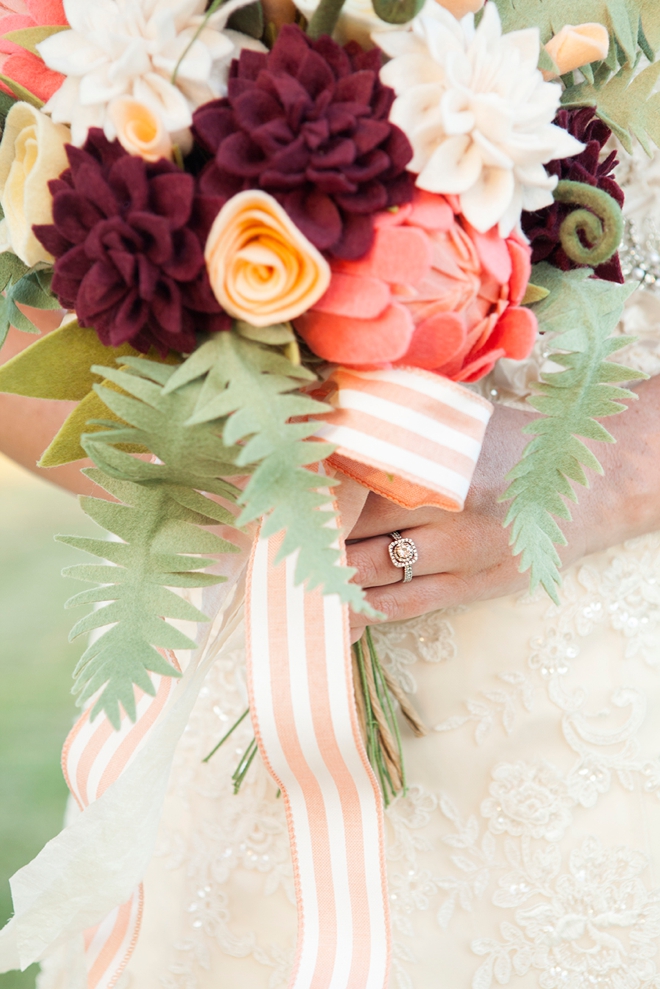
Once your arrangement is complete, trim all the wire stems to match. In my last bouquet I showed that you can wrap all the wires in felt and cover the entire bunch with ribbon. But I decided to leave these wires bare! Wrap the section of wire that you’ll be holding with a piece of green felt and secure with hot glue.
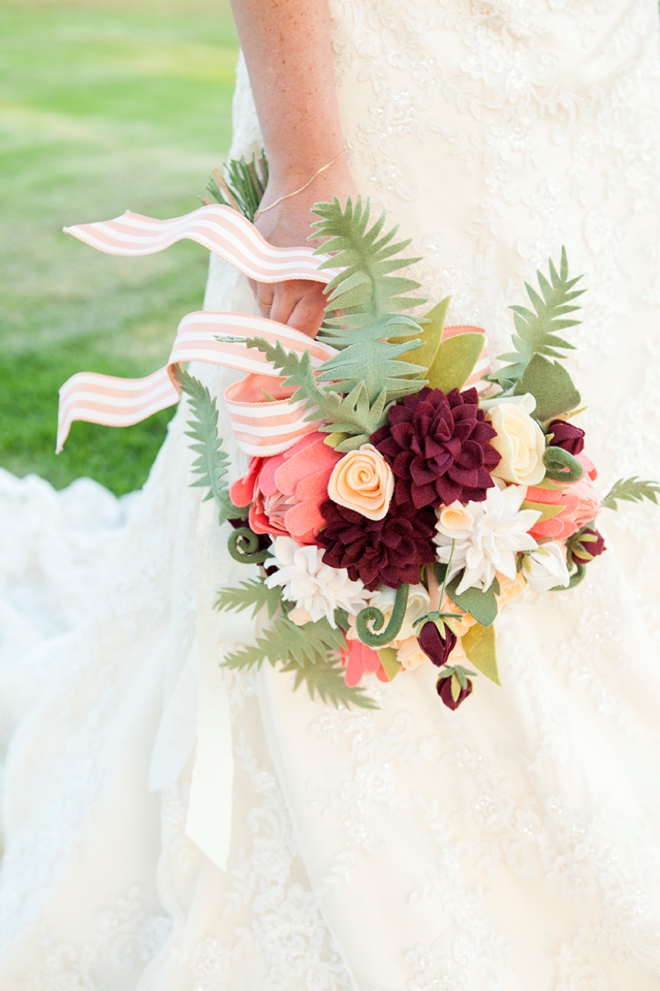
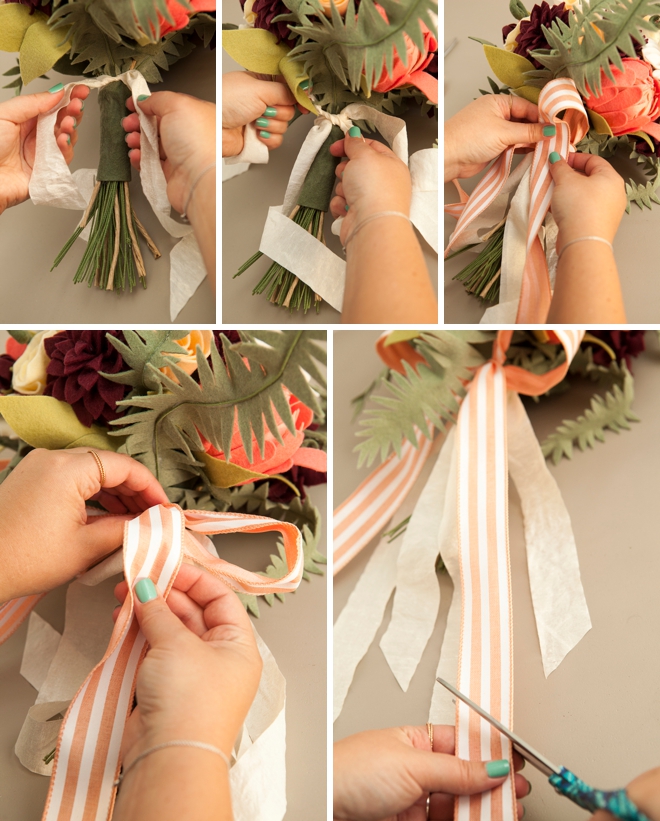
Add Ribbons
Pretty flowing ribbons are all the rage so I added two cream ribbons and then tied a bow with the peach striped ribbon… and that’s all there is to arranging this beautiful bunch! The making of the actual flowers is the hard part :-)
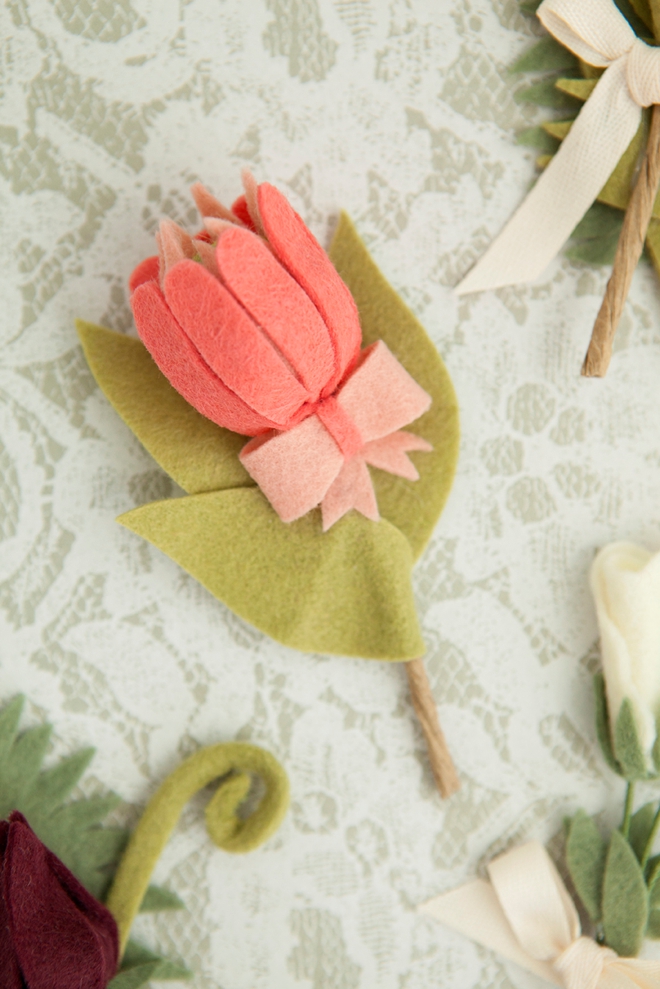
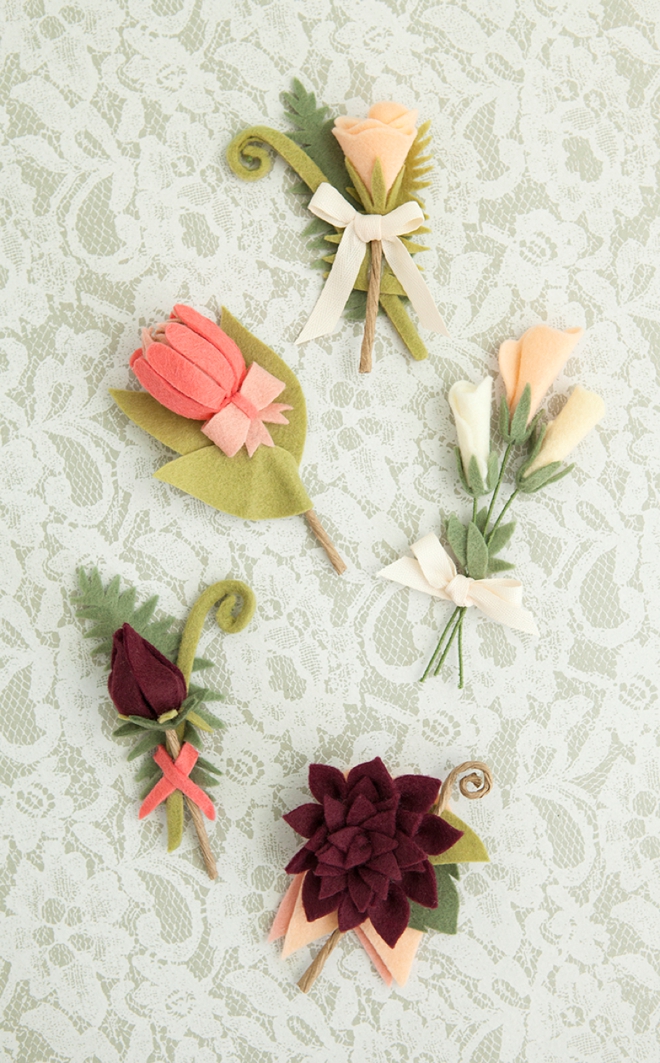
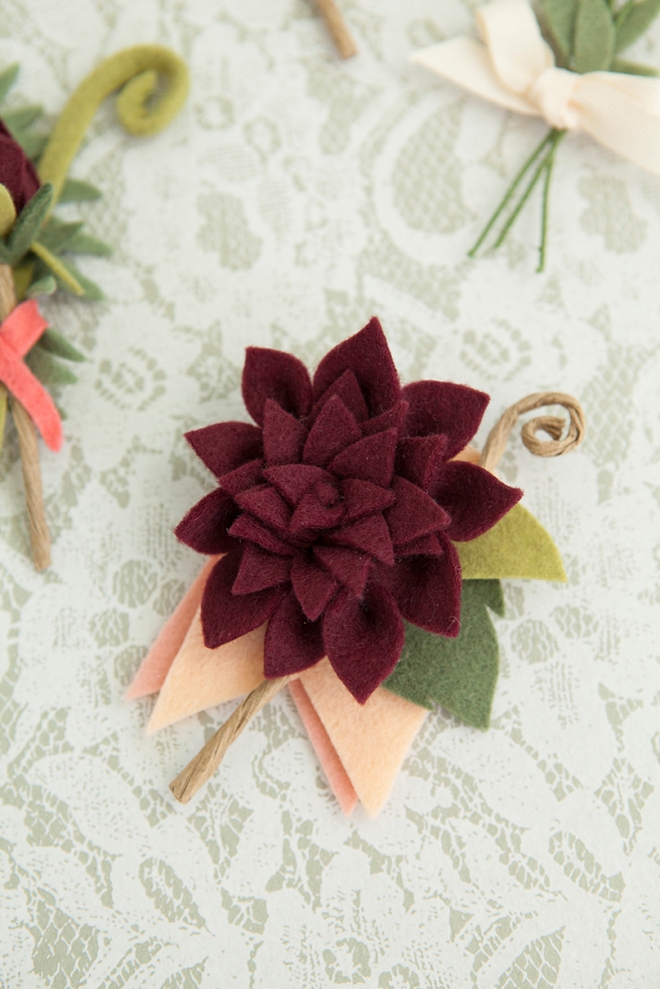
Fabulous Felt Boutonnieres
Don’t forget the guys! They need felt flowers too… and once you master each of these flower patterns, making them on this tiny scale will be a piece of wedding cake!


Cheers To All My Fabulous DIY Brides
I cannot wait for you to make this idea your own… from a wedding bouquet or just a toss bouquet to boutonnieres or maybe all your wedding flowers – we are raising our glass of bubbly to you!

As with all our DIY tutorials, if you create one of our projects please send us a picture – We Love Seeing Your Creativity! If you use Instagram or Twitter please use the hashtag #SomethingTurquoiseDIY and it will show up on our Get Social page. Happy Crafting!
DIY Tutorial Credits
Photography + DIY Tutorial: Jen Causey of Something Turquoise // All Felt courtesy of: Benzie Design on Etsy // Scissors: Fiskars // Floral Wire: all over; Amazon, Michaels, JoAnn // Glue Gun: Martha Stewart // Wire Cutters: Amazon // Nail Polish: OPI – Withstands the Test of Thyme
Shop The Supplies:
Find the supplies you’ll need for this project from our affiliate links below:

Comments