
DIY Save The Date Invitations With Photo Calendar Stickers
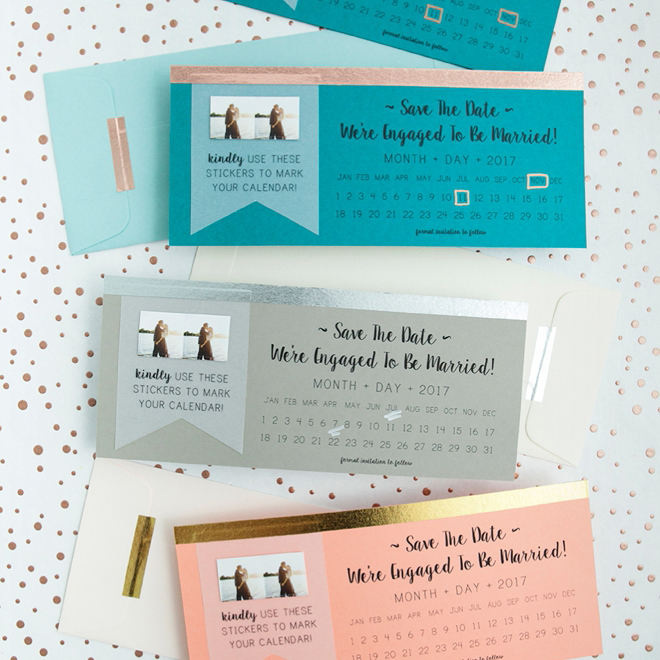
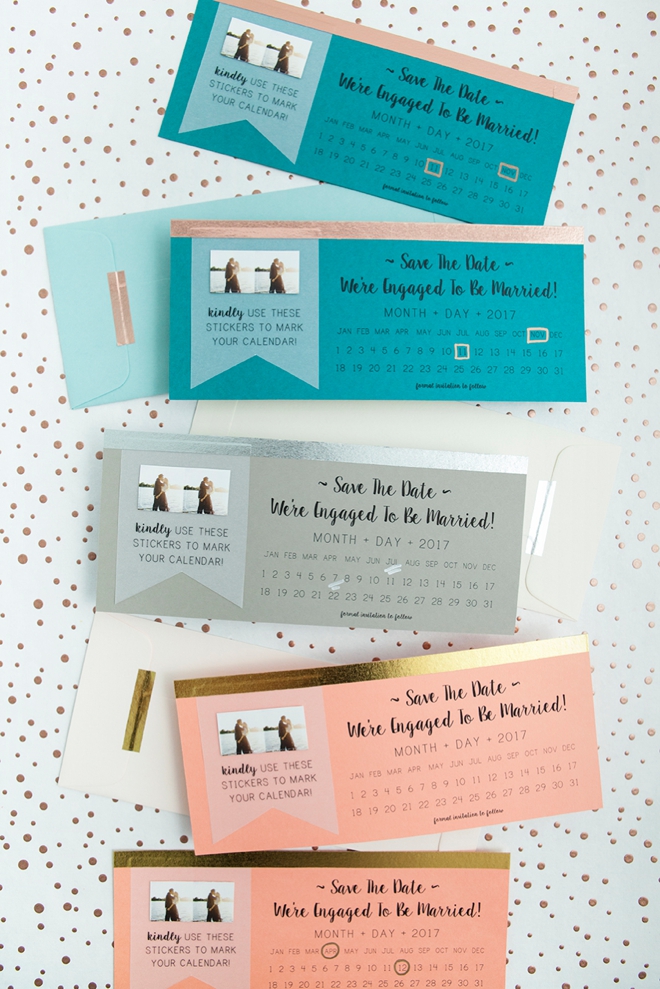
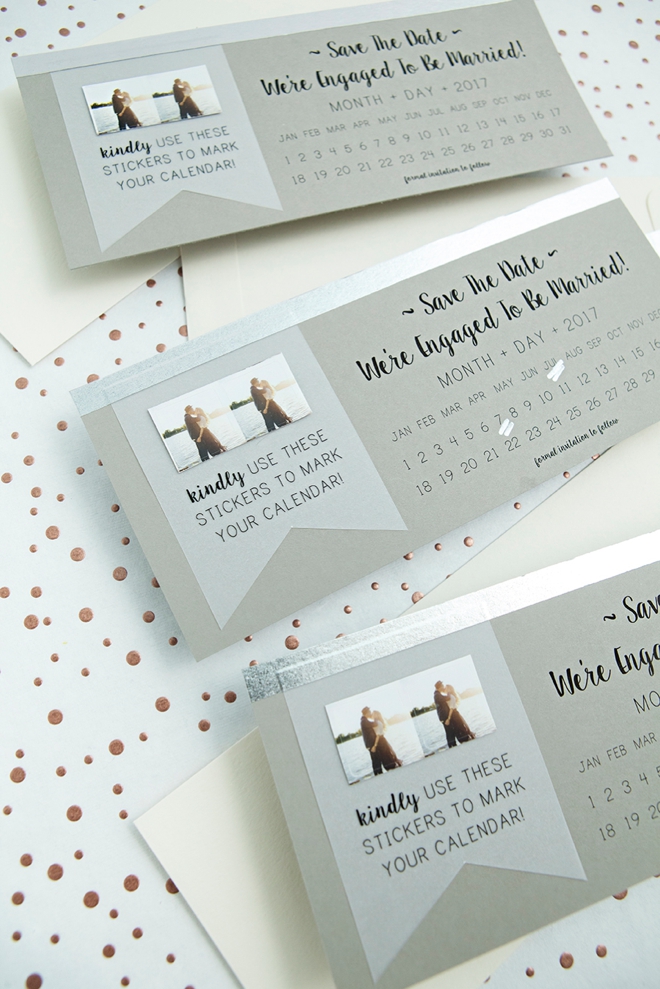
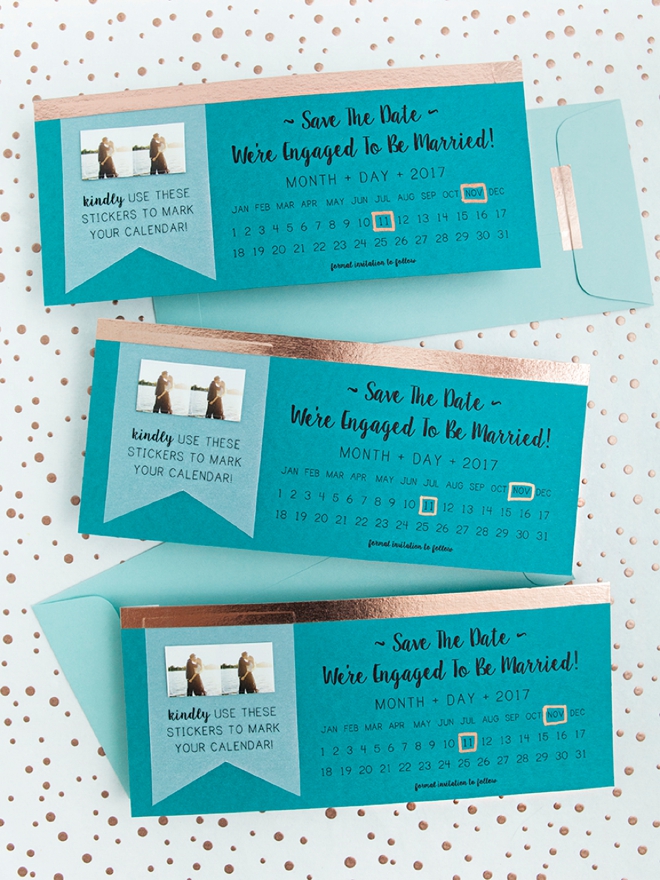
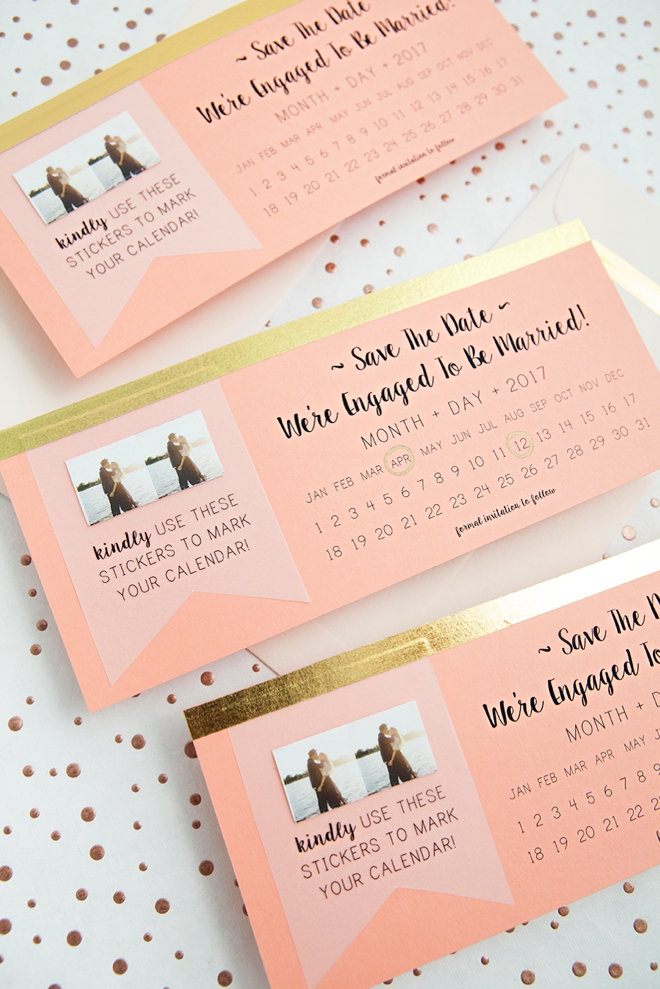
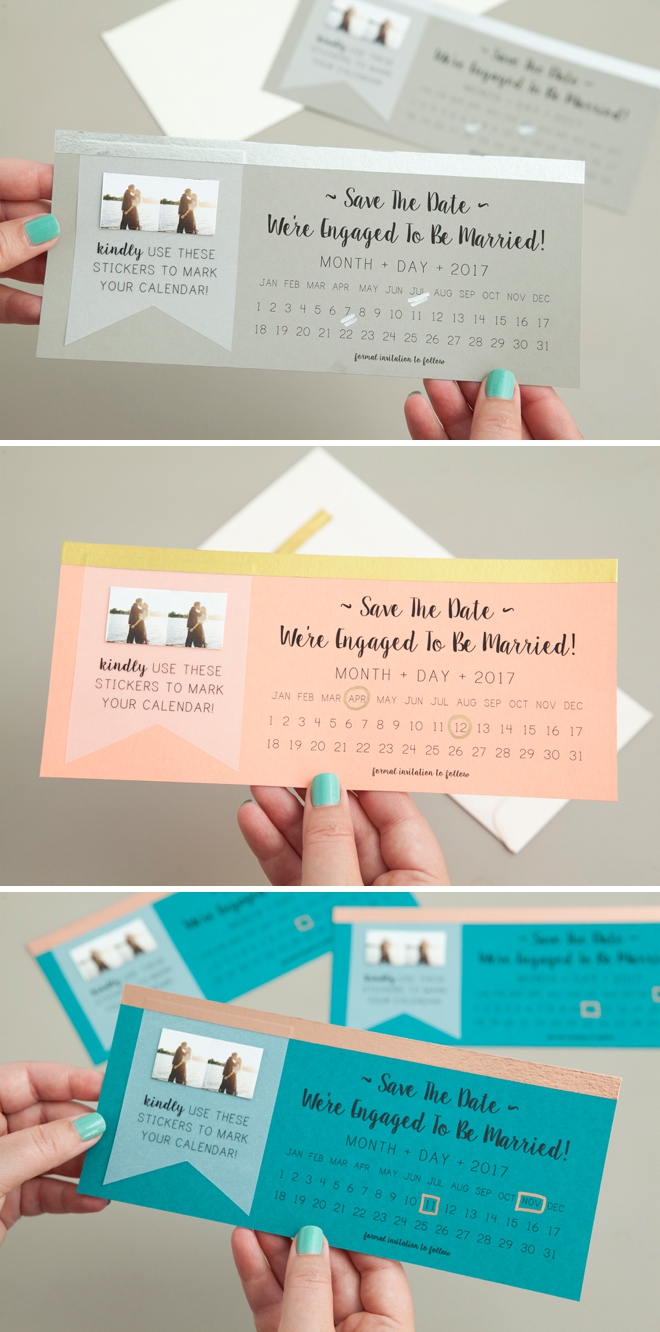
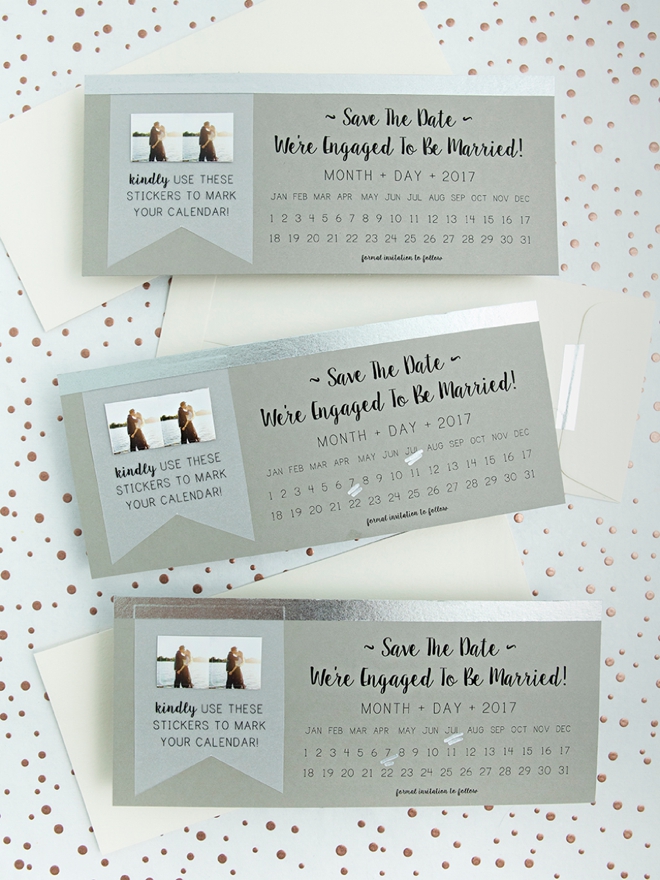
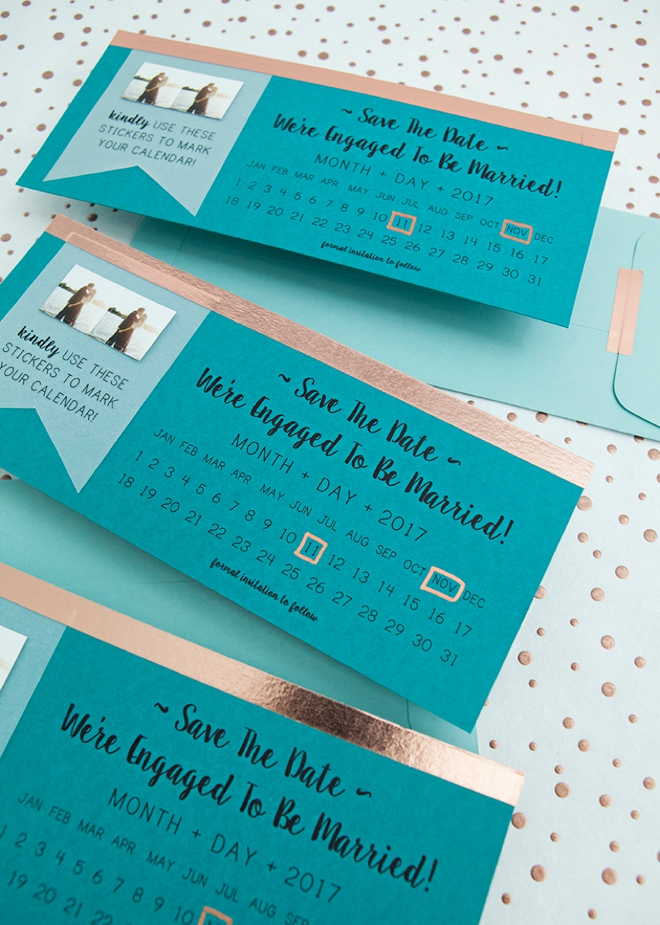
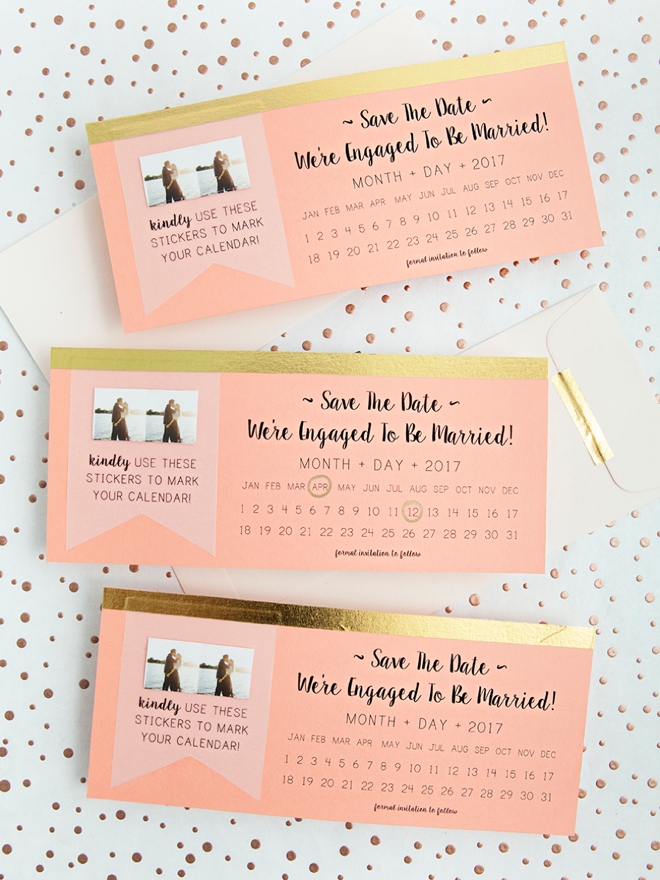
I’m SUPER excited to be sharing the fifth design of my popular “DIY Photo Save the Dates“. In the beginning, they were called Instagram Save the Dates because you had to order the adorable mini-stickers through your IG account… but the times have changed and now you can upload any photo that you’d like (from desktop or mobile) making these simply DIY Save the Date Invitations with Photo Calendar Stickers. I’ve printed the exact same files onto 3 very different colors of paper to show you just how versatile and unique these invitations can look, even when using the same stickers. I definitely love the other 4 designs, but this one is by far my favorite! …what do you think?
Save the Date!
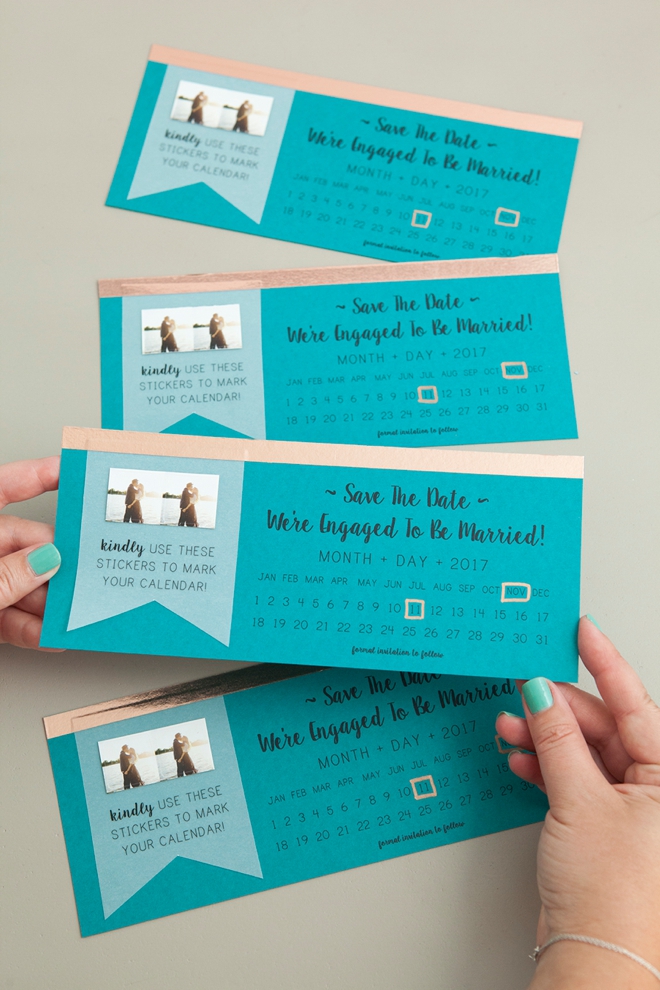
These darling mini-stickers are the perfect size for your guests to mark their calendars with!
Order Your Stickers
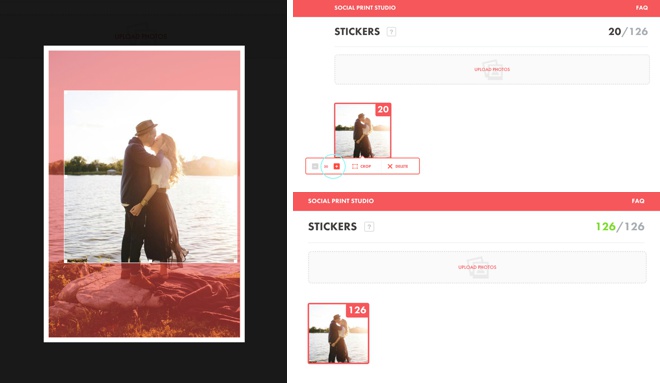
Visit Social Print Studio, upload and crop a pretty picture of you and your fiancé. The sticker books allow you to add 126 different pictures, so in order to get a book full of just one picture – use the plus sign until it reaches 126. Then order!
Cut Your Mini Stickers
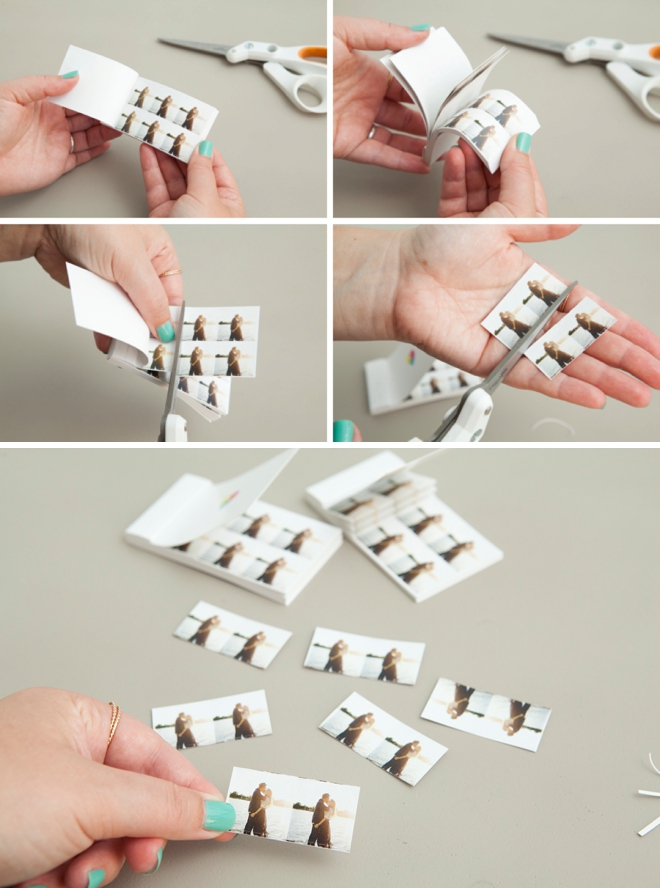
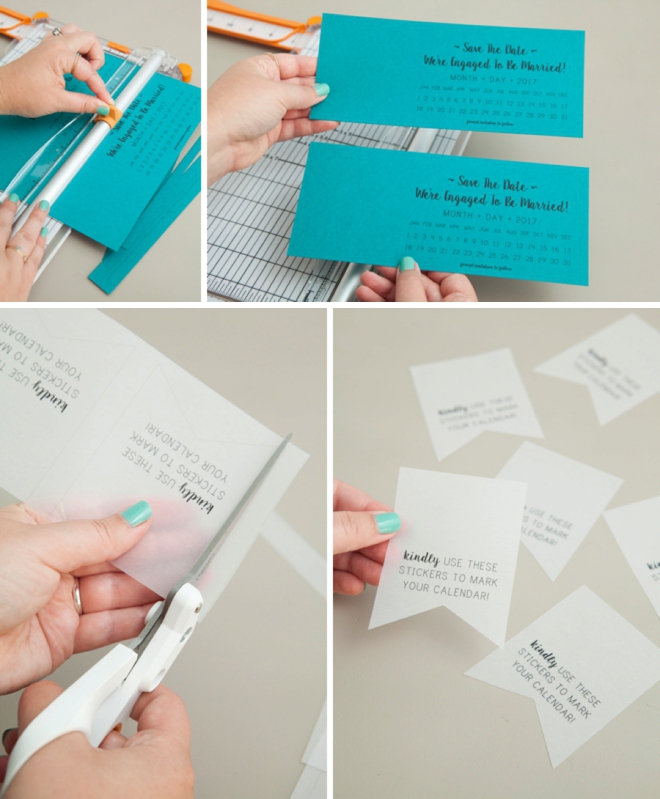
Once you receive your photo sticker books in the mail, cut as many as you need down into strips of 2. You’ll need one strip for each invitation.
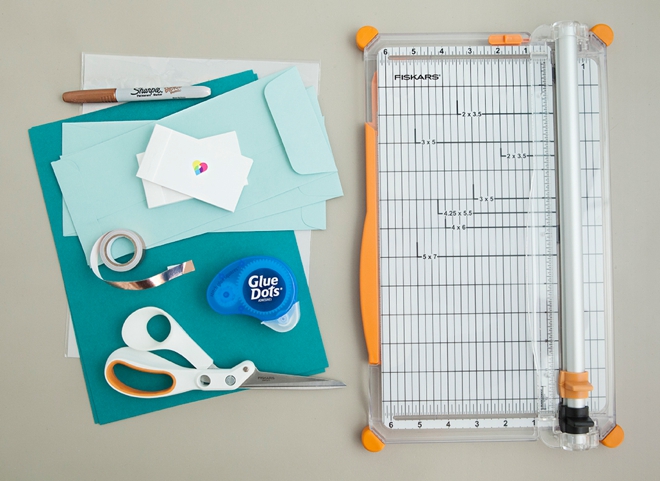
SUPPLIES:
- Social Print Studio Mini-stickers
- 8.5″ x 11″ cardstock
- 8.5″ x 11″ inkjet vellum
- #10 Envelopes
- Metallic Foil Washi Tape
- Paper Trimmer
- Glue Dot Squares
- Metallic Sharpies
- Scissors
- My FREE download designs below!
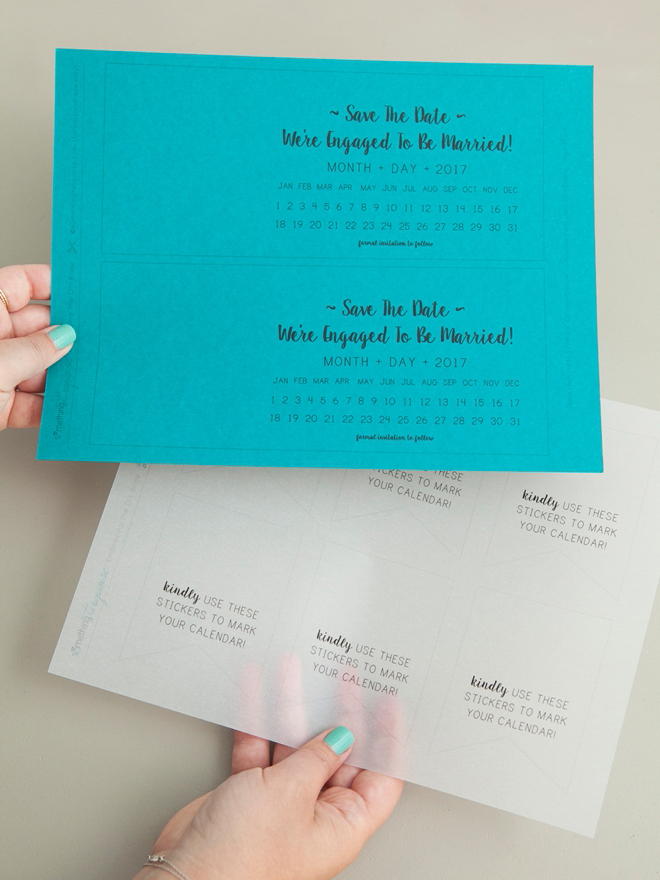
Download + Print
Grab the “sticker banners + your wedding year” downloads at the bottom of this post and print using your home printer. You can also take them to your local print shop if you don’t have a printer. The Save the Date card is printed on cardstock and there are 2 per page. The sticker banners are printed on inkjet vellum and there are 6 per page.
Cut Down To Size
Cut each invitation card and sticker banner as instructed on the printable.
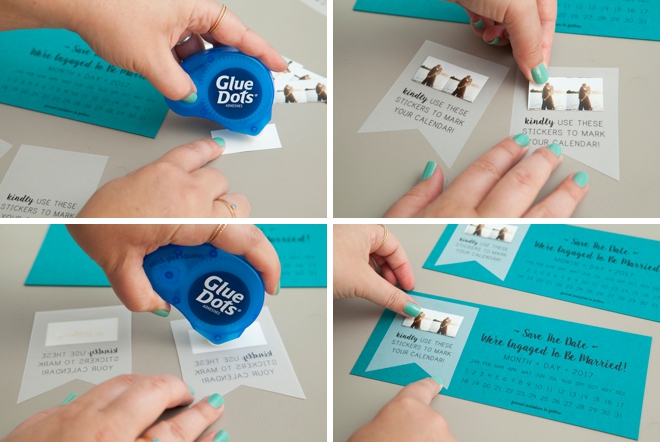
Adhere The Stickers + Banners
Using Glue Dots, add the stickers to the vellum banner and then on the backside of the vellum — only where the stickers are — add more Glue Dots and adhere to the invitation card. All adhesive will show through vellum, so you can hide the adhesive behind the stickers!
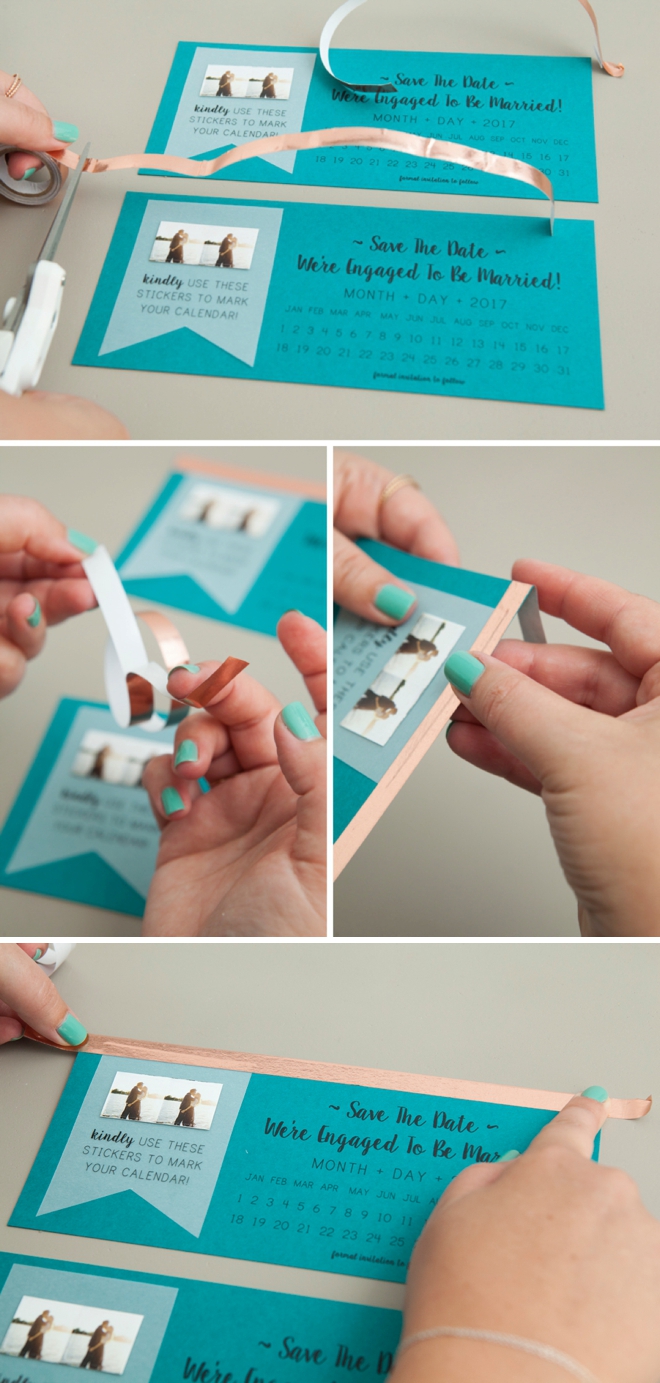
Add Washi Tape
Cut a strip of metallic washi tape (or any type that you fancy) and add a strip to the very top of the invitation. Wrap or cut off the extra from the ends.
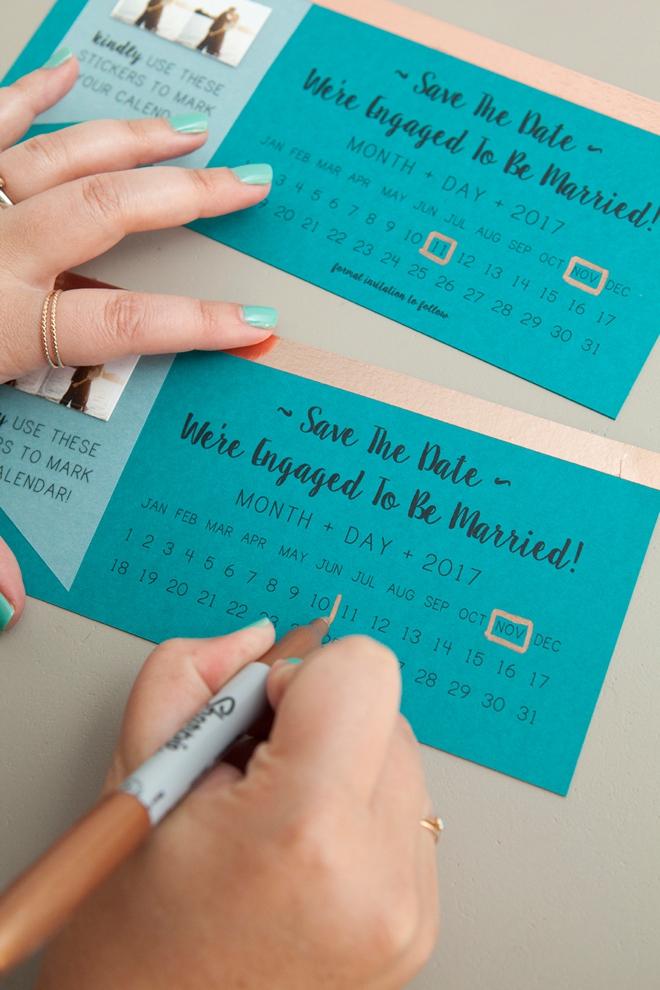
Mark Your Date
Simply circle, underline, square or heart your month and date… I’m using Metallic Sharpies on all of these invitations because the color really pops!
Done!
That’s all there is to it! In just a few short steps you’ll have created the most darling Save the Date invitations that are extra special because they’re handmade.
Get Creative!
Use any color of cardstock, washi tape and Sharpie to customize a Save the Date that is perfect for your unique event!
Grab The Downloads:


Click To See Our Other Designs:
As with all our DIY tutorials, if you create one of our projects please send us a picture – We Love Seeing Your Creativity! If you use Instagram or Twitter please use the hashtag #SomethingTurquoiseDIY and it will show up on our Get Social page. Happy Crafting!
DIY Tutorial Credits
Photography + DIY Tutorial: Jen Causey of Something Turquoise // Engagement image courtesy of: Shots By Cheyenne // Mini-stickers: courtesy of Social Print Studio // Inkjet Vellum, 8.5″ x 11″ Coverweight paper + A10 Envelopes in Peacock + Pool, Coral + Luxe Blush, and Gravel + Eco White: Paper-Source // Metallic Foil Washi Tape: Michaels // Metallic Sharpies: Amazon // Paper Trimmer: Amazon // Scissors: Amazon // Glue Dot Squares: Amazon // Fonts Used: Sugar Plums + Print Clearly // Nail Polish: OPI – Withstands the Test of Thyme
Shop The Supplies:
Find the supplies you’ll need for this project from our affiliate links below:

Comments